Hey guys--thanks to everyone for their helpful comments regarding this build--Bill, that's great suggestion about the 2,4,8, etc.--It certainly is a good idea.
Marc-that's another great idea; the jig--I made one out of a strip of balsa wood, following your example!
Andy (Bodge)--that's one beautiful! And hey--is that Hanz' twin brother, Ranz? LOL! Nice job, all around!
Well, here's the "How to fix a stupid disaster that you shoulda known better than to create" portion of our program! ![Banged Head [banghead]](/emoticons/icon_smile_banghead.gif)
Well, as pordoi pointed out, bonehead doog forgot to add the track blocks, but before I got to adding the track blocks to the tracks, I discovered a nasty surprise--the Magic Tracks that were sent were the wrong parts!
There are two different type of tracks provided in the kit; Magic Tracks, which come in little baggies, and other typical indy links stuck to the sprues. Each has a different pattern. Well, the Magic Track tracks had the WRONG TYPE of blocks--they're supposed to be metal cleats, and the MT's had only rubber-style blocks! That meant I had to add another half hour to cutting the other tracks off the sprues, and clean them up! I planned to just use the MT blocks with them, as the two blocks styles which came in both patterns in the kit were the same--but, SURPRISE! The MT blocks had different attaching pins--they couldn't be used! Not only that, but the track blocks of the sprue-type were directional, if you can believe that?! I had to make sure each one was turned the right way, or the pattern of aligning holes wouldn't match up!
Add another half hour to cutting off the track blocks and cleaning them up! Then, I basically had to trash the links I had already made, and make correct tracks and blocks from what I now had as correct pairings! Anyone else have this problem?!
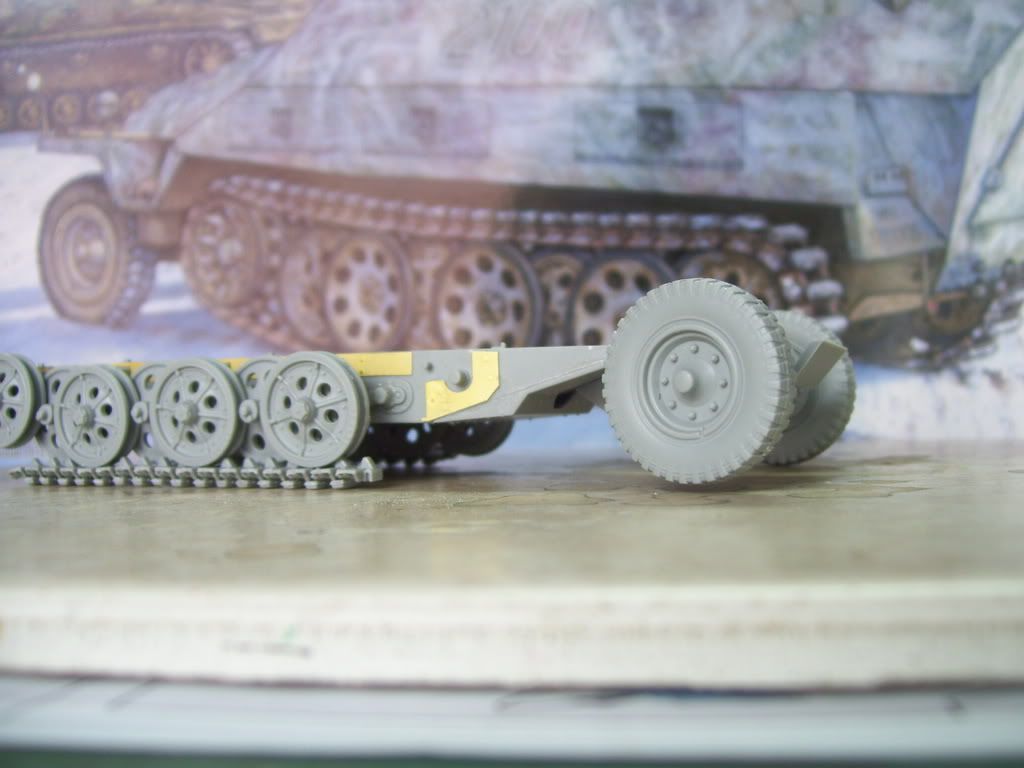
When I finally added them today, here's what I wound up with! FLOATERS!!!!! AAAAAARRRRGH!!! ![Banged Head [banghead]](/emoticons/icon_smile_banghead.gif)

Well, I only knew this--I was NOT going to let that lie! Now, how to fix it?
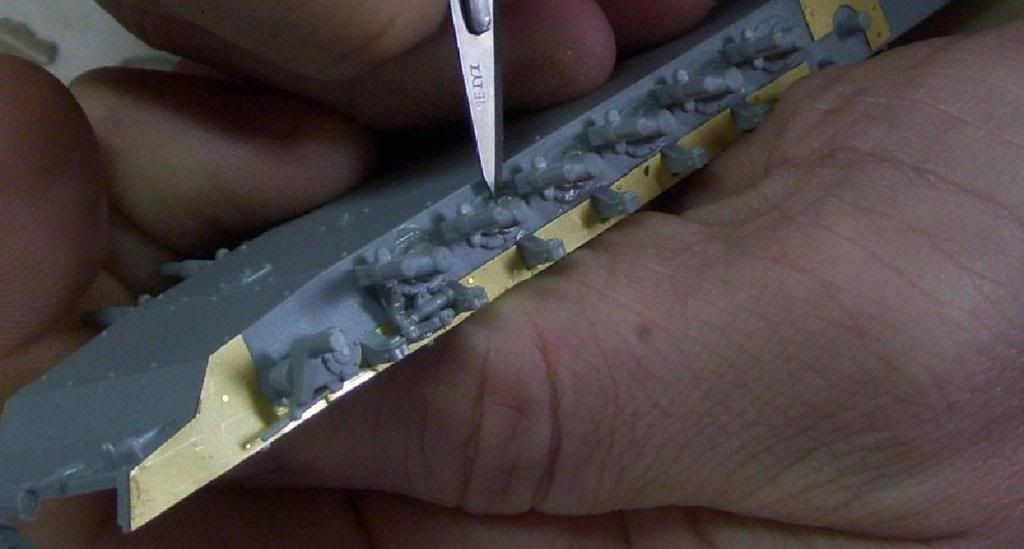
Well, first, I had to move the arms. Snce they were already cemented into place, I decided to try to cut halfway through them with a medical scalpel. Dr Doog in the house!!!!

I scored hlafway through each arm, and wiggled them loose. I was able to move each one about 2mm without them snapping.
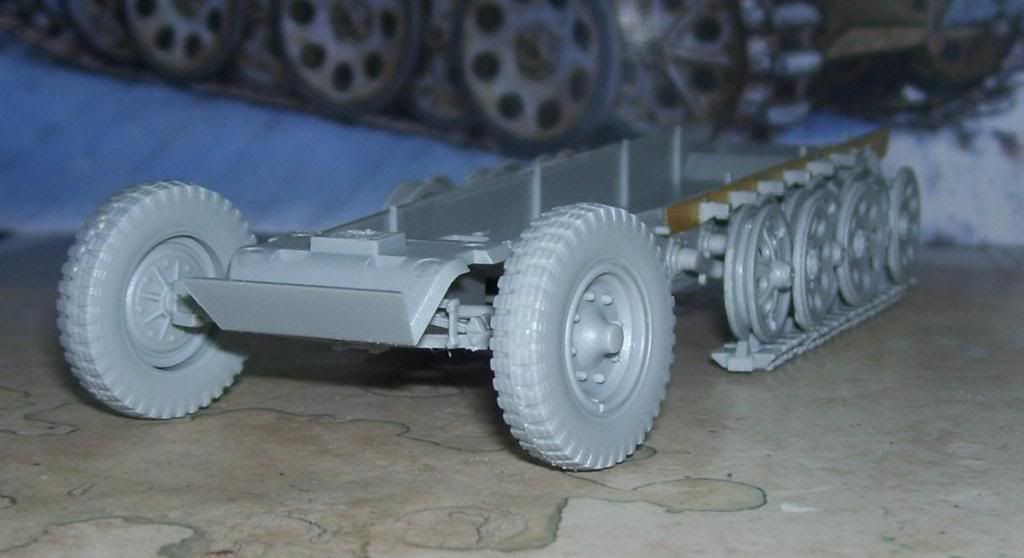
Now I had to make sure that all the wheels touched the tracks, as well as assuring that the "sit" of the hull was correct. I decided that the only proper way to assure this was to attach all the wheels--at least temporarily. This is not my preferred way of doing the suspension, but these are desperate times, and call for desperate measures!
I permanently glued the first 6 inner wheels on--they'll be easy to paint attached. Then, I added a tiny drop of glue to the attachmentt points of the other wheels, and glued them on. I will later twist them off, after I assemble the tracks around them completely. I willl then add them after the tracks and wheels are painted, same as I do tanlk tracks.
I used a drop of Tenax R-7 on each cut-through part of the mounting arms, which helped them move, as well as then cementing them again.
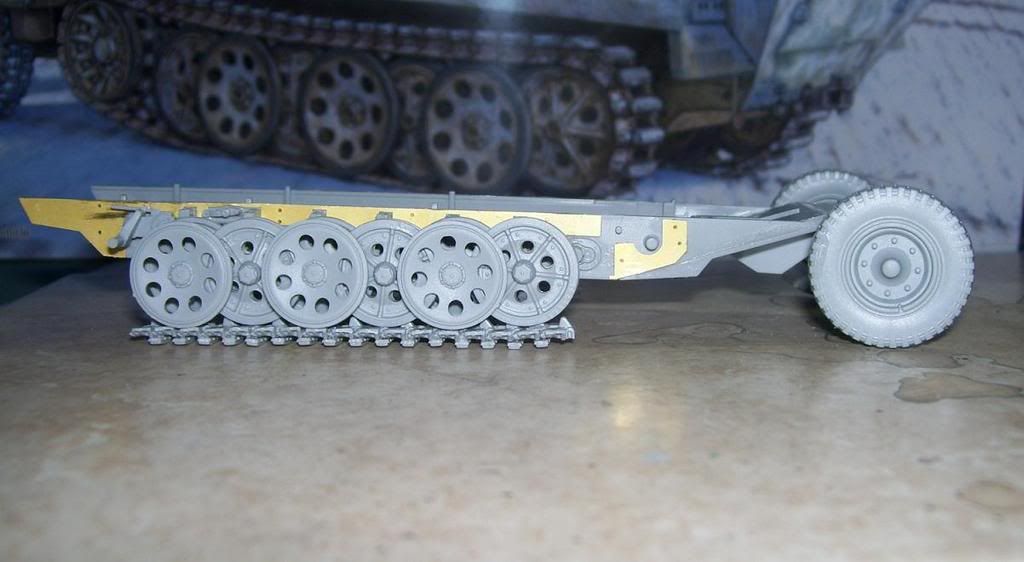
After some 4 hours of surgery and patient, diligent work, I have fixed my stupid oversight!

The wheels are sitting on the ground, and the tracks' wheels are all in contact with the track. PHEW!!! ![Tongue [:P]](/emoticons/icon_smile_tongue.gif)

I'm still working on the track length; as Bill pointed out, with some care, you can make the tracks workable--a necessity to affix them in anyo ther way than just gluing them to the wheels as I have here.
I will now assemble the length, form them around the wheels, and then glue tight the links--all except enough to remove the length from around the perimeter. The outer wheels will be twisted off with a quick snap, and the track slid off with the wheels to be painted. Reversing the order will put them on the model after all is painted properly.
OK--back to the workbench! I'm gonna beat this sucka yet! ![Big Smile [:D]](/emoticons/icon_smile_big.gif)