SEARCH FINESCALE.COM

Enter keywords or a search phrase below:

M3 Lee (Work in Progress)...PART 3 (4/17/2009)

18186 views
39 replies
1 rating 2 rating 3 rating 4 rating 5 rating
  • Member since
    July 2004
  • From: Texas
Posted by wbill76 on Thursday, April 16, 2009 1:06 PM
The two forward firing fixed MGs were literally "point and shoot". The driver aimed the vehicle and had control of them. Same concept that was in the M3 Stuart before it was dropped. Definitely not a concept that caught on much in actual combat and was dropped in favor of the ball mounts. Laugh [(-D]
  • Member since
    April 2009
  • From: Canada
Posted by vector123 on Thursday, April 16, 2009 8:12 PM
OMG that looks amasing im so impressed! Smile [:)]Bow [bow] 
always looking for tips and suggestions!
  • Member since
    October 2005
  • From: Maryland
Posted by usmc1371 on Thursday, April 16, 2009 11:01 PM

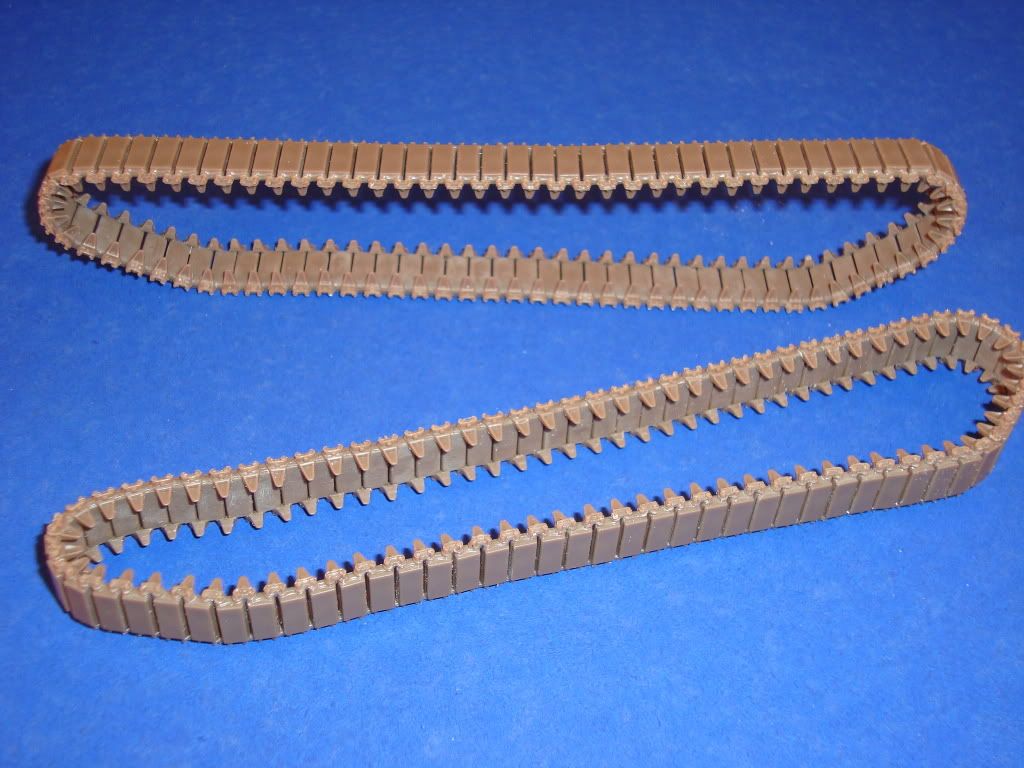
Got some more work done.  This time it's the main 75mm gun and the tracks.
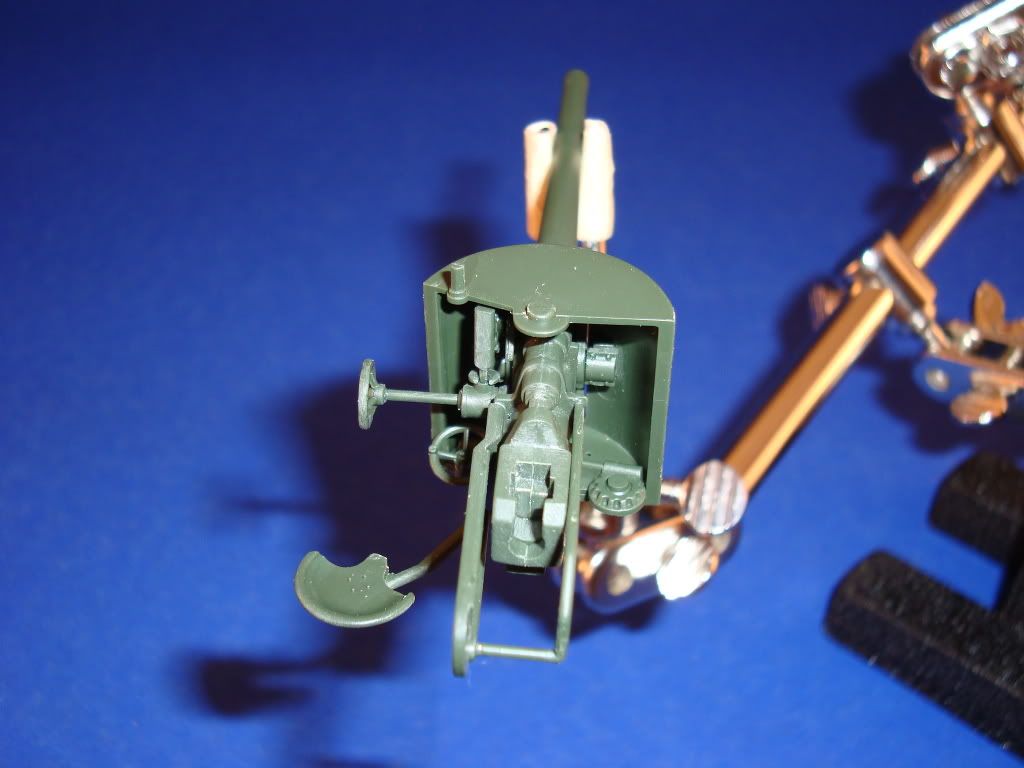
The gun went together well with no problems.  I did realize that the gun shield won't fit into the trunnions at the top and bottom of the hull.  The shield is slightly too short.  I decided to just glue the gun in place.

The tracks went together fine, just a little time consuming.  Each run is in two sections, a top and a bottom.  After painting, I'll just slip them onto the running gear.

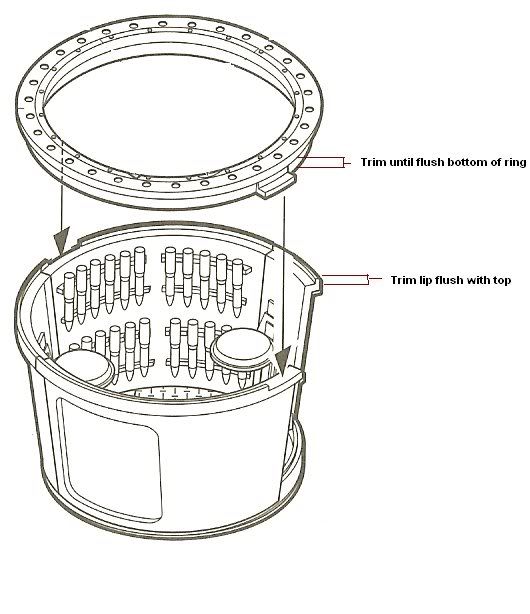
I ran into a problem with the turret basket.  I was dry fitting it and realized the basket won't sit all the way down into the hull.  The problem was the bottom of basket was hitting the top of the left sponson.  The clearance is 26 mm.  The basket and ring is 27 mm.  I decided to do some sanding.  The picture below shows were I removed excess material.  Basically, I removed the top lip of the basket and all of the underside of the turret ring.  I then glued the ring to the top of the basket and now everything fits fine.
I don't know if it's just me, but this kit has some fit issues.  I'm still polishing this piece of poo though.

-Jesse 

  • Member since
    April 2009
  • From: Canada
Posted by vector123 on Friday, April 17, 2009 2:21 PM
looks great how did u do the weathering? keep us posted! 
always looking for tips and suggestions!
  • Member since
    October 2005
  • From: Maryland
Posted by usmc1371 on Friday, April 17, 2009 4:35 PM

 vector123 wrote:
looks great how did u do the weathering? keep us posted! 

Thanks.  The weathering is just a wash of raw umber and dry brushing with Model Master Steel.  I wasn't going to spend much time on the interior since most of it won't be seen.

-Jesse

  • Member since
    April 2009
  • From: Canada
Posted by vector123 on Friday, April 17, 2009 5:11 PM
thanks it realy helps alot.Smile [:)] are you going to put any mods into it?
always looking for tips and suggestions!
  • Member since
    October 2004
  • From: League City, Texas
Posted by sfcmac on Saturday, April 18, 2009 6:26 AM
Woo HOO!Thumbs Up [tup]
  • Member since
    October 2005
  • From: Maryland
Posted by usmc1371 on Saturday, April 18, 2009 7:38 AM

 vector123 wrote:
thanks it realy helps alot.Smile [:)] are you going to put any mods into it?

No, it's pretty much straight out of the box except the toolboxes and light guards.  This kit requires enough modifications just to get it to fit correctly.

-Jesse

  • Member since
    April 2009
  • From: Canada
Posted by vector123 on Saturday, April 18, 2009 3:52 PM
Cool.
always looking for tips and suggestions!
  • Member since
    May 2005
  • From: Dublin Rep Of Ireland
Posted by terry35 on Saturday, April 18, 2009 4:17 PM

Excellent work going on there. looks incredible.

Terry.

JOIN OUR COMMUNITY!

Our community is FREE to join. To participate you must either login or register for an account.

SEARCH FORUMS
FREE NEWSLETTER
By signing up you may also receive reader surveys and occasional special offers. We do not sell, rent or trade our email lists. View our Privacy Policy.