SEARCH FINESCALE.COM

Enter keywords or a search phrase below:

T-26 / BT-2 "WIP"

23677 views
88 replies
1 rating 2 rating 3 rating 4 rating 5 rating
  • Member since
    October 2009
Posted by PANZERWAFFE on Sunday, February 6, 2011 2:47 PM

Terry - Thank you for the compliment.

markgloper - I have punched and glued rivets before and it has come out well but, for me anyway, I find when doing this many of them it is easier to drill.  It helps me line them up or put them in their place.  Can also get them easily to the same height by using a flat piece of styrene for a guide.  Just find it easier when doing lots of them.

Rob

  • Member since
    June 2003
Posted by markgloper on Saturday, February 5, 2011 8:02 PM

Why are you drilling holes and using plasitic rod to make your rivets?  Does this method provide better results than punching out the rivet heads and glueing them on?   

  • Member since
    May 2005
  • From: Dublin Rep Of Ireland
Posted by terry35 on Saturday, February 5, 2011 6:36 PM

Rob what can I say except EXCELLENT, she is really looking the part.


Terry.

  • Member since
    October 2009
Posted by PANZERWAFFE on Saturday, February 5, 2011 12:12 AM

parkadge, Wild Bill - As always thanks for the comments and stopping in.  Agree, the crew does really show the size of the vehicle, small.

If any one is intrested The dio is posted over in the Dioramas section.  The base is completed and figures are base coated.

Rob

Rob

  • Member since
    July 2004
  • From: Texas
Posted by wbill76 on Thursday, February 3, 2011 11:56 AM

Having the figs in the scene really brings home how small/cramped this vehicle was. Looking forward to seeing it fully "staffed" Rob. Yes

  • Member since
    January 2010
Posted by parkadge on Wednesday, February 2, 2011 5:50 PM

Hi just discoved this thread and read through it. You've done a fantastic job on this kit. Well done- and the dio is looking good too.

  • Member since
    October 2009
Posted by PANZERWAFFE on Saturday, January 29, 2011 8:48 PM

Beav - Yes, A BT-7.  You can check it out on my New thread "BT-7 mod 1937.

Wild Bill - Thanks for the Yes on this one.  At ties it was a challenge but your right, it was worth it.

SprueOne - Thanks for all of the great wods.  The horn should have been thinned out more but I think it will stay as it is now.  Dont want to mess up anything trying to get it off to fix.

Can't wait to see yours finished upYes

Tigerman - Glad you like it and as always thanks for stopping in.

Wing nut - Thanks Marc and be careful where you swing that thing Surprise

Jose Luis Lopez - Thank you very much for the kind words.  This was something new for me trying different colors and am happy to hear that you like it.

This build was suppose to be finished, the tank is, but one thing always leads to another. 

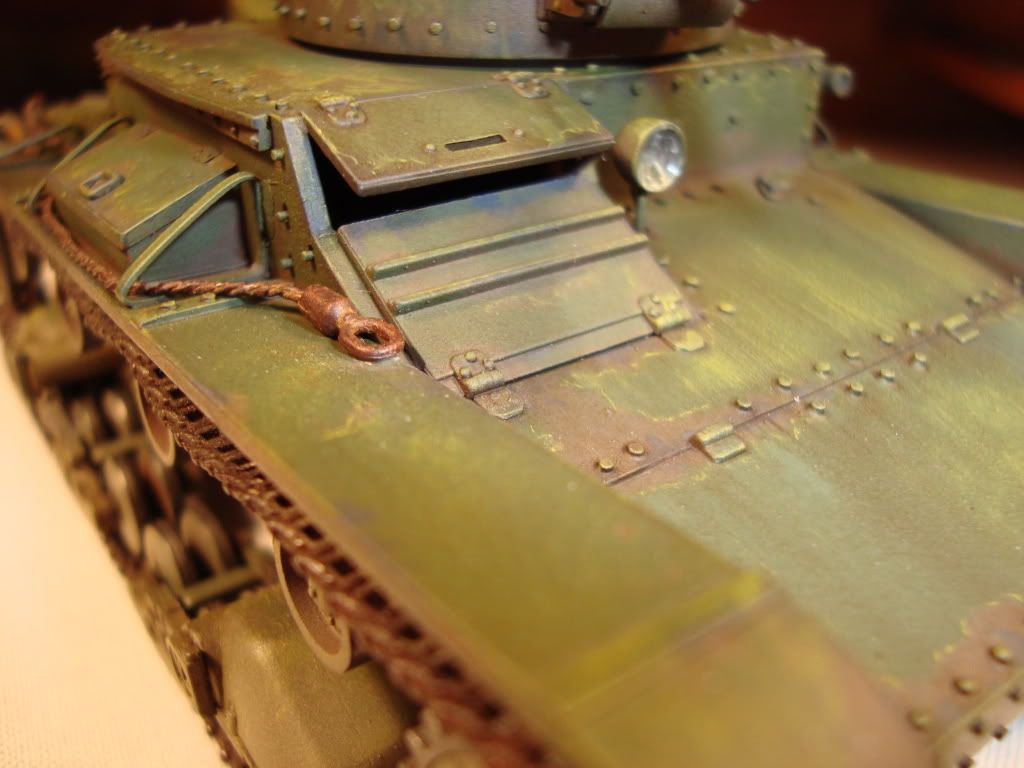
Finishe off th right side wih a wire rope and painted th axe.
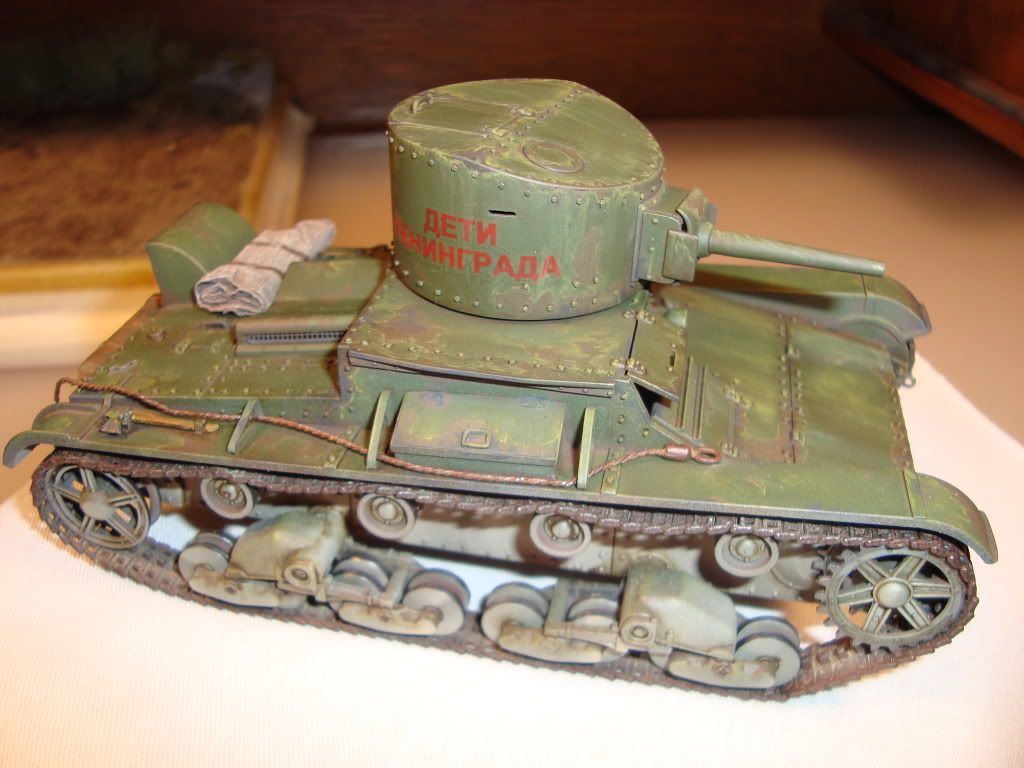
Used MM window maker to fill in the light.  Little hard to tell in the picture.
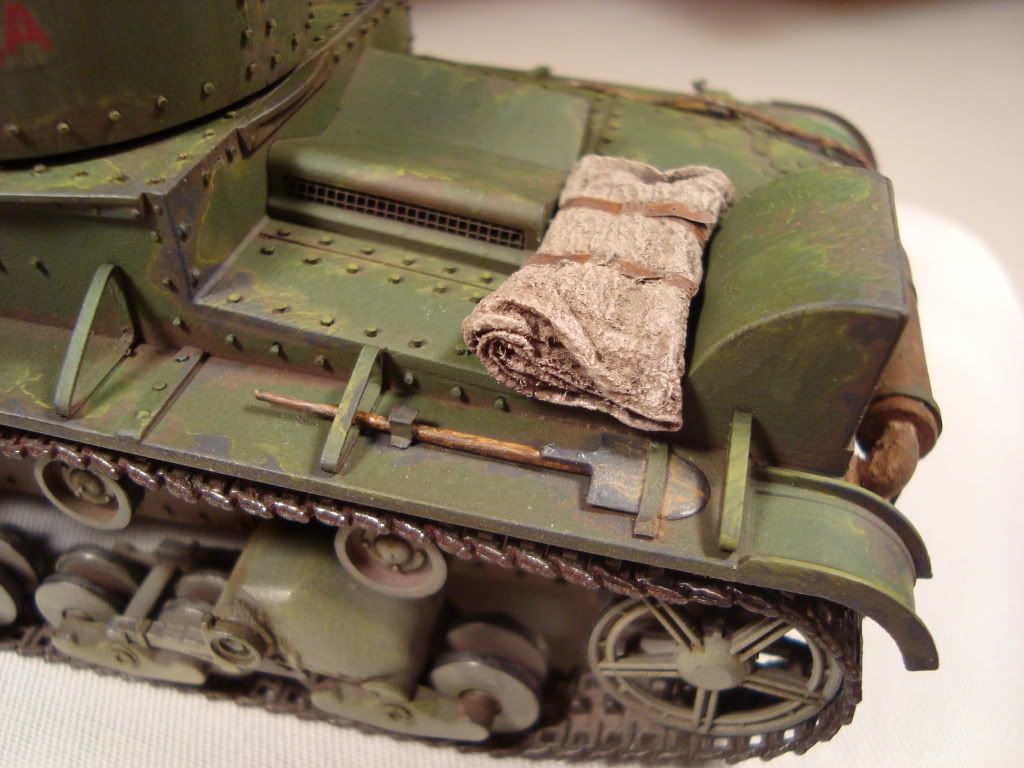
Left side, painted the shovel and added a tarp / blanket roll made from TP.
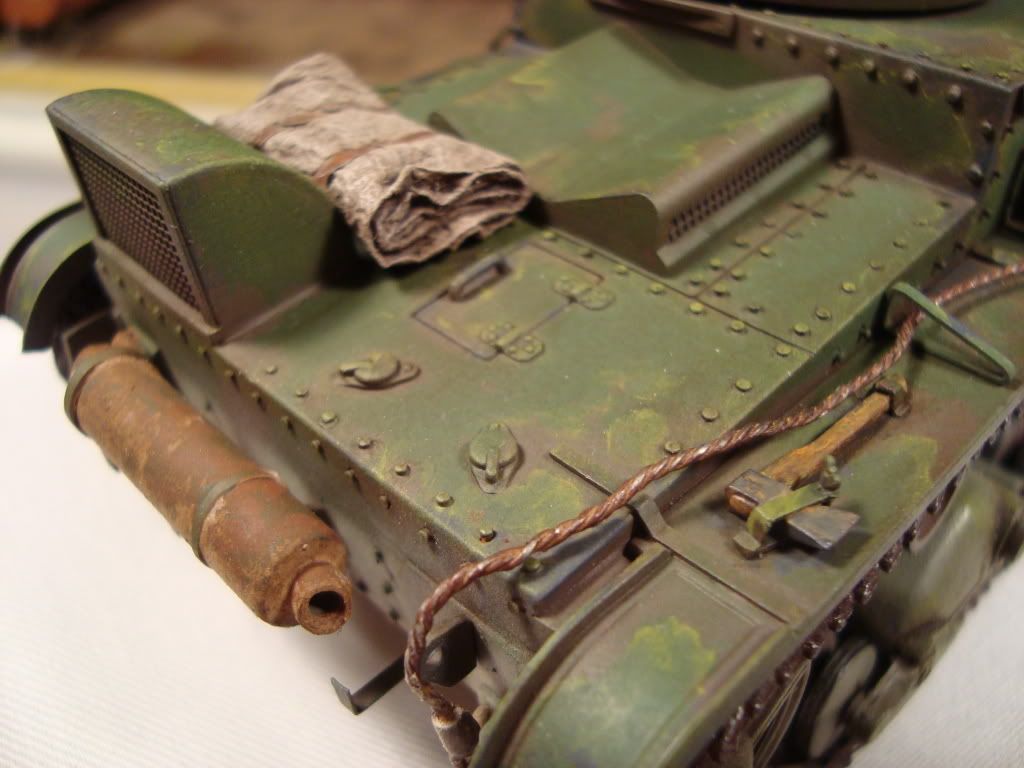
The rear, painted the exhaust, wire rope, axe, and tarp.
That finished up the tank it self but there's always more...

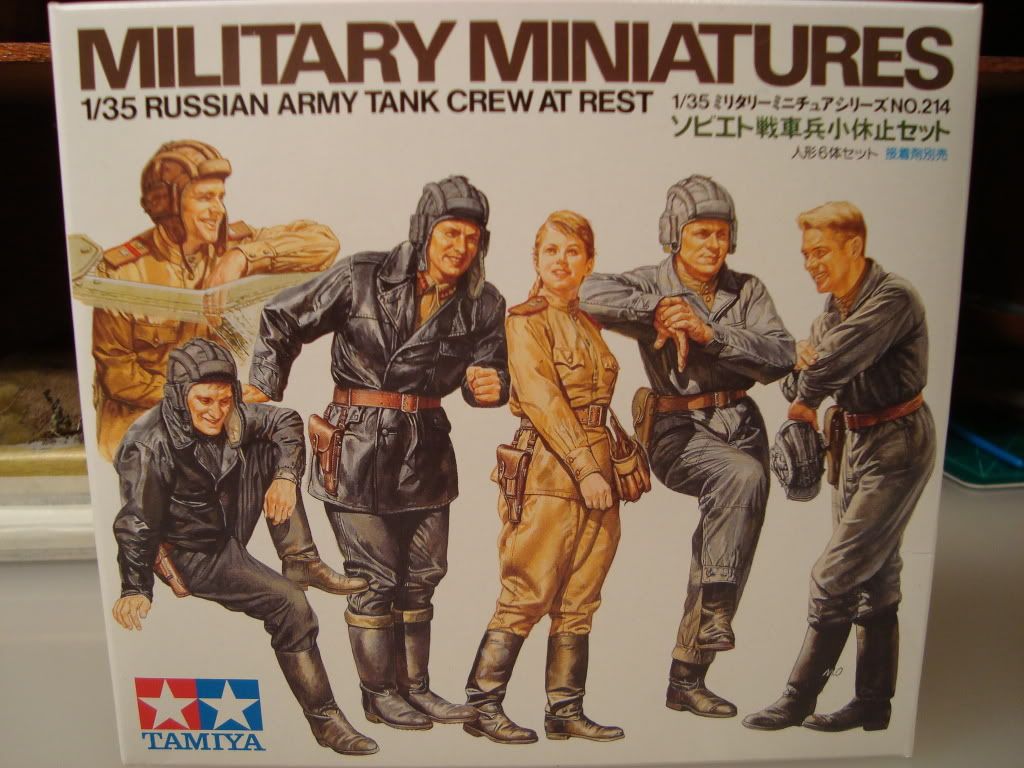
Decided to put this in a small dio and use the Tamiya Russian tank crew at rest set.
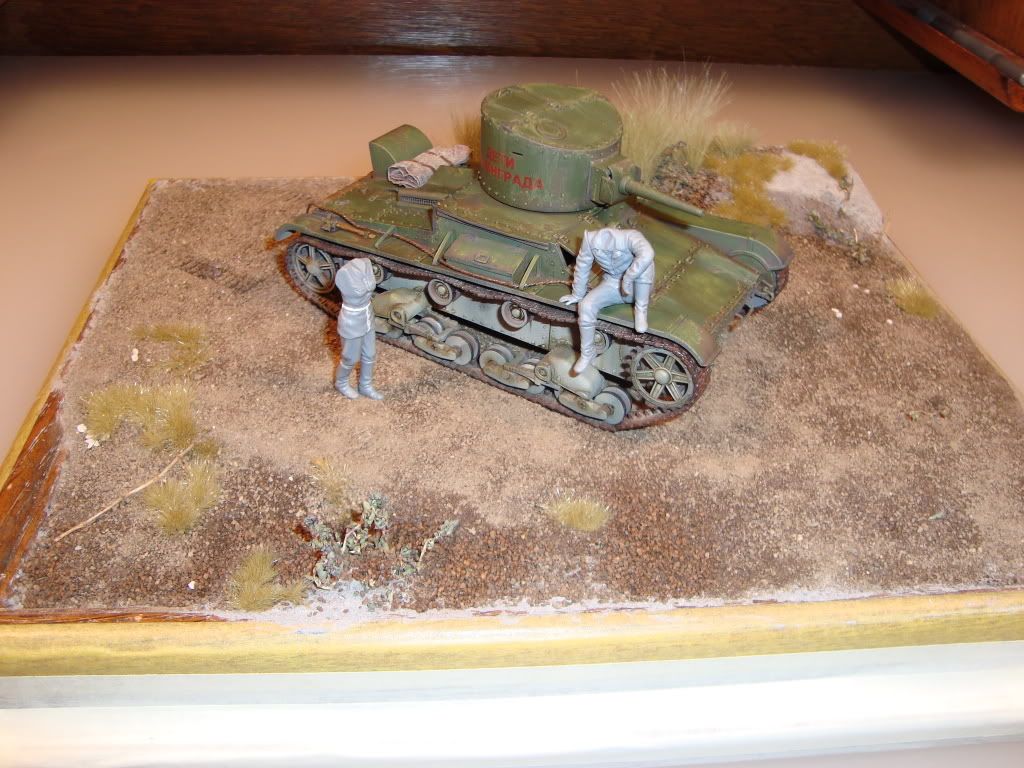
Here is the lay out of the dio, still waiting for it to fully dry then will at some static grass and paint.
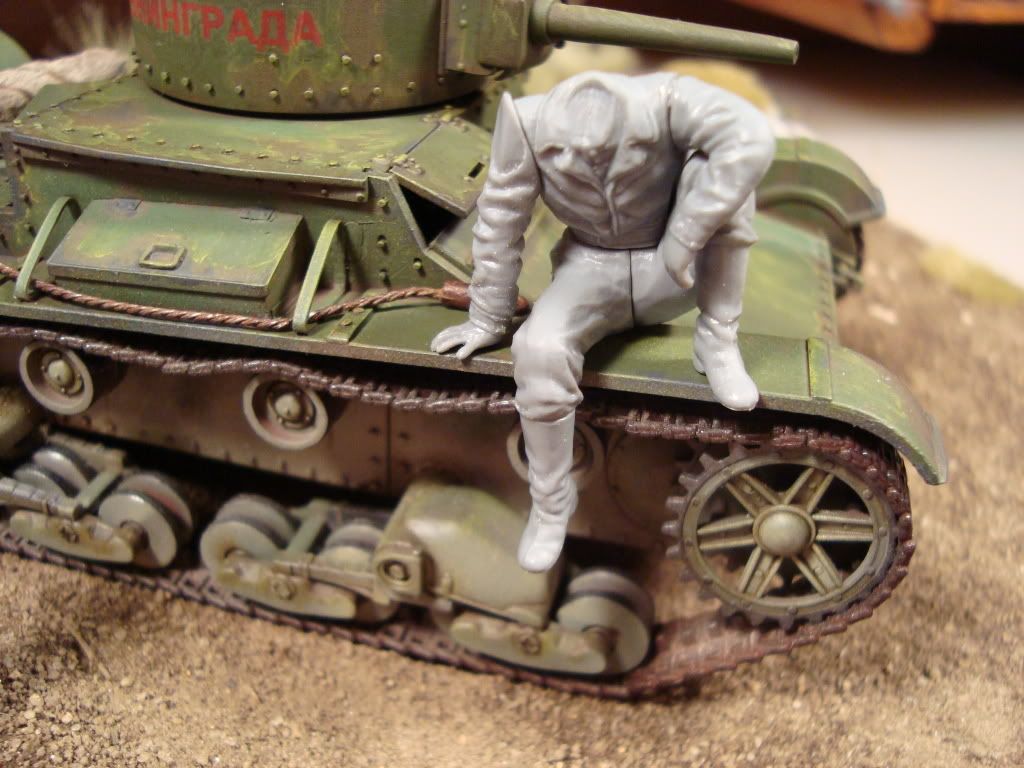
The crewman sitting needed slight adjustments to get the postion so there will be some puttying and shapping.
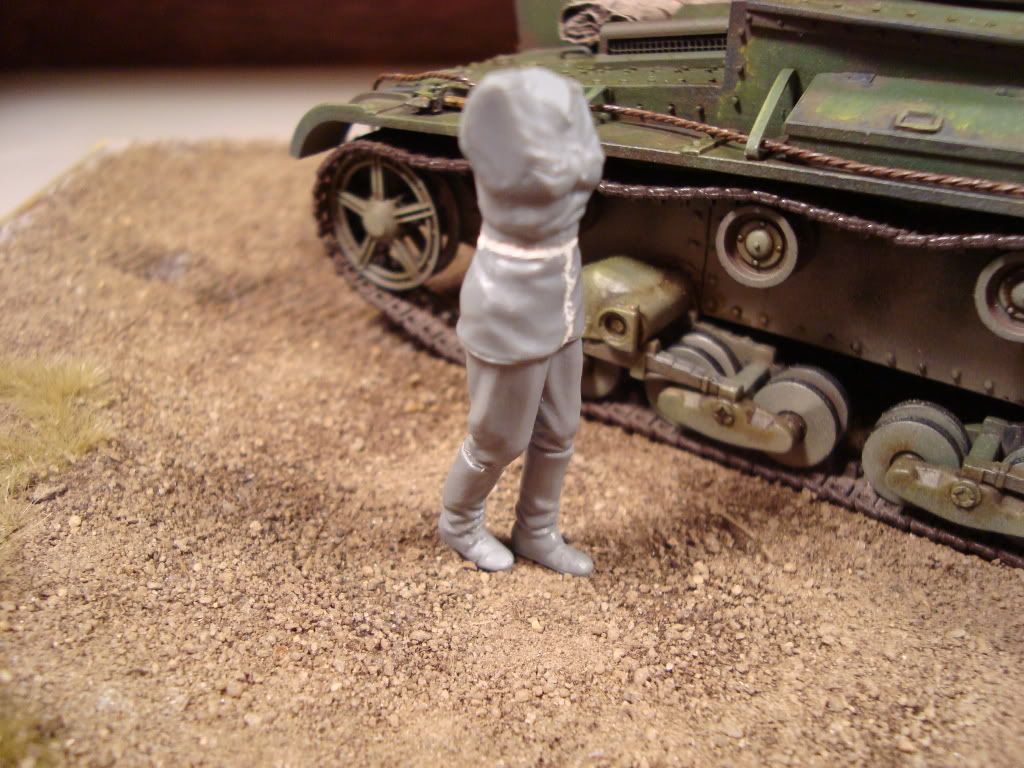
Used the crewwoman for a change.
So.....there will still be much work to do to this one but this is the last post on this thread.  Will post the completed dio under that subject when the time comes.  Thanks to all for taking the time to look in and comment during the duration of this build.

Thanks

Rob

Rob

  • Member since
    August 2010
Posted by Jose_Luis_Lopez on Thursday, January 27, 2011 4:20 AM

Absolutely nice. A winner!

I particualry love the warm colors you used. Perfect!


  • Member since
    April 2005
  • From: Piscataway, NJ!
Posted by wing_nut on Tuesday, January 25, 2011 7:46 AM

SCHWING

Marc  

  • Member since
    March 2003
  • From: Rain USA, Vancouver WA
Posted by tigerman on Tuesday, January 25, 2011 1:32 AM

Looking nice with that paint on Rob.

   http://i7.photobucket.com/albums/y269/wing_nut_5o/PANZERJAGERGB.jpg

 Eric 

  • Member since
    January 2006
  • From: California
Posted by SprueOne on Monday, January 24, 2011 8:58 PM

wow, well done! 

the paint weathering, extra detailing and build as a whole

Just one thing I see and I have to mention is the horn on the port side. Maybe it's because I was just working on mine last night but it looks a little thick.

I don't know, what do I know? I'm still building my first 1/35 russian armor model Smile 


Anyone with a good car don't need to be justified - Hazel Motes


Iron Rails 2015 by Wayne Cassell Weekend Madness sprueone

  • Member since
    July 2004
  • From: Texas
Posted by wbill76 on Monday, January 24, 2011 8:08 PM

Definitely looks like it's been through the wringer and seen its share of hard duty Rob! The tracks look good and were worth the effort. Yes

  • Member since
    May 2003
  • From: Ft. Sill, OK
Posted by beav on Monday, January 24, 2011 7:21 PM

Woohoo!  A BT!  

Is that Tam's or one of the 'Eastern Trifecta' kits? (zvezda, EE, ______ (insert))

"First to Fire!"

Steven

  • Member since
    October 2009
Posted by PANZERWAFFE on Monday, January 24, 2011 7:03 PM

Pawel - Thanks very much for the translation, really was wondering what it said.  Thats alright if you dont like the lettering, Have to admit, was not my favorite but was the only decal (Russian) had spare.  Was not going to hand paint having no idea of the Russian language so I used it.  I think it's alright.

TigerEP1 - Good of you too stop and thanks for the comments.  Kind-of like the Marder's Suck translation myself Big Smile  If a kit comes with it's own indi tracks I'll try them out but I'm glad these are done.  Not the best but they will have too do.

Here's the up date.  Tracks on!  Still some touch up to do on them just waiting for the glue points to dry completly first.

Only a few things left to do, should soon be finished.

Here is a peak at whats waiting in line.

Thanks for stopping in.

Rob Big Smile

Rob

  • Member since
    January 2011
  • From: Springfield, MA
Posted by TigerEP1 on Monday, January 24, 2011 10:44 AM

Rob,

The beast is looking superb, and i like the Marder's Suck  definition better than the actual translation...lol

Those tracks sound like a nightmare. I am working on a DML StuG atm and the tracks are still not assembled because they frighten me..lol

Best of luck and looking forward to more progress pics =D

On the bench:

1/35th Tamiya Willi's MB


  • Member since
    May 2009
  • From: Poland
Posted by Pawel on Monday, January 24, 2011 6:17 AM

Rob, your tank is looking good! Sorry to hear about the tracks, what system was that (vinyl?) Somehow I don't like the shape of the letters on the turret - decals, can;t help it. Sorry to disappoint you, the inscription says "Dyeti Leningrada" (The children of Leningrad*) *Leningrad, now Petersburg, a large city on the Baltic Sea coast. Looking forward to see the next update, have a nice day

Paweł

All comments and critique welcomed. Thanks for your honest opinions!

www.vietnam.net.pl

  • Member since
    October 2009
Posted by PANZERWAFFE on Monday, January 24, 2011 12:54 AM

SprueOne - Been wanting to try one with a heavy weathered paint job, good to hear she's looking it.

Nate - Thanks.  Happy you stopped in.  The painting on this one has been the result of trying out new things.  I think i'm happy I tryed something different, for me.  Good to hear you like it.

TRM - Thank you much sir, more too come soon.

Andy - You always make me laugh.  Was wondering myself what it said but now I like your translation, it's more fitting.  That's what I'm going to tell everyone it says.

Finally was able to get only one of the tracks on.  One more too go.  The tracks have been the worst ones I have ever done.  They were very hard to glue up and get them to stay togther.  Hard too fit and work them on the tank.  They are just not very user friendly.  If anyone builds one of these, I would suggest getting an AM track for it.  After all the complaining though, the track doesnt look to bad.  Will post updates tomorrow.

Rob

Rob

  • Member since
    April 2009
  • From: Carmel, IN
Posted by deafpanzer on Sunday, January 23, 2011 5:26 PM

Jeez, outstanding!!!  What does it say in Russian on the turret?  Maybe 'Marders suck'?  My russian is rusty at this moment...

Andy

TRM
  • Member since
    May 2010
  • From: Massachusetts
Posted by TRM on Sunday, January 23, 2011 3:54 PM

Very Nice work Rob!  Looking forward to seeing your progress.

Regards,

T


In Flanders fields the poppies grow
Between the crosses, row on row,
That mark our place, and in the sky,
The larks, still bravely singing, fly,
Scarce heard amid the guns below.

~John McCrae

  • Member since
    August 2003
  • From: Connecticut, USA
Posted by Nachtflieger on Sunday, January 23, 2011 3:47 PM

Love the paintwork Rob, looks great!

Nate


  • Member since
    January 2006
  • From: California
Posted by SprueOne on Saturday, January 22, 2011 8:34 PM

paint progress is looking good and weathered 


Anyone with a good car don't need to be justified - Hazel Motes


Iron Rails 2015 by Wayne Cassell Weekend Madness sprueone

  • Member since
    October 2009
Posted by PANZERWAFFE on Saturday, January 22, 2011 5:55 PM

Made it back to the bench today so quick update.  Gave raw umber (W&N artist's oil) wash.  Then mixed Russian Armor Green (base color) with yellow and hand painted select areas, pin washed with the same mix but with a touch more yellow, and finally went back and dry brushed with the lighter mix.

More too come

Rob

Rob

  • Member since
    January 2009
  • From: Edmonton, Alberta
Posted by Griffin on Tuesday, January 18, 2011 7:08 PM

Cool - thanks for the explanation.

BTW - Great looking tank! Yes

  • Member since
    October 2009
Posted by PANZERWAFFE on Tuesday, January 18, 2011 7:05 PM

Jose Luis Lopez - You make it sound good enough to eat.  Thanks for the words and for stopping in.

Joeviz - Indifferent

Wingnut - Happy that you like.  Used a small paint brush to place windex where wanted the salt and then poured it on.

The best part, when I put the salt back in the shaker on the table, can now see how much salt your putting on your food because it's green.

Griffin - TigerEP1 explained "Why the Salt" perfectly.  Thanks for taking a look

TigerEP1 - Thanks for stopping in.

Rob

  • Member since
    January 2011
  • From: Springfield, MA
Posted by TigerEP1 on Tuesday, January 18, 2011 6:33 PM

from what i can tell it looks to be a paste, and the reason to use it is salt will leave a fine but very uneven edge one dry it can be simply brushed off with your finger. Leaving a worn random edge that would be way too time consuming to attempt freehand.

On the bench:

1/35th Tamiya Willi's MB


  • Member since
    January 2009
  • From: Edmonton, Alberta
Posted by Griffin on Tuesday, January 18, 2011 1:54 PM

What was the reason behind using salt as a mask? Is this common?

  • Member since
    April 2005
  • From: Piscataway, NJ!
Posted by wing_nut on Tuesday, January 18, 2011 1:48 PM

Holy excessive sodium Batman!


Really looks nice.  Did you a salt paste? or we the model and pour the salt over it?

Marc  

  • Member since
    July 2010
  • From: Tornado Alley
Posted by Echo139er on Tuesday, January 18, 2011 10:26 AM

"delicious and cute" ????  Indifferent

  • Member since
    August 2010
Posted by Jose_Luis_Lopez on Tuesday, January 18, 2011 10:15 AM

Absolutely delicious and cute vehicle. Excellent work over all.

Very very interesting the result using salt ... I´ll have to do it some day, as I love the result!

Keep us posted!


JOIN OUR COMMUNITY!

Our community is FREE to join. To participate you must either login or register for an account.

SEARCH FORUMS
FREE NEWSLETTER
By signing up you may also receive reader surveys and occasional special offers. We do not sell, rent or trade our email lists. View our Privacy Policy.