SEARCH FINESCALE.COM

Enter keywords or a search phrase below:

Br 52 WIP

61375 views
192 replies
1 rating 2 rating 3 rating 4 rating 5 rating
  • Member since
    March 2003
  • From: Rain USA, Vancouver WA
Posted by tigerman on Sunday, November 25, 2012 11:46 PM

Rob, its always a treat to follow your builds. I do apologize for missing so much of this one, but it truly is  something special to witness.

   http://i7.photobucket.com/albums/y269/wing_nut_5o/PANZERJAGERGB.jpg

 Eric 

  • Member since
    January 2010
  • From: St. Louis
Posted by Shawn M. on Monday, November 26, 2012 12:10 PM

running gear looks amazing!

Im already hearing that great steam loco in my head

I love the smell of plastic in the morning

  • Member since
    April 2005
  • From: Piscataway, NJ!
Posted by wing_nut on Monday, November 26, 2012 5:05 PM

HOLY CRAP!   That's just to nice for words.

Marc  

  • Member since
    October 2009
Posted by PANZERWAFFE on Monday, November 26, 2012 5:09 PM

OK guys, this is going to be a long one.  Hope all had a excellent thanksgiving.....next Christmas Gift

WILLIAM - You could be mesmerized by all the turkey you probably had Surprise  Thanks for the words and here are some seconds for you.

BILL - Is it me or do those piston housings look like big turkey drumsticks Eats

DAVE - I'm getting pretty excited about "greasing" this thing up.  Almost there!

ERIC - Hey buddy!  No apologies needed, glad you could stop in.  Hope things are going good with you Smile

SHAWN M - Thanks man !  Thought I too was hearing the locomotive but come to find out, it was just the steam releasing from my head Indifferent

And now the update

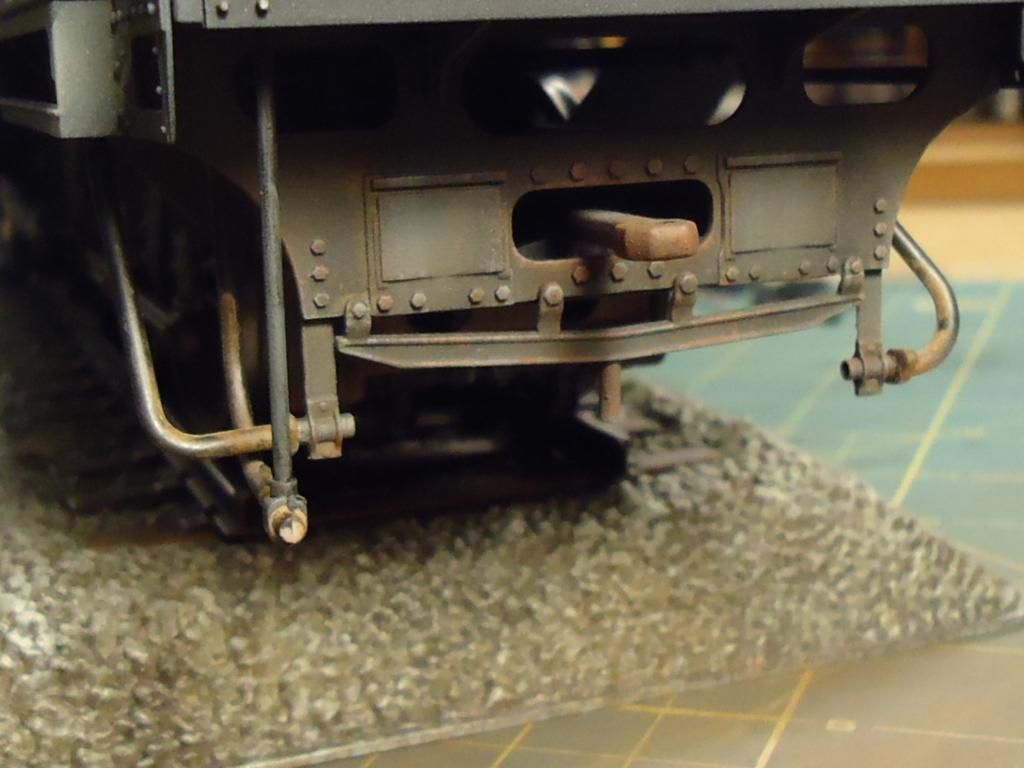
Work on the right side has been done.  Added the remaining parts, added some more dirty / dust weathering on the front section.
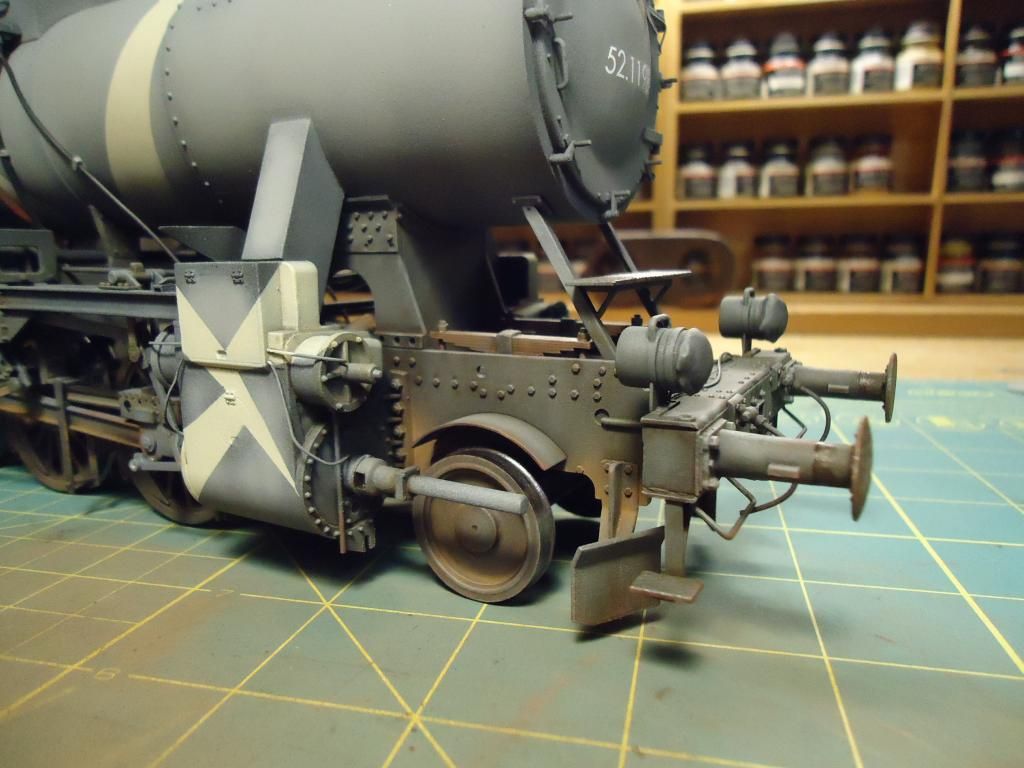
Then the remaining running gear
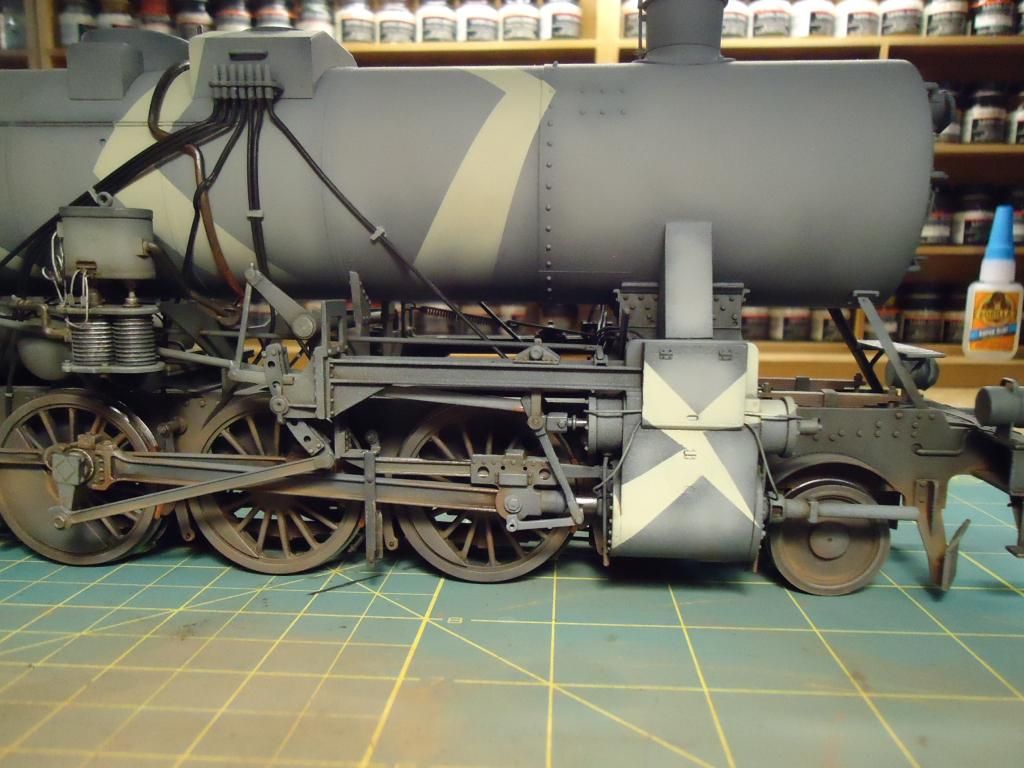
Here is another shot of it.  Can also see here a little more weathering on the compressor.
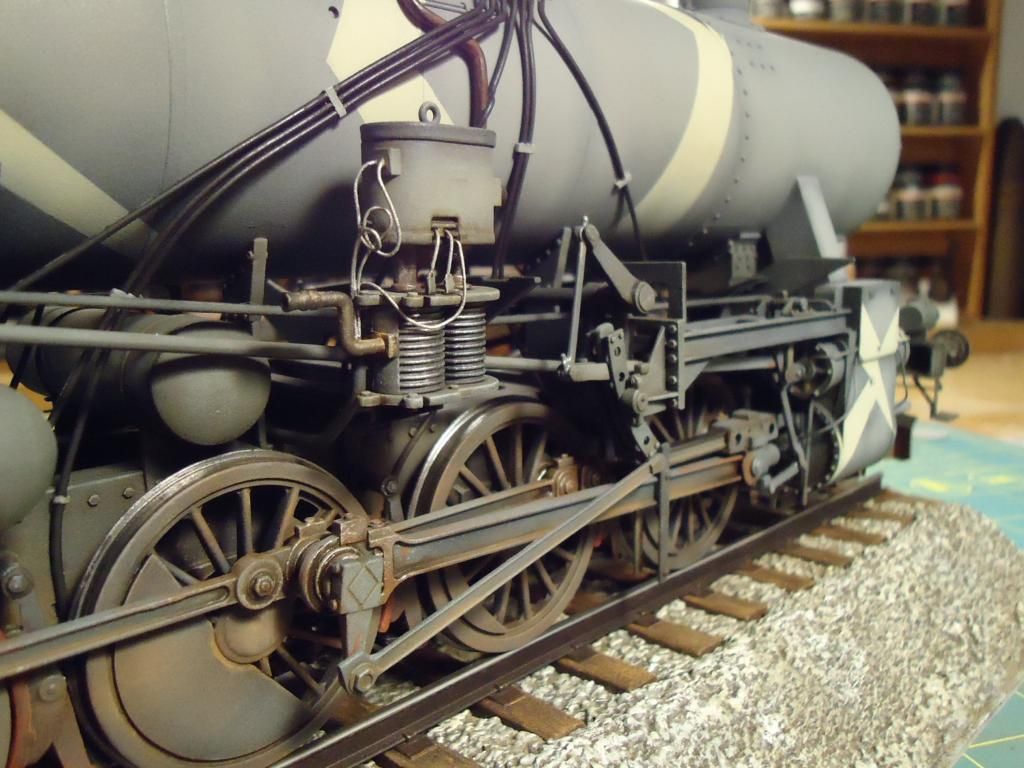
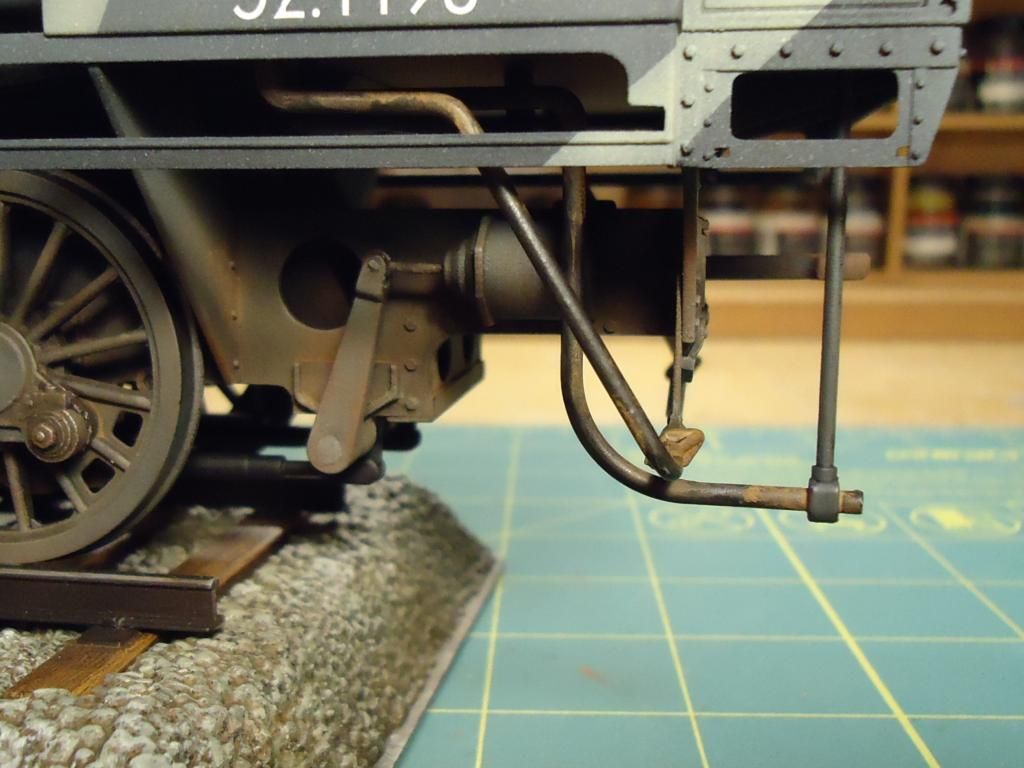
Had then went to work and the remaining plumbing underneath the cab.  Was added to both sides.
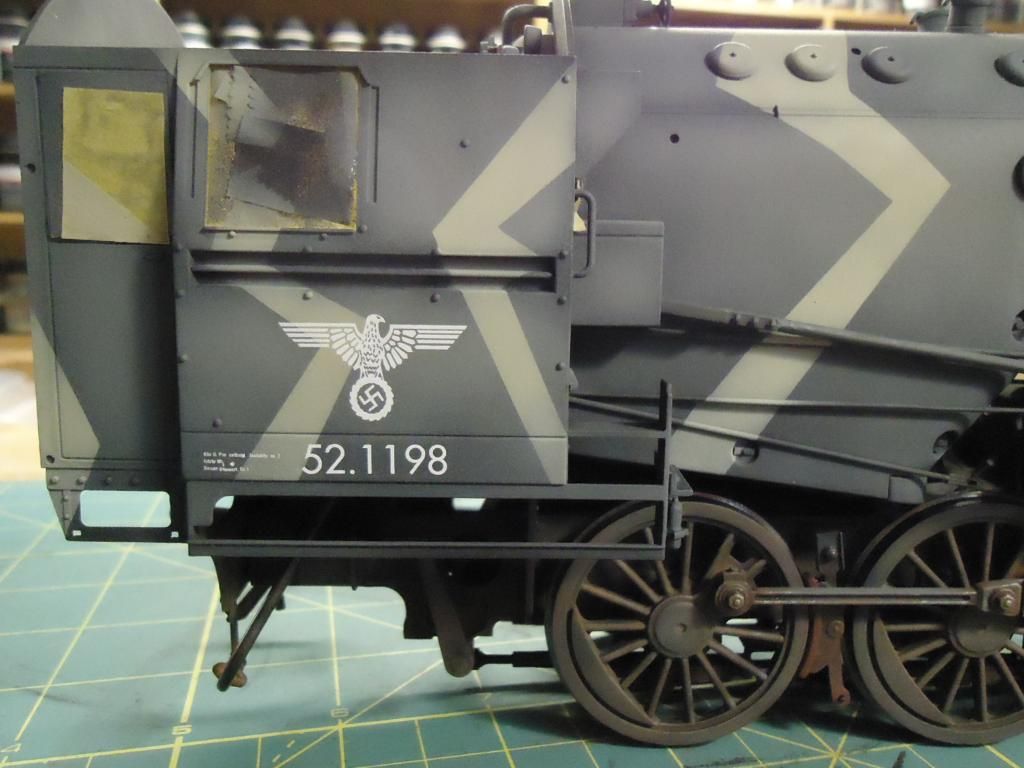
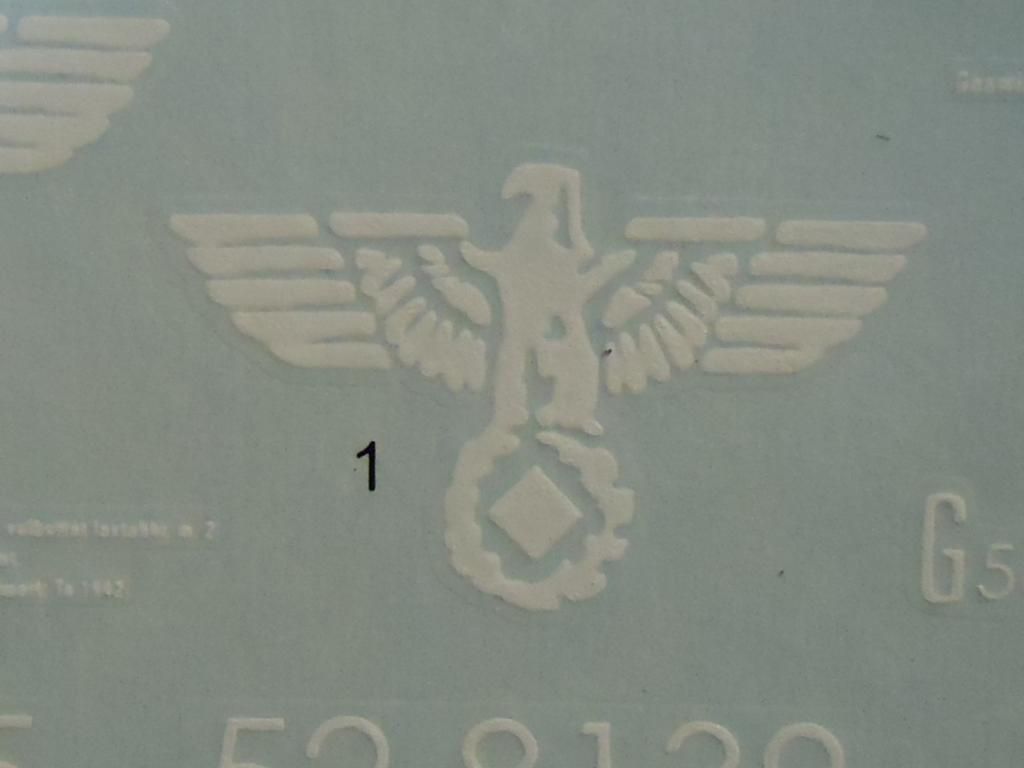
Next up was the markings.  The kit supplied decals I did not care for, especially the eagle.  Here is the kit supplied eagle
To improve these had went with dry transfers from Archer.  Theres look like this
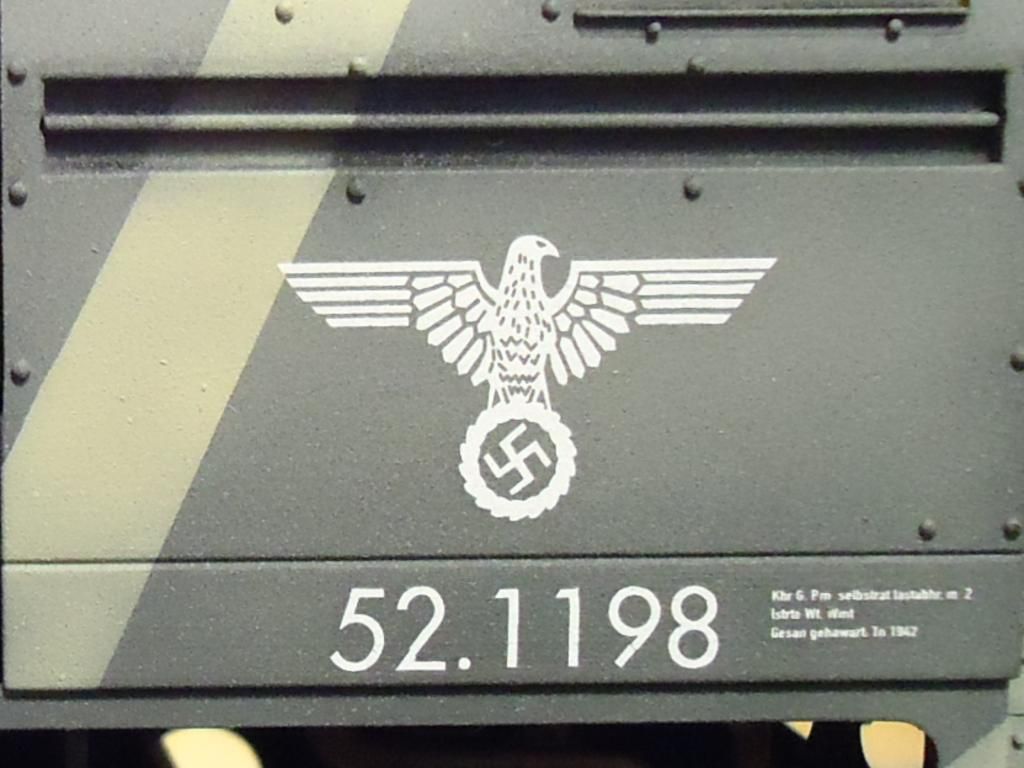
Here is the cab with it's markings.
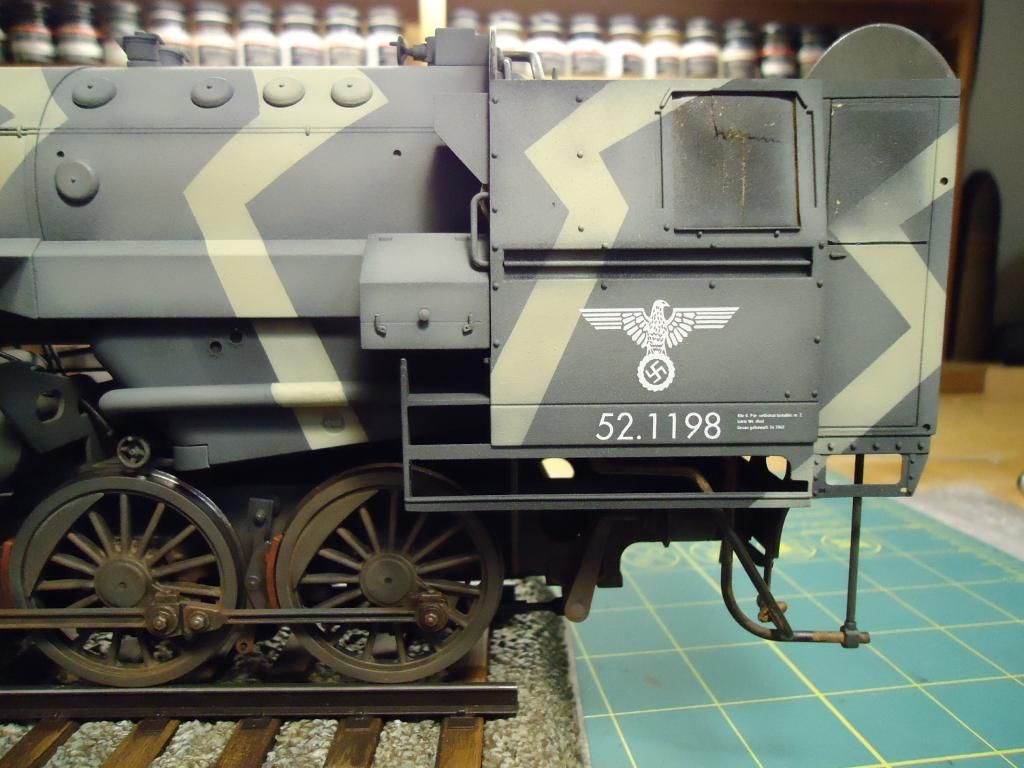
Moving along had went to the front.  Here I have a question for you guys.  Do the numbers look crooked ?  Had put the first set on and thought they were so had to scrape it off and use the transfer that should have went on the back.  It still looks crooked to me though but measuring things and using a square, things are straight???  What do you think?
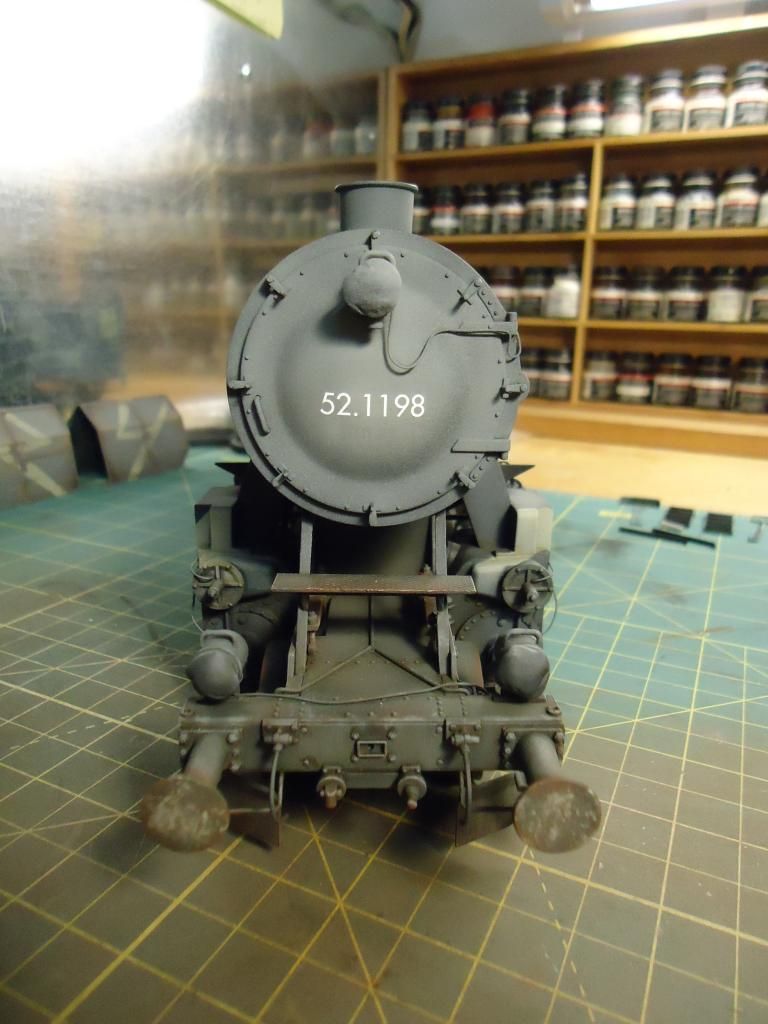
Here is another view.
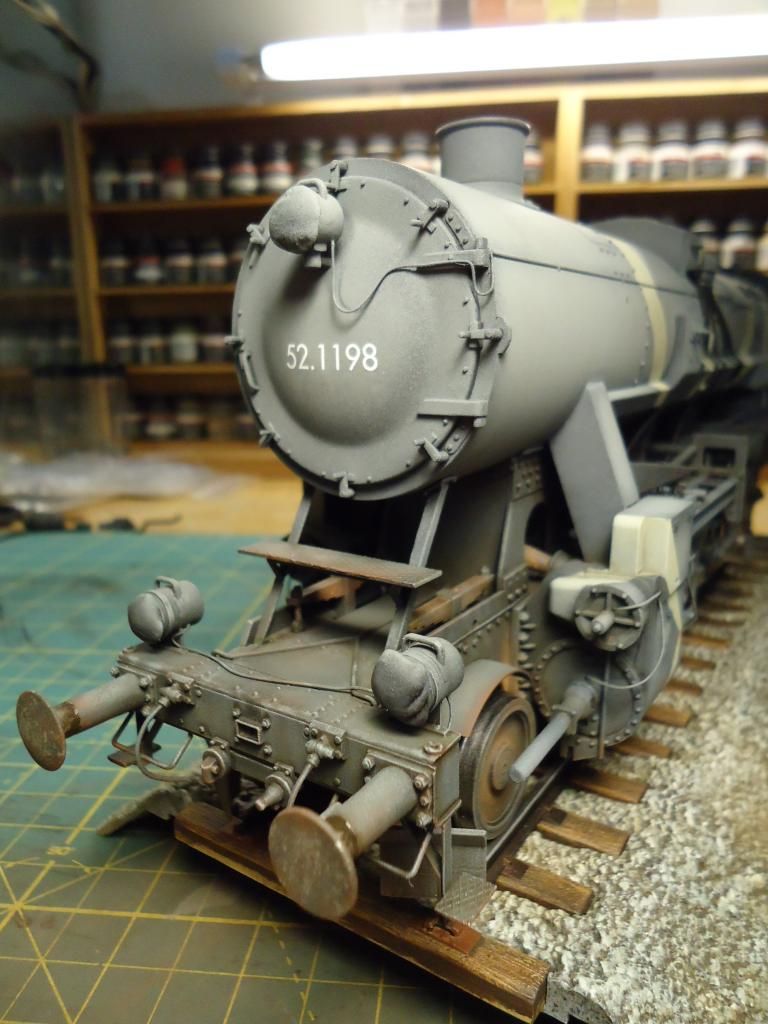
OK, had said I used the transfer that was suppose to go on the back of the tender car....so back there had to cut and piece the kit supplied decals to create the correct number. I can do the same for the front if everyone thinks it needs to be done.
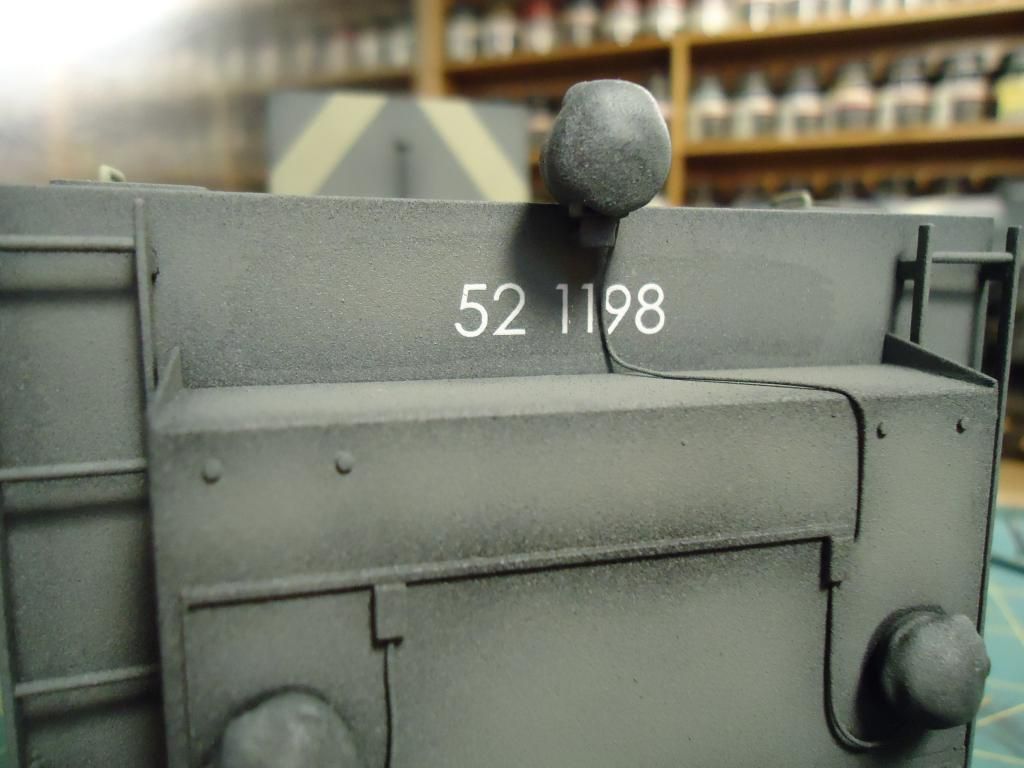
And now here are the overviews of how the engine looks now.
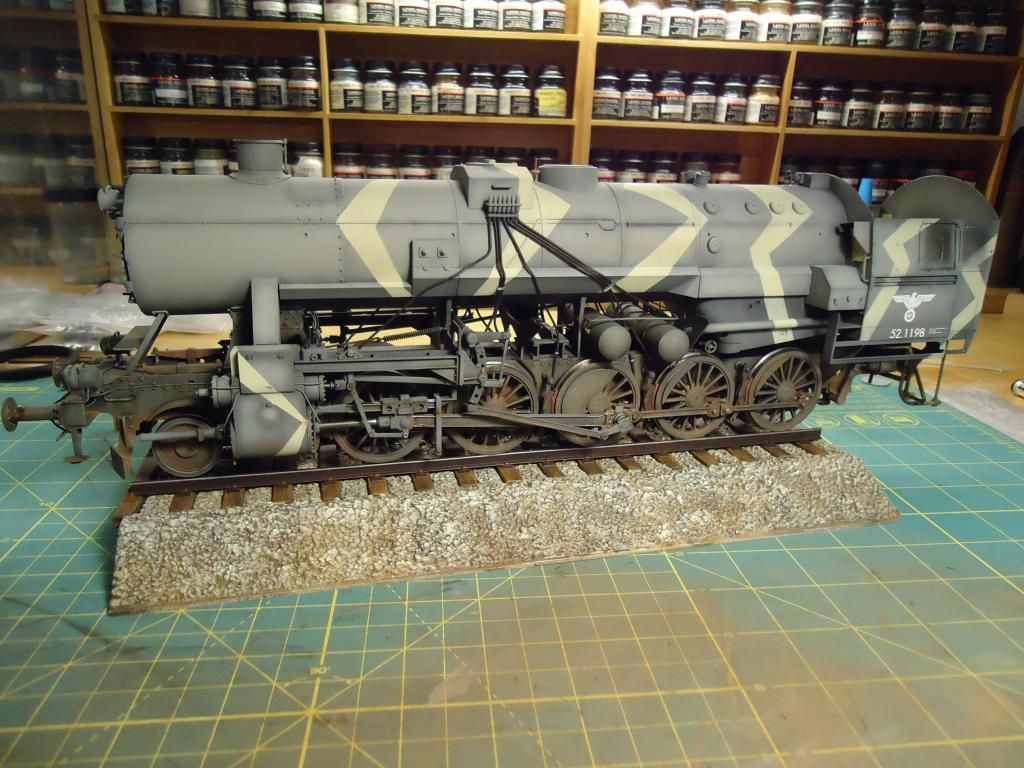
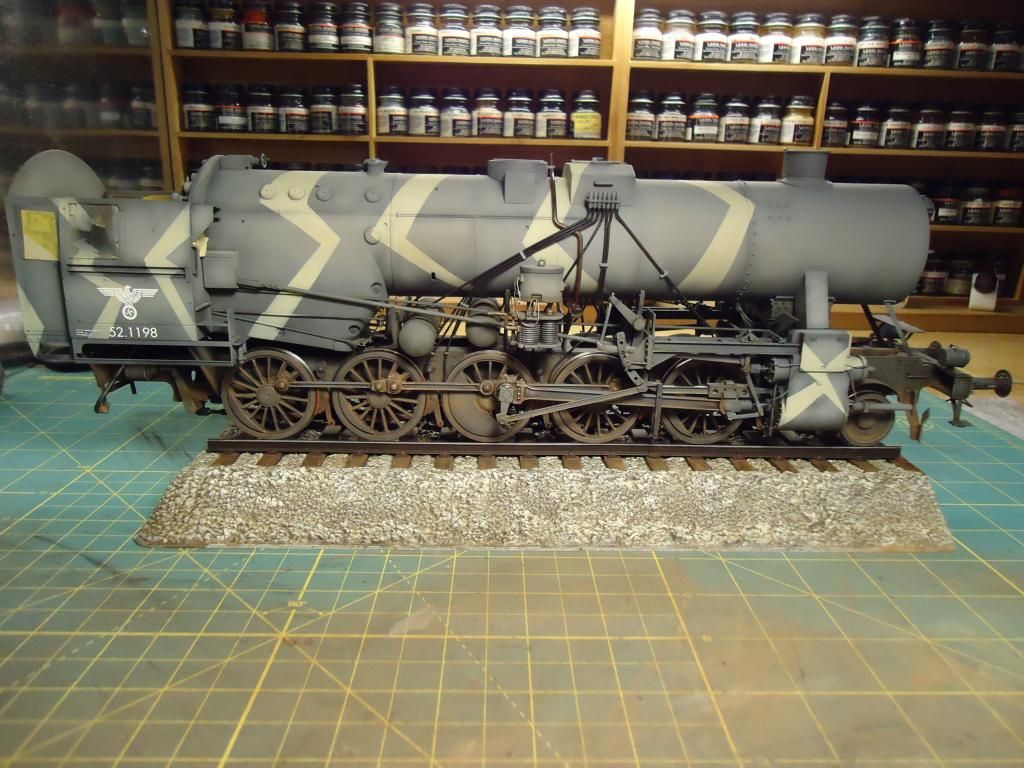
One last surprise update.  Arriving home today, this was dropped off by the FedEx man.
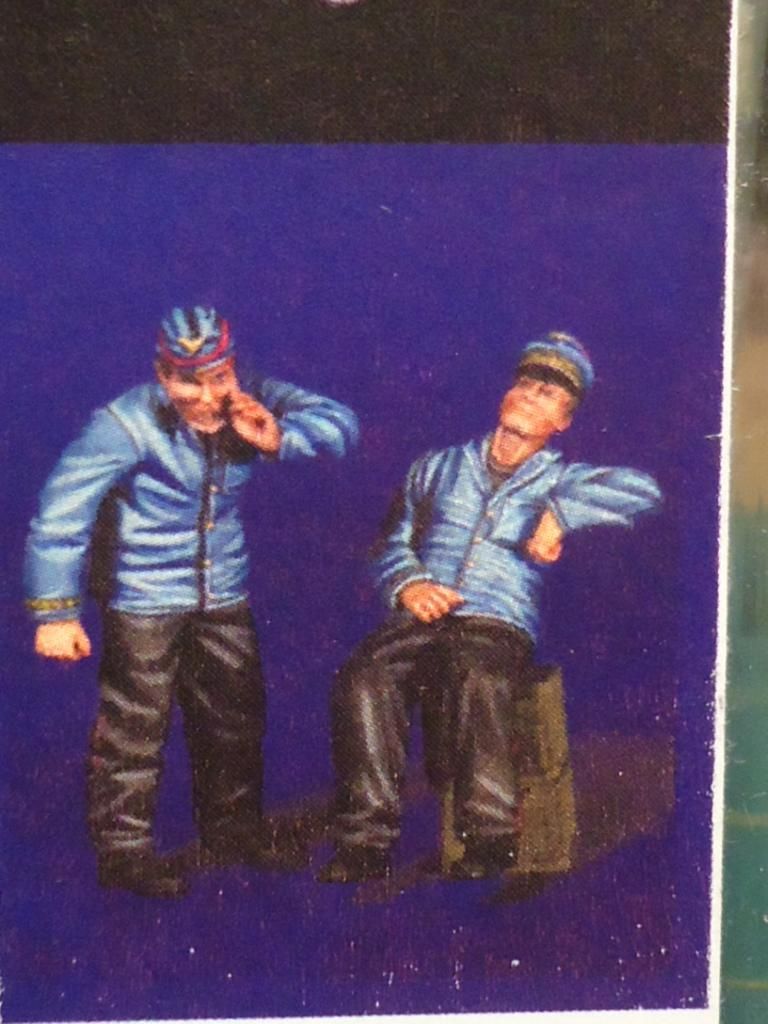
It's my locomotive figures by Warriors.  This will be my next step in the project, get them together  painted , and in their seats.  Will post progress of them for the next update.

Hope this was not to long but hope all enjoy.  Thanks for looking Cool

Rob

  • Member since
    October 2009
Posted by PANZERWAFFE on Monday, November 26, 2012 5:15 PM

Hey Marc, thanks man !

Rob

  • Member since
    August 2012
  • From: Parker City, IN.
Posted by Rambo on Monday, November 26, 2012 6:45 PM

the 2nd pic looks straight but I think its the curve in the wire that gives it that appearance

Clint

  • Member since
    August 2007
  • From: back country of SO-CAL, at the birth place of Naval Aviation
Posted by DUSTER on Tuesday, November 27, 2012 12:15 AM

Rob you may be correct , re: the numbers at the front.

You are required to take the following with a 100# bag of salt, 

With small skill and no scientific proof I submit the following:

arrow 1 : shows the hight above the arbitrary green line

arrow 2: shows the numbers touching or squeezing into the arbitrary green line

arrow 3 & 4: shows the spacing below the arbitrary red line

Note about the arbitrary lines:  they were drawn in on an illustration program (Paint.Net) and the

magnification was to confirm the the line had not moved out of straight from one side to the other.

Resulting in:

  • your 5 is tilted off the vertical and its lower portion should be into the horizontal green line.
  • your 2 is the same
  • the dot is fine
  • the 1's are fine
  • 9 is fine
  • 8 is fine

So upshot is, the tops of 1198 are all in a line, the 52 is not.

A word about text and fonts;

Generally the numbers that are strong verticals (1).are straight up and down and stop on the horizontal lines

The numbers with curved parts (3,6,8,9,) will have the curved part sweep into or below the horizontal line.

Spacing between  curved and straight letters is a problematic area as well.

Generally curves will appear closer together and verticals will be spaced farther apart. 


Please accept this as an attempt to help answer you question, not a criticism of your skills


ALLLL  A BOARD!

Steve

Building the perfect model---just not quite yet  Confused

  • Member since
    November 2009
Posted by artworks2 on Tuesday, November 27, 2012 12:48 AM

From the photo she looks Gscale????

  • Member since
    October 2009
Posted by PANZERWAFFE on Tuesday, November 27, 2012 4:39 PM

Clint - I hear ya, with that wire and the dome shape of the front of the boiler it makes it kinda hard to tell.  Sounds though you can see it slightly off to though at least it appears to be and that means I need to do something about it.  Thanks for the input.

Steve - Thanks for taking the time to do that with the picture and for pointing out the problem.  Now I know for sure it's off and that means I know what I have to fix.  Much appreciated!  Now just have to scrape off the transfer and piece together a new decal.  Will have to come up with a way to insure that the decal goes on straight?

Artwork - It's in 1/35 scale.  Thanks for taking a look.

Rob

  • Member since
    July 2004
  • From: Texas
Posted by wbill76 on Wednesday, November 28, 2012 1:22 PM

Personally I would leave the markings as-is...the bulge of the boiler front is going to cause some slight distortion no matter which medium you use (dry-transfer or decals) and you may find that getting the decals aligned will prove equally as difficult but ultimately it's up to you Rob! Wink The dry transfers are definitely an improvement over the kit markings...I know Trumpeter didn't do the swastika because of international restrictions in the EU over such things and Archer filled that gap nicely.

Nice update on the weathering and details, keep it coming! Yes

  • Member since
    January 2010
  • From: St. Louis
Posted by Shawn M. on Wednesday, November 28, 2012 3:08 PM

its the curvature playing tricks on you, leave it as is..my 2 cents

I love the smell of plastic in the morning

  • Member since
    April 2009
  • From: Carmel, IN
Posted by deafpanzer on Wednesday, November 28, 2012 9:24 PM

HOLY COW!  Great update out of Rob's factory!  I think it looks far better than the real thing now!  Nice score on the figures... they will go great with the train.  

Andy

  • Member since
    December 2004
  • From: ohio
Posted by vonryan on Wednesday, November 28, 2012 9:32 PM

WOW this just keeps getting better and better Rob. OUTSTANDING!!!!


Clay

  • Member since
    October 2009
Posted by PANZERWAFFE on Sunday, December 2, 2012 1:20 PM

Hello everyone.  Thanks for all your comments.  After reviewing the different opinions and points made about the positioning of the numbers on the front of the boiler, I now have a new solution I'm toying with in my head.  Thinking about removing the offset "52." and applying it on again using the Archer transfer set.  There are many "52." still on the set.  Just thinking but haven't gone any further then that with it.

I am now convinced it's my camera that sucks!  I;have tried so many different shots of these next set of pictures.  Tried different lighting, settings, backgrounds, and so on.  Anyway here are the pictures.

The next three pictures are shown because had to add almost a 1/4 inch of "butt" to this figure.  Did not think at the time  to take a good picture of the before and after.  His bottom was made up with Squadron putty and then sanded to shape.  Had done this to get the proper fit, with no gap, when he was sitting in his chair which worked very well.

I will say these figures look MUCH better here in person!  They may not be the best but I am very pleased with them.  I do not quit have figure painting down but have learned a lot painting these.  Hope all of you enjoy as much as I.

One last think, still have to paint the buttons.  Will then let cure completely for a few days and then maybe give them a wash with Raw Umber?

Thanks for taking a look.

Rob

  • Member since
    July 2004
  • From: Texas
Posted by wbill76 on Monday, December 3, 2012 11:12 AM

Nice pair of figures Rob, ought to look right at home in the cab! Wink

  • Member since
    September 2005
  • From: beacon falls , Ct.
Posted by treadwell on Monday, December 3, 2012 2:23 PM

Hey Rob Smile

Figures look really good from where I sit Yes.   Too bad you couldn't get a guy shoveling coal.. that would look cool.

After you paint the buttons (although I didn't notice they needed it ) I would take another pic or 2 with them in their places and then determine if they need the extra wash. 

I have a pretty hard time with 1/35 figures, only completed 1 that is even decent, but I enjoyed doing the 1 figure I have done in 1/16..... If you enjoy figure painting I recommend it to you.

Great stuff, Rob ... always a treat for my eyes !

treadCool 


  • Member since
    April 2009
  • From: Carmel, IN
Posted by deafpanzer on Monday, December 3, 2012 7:02 PM

Great job on the figures!!!!  They will bring life to the train for sure!  

How do you like NC?  It has been more than six months now?

Andy

  • Member since
    August 2007
  • From: back country of SO-CAL, at the birth place of Naval Aviation
Posted by DUSTER on Tuesday, December 4, 2012 12:31 PM

Rob

very nice job on the figures. 

And as for your camera, don't worry, at the time I'm writing this, Christmas is only 20 days 13 hours & 31 minuets away! 

So maybe... ??????

 Whistling

Steve

Building the perfect model---just not quite yet  Confused

  • Member since
    April 2005
  • From: Piscataway, NJ!
Posted by wing_nut on Friday, December 7, 2012 7:42 AM

WOW that is really some hotel sierra work. Good call on the dry transfers.  Archer should be paying you for that "ad".

Marc  

  • Member since
    March 2006
  • From: Right Side of a Left State
Posted by Shellback on Sunday, December 16, 2012 11:55 PM

She's a beaut Rob . Did you get the numbers on the front of the boiler dilema resolved ? I'd say some weathering will knock down how prominent they look and it wont be as noticeable . Figures a cool . That one guy sure looks to be yelling loud man .Cool

  • Member since
    October 2009
Posted by PANZERWAFFE on Friday, December 21, 2012 9:48 PM

BILL - Nothing like a nice pair, thanks.

ANDY - There will be another move in about a year...again.

WILLIAM - I have always said I was going to try my hand at those larger figures....one day

Here are the figs in place.

ALL ABOARD

STEVE - Whats our Christmas countdown look like now....

MARC - Sure would like if Archer sent some money this way or maybe just a transfer set.  Surprised no one picked up on the direction the eagle is looking.

The official order: Looking over the right wing was peace, over the left was combat use.  Just an interesting bit of info.

CARL - I'll give you a pictorial explanation to your question.

There was the option of no numbers on the front at all which looked good and was probably the most common.  I wanted a little bling though and research provided a few choices.  These first choices were not chosen in the end.

OLD SCHOOL was chosen

Now just have to go back and weather the front of the boiler.

Have done quit a bit since my last post: dot filtering, weathering, exhaust added weathered and pipes wrapped in asbestos, cat walks painted and on, cab roof installed, hand rails painted and attached, and various other small bits.  Will get pics up next couple days.

Have also decided that I did not like the smoke deflectors so I set out on scratch building some new ones.  Here's a quick review:


Almost forgot, have also added scratch linkage.  Still needs paint on it.

Rob

  • Member since
    October 2009
Posted by PANZERWAFFE on Friday, December 21, 2012 11:17 PM

This is my take of an asbestos wrapped pipe.


Rob

  • Member since
    February 2010
  • From: Maine
Posted by Stage_Left on Saturday, December 22, 2012 12:19 AM

Holy cow Rob- new smoke deflectors, and an asbestos-wrapped pipe. More fantastic stuff! Yes Beer

  • Member since
    July 2004
  • From: Texas
Posted by wbill76 on Saturday, December 22, 2012 10:14 AM

As always Rob, you're the master of the little details! Nice work on that wrapped pipe and of course everything else to do with this beast! Figs look right at home in the cab as well, very cool! Beer

  • Member since
    October 2009
Posted by PANZERWAFFE on Sunday, December 23, 2012 3:13 PM

DAVE, Bill - Really appreciate the comments and for following along with me !

Thanks to all who took the time to look in and comment.  That's what makes it worth coming here.

Rob

  • Member since
    August 2012
  • From: Parker City, IN.
Posted by Rambo on Thursday, December 27, 2012 4:23 AM

Wow I haven't been on in a long while, been working 60 hours a week but this was the first post I wanted to find and see what you have done since I last been on. Have to say it wasn't a disappointment Its all amazing keep up the great work

Clint

  • Member since
    December 2004
  • From: ohio
Posted by vonryan on Thursday, December 27, 2012 9:14 AM

AH HA found something wrong. you need to fix it or you'll never sleep at night. you don't have a fire in the pit it will never run with out coal AAAAHAHAHA awesome work good lord you are trying to make this beauty work. AWESOME Rob

Clay

  • Member since
    July 2011
  • From: Pittsfield, IL USA
Posted by novembergray on Friday, December 28, 2012 11:33 PM

This is awesome. Thank God for guys like you coz I'll never have the patience for something like that. WOW!

Joe

It's not about how fast you get there or even where you're going. It's whether you enjoy the ride.

  • Member since
    May 2003
  • From: Mexico
Posted by rtvmodeler on Saturday, December 29, 2012 11:38 PM

Yes Bow Down Amazing work with those details!

Regards!
Rodolfo

Current Project:

Figures from Dragon, "German 6th Army, Stalingrad 1942-1943", 1/35

  • Member since
    September 2012
  • From: Manila Philippines
Posted by evo_lover on Monday, December 31, 2012 11:12 PM

Fantastic work as usual...You're one of those guys that inspires me a lot to pursue this hobby!!!!

on th bench:1/35 Tamiya Tiran 5

JOIN OUR COMMUNITY!

Our community is FREE to join. To participate you must either login or register for an account.

SEARCH FORUMS
FREE NEWSLETTER
By signing up you may also receive reader surveys and occasional special offers. We do not sell, rent or trade our email lists. View our Privacy Policy.