Thanks, I always have a blast building these things!!
For the build I added the last of the model's details and the model is now ready for painting!!
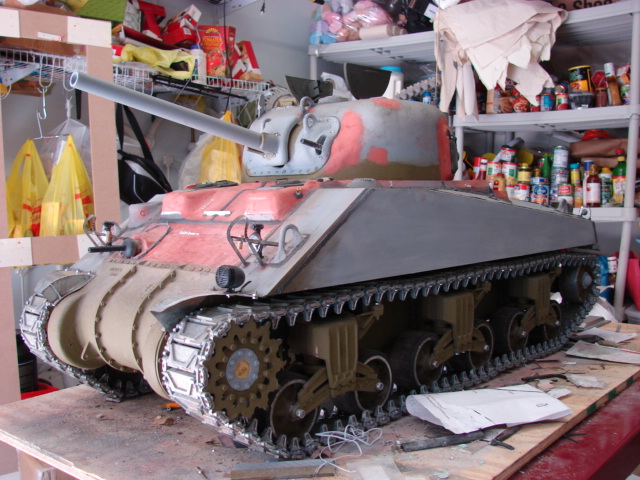
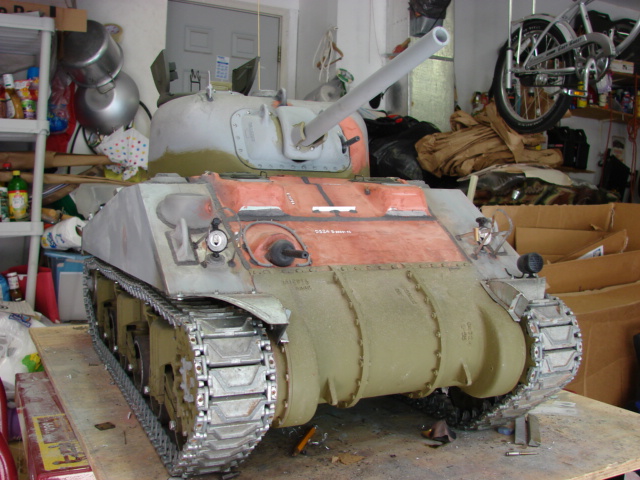
After the rear hatch work was completed turned my attention to the tool posts. The tool posts are fabricated with my usual method. As for the tool layout the A4 used the same tool layout of the other sherman family. the posts and footman loops are all metal fabrication and have sculpted welds.
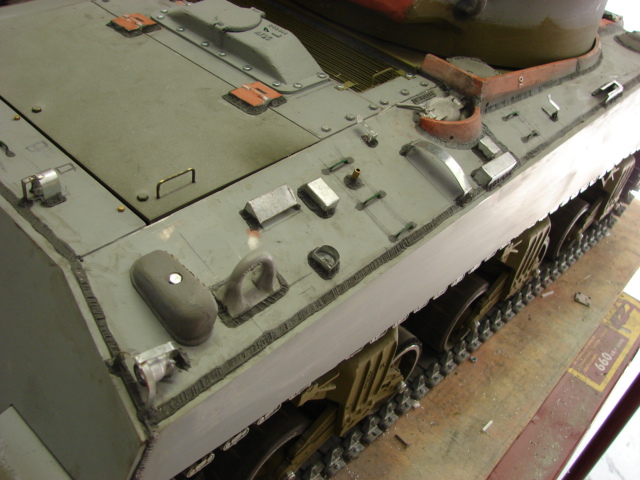
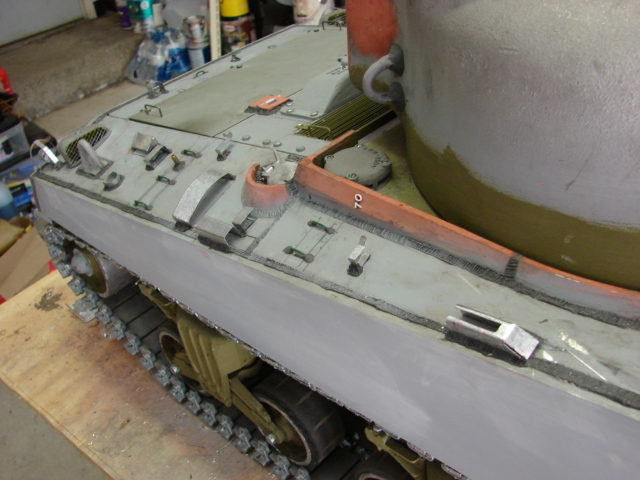
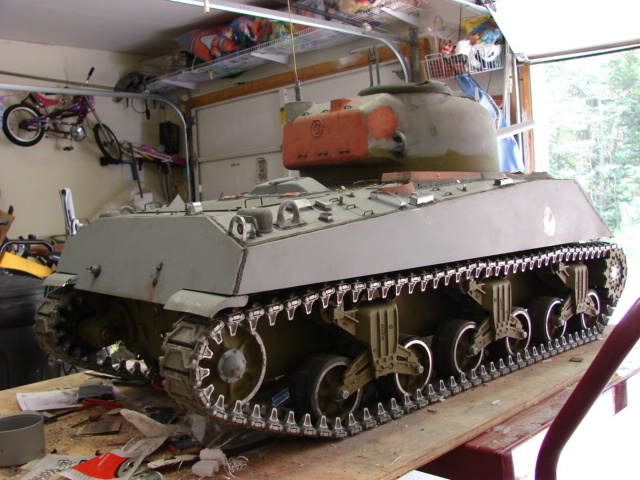
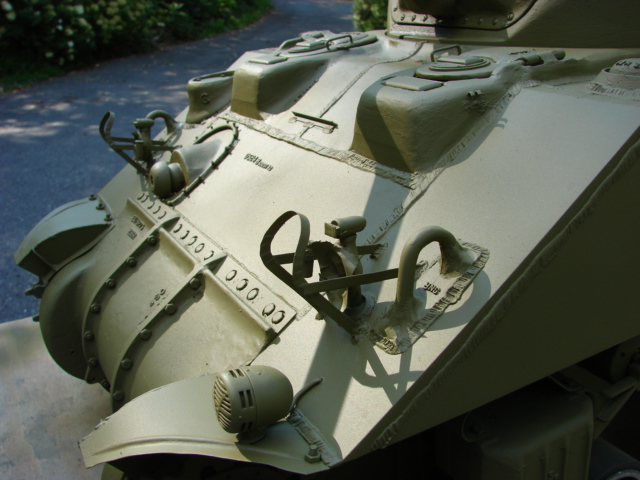
The tow cable mounts were also added, unlike the later shermans the early war period ones only had one cable lock, as the cable would connect to the U hook on the front transmission cover, this was changed later on in the war to feature another cable lock on the front cover.
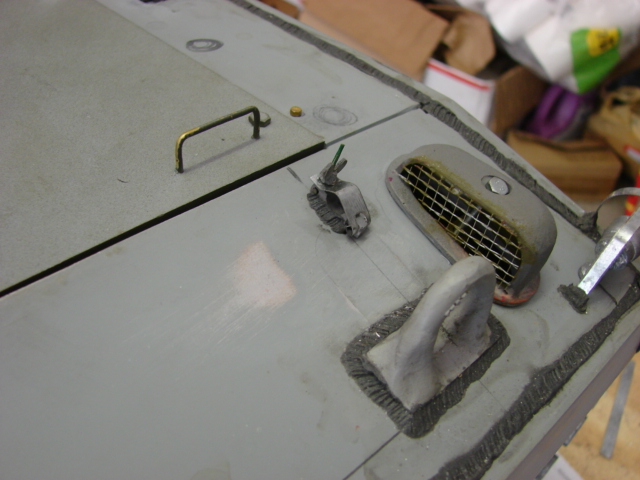
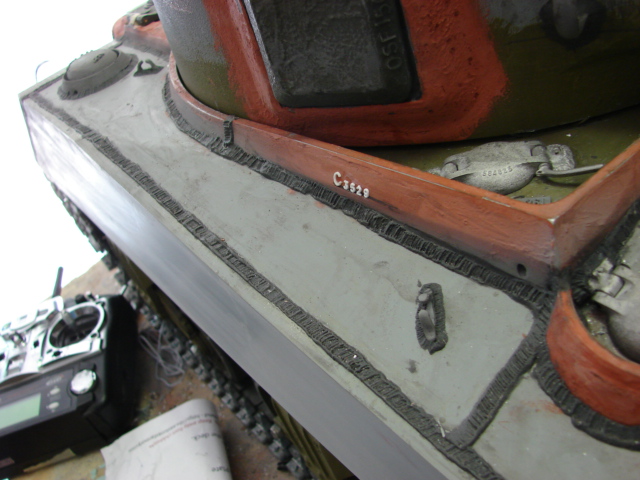
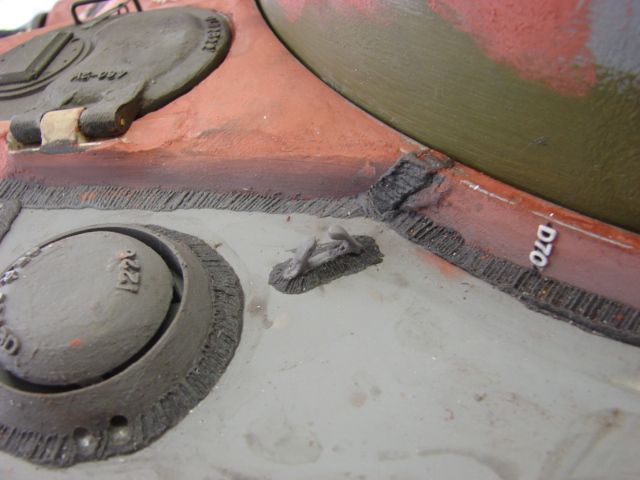
The Fluid ID tags were also added,
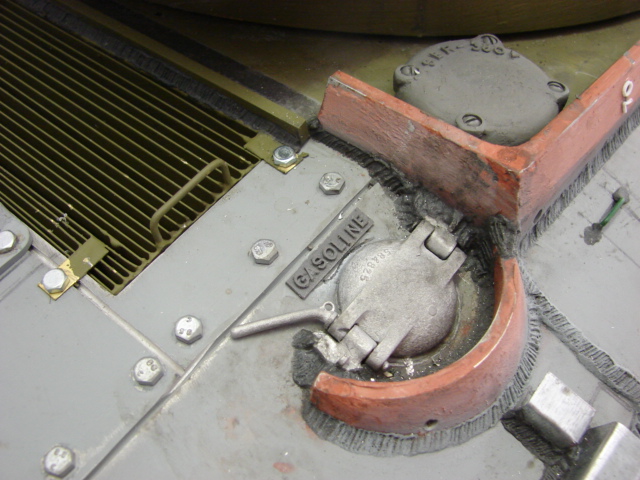
While adding these parts I tooled up the ID plate for the Little joe generator. Because the generator was a two stroke engine the unit needed Premix fuel. The ID plate stated the info as "GASOIL". The new plate was added to the current ID tag set and is now available on the product line.
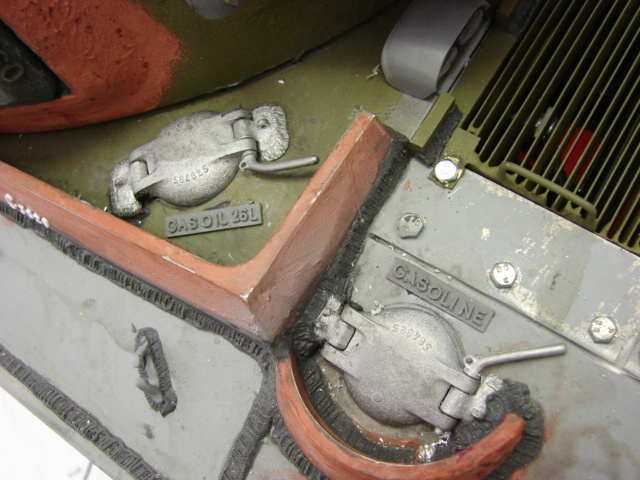
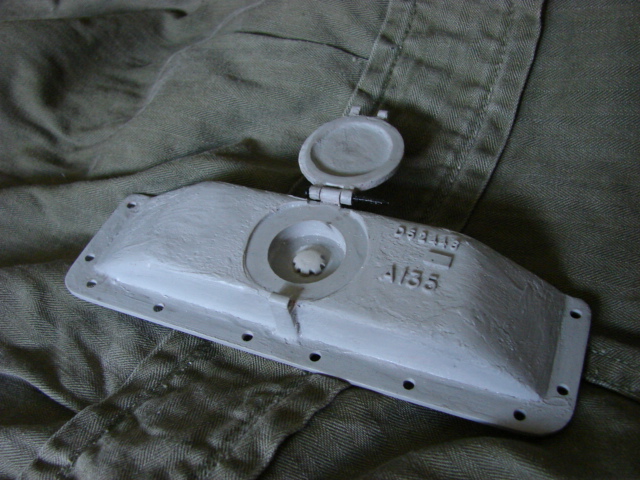
The last component to be fabricated / installed to the rear deck was the radiator armored cover blister.
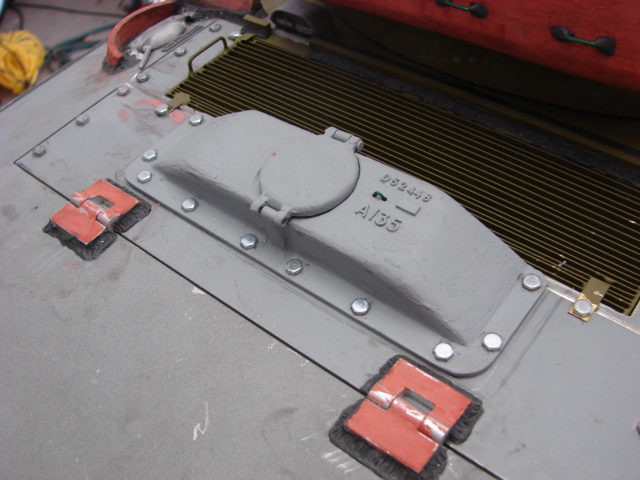
The Blister is one of the key distinguishing features of the A4 over other shermans, The purpose of the blister was because of the large radiator on the multibank engine. The engine was so large that even with the hull extended the engine still didn't fit. In addition to the large blister was added to the lower hull a top blister was also needed.
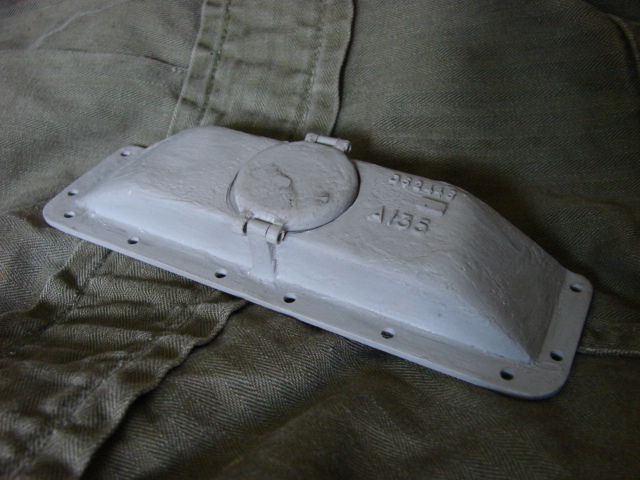
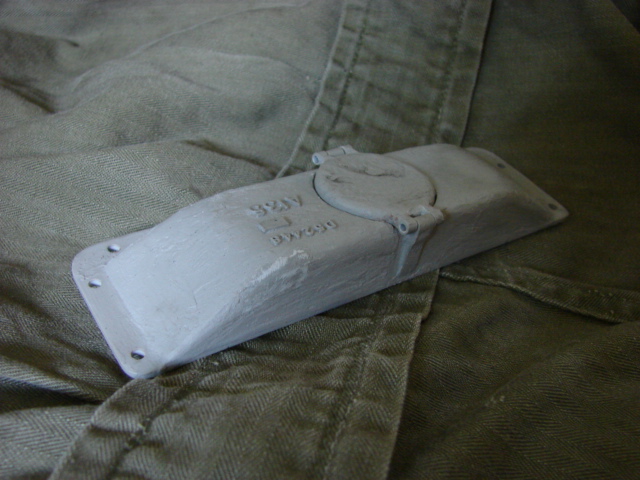
the top blister also has a large round hatch for access to the radiator filler cap.
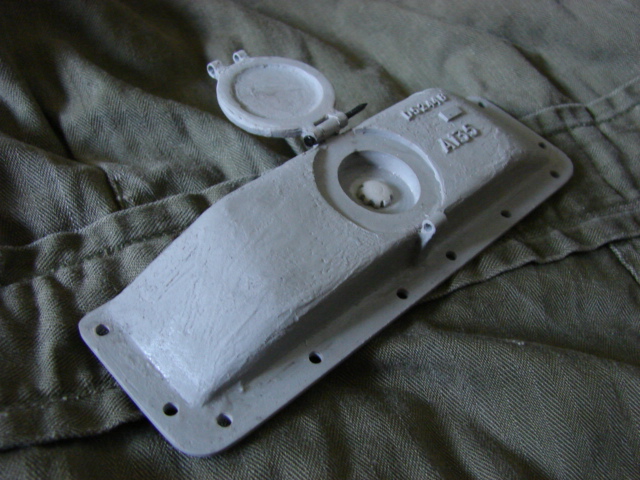
The blister was tooled up and is added to the catalog.
Once the hull was complete I turned my attention to the turret.
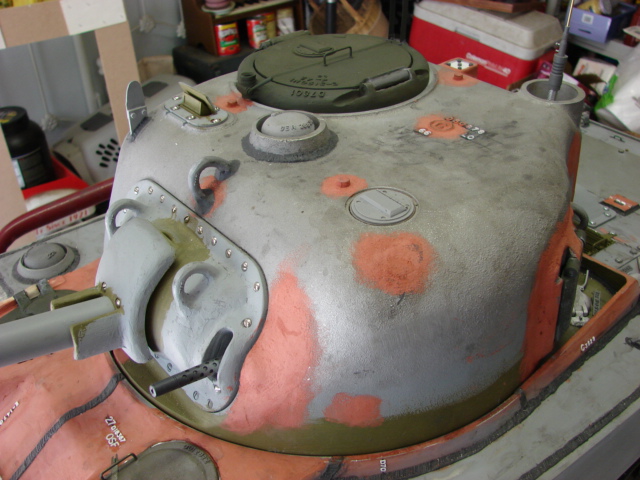
The details that were added were the turret lift hooks, shark fin vane sight, and MP48 spring antenna base... All parts were stock ECA. For the antenna all that was needed to prep the location was to drill a small drainage hole in the lower center of the antenna well.
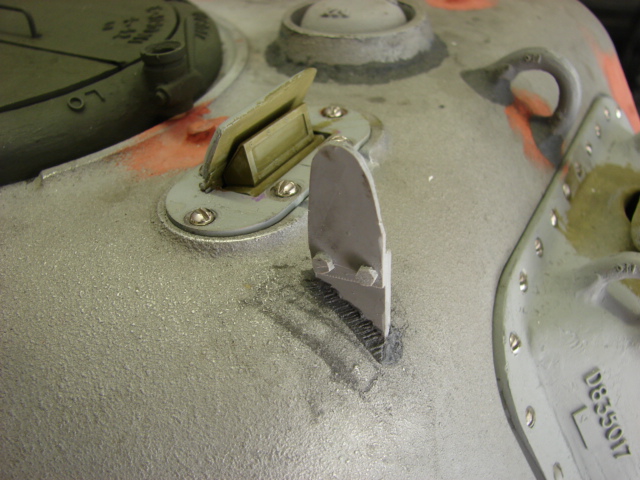
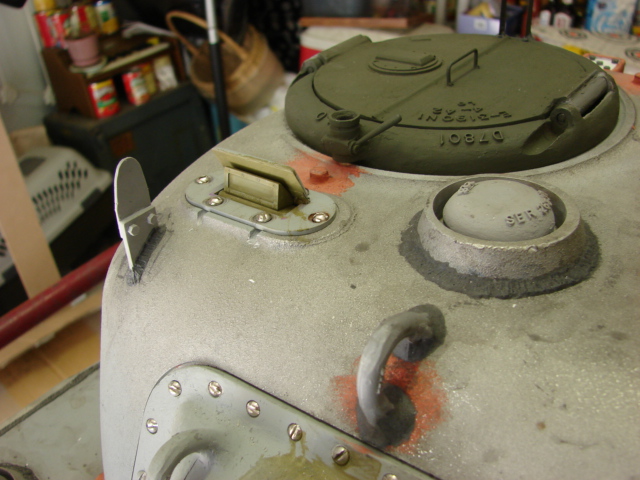
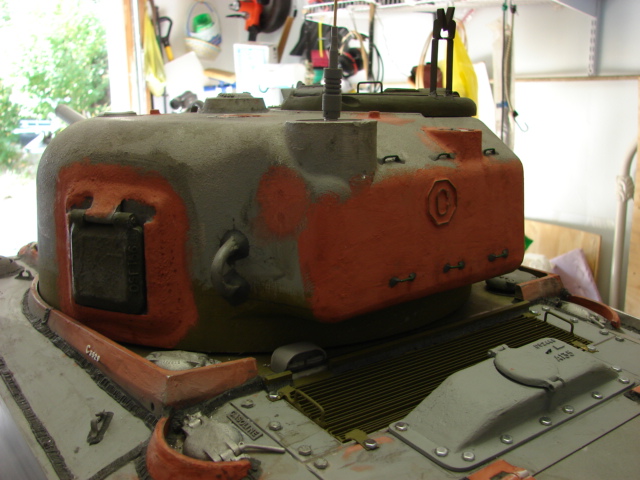
Unlike my other builds where I run the radio antenna into the MP48 antenna base on this build that was not needed. This was because of the 2ghz radio used, the antenna extension of the antenna was not needed so a static one was used instead. One good factor is that it leaves one less umbilical cord to deal with when removing the turret.
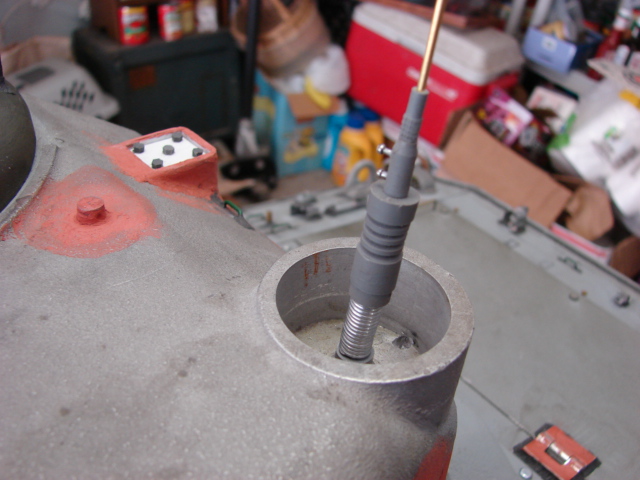
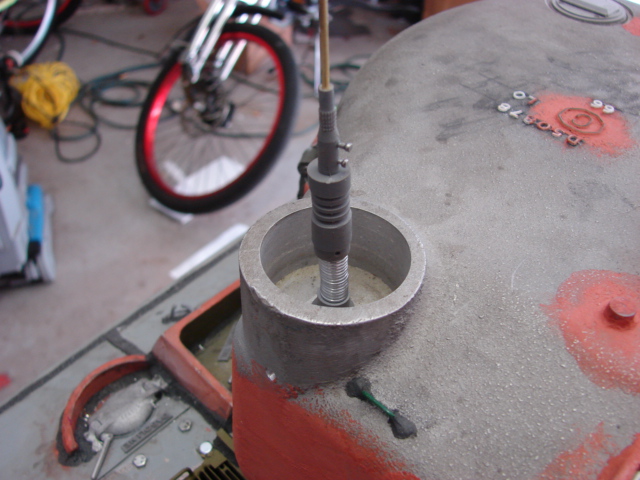
Also what was added was the nubs for the the lift eyelets to the turret's top deck. The sherman was originally intended to have the turret removed via threaded eyelets, this design was a carry over from the M3 Lee. The design was dropped and the larger cast in lift rings were developed in stead. Even though the design was dropped the eyelet locations were still present in the turret casting. These three nubs were added to the model.
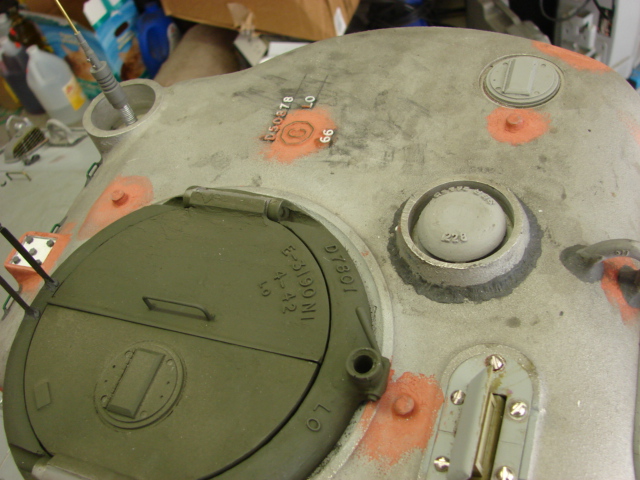
On the rear bustle and top deck of the turret I added the casting and foundry marks. Also added were the 6 footman loop tie downs found on the rear bustle. These tie downs were very common on the low bustle turret shermans of the era.
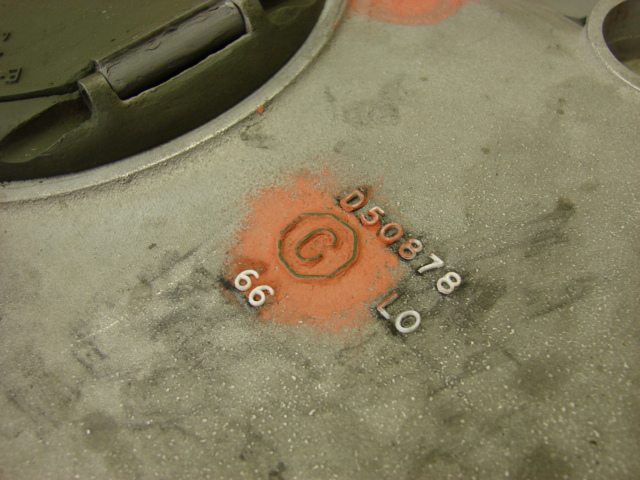
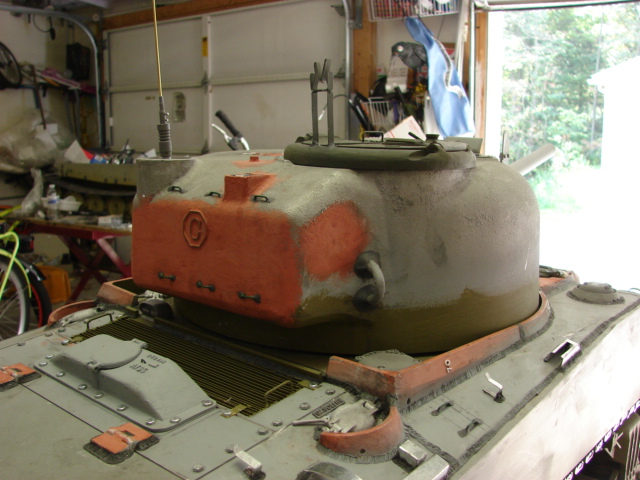
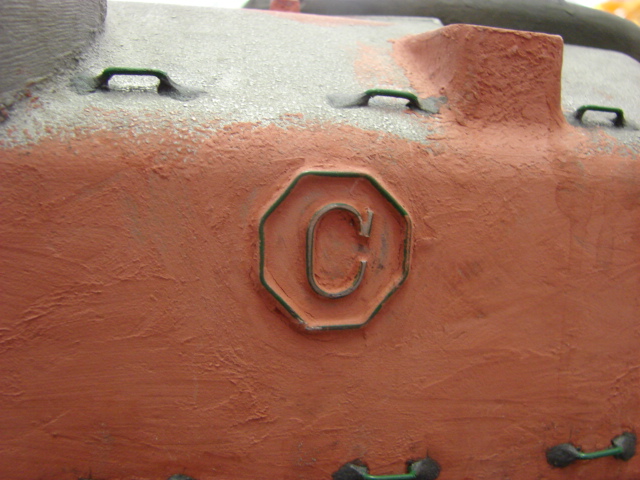
From what I have noticed on most M4A4s the low bustle turrets were mostly casted in east Chicago by the American Steel Foundries Cast Armor Plant. These castings have a prominent "C" inside a Octagon. This logo was scratch built amd blended in the turret's bodywork.
Work was also done to the auxiliary antenna base mount. The armortek turret has the blister casted in and has a simple cover plate that get bolted to the location. The parts are correct and look good once mounted, but I wanted to mod the part to have the recess plate well that was common on early period tanks. The mod was simple and was done with strips of plastic and body work. the unit was then blended together into the turret with the body work
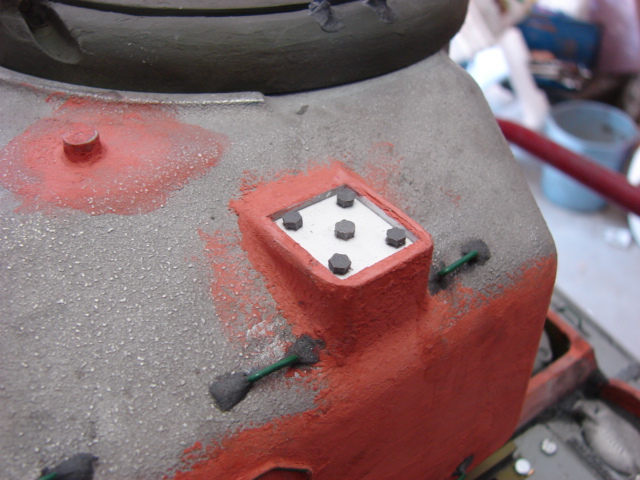
A new plate was fabricated out of styrene and detail bolt heads were mounted.
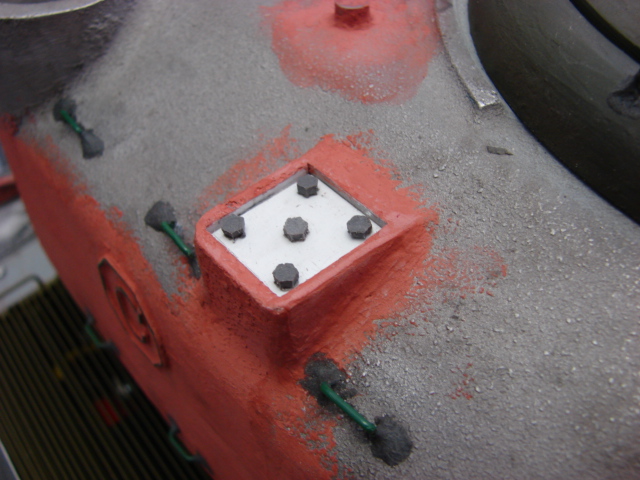
Like I always mention in these build logs, this part is for the spare antenna base ONLY! Many people miss ID this for the location of the MG pintle mount (because of the four bolts), and if added here is WRONG and KILLS the look of the tank... Don't do it!!!!
The last part of the build that was needed prior to paint was the commander's copula. The kit supplies you with a basic commander's split ring copula. The kit copula is a good starting point, however I always wanted to tool up this part as I already have the late single hatch version, and wanted this style as well.
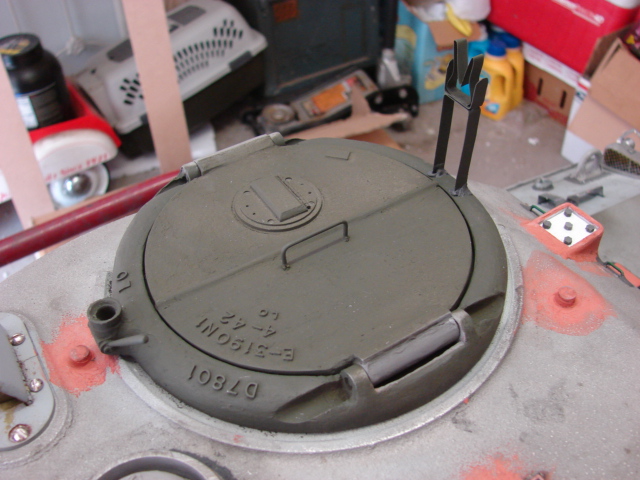
This is the first sherman I have built in 10 years to have the split ring so for me building a tank with this part is very overdue, The new copula is fully functional and has been added to the catalog.
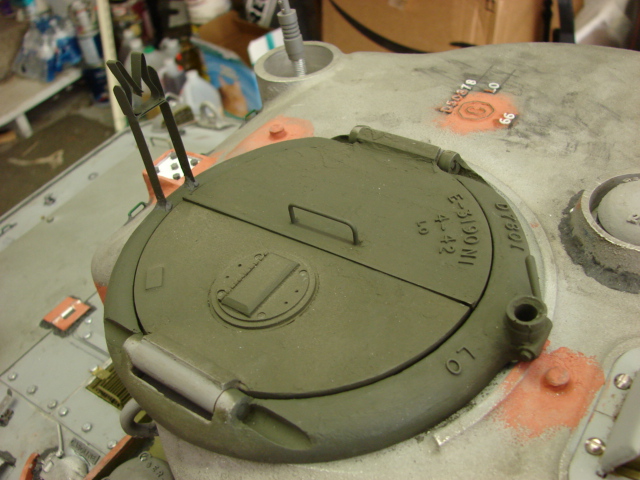
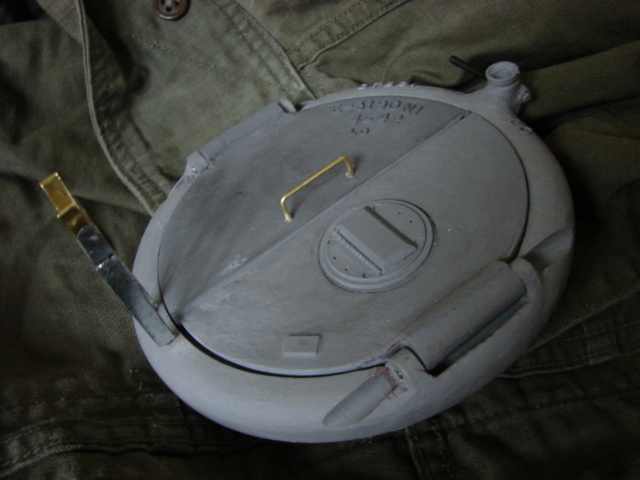
The copula features full interior detailing on both the ring and hatches, minus the internal periscope... in which case I recommend the rein one from Panzerwerk (which is what I used) or the white metal one from Armorpax.
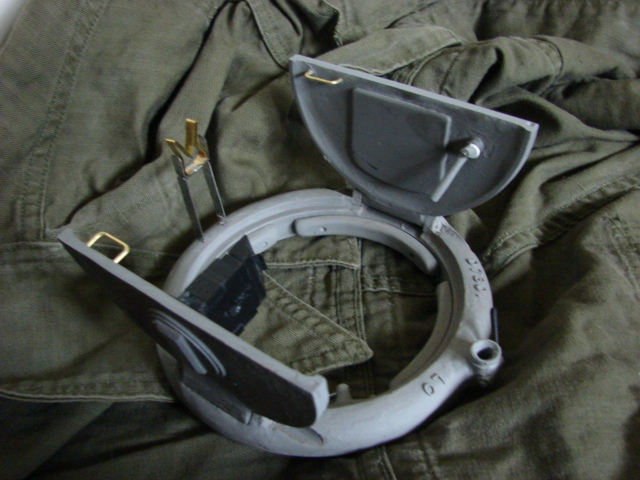
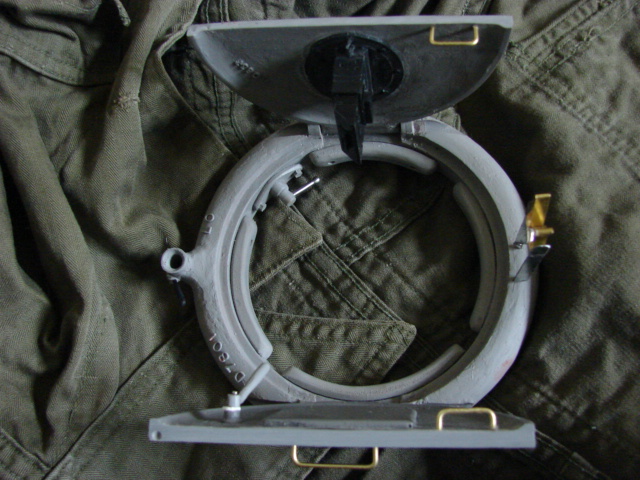
This version of the copula represents the first style witch doesn't have the spring assist which was found on later units. The hatch comes in two styles, One with the early style fixed M2 travel lock, and the other with the later retracting style travel lock.
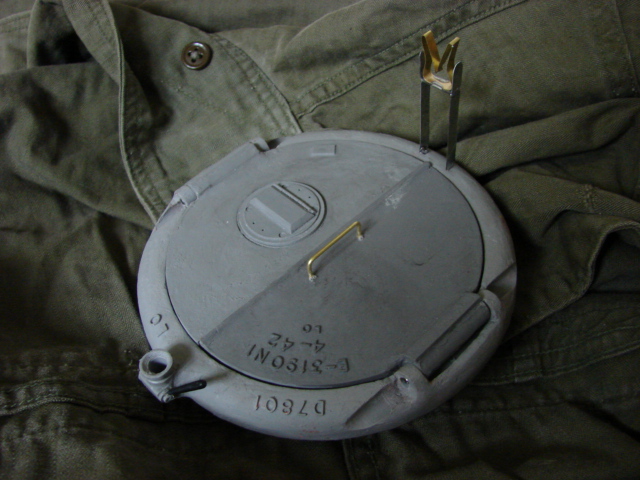
This style was more commonly found on early low bustle turret tanks, this kit will work for the Viper, New DML firefly / composite hull M4, Armortek early production M4A3 and armortek M4A4. This version may not be 100% accurate for the DML mid / late production M4A3, but I have that version in the works.
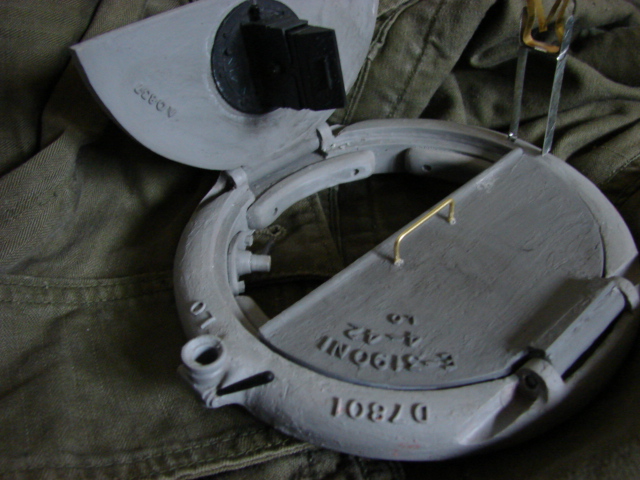
Even though, this replacement copula is already superior the the stock DML one in that it has the integral pintle mount, interior detailing, and is the correct scale unlike the DML one which is severely under scaled, more on the new copula to come ;)
Also added to the catalog is the early style copula M2 fixed travel lock. This travel lock was common on early period tanks, and is all fabricated out of metal
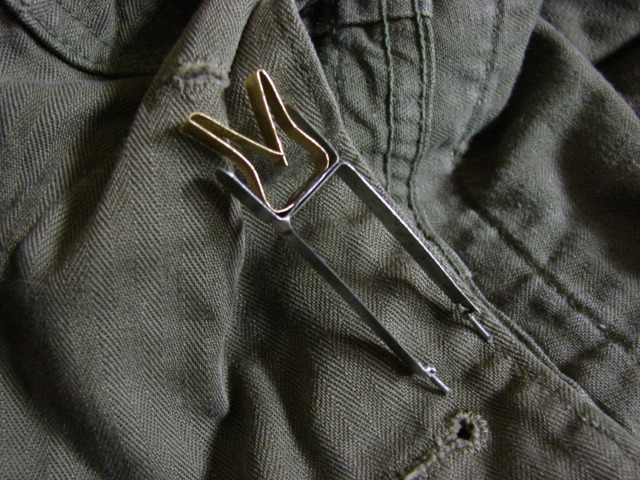
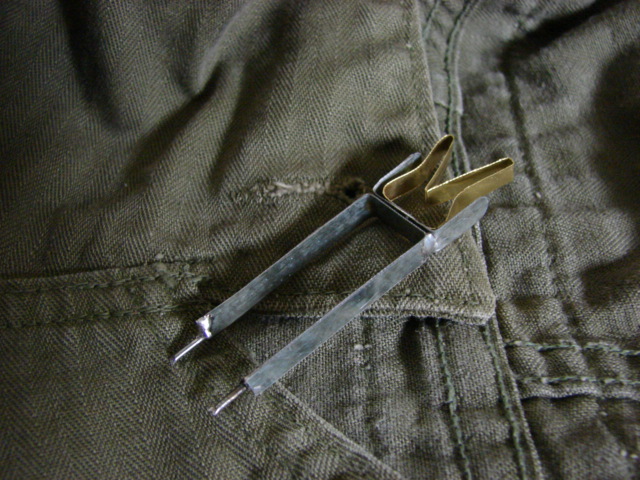
Before installation the copula was painted in it's OD base, the details like the pads and heads rests will be painted after the rest of the tank is painted.
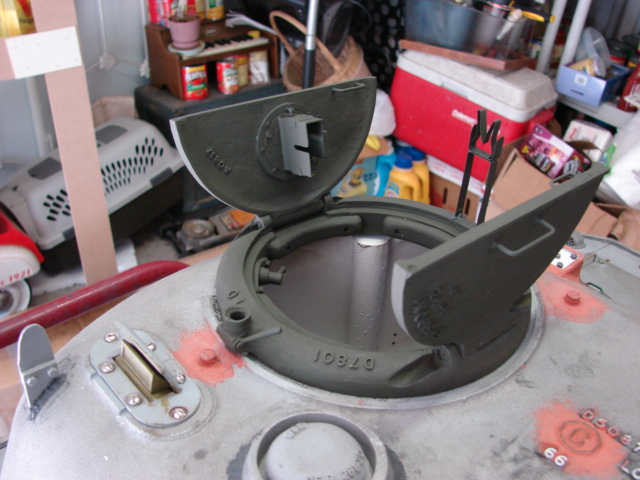
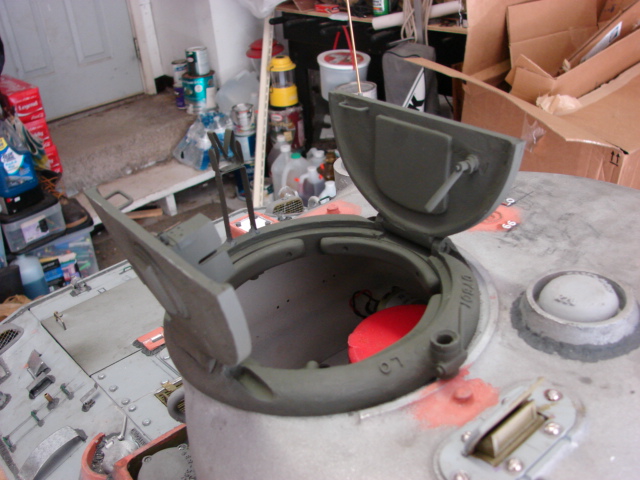
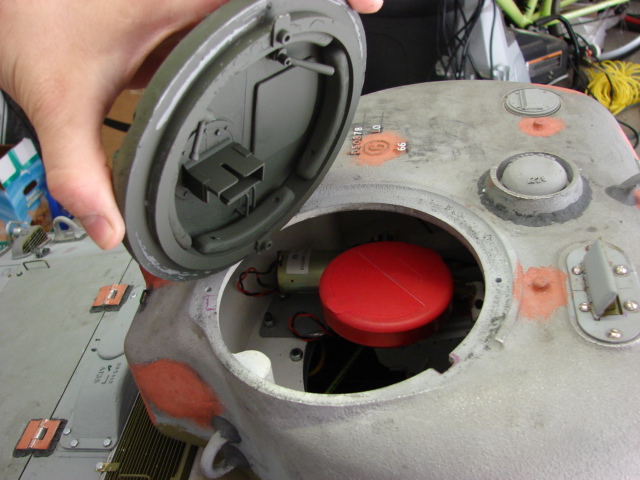
The final feature that I added was the ability to have the copula rotate. Unlike the single hatch version the split ring was able to rotate 360 degrees. This feature was built into my model, giving the tank a unique feature.
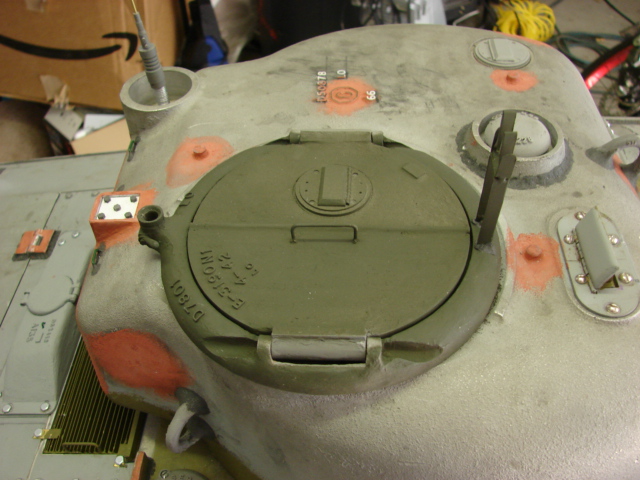
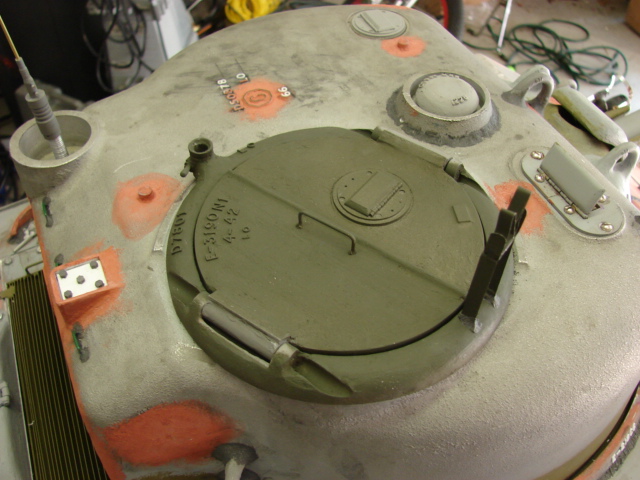
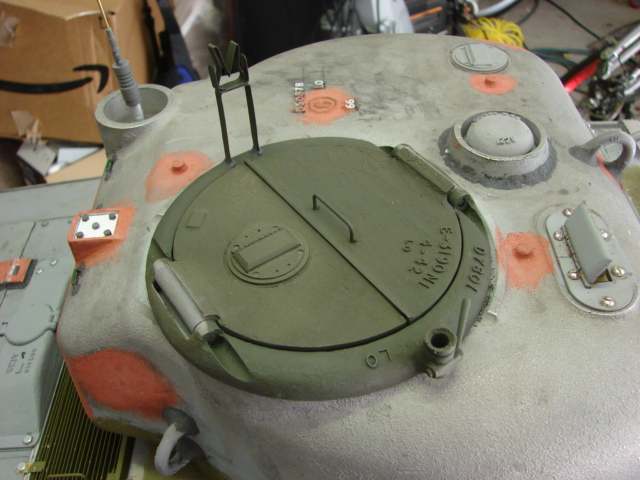
This was done by adding to locks to the bottom of the copula and notches to the turret, like a 1/35th scale tank model. Another reason for making the copula removable was so I can still get easy access to the airsoft gun without risk of damage to any copula details.
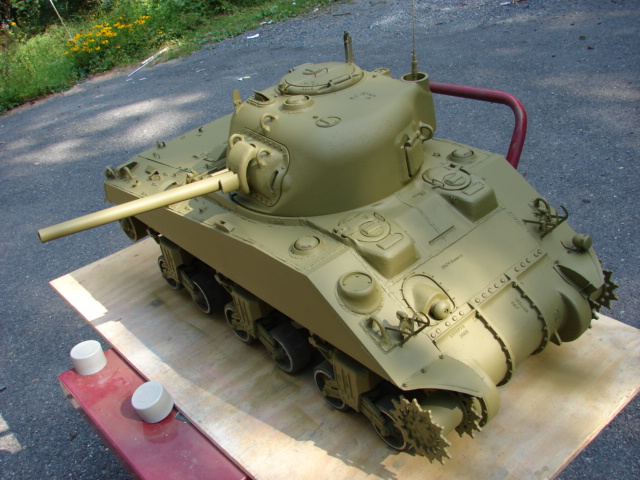
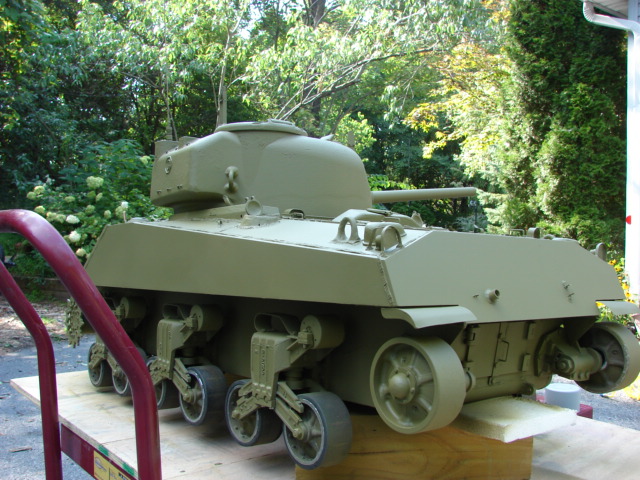
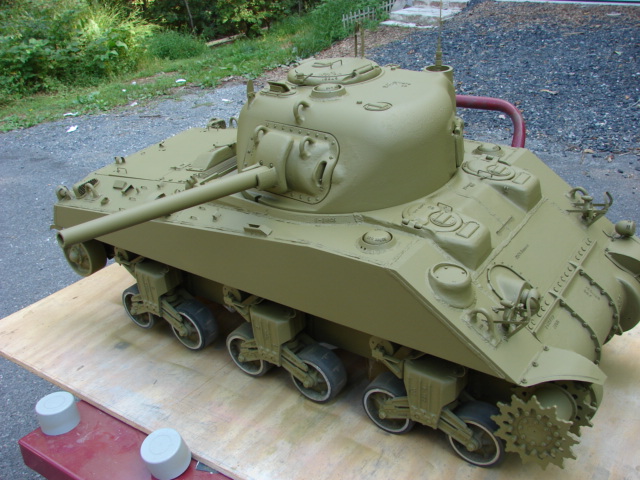
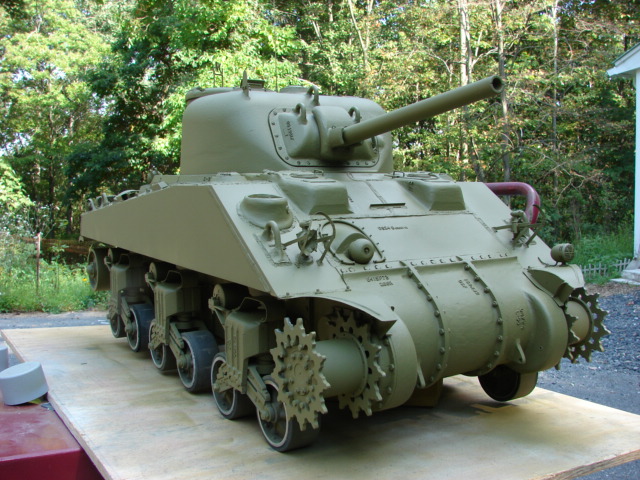
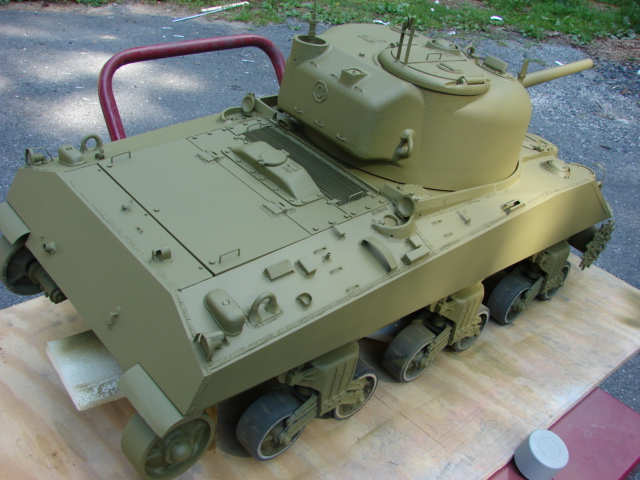
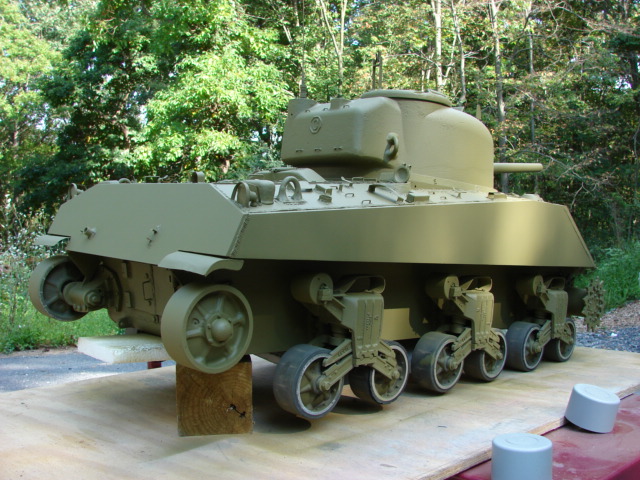
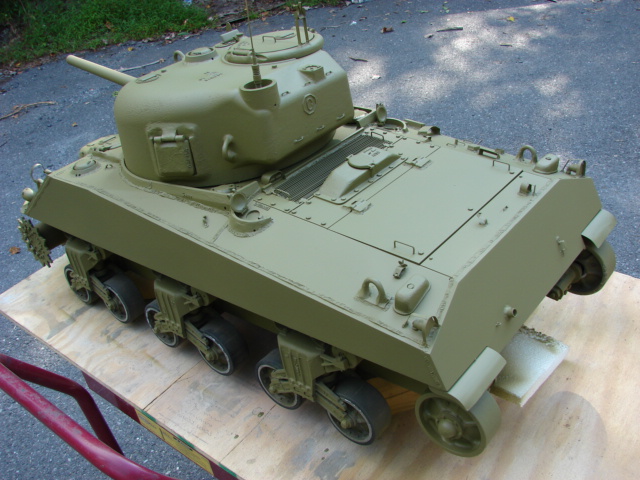
Once the details were done it was time to get the tank into paint, the tracks were removed, lights / pre painted lower hull areas were masked, and the model got a good dusting / vacuuming. Once ready the tank got it's final prime
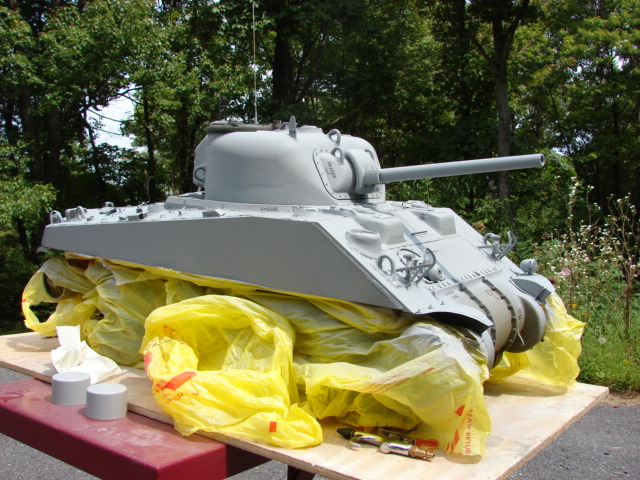
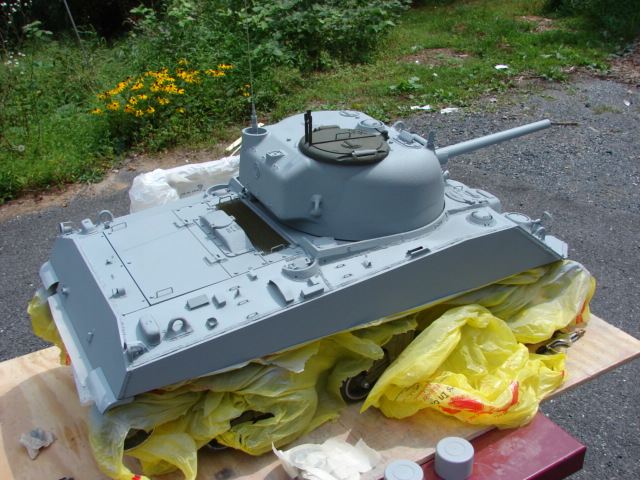
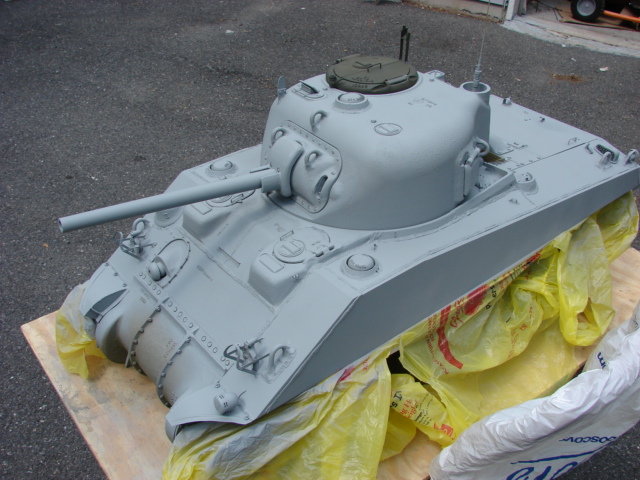
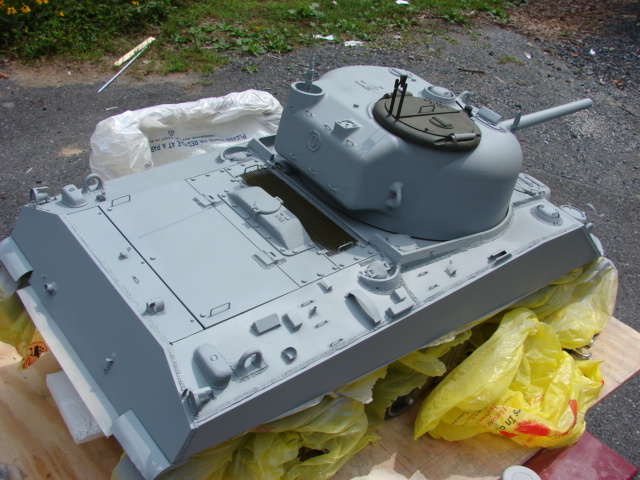
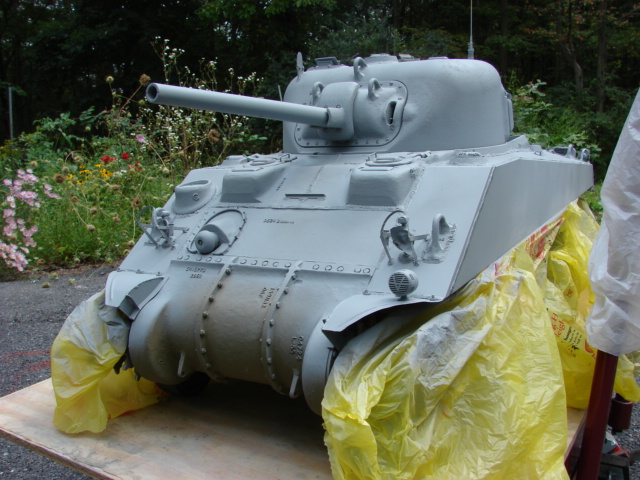
After the prime the base coat of OD was added, Like I mentioned earlier for the color I'm going with the early shade of OD (like the one I used on my M3 Lee). With the base on the tank is all one shade and all the work begins to pay off
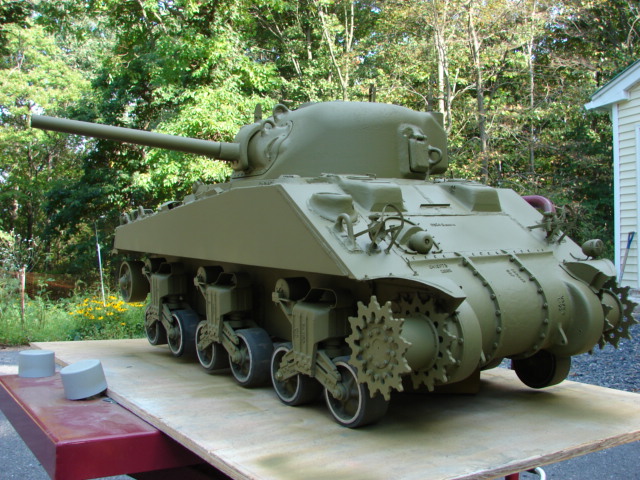
More pics were posted on the facebook page, http://www.facebook.com/EastCoastArmory
and a video update was added to youtube
http://youtu.be/AKkJxkz3ssE
Now with the tank is in it's base coat I've started to add the markings... More to come!!!