SEARCH FINESCALE.COM

Enter keywords or a search phrase below:

Takom Objekt 279: UPDATE! The Goon Squad and a new doog

20814 views
133 replies
1 rating 2 rating 3 rating 4 rating 5 rating
  • Member since
    January 2007
Posted by the doog on Friday, May 9, 2014 1:29 PM

Update soon! Just got back from a short trip; working now on the final details.

Nice models, Melchior. Just one question: why did you build all three? Did you do a kit review or something?

  • Member since
    January 2007
Posted by the doog on Saturday, May 10, 2014 4:41 PM

Ready for paint!

I noticed some small details that I could ad here; look at the wire pulls on the bottom of the tank's sides here. Also, there are some "loop"-type things that are actually hollowed out, but molded as solid in the model. I cut out the middles of the loops and pit in styrene "wires" between the small stays. I"ll add the actual wire after painting.

All the parts laid out for painting.

And the wheels---thank god these are steel-rimmed!

That's it for now! I should get some base paint on it by the time I leave again on Wednesday! Thanks for looking in and any comments are always welcomed! Big Smile

  • Member since
    July 2003
  • From: On my kitchen counter top somewhere in central North Carolina.
Posted by disastermaster on Saturday, May 10, 2014 5:37 PM

   Details, details, details........... it all appears to be on the right track  (http://i929.photobucket.com/albums/ad138/ultimatenurse/Smilies/smiley_fishslap.gif or is it on the left?).

           I'm glad I got back on tonight to see this.

 https://i.imgur.com/LjRRaV1.png


  • Member since
    July 2004
  • From: Texas
Posted by wbill76 on Sunday, May 11, 2014 5:29 PM

Looking forward to seeing this one with paint on Karl, so much real estate to play with there! Beer

  • Member since
    July 2006
  • From: New Jersey
Posted by redleg12 on Sunday, May 11, 2014 7:30 PM

Wow...that's a lot of road wheels...looking forward to paint.

Rounds Complete!!

"The Moral High Ground....A Great Place to Emplace Artillery."

  • Member since
    January 2007
Posted by the doog on Monday, May 12, 2014 7:05 AM

Thanks, guys--painting today!

  • Member since
    January 2007
Posted by the doog on Monday, May 12, 2014 10:58 AM

OK, I'm starting to paint!

Here's my "vision" for this beast: since this was a "nuclear tank" which had its "boat" shape designed to withstand the shockwave from a nuclear blast, I figured I would play with that. I see a tank which has just come through the shockwave and the tremendous hurricane of heat and flying debris resulting from the detonation at Ground Zero, The front surfaces of the tank--having absorbed all of that--is scarred, burnt, and scorched; the paint burned off, the tool handles reduced to ash. Hell, if I get inspired enough, I may even do a desolate base to mount "Nookular Ivan" on next to the thing!

With that in mind, I've primed with Tamiya Gray primer. I then used enamels (a rarity for me!)-- Steel, Black, Rust and Rubber from Testors' to paint the undercoated metal of the tank where the degradation will be. I'm going to try to use the "Sand Technique" to really degrade the top camo scheme...oh yes---did I mention a camo scheme? I'm going to go for a fictitious "post-apocalyptic" (yet plausible) Soviet camo scheme in three colors. Man, I hope I can get that to all come together....! Surprise

Anyhoo...stay tuned! I have one more day "in country", and then will be gone until the 25th of May. Updates most likely after that date!

  • Member since
    July 2004
  • From: Texas
Posted by wbill76 on Monday, May 12, 2014 1:03 PM

Should be fun to see you bring this 'post-nuke' premise to life Karl. Looking forward to it.

  • Member since
    July 2003
  • From: On my kitchen counter top somewhere in central North Carolina.
Posted by disastermaster on Monday, May 12, 2014 1:36 PM

This is gonna be a blast!

                          http://media.tumblr.com/tumblr_mc17svj1BV1qhm59c.gif

What great imagination here Karl!

 I was thinking that other smaller, less prominent peripheral fittings such as the guards around the lights and the search lights themselves would take a serious smelting too.

 https://i.imgur.com/LjRRaV1.png


  • Member since
    April 2006
  • From: ON, Canada
Posted by jgeratic on Monday, May 12, 2014 2:18 PM

Karl, interesting project.

Cool idea with the nuclear blast effect.  I've never witnessed one of these, but wouldn't the whole vehicle get "baked"?  Of course, there is artistic license, or you could be portraying a moment in time as the event is happening?

regards,

Jack

  • Member since
    November 2009
  • From: SW Virginia
Posted by Gamera on Monday, May 12, 2014 2:43 PM

Sounds like a really cool idea Karl, looking forward to seeing how you pull this off!

"I dream in fire but work in clay." -Arthur Machen


  • Member since
    May 2009
  • From: Poland
Posted by Pawel on Monday, May 12, 2014 3:47 PM

Hello!

Now the idea is certainly fresh! That's creativity Karl!

I don't have a good idea yet, but I guess some research would make it even better - does anybody have photos of test objects at a nuclear range? Like maybe taken frome some "Duck and cover"-like movie?

Once you have something to hold on, the intensity of the effect would surely vary with the distance from the detonation point. The way I understand it there are different damage from the "flash" and the shockwave - those would have to be held in proportion - or maybe I'm getting too picky here?

Anyhow, good luck with your projects and safe travels, too!

Paweł

All comments and critique welcomed. Thanks for your honest opinions!

www.vietnam.net.pl

  • Member since
    January 2007
Posted by the doog on Monday, May 12, 2014 4:57 PM

Thanks for all the comments, guys! To be honest, I'm still figuring out "how I'm going to pull this off", lol. It's probably a good thing that I've got a 10-day trip coming up---lots of time to strategize and weigh pros-cons of this vs that!

One thing's for sure--I"m looking forward to getting back and getting back TO it!

  • Member since
    April 2006
  • From: Denver, Colorado
Posted by waynec on Monday, May 12, 2014 6:11 PM

hey DOOG

welcome back and congrats on the house. definitely have to put ivan nukeski next to it, perhaps with mounts of rubble ala TERMINATOR  and lots of dust. think i'll stick to my warwheels and pass on this one though i do have a couple of tracks in the queue. have a safe trip.

Никто не Забыт    (No one is Forgotten)
Ничто не Забыто  (Nothing is Forgotten)


  • Member since
    July 2006
  • From: New Jersey
Posted by redleg12 on Monday, May 12, 2014 7:10 PM

Totally cool idea...love it. My one thought is think as the fire hit the front...the items sticking up on the turret would also get burnt.....or welded. the searchlight might be blown off!.... Just some thoughts

Love it!

Rounds Complete!!

"The Moral High Ground....A Great Place to Emplace Artillery."

  • Member since
    January 2007
Posted by the doog on Monday, May 12, 2014 7:58 PM

Thanks, Wayne, and Mike, for the comments and suggestions. I realize that the blast wave would probably blow off most of the fittings, but I may take "artistic license" to keep a little more of the tank intact. It will be more of a "paint effect" thing that I"m going for. Like I said, I've got some time to think about it....

  • Member since
    July 2003
  • From: On my kitchen counter top somewhere in central North Carolina.
Posted by disastermaster on Wednesday, May 14, 2014 4:34 AM

  Well since I ain't building anything, then maybe I can help you blast it around a bit. This should give you some ideas.

  I had put this info back for a Centurion build later on, but at the rate I'm going at now that probably isn't going to happen ..... read on and enjoy.

                                    http://www.sherv.net/cm/emoticons/war/falling-bomb-smiley-emoticon.gif

            ***********************************************************************************************

 An Australian Army Mk 3 Centurion Type K, Army Registration Number 169041, was involved in a small nuclear test at Emu Field in Australia in 1953 as part of Operation Totem I. Built as number 39/190 at the Royal Ordnance Factory, Barnbow in 1951 it was assigned the British Army number 06 BA 16 and supplied to the Australian Commonwealth Government under Contract 2843 in 1952.

 It was placed less than 500 yards (460 m) from the 9.1kt.1blast with its turret facing the epicentre, left with the engine running and a full ammunition load. Upon examination after detonation it had been pushed away from the blast point by about 5 feet (1.5 m), pushed slightly left and that its engine had stopped working, only because it had run out of fuel. Antennae were missing, lights and periscopes were heavily sandblasted, the cloth mantlet cover was incinerated, and the armoured side plates had been blown off and carried up to 200 yards (180 m) from the tank. Remarkably, though, the tank could still be driven from the site. Had it been manned, the crew would probably have been killed by the shock wave .http://chivethebrigade.files.wordpress.com/2011/07/tank-nuke-500-6.jpg

       (one of the side plates)

http://chivethebrigade.files.wordpress.com/2011/07/tank-nuke-500-7.jpg

      (three days later)

 169041, subsequently nicknamed The Atomic Tank, was later used in the Vietnam war. In May 1969, during a firefight, 169041 (call sign 24C) was hit by a rocket-propelled grenade (RPG). The turret crew were all wounded by shrapnel as the RPG entered the lower left side of the fighting compartment, travelled diagonally across the floor and lodged in the rear right corner. Trooper Carter was evacuated while the others remained on duty and the tank remained battleworthy.

The Atomic Tank is now located at Robertson Barracks in Palmerston, Northern Territory. Although other tanks were subjected to nuclear tests, 169041 is the only tank known to have withstood atomic tests and subsequently gone on for another 23 years of service, including 15 months on operational deployment in a war zone.

  So if 'ya wanna read some more .......

                     .....ride the Bomb.

                                         https://encrypted-tbn3.gstatic.com/images?q=tbn:ANd9GcRoMmqi4Lf94jbnHbYupakNa5CsWes1cewIBMIEMuqe_s9LjYcekgXdHQ


 https://i.imgur.com/LjRRaV1.png


  • Member since
    January 2007
Posted by the doog on Wednesday, May 14, 2014 6:58 AM

Awesome stuff, Steve! Thanks for posting that!

I have to make an "artist's choice" here---I realize that, realistically, the tank would probably be damaged more than I want to damage it; i.e. lights blown off, parts missing, etc. Except I don't want it to look "bare". I also want to model "the tank" more so than I want to impute the circumstances surrounding its appearance.

I think of myself as a bit of a "director" in a movie here. How many times have you watched a movie and thought "If that had really happened, then X, Y, and Z would have happened too"--yet "X,Y,and Z" are never shown. Or you think "Oh come ON! That totally defied physics!". Of course, the director is more concerned with the "Art" of the film than the strict realism. That's kinda the decision I'm making here. I don't think I"ll bust off the lights and whatnot---I'll imagine the tank as being somewhat farther from the blast than that "Atomic Tank". Enough to abuse the paint but not enough to strip the vehicle of steel.

In any case, I won't be able to get back to it until at least May 26th or so. Gotta go rock the world again...Smile

  • Member since
    December 2008
  • From: Goffstown, NH
Posted by New Hampshire on Wednesday, May 14, 2014 5:58 PM

Damn, DM, I knew the Aussies were tough buggers....but their war equipment too!?  Hot dang I knew I love those crazy folks Down Under for a reason. Big Smile

Brian

  • Member since
    August 2007
Posted by adb2323 on Wednesday, May 14, 2014 8:50 PM

Great new project! Love this crazy tank. Can't wait to see your final product! Saw that you said that you are building a home in North Carolina. I'm moving there in a few weeks to the Winston-Salem/Greensboro area.  What area are you in?

  • Member since
    January 2007
Posted by the doog on Thursday, May 15, 2014 8:42 AM

I'm in Charlotte, University area. We moved in about two months ago. :)

Thanks for the comments and welcome to the Carolinas!

  • Member since
    March 2013
  • From: Puebla, Mexico
Posted by garzonh on Thursday, May 15, 2014 1:42 PM

Hello my friend!!

Sorry for not being so active in this forum, I've been working on a diorama so I was more on that "side" of the site. Still have not finished it, waiting for some Vallejo paints to be delivered for paiting the figures.

Your kits is coming great...will you ever dissapoint us?...heheehe....nooo

Im eager to see how you will paint and "scorch" this one out.

Also, I have suscribed to the GB of FSM Orpahned Armor, so I need to buy some stuff for it...cool you are in NC. In fact I will be in GA and SC next mid June...hopefully can find a lot of weathering paints and stuff.

See you around.

Hugo

  • Member since
    January 2007
Posted by the doog on Wednesday, June 25, 2014 5:16 PM

Hello all, once again,

Well, I"e been working away on the Objekt 279; actually, to be perfectly honest, I rebuilt the hull since the last post. Got a new model and all---the tracks and "sit" of the model just weren't 100% level on the last one when I tried to glue the suspension sponsons back on. Through a minor mistake, it became impossible to sit the tank. So the hull ONLY had to be re-built. This time, I glued the suspension sponsons on first. I took the opportunity to improve and stagger a new set of cleaning rods
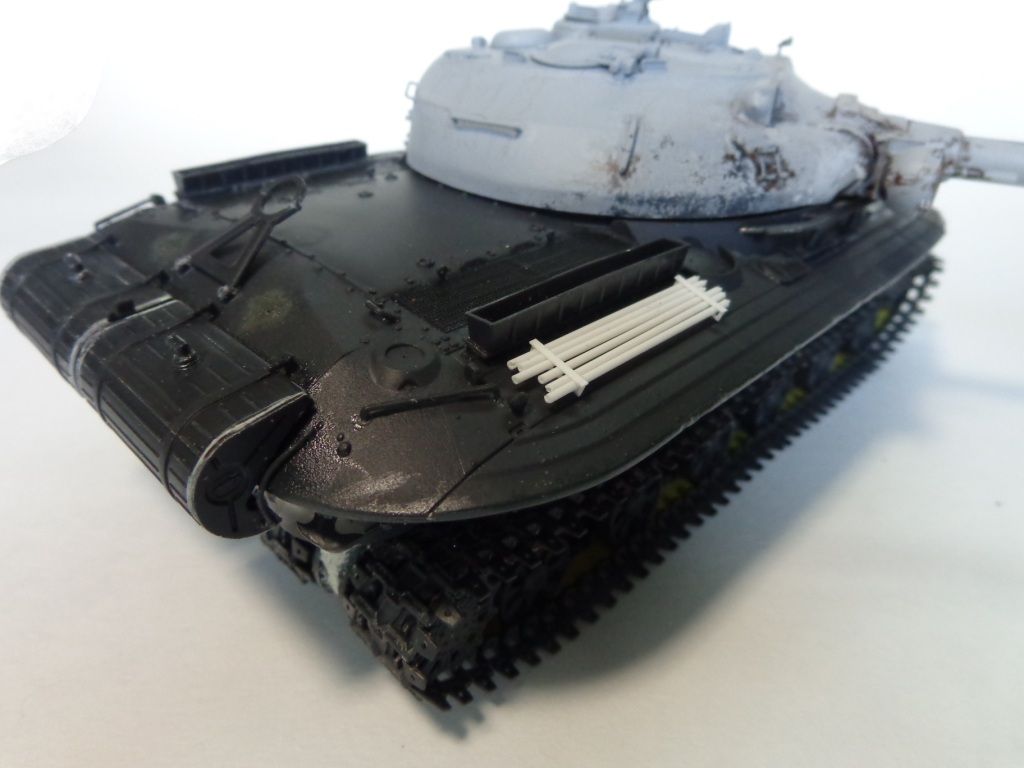
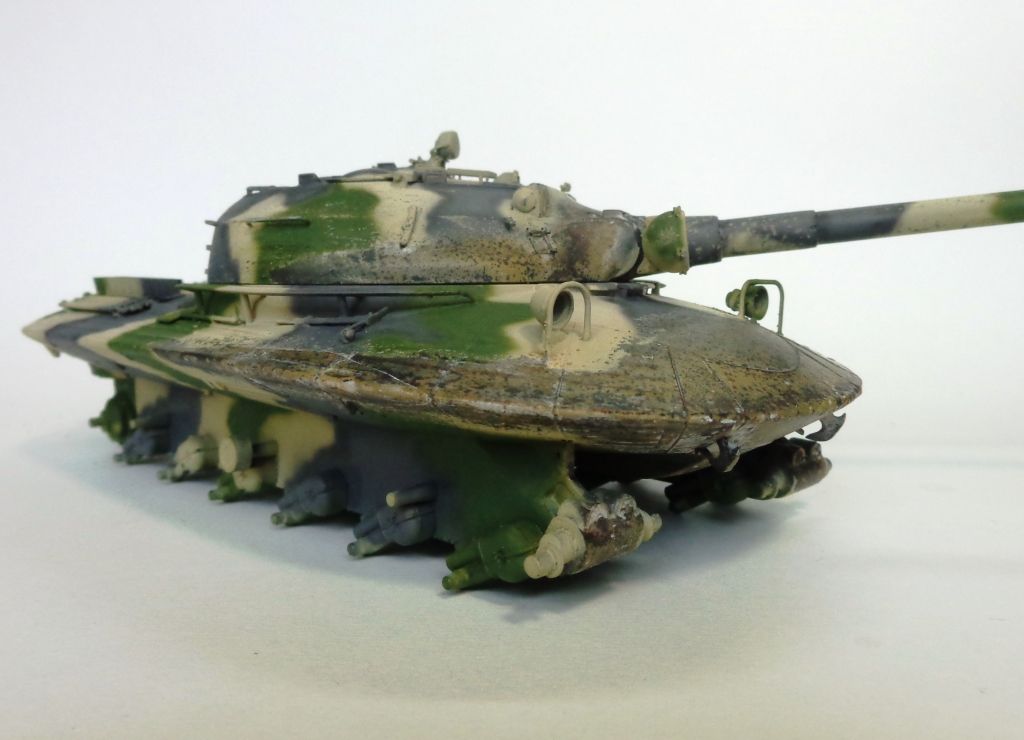
As I had said before, I am going for a "blasted" look, where the tank has just survived a nuclear blast wave. I'm taking some artistic liberties here---damnit, Jim, I'm an artist, not an engineer!.--so you won't see the lights blown of and hull stripped clean. The paint job is going to have to tell the story, for the most part.

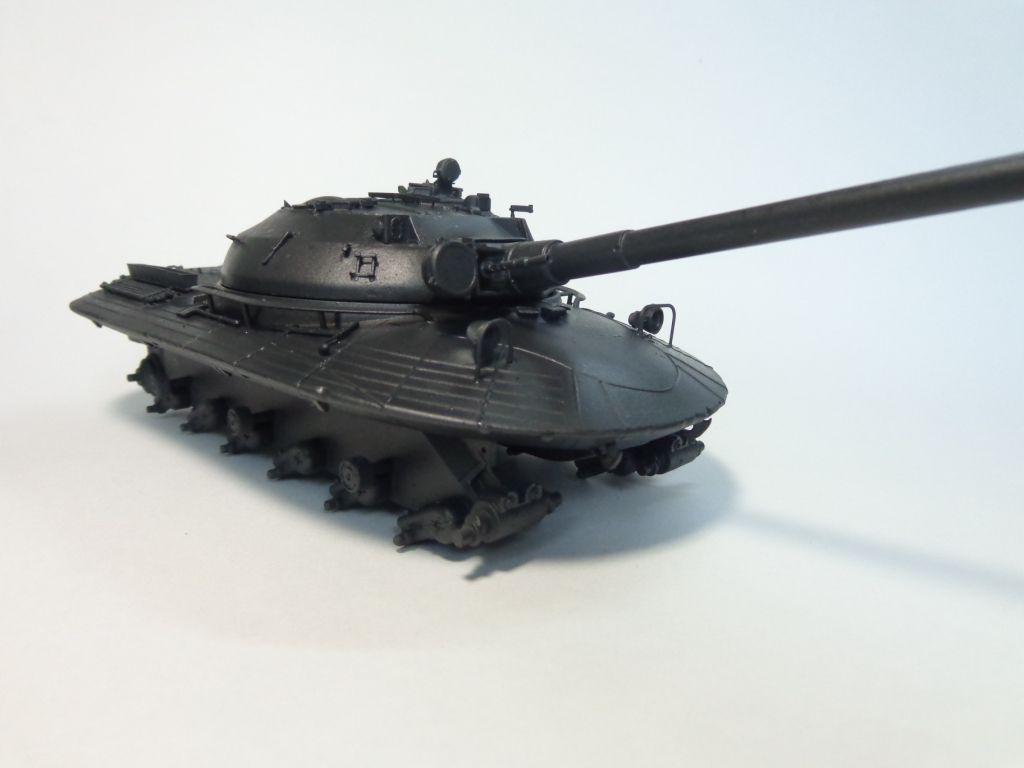
I started with an overall coat of Tamiya primer gray again, and then a coat of metallic grey mixed from Tamiya paints.
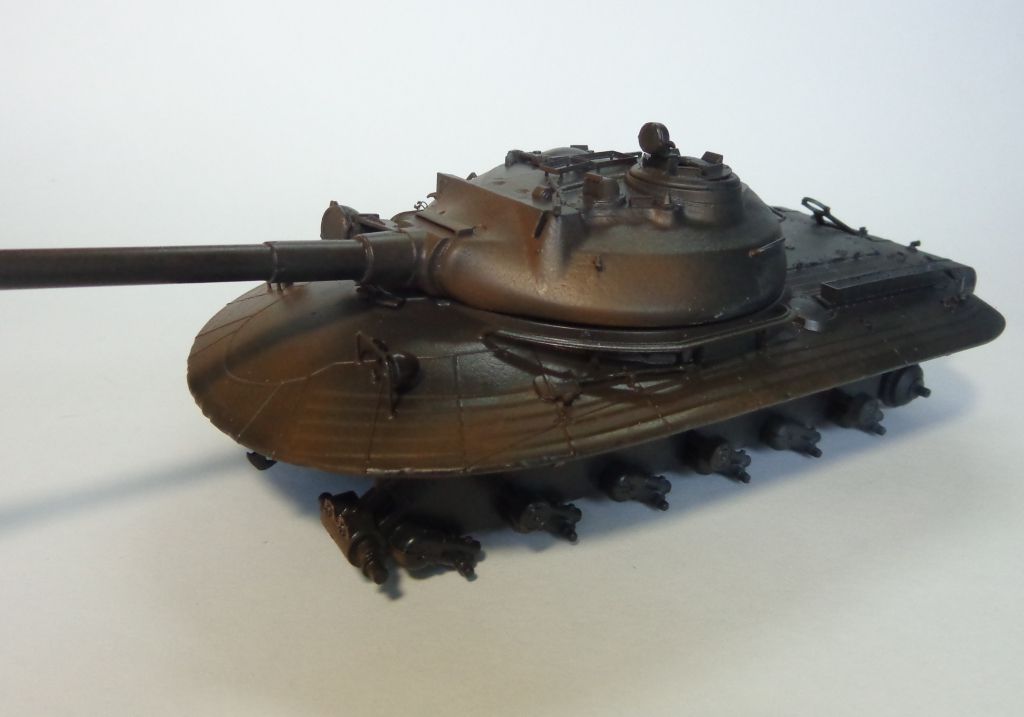
Then, after adding a coat of hair spray, I added a rust-colored top coat.
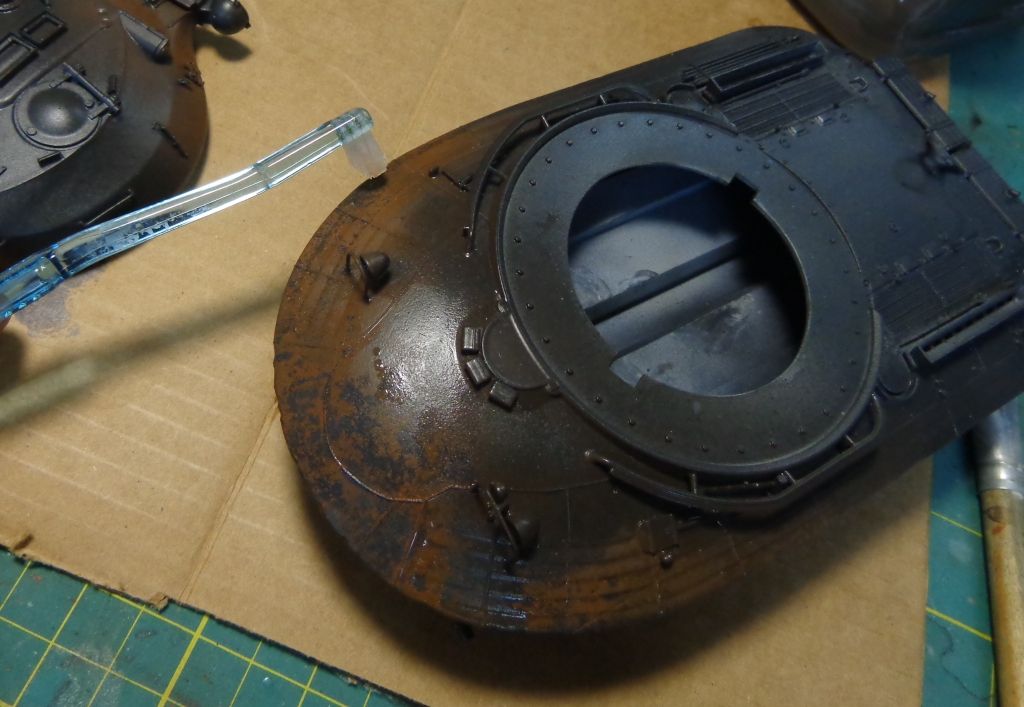
Using a special tooth brush for tight spots, I started removing the top coat:
Then, I added some water and ....
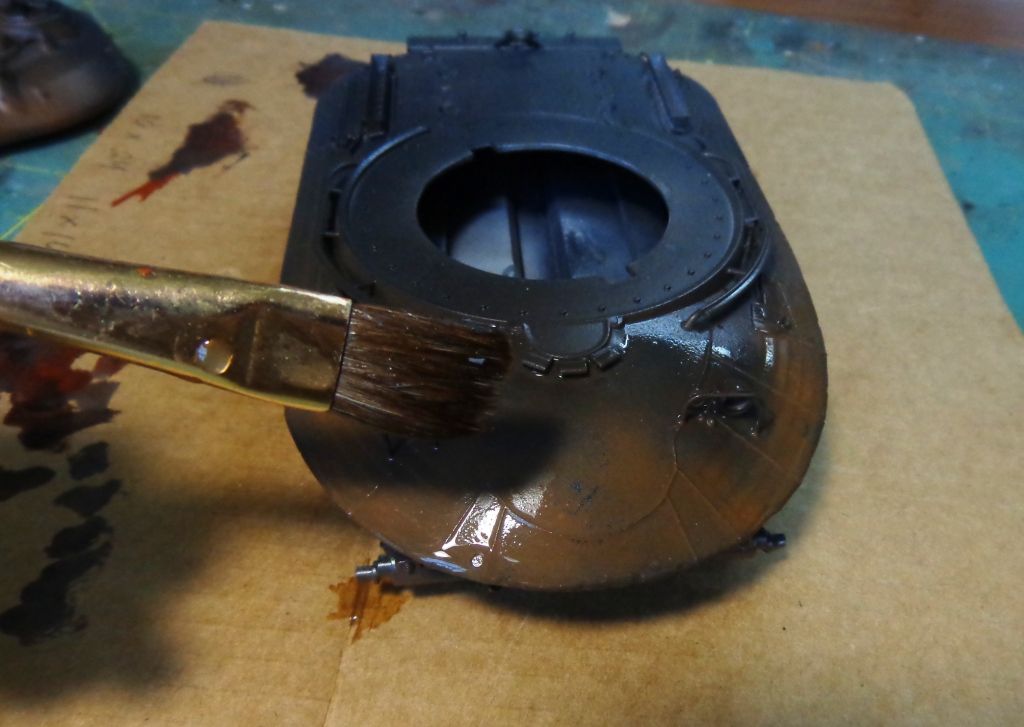
SALT!
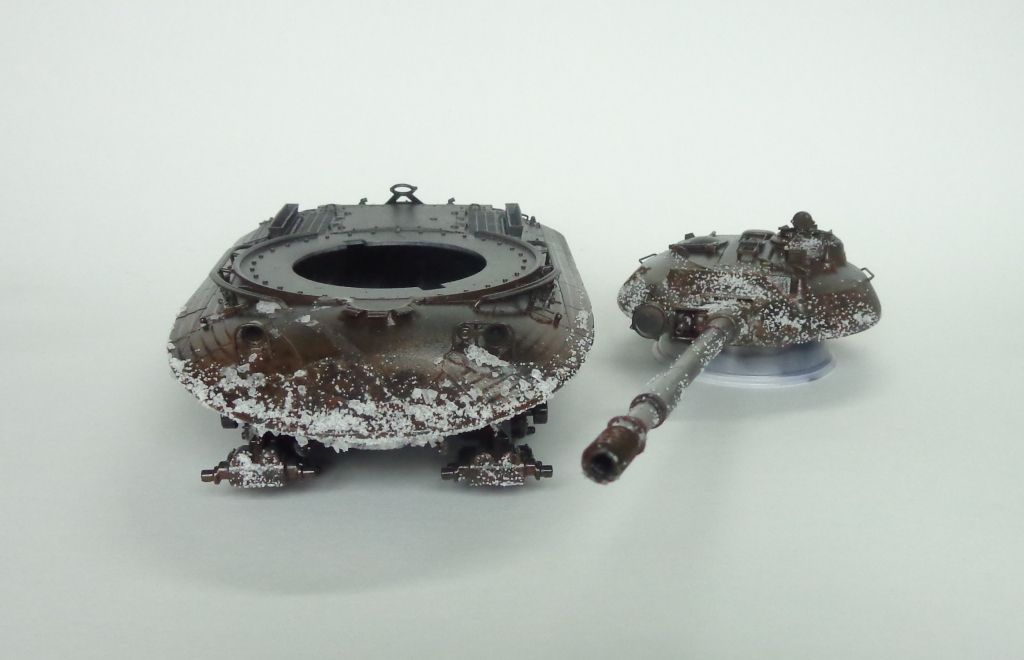
After a coat of lighter rust, and scrubbing away the salt, here's what I have...
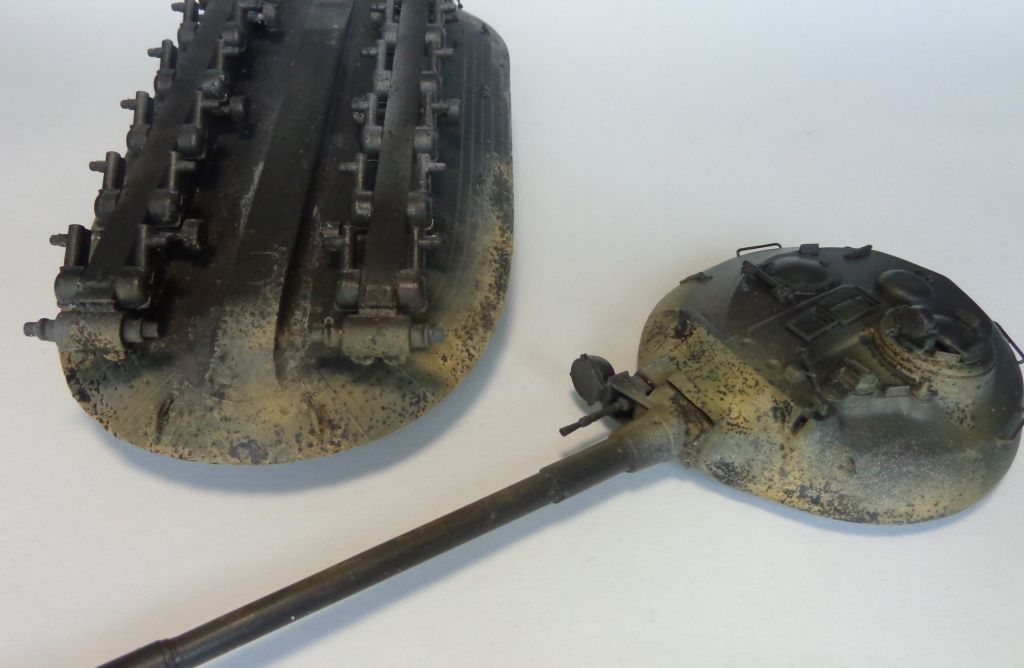
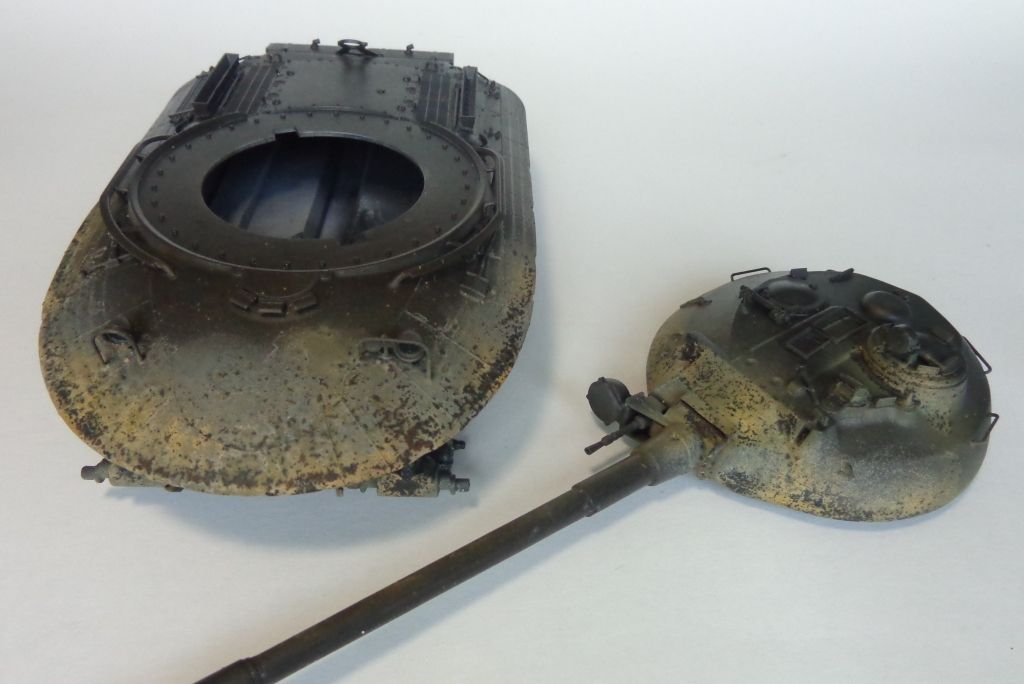
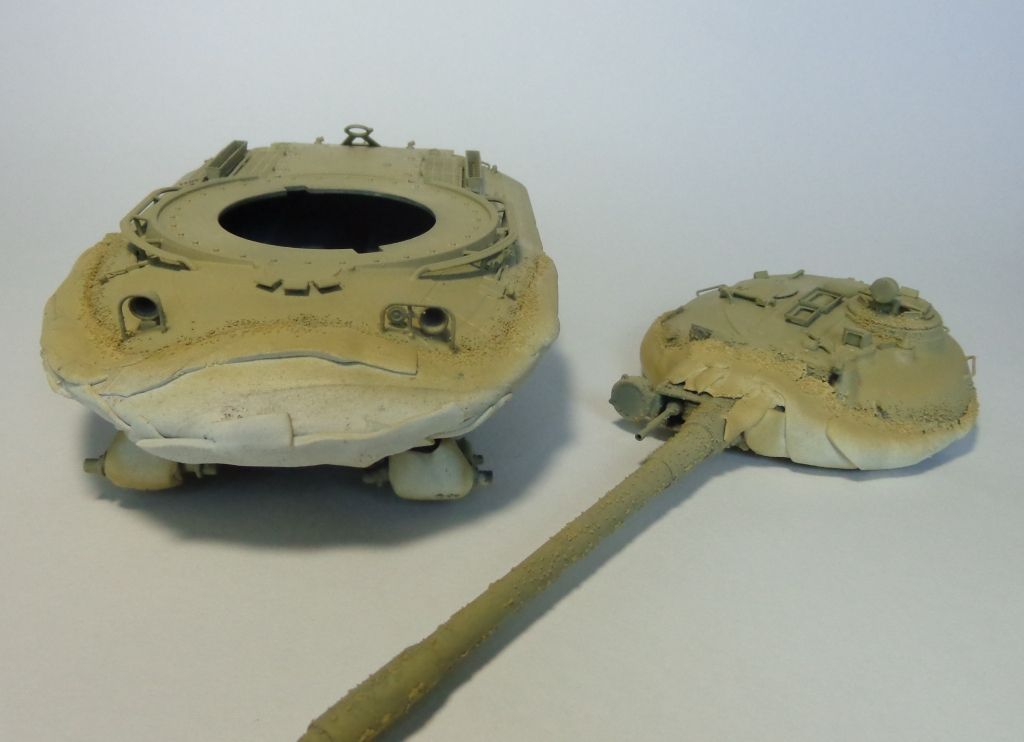
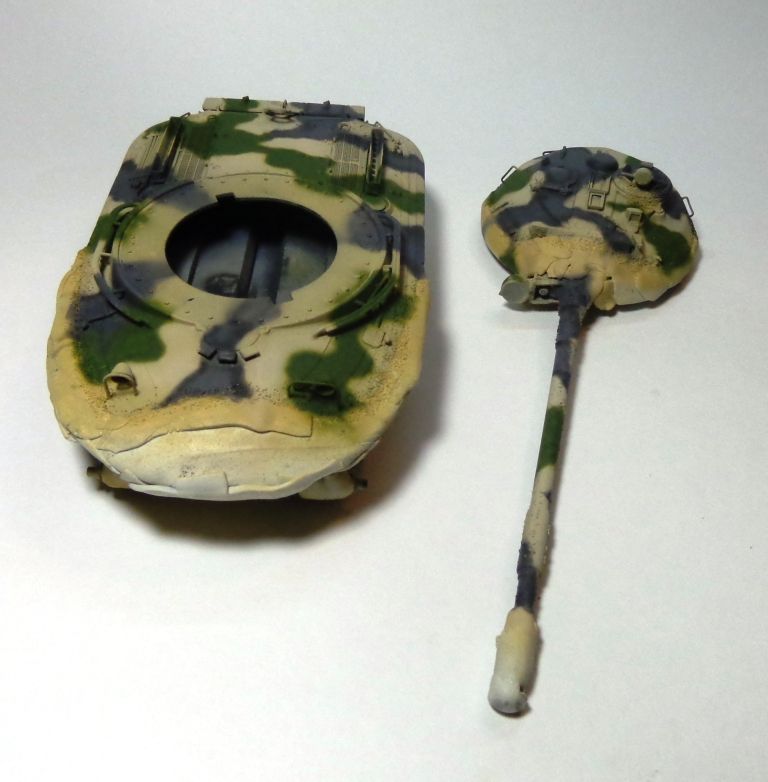
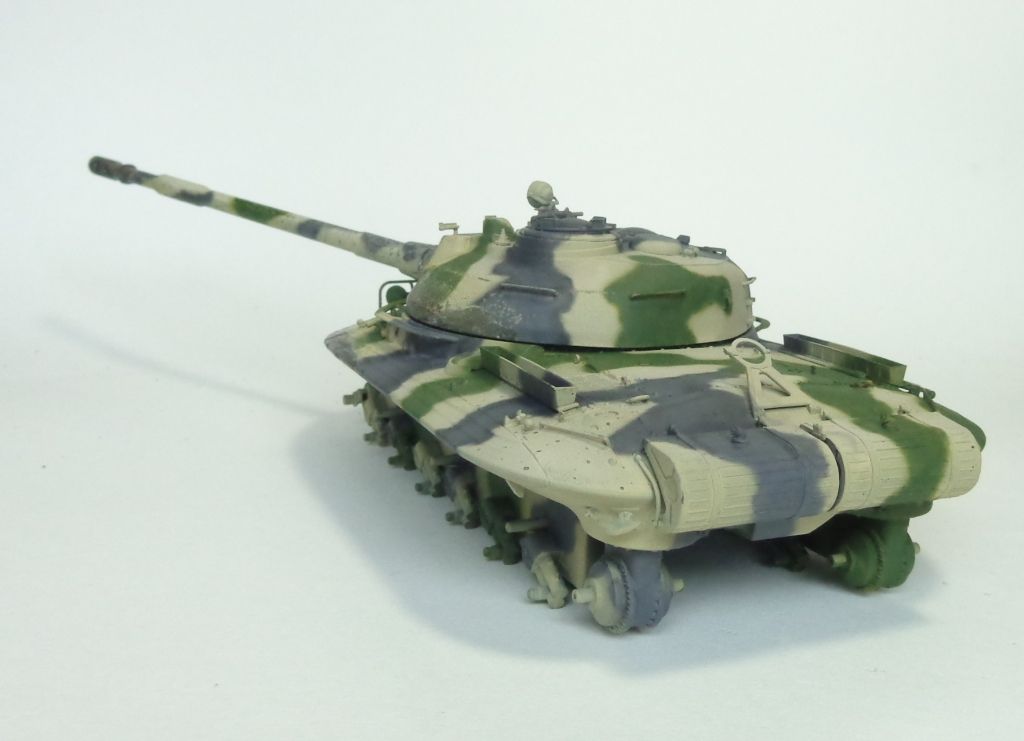
Next, I masked the front with some Adam Wilder clay mask, and started the 3-color camo, which is a custom mix of Sand Yellow,. Olive Green, and Gray, mixed from Tamiya paints.
The three colors....
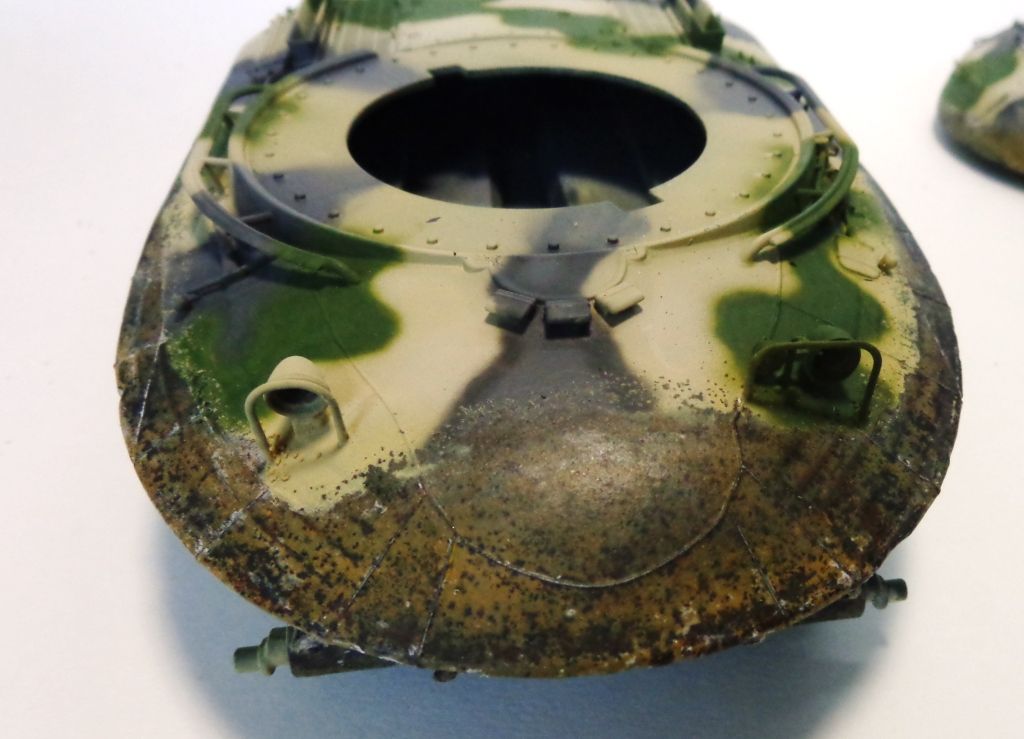
After removing the mask, I have a delineation line of where the paint go scorched off...
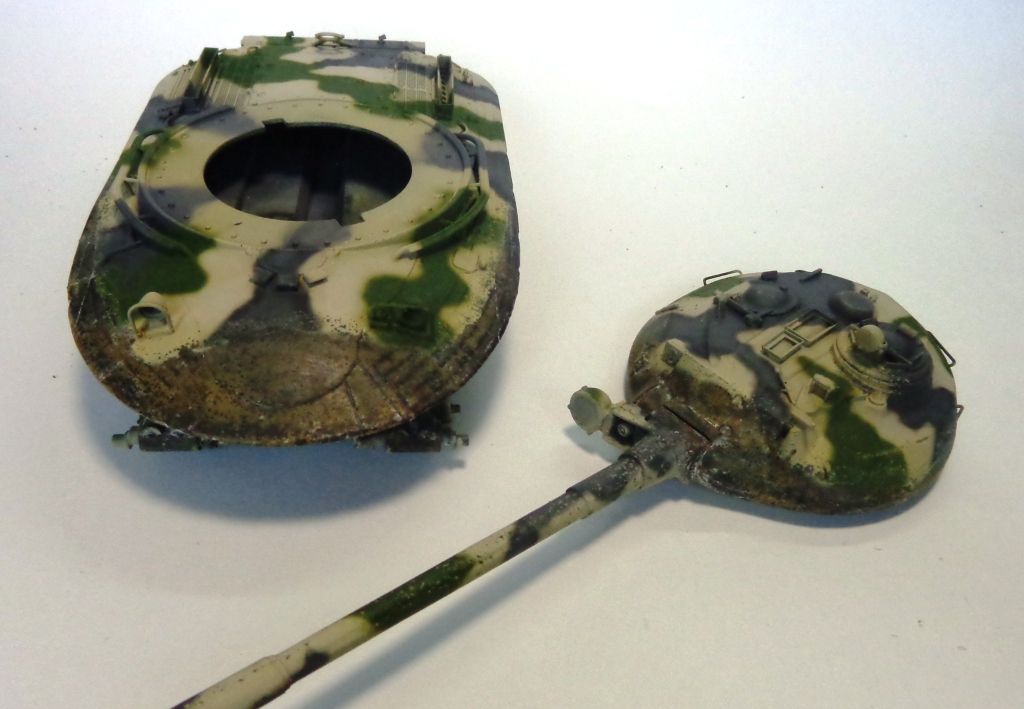
Detail...
THe rear...
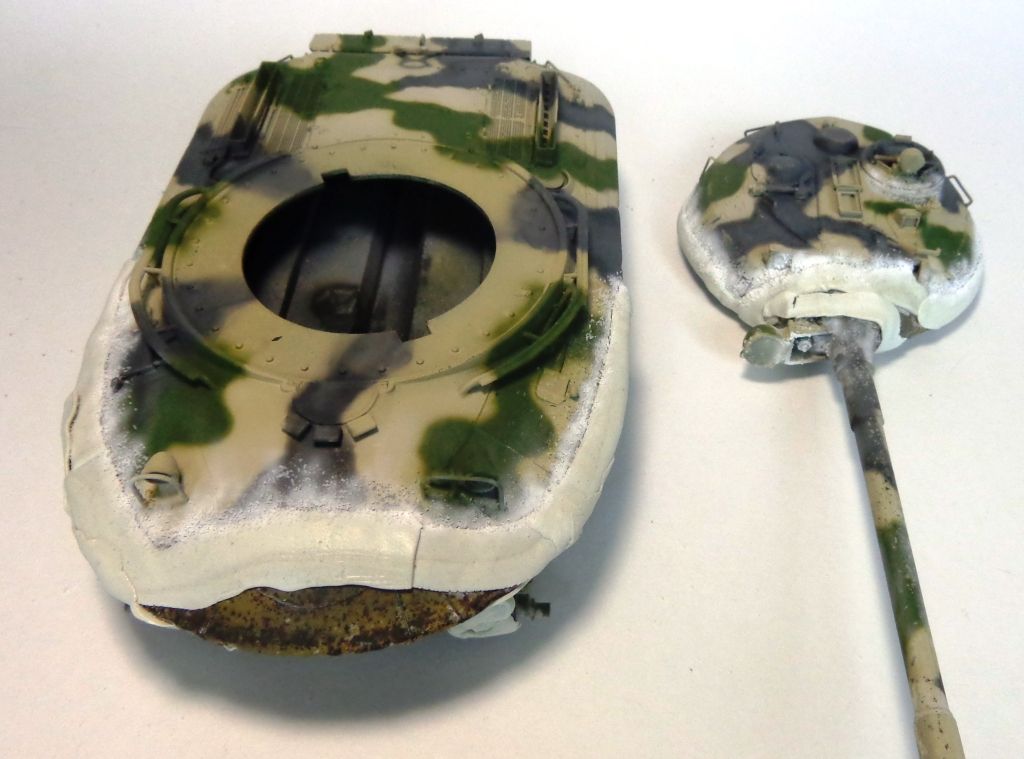
Next, the front was again masked at the line, and salt added in front of the mask, A line of "scorch"white was then painted on...
What I got...
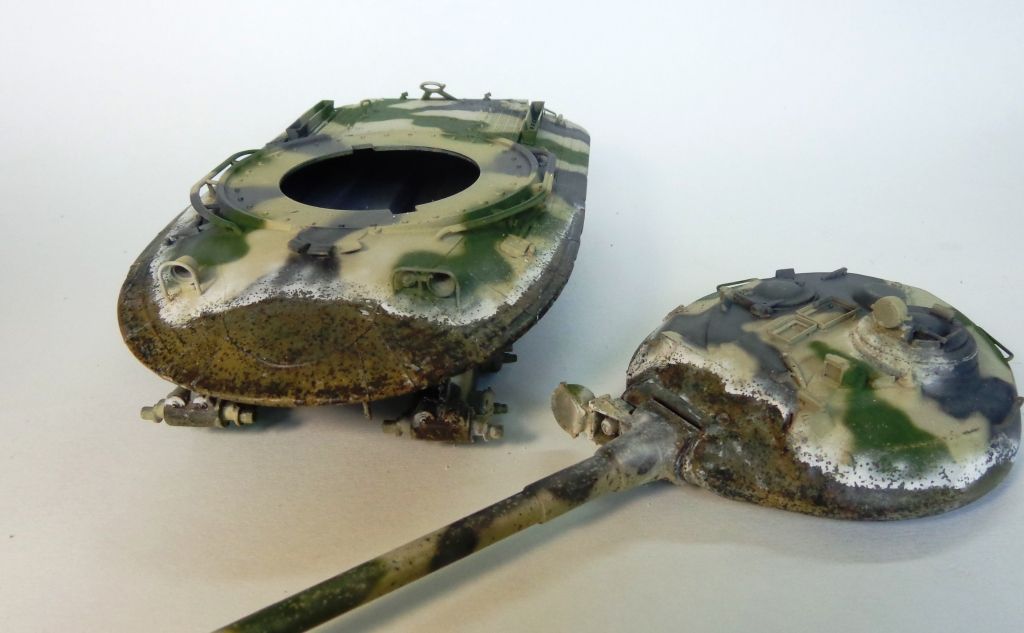
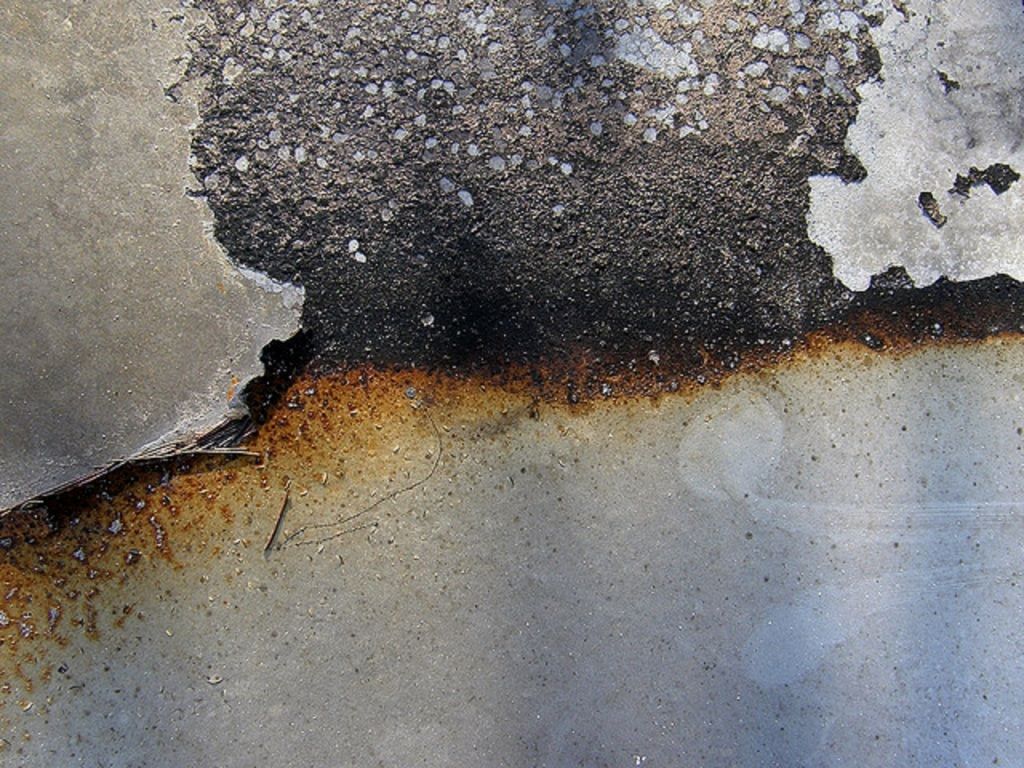
This is going to be the effect that I"m going for:
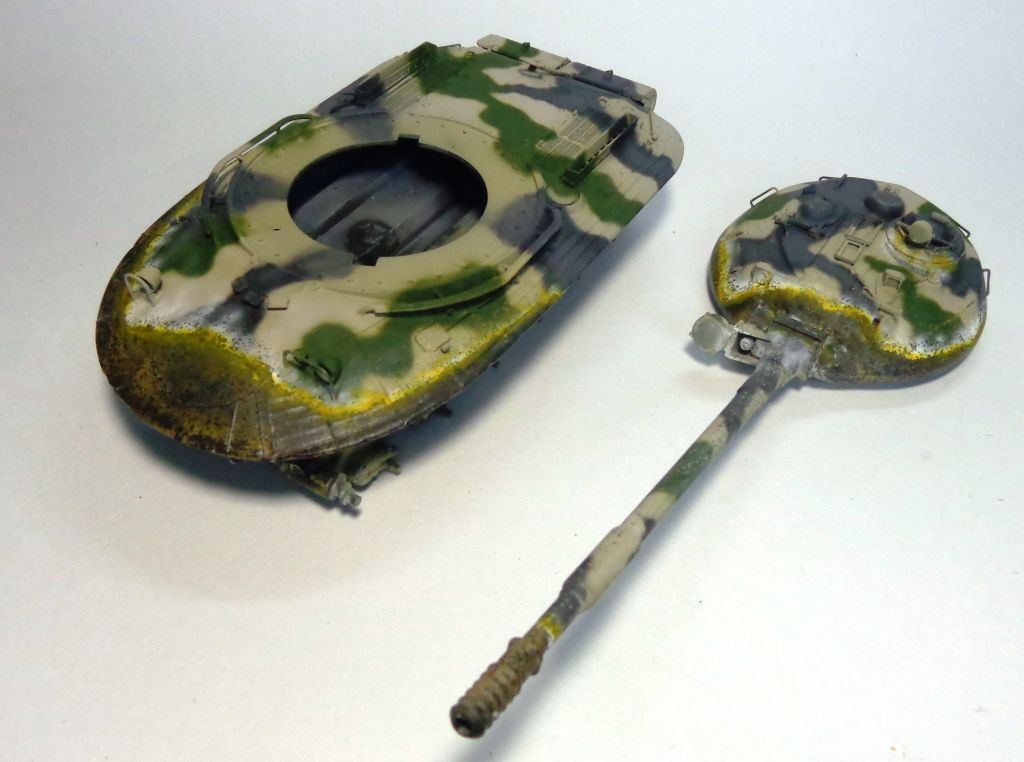
To get this, I now add a yellow line, first...
Then two successively darker shades of rust
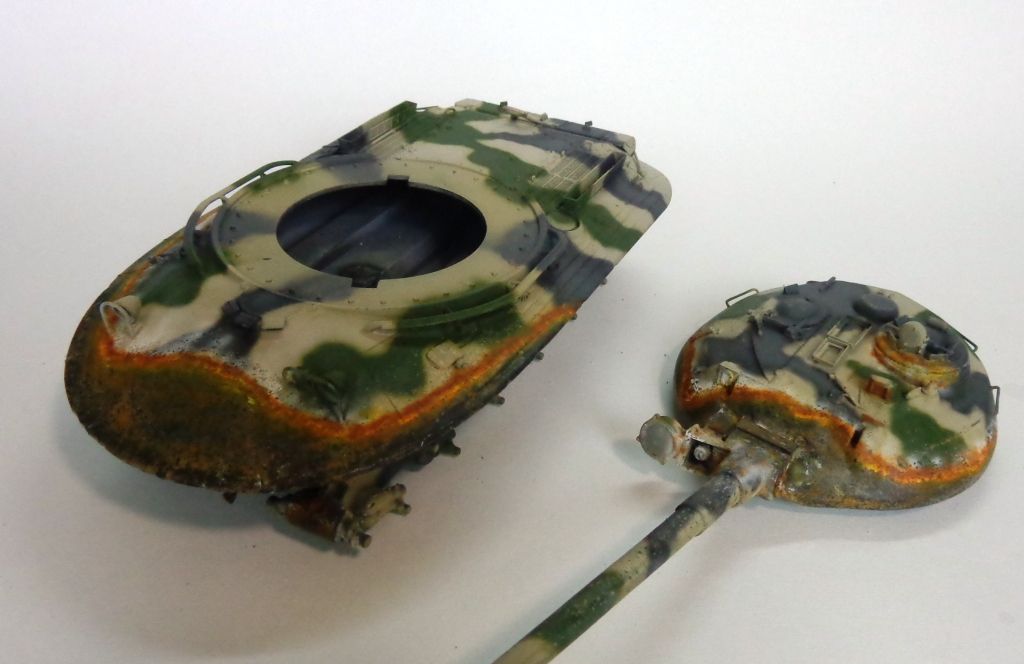
This is where I"m at now.....It looks a little excessive now, almost clownish, but I've been here before, haven't I? Wink The excess is intentional--I need a "background" o rusty tones for the next step--adequately minimizing and sharpening the blast-line. I will next add some weathering filters, and tint the base coat, and then add some more salt, white, and black soot painting.

I've also been working on creating a "goon army" from some extra TAKOM Soviet soldiers in their spooky gas masks...
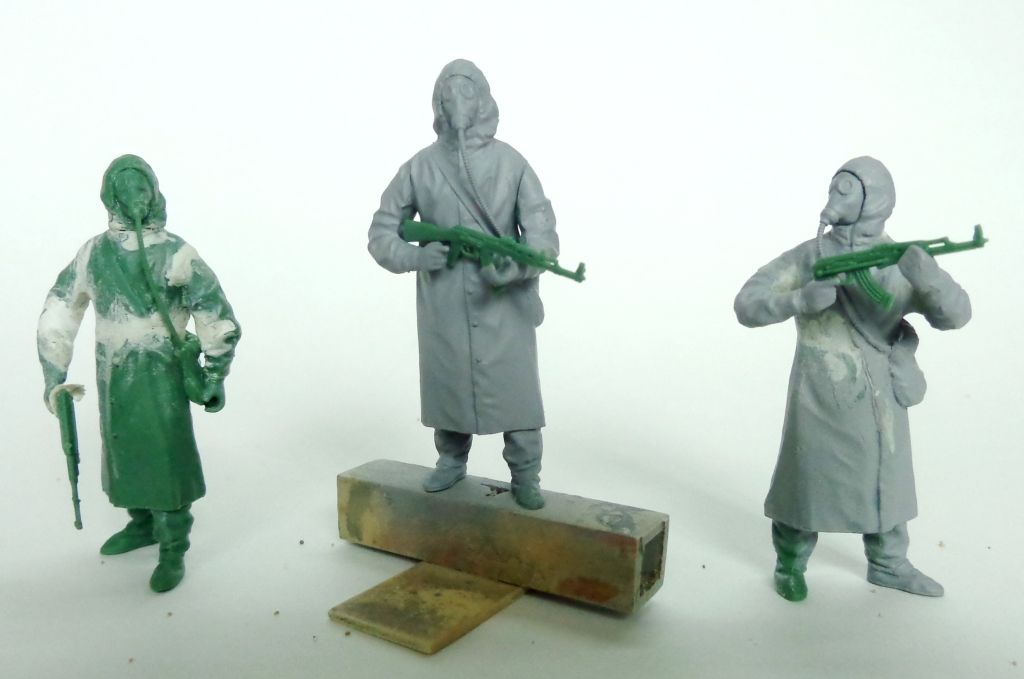
THAT'S IT FOR NOW!

Any comments or questions gladly welcomed!

STAY TUNED!!! It's going to be a wild ride! Stick out tongue

  • Member since
    July 2003
  • From: On my kitchen counter top somewhere in central North Carolina.
Posted by disastermaster on Wednesday, June 25, 2014 10:44 PM

Karl, the artistry here really shows.


I think you're hot on the trail of what you're looking for.          http://www.millan.net/minimations/smileys/dog.gif

                              I know I like it!

 https://i.imgur.com/LjRRaV1.png


cml
  • Member since
    March 2007
  • From: Brisbane, Australia
Posted by cml on Wednesday, June 25, 2014 11:00 PM

Some excellent techniques and tips Karl.

The burnt steel is looks terrific.

Chris

  • Member since
    February 2010
  • From: Maine
Posted by Stage_Left on Thursday, June 26, 2014 8:39 AM

Really cool Karl- yeah, I'd say the paint job is telling the story.....

Dave

  • Member since
    September 2006
  • From: Dripping Springs, TX, USA
Posted by RBaer on Thursday, June 26, 2014 2:06 PM

I like the effect, and it certainly tells a story.......

Apprentice rivet counter.

  • Member since
    November 2009
  • From: SW Virginia
Posted by Gamera on Thursday, June 26, 2014 2:13 PM

Lol, I can't comment on how realistic it is since I have no idea what it should look like! Indifferent

But it's friggin' awesome in any case!  Toast

"I dream in fire but work in clay." -Arthur Machen


  • Member since
    January 2007
Posted by the doog on Friday, June 27, 2014 5:55 AM

Guys, thanks for all your positive comments!

I admit that I was somewhat intimidated to even start this project as I too, "had no idea what it was supposed to look like" to paraphrase Gamera. I'm kinda shooting from the hip on this one, but it seems to have reached a stage of plausibility at least for now. Let's see how I can screw it up with further weathering, lol. (Hopefully not!)

I'm going to add that next step of adding smoke and soot with he airbrush and then see what it looke like--update soon!

  • Member since
    July 2006
  • From: New Jersey
Posted by redleg12 on Saturday, June 28, 2014 6:20 AM

OUTSTANDING!!!!!  The artistry of your finish work comes through. Love the figs in the NBC gear. The usual "Doog" creativity.

Rounds Complete!!

"The Moral High Ground....A Great Place to Emplace Artillery."

JOIN OUR COMMUNITY!

Our community is FREE to join. To participate you must either login or register for an account.

SEARCH FORUMS
FREE NEWSLETTER
By signing up you may also receive reader surveys and occasional special offers. We do not sell, rent or trade our email lists. View our Privacy Policy.