SEARCH FINESCALE.COM

Enter keywords or a search phrase below:

Tamiya 1/35 Char B1 bis *WIP*

27549 views
137 replies
1 rating 2 rating 3 rating 4 rating 5 rating
  • Member since
    July 2006
  • From: San Francisco Bay Area
Posted by bufflehead on Saturday, July 5, 2008 12:21 PM

Hey Scott!  I missed your original post early this week, I had no idea you were building this!!  Great WIP on a vehicle thats starting to get the attention it deserves!  I'm really glad Tamiya released this kit and I'm itching to get one myself.  I'm going to keeping a close eye on this WIP post!  BTW, your photos are getting better and better!!  Did you change your photo setup?

Oh, and sorry about your smoky skies.....darn California widlfires!!  I also had some respiratory problems a couple of weeks ago and it was kind of strange to wake up to orange skies!

Ernest

Last Armor Build - 1/35 Dragon M-26A1, 1/35 Emhar Mk.IV Female


Last Aircraft Builds - Hobby Boss 1/72 F4F Wildcat & FW-190A8


  • Member since
    December 2002
  • From: Reno, NV
Posted by espins1 on Saturday, July 5, 2008 12:24 PM
 bufflehead wrote:

Hey Scott!  I missed your original post early this week, I had no idea you were building this!!  Great WIP on a vehicle thats starting to get the attention it deserves!  I'm really glad Tamiya released this kit and I'm itching to get one myself.  I'm going to keeping a close eye on this WIP post!  BTW, your photos are getting better and better!!  Did you change your photo setup?

Oh, and sorry about your smoky skies.....darn California widlfires!!  I also had some respiratory problems a couple of weeks ago and it was kind of strange to wake up to orange skies!

Thanks Ernest.  Yes, I changed my lighting and am using a different background, which seems to be helping.  I always loved the black background, but it really messes up the light metering on the camera.  The light baby blue seems to work much better.  Having a big and small tripod makes a big difference as well.  

I'm still taking my anti-biotics and nasonex and am slowly feeling better.  The skies are still a little bit smokey here, but not as bad as they were last week or the other day.  

I can say one thing, there is nothing like the fit and engineering of a Tamiya kit!  The fit is pretty good!  

Scott Espin - IPMS Reno High Rollers  Geeked My Reviews 

  • Member since
    December 2002
  • From: Reno, NV
Posted by espins1 on Monday, July 7, 2008 11:24 AM

I made a lot of progress on the Char B1 bis this weekend.  I took in progress photos but now that most of the assembly is complete it seems a bit redundant to post the earlier photos.  There are a few more detail parts to attach, such as the rear turret hatch, jacks, lifting hooks etc.  I also need to fix the seam between the turret and the turret ring.  The tow chain will be attached later after painting, but before weathering.  Burger [BG]


Scott Espin - IPMS Reno High Rollers  Geeked My Reviews 

  • Member since
    November 2005
Posted by Anonymous on Monday, July 7, 2008 12:44 PM
Very clean build...should paint up nicely...
  • Member since
    May 2007
Posted by Specter on Monday, July 7, 2008 12:48 PM
Looking goodThumbs Up [tup]
Seth
  • Member since
    July 2004
  • From: Texas
Posted by wbill76 on Monday, July 7, 2008 2:45 PM

Making good progress Scott, have you settled on a vehicle yet? Since you've opted for the spaced fenders, it'll have to be an earlier numbered vehicle but still leaves some good choices out there. Check out this listing on the Char-Francais site if you haven't already: http://www.chars-francais.net/new/index.php?option=com_content&task=view&id=524&Itemid=66

My all-time favorite is "Fantasque".

  • Member since
    December 2002
  • From: Reno, NV
Posted by espins1 on Monday, July 7, 2008 4:07 PM
 wbill76 wrote:

Making good progress Scott, have you settled on a vehicle yet? Since you've opted for the spaced fenders, it'll have to be an earlier numbered vehicle but still leaves some good choices out there. Check out this listing on the Char-Francais site if you haven't already: http://www.chars-francais.net/new/index.php?option=com_content&task=view&id=524&Itemid=66

My all-time favorite is "Fantasque".

Thanks guys.

Bill, I'll have to agree with you on that one.  The paint scheme for Fantasque is killer!  I'm going to have to build another Char B1 bis which I'd like to do in that scheme, although that would be a tough one to paint.  That web site is a wealth of information.  In fact, I've compiled a document with the data from each individual link for each of the tanks all into a single document, which I've been translating into English for my own purposes.  It is time consuming, but will make a great reference!  

I was on a roll with the build and went for the configuratoin found on Bourrasque and will probably stick with that scheme, although I may change my mind at the last minute to another one that matches that configuration. 

Scott Espin - IPMS Reno High Rollers  Geeked My Reviews 

  • Member since
    June 2005
  • From: San Tan Valley,AZ
Posted by smokinguns3 on Monday, July 7, 2008 4:16 PM
Nice work there Scott.
Rob I think i can I think i can
  • Member since
    March 2007
  • From: NJ
Posted by JMart on Monday, July 7, 2008 6:08 PM
excellent build as usual... great thread! Your pictures are also top notch, look forward to the paint! Thanks for sharing your build log, and everyone that has added reams of good info to this one... a bookmark for sure! cheers


  • Member since
    April 2007
  • From: Schroon Lake, NY
Posted by SMJmodeler on Tuesday, July 8, 2008 8:35 AM

Scott:  "It's only a flesh wound"...

...Still a nasty looking beast, nice build though, really cleanThumbs Up [tup]!!!

  • Member since
    December 2002
  • From: Reno, NV
Posted by espins1 on Monday, October 20, 2008 4:34 PM

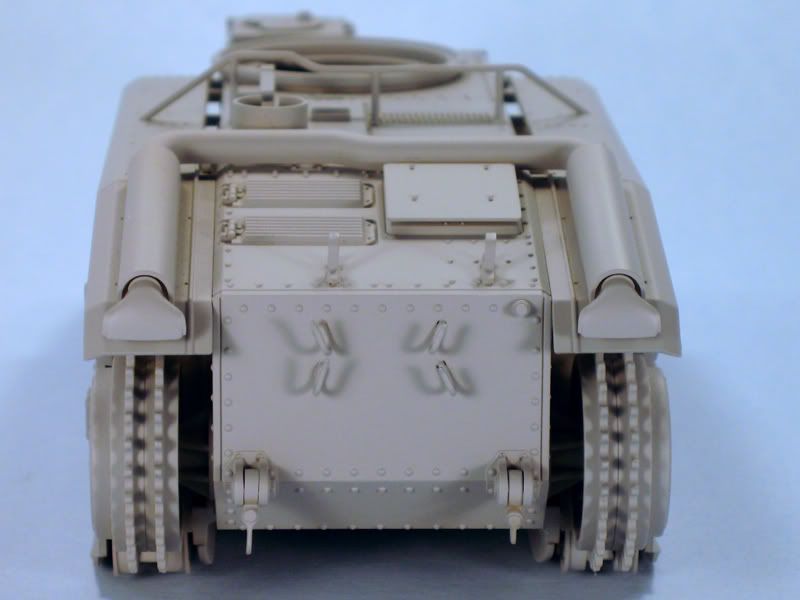
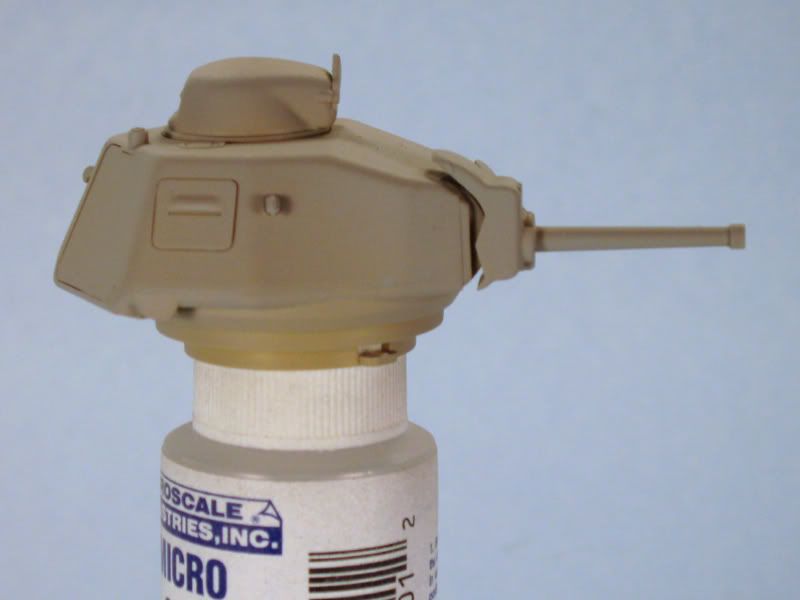
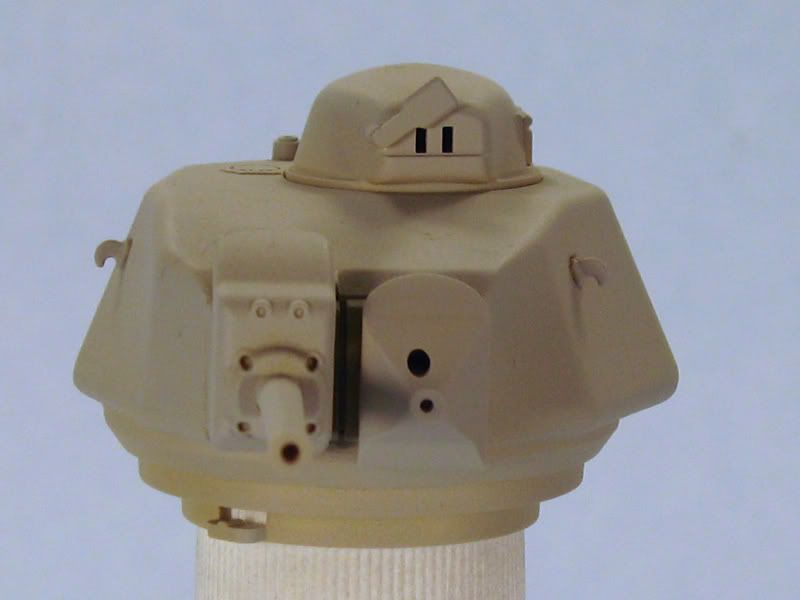
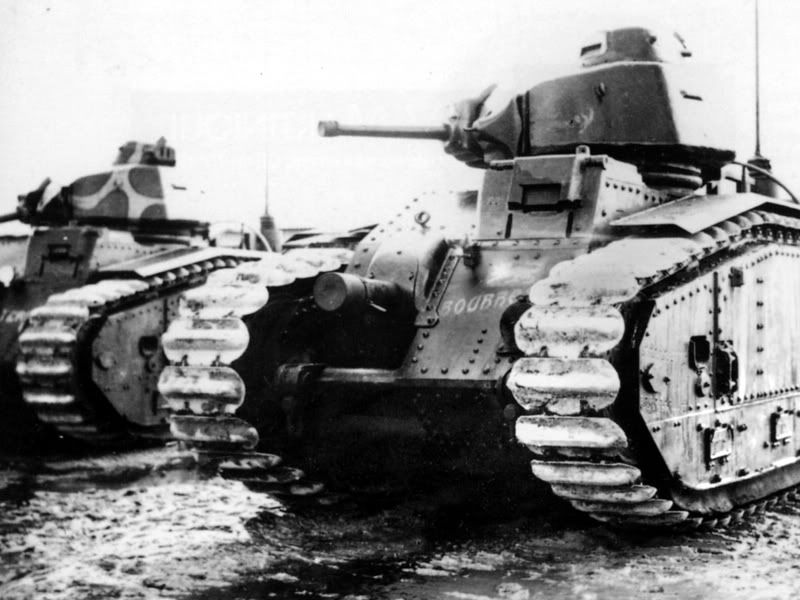
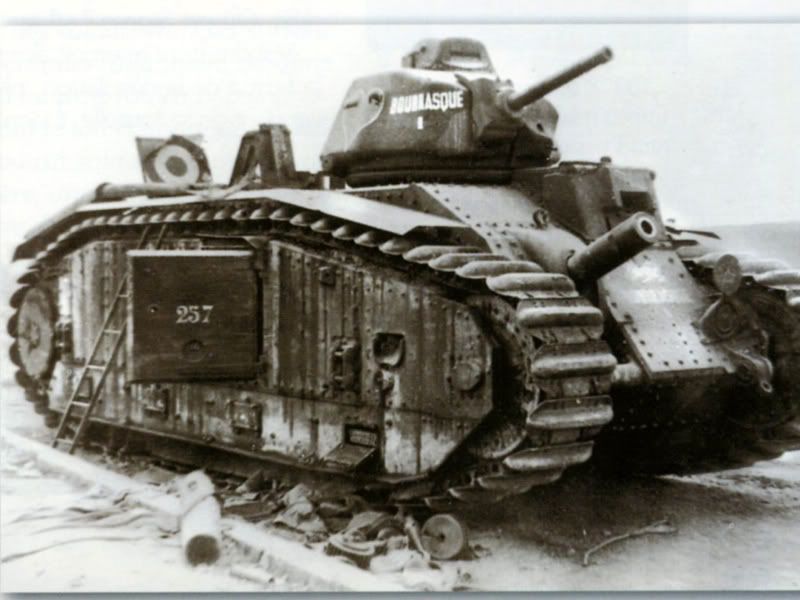
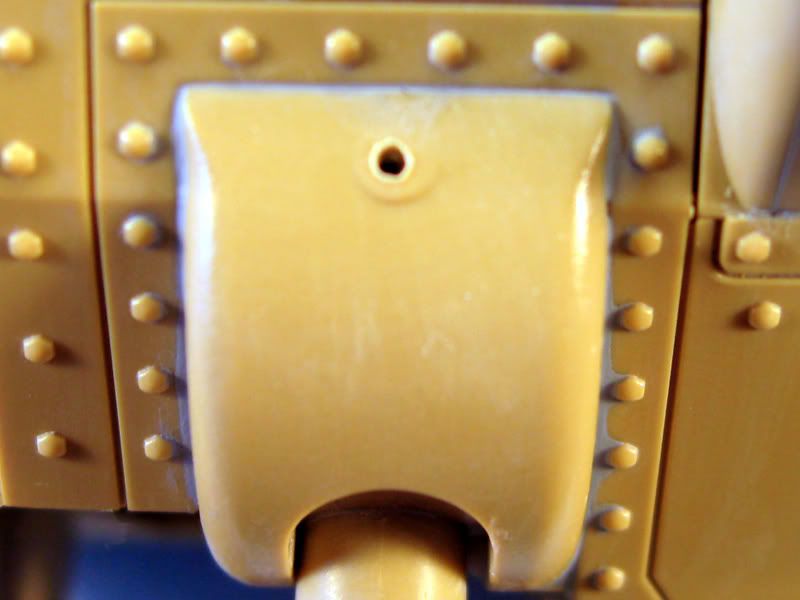
I replicated the pigtail lifting hook for Bourrasque using a wire type item from my wife's misc. craft supply box that already had loops of about the right size in them.  It worked perfectly.  I just pulled the end of the loop out a bit, carefully filed the tip to a point and then gently bent it back in (but not all the way).  I drilled a hole into the plastic to mount it above the 75mm gun on the top of the mantlet assembly and voila, the pigtail lifting hook is good to go!  Looking at my reference photos, it was apparent to me that the lifting hooks were crafted individually, and mounted in all sorts of ways so that each tank was unique.  Bourrasque's was installed parallel with the front of the tank, with the pigtail point on the front.  Other Char's had them flipped the opposite way, or even perpendicular to the front, so check your reference photos if you're building one of these.


I am rapidly running out of time as I'm building this tank for the Blitzkrieg Group Build over at www.armorama.com which ends at the end of this month, so I think I'm going to skip rest of the corrections I had planned (the 6 bolts on the 75mm gun mantlet and the mud scrapers).  

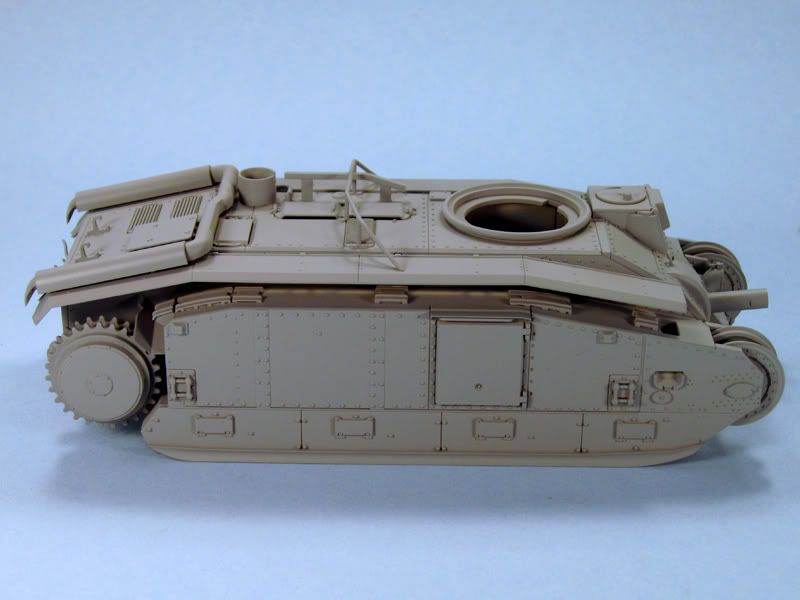
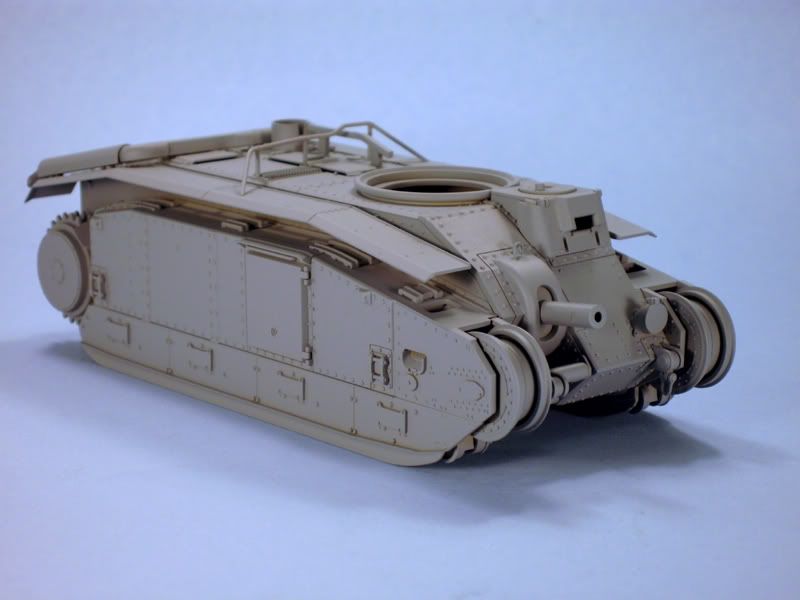
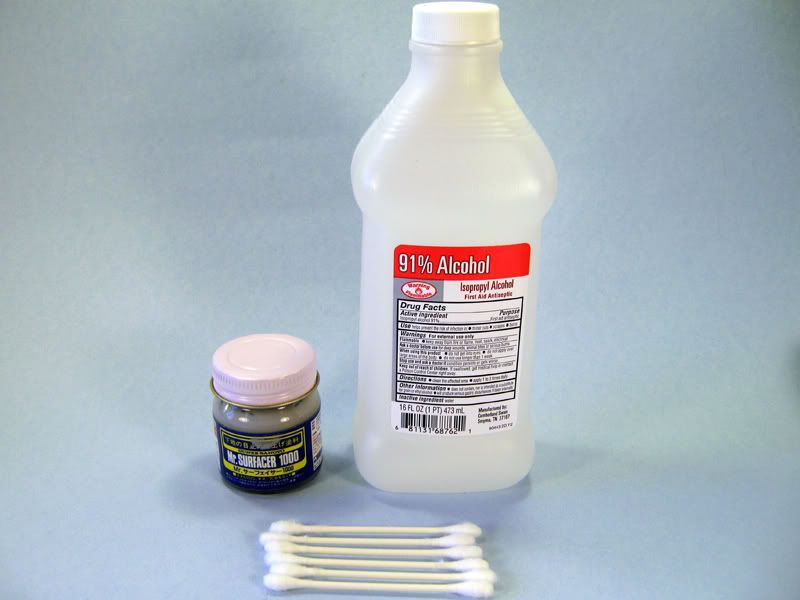
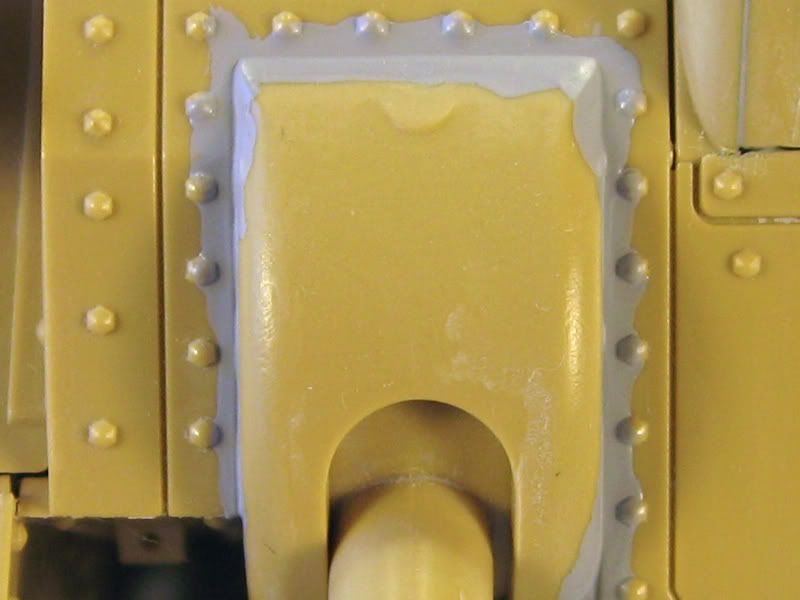
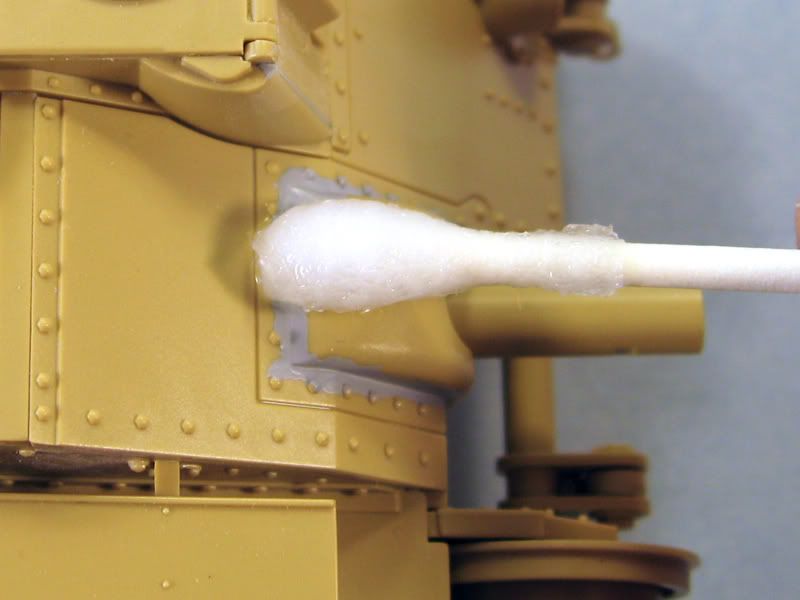
The seam corrections are complete as well.  I used Mr. Surfacer 1000, Q-tips and 91% Isopropyl Alcohol to fill in the seam errors with this kit.  This is a great technique for filling in seams, especially if there is delicate detail in the area or there are hard to reach places.  This way you won't damage anything, unlike the fill and sand technique.  Just apply the Mr. Surfacer with a toothpick or small brush.  After it has dried simply dip the end of a Q-tip in the 91% Isopropyl Alcohol (squeeze a bit off so you don't flood the model) then just gently rub the area where the seam is.  It may take a few moments for the alcohol to begin dissolving the Mr. Surfacer, longer if it has thoroughly dried and cured.  You may need to apply more Mr. Surfacer and repeat the process a couple of times until the seams are filled to your satisfaction.  I did one more application after these photos and carefully cleaned up any Mr. Surfacer residue using Q-tips and the alcohol.


I sprayed on a coat of Tamiya gray primer yesterday evening so now it's ready for the base coat.


Scott Espin - IPMS Reno High Rollers  Geeked My Reviews 

  • Member since
    November 2006
  • From: Massachusetts
Posted by jadgpanther302 on Monday, October 20, 2008 5:35 PM
looks nice!
  • Member since
    December 2006
  • From: N. Georgia
Posted by Jester75 on Monday, October 20, 2008 5:40 PM
Looking pretty sweet!!Thumbs Up [tup]

Eric


  • Member since
    March 2003
  • From: Rain USA, Vancouver WA
Posted by tigerman on Monday, October 20, 2008 5:43 PM
This is too funny. I came across a bottle of Mr. Surfacer the other day and wondered why I bought it. I believe after looking at your demonstration, it must have been for the same purpose. Thanks and btw, the Char is looking great so far.

   http://i7.photobucket.com/albums/y269/wing_nut_5o/PANZERJAGERGB.jpg

 Eric 

  • Member since
    November 2005
Posted by Anonymous on Monday, October 20, 2008 7:45 PM
Great looking build and nice tip on the Surfacer...
  • Member since
    December 2002
  • From: Reno, NV
Posted by espins1 on Tuesday, October 21, 2008 10:02 AM
Thanks guys.  I can't take credit for the technique though, I picked it up from the excellent Master Class Model Building Video "Building the Bf 109G-6" by Floyd S. Werner Jr.  

The tracks are assembled and I must say, these have got to be the easiest individual track links, they simply snap together.  The joins are very strong which allows you to handle the tracks as much as you want without coming apart.  I used a medium sanding stick to scuff the highest part of the track links to simulate the scuffing that appears from the tank driving over hard surfaces which can clearly be seen in most good photos of the Char B1 bis.  


Scott Espin - IPMS Reno High Rollers  Geeked My Reviews 

  • Member since
    April 2005
  • From: Piscataway, NJ!
Posted by wing_nut on Tuesday, October 21, 2008 10:52 AM
Looking good Scott.  Snap together tracks? very handy.  I've done that wipe off thing with Tamiya putty and acetone, nefer with Mr. Surfacer.  That's is handy stuff.  I just used Mr. S. 500 to make some weld beads on the 251 i am working on.

Marc  

  • Member since
    December 2002
  • From: Reno, NV
Posted by espins1 on Wednesday, October 22, 2008 10:12 AM

Tanks Marc.  I hope you're recovering quickly!

The painting has begun!  I use Tamiya Acrylics exclusively.  The tracks have been sprayed with a 1 to 1 ratio of XF-56 Metallic Gray/XF-64 Red Brown.  That mixture was then thinned with X-20A Tamiya thinner in approximately a 50/50 ratio.  The base coat has also been sprayed.  I used a 2 to 1 ratio of XF-59 and XF-60 Desert Yellow XF-60 Dark Yellow, again thinned to about a 50/50 mix with Tamiya X-20A thinner.   


Scott Espin - IPMS Reno High Rollers  Geeked My Reviews 

  • Member since
    January 2007
Posted by the doog on Wednesday, October 22, 2008 10:17 AM

Hey Scott--that's looking great!

How big is this sucker? Can you take a shot next time next to a Sherman or a Tiger for comparison?

  • Member since
    December 2002
  • From: Reno, NV
Posted by espins1 on Wednesday, October 22, 2008 10:28 AM
 the doog wrote:

Hey Scott--that's looking great!

How big is this sucker? Can you take a shot next time next to a Sherman or a Tiger for comparison?

Thanks Karl and you bet!  I'll post a pic with my Tiger I S33 "Das Reich" tonight.

Scott Espin - IPMS Reno High Rollers  Geeked My Reviews 

  • Member since
    August 2007
Posted by adb2323 on Friday, October 24, 2008 10:39 AM

Hi Scott, nice work on the bis so far. (I have the German version waiting to be built...)  I have a question regarding the Tamiya surface primer.  Are you using the bottled primer and airbrushing it? If so, how much do you thin it and what thinner do you use? 

Thanks,

Al B.

  • Member since
    December 2002
  • From: Reno, NV
Posted by espins1 on Friday, October 24, 2008 10:58 AM
 adb2323 wrote:

Hi Scott, nice work on the bis so far. (I have the German version waiting to be built...)  I have a question regarding the Tamiya surface primer.  Are you using the bottled primer and airbrushing it? If so, how much do you thin it and what thinner do you use? 

Thanks,

Al B.

Thanks Al.  The Tamiya primer I'm using comes in a "rattle can", so I just quickly spray it in even strokes.  

Scott Espin - IPMS Reno High Rollers  Geeked My Reviews 

  • Member since
    December 2002
  • From: Reno, NV
Posted by espins1 on Friday, October 24, 2008 11:00 AM
 espins1 wrote:
 the doog wrote:

Hey Scott--that's looking great!

How big is this sucker? Can you take a shot next time next to a Sherman or a Tiger for comparison?

Thanks Karl and you bet!  I'll post a pic with my Tiger I S33 "Das Reich" tonight.

Whoops, forgot to take the photo last night, had a brutal headache when I got home which was cured by some red wine and an early bed time.  Zzz [zzz]

Scott Espin - IPMS Reno High Rollers  Geeked My Reviews 

  • Member since
    September 2007
  • From: Relocating
Posted by Mobious on Friday, October 24, 2008 11:48 AM

 Hello,

 Great lOOking build, espins1. Tracks look great. Looking forward to comparison pics.

 Best Regards,

 Mobious

"It's a problem of applied physics" Roy Brown

  • Member since
    July 2004
  • From: Texas
Posted by wbill76 on Friday, October 24, 2008 11:53 AM
Making great progress here Scott, the Tamiya click-together tracks are a dream to assemble aren't they? It's too bad that type of arrangement can't be used more often with tracks, it would sure cure a lot of headaches for builders if they could. Looking forward to seeing this one with the paint scheme on! Thumbs Up [tup]
  • Member since
    March 2007
  • From: NJ
Posted by JMart on Friday, October 24, 2008 7:47 PM
great build and great blos as usual scott, great job and thanks for all the tips!


  • Member since
    November 2007
  • From: Wisconsin Rapids, WI
Posted by moose421 on Saturday, October 25, 2008 8:01 AM

Looking real killer.  Your Char is an odd duck, and I must resist the urge.  To buy one that is.  Between your wip and wbill76's would make such adventure alot easier.  Keep up the great work.

Off to the basement, my tiger is crying for some more washes.


  • Member since
    December 2002
  • From: Reno, NV
Posted by espins1 on Monday, October 27, 2008 10:47 AM

Thanks guys.  I appreciate the comments and the interest.  The tracks were an absolute dream to assemble.  They've been painted, and metallic gray has been drybrushed on the upper surfaces.

The camouflage has been painted  Shock [:O]   Much of it was done by hand so the pattern would have a hard edge to it.  I used Tamiya Acrylics (as always) and thinned it a bit more than 50% so it would flow well and be brush mark free.  I then painted the outlines for the green striping so I could fill them in using the airbrush, although the turret was done entirely by hand.  I got the idea of hand painting the outlines from an excellent article that Mike Rinaldi did documenting his builds of 4 different Char B1 bis in MMiR.  I had to go back over some of the tan areas, again with highly thinned paint to fix a bit of the green over spray here and there.  Up next, decals!


Scott Espin - IPMS Reno High Rollers  Geeked My Reviews 

  • Member since
    January 2005
  • From: Las Vegas
Posted by dood_dood on Monday, October 27, 2008 8:19 PM

You wield a steady brush, my friend!  That looks excellent. 

Have you tried silly putty for hard edge?  My Char B was my first attempt.  Used it many times since for hard edge.

  • Member since
    September 2007
  • From: Relocating
Posted by Mobious on Monday, October 27, 2008 9:06 PM

 Hello,

 Fine looking camo. Looking back over your WIP and noticed the number of roadwheels the Char-B had. Wow, that's a lot of wheels. A really well executed build, the paint looks great. Be looking forward to weathering. Best of luck with the research project sounds very intriguing. Have read a couple books on the "Blitzkrieg Era" but nothing really detailed enough to list individual tanks or commanders.

 Keep up the excellent work, hope you're feeling better.

 Mobious

"It's a problem of applied physics" Roy Brown

JOIN OUR COMMUNITY!

Our community is FREE to join. To participate you must either login or register for an account.

SEARCH FORUMS
FREE NEWSLETTER
By signing up you may also receive reader surveys and occasional special offers. We do not sell, rent or trade our email lists. View our Privacy Policy.