SEARCH FINESCALE.COM

Enter keywords or a search phrase below:

THE FINAL HURDLE!... 1:20 scale scratch built B17G

20296 views
68 replies
1 rating 2 rating 3 rating 4 rating 5 rating
  • Member since
    July 2014
Posted by modelcrazy on Sunday, August 8, 2021 11:51 AM

I don't know why I haven't see this post before Surprise

Great work Foz!

Steve

Building a kit from your stash is like cutting a head off a Hydra, two more take it's place.


http://www.spamodeler.com/forum/

Foz
  • Member since
    April 2011
  • From: S.E Bulgaria
Posted by Foz on Sunday, August 22, 2021 3:58 AM

modelcrazy

I don't know why I haven't see this post before Surprise

Great work Foz!


Thanks a lot!Smile


Hi there


This post will be all about painting and adding the markings to the rear of this fuselage. I thought that this would be the last post before i actually finish all the work on the fuselage but then I remembered that I had to make the rear crew door!


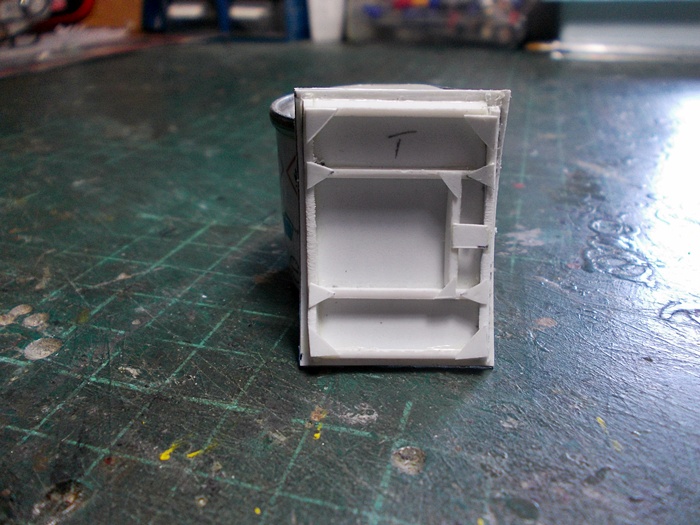
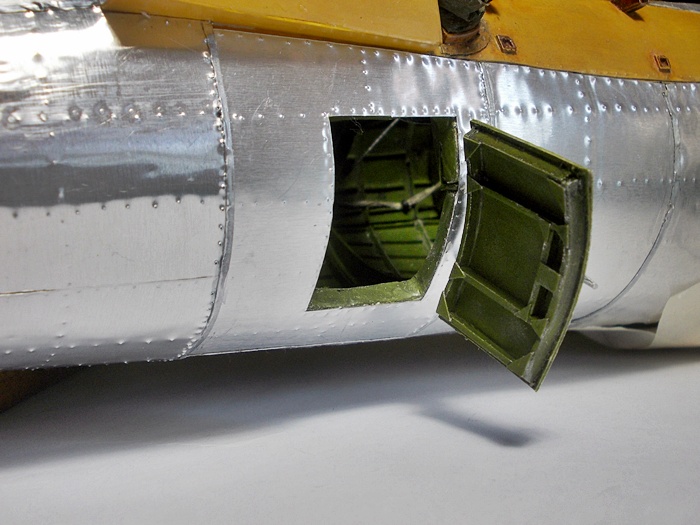
I have made the rear gunners door that I will show you now. Because the door is the shape of the fuselage I had to use the bulk head formers as a template to get the shape right. I made it from plastic card and here is the inside of the door...


PAINTING_AND_MARKINGS.jpg


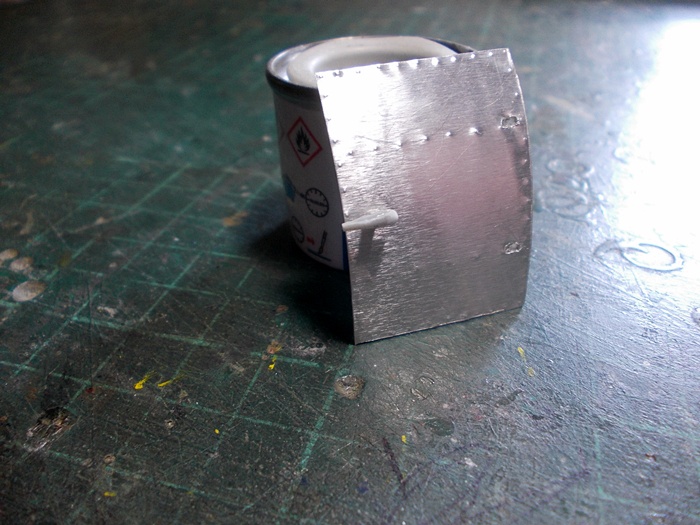
The out side was then covered in a sheet of aluminum and a handle was made from a piece of sanded plastic sprue...


PAINTING_AND_MARKINGS_(1).jpg


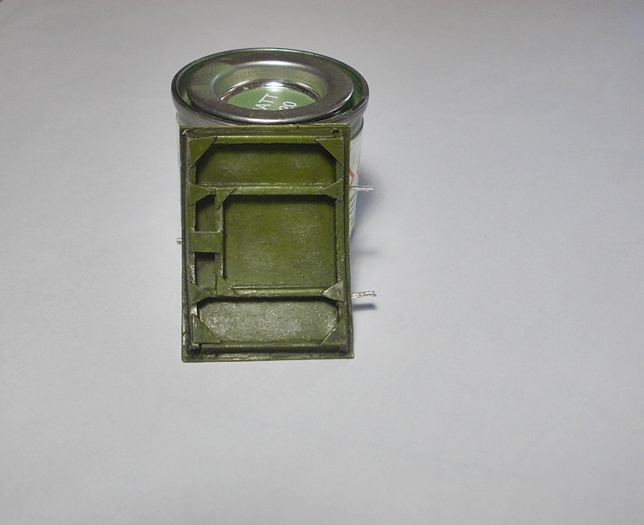
Then I painted the inside of the door with interior green....


PAINTING_AND_MARKINGS_(2).jpg


PAINTING_AND_MARKINGS_(3).jpg


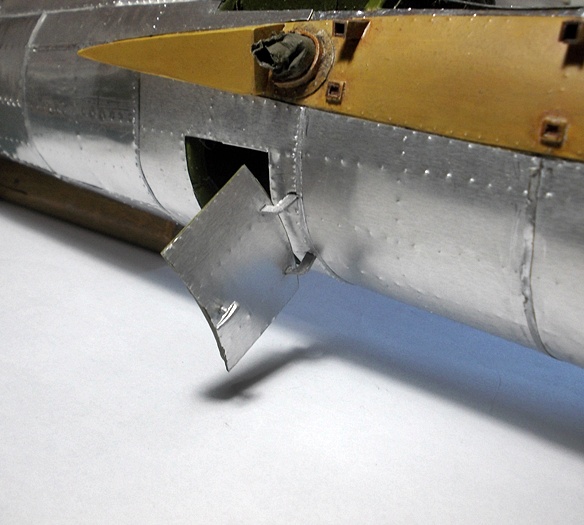
I made a couple of hinges from plastic, (covered in pieces of aluminum from a Coca Cola can to strengthen them)... and then dry fitted the completed door to the fuselage.


PAINTING_AND_MARKINGS_(4).jpg


PAINTING_AND_MARKINGS_(5).jpg


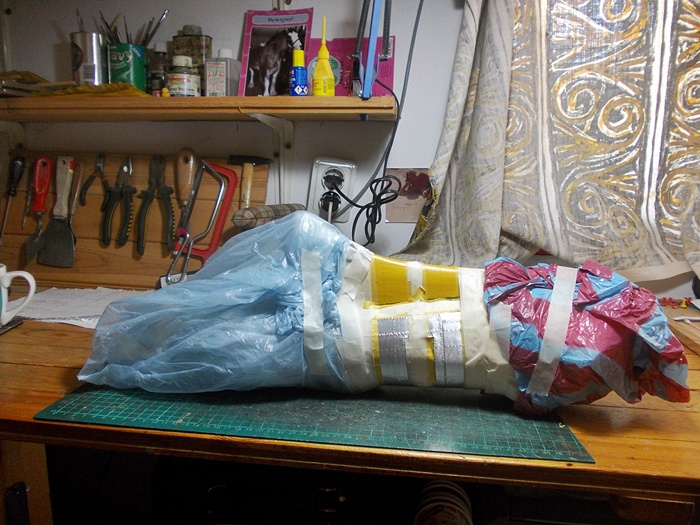
Its now time to paint the markings on the fuselage but first I had to mask up the areas I didn't want the airbrush to cover....for some reason I hate this job of masking ....you miss a bit and the blasted spray gets it!!


PAINTING_AND_MARKINGS_(6).jpg


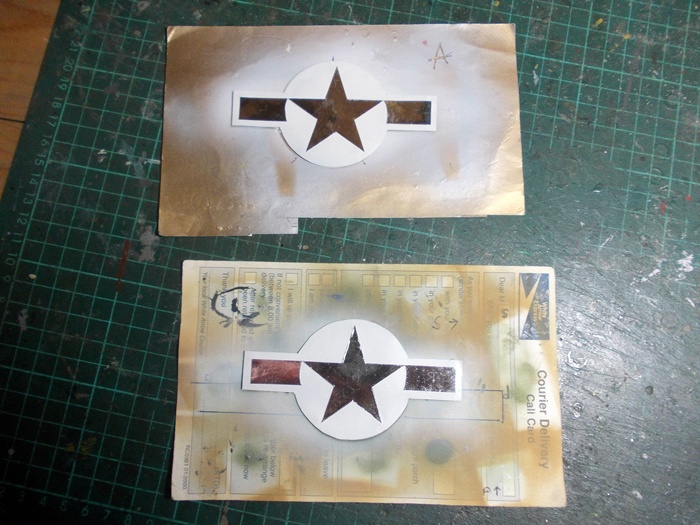
Before I fired up my Paasche....I spent a LOT of time marking out the USAF Insignia I needed for both sides of the fuselage. This wasn't as easy as I thought as not only did I have to get the scale correct but actually drawing out the insignia meant I had to dabble into geometry....which I totally ignored in my schooling years!....72 degrees spacing for each star point ...the bars are the radius x a half.... etc etc...luckily I found a great little page on the internet explaining how to actually draw the Insignia!

I drew the insignia onto some sticky back silver paper I have...which if all goes well I can literally just place them on the fuselage!  After drawing another extra insignia , I cut out the star and the bars.....sprayed the original white and then replaced the star and bars over the white as a mask for the dark blue paint!.....did you get all that??? !!!


PAINTING_AND_MARKINGS_(7).jpg


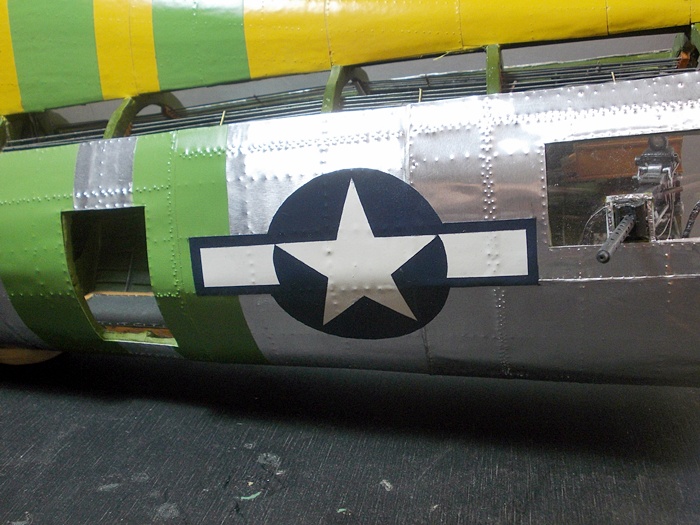
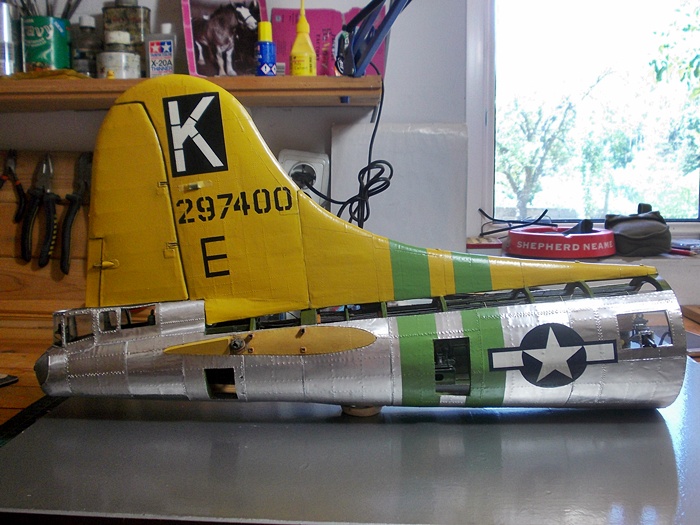
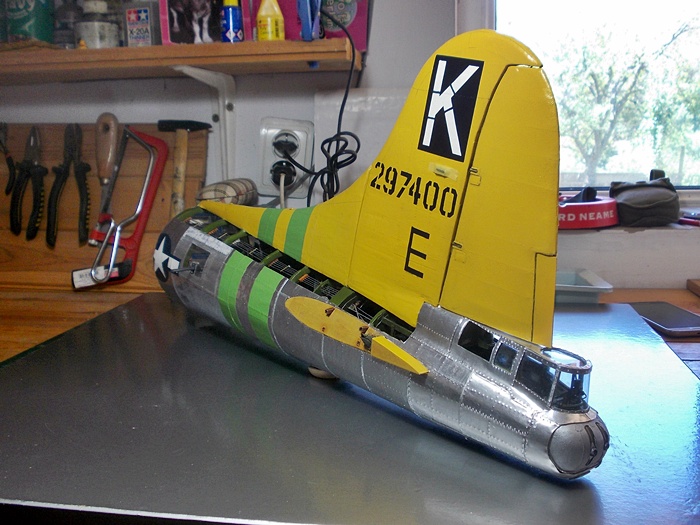
So first off....here are the green bands I sprayed that are on "Fuddy Duddy"...


PAINTING_AND_MARKINGS_(8).jpg


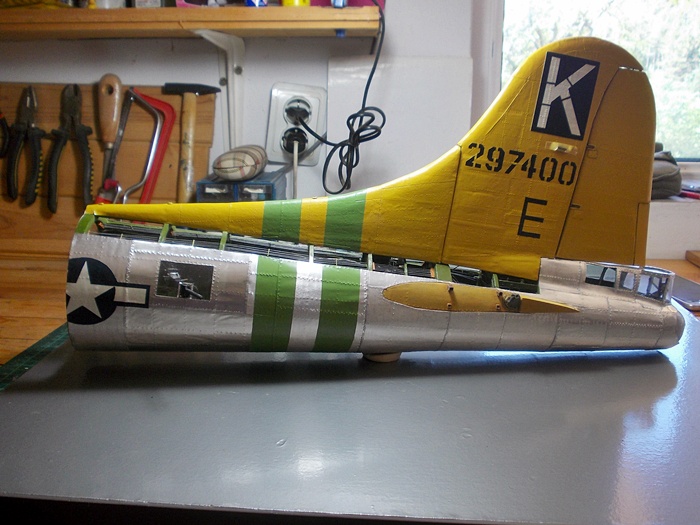
....and here is the USAF insignia on the starboard side....I have to say I am pleased in how they have turned out!....


PAINTING_AND_MARKINGS_(9).jpg


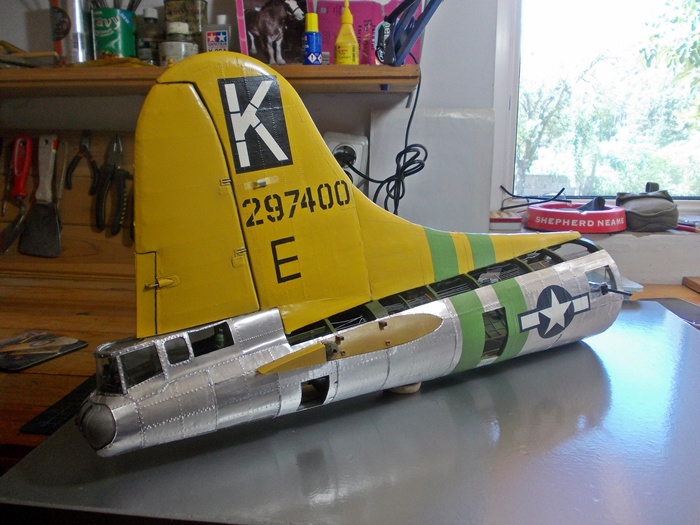
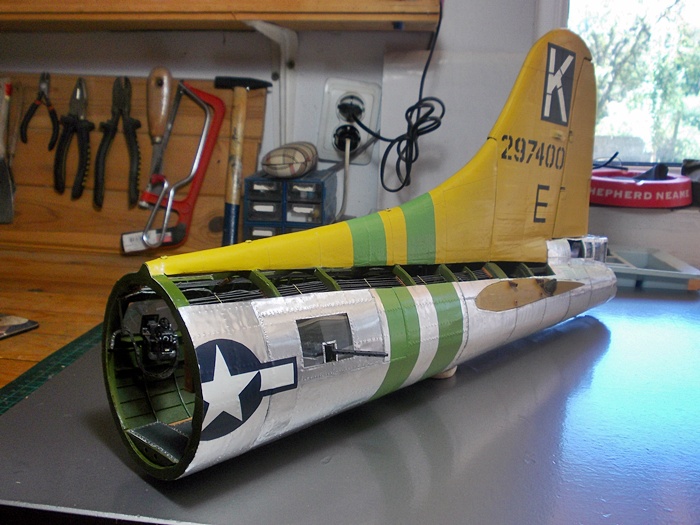
The next 6 photos show the overall completed paint scheme for the rear of this B17...


PAINTING_AND_MARKINGS_(10).jpg


PAINTING_AND_MARKINGS_(11).jpg


PAINTING_AND_MARKINGS_(12).jpg


PAINTING_AND_MARKINGS_(13).jpg


PAINTING_AND_MARKINGS_(14).jpg


PAINTING_AND_MARKINGS_(15).jpg


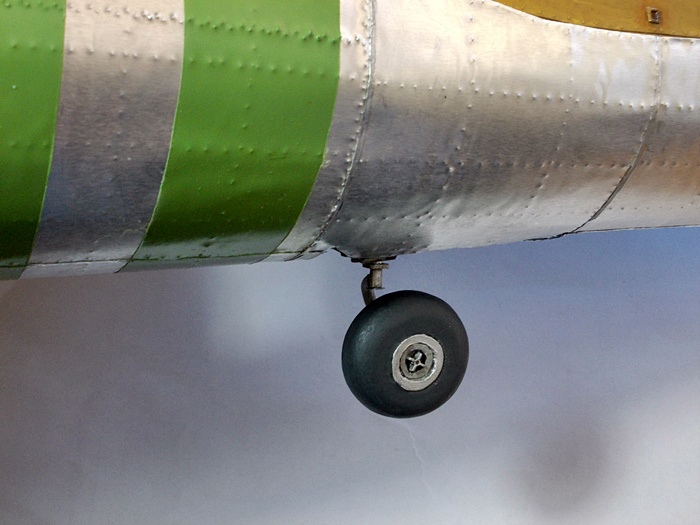
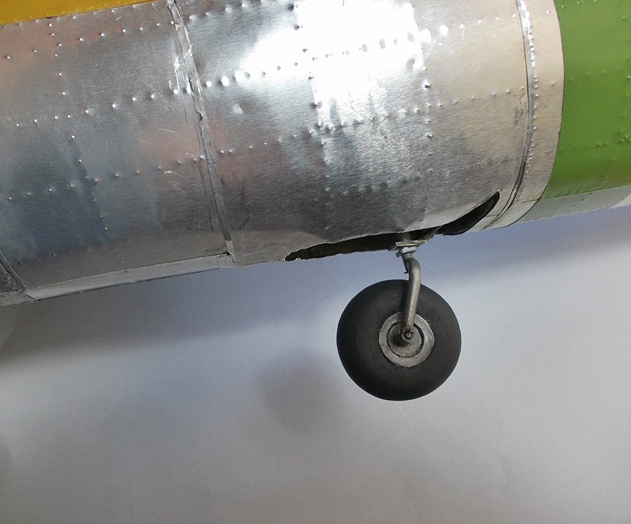
It seems such a long time ago that I had the tail wheel in place!... The reason it isn't fixed at the moment is the fact that this whole model has to be transported to USA at some point and the less sticky out bits for packing the better!!...but as a reminder for myself and you guys...here it is....


PAINTING_AND_MARKINGS_(16).jpg


PAINTING_AND_MARKINGS_(17).jpg


Well that's it for this week!


Next week some time will be the final post of this rear section showing the rear crew door that I have yet to build and a good few photos of the rear section completed!


Until then ....take care and thanks for looking in!


Cheers


Fozzy


GAF
  • Member since
    June 2012
  • From: Anniston, AL
Posted by GAF on Sunday, August 22, 2021 10:00 AM

I'm impressed by your attention to detail, but one thing bothers me.  Wouldn't they have removed the guns and ammunition before stripping the aircraft down?  It looks incongruous with guns and ammo and no wings.  Still, nice work!

Gary

Foz
  • Member since
    April 2011
  • From: S.E Bulgaria
Posted by Foz on Sunday, August 22, 2021 4:14 PM

GAF

I'm impressed by your attention to detail, but one thing bothers me.  Wouldn't they have removed the guns and ammunition before stripping the aircraft down?  It looks incongruous with guns and ammo and no wings.  Still, nice work!

Gary


Thanks for your input Gary....

My intention right from the start was to make a study of the B17 fuselage as a cutaway showing as much of what there was internally...like a kind of anatomy of a B17G .This is why I have modeled the fuselage with most of the top section missing along the fuselage and so it isn't something you would see in a hangar for example....I hope that makes sense!...cheers! 

GAF
  • Member since
    June 2012
  • From: Anniston, AL
Posted by GAF on Monday, August 23, 2021 2:27 PM

Fair enough!  Smile

Gary

Foz
  • Member since
    April 2011
  • From: S.E Bulgaria
Posted by Foz on Monday, August 30, 2021 2:25 PM


Hi guys 

Just a quick post showing the very last detail that I shall be doing on this B17.

Of course they is still a lot more thought and scratch building to be done to finally display the model but I am going to take a bit of time out whilst I think about it!

I have made a decision about the two halves of the fuselage (front section and rear section). Right from the start of this project it was important for me to show all the interior detail and the actual outer fuselage came second in the importance of this project and so to that end the two sections will be apart. I am thinking of a gap about 8 inches between the front and the rear.This will allow you peer down into the fuselage as well as seeing the detail from the missing panels in the top. I am also steering towards actually keeping the ball turret displayed on a little stand in the 8 inch gap between the two halves......I know it sounds crazy but I am also thinking of taking out the ball turret hanging frame which holds the ammo chutes from the fuselage and attaching it to the top of the turret as a complete unit.  I have seen a photo of this of a turret from a B24 and I think it might work for my display but as I said I am going to take time out and think about it!

In the mean time here is the last of the detail which I will do on the actual fuselage.... and that is the rear crew door.

Made in the same way I built the tail turret door....here it is before painting...


REAR_CREW_DOOR.jpg


REAR_CREW_DOOR_(1).jpg


...and here it is painted....


REAR_CREW_DOOR_(2).jpg


REAR_CREW_DOOR_(3).jpg


REAR_CREW_DOOR_(4).jpg


....here's a couple of photos of the door attached to the fuselage...


REAR_CREW_DOOR_(5).jpg


REAR_CREW_DOOR_(6).jpg


So that's all the internal and external scratch building done for this B17G.


Of course you won't get rid of me that easy after these past 10 years!Wink......I am going to try to photo the 2 fuselage sections before starting on the display work ,so I will be back soon!


Cheers as always for looking in and see you on the next post!


Fozzy

Foz
  • Member since
    April 2011
  • From: S.E Bulgaria
Posted by Foz on Sunday, October 31, 2021 8:10 AM

Hi everyone


This is it!...............the absolute FINAL post I will make on this 10 year project! Big Smile


In my last post I was talking about the display aspect of this model and what was the best way to display this B17G  ....I gave it considerable thought and finally decided that the best way would be to make it as simple as possible.  I  came up with a simple idea of just placing the ball turret on a clear plastic stand (actually its a small plastic cup!)....it sort of gives it a floating kind of look!...ish!....I didn't place it underneath the fuselage because it just obscured the 9 months of work I did scratch building it! 

I wanted to place both bomb bay doors on so I had to be sure the fuselage sat high enough off the ground to clear the very large bomb bay doors!  So to that end I had to revamp the display stands. There are 4 in total...2 on the front section and 2 at the rear. The rear section stands had to be way higher as the tail lifts up towards the rear...I built these out of reinforced balsa wood (plastic covering) and cocktail sticks! 

I have left an 8 inch gap between the front and rear sections so that you can peer down into the fuselage both front and back and of course as you probably know the top half of the fuselage along its entire length has viewing points to see the interior.


So that is what I did......but first......something was really bothering me about the aluminum skin on the front section back to the radio room. It seemed to be a tad wrinkly here and there. I know exactly why...its because 10 years ago I constructed the front fuselage section completely in a different way to how I built the rear section 8 years down the line!......plus the joins on each section were showing through!.......no it was no good!.....I just had to re skin the front section. .............


Here are the display stands that I built.........


...and here is the finished display........


Cheers for looking in!.....I guess its time to move on now and start thinking of my next project!


Fozzy

  • Member since
    July 2009
  • From: North Carolina
Posted by Back to the bench on Tuesday, November 2, 2021 8:31 AM

Wow truly at a loss for words on this build. Just to have the stamina and determination for such a long project is impressive, but to execute at this level is really amazing! I actually learned a lot about the real aircraft looking at your build thread. Your photography is also amazingly well done and it allows us to appreciate the meticulous detail work even more. I will be looking back through this build thread again and again, both for pleasure and to learn scratch building techniques. Congratulations on completing such a daunting project and thank you for sharing your amazing work.

Gil

Foz
  • Member since
    April 2011
  • From: S.E Bulgaria
Posted by Foz on Tuesday, November 2, 2021 8:50 AM

Back to the bench

Wow truly at a loss for words on this build. Just to have the stamina and determination for such a long project is impressive, but to execute at this level is really amazing! I actually learned a lot about the real aircraft looking at your build thread. Your photography is also amazingly well done and it allows us to appreciate the meticulous detail work even more. I will be looking back through this build thread again and again, both for pleasure and to learn scratch building techniques. Congratulations on completing such a daunting project and thank you for sharing your amazing work.


Thank you for your kind words!

When I started this project 10 years ago it was only going to be the nose section back to the top turret!....I made a display stand for it and put it to bed. I was then encouraged by other model makers that I should continue down the fuselage to the tail!....so what was to be maybe a 2 year project turned into 10 years!....it has been an enormous challenge for me as some of the areas of the B17 I wasn't sure if I could actually replicate! ....but.....All done now and I'm not sure if I would take on such a huge project again!....we shall see!Hmm

JOIN OUR COMMUNITY!

Our community is FREE to join. To participate you must either login or register for an account.

SEARCH FORUMS
FREE NEWSLETTER
By signing up you may also receive reader surveys and occasional special offers. We do not sell, rent or trade our email lists. View our Privacy Policy.