SEARCH FINESCALE.COM

Enter keywords or a search phrase below:

M55 Quad 50 Vietnam crew - Completed 06/15/2010

16863 views
43 replies
1 rating 2 rating 3 rating 4 rating 5 rating
  • Member since
    May 2009
  • From: Poland
M55 Quad 50 Vietnam crew chief
Posted by Pawel on Wednesday, February 10, 2010 6:31 AM

Hello everybody, it's been a long time since I did something with figures, but my quad 50 diorama is movin' on and I decided to add more figures. I'm planning to build a crew chief, I think I'll call him "sarge" and two ammo loaders. I plan to modify the old Tamiya 35079 "Command" set, since it's a good source of Vietnam-era US soldiers WITHOUT load carrying equipment.

So here comes the sarge, out of the box he looks like this:

US NCO in Vietnam 1:35 by Pawel Mroczkowski

The resin head is from Squadron's head set number 7, just after taking the foto I saw that mean air bubble right on the tip of his nose. Gonna hafta fill that - wonder how... Anyhow I plan to transplant this head onto the rest of the figure.

US NCO in Vietnam 1:35 by Pawel Mroczkowski

There's also quite a bit of a sink hole on his back, this is going to be filled too. Sarge is going to carry a pistol with holster, other than that he's going to travel light.

As usual I'm looking for your comments, thanks for reading and have a nice day

Pawel

All comments and critique welcomed. Thanks for your honest opinions!

www.vietnam.net.pl

  • Member since
    September 2004
  • From: Tulsa, Oklahoma
Posted by mm23t on Friday, December 11, 2009 4:03 PM

Nice job on the figure. Be interesting to see everything in position when the quad is finished.

Medals are not "Won", they are "Earned".

Mike..


  • Member since
    May 2009
  • From: Poland
Posted by Pawel on Wednesday, December 9, 2009 4:36 AM

Thanks for the comment deafpanzer, and please excuse me you had to wait for my reply that long. It's always good to see a tutorial but due to different materials everybody uses and even different perception of many things, in the end you just have to practice - it's a bit like playing music, reading about it doesn't get you very far, does it? So here I am, practicing on a Vietnam GI. I thought the jacket had a bit too little shadows, so I tried to add more, I painted the jungle boots and the helmet and the belt. I'm not entirely satisfied, but I think I'm going to call the gunner mission capable now Smile. Here's what he looks like:

Quad 50 Vietnam gunner

Quad 50 Vietnam gunner

Quad 50 Vietnam gunner

One more note, the boot tips look a bit funny, because they need to be trimmed some more in order not to interfere with the front shield of the quad 50. Watch the armor forum HERE for more details. As always I look forward to hear your comments and wish everybody a nice day

Pawel

All comments and critique welcomed. Thanks for your honest opinions!

www.vietnam.net.pl

  • Member since
    April 2009
  • From: Carmel, IN
Posted by deafpanzer on Wednesday, November 18, 2009 9:57 PM

Nice work on the helmet camo!  Your figure looks better now.  I followed Bodge's toot he posted a while ago about figure painting and it helped me alot... but still needs lots of practice to make do it right.  It is a nice break for us to see GI from Vietnam War era instead of WW2 or Gulf Wars...

Andy

  • Member since
    May 2009
  • From: Poland
Posted by Pawel on Wednesday, November 18, 2009 5:10 AM

Hello!

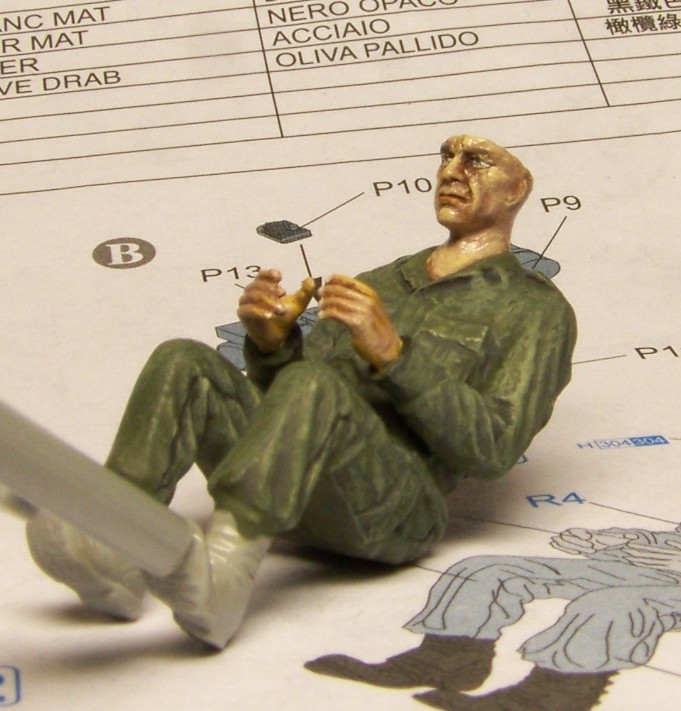
No comments? Pity.. Movin' on! I finished the face, painted the eyes, eyebrows and lower lip. I tried to use subdued colors, that means light gray instead of white, dark grey instead of black and for the lip I mixed tan and a little red.

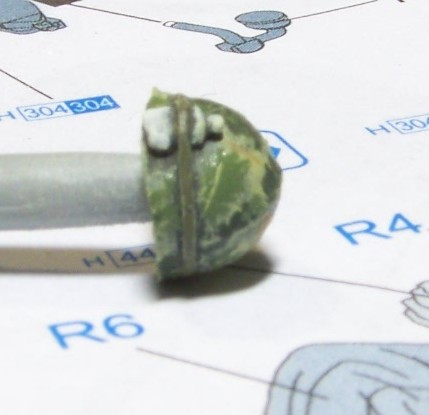
In the meantime I made the helmet. I took it from Dragon's 1st Cav kit (number 3312) together with the insect repellant bottle (I think it was dubbed Bug Juice in vietnam). I replaced the missing part of the universal strap with thin styrene sheet. Like this:

Vietnam Quad 50 gunner 1:35

Vietnam Quad 50 gunner 1:35

Vietnam Quad 50 gunner 1:35

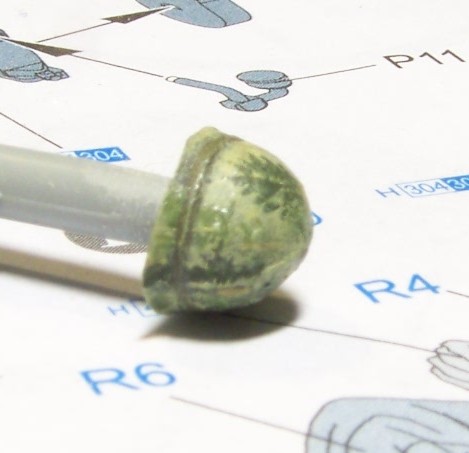
Then I primed the helmet with olive drab, and after it dried I went to paint the mitchell pattern on the helmet cover. I began with a light coat of sand with a little green mixed in. On this coat I painted the "leaves", first with dark green, then with a little lighter green. Finally I added a few tan spots and to finish it off I lightly dry-brushed the helmet with the sand/green base coat. Here's what it looks like now:

def

Then I primed the uniform with dark green, and finally here comes the picture of the whole figure:

Vietnam Quad 50 gunner 1:35

Vietnam Quad 50 gunner 1:35

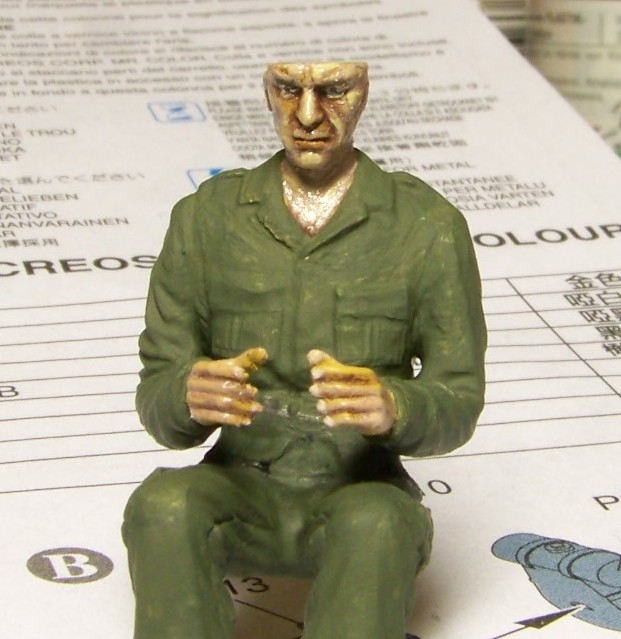
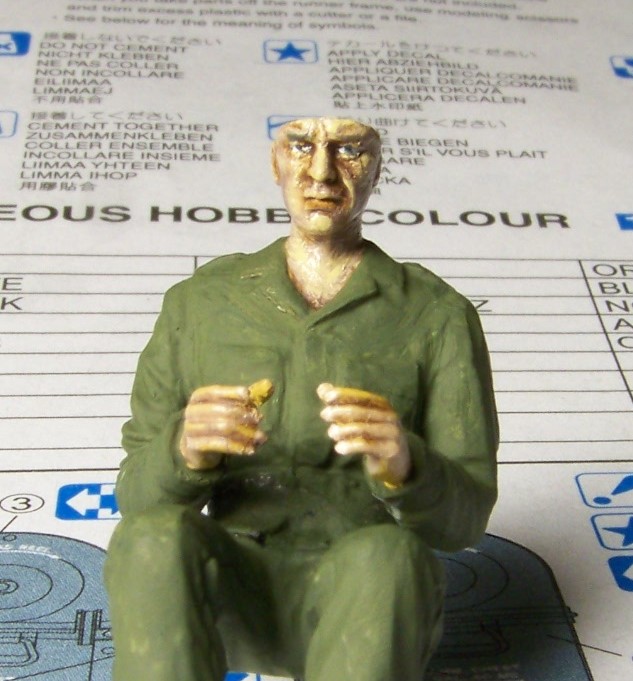
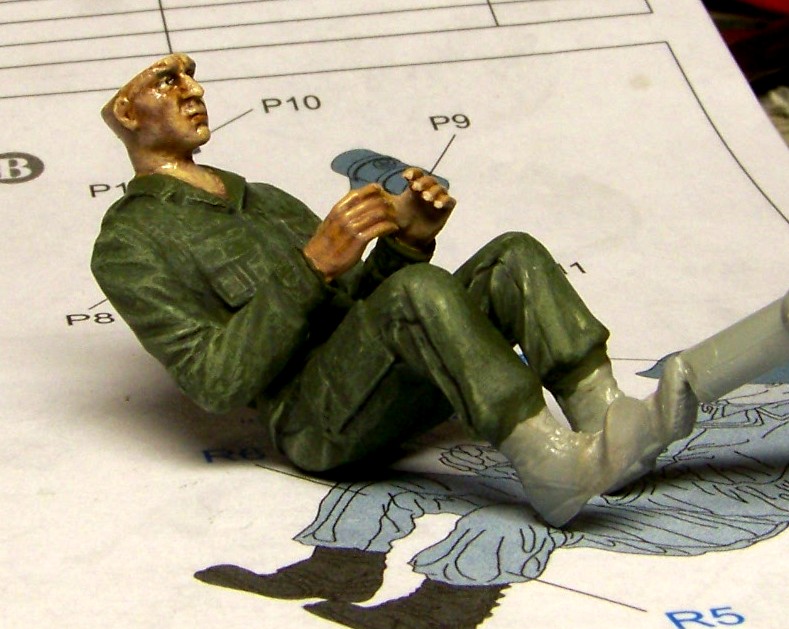
After that I painted the shadows and highlights and the figure started to look like this:

Vietnam Quad 50 gunner 1:35

Vietnam Quad 50 gunner 1:35

And that would be it for now, like they say, critics and comments welcome. Happy modelling to all and have a nice day

Pawel

All comments and critique welcomed. Thanks for your honest opinions!

www.vietnam.net.pl

  • Member since
    May 2009
  • From: Poland
Posted by Pawel on Monday, November 16, 2009 7:43 AM

Hello everybody!

I moved on with painting the flesh. First I painted the shadows with diluted artist oil, the only one I have, dark brown (I think it's called burnt umbra):

Quad 50 Vietnam gunner 1:35

Then, after it dried slightly I mixed some humbrols andstarted painting the highlights. The shadows didn't want to "stay down", the face was to dark and to brown for me:

Quad 50 Vietnam gunner 1:35

So I mixed more white and yellow and went on with the highlights. I also start to see my lighting is insufficient. Now the fig looks like this:

Quad 50 Vietnam gunner 1:35

How do you like the fingernails? By the way, I think Dragon did a really good job on sculpting this face. Looking forward to your comments, have a nice day

Pawel

All comments and critique welcomed. Thanks for your honest opinions!

www.vietnam.net.pl

  • Member since
    December 2003
  • From: Colorado
Posted by psstoff995 on Tuesday, November 10, 2009 7:51 AM
Steel pot's looking good- sorry to hear about the feet, but other than that- can't wait!

-Chris

US Army Infantryman

  • Member since
    May 2009
  • From: Poland
Posted by Pawel on Tuesday, November 10, 2009 5:45 AM

Hello everybody,

movin on with the build. Recently I dry-fitted the steel pot and primed the face and the hands with Humbrol paint. One it dries, I'll do the hard work - I'll paint the face. For now it looks like this:

Quad 50 Vietnam gunner 1:35

It looks like there are going to be some problems with fitting the shield, due to his feet, but that'll have to wait a little, until he's permanently fixed.

Please stay tuned, looking forward to your comments, have a nice day

Pawel

All comments and critique welcomed. Thanks for your honest opinions!

www.vietnam.net.pl

  • Member since
    May 2009
  • From: Poland
Posted by Pawel on Thursday, October 29, 2009 3:13 AM

Thanks a lot Chris, looking forward to see more of Your Vietnam dio!

Steel helmet won't be too hard to do, it still leaves me three options: without liner, with liner but not too heavily loaded or packed with cigarettes, TP and bug juice. As the gunner doesn't wear the web gear, I don't thing going for the "loaded" helmet would be correct, what do you think? Anyhow, happy modeling and have a nice day

Pawel

All comments and critique welcomed. Thanks for your honest opinions!

www.vietnam.net.pl

  • Member since
    December 2003
  • From: Colorado
Posted by psstoff995 on Wednesday, October 28, 2009 11:57 PM

Hey- thanks for remembering that one- I'm sorry to say is hasn't moved along much at all. I had a hang up trying to figure out what to use for vegitation. Then durring the down time I, of course, started a few other projects. I have it sitting right next to my bench though and really want to start back into it- I managed to find some good materials for vegitation at Michaels so we'll see how it turns out, I hope to get started on it again before Xmas.


Let me just say WOW!! That's a great fit, he looks right at home. Nice work on the cuffs.

As for the head gear, I'd think the standard M1 would work fine, although after a quick Google search, it looked like the only pictures of M55 gunners looked like they were from WWII.


-Chris

US Army Infantryman

  • Member since
    May 2009
  • From: Poland
Posted by Pawel on Wednesday, October 28, 2009 6:42 AM

Hello everybody!

Thanks for the comment Chris, how's Your Vietnam dio movin' on? Just can't get enough of nice 1/35 M151'sBig Smile [:D]

And now! ... here's an update.What I did last week was converting the gunner's arms to something more resembling the uniforms worn in Vietnam. I resculpted the cuffs, using pin files and a scalpel with a triangular blade. Let's see two of my favourite before&after photos. On the right - before, on the left - after:

Quad 50 gunner Vietnam

Quad 50 gunner Vietnam

Next came the time to put the main parts together. At this time I had to ensure the man will fit the machine. My method for such things is to join the parts with acetone or other solvent, that melts the plastic and add some acetone-soluble filler to the joint. This allows for joint that stay somewhat flexible for like half an hour plus after it all dries you don't have to putty the joint, just sand it. I dry-fitted the gunner to the gun mount ant also put the steereing yoke in, to adjust the arms, and this is what it looked like in the end:

Quad 50 gunner Vietnam

I'll let the figure dry really good and then sand it some. In the meantime I'd like to ask You all for help:

What would be the correct cover/headgear for the Quad 50 gunner in Vietnam? Thanks a lot in advance,have a nice day

Pawel

All comments and critique welcomed. Thanks for your honest opinions!

www.vietnam.net.pl

  • Member since
    December 2003
  • From: Colorado
Posted by psstoff995 on Monday, October 26, 2009 11:29 PM
Wow- looking great so far, can't wait to see him finished up- and also with the M55!

-Chris

US Army Infantryman

  • Member since
    May 2009
  • From: Poland
Posted by Pawel on Monday, October 19, 2009 9:08 AM

Thanks for Your comment, Steve. I'm on a business trip in Germany now and I'll get back to work as soon as I'm in Poland again. Stay tuned and have a nice day

Pawel

All comments and critique welcomed. Thanks for your honest opinions!

www.vietnam.net.pl

Mic
  • Member since
    June 2009
  • From: AusTx, Live Music Capitol of the World
Posted by Mic on Thursday, October 15, 2009 8:51 AM

Nice conversion work goin' on here. Looking forward to seeing more.

Steve


Steve M.

On the workbench: every tool, paint, brush, glue I own

  • Member since
    May 2009
  • From: Poland
M55 Quad 50 Vietnam crew - Completed 06/15/2010
Posted by Pawel on Thursday, October 15, 2009 8:12 AM

Hello everybody!

I'd like to share my current work with you all. It's a gunner for my M55 Quad 50 serving in Vietnam. I'm building it from the recent relase of the company which sponsors strange bloggers (aka Dragon). Well the kit gets you a gunner, but he wears a very typical WWII uniform, so I decided to modify him. Here's what I did so far: I sawed off his boots and replaced them with jungle boots taken out of older Dragon figure kit. I had to bend the tips some, so the fit inside the armor. I did it Hans von Hammer style (means using open flame - Danke Schon Hans!) and then puttied them a bit and rescribed the soles. I also puttied and sanded the parka an added six pockets in total - two for the pants and four for the parka. In order for the lower pockets to fit I lengthened the body a bit (under the belt) withsome sheet styrene. The pockets are also thin sheet styrene glued with plastic putty and softened with liquid glue (nail lacquer remover would do also) and preshaped while soft. 'Nuff said here is the picture:

M55 Quad 50 Vietnam gunner

As always, I'm waiting for your comments. Thanks in advance and have a nice day

Pawel

All comments and critique welcomed. Thanks for your honest opinions!

www.vietnam.net.pl

JOIN OUR COMMUNITY!

Our community is FREE to join. To participate you must either login or register for an account.

SEARCH FORUMS
FREE NEWSLETTER
By signing up you may also receive reader surveys and occasional special offers. We do not sell, rent or trade our email lists. View our Privacy Policy.