SEARCH FINESCALE.COM

Enter keywords or a search phrase below:

LIS Chariot 1:35

40222 views
676 replies
1 rating 2 rating 3 rating 4 rating 5 rating
  • Member since
    July 2014
  • From: Franklin Wi
Posted by Bakster on Monday, September 25, 2023 8:31 PM

PhoenixG


Bakster
Hey PhoenixG, maybe close your eyes. We are talking color again Lol


ROFLMAO!  Laughed so hard my sides hurt! 

I'm a good sport though.  Here's a great link that shows you how Snowcat Tracks are made with lots of various detailed pictures.

https://www.snowcattracks.com/the-process


Hey, glad you had a good laugh. That makes me laugh.


I will check out the link. Thanks!

  • Member since
    November 2005
  • From: Formerly Bryan, now Arlington, Texas
Posted by CapnMac82 on Tuesday, September 26, 2023 5:47 PM

Saw this today

  • Member since
    April 2003
  • From: USA
Posted by keavdog on Tuesday, September 26, 2023 5:54 PM

LOL!

Thanks,

John

  • Member since
    November 2005
  • From: Formerly Bryan, now Arlington, Texas
Posted by CapnMac82 on Tuesday, September 26, 2023 5:58 PM

Bakster
More info is needed on their construction.

From the link, they go on conveyor belt "rubber" with painted metal cleats.

That makes a wrinkle, doesn't it

Probably a Rubber Black base.  Then, use a gray wash on the tires on the road wheels so that they look a bit different.

From the slide show, those cleats look like they'd want Black Chrome when new.  Looks like they'd weather to a dark steel on the contact surfaces, with chipping along the edges.

Which sounds like a frightening amount of work on the tracks.

Where's Dr Zaius to just read us the answer from the Scrolls when we need him?

  • Member since
    July 2014
  • From: Franklin Wi
Posted by Bakster on Tuesday, September 26, 2023 7:59 PM

keavdog

LOL!


Ditto.

  • Member since
    November 2009
  • From: SW Virginia
Posted by Gamera on Tuesday, September 26, 2023 8:11 PM

LOL guys!!!


Awesome work Bakster! I am not commenting on your colour issues because I can't half see out of one eye and I'm half blind in the other. But what you've got looks great to me. 

Congrads Capt on your new ship, she looks like a nice ride! 


And you ain't kidding about reused props. The other night on 'LiS' (I can't remember the name of the episode) a couple of astronauts showed up in EV suits I swear were from 'Destination Moon' in 1950.  

"I dream in fire but work in clay." -Arthur Machen


  • Member since
    July 2014
  • From: Franklin Wi
Posted by Bakster on Tuesday, September 26, 2023 9:32 PM

CapnMac82


Bakster
More info is needed on their construction.


From the link, they go on conveyor belt "rubber" with painted metal cleats.

That makes a wrinkle, doesn't it

Probably a Rubber Black base.  Then, use a gray wash on the tires on the road wheels so that they look a bit different.

From the slide show, those cleats look like they'd want Black Chrome when new.  Looks like they'd weather to a dark steel on the contact surfaces, with chipping along the edges.


Sounds like we are on the same page.

Which sounds like a frightening amount of work on the tracks.

Did you say work? I am sorry but I have to pull a Smith here. Work does not go well with my weak constitution.

Where's Dr Zaius to just read us the answer from the Scrolls when we need him? Hehe

He is at an archeological dig destroying evidence. He should be back in a few days. YesBeer

  • Member since
    October 2021
Posted by PhoenixG on Thursday, September 28, 2023 7:02 PM

Regarding the tracks.  The stills from the show look like mild wear with the black ground off rather than chipped.  They tended to drive on sandy soils which would be, no pun intended, as if the surfaces were sanded rather than the chipping you get from rockier terrain  Perhaps the black chrome with dry brushing the dark steel on the upper surfaces  in the greatest contact with the ground?

On the Bench:

Bandai Starblazers 2202 Garmillas Zoellugut

  • Member since
    November 2005
  • From: Formerly Bryan, now Arlington, Texas
Posted by CapnMac82 on Friday, September 29, 2023 11:42 AM

PhoenixG
Perhaps the black chrome with dry brushing the dark steel on the upper surfaces in the greatest contact with the ground?

I like the logic of it, and the colors.

Also, that suggests being aboe to lat the tracks out flat and being able to brush across them en masse, and not having to fuss with each, individual, bar.

  • Member since
    July 2014
  • From: Franklin Wi
Posted by Bakster on Friday, September 29, 2023 9:14 PM

How do I black chrome the cleats without individually masking them from the rubber tracks. It's all one piece. I understand the part of dry brushing dark steel on the upper surfaces. That is an easy deal. But painting the cleats a different color from the rubber tracks without masking them, I don't understand. Am I missing soemthing? 

PS: I have the body painted. I have a few things to paint orange and then clear. It's been quite the adventure. More on that later.

  • Member since
    July 2014
  • From: Franklin Wi
Posted by Bakster on Friday, September 29, 2023 9:33 PM

I tend to think I must paint the cleats the same color as the rubber tracks and then dry brush the top surfaces of the cleats in a metal. That has been my plan from the start. I doubt it will be very noticeable that the sides are the same color as the rubber. Both are dark colors and once I dust them up some, should look good enough. For sure though, I won't be masking them.

  • Member since
    November 2005
  • From: Formerly Bryan, now Arlington, Texas
Posted by CapnMac82 on Saturday, September 30, 2023 10:35 AM

Bakster
How do I black chrome the cleats without individually masking them from the rubber tracks. It's all one piece.

Ah, so.  Ok, as a though experiment, paint tracks the rubber color, then brush (with a stiff, square, brush) a gloss coat on the cleats to get them to "look" different.  Then, come back with the steel on the top edge.

Mind, a #2 pencil might be as good for the cleat edges, then a drybrush of silver to taste.

Dunno.  Just spitballing here.

  • Member since
    July 2014
  • From: Franklin Wi
Posted by Bakster on Saturday, September 30, 2023 4:14 PM

CapnMac82


Bakster
How do I black chrome the cleats without individually masking them from the rubber tracks. It's all one piece.


Ah, so.  Ok, as a though experiment, paint tracks the rubber color, then brush (with a stiff, square, brush) a gloss coat on the cleats to get them to "look" different.  Then, come back with the steel on the top edge.

Mind, a #2 pencil might be as good for the cleat edges, then a drybrush of silver to taste.

Dunno.  Just spitballing here.


Hey Capn, now there is a novel idea to use a pencil. I will give that some thought. That might work very well.

And THAT is the beauty of bantering ideas, it leads to breakthroughs.

For fun, and to further enhance PhoenixG's color topic experience (:)), another image. This is from the 1:1. Notice the bottom cleat. You can see the top surface is worn but the side looks black similar to the rubber. I did not expect to see how close they match. 


Thanks for the participation, guys. Always appreciated!


  • Member since
    November 2005
  • From: Formerly Bryan, now Arlington, Texas
Posted by CapnMac82 on Sunday, October 1, 2023 1:21 PM


Bakster

Thanks for the participation, guys. Always appreciated!


That photo shows something I would not have expected.

Note the tire tread on the road wheel.

Normally, for rubber tires with tread, you wan the groundwork color in the tread, and the contact surface the runbber color (and sidewalls of a paler version of the ground contact color).

But, in that photo, the track appears to elevate the ground wheel high enough to not collect road dust.  In fact it almost looks carwash clean (which may be the Occam's Razor answer to the photo).

But, yes, the photo does really suggest using a pencil to highlight the cleats.

I might use two pencils--and HB first and a #2 after.  The first being a touch darker, the latter a bit mor "shiny."  Now, I happen to have a large collection of pencil leads and pencils--so, I'm referring to my reflexes.  I'm not advocating that a person run out and hunt down an HB pencil as the only solution--that's kind of tough sledding any more.

Penci also offers a two-step potential process, too.  Sand-papering the lead will give a person a nice bit of graphite powder which can be used to darken things in the manner of any other weathering powder (although pencil lead has some wax in it).  The nifty part is that the hue will mathc hthe "shiny" from the direct application of the pencil to the part--this can be very subtle and, to pick a word, satisfying.

My 2¢; others' may differ.

  • Member since
    July 2014
  • From: Franklin Wi
Posted by Bakster on Sunday, October 1, 2023 4:43 PM


Normally, for rubber tires with tread, you wan the groundwork color in the tread, and the contact surface the runbber color (and sidewalls of a paler version of the ground contact color).

Hey Capn, I noticed that but I didn't think it through as far as you did. That is an interesting observation about the tire being so clean and why.

I noticed too that the inward side of the cleat system is shinier than the outward. I am assuming that they are connecited as part of the cleats hardware. Maybe a backing out of a different metal? It is hard to tell from that angle. Just an observation.

Thanks about the pencils. I might have some artists pencils that might work too.

  • Member since
    July 2014
  • From: Franklin Wi
Posted by Bakster on Monday, October 2, 2023 11:01 AM

Well, finally, paint is flying... and it is good. It was a journey. 

1. Rather than use primer, I decided to use MRP White lacquer as a sort of primer/base coat. I suspected what happened might happen, but I didn't realize to what degree that it would. And that is... it does little to fill minor scratches. The short of it is I thought I did a good enough job prepping the plastic. The problem wasn't terrible, just not to my liking. And actually, this is another property of this paint that makes it appealing. This paint goes on very thin, thus preserving the detail below. So, I learned, that if I am going to go that route, I need to polish the plastic better. I suppose it will depend on what I am going after, and what the condition of the plastic is. 

2. Problem 1 lead to problem 2. I tried applying heavier coats to fill minor scratches. What I learned, is that is a mistake. Mainly, because I was in the old mindset that hey, I will flood the piece and at the same time, draw out the gloss. That works well for acrylics and enamels, but forget it with lacquer. This paint is so darn forgiving I thought, I might just get away with it. Mostly, I did get away with it, but certain areas where paint pooled... not so. The end result was that the paint crazed. It took me awhile to get it through my thick skull just what was happening. I at first thought I did a crummy job sanding the plastic. I then followed with sanding the affected areas and reapplied. And wouldn't you know it, the problem reappeared when I sprayed it again. I went through two of these cycles when I realized, ok, the paint is crazing.

3. On the third attempt I decided, ok, let's see what this paint does applying lighter coats. Again, being used to acrylics and how they can produce rough finishes, I was skeptical. And boy, was I wrong! This paint is awesome! It went on super smooth and it even has the ability to draw out gloss all on its own. Certainly, not car finish gloss, but the paint went down smooth producing a sheen. 

4. The next step was to try their Super Clear Gloss. I wanted a layer of protection for the color coat, but also, I wanted a deeper shine. I tested it on some spoons and it seemed ok. With a leap of faith... I went for it. And holy cats...again... the paint exceeds my expectations. In the images below you will see just how nice a gloss I achieved. And I tell ya, I didn't even need to work at it. The gloss I got is in my opinion, good enough for a car body, and all without losing massive detail. I am gonna try this on a car model one of these days.

I don't want this post to be all about paint, but it is part of the journey. So, for the last time, here is what I think of this paint:

It comes perfectly thinned for airbrushing. I never need to thin it.

It sprays like silk. What a joy to watch it spray.

It goes onto the model wet, minimizing sandpaper finishes.

Tipdry is a thing of the past.

Not once did I get some sort of glob making it to the model. Acrylics, almost all the time.

The finish is literally perfect. If dust makes it to the model, you can lightly sand it and touch it up. No issues blending. In some cases, I was able to scratch the dust off with my fingernail, and no need to repaint.

It dries to the touch super fast.

I had to mask for the orange and absolutely no evidence of paint pulling up. And, I get clean lines along the paint edge.

In my opinion, it covers well.

The paint keeps a low profile maintaining the models detail.

Cons?

Must do a good job prepping the plastic. If you are not using a primer, the plastic should appear polished. My next step is to paint the tub and I will use a dedicated primer, followed by a light sanding. Looking to see how that goes. And btw. Applying the clear fixed most flaws in the paint/plastic issue.

Fumes, I guess, but I don't find this overly offensive. Though, I have a pretty good evacuation system.

Price, probably. But, I don't mind paying more for a paint that works so darn well... straight from the bottle. The cost of a messed up model far outweighs the cost of this paint. Modeling should be fun. Fighting paint is not fun.

Ok, off my soapbox. 

Here is how they came out. Some of the pieces I didn't shoot for that super gloss. I did so mainly on the pan.

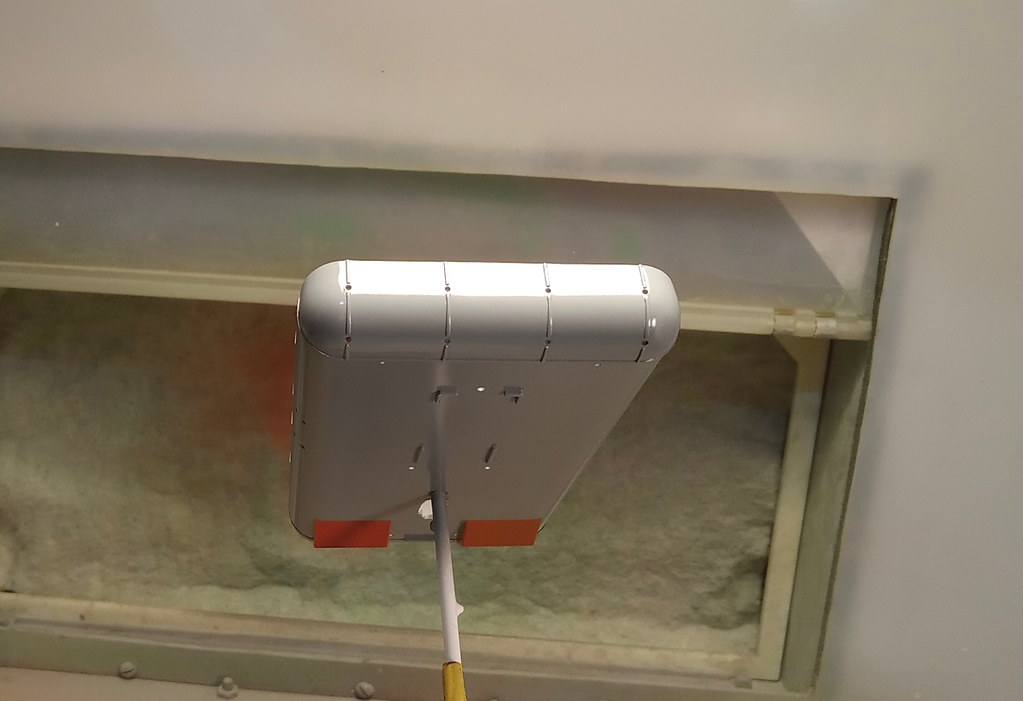
Below. To an astute eye, one might say, hey Bakster. I see a spec in the finish just right of the clip. To which I would say, yeah, you are right. It settled after paint. I blew it off after taking the image.


Below. I dont recall but I think this piece had a rougher finish as molded. Maybe to simulate cast iron. Not sure, but I did not spend much time cleaning it up. For the most part, it won't be seen once the tracks are installed. 


Now, the hard part. Protecting the work from all the wiring and optic work I will be doing.

Next step is to prime the tub. There are hard to reach scratches and a lot of filling was done. Need to see what I missed.


  • Member since
    November 2009
  • From: SW Virginia
Posted by Gamera on Monday, October 2, 2023 11:42 PM

That looks great Bakster! Esp the orange, such a pain to get the gloss to spray well! 

BTW what brand of lacquer is this? Maybe you said and I missed it- in that case I apologize. 


BTW: 'LiS' is leaving Amazon Prime in two weeks! Thankfully I'm down to six episodes or so till finishing off the whole series. The episode I watched tonight, 'The Time Merchant' was pretty darn good! It's about Smith going back in time and altering the timeline and Prof. Robinson, Will, and the Robot having to set time back to how things are 'supposed to go'. 

And a few episodes before that Prof. Robinson, Will, Smith, and the Robot end up in an alternate dimension where they were captured by an evil Major West with a scarred up face and a beard!  

"I dream in fire but work in clay." -Arthur Machen


  • Member since
    July 2014
  • From: Franklin Wi
Posted by Bakster on Thursday, October 5, 2023 10:56 AM

Hey Gam, thanks. The paint is MRP.

Interesting about Amazon. I didn't know that is where you were streaming from or that they had it. 

  • Member since
    November 2009
  • From: SW Virginia
Posted by Gamera on Friday, October 6, 2023 9:40 PM

Thanks Bakster! I've been having uneven luck with gloss paint. I'll give the MRP a try if things get really bad. 

Yeah, Amazon Prime has LiS for about a week left. I'm down to the 'Vegetable Rebellion' one and the last episode now.  

"I dream in fire but work in clay." -Arthur Machen


  • Member since
    November 2009
  • From: SW Virginia
Posted by Gamera on Sunday, October 8, 2023 8:56 PM

Just finished the series with one week to go before it leaves Prime. 

Not a great series but it was fun! 

Thanks for the link to the blooper videos Bakster. That Guy Williams and Julie Lockhart were left out of two episodes because they couldn't stop laughing during 'The Great Vegetable Rebellion' was a hoot. Frankly I'm not sure I'd call it the worst episode of the series... but it was... strange. I've never taken any drugs stronger than caffeine but I swear this is what a bad acid trip must be like...

"I dream in fire but work in clay." -Arthur Machen


  • Member since
    July 2014
  • From: Franklin Wi
Posted by Bakster on Tuesday, October 10, 2023 11:59 AM

Gamera

Just finished the series with one week to go before it leaves Prime. 

Not a great series but it was fun! 

Thanks for the link to the blooper videos Bakster. That Guy Williams and Julie Lockhart were left out of two episodes because they couldn't stop laughing during 'The Great Vegetable Rebellion' was a hoot. Frankly I'm not sure I'd call it the worst episode of the series... but it was... strange. I've never taken any drugs stronger than caffeine but I swear this is what a bad acid trip must be like...


I agree about Guy Williams and June Lockart. Funny stuff. And yeah... one might be high to dream up LIS corn cheese. It was the 60s... probably LSD. Whoa! Dude! I see vegetable people!


  • Member since
    October 2021
Posted by PhoenixG on Thursday, October 12, 2023 5:41 PM

Bakster, that paint looks sharp.  I wouldn't be surprised if the completed model could be substituted for the 1-1.

On the Bench:

Bandai Starblazers 2202 Garmillas Zoellugut

  • Member since
    November 2009
  • From: SW Virginia
Posted by Gamera on Thursday, October 12, 2023 11:07 PM

Hey Bakster- hope you get back to work on her again soon. I'm jonesing for your next update! 

"I dream in fire but work in clay." -Arthur Machen


  • Member since
    April 2003
  • From: USA
Posted by keavdog on Friday, October 13, 2023 7:27 PM

Read this on another site:


Mark Goddard has passed.


www.hollywoodreporter.com/tv/tv-news/mark-goddard-dead-lost-in-space-actor-1235617996/


I know "Lost In Space" was not the best of TV science fiction but it was watched by many, including me, 
after school while in syndication.

He was a teacher a few towns over from me for years. He was a good guy.

RIP Don West

Thanks,

John

  • Member since
    November 2009
  • From: SW Virginia
Posted by Gamera on Friday, October 13, 2023 9:05 PM

keavdog

Read this on another site:


Mark Goddard has passed.


www.hollywoodreporter.com/tv/tv-news/mark-goddard-dead-lost-in-space-actor-1235617996/


I know "Lost In Space" was not the best of TV science fiction but it was watched by many, including me, 
after school while in syndication.

He was a teacher a few towns over from me for years. He was a good guy.

RIP Don West


Oh gosh, so sad to hear that! 

RIP Mr. Goddard... 


And thanks John for letting us know. 

"I dream in fire but work in clay." -Arthur Machen


  • Member since
    July 2014
  • From: Franklin Wi
Posted by Bakster on Saturday, October 14, 2023 10:12 AM

keavdog

Read this on another site:


Mark Goddard has passed.


www.hollywoodreporter.com/tv/tv-news/mark-goddard-dead-lost-in-space-actor-1235617996/


I know "Lost In Space" was not the best of TV science fiction but it was watched by many, including me, 
after school while in syndication.

He was a teacher a few towns over from me for years. He was a good guy.

RIP Don West


Sad to hear this, John. Thanks for advising.

  • Member since
    July 2014
  • From: Franklin Wi
Posted by Bakster on Saturday, October 14, 2023 10:15 AM

Gamera

Hey Bakster- hope you get back to work on her again soon. I'm jonesing for your next update! 


Hey Gam, I hope to have an update this weekend. It won't be much of one because I had a setback primering the tub. Digging myself out. 


  • Member since
    July 2014
  • From: Franklin Wi
Posted by Bakster on Saturday, October 14, 2023 10:17 AM

PhoenixG

Bakster, that paint looks sharp.  I wouldn't be surprised if the completed model could be substituted for the 1-1.


Hey thanks, Phoenix G. Fingers crossed! 

  • Member since
    July 2014
  • From: Franklin Wi
Posted by Bakster on Saturday, October 14, 2023 5:35 PM

Bakster


Gamera

Hey Bakster- hope you get back to work on her again soon. I'm jonesing for your next update! 


Hey Gam, I hope to have an update this weekend. It won't be much of one because I had a setback primering the tub. Digging myself out. 


As mentioned, I had primer issues. I used Mr Surfacer 1500. I have used it before, and generally, it has worked well. It is very similar to Tamiya Fine Surface Primer.

The issue I had was the finish. It was probably the worst finish I have ever painted. The paint produced massive sandpapering. I expected to see vorticing issues around internal structures, but this was off the scale. The entire piece needed serious sanding. To which, I tried. I sanded probably 3/4s of the piece and when I got to the tighter areas around the dash, I threw in the towel. There was just no way I could get in there to clean things up to my liking. Disgusted, it was time for a reset. I soaked the piece in Testors ELO Paint Stripper. Btw. I have had this same issue using Tamiya. Not always, but occasionally it rears it's ugly head. Not sure what the issue is. Old paint? Too much humidity? I just don't know.

It is time to try a different primer. Since I like MRP paint so much, I ordered some of their primer. 

I just got done spraying and it's night and day difference. It sprays as well as their other paints. The finish is near perfect. But, it does little to fill imperfections.

Maybe I expect too much and maybe I need to rethink my process. MRPs primer did what I should probably expect. That is, to go on smooth, and to lay a layer where you can easily see imperfections. Maybe, that is all I should expect. Then it's a matter of fixing the problem areas and reapply. I think this is especially true for pieces that have intricate details. What I don't know yet is how well their primer sands. I will test that tomorrow and when the paint is thoroughly dry. Maybe, hopefully, I am honing in on a new process that works for me. Primers have been a thorn in my side for a long time. Though, I am darn picky. Lol.

Below: Painted using MRP Primer. The finish came out super smooth. 

At this point, I need to switch gears and make the decals. I am running out of time. Soon, it may be too cold to spray the sealer in my garage. 


  • Member since
    July 2014
  • From: Franklin Wi
Posted by Bakster on Sunday, October 15, 2023 4:09 PM

Below: You can see the areas I reapplied CA. These are the problem areas that had depressions. 


Below: Sanded. I will reshoot the primer sometime this week and see how it looks. Notice how the primer feathers. It does not tear, it actually feathers. This answers how well it sands. Bakster likey... a lot.

I gave the tub a quick overall swipe using 1800 grit. It probably didn't need it but it does make the paint even smoother. I am a big proponent of keeping each paint layer smooth. Paint grain is cumulative.

This week I will work on the decal graphics.

JOIN OUR COMMUNITY!

Our community is FREE to join. To participate you must either login or register for an account.

SEARCH FORUMS
FREE NEWSLETTER
By signing up you may also receive reader surveys and occasional special offers. We do not sell, rent or trade our email lists. View our Privacy Policy.