SEARCH FINESCALE.COM

Enter keywords or a search phrase below:

LIS Chariot 1:35

40319 views
677 replies
1 rating 2 rating 3 rating 4 rating 5 rating
  • Member since
    November 2009
  • From: SW Virginia
Posted by Gamera on Friday, October 6, 2023 9:40 PM

Thanks Bakster! I've been having uneven luck with gloss paint. I'll give the MRP a try if things get really bad. 

Yeah, Amazon Prime has LiS for about a week left. I'm down to the 'Vegetable Rebellion' one and the last episode now.  

"I dream in fire but work in clay." -Arthur Machen


  • Member since
    July 2014
  • From: Franklin Wi
Posted by Bakster on Thursday, October 5, 2023 10:56 AM

Hey Gam, thanks. The paint is MRP.

Interesting about Amazon. I didn't know that is where you were streaming from or that they had it. 

  • Member since
    November 2009
  • From: SW Virginia
Posted by Gamera on Monday, October 2, 2023 11:42 PM

That looks great Bakster! Esp the orange, such a pain to get the gloss to spray well! 

BTW what brand of lacquer is this? Maybe you said and I missed it- in that case I apologize. 


BTW: 'LiS' is leaving Amazon Prime in two weeks! Thankfully I'm down to six episodes or so till finishing off the whole series. The episode I watched tonight, 'The Time Merchant' was pretty darn good! It's about Smith going back in time and altering the timeline and Prof. Robinson, Will, and the Robot having to set time back to how things are 'supposed to go'. 

And a few episodes before that Prof. Robinson, Will, Smith, and the Robot end up in an alternate dimension where they were captured by an evil Major West with a scarred up face and a beard!  

"I dream in fire but work in clay." -Arthur Machen


  • Member since
    July 2014
  • From: Franklin Wi
Posted by Bakster on Monday, October 2, 2023 11:01 AM

Well, finally, paint is flying... and it is good. It was a journey. 

1. Rather than use primer, I decided to use MRP White lacquer as a sort of primer/base coat. I suspected what happened might happen, but I didn't realize to what degree that it would. And that is... it does little to fill minor scratches. The short of it is I thought I did a good enough job prepping the plastic. The problem wasn't terrible, just not to my liking. And actually, this is another property of this paint that makes it appealing. This paint goes on very thin, thus preserving the detail below. So, I learned, that if I am going to go that route, I need to polish the plastic better. I suppose it will depend on what I am going after, and what the condition of the plastic is. 

2. Problem 1 lead to problem 2. I tried applying heavier coats to fill minor scratches. What I learned, is that is a mistake. Mainly, because I was in the old mindset that hey, I will flood the piece and at the same time, draw out the gloss. That works well for acrylics and enamels, but forget it with lacquer. This paint is so darn forgiving I thought, I might just get away with it. Mostly, I did get away with it, but certain areas where paint pooled... not so. The end result was that the paint crazed. It took me awhile to get it through my thick skull just what was happening. I at first thought I did a crummy job sanding the plastic. I then followed with sanding the affected areas and reapplied. And wouldn't you know it, the problem reappeared when I sprayed it again. I went through two of these cycles when I realized, ok, the paint is crazing.

3. On the third attempt I decided, ok, let's see what this paint does applying lighter coats. Again, being used to acrylics and how they can produce rough finishes, I was skeptical. And boy, was I wrong! This paint is awesome! It went on super smooth and it even has the ability to draw out gloss all on its own. Certainly, not car finish gloss, but the paint went down smooth producing a sheen. 

4. The next step was to try their Super Clear Gloss. I wanted a layer of protection for the color coat, but also, I wanted a deeper shine. I tested it on some spoons and it seemed ok. With a leap of faith... I went for it. And holy cats...again... the paint exceeds my expectations. In the images below you will see just how nice a gloss I achieved. And I tell ya, I didn't even need to work at it. The gloss I got is in my opinion, good enough for a car body, and all without losing massive detail. I am gonna try this on a car model one of these days.

I don't want this post to be all about paint, but it is part of the journey. So, for the last time, here is what I think of this paint:

It comes perfectly thinned for airbrushing. I never need to thin it.

It sprays like silk. What a joy to watch it spray.

It goes onto the model wet, minimizing sandpaper finishes.

Tipdry is a thing of the past.

Not once did I get some sort of glob making it to the model. Acrylics, almost all the time.

The finish is literally perfect. If dust makes it to the model, you can lightly sand it and touch it up. No issues blending. In some cases, I was able to scratch the dust off with my fingernail, and no need to repaint.

It dries to the touch super fast.

I had to mask for the orange and absolutely no evidence of paint pulling up. And, I get clean lines along the paint edge.

In my opinion, it covers well.

The paint keeps a low profile maintaining the models detail.

Cons?

Must do a good job prepping the plastic. If you are not using a primer, the plastic should appear polished. My next step is to paint the tub and I will use a dedicated primer, followed by a light sanding. Looking to see how that goes. And btw. Applying the clear fixed most flaws in the paint/plastic issue.

Fumes, I guess, but I don't find this overly offensive. Though, I have a pretty good evacuation system.

Price, probably. But, I don't mind paying more for a paint that works so darn well... straight from the bottle. The cost of a messed up model far outweighs the cost of this paint. Modeling should be fun. Fighting paint is not fun.

Ok, off my soapbox. 

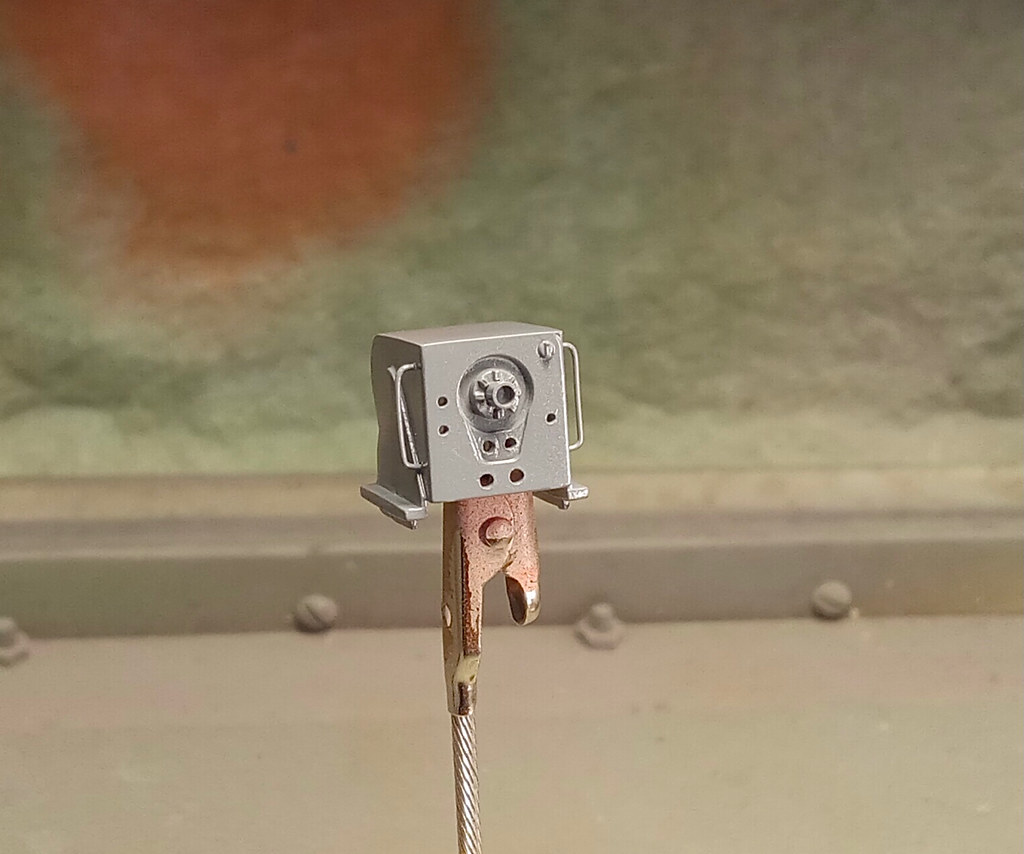
Here is how they came out. Some of the pieces I didn't shoot for that super gloss. I did so mainly on the pan.

Below. To an astute eye, one might say, hey Bakster. I see a spec in the finish just right of the clip. To which I would say, yeah, you are right. It settled after paint. I blew it off after taking the image.

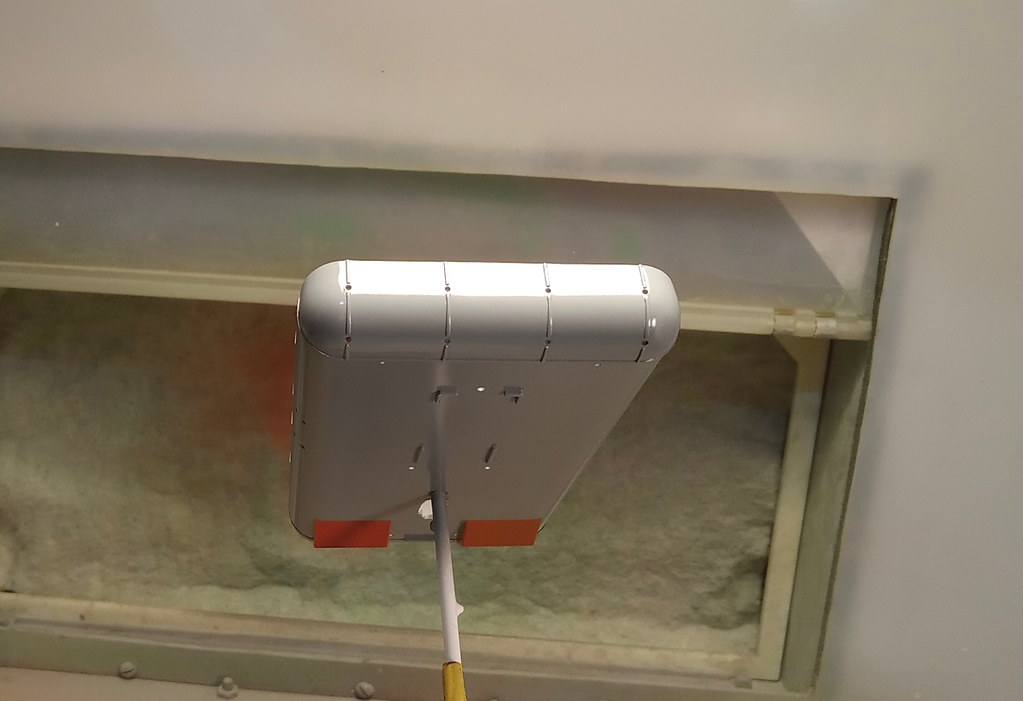

Below. I dont recall but I think this piece had a rougher finish as molded. Maybe to simulate cast iron. Not sure, but I did not spend much time cleaning it up. For the most part, it won't be seen once the tracks are installed. 


Now, the hard part. Protecting the work from all the wiring and optic work I will be doing.

Next step is to prime the tub. There are hard to reach scratches and a lot of filling was done. Need to see what I missed.


  • Member since
    July 2014
  • From: Franklin Wi
Posted by Bakster on Sunday, October 1, 2023 4:43 PM


Normally, for rubber tires with tread, you wan the groundwork color in the tread, and the contact surface the runbber color (and sidewalls of a paler version of the ground contact color).

Hey Capn, I noticed that but I didn't think it through as far as you did. That is an interesting observation about the tire being so clean and why.

I noticed too that the inward side of the cleat system is shinier than the outward. I am assuming that they are connecited as part of the cleats hardware. Maybe a backing out of a different metal? It is hard to tell from that angle. Just an observation.

Thanks about the pencils. I might have some artists pencils that might work too.

  • Member since
    November 2005
  • From: Formerly Bryan, now Arlington, Texas
Posted by CapnMac82 on Sunday, October 1, 2023 1:21 PM


Bakster

Thanks for the participation, guys. Always appreciated!


That photo shows something I would not have expected.

Note the tire tread on the road wheel.

Normally, for rubber tires with tread, you wan the groundwork color in the tread, and the contact surface the runbber color (and sidewalls of a paler version of the ground contact color).

But, in that photo, the track appears to elevate the ground wheel high enough to not collect road dust.  In fact it almost looks carwash clean (which may be the Occam's Razor answer to the photo).

But, yes, the photo does really suggest using a pencil to highlight the cleats.

I might use two pencils--and HB first and a #2 after.  The first being a touch darker, the latter a bit mor "shiny."  Now, I happen to have a large collection of pencil leads and pencils--so, I'm referring to my reflexes.  I'm not advocating that a person run out and hunt down an HB pencil as the only solution--that's kind of tough sledding any more.

Penci also offers a two-step potential process, too.  Sand-papering the lead will give a person a nice bit of graphite powder which can be used to darken things in the manner of any other weathering powder (although pencil lead has some wax in it).  The nifty part is that the hue will mathc hthe "shiny" from the direct application of the pencil to the part--this can be very subtle and, to pick a word, satisfying.

My 2¢; others' may differ.

  • Member since
    July 2014
  • From: Franklin Wi
Posted by Bakster on Saturday, September 30, 2023 4:14 PM

CapnMac82


Bakster
How do I black chrome the cleats without individually masking them from the rubber tracks. It's all one piece.


Ah, so.  Ok, as a though experiment, paint tracks the rubber color, then brush (with a stiff, square, brush) a gloss coat on the cleats to get them to "look" different.  Then, come back with the steel on the top edge.

Mind, a #2 pencil might be as good for the cleat edges, then a drybrush of silver to taste.

Dunno.  Just spitballing here.


Hey Capn, now there is a novel idea to use a pencil. I will give that some thought. That might work very well.

And THAT is the beauty of bantering ideas, it leads to breakthroughs.

For fun, and to further enhance PhoenixG's color topic experience (:)), another image. This is from the 1:1. Notice the bottom cleat. You can see the top surface is worn but the side looks black similar to the rubber. I did not expect to see how close they match. 


Thanks for the participation, guys. Always appreciated!


  • Member since
    November 2005
  • From: Formerly Bryan, now Arlington, Texas
Posted by CapnMac82 on Saturday, September 30, 2023 10:35 AM

Bakster
How do I black chrome the cleats without individually masking them from the rubber tracks. It's all one piece.

Ah, so.  Ok, as a though experiment, paint tracks the rubber color, then brush (with a stiff, square, brush) a gloss coat on the cleats to get them to "look" different.  Then, come back with the steel on the top edge.

Mind, a #2 pencil might be as good for the cleat edges, then a drybrush of silver to taste.

Dunno.  Just spitballing here.

  • Member since
    July 2014
  • From: Franklin Wi
Posted by Bakster on Friday, September 29, 2023 9:33 PM

I tend to think I must paint the cleats the same color as the rubber tracks and then dry brush the top surfaces of the cleats in a metal. That has been my plan from the start. I doubt it will be very noticeable that the sides are the same color as the rubber. Both are dark colors and once I dust them up some, should look good enough. For sure though, I won't be masking them.

  • Member since
    July 2014
  • From: Franklin Wi
Posted by Bakster on Friday, September 29, 2023 9:14 PM

How do I black chrome the cleats without individually masking them from the rubber tracks. It's all one piece. I understand the part of dry brushing dark steel on the upper surfaces. That is an easy deal. But painting the cleats a different color from the rubber tracks without masking them, I don't understand. Am I missing soemthing? 

PS: I have the body painted. I have a few things to paint orange and then clear. It's been quite the adventure. More on that later.

  • Member since
    November 2005
  • From: Formerly Bryan, now Arlington, Texas
Posted by CapnMac82 on Friday, September 29, 2023 11:42 AM

PhoenixG
Perhaps the black chrome with dry brushing the dark steel on the upper surfaces in the greatest contact with the ground?

I like the logic of it, and the colors.

Also, that suggests being aboe to lat the tracks out flat and being able to brush across them en masse, and not having to fuss with each, individual, bar.

  • Member since
    October 2021
Posted by PhoenixG on Thursday, September 28, 2023 7:02 PM

Regarding the tracks.  The stills from the show look like mild wear with the black ground off rather than chipped.  They tended to drive on sandy soils which would be, no pun intended, as if the surfaces were sanded rather than the chipping you get from rockier terrain  Perhaps the black chrome with dry brushing the dark steel on the upper surfaces  in the greatest contact with the ground?

On the Bench:

Bandai Starblazers 2202 Garmillas Zoellugut

  • Member since
    July 2014
  • From: Franklin Wi
Posted by Bakster on Tuesday, September 26, 2023 9:32 PM

CapnMac82


Bakster
More info is needed on their construction.


From the link, they go on conveyor belt "rubber" with painted metal cleats.

That makes a wrinkle, doesn't it

Probably a Rubber Black base.  Then, use a gray wash on the tires on the road wheels so that they look a bit different.

From the slide show, those cleats look like they'd want Black Chrome when new.  Looks like they'd weather to a dark steel on the contact surfaces, with chipping along the edges.


Sounds like we are on the same page.

Which sounds like a frightening amount of work on the tracks.

Did you say work? I am sorry but I have to pull a Smith here. Work does not go well with my weak constitution.

Where's Dr Zaius to just read us the answer from the Scrolls when we need him? Hehe

He is at an archeological dig destroying evidence. He should be back in a few days. YesBeer

  • Member since
    November 2009
  • From: SW Virginia
Posted by Gamera on Tuesday, September 26, 2023 8:11 PM

LOL guys!!!


Awesome work Bakster! I am not commenting on your colour issues because I can't half see out of one eye and I'm half blind in the other. But what you've got looks great to me. 

Congrads Capt on your new ship, she looks like a nice ride! 


And you ain't kidding about reused props. The other night on 'LiS' (I can't remember the name of the episode) a couple of astronauts showed up in EV suits I swear were from 'Destination Moon' in 1950.  

"I dream in fire but work in clay." -Arthur Machen


  • Member since
    July 2014
  • From: Franklin Wi
Posted by Bakster on Tuesday, September 26, 2023 7:59 PM

keavdog

LOL!


Ditto.

  • Member since
    November 2005
  • From: Formerly Bryan, now Arlington, Texas
Posted by CapnMac82 on Tuesday, September 26, 2023 5:58 PM

Bakster
More info is needed on their construction.

From the link, they go on conveyor belt "rubber" with painted metal cleats.

That makes a wrinkle, doesn't it

Probably a Rubber Black base.  Then, use a gray wash on the tires on the road wheels so that they look a bit different.

From the slide show, those cleats look like they'd want Black Chrome when new.  Looks like they'd weather to a dark steel on the contact surfaces, with chipping along the edges.

Which sounds like a frightening amount of work on the tracks.

Where's Dr Zaius to just read us the answer from the Scrolls when we need him?

  • Member since
    April 2003
  • From: USA
Posted by keavdog on Tuesday, September 26, 2023 5:54 PM

LOL!

Thanks,

John

  • Member since
    November 2005
  • From: Formerly Bryan, now Arlington, Texas
Posted by CapnMac82 on Tuesday, September 26, 2023 5:47 PM

Saw this today

  • Member since
    July 2014
  • From: Franklin Wi
Posted by Bakster on Monday, September 25, 2023 8:31 PM

PhoenixG


Bakster
Hey PhoenixG, maybe close your eyes. We are talking color again Lol


ROFLMAO!  Laughed so hard my sides hurt! 

I'm a good sport though.  Here's a great link that shows you how Snowcat Tracks are made with lots of various detailed pictures.

https://www.snowcattracks.com/the-process


Hey, glad you had a good laugh. That makes me laugh.


I will check out the link. Thanks!

  • Member since
    October 2021
Posted by PhoenixG on Monday, September 25, 2023 2:35 PM

Bakster
Hey PhoenixG, maybe close your eyes. We are talking color again Lol


ROFLMAO!  Laughed so hard my sides hurt! 

I'm a good sport though.  Here's a great link that shows you how Snowcat Tracks are made with lots of various detailed pictures.

https://www.snowcattracks.com/the-process

On the Bench:

Bandai Starblazers 2202 Garmillas Zoellugut

  • Member since
    July 2014
  • From: Franklin Wi
Posted by Bakster on Monday, September 25, 2023 1:11 PM

Capn, I guess in this scenario where the tracks ride on rubber tires, do the tracks have some sort of steel reinforced rubberized belt with metal cleats? And if yes... then does the burnt metal still make sence? I am waffling now. More info is needed on their construction.

  • Member since
    July 2014
  • From: Franklin Wi
Posted by Bakster on Monday, September 25, 2023 1:04 PM

Here is John's image from an earlier post.


Hey PhoenixG, maybe close your eyes. We are talking color again

Lol

  • Member since
    July 2014
  • From: Franklin Wi
Posted by Bakster on Monday, September 25, 2023 1:00 PM

Capn, that is interesting your idea about using burnt iron. It is somewhat of a divergence from the norm. Most paint the tracks rubber black and perhaps highlight the contact surfaces silver. One builder had the rims as white, and the instructions have them white, though I see the 1:1 have them silver. I have to tell you, your idea for burnt iron intrigues me. That would make this thing really stand out. I am gonna give that some serious consideration. And of course yes, the contact surfaces will have a silver of some sort to show wear. I also plan to add ground dust to the mix. Afterall, it's a dusty planet, and this contraption has already seen some serious milage. 

Thanks for the unput.

  • Member since
    November 2005
  • From: Formerly Bryan, now Arlington, Texas
Posted by CapnMac82 on Monday, September 25, 2023 12:22 PM

Bakster
were Fords. I have had good luck with them.

I have FLM dealers as family (but have not bought from them).  I've gotten some "inside baseball" info from those folk, though.  They have put me on to some great deals, though--rides I basically drove the wheels off of.

Between the data screen in the middle of the cluster, and the 8" "infotainment" screen and the middle of the dash, sits my Magellan GPS, so it can feel a bit like al lthe "stuff" on the Chariot.  :-)  I'm almost glad I did not find a Titanium trim level, as those have a HUD that displays on the windshield  o_O

Back to Chariot, have you started thinking much about the track?  Even with all the variations in how the phots render, the tracks always appear rather shiny-new.  A sort of zinc color.  Not sure how that would render in model form, though. 

With my experience with metal-track excavators, I'd be inclined to a Burnt Iron primer/base coat, with a thin/wash coat of Steel over that, then highlight the outside contact surfaces in a silver sort of color.  Where the road wheels rub probably would want a gunmetal sort of color, and the remainder a zinc sort of color with a black wash before dirt and dust coats.

But, that's just me thinking out loud.


  • Member since
    July 2014
  • From: Franklin Wi
Posted by Bakster on Monday, September 25, 2023 10:15 AM

CapnMac82

As to chosing FoMoCo, it's kind of a family thing, a reflex as much as a deliberate choice.

But, it's not pure reflex as my work requires travel, so, I'm in rentals pretty frequently.  In the last eight weeks I'be been in a Jeep Compass, a Chevy Tahoe, a Toyota 4Runner, and even a Ford Edge.

Getting into that Toyota was bit like leaping into the Chariot without a briefing on the controls.  Trying to decypher the cruise control at 0600 can be les-than ideal.  (It's somewhat distressing to contemplate being more able to jump into an excavator and be more familiar with the controls.)

Which gets us, full circle, back to the interio of the Chariot.  I'm not remembering how the sterring was depicted in the series.  The SnoCats the Chariot is based upon have both wheel, tiller, and brake lever steering.  The wheel and tiller sterring run much like a car, turn the control in the direction of wanted movement.  With brake levers, you pull back on the side you want to be the inside of a curve.  (On some venicles with clutch lever steering, you push forward, instead.)

Which steering system can affect how many and what sort of pedals are on the floor, too.  From memory, SnoCats use a lever to set the acceleration, not a foot bedal.


My last two vehicles were Fords. I have had good luck with them. Very few repairs and what I did do, mostly under warranty. And what helps too is there is a Ford dealer within walking distance from my house. Along with that, the dealer has always been fair with their pricing. They even have their own quick lube. It's worked well for me. No reason to change at this time.

  • Member since
    July 2014
  • From: Franklin Wi
Posted by Bakster on Monday, September 25, 2023 10:08 AM

It's one of the first things I noticed, and evoked memories of out discussions here for rendering the Chariot.


So, now, every time you get into the car, you can pretend it's the chariot. Your GPS is your terrain scanner. Stick out tongue

Thanks for the additional info on color. 

  • Member since
    July 2014
  • From: Franklin Wi
Posted by Bakster on Monday, September 25, 2023 10:00 AM

LOL I was beginning to think the Chariot was all about curtains and color selection.  Good to see the rest of it still exists! 


Yeah, that is how it goes sometimes. At the least it makes for interesting discussions. I learned some things from it. Primarily, how untrustworthy images are and especially those taken from film stock.


After hearing/seeing your work with it I've decided it's time to turn my current bottle of Tamiya extra thin into sprue goo bottle. Just as soon as I get a second one for normal use.  :)


Awesome! It is one of those things that the more you use it, the more uses you find for it. I often use it to shoreup internal structures and in place of hobby epoxy. Hobby epoxy has  failed me far too many times. I consider it garbage.

Btw. A couple of tips.

1. I would suggest using sprue from modern plastic. Years back and my first attempts did not go well. I used sprue from an old kit. Second to that, I used Tenax instead of Tamiya. I am not completely sure which caused the problem, maybe both, but the mixture caused serious gassing that produced serious air bubbles. It was pretty much useless. The resulting divots were horrendouse. Since going to Tamiya and modern kit plastic, no such issues. When first making it, try to give the mixture several days to gas out. During the initial stirring of plastic air gets trapped. Anyhow, now a days, I never see bubbles and divots.

2. I made two batches. One from white and one from grey. It helps with color matching. Just a me thing, though.

I hope I am not stating the obvious on the above.

It is an interesting serendipity FSM released a video on the subject just as I was using it. Crazy timing.

https://youtu.be/PGYY7bTfFIE?si=jVRcLN26Sz5YRzmF


  • Member since
    October 2021
Posted by PhoenixG on Sunday, September 24, 2023 11:20 PM

LOL I was beginning to think the Chariot was all about curtains and color selection.  Good to see the rest of it still exists! Big Smile

After hearing/seeing your work with it I've decided it's time to turn my current bottle of Tamiya extra thin into sprue goo bottle. Just as soon as I get a second one for normal use.  :)

After hearing all the accolades for the stuff from other posters and seeing the examples of where you've used it Bakster, it looks to be one of those core tools every modeler should have.  I have a sneaking suspicion my current build will be getting a liberal dose of the stuff.

On the Bench:

Bandai Starblazers 2202 Garmillas Zoellugut

  • Member since
    November 2005
  • From: Formerly Bryan, now Arlington, Texas
Posted by CapnMac82 on Sunday, September 24, 2023 5:26 PM

As to chosing FoMoCo, it's kind of a family thing, a reflex as much as a deliberate choice.

But, it's not pure reflex as my work requires travel, so, I'm in rentals pretty frequently.  In the last eight weeks I'be been in a Jeep Compass, a Chevy Tahoe, a Toyota 4Runner, and even a Ford Edge.

Getting into that Toyota was bit like leaping into the Chariot without a briefing on the controls.  Trying to decypher the cruise control at 0600 can be les-than ideal.  (It's somewhat distressing to contemplate being more able to jump into an excavator and be more familiar with the controls.)

Which gets us, full circle, back to the interio of the Chariot.  I'm not remembering how the sterring was depicted in the series.  The SnoCats the Chariot is based upon have both wheel, tiller, and brake lever steering.  The wheel and tiller sterring run much like a car, turn the control in the direction of wanted movement.  With brake levers, you pull back on the side you want to be the inside of a curve.  (On some venicles with clutch lever steering, you push forward, instead.)

Which steering system can affect how many and what sort of pedals are on the floor, too.  From memory, SnoCats use a lever to set the acceleration, not a foot bedal.

  • Member since
    November 2005
  • From: Formerly Bryan, now Arlington, Texas
Posted by CapnMac82 on Sunday, September 24, 2023 5:07 PM

Bakster
And, the million dollar question. Is the color in your image accurate? Or is it skewed by lighting, camera, or other. Hehe.

It's one of the first things I noticed, and evoked memories of out discussions here for rendering the Chariot.

In some light, my [new, it's a '22] ride is near black, in others it's a pale "gunmetal" and very much more gray.  Phone camera tends to render it dark, as do computer monitors.  But, in indirect light, it's lighter than the images depicted on the phone.

Or, very much the sort of range that the various refernce photos show of the Chariot.  The in-stuido photos are going to be affected by the amount, and the color balance, of the stage lighting.  The oudoor views will be afected by the sunlight and color balnce of the film used.  Ektachrome will have a blue bias; Kodachrome will have a warm sort of bias.

We are back to how modeling wants to be representational. 

Which is part of the "why" of how I will use a medium blue primer for some white-finished things; and rattle can silver for white painted things like aircraft or space craft.

JOIN OUR COMMUNITY!

Our community is FREE to join. To participate you must either login or register for an account.

SEARCH FORUMS
FREE NEWSLETTER
By signing up you may also receive reader surveys and occasional special offers. We do not sell, rent or trade our email lists. View our Privacy Policy.