SEARCH FINESCALE.COM

Enter keywords or a search phrase below:

Old Ironsides - Revisiting the classic Revell 1/96 kit

208371 views
510 replies
1 rating 2 rating 3 rating 4 rating 5 rating
  • Member since
    June 2010
  • From: Irvine, CA
Old Ironsides - Revisiting the classic Revell 1/96 kit
Posted by Force9 on Monday, April 30, 2012 11:44 PM

Folks

I've started a few posts in other forums for my latest build - thought I'd better start one up here for anyone who doesn't patrol the other sites and might want to comment and help guide my progress.  (I apologize in advance for the initial brain dump)

 I’ve had a Revell 1/96 USS Constitution fall into my stash at a very reasonable price (Overstock.com) and it seems appropriate to take it on in recognition of the upcoming anniversary of USS Constitution’s victory over HMS Guerriere on August 19.

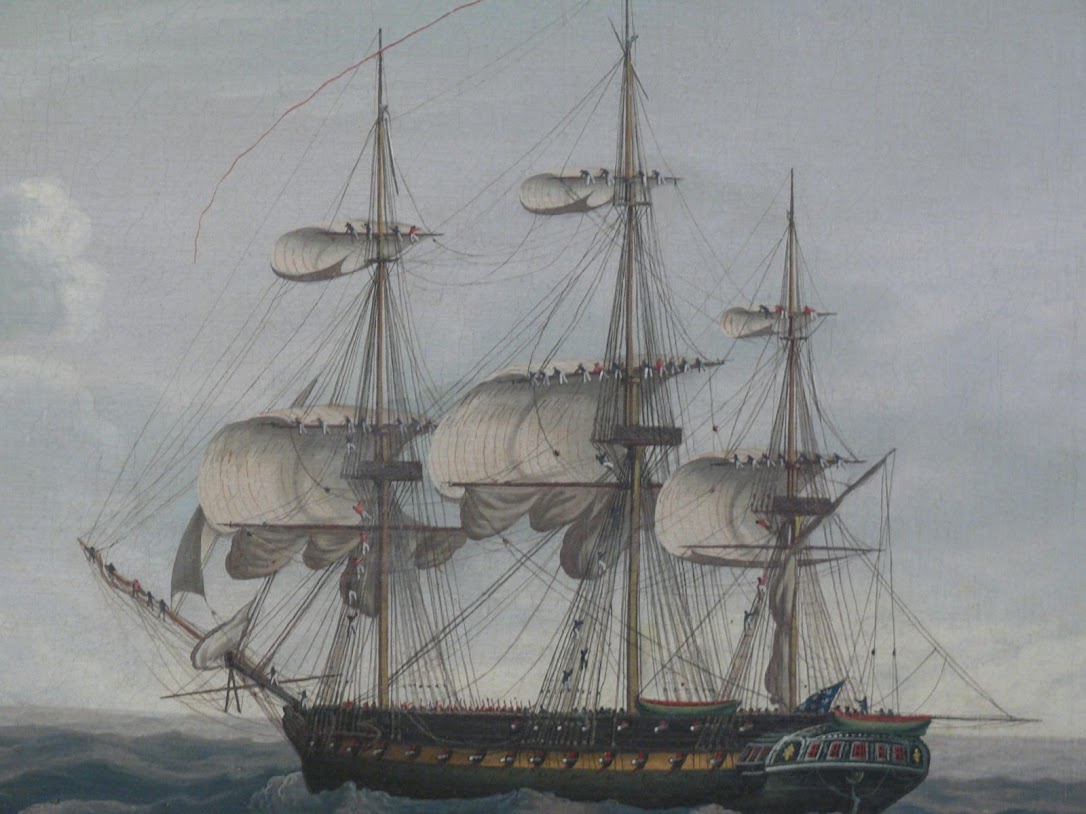
I’ve been spewing forth much hot air in defense of the Michel Felice Corne paintings and their representation of the ship as she first burst into glory against HMS Guerriere, so I feel obligated to back up my tirades with action. I’ll try to make this version align very closely to what we see in these paintings commissioned by Captain Hull immediately after his victory

Corne Costitution - The Approach

https://photos.app.goo.gl/G3uGauhVgL5rJpKN9

This does mean that I’ll set aside my Heller HMS Victory build for a time - I haven’t lost a bit of enthusiasm for that project - but I’ll apply what I learn in this new effort towards making that one better down the line.

Like many of us (most of us?) I’ve built this kit before... a few decades (or more) back. It seems to have been almost a rite of passage for anyone wanting to take ship modeling seriously. I’ll call that one the MK 1 version and it still exists in a dusty condition on a high shelf in the garage:

Revell Mark 1 View 1

Revell Mark 1 View 2

I was never happy with that earlier effort. Much has happened in the intervening years to improve my chances of making a more representative kit - most notably the proliferation of great information on the internet to inform my approach.

This venerable kit was originally issued back... well, back before some of us were born(!)... and I think it still holds up well. Certainly there is plenty of flash and injection moulding marks that we don't see in modern kits, but the kit still makes up into an impressive display as we can see in the various log entries across this forum.  It seems to be a copy of the 1/48 George Campbell plan model in the Smithsonian collection (http://www.modelshipgallery.com/gallery/misc/sail/constitution-48-sm/con-index.html) - which itself is a refinement of the famous Hull model built by the crew and presented to Captain Hull following his victory over Guerriere

(https://photos.app.goo.gl/74RBUpABk4sd16io7)

We see plenty of similarities in the bow and stern between the models and the Revell color guide somewhat follows the original. So the question becomes - does this Revell kit align well to the configuration of the Constitution when she earned her “Old Ironsides” moniker against HMS Guerriere? Well, strictly speaking no... In fact, if built OOB it would not actually represent Constitution as she was configured in any of her wartime cruises. There is a critical difference between the historic model and her modern copy - the Hull model shows 15 gun ports on each side of her gun deck (although the forward most are a bit too far forward) and the Revell kit shows 16. The difference is explained by this journal entry from Frederick Baury - one of Constitution’s midshipmen:

21 Sep 1812  Carpenters cutting bridle ports in bows ‑‑ Lieutenant Morgan and Midshipman Taylor left on recruiting duty.

After returning to Boston following the battle, Isaac Hull resigned and command was handed over to the much despised William Bainbridge. He proceeded to make a few changes including the addition of “bridle ports” up forward to help in towing, anchoring, and to potentially serve as bow chaser positions. Unlike the guidance provided by the Revell instructions, these positions would not normally have had a gun mounted. If needed during a chase, a nearby 24-pounder would be hauled into one of these spots to lob a few shots and try for a lucky hit to take out a spar and slow down the prey. To that end Bainbridge made another change as outlined by Commander Tyrone Martin in his overview of Constitution’s armament:

Following his succession to command of the ship on 15 September 1812, Commodore William Bainbridge eliminated the 18-pounder, simplifying his ammunition loading and handling problem by dropping one caliber. The gun had been virtually useless, anyway, since the ship's bow structure was not well suited to the accommodation of a chase gun.

Bainbridge may have been a jerk of a human being, but he was an astute naval commander and he thought it made more sense to offload the 18 pdr chase gun and make room to store more 24 pdr ammunition for his main guns.

So the 16 gun ports and the spar deck bow chaser as provided in the kit could not co-exist. The easiest solution to bring things into alignment is to ditch the bow chaser and the two forward main deck guns and call it a day. You’d likely have the correct representation of Constitution’s configuration when she scored her victory over HMS Java. Since I am trying to show her during the battle with HMS Guerriere, I will preserve the bow chaser gun, but I will need to take the drastic step of filling in the forward bridle ports. 

If you want to represent her last war cruise under Charles Stewart, then you’ll have to revisit the carronades on the spar deck. Here again Commander Martin provides some insight:

[Charles Stewart] reduced the number of carronades to twenty and added two 24-pounder "shifting gunades" recently captured from the British by an American privateer. Designed by Sir William Congreve in 1814, each was 8' 6" long, but being of thinner barrel construction weighed only about 5000 pounds on carriage. The design was an attempt to combine the range of a long gun with the lighter weight of a carronade. The pair sat on carriages like the long guns, and it was expected that, since they were lighter, they could readily be shifted from side to side as combat required.


Gunnade

Apparently Stewart had the two forward most and two aft most carronades removed and replaced with one each of the newfangled gunnades. I have no idea how these actually looked when mounted on a carriage, but it might be possible to find slightly over scale carronade barrels and mount them to the two gun carriages no longer needed on the main gun deck. Oh, and you’d also need to paint her with a yellow band - that is well documented.

Regarding the carronades... As represented in the kit with the wooden quoins, these would seem to be rather quaint. The carriages on the foredeck with their small trucks would also seem to be inappropriate for 1812. Certainly by the time of Trafalgar it would be more typical for a carronade to be mounted with a pin to the bulwark with trajectory controlled by an elevation screw. I think Karl Heinz Marquardt addresses these same concerns in his AOTS book since the restored ship has these outmoded versions still represented. I’ll optimistically try to modify all of the carronades to include the elevation screws and eliminate the funky rolling carriages on the foredeck.

Many folks get caught up in the various permutations of the stern gallery windows. Were there six or five?... or three or eight? The Hull model shows six, but the Corne paintings have five... I’m frankly not concerned either way. I assume there were many chances for the configuration to have changed across the years as different commanders supervised different refits within different time and budget limitations. Perhaps Hull and his crew replaced the six windows with only five after destroying the original gallery windows during their escape from Broke’s squadron (they axed out the windows and some of the transom to position guns to fire at their pursuers). Maybe there were always six and Corne got this wrong. Nobody knows the truth and we likely never will... I’m fine with working with the six depicted on the kit.

The rudder on this kit is a bit perplexing... It is moulded with wood grain without any copper plating represented. Hmmm... That doesn’t seem correct. I’ll ponder the idea of putting some of my extra styrene strips to work and setting that right.

Of course the kit provided plastic eyelets and rings are worthless - easily broken and a bit over scale. Those will be replaced with wire or PE versions. Somehow I managed to not break any of the plastic hammock cranes on my first effort all those years ago, but I’ll replace those with ones fashioned from brass micro-tubing and Jotika eyelets. Some of the thinner spars are also vulnerable to bending/breakage. I’ll try to shape some brass rod for replacements. I’ll need to carefully consider the moulded blocks - some may be usable or otherwise converted to usefulness. I suspect I’ll replace most with online purchases. The gun port lids will be omitted altogether - the Hull model and the credible paintings of the period (including the Corne series) don’t show them mounted (although the Hull model has a lid for the forward most ports).

The pre-formed ratlines, moulded deadeyes, and vacuum formed sails will not be utilized. ‘Nuff said. As for the accuracy of the rig represented in the kit... I am having trouble finding a stable representation of her complete masting and rigging layout. The 1817 Charles Ware diagram may be about the best, but as Marquardt points out it differs in some respects to other seemingly authoritative sources. It is also interesting to note that the Corne paintings are showing crows feet rigged... that is unique. At least it appears that the trysail mast (immediately abaft the mizzen) is authentic - records indicate that Isaac Hull had this added to allow better movement for the boom and gaff. The Hull model clearly shows it fitted as well. I’ll worry more about the rigging when I’m much closer to that phase, but in the meantime I’ll probably fork over the $60 bucks for the Bluejacket manual set and perhaps rely on that for guidance...

The biggest bugaboo in this kit is the multi-part decking. Ugh... The forums are full of attempts to mitigate the unsightly seams with various levels of success. Some folks just don’t worry about them at all and instead try to make the rest of the deck interesting enough to be distracting. I’ve even seen one modeler glue “battens” over them and pass them off as a “feature”. My first attempt was relatively successful in aligning the deck sections and eliminating any meaningful gap, but I was hesitant to fill and sand because I was trying to preserve the moulded wood grain detail. I was attempting to follow the “Les Wilkins” method of using a razor or low-grit sandpaper to remove the top layer of tan paint to reveal the base coat of black and highlight the grain (guidance that is also provided in the Revell instructions). I’ve since decided that the grain is a bit overdone at this scale and it’d be best to smooth everything down and use shades of paint and perhaps some artist pencils to impart the wood tones. Eliminating the seams is more important than preserving the grain.

There are many fine efforts out there... Here’s one that inspires - well known to those of us who prowl the web for impressive builds:

http://www.modelforum.cz/viewtopic.php?f=177&t=11091&sid=a22ea2a7adc8efe9b2fcffd0273bb134

Other useful online resources:

http://www.history.navy.mil/photos/events/war1812/atsea/con-guer.htm

http://www.navsource.org/archives/09/46/46021.htm

http://www.maritimequest.com/warship_directory/us_navy_pages/sailing_ships/constitution/uss_constitution.htm

http://www.hazegray.org/features/constitution/

http://navysite.de/ships/consttour.htm

http://www.captainsclerk.info/


Here are some of the modifications I hope to incorporate along the way:

Customized elements:

Fill in the forward Bridle ports.

Thicken the gunport sills.

Add a scratch built galley stove.

Show the anchor cable/messenger cable rigged on the gun deck.

Display Carronades with elevation screws.

Replace rolling carronade carriages with lug mounted versions.

Copper plating on the rudder.

Hammock Cranes fashioned from brass micro-tubing.

Brass Rod for delicate spars.

New capstan on spar deck (and gun deck).


Paint scheme (guidance from Corne paintings and Hull model):

Yellow ochre band ending up forward in a scalloped half-circle.

White trim on bow and stern details.

Red gallery windows. 

Red gunport sills/linings,

Green interior bulwarks on spar deck.

White bulwarks on the gun deck.

Green deck coamings/furniture on spar deck.

Yellow ochre lower masts with “natural” above.

Tops in Black.

Black bowsprit with “natural” jib boom.


Let the fun begin.

  • Member since
    June 2010
  • From: Irvine, CA
Posted by Force9 on Monday, April 30, 2012 11:46 PM

The kit came packaged much better than I remember back in the day... The parts all seem undamaged on initial inspection.

Some obvious flash and some parts that should be refashioned from Styrene, but still an impressive box of plastic.  Certainly one of the best price/quantity ratios out there!

  • Member since
    June 2010
  • From: Irvine, CA
Posted by Force9 on Monday, April 30, 2012 11:47 PM

Might as well jump right in and start with the Bridle Ports:

I'll put in a bit of backing behind the ports to give a surface for the styrene sheet that will fill the gap.  

Next I'll insert some sheet carefully shaped to fit the openings to eliminate the ports.  

Then I need to lay on a very thin strip to continue the run of the upper wale line.

Later I'll come back in with some filler and use a heavy grit (80) sandpaper to add some grain.  I've experimented a bit with this and it seems to work reasonably well on my test pieces.

  • Member since
    June 2010
  • From: Irvine, CA
Posted by Force9 on Monday, April 30, 2012 11:49 PM

Well... They didn't call her Old Ironsides for nuthin'...

I've been building up the gun deck bulwarks:

Gun ports are lined with .080 x.156" Evergreen strip

Bulwarks are planked with .040 x .156" Evergreen strip

I've got the port side bulwarks mostly complete - I'll add a ledge/shelf strip across the top and a few touch ups with a file are needed, but otherwise I'm pleased with the progress:

You'll notice I've panelled the captain's quarters up to the mizzen mast.  I think that is more accurate than what the kit has laid out.

The candle in the background is not to set the mood... The dog managed to find a dead fish on the shoreline and reeked to high heaven...     After a thorough bath in the garage washtub (the DOG - not me!), I needed to light the scented candle (orange flavored, I think) to overlay on the stench before proceeding to my project.

Not particularly glamorous, but it will seem satisfying when all is completed.

Thanks for looking

  • Member since
    September 2005
  • From: Groton, CT
Posted by warshipguy on Friday, May 4, 2012 8:04 AM

How did I miss this thread?  I will be following this with INTENSE interest!  Outstanding research and analysis!

Bill

  • Member since
    January 2006
  • From: Sarasota, FL
Posted by RedCorvette on Friday, May 4, 2012 8:38 AM

Very nice work; you're off to a great start. Love the paneling in the great cabin - a great touch.   Big Smile

I'm currently in the middle of building the 1/196 "little brother" Constitution kit as the restored ship when it was sailed in 1997 on her 200th birthday.  I've also got the 1/96 kit in the stash and plan to get to her one of these days.

FWIW, the best reference I've found for the Constitution's rigging is Olof Erikson's book All Sails Up and Flying.  It's a bit pricey, but well worth it.

Keep up the good work.  Look forward to following your build!

Mark

FSM Charter Subscriber

  • Member since
    June 2010
  • From: Irvine, CA
Posted by Force9 on Friday, May 4, 2012 11:41 PM

Bill -

Thank you for taking an interest in my project...  I was wondering for awhile if anyone was paying attention to this thread!

I'll have some other good stuff to add along the way - hope you stay with me on this voyage.


Mark -

Thank you for your interest as well... I have seen another link to the Google Book version of Mr. Erikson's work - largely based on his close examination of the Hull model in the Peabody Essex Museum.  I agree with his general theory of how the model evolved - it rings true to me - especially after visiting the PEM and seeing the model myself.

I'll keep adding to this log and I hope you find it inspiring enough to go dig out your 1/96 and give it a try...

Cheers!

Evan

  • Member since
    June 2010
  • From: Irvine, CA
Posted by Force9 on Friday, May 4, 2012 11:48 PM


Continuing along the theme of Old Ironsides

As usual, I've gone crazy with the hobby knife and peeled back a bit of the lower hull - this time to reveal the stout framing of an American Heavy Frigate.


Karl Heinz Marquardt presents a "classic" frame layout in his AOTS book - double frames between the gun ports with single frames spaced apart in between.  Commander Tyrone Martin states in his writings that Joshua Humphries specified closely spaced frames - about two inches separation.  This historic photo from her 1875 refit would seem to agree.  We see the frames exposed after the outer planking has been stripped away:

 It is surmised that Constitution did, in fact, have the diagonal riders fitted originally and they were removed in an earlier restoration.  Her waist was also filled in and her spar deck bulwarks built up during an earlier refit which was supposed to stiffen her and introduce longitudinal strength - a thought shared by Lt. John Lord when he supervised the 1927- 1934 refit.

094602188.jpg

 In reality, all this did was introduce about 16 tons of unneeded stress on her keel (all of which was removed in her very recent refit).


I've gone ahead and used the 1875 photo as guidance and spaced my frames accordingly:

Russ over at MSW confirms that the 1875 photo should be accurate.  Research confirms that the keel on Old Ironsides is original as well as most of the futtocks and flooring.  This would dictate the spacing of the frames for the life of the ship - even if the contours of the upper framing changed over the years.

The placement of my gash is not arbitrary - it is actually symbolic.  Captain Dacres testified in his court martial after the battle that "on the larboard side of the Guerrière there were about thirty shot which had taken effect about five sheets of copper down.."  This was most likely the result of Constitution's initial broadside which Captain Hull had held back until his ship was directly alongside his opponent at half-pistol shot range.  The blast fairly rocked Guerriere and sent "washtubs" of blood pouring down her hatches according to an eyewitness.  The damage below the waterline ultimately sealed her fate.  The prize crew couldn't stem the flow and Hull ordered her blown up the next morning.

My representation here should give folks an idea of just how much damage the Guerriere absorbed from the outset of the fight.


  • Member since
    September 2005
  • From: Illinois: Hive of Scum and Villany
Posted by Sprue-ce Goose on Saturday, May 5, 2012 12:08 AM

Thanks for posting this thread as it gives me a very good idea what comprises the kit contents.

I've been wanting this kit for a while but do not yet know where I will put it once complete.

I'll be watching your very interesting and informative build with much interest.CoolYes


  • Member since
    March 2007
  • From: Carmel, CA
Posted by bondoman on Saturday, May 5, 2012 2:31 AM

I think this is a great thread. I'm very curious about the fact that she didn't have gun port lids. That is kind of strange.

If I were you I would seriously consider replacing the spar deck/ forecastle/quarter deck with a real wood one. I've committed to do that with the upper two decks on my Heller Victory and it's set me back a year. But... it will be worth it I think. I've bought a brace of scribed planks from micro mark and am in the process of putting in enough beams in square brass tubing to support it/ them.

I seriously suggest you set up your cable and messenger, make your capstans below and ...

install lighting!

I wrote a piece on the Airfix Victory thread about that.

You can buy a nice yellow LED bulb in a yellow plastic drop, about the size of a popcorn kernel with two leads. Bend the leads 90 and cut them off about 1/4" long.

Get out that 3/16" wide copper tape you used to re-copper the hull, and run two strips the length of the underside of your deck. Position the lamps every so often and tape down with more of same. Later you'll wire it together in the great cabin.

  • Member since
    September 2005
  • From: Groton, CT
Posted by warshipguy on Saturday, May 5, 2012 9:31 AM

I also notice that the Corne painting does not show gunport lids on the Guerriere.  I know that this topic has been hotly debated; I even remember reading that at one point the Hull model showed stacks of gunport lids lashed to the deck, perhaps indicating that these were removed and stored by the crew under certain conditions.  The real answer is that nobody knows for sure.  Building the ship under the parameters that you describe, your decision to leave the gunport lids off seems appropriate.

Anyway, I am intrigued by your method of showing the framing; it is obviously a key to understanding the success of these ships.

Also, Bondoman, I love the work you are doing on Victory!  I am trying to replicate it to some extent in Soleil Royal, having solved to my satisfaction the issue of the shallow hull below the waterline.

Bill

  • Member since
    June 2010
  • From: Irvine, CA
Posted by Force9 on Saturday, May 5, 2012 1:35 PM

Bondoman - good to see you have not abandoned the Heller Victory... That will be quite spectacular with the wooden decks, shiny copper, and internal lighting.

I did call out the cable/messenger and capstans in my initial post - I'm in violent agreement that those will be critical improvements for this build.  It will be all the more important since I intend to cut away some of the spar deck to reveal the beams and the underlying gun deck.

I'm going to try to utilize the provided decking and eliminate the deck seams without resorting to wood.  If the initial results sucks, then I'll likely resort to very thin styrene strips to "plank" the deck and cover up any mistakes.  That'll allow me to avoid some of the issues with the coamings, height of cannon, etc.  

Your lighting technique looks terrific and very easy to implement... I probably won't be lighting this model, however, for various reasons...

Regarding the gun port lids... I'll fall back on the initial reasoning that they aren't included on my two primary sources - the Corne paintings and the Hull model.  I did once read something somewhere that cited an admiralty directive that eliminated gun port lids in smaller rate ships as a cost savings measure... I have no idea where that was and have never seen such a reference since... I would also cite the lack of gun ports on the Thomas Birch paintings as well in leaning towards the idea that it would be right to omit them.  Also - I do not believe that the Hull model has any depiction of the lids being stored on deck - you can consult the series of pictures I took on my visit to the PEM, but I scrutinized that thing and I think that would've stood out to me...


Thomas Birch was known to be meticulous in his research - including interviewing participants.  Here is the Birch painting of United States vs Macedonian - no lids to be seen anywhere:


We know that Preble had his carpenters build split lids on his cruise... And it may be that the ships only removed them for battle.  Certainly not the end of the discussion.

  • Member since
    September 2005
  • From: Groton, CT
Posted by warshipguy on Saturday, May 5, 2012 7:09 PM

It's interesting that the Macedonian does not have lids, either. Perhaps lids were removed in battle as part of clearing for action.  It would be interesting to contrast both paintings against paintings of these ships in port or simply cruising at sea during the same period. But, you're correct; I believe that this debate will go on for years to come.  Anyway, you do have ample evidence to justify leaving them off, particularly if you pose the cannon run out.

Bill

  • Member since
    March 2007
  • From: Carmel, CA
Posted by bondoman on Wednesday, May 9, 2012 11:22 PM

It's a puzzle. What an enormous PITA that would be, to unship the lids. Each would have to be carefully marked for it's location. And they'd be heavy. Plus the falls set up to open them would have to be undone. And for what reason. The main guns on the gun decks didn't get much elevation, they just blasted away at short range.

I think we'd all agree that a ship in passage would need the lids, at least on the gun deck.

  • Member since
    March 2009
  • From: brisbane australia
Posted by surfsup on Thursday, May 10, 2012 3:42 AM

Just came across this thread so will watch with keen interest.....Cheers Mark

If i was your wife, i'd poison your tea! If Iwas your husband, I would drink it! WINSTON CHURCHILL

  • Member since
    September 2005
  • From: Groton, CT
Posted by warshipguy on Thursday, May 10, 2012 6:58 AM

You know  . . . it might make an interesting conversion to take the Revell 1/96 USS United States and modify the stern and quarter galleries to match those in the painting . . . hmmmmm.

Bill

  • Member since
    June 2010
  • From: Irvine, CA
Posted by Force9 on Thursday, May 10, 2012 10:47 AM

Bill...

Because the Birch painting represents United States without the "stacked" quarter galleries, I would think it would be easier to modify a 1/96 Constitution to include a roundhouse deck, than it would to rebuild the galleries on the United States kit.  The paint scheme is very interesting as well - unusual enough that I would think the artist didn't invent it...

Here is the Thomas Birch treatment of the Guerriere fight:


http://educators.mfa.org/objects/detail/114851?related_people_text=Thomas+Birch

Again... Yellow stripe, no gun port lids.
Use the link above to access the MFA site.  You can zoom in on the painting and admire the incredible detail.  The stiff breeze is blowing in the correct direction and the swells and smoke correctly correspond.  This painting includes very accurate elements from the official battle report and journals: The gaff is broken and the starboard crojack yard is snapped, the main topgallant is set and the royal yards have been sent down.  Notice the rigging - very accurate representation of the braces and control lines - including associated blocks.  Have a look at the sails... The main and mizzen have the sails aback while the foremast shows the topsail filled.  This will pivot the ship around without her drifting into the field of fire of Guerriere's starboard broadside.  This painter knew what he was doing...
These Birch paintings are both in the collection of the Boston Museum of Fine Arts (MFA) and are worth a visit if you end up in that fine city some day.  They are displayed very prominently in the same gallery as some very famous Gilbert Stuart portraits.
Food for thought


  • Member since
    March 2004
  • From: Kincheloe Michigan
Posted by Mikeym_us on Thursday, May 10, 2012 12:38 PM

Do my eyes decieve me or are those the fabled coated thread ratlines I've heard about? I hope someday Revell will add the same type to their 1/196 scale Constitution as the ratlines shown in your kits box looks lightyears better than any injected molded ratlines.

Force9

The kit came packaged much better than I remember back in the day... The parts all seem undamaged on initial inspection.


https://lh5.googleusercontent.com/-g54qox3NeYk/T2_h_VGw4sI/AAAAAAAAAxM/TMJNDiR3WnE/s640/L1100089.JPG


Some obvious flash and some parts that should be refashioned from Styrene, but still an impressive box of plastic.  Certainly one of the best price/quantity ratios out there!

On the workbench: Dragon 1/350 scale Ticonderoga class USS BunkerHill 1/720 scale Italeri USS Harry S. Truman 1/72 scale Encore Yak-6

The 71st Tactical Fighter Squadron the only Squadron to get an Air to Air kill and an Air to Ground kill in the same week with only a F-15   http://photobucket.com/albums/v332/Mikeym_us/

  • Member since
    January 2006
  • From: Sarasota, FL
Posted by RedCorvette on Thursday, May 10, 2012 3:11 PM

Mikeym_us

Do my eyes decieve me or are those the fabled coated thread ratlines I've heard about? I hope someday Revell will add the same type to their 1/196 scale Constitution as the ratlines shown in your kits box looks lightyears better than any injected molded ratlines.


Actually, the original releases of the 1/196 kit had the coated thread ratlines.   The first one I was built was back in the mid 60's and it had them. I thought they looked pretty good on the finished model.   The molded pieces were definitely a major step backwards in my opinion.

You can still find some of the older kits with the coated ratlines on Ebay and elsewhere.

Mark

FSM Charter Subscriber

  • Member since
    March 2007
  • From: Carmel, CA
Posted by bondoman on Thursday, May 10, 2012 10:36 PM

All of the old original Revell kits had them, or all of the ones I built.

Very hard to use, because the thread is flat. Seizing them around the deadeye is tedious. Making the thing sit flat is hard because the foot ropes are stiff and make the thing want to warp.

I had some success using only the end shrouds top and bottom, and gluing the middle ones to the top of the dead eyes. 

Much better than injection molded, which are completely useless.

  • Member since
    March 2004
  • From: Kincheloe Michigan
Posted by Mikeym_us on Friday, May 11, 2012 4:35 AM

which makes you wonder if they (Revell) are actually listening to the modelers?

On the workbench: Dragon 1/350 scale Ticonderoga class USS BunkerHill 1/720 scale Italeri USS Harry S. Truman 1/72 scale Encore Yak-6

The 71st Tactical Fighter Squadron the only Squadron to get an Air to Air kill and an Air to Ground kill in the same week with only a F-15   http://photobucket.com/albums/v332/Mikeym_us/

  • Member since
    January 2006
  • From: Sarasota, FL
Posted by RedCorvette on Friday, May 11, 2012 7:25 AM

Mikeym_us

which makes you wonder if they (Revell) are actually listening to the modelers?

I would assume that the reason for the change to the molded ratlines was because of either cost or because Revell thought it might make the kits easier to build and therefore increase sales.

The coated thread pieces weren't perfect and somewhat challenging to deal with, but they certainly look a lot better than the telephone pole-sized molded pieces that give the finished model a real toy-like appearance.

Mark

FSM Charter Subscriber

  • Member since
    March 2012
  • From: Marysville, WA
Posted by David_K on Friday, May 11, 2012 2:29 PM

I'm curious...what kinds of differences are there in versions of the 1/96 Constitution?  Earlier vs. Recent (or Less Early, I suppose!)....or between the US and Revell of Germany version?  Do people have preferences??  If I was thinking of getting one, would anyone recommend looking for a certain *type*, or one to avoid??

Thanks!


        _~
     _~ )_)_~
     )_))_))_)
     _!__!__!_         
     (_D_P_K_)
   ~~~~~~~~~~~~~
    ~~~~~~~~~~~

Current Project:  Imai/ERTL Spanish Galleon #2

Recently Finished: Revell 1/96 Cutty Sark

Next Up:  ???


  • Member since
    July 2010
  • From: Tempe AZ
Posted by docidle on Friday, May 11, 2012 7:06 PM

The basic difference from the older kits to the newer kits is the amount of flash.  I have a newer model from about two years ago and I was actually amazed on how the little flash there was considering the age of the molds.

From what I have seen from different threads and different forums is that there is NO difference in the U.S. vs. German kits except the price.   Can anyone else affirm this?


  • Member since
    March 2004
  • From: Kincheloe Michigan
Posted by Mikeym_us on Friday, May 11, 2012 8:08 PM

The RoG 1/96 Constitution I've seen runs around $90 US but I've found it (the US version) on the KMarts website for around $60.

docidle
The basic difference from the older kits to the newer kits is the amount of flash.  I have a newer model from about two years ago and I was actually amazed on how the little flash there was considering the age of the molds.
From what I have seen from different threads and different forums is that there is NO difference in the U.S. vs. German kits except the price.   Can anyone else affirm this?

On the workbench: Dragon 1/350 scale Ticonderoga class USS BunkerHill 1/720 scale Italeri USS Harry S. Truman 1/72 scale Encore Yak-6

The 71st Tactical Fighter Squadron the only Squadron to get an Air to Air kill and an Air to Ground kill in the same week with only a F-15   http://photobucket.com/albums/v332/Mikeym_us/

  • Member since
    September 2005
  • From: Groton, CT
Posted by warshipguy on Saturday, May 12, 2012 8:54 AM

Force9,

One other issue with converting the 1/96 Revell United States into something more closely resembling the Birch paintings is that the kit's transom needs changing.  The paintings depict the transom as being rounded at the top with one row of windows; the kit transom piece is flared upward and outward with a double row of windows. Perhaps it would be easier to convert a Connie into the United States.

docidle,

You are absolutely correct; there is no difference between both kits except for the price.

Bill

  • Member since
    May 2003
  • From: Greenville, NC
Posted by jtilley on Saturday, May 12, 2012 4:34 PM

I don't do this often, but I'm going to presume to offer a suggestion.  Force 9 - it's obvious that you know what you're doing, and your model is going to be outstanding.  You'll be much happier, though, if you make wood decks for it.  And it isn't particularly time consuming.  I suspect you can do it in less time than you spent thickening the bulwarks.

Caveat:  I'm assuming the kit you've got is essentially identical to the last one I built - when I was in college, back in the seventies.  Knowing Revell, I think that's a safe assumption.

If you'll take a close look at the undersides of the deck pieces, you'll see along the edges a series of locator pins.  Each of them is located in the middle of a little plastic pad, which, fortuitously, is 1/32" thick.  Shave off the pads and pins, so the entire deck drops by 1/32" when it's glued to the hull halves.  Now you can lay 1/32"-thick deck planks, and they'll be at just the right level.

Basswood strips, 1/32" x 1/16", will do a nice job.  My favorite for such purposes, though, is holly veneer.  It's hard (much harder than basswood - and that's a big advantage), it's almost pure white, and the grain is almost invisible.  With a little stain added, it actually looks like miniaturized wood.  Holly veneer is a little hard to find; my old source, Constantine's, doesn't list it any more, but a google search on "holly veneer' will bring up several sources.

The obvious drawback to holly compared to basswood strips is that the holly needs to be cut into planks.  I normally do that job on my little Micromark table saw, but if you don't have one there are other ways to cut the stuff,

There has been some discussion about ways to represent the caulking between the plank.  (Black paint, black paper, etc., etc.).  My personal favorite trick is to run a fairly hard pencil around each plank.  That will produce an extremely fine line to represent the caulked seam, and the line wil be dqrk grey.  (The caulking on a real ship's deck is no more black than the asphalt on a street.)

I stuck the planks down to the plastic "subdeck" with old-fashioned Revell tube-type plastic cement.  That worked fine; the adhesive dissolved the plastic and soaked into the wood.  Whether any of the tube glues available now would be as good I don't know.

I like to give the planks a thin coat of stain.  My favorite used to be Floquil's "Driftwood,"which was a dull grey with just a tiny bet if green in it, to my eye just what a real deck looks like after several hundred people have stomped on it.  (Yeah, I've read those romanticized accounts of "snow white decks," but I don't swallow them.)   Floquil no longer makes the stuff, but Olympic and Cabot (both available at Lowe's) offer similar colors.

As the last step, I like to give the deck a thin coat of old-fashioned white shellcc, dilluted almost beyond recognition with denatured alcohol.  The shellac (which is wonderful stuff - and making a big comeback in the woodworking community) will settle any slight fuzziness in the wood grain and protect the deck from paint spills and any other indignities you inflict on it later.

If I were building that kit again (gawd forbid) I'd add some heavy wood beams under the deck - and work the appropriate camber (curvature) into them.  (With the notable exceptions of aircraft carriers, almost no ship has a perfectly flat deck.)  I'd also take a crack at making the joggled margin planks to scale.  The kit actually, as I recall, represents them nicely - within the limitation of lines scratched into the mold.  The kit parts would make good patterns.

All this may sound complicated, but it really isn't.  And I don't think it would take much more time tha eradicating those awful athwartships joints between the plastic deck sections.  As I remember, planking the decks of my model (including the areas of the gundeck that would be visible through the hatches) took about three evenings.  In relation to the total time required to build a model like that, three evenings aren't much.  And the improvement in appearance - believe me - is enormous. 


Youth, talent, hard work, and enthusiasm are no match for old age and treachery.

  • Member since
    December 2006
  • From: Jerome, Idaho, U.S.A.
Posted by crackers on Saturday, May 12, 2012 9:18 PM

What color were the inside of the bulwarks on the 1812 version of the CONSTITUTION ? Was it the traditional red, or light green as I have seen it on some models ?

Montani semper liberi. Happy modeling to all and every one of you.

                    Crackers  Geeked


Anthony V. Santos

  • Member since
    September 2005
  • From: Groton, CT
Posted by warshipguy on Sunday, May 13, 2012 9:04 AM

I fully agree with John about the improvements provided by a wood deck. However, I most respectfully disagree with him about the color of wood decks on real ships.

Throughout my naval career, I had the pleasure of visiting several ships with teak decks. These decks were very well maintained and they were very nearly an off-white color. They shone in the sunlight.  The key phrase is that they were well-maintained.

We had this debate several years ago in which one contributor provided photos of the HMS Rose/HMS Surprise in San Diego in which the teak decks were grayish-brown. His argument was that this ship's teak decks were that color, citing the photographic evidence as proof. He neglected to recognise that British and American warship crews holystoned, swept, swabbed, and dried these decks daily, even at sea, in order to maintain their emaculate appearances.  Deck planking was frequently replaced when even the slightest evidence of decrepitness showed.  The ship in his photographs had probably never been holystoned, let alone had deck planking replaced.

Check the photos of the four American Iowa class battleships late in their active careers. Check also any photos of the decks of the USS Fulton at the end of her life.  The decks are emaculate and they are very light in their color.

Bill

  • Member since
    May 2003
  • From: Greenville, NC
Posted by jtilley on Sunday, May 13, 2012 12:29 PM

I don't think Bill and I actually disagree.  The technique I described earlier (thinned greyish stain followed by very thin white shellac on holly planks) will produce just about the color he describes.  Holly, by furniture makers' standards, is a lousy wood to stain; due to its fine, tight grain the stain can barely penetrate. 
For a ship model's deck, that's a good thing.  If you use basswood you'll need to be really careful; basswood does soak up stain.

I just spent a few minutes on the web trying to get a straightforward answer to the question:  what kind of wood were the Constitution's original decks made of?  I'm not quite a hundred percent sure, but I'm pretty confident that the answer is yellow pine.  Pine weathers differently than teak.  I've spent quite a bit of time on board the North Carolina, which got a new teak deck about ten years ago.  Like any teak exposed to the elements, it's aged to a beautiful silvery color, with a distinct hint of beige.  Here's a link to some interesting, fairly recant photos:  http://www.navsource.org/archives/01/55f.htm .  Notice how different the deck color looks in different lights.  Good luck reproducing that on a model.

I don't think I've ever seen a yellow pine deck; the stuff is scarce nowadays.  It does look a little different than the white pine one normally finds on lumber yards (yellow pine is - surprise - more yellowish), but the big difference is that yellow pine is noticeably harder.

I've watched "Master and Commander" quite a few times.  It looks to me like that ship's upper deck was built from ordinary pressure-treated pine bought from a lumber yard.  Good stuff for the purpose, but obviously not available in the late eighteenth century.  And I think Bill's right: it hasn't had much in the way of regular maintenance.

Youth, talent, hard work, and enthusiasm are no match for old age and treachery.

JOIN OUR COMMUNITY!

Our community is FREE to join. To participate you must either login or register for an account.

SEARCH FORUMS
FREE NEWSLETTER
By signing up you may also receive reader surveys and occasional special offers. We do not sell, rent or trade our email lists. View our Privacy Policy.