SEARCH FINESCALE.COM

Enter keywords or a search phrase below:

1/200 USS Nimitz 2003. Scratchbuild

50717 views
244 replies
1 rating 2 rating 3 rating 4 rating 5 rating
  • Member since
    November 2012
Posted by Jaguar1969 on Wednesday, October 30, 2013 1:44 PM

I know Subfixer, but i have seen this effect in several photos of the flight deck. i suppose it depends on how the light hits the surface ;-), of course i have photos where the strips not appear or are difuminated.

Here are a few more examples:

  • Member since
    March 2004
  • From: Spartanburg, SC
Posted by subfixer on Wednesday, October 30, 2013 12:42 PM

Wow! That bottom photo above shows some crazy looking striping that I have never seen before. A trick of the lighting?

Here a close up view of a Nimitz class flight deck.


I'm from the government and I'm here to help.

  • Member since
    November 2012
Posted by Jaguar1969 on Wednesday, October 30, 2013 5:44 AM

Thank you Bish.

Hi Subfixer. I use the Tamiya putty to eliminate the joins between the sand paper, and after painting, they are not, of course weld beads, i don´t know what create this effect in the photos, but in many photos of the flight deck are clearly seen. I think this effect is created when the non-skid layer is applied in strips.

I hope i have explained it Big Smile

  • Member since
    March 2004
  • From: Spartanburg, SC
Posted by subfixer on Tuesday, October 29, 2013 9:19 AM

What is it that you are replicating with the Tamiya putty? If it is weld beads then they are way over scale, are not easily seen even at full scale, and are not put down in long strips. Non-skid is painted uniformly over wide sections of the deck and covers up most evidence of welding. I have walked the decks of every Nimitz class carrier and a large amount of conventionals over my 40 year span of service, they are all the same.

I'm from the government and I'm here to help.

  • Member since
    December 2002
  • From: Bury St Edmunds, Suffolk, England
Posted by Bish on Tuesday, October 29, 2013 2:32 AM

That's is just some amazing modelling. And nothing like a challenge. It is certainly going to be something to be proud of. Those aircraft look awesome.

I am a Norfolk man and i glory in being so


On the bench: Airfix 1/72nd Harrier GR.3/Fujimi 1/72nd Ju 87D-3

  • Member since
    November 2012
Posted by Jaguar1969 on Tuesday, October 29, 2013 2:27 AM

Thanks Scorp. New photos soon

  • Member since
    July 2007
Posted by scorpr2 on Monday, October 28, 2013 10:22 PM

You are doing some great work!  Keep it up!!!

  • Member since
    November 2012
Posted by Jaguar1969 on Monday, October 28, 2013 5:09 AM

Thank you Silvershadow

  • Member since
    October 2013
Posted by silvershadow on Monday, October 28, 2013 1:03 AM

Awesome stuff!!

  • Member since
    November 2012
Posted by Jaguar1969 on Saturday, October 26, 2013 6:07 AM

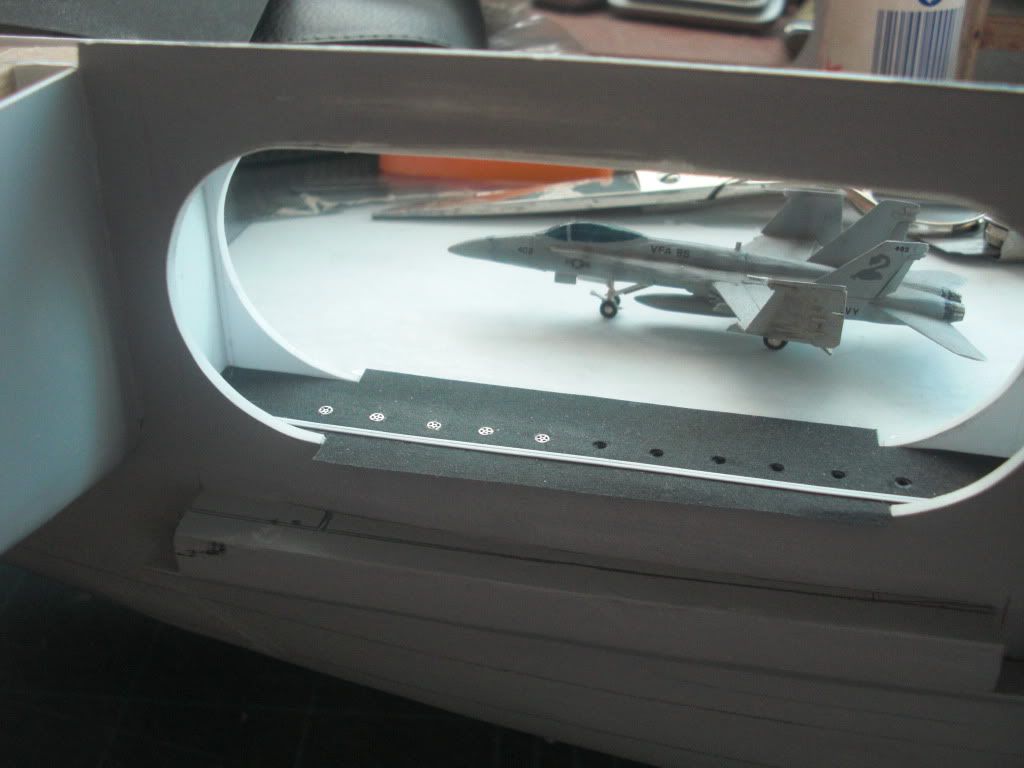
Well, here we are. I continue working on the hangar bay.

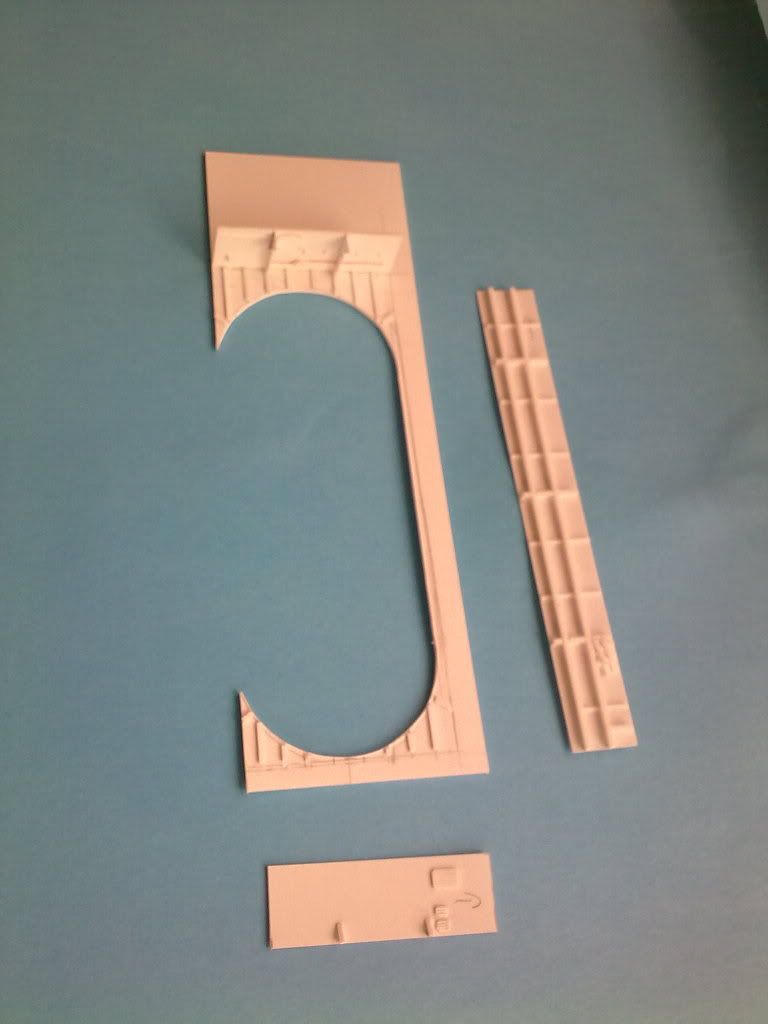
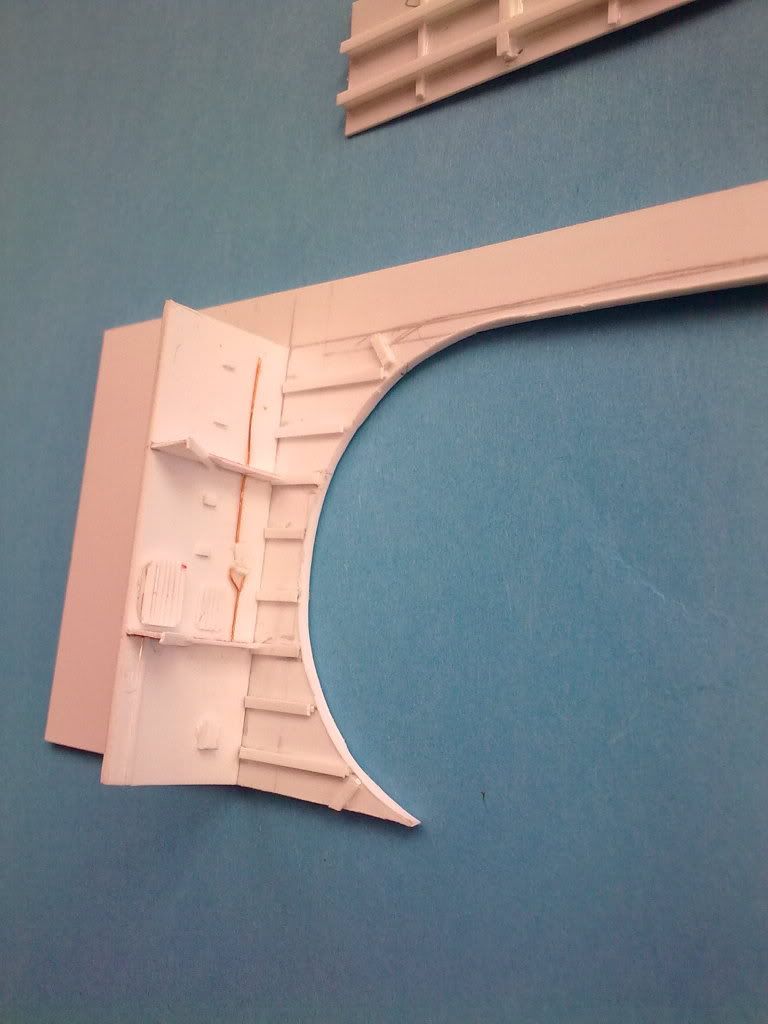
Main door of elevator nº 4, i discovered that is better to build and paint the parts one by one before glue them together

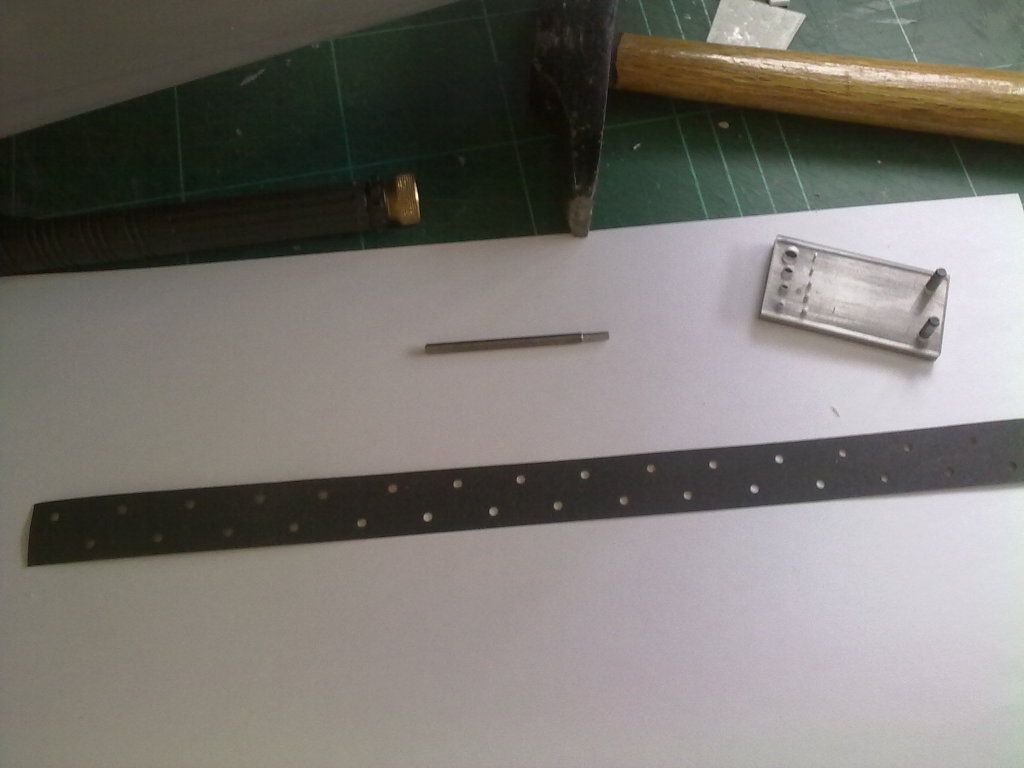
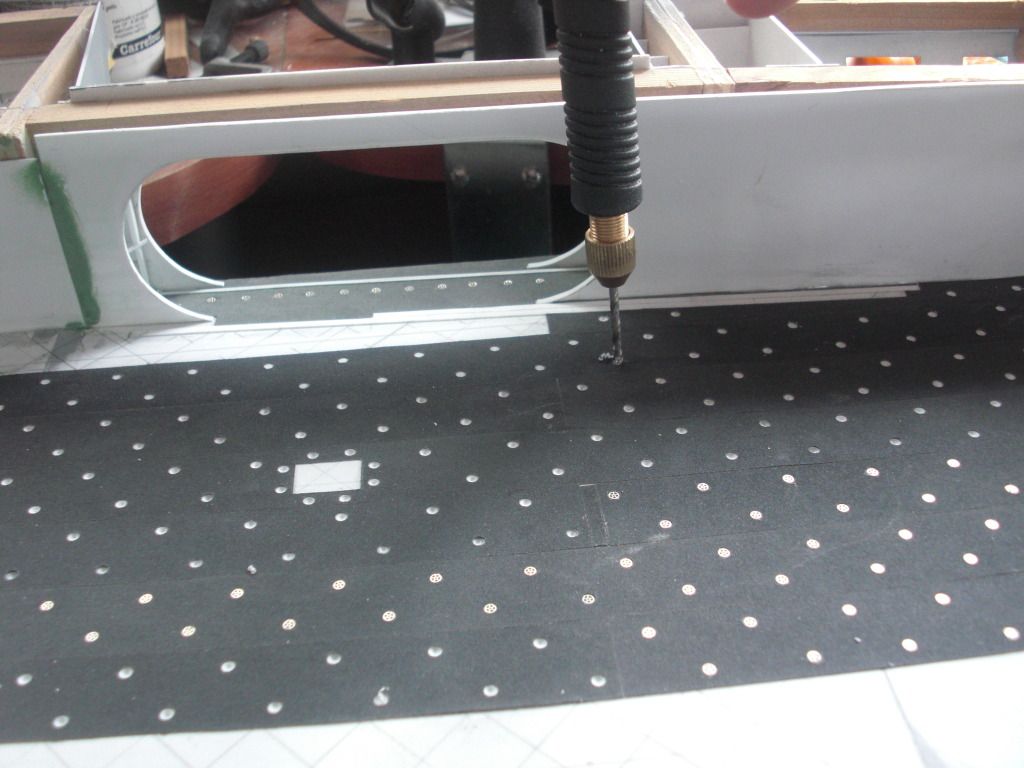
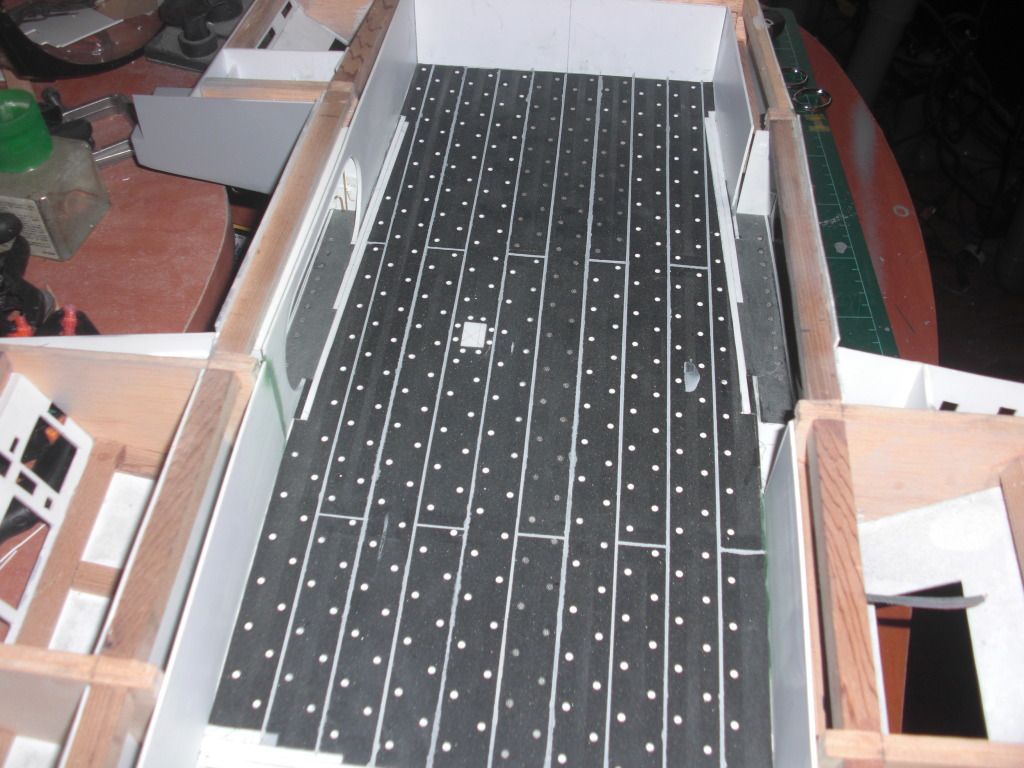
Now, starting the tedious work of make the holes for the padeyes.

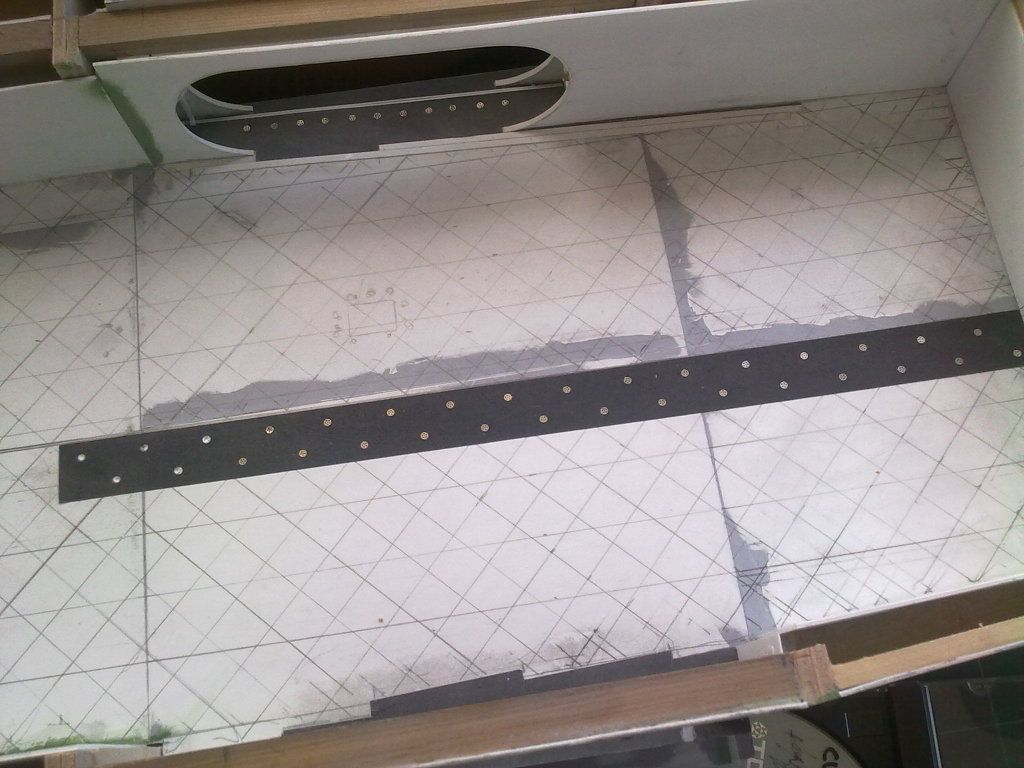
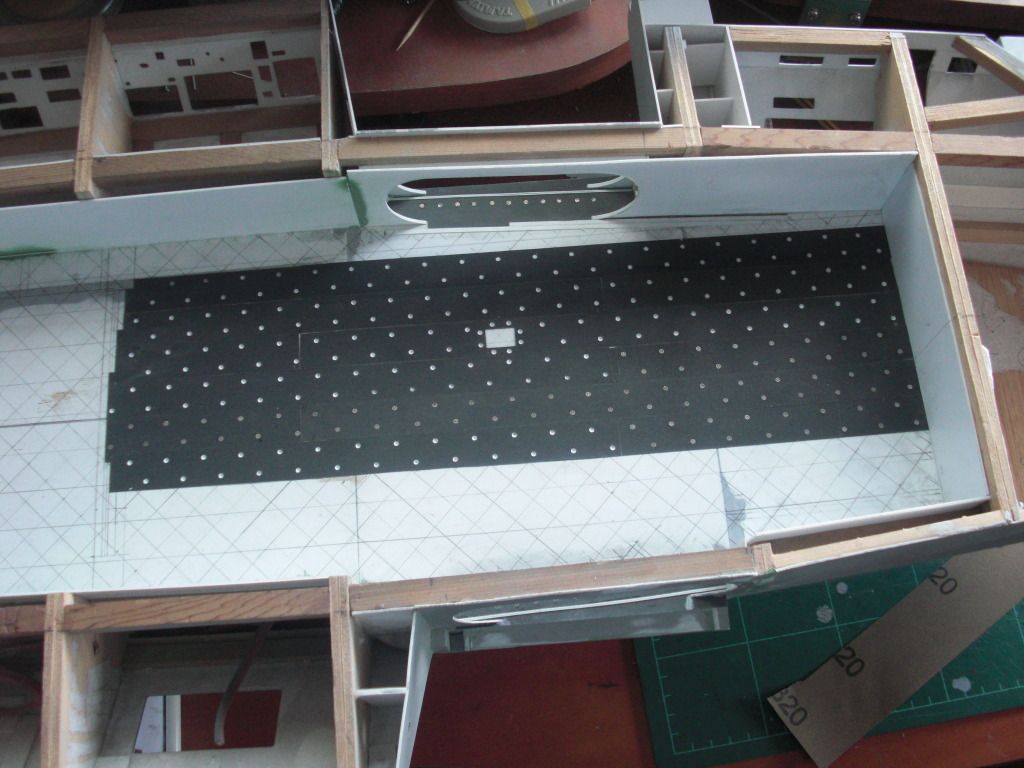
I have used tamiya putty to simulate the joins between the antiskid plates

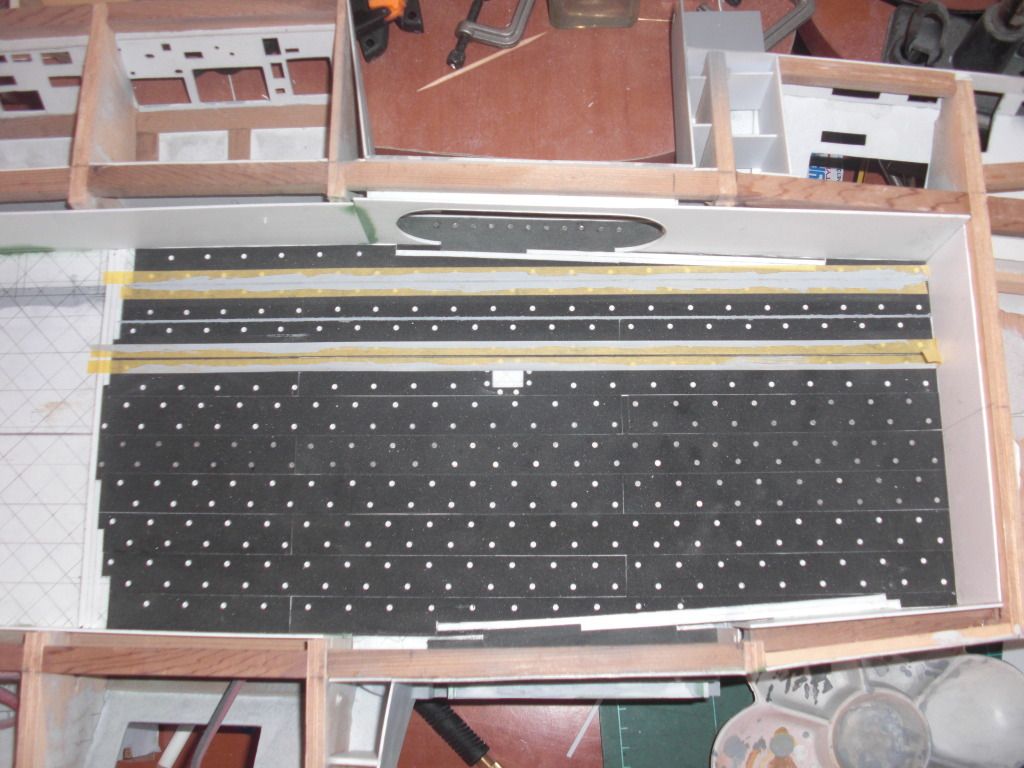
That,s all. Next to come: to paint the hangar bay

  • Member since
    November 2012
Posted by Jaguar1969 on Wednesday, October 23, 2013 6:29 AM

Of course Scorp. Here are new pictures. I have started with details. Its time to elevator nº3. Solution for tie downs: 5 arm wheels for Us Navy doors. the antiskid layer is made of sand paper.

  • Member since
    July 2007
Posted by scorpr2 on Wednesday, October 23, 2013 1:05 AM

That is some AWESOME work!!!  PLEASE, keep it up!!!

  • Member since
    September 2006
  • From: san francisco,ca
Posted by raider-hall on Tuesday, October 22, 2013 8:47 PM

scracthbuild model of the year period!!!!!!

  • Member since
    March 2003
  • From: Western North Carolina
Posted by Tojo72 on Tuesday, October 22, 2013 11:22 AM

Your welcome

  • Member since
    November 2012
Posted by Jaguar1969 on Tuesday, October 22, 2013 10:07 AM

i know Subfixer, not hundred but thousands. But i have an idea about how to do these tie downs :-)

  • Member since
    March 2004
  • From: Spartanburg, SC
Posted by subfixer on Tuesday, October 22, 2013 10:04 AM

OK, I quit!    Indifferent

But on a positive note, (for me) you have to replicate hundreds of tie down padeyes on the flight deck. Have fun with that!

Devil

I'm from the government and I'm here to help.

  • Member since
    November 2012
Posted by Jaguar1969 on Tuesday, October 22, 2013 10:01 AM

Jajaja, thank you Mark ;-¨)

  • Member since
    December 2010
  • From: Salem, Oregon
Posted by 1943Mike on Tuesday, October 22, 2013 9:07 AM

Supercalifragilisticexpialidocious!!

Mike

Mike

"Le temps est un grand maître, mais malheureusement, il tue tous ses élèves."

Hector Berlioz

  • Member since
    November 2012
Posted by Jaguar1969 on Tuesday, October 22, 2013 6:28 AM

  • Member since
    November 2012
Posted by Jaguar1969 on Tuesday, October 22, 2013 6:17 AM

Thank you Mike. I have a great amount of photos of the construction of the ship and the planes. Basically, i glue several layers of evergreen and then i give the correct shape with a rotary tool like the Dremel.

I can post an example with the turbofan the S-3 Viking

  • Member since
    December 2006
  • From: Phoenix, AZ
Posted by Fly-n-hi on Monday, October 21, 2013 9:22 PM

Awesome work!

  • Member since
    December 2010
  • From: Salem, Oregon
Posted by 1943Mike on Monday, October 21, 2013 6:11 PM

Jaguar1969,

I am speechless!!Bow Down

Although not speechless enough not to ask if by any chance you documented how you made the template for the aircraft out of Evergreen?

It is beyond my ability to imagine how one constructs these scale models from scratch. I stand in awe.

Mike 

Mike

"Le temps est un grand maître, mais malheureusement, il tue tous ses élèves."

Hector Berlioz

  • Member since
    March 2003
  • From: Western North Carolina
Posted by Tojo72 on Monday, October 21, 2013 4:21 PM

Man,that is just some impressive work,I can't comprehend not building from a kit.

  • Member since
    November 2012
Posted by Jaguar1969 on Monday, October 21, 2013 11:35 AM

Thank you Bish. Of course i have to scratchbuild the aircraft too. Currently i have testing and E-2, an F-18C, and the latest is the S-3 Viking. For the Viking i made a master from evergreen, and the i made resin copies. Here are the result.

  • Member since
    December 2002
  • From: Bury St Edmunds, Suffolk, England
Posted by Bish on Monday, October 21, 2013 11:10 AM

That's one nice looking build, glad you decided to post the pics. Look forward to seeing more of this.

Are you adding aircraft.

I am a Norfolk man and i glory in being so


On the bench: Airfix 1/72nd Harrier GR.3/Fujimi 1/72nd Ju 87D-3

  • Member since
    November 2012
Posted by Jaguar1969 on Monday, October 21, 2013 10:18 AM

Thank you very much Don. I´ll post more pictures son, as i advance in my Project.

  • Member since
    November 2009
  • From: Twin Cities of Minnesota
Posted by Don Stauffer on Monday, October 21, 2013 8:43 AM

There were a few books on scratch building ship models. I know Tab books was one of the publishers.  Folks wanting to try scratchbuilding may want to see if they can find one of those.  Finding old books these days is easy with computerized online used-book companies.  So many folks are just so reluctant to trying scratch building that I love to see folks try it.

That being said, Jaguar's model is a whole cut above most scratch built ship models!  Wow, that is one major project, and it sure looks good.

Don Stauffer in Minnesota

  • Member since
    October 2012
  • From: Mt. Washington, KY
Posted by Geezer on Monday, October 21, 2013 6:38 AM

a very beautiful piece of work Jaguar1969. I am in awe of those that can do this. Great work.

www.spamodeler.com/forum/index.php 

Mediocraties - my favorite Greek model builder. 


  • Member since
    November 2012
Posted by Jaguar1969 on Monday, October 21, 2013 3:55 AM

Thank you Edgrune, i´ll get a copy of this book

Flaver, i´ve also finished the hull of the Amati 1/200 Bismark. The only difference is that you have to cut by yourself the frames of the hull. I decided to cover the hull with 1 mm thick evergreen instead of wood in the carrier, but it´s only because i prefer to manage plastic instead of wood.

I enjoy that you are impressed about my work, thanks

  • Member since
    April 2012
Posted by flaver 2.0 on Sunday, October 20, 2013 9:08 PM
I'll check it out. I've been thinking of doing a wooden ship this winter.
Thanks
JOIN OUR COMMUNITY!

Our community is FREE to join. To participate you must either login or register for an account.

SEARCH FORUMS
FREE NEWSLETTER
By signing up you may also receive reader surveys and occasional special offers. We do not sell, rent or trade our email lists. View our Privacy Policy.