SEARCH FINESCALE.COM

Enter keywords or a search phrase below:

IDF Group Build Mk. II 2010-2011

107434 views
398 replies
1 rating 2 rating 3 rating 4 rating 5 rating
  • Member since
    September 2006
  • From: Dripping Springs, TX, USA
Posted by RBaer on Monday, July 12, 2010 11:23 AM

Looks really good, Mike.

I jumped into an M10 yesterday for another GB,  but I NEED to tie up some loose ends.........

Apprentice rivet counter.

  • Member since
    October 2007
Posted by White_R34 on Friday, July 16, 2010 1:47 AM

Hello all here the finished detailed work on my M113 Nagmash Ambulance before I start the paint process to day.


Building the Impossible Is my main goal!!
  • Member since
    October 2007
Posted by White_R34 on Friday, July 16, 2010 1:49 AM

Now the lower hull. An I like the out come of my work.

Building the Impossible Is my main goal!!
  • Member since
    October 2007
Posted by White_R34 on Sunday, July 18, 2010 7:34 PM

My interior paint work has started.

Building the Impossible Is my main goal!!
  • Member since
    October 2007
Posted by White_R34 on Sunday, July 18, 2010 7:39 PM

Here's some engine photos. Now iI must tell you all I painted every thing in place.

Building the Impossible Is my main goal!!
  • Member since
    April 2005
Posted by Thunderbolt379 on Sunday, July 18, 2010 7:46 PM

Truly remarkable work, White -- your skill and patience are outstanding!

M/TB379

http://worldinminiature.blogspot.com/

  • Member since
    October 2007
Posted by White_R34 on Monday, September 27, 2010 6:00 AM

Thanks "Thunder". Guys I have bean working on some othere projects, as well as my MkIV APC/IFV and I will have new photos for this GB with in the next two days.

Building the Impossible Is my main goal!!
  • Member since
    June 2009
  • From: Florida
Posted by STFD637 on Wednesday, September 29, 2010 2:06 PM

Hi! If you allow Cross over builds, and it is not too late, I would like to jump in here! I am building a F-16A "Netz" and a F-16I "Sufa" for my Viper GB. Please let me know.

Travis

"If a lie is told often, and long enough, it becomes reality!"

Travis/STFD637

make an avatar

  • Member since
    April 2005
Posted by Thunderbolt379 on Thursday, October 7, 2010 2:32 AM

Hi all,

With my Fw 190 finally home and hosed, I took a couple of days rest and then thought I'd like to crack on with the S-199 for IDF II. I thought all I had to do was sort out the canopy and get some interior cockpit paint over the masks...

This is a bit of a mish-mash. The Galland Panzer rear armour was cast in clear plastic by Hobbycraft so I cut  Tamiya tape masks for each side and sprayed it cockpit grey. But then it turned out there were no sockets in the canopy into which the pegs on the armour plate would sit. I filed them in, but foolishly trusted the kit plans' suggestion as to where they should go, which was far enough back to obstruct the fit against the scratchbuilt detail of the locking bar.

If this wasn't enough, it turns out the canopy is an attrocious fit, toeing in at the left front by almost the width of the sidewall. Angry I thought an hour's fiddling and I'd have that set of previously-used diecut masks into place and be applying paint to this and two other models, but noooooooo...

I'm thinking of posing the canopy open, that way the mis-match won't be immediately obvious, but it's a whole lot of fiddling in other ways, and the canopy is fragile, the less handling it gets, the better...

Hmmmmmm.....

Mike/TB379

http://worldinminiature.blogspot.com/

  • Member since
    September 2003
  • From: Australia
Posted by Helo H-34 on Thursday, October 7, 2010 5:33 AM

White , the level of detail and the amount of work you have put into your M113 Nagmash Ambulance is absolutly amazing , excellent work Sir ...Bow Down

Mike , that Hobbycraft S-199 seems to have been fighting you all the way , I build mostly in 1/72 scale but every time I visit the LHS , they have the Academy 1/48 Avia S-199 . I've had it in my hands a few times and then put her back on the shelf ; I wonder if it fits better than the Hobbycraft kit ???

Hang in there anyway bud .

                                                 John

  • Member since
    April 2005
Posted by Thunderbolt379 on Thursday, October 7, 2010 6:40 AM

Hi John,

It's, um... exactly the same kit! Academy and Hobbycraft have a reboxing agreement. You find Hobbcraft in Academy boxes, the way you find Trumpeter in Hobbycraft boxes...

The overall airframe is pretty good, good enough that I bought an extra one, but this canopy was an unexpected snag. The parts are crystal clear and look great on the sprue, they're just a different shape to the fuselage! I wonder if a replacement from Squadron might be a good idea... But I've heard working with vacform canopies can drive grown modellers to drink (even quicker that working with the kit bits)...Smile

Cheers, Mike/TB379

http://worldinminiature.blogspot.com/

  • Member since
    October 2007
Posted by White_R34 on Thursday, October 7, 2010 10:12 PM

Hello guys Im sorry I have neglected posting my new work., so here what I have so far on the Namera Mk. IV-IFV and Achzarit APC/IFV.

Achzarit APC/IFV project:

Here I had to cut the rear down a bit.

Building the Impossible Is my main goal!!
  • Member since
    April 2005
Posted by Thunderbolt379 on Thursday, October 7, 2010 10:58 PM

White -- your scratchbuilding is inspirational and reminds me how much fun it used to be engineering in styrene sheet!

Well, it took two sessions of fiddling, but the S-199 canopy is masked for painting inside and out:


Now for cockpit grey inside, mask again and set aside for the overall colour on the outside. Speaking of which, I'll need to hit the LHS for the shades Bondo used (way back in this thread...). I could go with RLM 02, but it just wouldn't be right, so a mixed "Sinai Grey" it is.

Cheers, M/TB379

http://worldinminiature.blogspot.com/

  • Member since
    October 2007
Posted by White_R34 on Friday, October 8, 2010 6:32 AM

Thanks Thunder for the comments, I have a lot more to build and then I'll have a lot of realy small detailed work to do. I love your masking work keep it up M8.

Building the Impossible Is my main goal!!
  • Member since
    October 2007
Posted by White_R34 on Saturday, October 9, 2010 5:46 PM

Ok I repainted the M113's interior with a lighter color.

An I added grees plugs to the drive sprockets of the Achzarit APC/IFV.

Here's a look at the real wheels, with colored plugs and whit out color.

Now the painted sprocket.... :D

Building the Impossible Is my main goal!!
  • Member since
    April 2005
Posted by Thunderbolt379 on Monday, October 11, 2010 8:16 PM

Hi guys,

The canopy of the Hobbycraft Avia was a nuisance and so too was the windscreen. As usual, Hobbycraft seems to have been engineered by a committee, and the canopy subcommittee was working from diffrerent measurements to the fuselage subcommittee. The windscreen matches the canopy, so it does not fit the fuselage... All I can do is set up one side correctly and ignore the other! (Replacement vac canopy in future...)

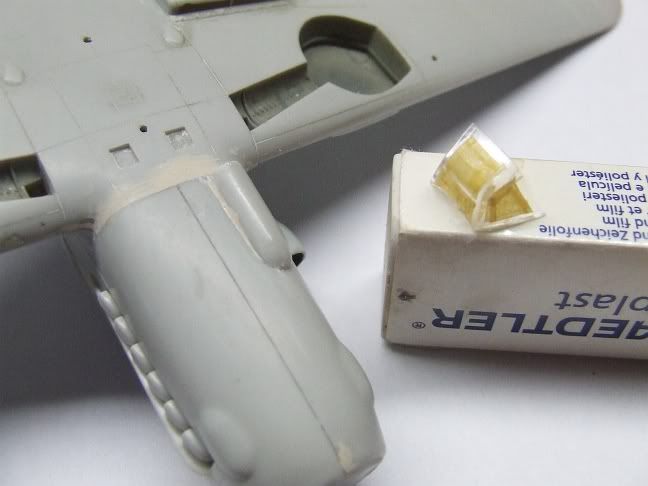
Here is the windscreen masked (from scratch, once again, the dimensions of this canopy are much smaller than those of Hasegawa's version of the same thing and for which the Eduard masks were designed -- masking from scratch really makes me appreciate the precut items):


Also, the small intake/fairing under the nmose is now in place. I had to take a best guess at placement, Hobbycraft certainly didn't know exactly where it went and that structure is obscured in all my reference photos. The only certainty is that 120.D didn't have the big intake/radiator under the nose, so by default it was the small one.

I'm starting to think in terms of paint. I picked up Tamiya XF-12 IJN Grey yesterday and will use Bondo's mixing ratio. While no photos I have show the wheelwells, an underside view of another completed model suggests the wheel wells were the overall camo colour, which would make sense if the aircraft were being prepared as quickly as humanly possible. The gear legs on 120.D in the museum today seem to be a cooler, bluer grey shade, but the inside of the gear bay doors looks like a match for the rest of the aircraft. Likewise, her prop blades are now in overall camo colour, while an older photo shows them black with yellow spinners, and some models are finished in RLM 70, which seems likely for the operational aircraft in 1948.

Aeromaster's sheet includes the red and white chevron rudder but the decal is much larger than the rudder and seems to be meant to be trimmed around after application. Getting the chevrons to match up seamlessly at the trailing edge of the rudder sounds very dodgy to me under those circumstances, so I'm thinking of painting the tail instead -- satin white, mask the six white bands on each side, satin red (and matching spinner cone), then mask the rudder and fin cap completely.

I'm seeing light at the end of the tunnel on this one, and when she's done I'll turn my attention to finishing the Merkava II from IDF I.

Cheers, Mike/TB379

http://worldinminiature.blogspot.com/

  • Member since
    September 2003
  • From: Australia
Posted by Helo H-34 on Monday, October 11, 2010 9:14 PM

Hi Mike ;

Sorry to hear about the poor fit of the canopy ;

Good on ya for perserving with the build though Yes

I know what you mean about the rudder decals , when I built a few 1/72 IDF Spitfire's last year , the Chevron rudder decals from the Sky Decals IAF First Fighters sheet were way too big , so I did what you are thinking about and airbrushed white first then masked and added the red bands . It worked out okay .

Best of luck ;

                                     John .


  • Member since
    October 2007
Posted by White_R34 on Tuesday, October 12, 2010 10:59 PM

Here's a bit more work done.

Building the Impossible Is my main goal!!
  • Member since
    October 2007
Posted by White_R34 on Tuesday, October 12, 2010 11:01 PM

Here's a nice side view....

More to come......

Building the Impossible Is my main goal!!
  • Member since
    October 2007
Posted by White_R34 on Sunday, October 17, 2010 6:59 PM

Here's a bit of work for this day/knight...

Building the Impossible Is my main goal!!
  • Member since
    October 2007
Posted by White_R34 on Sunday, October 17, 2010 7:04 PM

Here's a bit more to look at....

Building the Impossible Is my main goal!!
  • Member since
    April 2005
Posted by Thunderbolt379 on Monday, October 18, 2010 6:19 AM

White -- stunning work! The figures are amazing, how you get such life in 35th scale I do not know! This will be a showpiece, I envy your research materials, dedication to subject, perseverence ... and eyesight!

Only a bit to report -- I got the cockpit masked and sprayed. The windscreen no more fit thanthe canopy did, so I gritted my teeth and got on with it. All panes were masked froms cratch with Tamiya tape, then I masked over the completed cockpit and back of the windscreen before laying on some XF-63 standing in for RLM-66:


Next up, satin white on the tail, and mask the stripes...

Cheers, Mike/TB379

http://worldinminiature.blogspot.com/

  • Member since
    October 2007
Posted by White_R34 on Monday, October 18, 2010 7:44 AM

Thanks "Thunder" for your comments man, I must point out that I have never seen any one, detal mask as well as you M8.Bow Down I can't wate to see your masking work on the stripes. (If you choose to show it).... Toast

Building the Impossible Is my main goal!!
  • Member since
    April 2005
Posted by Thunderbolt379 on Monday, October 18, 2010 8:21 AM

Hi White -- thankyou so much for the kind words! Smile I put off this job for a long time because I knew deep down it would have to be from scratch, and I guess Eduard mask sets have made me lazy!

The IDF Knife will be getting some attention in the near future, and I will definitely be posting pics of how I do the rudder masking. I'm off overseas for a couple of weeks at the end of the month and I would like to have this one finished in that timeframe. If I'd been on schedule I should have had the paint on by now, in fact, but real life always gets in the way.

Cheers, Mike/TB379

http://worldinminiature.blogspot.com/

  • Member since
    April 2005
Posted by Thunderbolt379 on Tuesday, October 19, 2010 2:15 AM

A smidgeon of progress, I got the white onto the bird today. I mixed flat and gloss white for a satin finish (Tamiya acrylics) and applied them by airbrush. The paint was too thin and ran a bit, so I'll smooth it out with 2000-grit paper, sanding wet. I also put the spinner cone into white, so that the red will have equal luminoscity to the same shade at the tail. I sprayed the spinner a mixed flat red ages ago and it was okay but ... dull. It really needed the white primer!

Okay, here she is:

The white doesn't show up much in this shot, but the other colours should be a good contrast.

Cheers, Mike/TB379

http://worldinminiature.blogspot.com/

  • Member since
    September 2003
  • From: Australia
Posted by Helo H-34 on Thursday, October 21, 2010 6:15 PM

Hi everyone ;

I was thinking of having a go at some 1/72 scale Israeli Armor builds and I have come up with these four kits ;

Firstly Revell's 1/72 Magach 3 [105mm] M48 ; The kit has markings for 7th Armored Brigade , Sinai 1973 .

Along side her the Airfix M3A1 Half-Track ...

Also the 1/72 Revell M19 Transporter also with makings from the 7th Armored Brigade as well as a Italeri M113 A1 ...

Revell's paint instructions call for the Magach 3 to be beige in color , where as the M19 is in light Olive Drab .

I'm unsure what color scheme to do the M3A1 Half-Track and the M113 A1 ; I'm thinking probably light Olive Drab like the M19 but I'm not really sure ???

Anyway I'm hoping these four kits would be suitable for the time frame of around the Yom Kippur War .

Suggestions and advice are most welcome , I'll make a start on the Revell M48 and M19 kits today .

                              John .

  • Member since
    September 2003
  • From: Australia
Posted by Helo H-34 on Sunday, October 24, 2010 5:58 AM

I did a little preliminary airbrushing on the M19 Transporter parts ;

I mixed Tamiya XF-62 Olive Drab with X-2 White 50/50 for a light olive drab base coat . I'll start glueing the truck cabin and trailer pieces next .

Also a little work on the M113 ;

I mixed Tamiya XF-71 and X-2 , 3:1 for a light interior green on the insides of the M113 .

For a base coat on the outside I mixed equal parts of XF-57+XF-59+XF-20 , for a Yom Kippur War "Sinai Grey"

I found a couple of stowage racks to add to the sides of the M113 as well as a couple of upper rails .

I'm not sure which type of external exhaust to use , a solid piece or the flexible type ????

Lot's of glueing tomorrow , I'm happy with the paint colors so far .

                                 John .

  • Member since
    October 2007
Posted by White_R34 on Sunday, October 24, 2010 8:08 PM

WoW that's a lot of little parts, look like fun. Here a photo link on the Yum Kippur War for any one that need's it: Yum Kippur War Photos

Building the Impossible Is my main goal!!
  • Member since
    September 2003
  • From: Australia
Posted by Helo H-34 on Thursday, October 28, 2010 3:03 PM

Thank's for the link on the Yom Kippur war photo's , there are some awesome pic's on that site .

Mike , I recently read a tip in a back issue of FSM on painting/airbrushing stripes on tail rudders etc ;

After airbrushing the white and then cutting your strips of masking tape to cover the area you wish to remain white , you then airbrush a couple more of coats of white first to seal the edges of the masking tape , this helps from any of the next "darker color" paint bleeding under the tape .

HTH ;

                          John .

  • Member since
    September 2006
  • From: Dripping Springs, TX, USA
Posted by RBaer on Monday, November 1, 2010 4:39 PM

Everybody's looking good.........

I'm still alive, just have had zip for modeling time lately, but hope to get back to the bench shortly.

Apprentice rivet counter.

JOIN OUR COMMUNITY!

Our community is FREE to join. To participate you must either login or register for an account.

SEARCH FORUMS
FREE NEWSLETTER
By signing up you may also receive reader surveys and occasional special offers. We do not sell, rent or trade our email lists. View our Privacy Policy.