SEARCH FINESCALE.COM

Enter keywords or a search phrase below:

MONOGRAM MAFIA II GB

102201 views
811 replies
1 rating 2 rating 3 rating 4 rating 5 rating
  • Member since
    January 2012
  • From: East Peoria, IL
Posted by stoutfella on Tuesday, January 29, 2013 5:36 PM

Greetings,

I'll take some proper pictures in the lightbox later, but wanted to post a few just to prove I've persevered to completion on the P-38. Though I do reserve the option to replace the canopy with a vacuform part someday. Of all the lousy-fitting pieces in this kit, the clear parts rose to a new level of towering awfulness. Wow! If I'd done a bit more test fitting earlier in the process, I would have bitten that bullet and ordered a Squadron canopy. Anyway, here 'tis. As I've said, it'll look OK on the shelf just because the 38 is such an impressive aircraft, but don't look too close. This was meatball surgery on a mediocre kit cast from nearly 50-year-old molds. So I'm moving on to something from my Tamiya stash and not looking back, unless I decide to replace that canopy.

By the way, stikpusher, that MicroGloss worked OK for me, though it wasn't demonstrably better than the MM acrylic gloss I've been using. I'll probably use up what I have on hand, but wouldn't bother to order any more.

Cheers,

Stoutfella

On the bench: 1/48 Tamiya Bristol Beaufighter

On deck: 1/48 Tamiya P51-B

  • Member since
    April 2005
  • From: Australia
Posted by taxtp on Tuesday, January 29, 2013 5:56 PM

Outstanding work on the P-38 Stoutfella, that's a very realistic paint job.

I've finally got back to the Monogram 1/32 Mustang that I started.

I did some of the hack work on this one last night, removing parts from the sprue, clearing flash and filling ejection pin marks. I also removed the kit chrome using a weak solution of caustic soda.

I then set about spraying and some basic assembly. So the interior pieces and the axles got semi gloss black, some of the chrome bits have been primed with gloss black, in preparation for a subsequent coat of Alcad II Chrome. I still have more cleanup to do on the hub caps, so I didn't prime them. The tyres are two piece (right and left)  solid plastic, but I'll have to remove the seam line before proceeding.

Cheers

Tony

I'm just taking it one GB at a time.

  • Member since
    October 2010
  • From: Hoodsport, WA
Posted by Dogfish_7 on Wednesday, January 30, 2013 11:39 AM

Just finished putting the decals on this 1964 Aurora P-40 Flying Tiger.

Bruce

  • Member since
    January 2011
  • From: Commonwealth of Virginia
Posted by Tal Afar Dave on Thursday, January 31, 2013 11:48 AM

Looks like I 'missed movement' on this operation......work, army, and home remodeling still taking a toll.  At least I'll be ready for Monogram Mafia part III???  Whatdoyasay, Don Hammerini???

2022 New Year's Resolution:  Enter 1 group build and COMPLETE a build this year!!  Why Photobucket did you rob me of my one Group Build Badge???  Must be part of the strong anti-Monogram cartel!!!

 ]

  • Member since
    January 2012
  • From: East Peoria, IL
Posted by stoutfella on Thursday, January 31, 2013 12:45 PM

Greetings,

Here a few more pics of the P-38 from the lightbox.And so I bid a not-so-fond farewell to this old Revellogram kit, my third and last Lightning unless Tamiya steps up.

Cheers,

Stoutfella

On the bench: 1/48 Tamiya Bristol Beaufighter

On deck: 1/48 Tamiya P51-B

  • Member since
    September 2008
  • From: World Champions! Not anymore..
Posted by swingr1121 on Thursday, January 31, 2013 12:58 PM

Stoutfella, that lightning looks fantabulous.

  • Member since
    April 2005
  • From: Australia
Posted by taxtp on Thursday, January 31, 2013 7:03 PM

Come on Tamiya, I wanna see Stoutfella weave some magic over another one !

Monogram 1/32 1966 Mustang GT-350

Chrome has been sprayed on the various bits, using Tamiya aerosol TS-83. I've started masking the stripes on the body, I'm a bit nervous about getting good alignment. Looking at this photo, I might need to revisit it again (again).

Cheers

Tony

I'm just taking it one GB at a time.

  • Member since
    April 2005
  • From: Australia
Posted by taxtp on Saturday, February 2, 2013 7:03 AM

I get to make two updates in a row.

This is the progress on the Monogram 1/32 1966 Mustang, however, it's not my greatest photographic moment.

I've coloured the tail light lenses, completed the rim and tyre assembly, finished the grille, also the seats and completed the woodgrain steering wheel.

Cheers

Tony

I'm just taking it one GB at a time.

  • Member since
    December 2011
  • From: Alabama
Posted by Big_Dog on Saturday, February 2, 2013 3:57 PM

As promised here are the "walk around" shots of the Hawk Ha-81A3. I modified 2 sets of the Kits decals to correctly portray R.T. Smith's # 77 that crashed on take off at Magwe, Burma 23 Feb 42.

  • Member since
    December 2002
  • From: Coldwater, Mich
Posted by MKelley on Wednesday, February 13, 2013 1:17 PM

I have not checked in a long time, has the Don been heard from lately? Just trying to figure out who earned what and if there will be a MM III. The world wonders...................Whistling 

  • Member since
    September 2005
  • From: Central Nebraska
Posted by freem on Wednesday, February 13, 2013 2:00 PM

A MMIII would soothe the wounds of me failing miserably on MMII. That and a 25 hour day 8 days a week.

Chris Christenson


  • Member since
    April 2005
  • From: Australia
Posted by taxtp on Wednesday, February 13, 2013 11:16 PM

Here's some photo's of the 1/32 Mustang GT-350 that I built for this. It's certainly not my best effort, but at least it's completed.

Cheers

Tony

I'm just taking it one GB at a time.

  • Member since
    December 2002
  • From: Coldwater, Mich
Posted by MKelley on Monday, February 25, 2013 6:04 AM

Seriously anyone heard or seen HVH? I have not seen a post anywhere from him, very unusual. Miss his knowledge and 2 cents worth on the forum.

  • Member since
    July 2004
  • From: Sonora Desert
Posted by stikpusher on Tuesday, February 26, 2013 12:09 AM

I am hoping that he is just swamped with work and not pulling up stakes and popping smoke here...


F is for FIRE, That burns down the whole town!

U is for URANIUM... BOMBS!

N is for NO SURVIVORS...

       - Plankton

LSM


  • Member since
    January 2003
  • From: Hancock, Me USA
Posted by p38jl on Tuesday, February 26, 2013 9:16 AM

I think he's busy with the "job".. I did send him an email to ck in... Let you know what I find.. also.. will be adding my 1st entry soon...

[Photobucket]

  • Member since
    January 2003
  • From: Hancock, Me USA
Posted by p38jl on Wednesday, February 27, 2013 11:16 AM

Here's my Esci 1/48 Huey, UH-1H,, done up as a hodge-podge of the choppers from Apocolypse Now, the Ride of The Valkries scene..

scratch built Surf boards w homemade decals

scratched loud speakers

scratched reel to reel tape deck w actual CCR Music cannibilised from a Born on the 4th of July soundtrack cassette.

hand painted nose art..

this was meant as good representative of a "movie chopper "..


[Photobucket]

  • Member since
    July 2008
  • From: USA California
Posted by vetteman42 on Sunday, March 17, 2013 12:25 AM

Anyone ever hear from HVH ????? Hope he is ok

Randy So many to build.......So little time

  • Member since
    December 2006
  • From: Phoenix, AZ
Posted by Fly-n-hi on Sunday, March 17, 2013 11:44 AM

Hey guys!  Been a while since I've updated my F-20.  I ended up putting all my modeling stuff in the closet for a few months.  You know how life gets in the way sometimes...well life + CoD: Black Ops II, NFL Football/playoffs, NCAA Basketball and laziness.

Anyway,  I committed to a group build for my local IPMS chapter and the build needs to be done by mid July.  Problem is I'm gonna be crazy busy from May 1st through about the end of June so I got to get it done.  So since I have my stuff out again I'm gonna try to finish 3 builds that I started...including the F-20.  

So here's where I'm at now.  I guess I missed the six month build deadline:

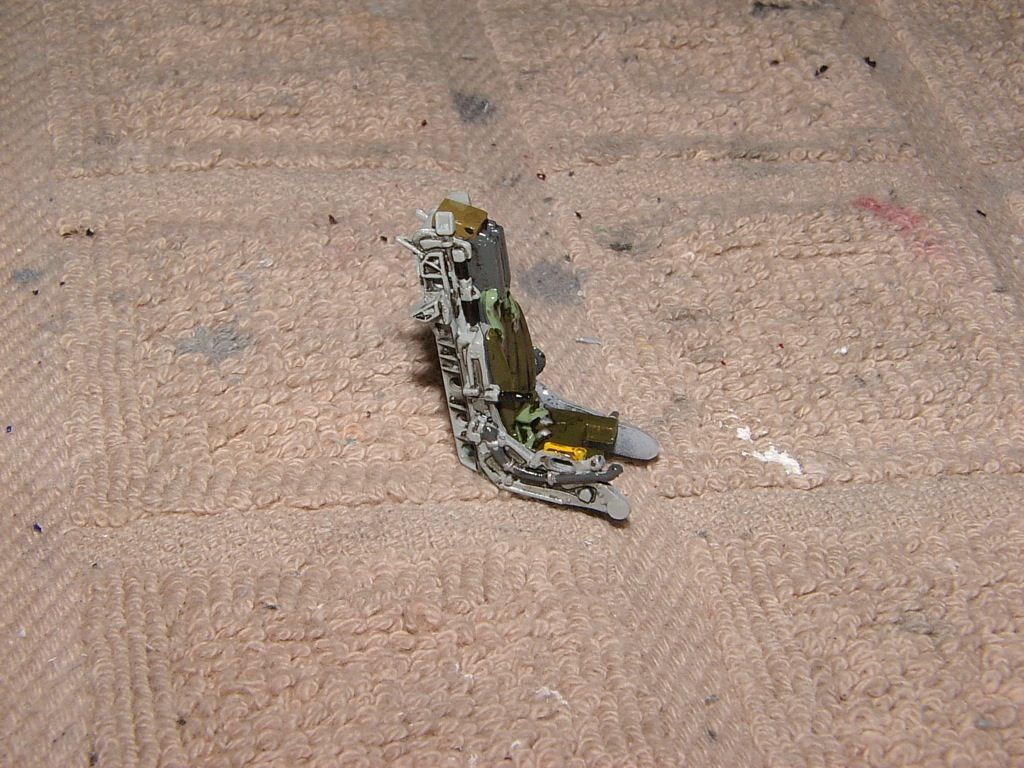
The bang seat (which is actually a really nicely detailed seat) is painted, glossed and washed:

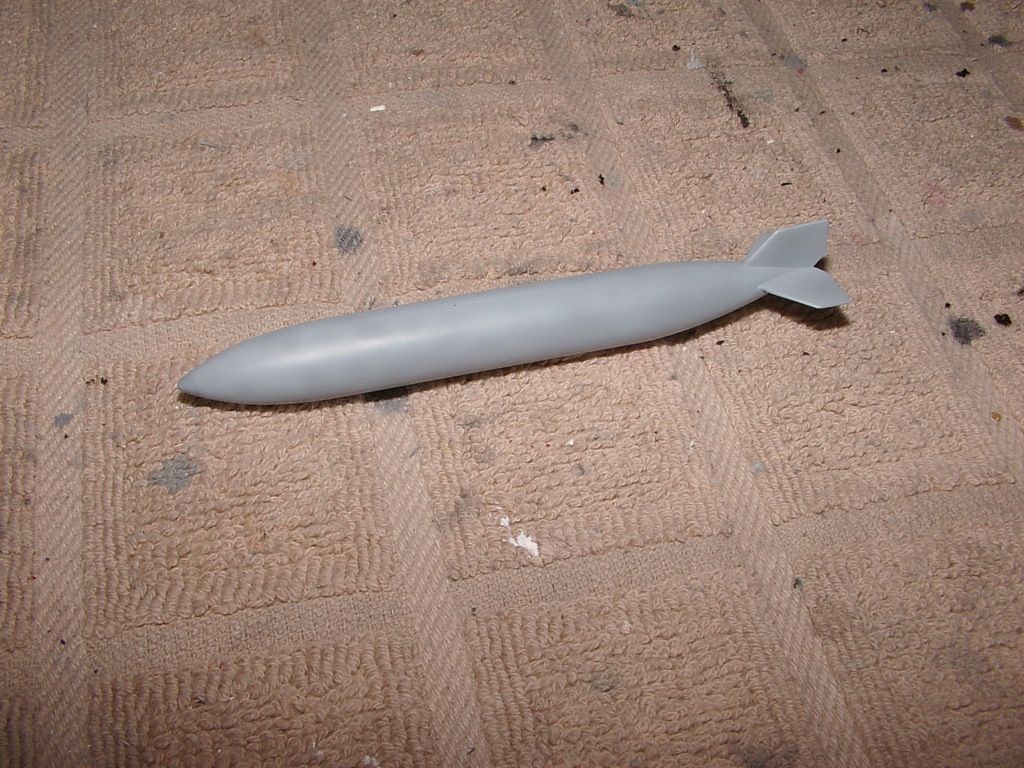
The F-20 is going to have a what-if aggressor scheme but I'm giving it a grey fuel tank just to break up the colors a little.  Here it is with some base weathering:

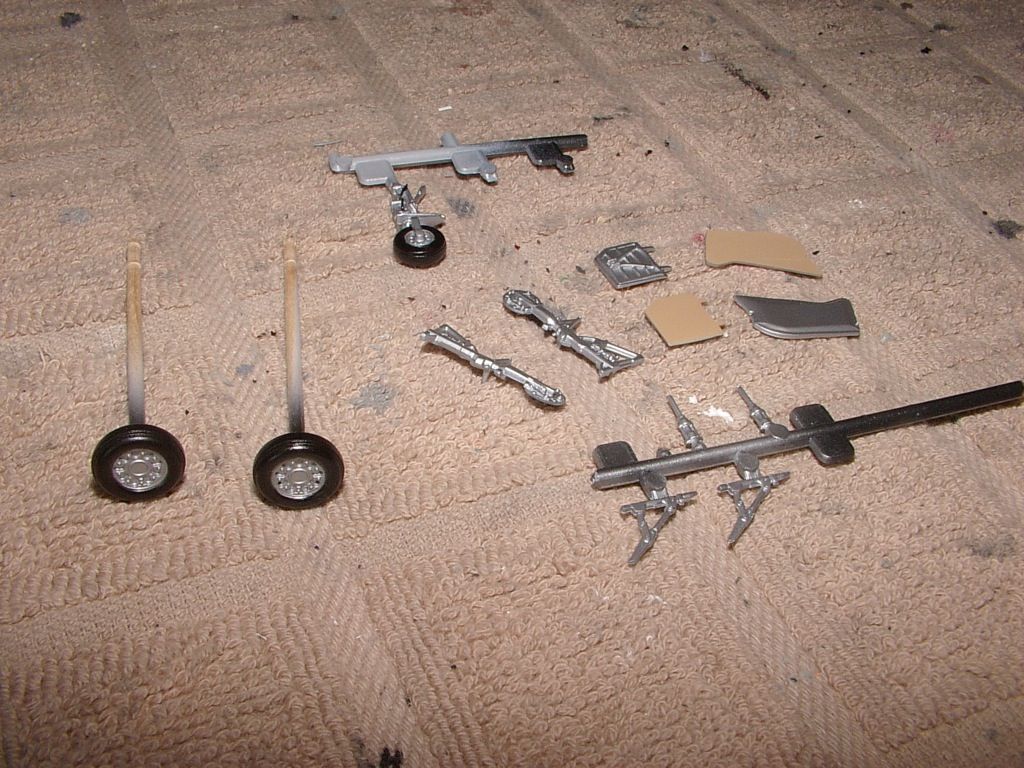
The gear legs and wheels/tires are painted.  Gonna make these silver instead of the standard white.  I see alot of F-5s with silver gear so I figured it might look cool and be different.  I also added a brake line to the nose gear...the first time I've tried that:

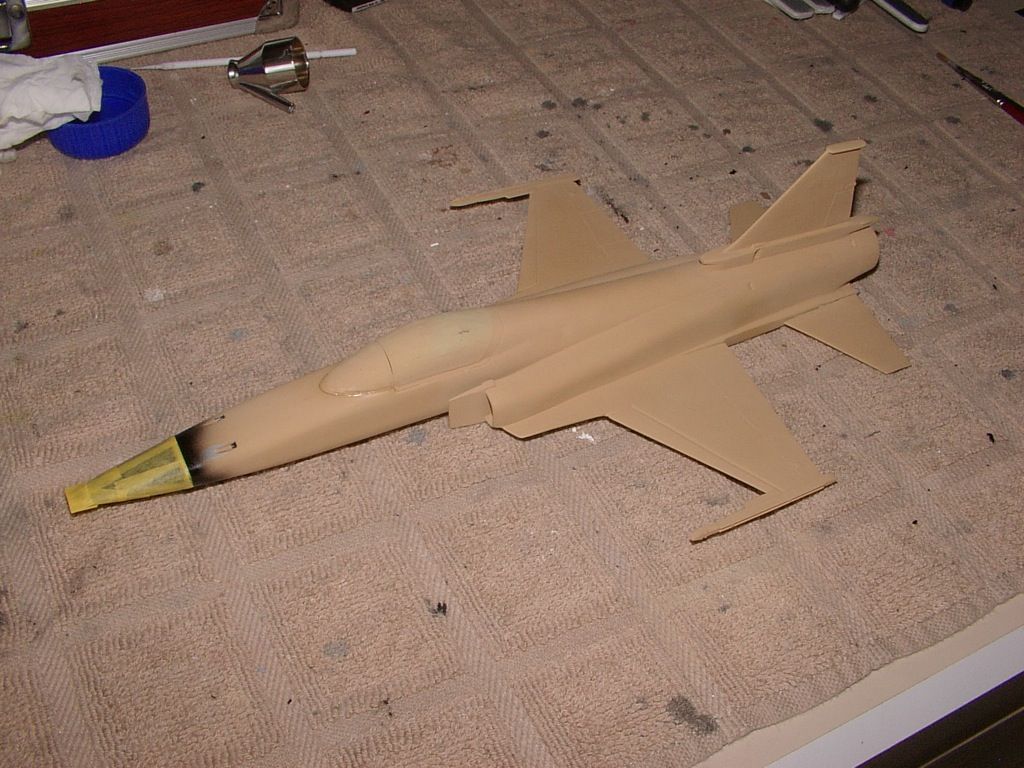
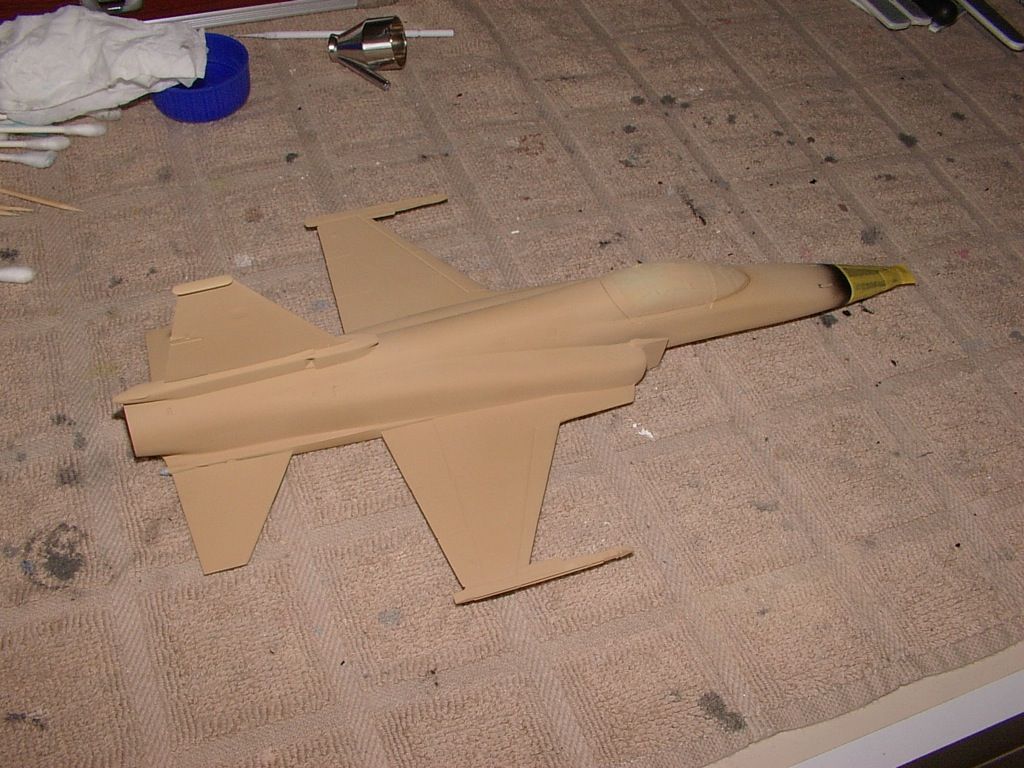
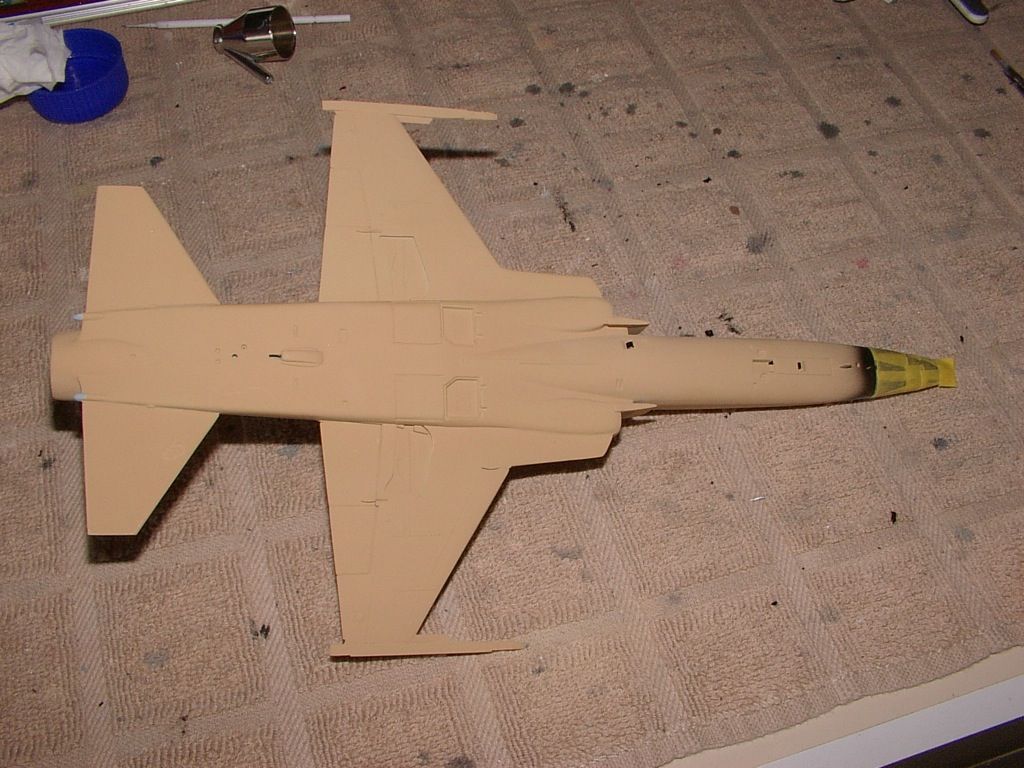
Here's the F-20 with the base color on it.  It needs some touch ups before the next color goes on:

  • Member since
    December 2002
  • From: Coldwater, Mich
Posted by MKelley on Sunday, March 17, 2013 1:18 PM

vetteman42

Anyone ever hear from HVH ????? Hope he is ok

Not a peep. Wondering what is going on.

  • Member since
    December 2006
  • From: Phoenix, AZ
Posted by Fly-n-hi on Thursday, March 21, 2013 11:36 PM

Got the camo on.  I forgot to take pictures of the first brown layer.  Oh well.  Its not by best camo work and I still need to touch up some areas but this is the the final camo.  I tried to give it a faded look by mixing in some white and post fading in different areas:

  • Member since
    December 2006
  • From: Phoenix, AZ
Posted by Fly-n-hi on Sunday, March 24, 2013 2:03 AM

Ok...making good progress now.  Did a little more post shading around some of the panel lines and some other "dirty" areas.  Also put a gloss coat of Future over it:

I was going over the exterior parts and I realized that I must have thrown out the nose gear door.  I guess I'll have the scratch it.  I'm gonna paint the gear silver instead of white.  It seems like many of the F-5 types had silver gear.  It will be a nice change from the always white gear.

I've got the pylons painted and ready to go to so I'll get a pic up soon.  I'm gonna have to scratch the gun barrels out of brass tube, as well.

  • Member since
    July 2004
  • From: Sonora Desert
Posted by stikpusher on Sunday, March 24, 2013 1:51 PM

coming along nicely! I love those wraparound schemes!


F is for FIRE, That burns down the whole town!

U is for URANIUM... BOMBS!

N is for NO SURVIVORS...

       - Plankton

LSM


  • Member since
    December 2006
  • From: Phoenix, AZ
Posted by Fly-n-hi on Thursday, March 28, 2013 12:27 AM

stikpusher

coming along nicely! I love those wraparound schemes!

Thanks Stik.  Yeah, the wrap arounds are cool but can be a little tedious.  This one wasn't too bad.  I really only have a few steps left...like painting the wheel wells, decaling, washing the flap panel lines, a flat coat and some weathering.

I thought I was gonna be crazy busy starting in May but that got moved back to June so I should get 'er done soon.

So do we know what happened to Hans?  Was he so disappointed that I missed the six month deadline that he quit the forums?

  • Member since
    November 2003
  • From: State of Mississippi. State motto: Virtute et armis (By valor and arms)
Posted by mississippivol on Thursday, March 28, 2013 9:55 PM

Great idea for your F-20! I'd bet she'd be a hot rod for that sort of thing!

Glenn

  • Member since
    December 2006
  • From: Phoenix, AZ
Posted by Fly-n-hi on Friday, March 29, 2013 5:05 PM

Thanks MS!

Here's a few more pics.  Like I mentioned earlier I had the pylons all painted.  Since this is an adversary scheme you wouldn't normally see the pylons on it but I wanted to break up the cleanness of the plane a bit.  The pylons will probably hang empty but I think it makes the plane a little more interesting visually.  I wish that Monogram had included the fuel tanks that go out on the wings.  Oh well.

Painted the wheel wells:

I've started painting some of the little panels to add more visual interest.  Since I sanded off all of the panel lines the surface is fairly boring.  I'll get some pics up soon.  Also, I bought some brass tubing today so I'm gonna try to make the gun barrels.

  • Member since
    December 2006
  • From: Phoenix, AZ
Posted by Fly-n-hi on Tuesday, April 2, 2013 7:04 PM

Ok, a little more progress.  

I cut out the brass tubing to make the gun barrels.  Man, these look so much better than the kit part:

I washed the control surface panel lines and most of the openings/vents:

I'm at a sort of stall out.  Obviously its painted up as an aggressor bird but I'd love to put ordinance on it.  So I can continue and arm it or I could come up with some different decals to make it more "active duty."  I am debating this one at the moment...otherwise I could move along quickly.

  • Member since
    December 2006
  • From: Phoenix, AZ
Posted by Fly-n-hi on Tuesday, April 23, 2013 2:31 PM

Ok, here's the F-20 with some markings on her.  The squadron markings are spares from the Tamiya F-16 Aggressor that I won't be using.  The general markings are from the spares box.  Obviously, I had to guess where the marking should go since I'm making this up.

You can see in this photo that there is damaged area right smack in the middle of the "AIR" in the US AIR FORCE decal.  Gonna try to touch that up.

Now I just have to add a few little details/decals, touch up a couple of spots and the rest should happen fairly quickly.

I have no idea why these sentences turned into hyperlinks, btw.

  • Member since
    February 2010
  • From: New Jersey
Posted by 68GT on Sunday, May 19, 2013 6:39 PM

This is what the F-106A looks like now that it has been completed.

On Ed's bench, ???


  • Member since
    July 2004
  • From: Sonora Desert
Posted by stikpusher on Tuesday, May 21, 2013 5:58 PM

Nice Dart 68! beautiful finish!

Well I pulled out my TBD and am knuckling down on the final steps. Today was washes and drybrushed highlights....

Tomorrow or the day after will be the Matt coat from Humbrol... I'm tired of this one staring at me almost done...


F is for FIRE, That burns down the whole town!

U is for URANIUM... BOMBS!

N is for NO SURVIVORS...

       - Plankton

LSM


  • Member since
    December 2006
  • From: Phoenix, AZ
Posted by Fly-n-hi on Tuesday, May 21, 2013 7:14 PM

Nice work 68GT.  Nice and clean!

Stik, that TBD is turning out great!

Well, I ran into some trouble with the F-20.  First, the Tamiya decals just weren't that good.  This comes as no surprise since Tamiya decals suck 95% of the time.  Couple that with the fact that some of the decals that I had to use to complete the markings were old, dried up and just didn't really lay down well.  

But the real problem was something I did.  I used a lacquer dullcoat on top of the Future and the Future reacted with it.  It pretty much ruined it.  I don't feel that bad about it since I wasn't super happy with it in the first place.  So I stripped it and started the paint process over.  Fortunately, all that was ruined was the paint.  I didn't have to do anything in the way of sanding or repairing anything.

I re-primed it and preshaded it.  Also, I re-masked the canopy and windshield:

I went ahead and purchased some decals this time...instead of trying to use old scraps from the spares box.  The scheme at the top is what I'm going for:

Hopefully I'll have better luck this time around.

JOIN OUR COMMUNITY!

Our community is FREE to join. To participate you must either login or register for an account.

SEARCH FORUMS
FREE NEWSLETTER
By signing up you may also receive reader surveys and occasional special offers. We do not sell, rent or trade our email lists. View our Privacy Policy.