SEARCH FINESCALE.COM

Enter keywords or a search phrase below:

Vietnam Air War GB - Extended!

137483 views
1018 replies
1 rating 2 rating 3 rating 4 rating 5 rating
  • Member since
    November 2010
  • From: Lafayette, Indiana
Posted by Son Of Medicine Man on Wednesday, January 30, 2013 5:34 PM

taxtp

That seems like a frustrating exercise. Well done on achieving a good outcome.

Cheers

Tony

Thank you Tony, I am just glad it didn't break in two!

Ken

  • Member since
    November 2010
  • From: Lafayette, Indiana
Posted by Son Of Medicine Man on Wednesday, January 30, 2013 5:31 PM

eatthis

that looks like a job and a half!

Thank you, I appreciate the compliment!

Ken

  • Member since
    October 2008
Posted by eatthis on Wednesday, January 30, 2013 3:18 PM


snow + 4wd + escessive hp = :)  http://www.youtube.com/watch?v=x7egUIS70YM

  • Member since
    October 2008
Posted by eatthis on Tuesday, January 29, 2013 10:59 PM


snow + 4wd + escessive hp = :)  http://www.youtube.com/watch?v=x7egUIS70YM

  • Member since
    October 2008
Posted by eatthis on Tuesday, January 29, 2013 10:24 PM

the decals iv got for the tsr2 are from part 2 of xtradecals what if sheets and is for an 80s bird would this be useable for vietnam era markings or not?


snow + 4wd + escessive hp = :)  http://www.youtube.com/watch?v=x7egUIS70YM

  • Member since
    April 2005
  • From: Australia
Posted by taxtp on Tuesday, January 29, 2013 9:20 PM

That seems like a frustrating exercise. Well done on achieving a good outcome.

Cheers

Tony

I'm just taking it one GB at a time.

  • Member since
    October 2008
Posted by eatthis on Tuesday, January 29, 2013 8:34 PM

that looks like a job and a half!


snow + 4wd + escessive hp = :)  http://www.youtube.com/watch?v=x7egUIS70YM

  • Member since
    November 2010
  • From: Lafayette, Indiana
Posted by Son Of Medicine Man on Tuesday, January 29, 2013 8:04 PM

Hi Everyone,

I thought that epoxying those cockpit side walls was going to be a piece of cake.  WRONG!  The forward end on each side wall did not want to conform to the shape of the cockpit.  The canopy release handle (the ones that I spent all that time making) popped off of each side in the front cockpit from the stress of me flexing the side wall to make them fit.  I lost one of them.

I was using rubber bands to hold them in place but it was not working for the front end.  I had to use a clamp, but there was only room to clamp one side at a time.  And since I had already put epoxy on both sides (5 minute), I had to do surgery on the other side last night and cut it loose so I could redo it.

I clamped it and let it cure overnight.  Here is a couple of pictures:


Here is the finished repair in the next picture.  To try and describe what exactly was happening, the bottom seam of the cockpit wall was not true to the seam of the cockpit tub.  It wanted to raise up towards the front.

 Here are some pictures showing the side walls in place:


Next is filing down those ridges off the exterior of the side walls to make room for the cockpit to fit into the fuselage.

Ken

  • Member since
    October 2008
Posted by eatthis on Tuesday, January 29, 2013 5:52 PM

this is where the tsr2 is at so far this is the 4th time iv painted it and im STILL not 100% sure on the colours! i had no idea sea camo would be such a pita lol


snow + 4wd + escessive hp = :)  http://www.youtube.com/watch?v=x7egUIS70YM

  • Member since
    October 2008
Posted by eatthis on Tuesday, January 29, 2013 4:51 PM

can i enter this please?

f111a and a usaf tsr2 il get a build thread up soon


snow + 4wd + escessive hp = :)  http://www.youtube.com/watch?v=x7egUIS70YM

  • Member since
    November 2010
  • From: Lafayette, Indiana
Posted by Son Of Medicine Man on Monday, January 21, 2013 8:46 PM

Hi Everyone,

I have the sidewalls done for the cockpit complete with the canopy release handles.  This first picture is the right sidewall:


And the next picture shows the left side wall:


The next step is to epoxy them onto the cockpit tub.

Ken

  • Member since
    November 2010
  • From: Lafayette, Indiana
Posted by Son Of Medicine Man on Wednesday, January 16, 2013 5:48 AM

Hi Everyone,

Well here is the photograph of the finished two color photo-etched canopy release handles.  I glued them together using Future:


Next step is to attach them to the cockpit walls tonight.

Ken

  • Member since
    November 2010
  • From: Lafayette, Indiana
Posted by Son Of Medicine Man on Wednesday, January 9, 2013 7:29 PM

Hi Everyone!

Wednesday is finally here and so the enamel is finally hardened enough to complete the final step of the 2 color photo-etch.

First we need mineral spirits:


We use this because it is not nearly as aggressive as other paint removers which will allow us to get more control on the process.

Next we need a straight edged spreader:


This is the type used to apply different types of putty and is made of plastic.  I believe this one came from an auto body & paint supply store, I can't remember.  I have had it for so long.

The next thing you will need is some very tightly woven cloth material, like a handkerchief.  Take the material, soak an area of it with mineral spirits, then wrap it tight around the spreader like this:

 Then start scraping across the photo-etch watching carefully how much paint you are removing.  You only want to remove the last color from the flat "shiny" surface (or what would have been the shiny surface) to expose the color underneath.  You want to leave the last color painted in the "etched" area of the photo-etch.

For example, in the above picture, the last color was black and the first color was yellow.  So we want to remove the black from the upper non etched area exposing the yellow but leaving the black in the lower etched areas like in the next photo:


And here is a shot of the reverse color photo-etch after I was done:


Pretty cool huh?  Like I said, just keep an eye on how much paint you are removing.  The thing is, if you screw up, you can always take the laquer thinner and remove all of it and start all over!

Ken


  • Member since
    November 2010
  • From: Lafayette, Indiana
Posted by Son Of Medicine Man on Sunday, January 6, 2013 8:20 PM

Hi Everyone,

Here is another episode of how to paint two colors on photo-etch.  Tonight is a little more work than last night since we have to use two colors again.  This is of course because I am painting two different photo-etch sheets.  If you were only doing one sheet, you would only be painting one color.

Tonight we use the opposite color on each sheet that we used as the first color, and the paint has to be gloss enamel.  I also use Model Master brand for the enamel, and I thin it with a 1 to 1 ratio.  This is because I want to be sure the paint gets down into all of the etched areas of the metal completely.  Once again I am using about 22 lbs of pressure.

Here is the sheet that had the black painted first and now has the gloss enamel yellow sprayed on top:


You can see how the yellow has settled down into the etched areas and since yellow is a little transparent to begin with, is showing the black through on the non etched areas.  This is giving you a hint of what this is going to look like when we are done.

Here is a shot of the sheet originally painted yellow with the gloss black enamel painted over it:


Once again you can see a hint of what this is going to look like when we are finished.

Model Master enamel takes 72 hours to harden completely, and we need it to be completey set before the next step.  So it will be Wednesday night before we can move to the next step.

Ken

  • Member since
    April 2010
Posted by Theuns on Sunday, January 6, 2013 7:42 AM

My 1/72 Airfix A-4b completed. Depicted in the colors of VA 95 aboard USS Intrepid 1966 (IIRC)

1/72 A-4b (VA 95)

1/72 A-4b (VA 95)

Next up is the Hasa 1/48 A-4 E

Theuns

  • Member since
    November 2010
  • From: Lafayette, Indiana
Posted by Son Of Medicine Man on Saturday, January 5, 2013 8:11 PM

Greetings Everyone!

Tonight's continuation of painting the two colors on the photo-etch process is very simple and short.  For this step we need to paint the clear coat on top of the base color we applied last night.  This needs to be gloss acrylic clear.  I am using Model Master brand.  By the way, I did not mention this but I am using about 22 lbs pressure.  Also, I am not using any thinner as Model Master acrylic comes ready to be used in an air brush.

Here is a picture of the yellow photo-etch I painted yesterday with the clear gloss coat that I applied tonight:

 And this next photo shows the black photo-etch with the gloss acrylic clear.  The camera is not able to get a good shot of the pieces but one thing you can see is where the paper towel was blocking the clear as I was spraying it on the left side.


Once again this will need to dry for 24 hours before proceeding with the next step.  So I will continue tomorrow!

Ken

  • Member since
    April 2010
Posted by Theuns on Saturday, January 5, 2013 12:34 AM

In the meantime, this wil be my next entry......

Hasa A-4 e/f

Theuns

  • Member since
    April 2010
Posted by Theuns on Saturday, January 5, 2013 12:32 AM

Since we still have some time I will then also enter a 1/48 Hasa A-4 E/F. :-)  Seems 2013 will be my Scooter year LOL!

The new little Airfix kit is actually vey nice, the wing does need some filler to join smoothly , and the slat rails tend to break off with handling th model. but otherwize the fit is very nice. The scraibed detail is also much finer than on some other new Airfix stuff, I would put it about the same as Academy's detail.

U cut off the flaps , thinned them out and re-glued the top halves to the wing.

Airfix 1/72 A-4 b (flap mod)

I left the cockpit pretty much out the box, the canopy so so somaal I was not sure much would be visable anyway, but the detail level is not bad atall.

Airfix A-4b

Primed ready for paint

A-4 b primed

Airfix 1/72 A-4b

The decals were a pure joy to work with, I was worried about the star that went over the votrex generators and the IFR probe, but they went into the detail witout any hassles.

The only thing with this kit I am not sure about is the instructions show the ailerons outboard tips to be painted in a straight line, jet there is a scribe line just ahaid of the outer leading edge that looks allot like the counter weight like on later scooters. I am not sure if Airfix is planing on bringing out later models and threrefore did this.

Completed pix to follow. 


Theuns

  • Member since
    April 2010
Posted by Theuns on Saturday, January 5, 2013 12:09 AM

Morning, yes it is the new Airfix 1/72 A-4b, but I have by now almost completed it.

Theuns

  • Member since
    November 2010
  • From: Lafayette, Indiana
Posted by Son Of Medicine Man on Friday, January 4, 2013 10:15 PM

Hi Everyone,

It has been a while since I posted my progress so I am going to play catch up tonight.

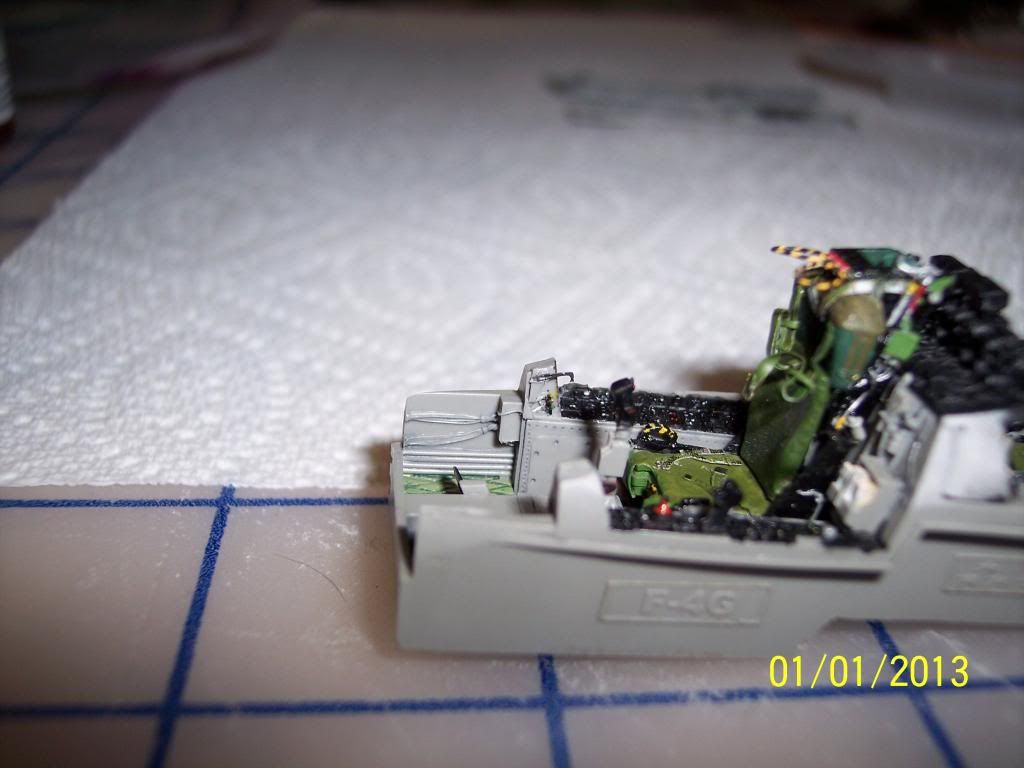
In this first picture I have painted the photo-etch landing gear control handle and attached it to the left side instrument panel:

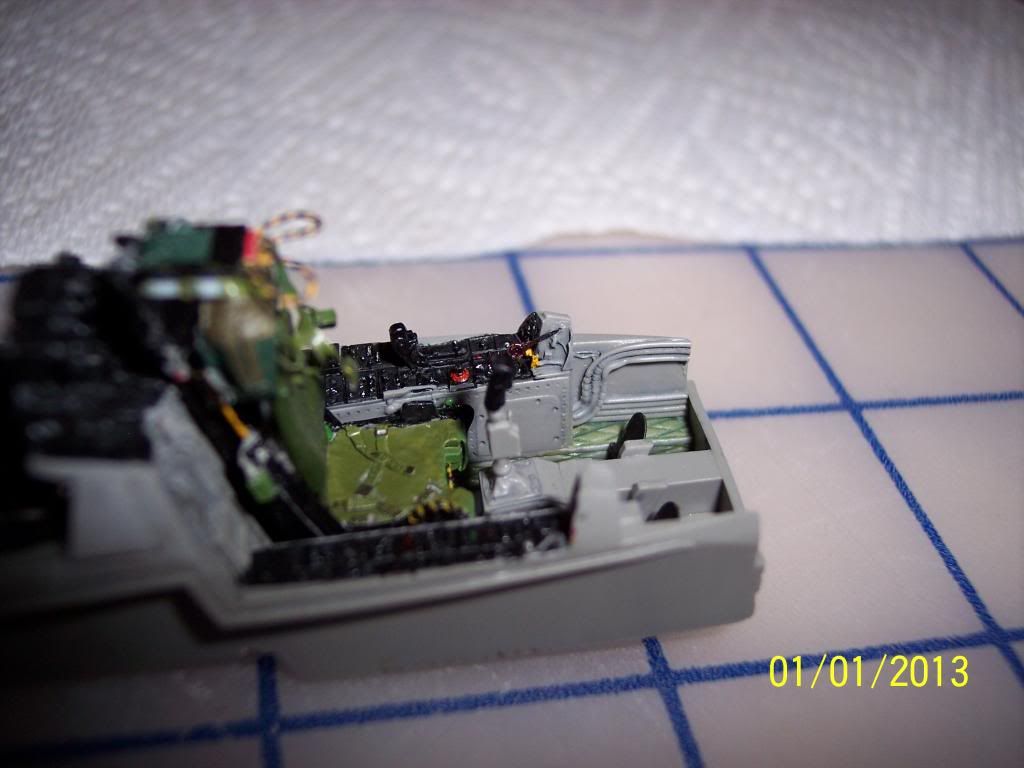
 In this next picture I have just cut the resin rear cockpit's engine throtle controls from the resin mold base:

  In the next picture you can see where the engine throtle control will be attached (the two long slots closest to you):

 The next photo shows the engine throtle control in place:

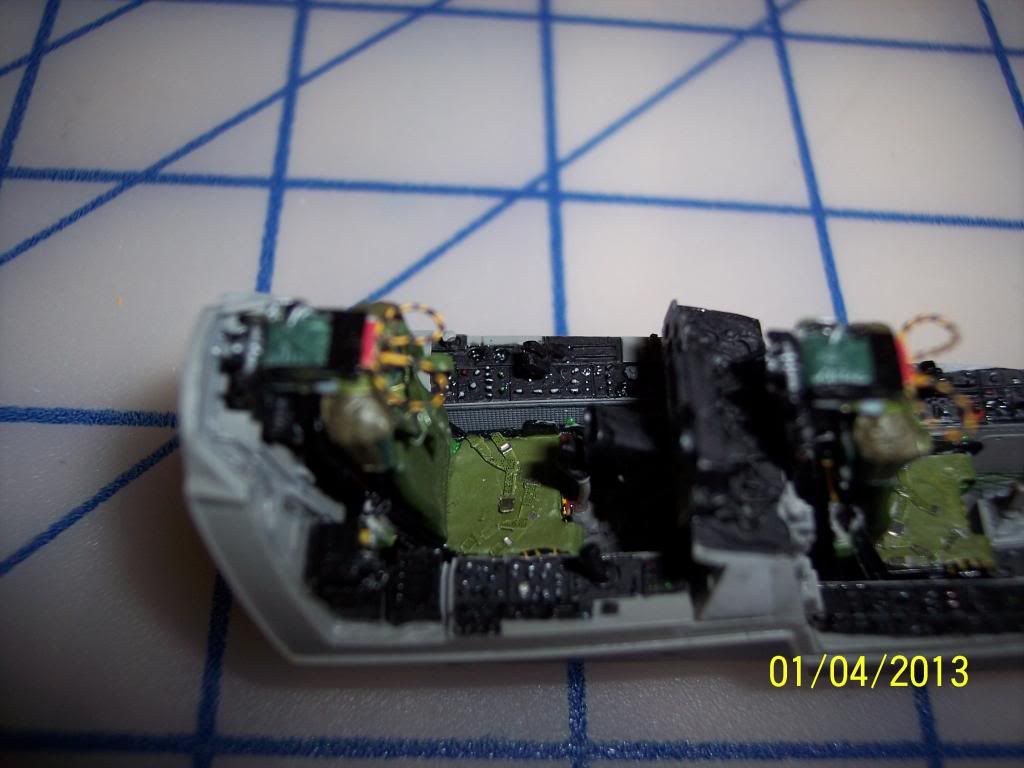
 The next picture shows the photo-etch of the arrestor hook control painted and attached to the right instrument panel:

 There has been a couple of requests on how I did the instrument panels.  Well I realized today that I needed to paint the photo-etch canopy emergency release handles yellow and black.  Since I will do this the very same way that I did the instrument panels, I will document it as I do them.

I must first give credit to Robert Kwikkel on this idea.  Here is a link to the web page where he describes how he does it:

http://www.arcair.com/tnt1/001-100/TNT033-PE-Painting-Kwikkel/00.shtm

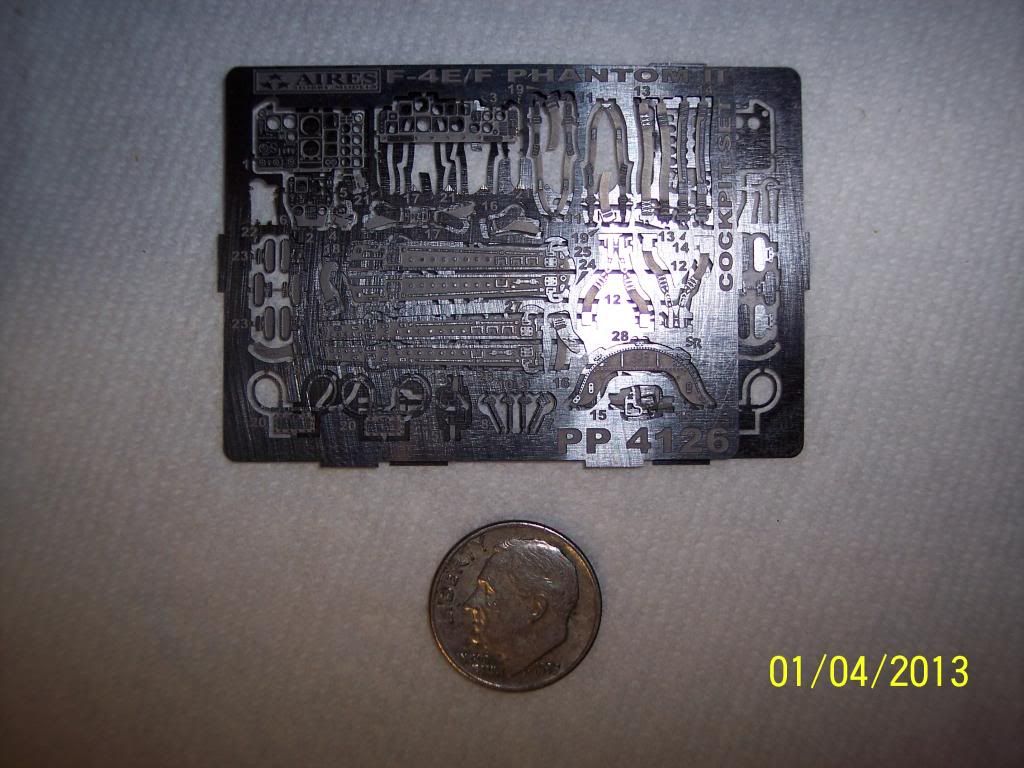
Here is a picture of the photo-etch handles.  They are numbered 7, 8, 9, and 10 right above the dime:

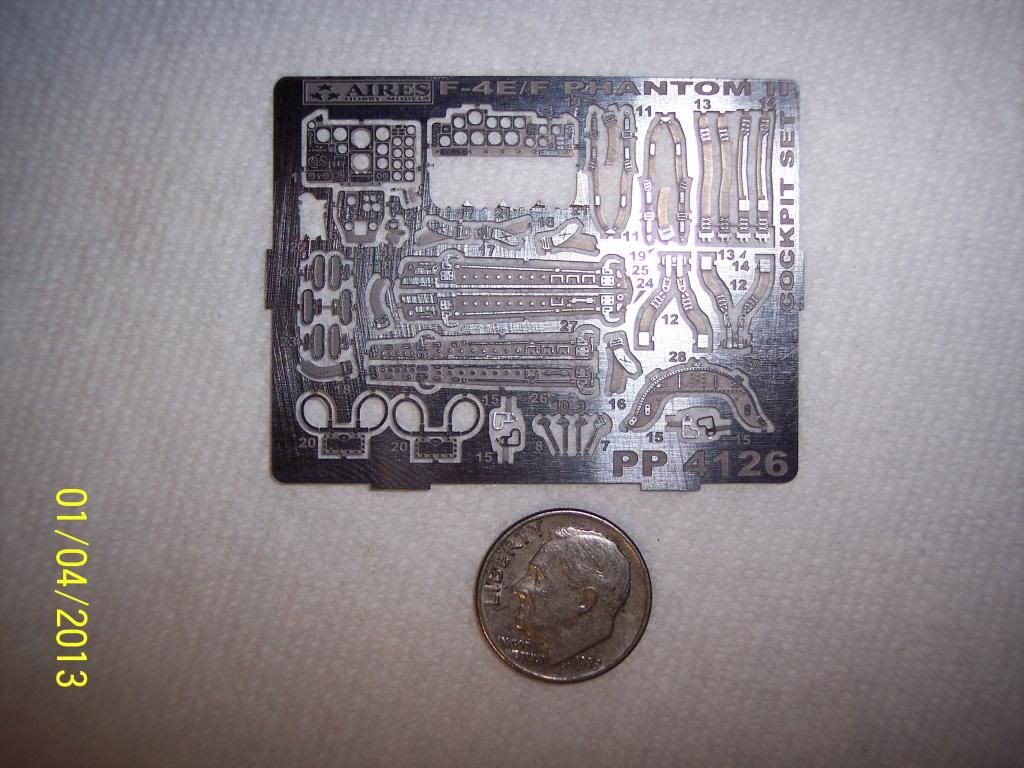
 Now one thing about the handles is that the top of each of them will be right above the bottom of the canopy glass.  This means that you will be able to see both sides.  As it turns out, I happen to have two photo-etch sheets since I had to order a second cockpit after accidentally destroying the first one.

 I also discovered that the handles are mirror images so I can glue them together to have a two sided photo-etch handle.


Another thing about the handles is that the emergency ones one the left side are yellow with black trim and the manual ones on the right side are black with yellow trim.  So I will be doing the colors in reverse order on the two sheets.

Here is the paint I will be using:

 First thing to do is clean the photo-etch.  I use lacquer thinner:


Just be sure to use plenty of ventilation when you use it.  Also be really careful not to spill any, it can destroy paint in a hurry.  Also you should wear latex gloves, in fact, just read the warning label!

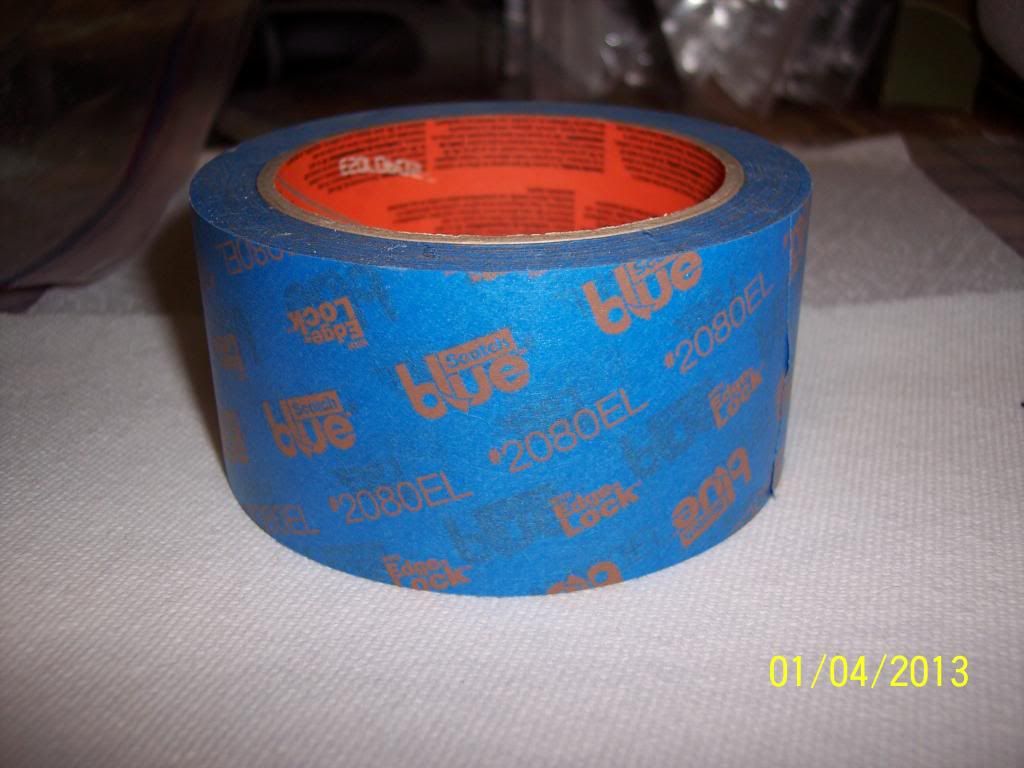
Next you will need to mask off the area that you are going to work with.  I like to use the Scotch brand "Safe-Release Painters" masking tape:

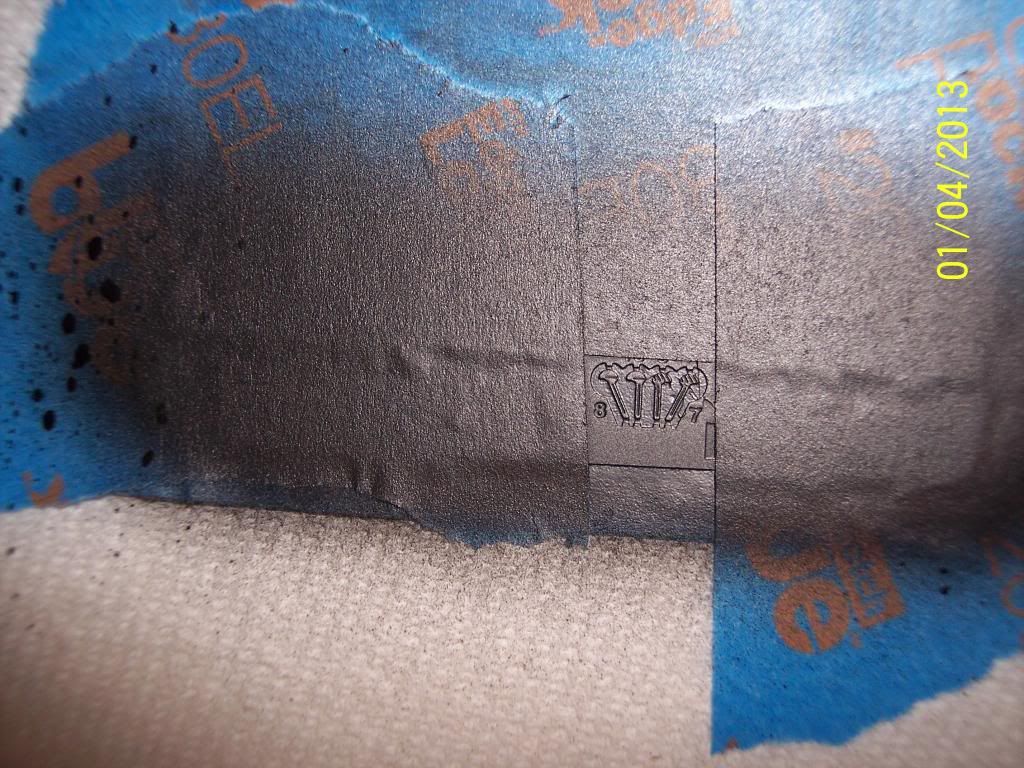
 First thing is to seal the backside so there isn't any paint that comes up from underneath.  So I mask the entire backside:

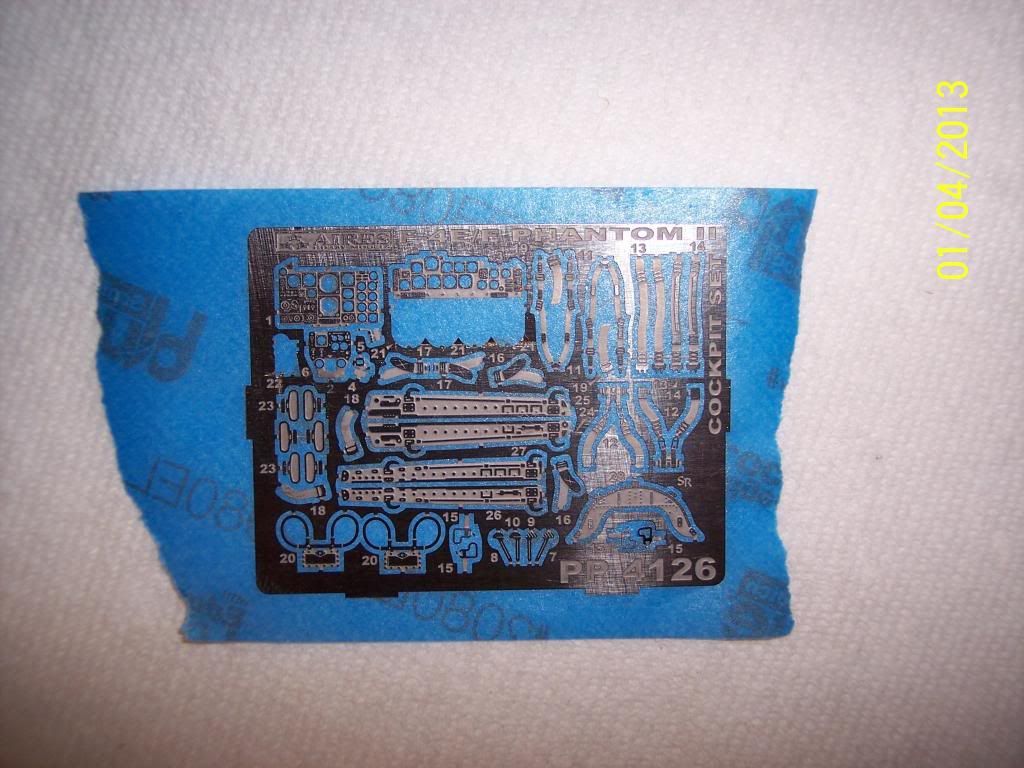
 Next I mask off everything on the front except for what I am painting:

 The first color to paint is the color you want the "shiny" part of the metal to be when you are done, and not in the "etched" area.  Also you want this to be an acrylic paint.  Since I need both colors reversed, I will be doing each sheet reversed.  Here is the first one where I need the handles yellow with black trim:

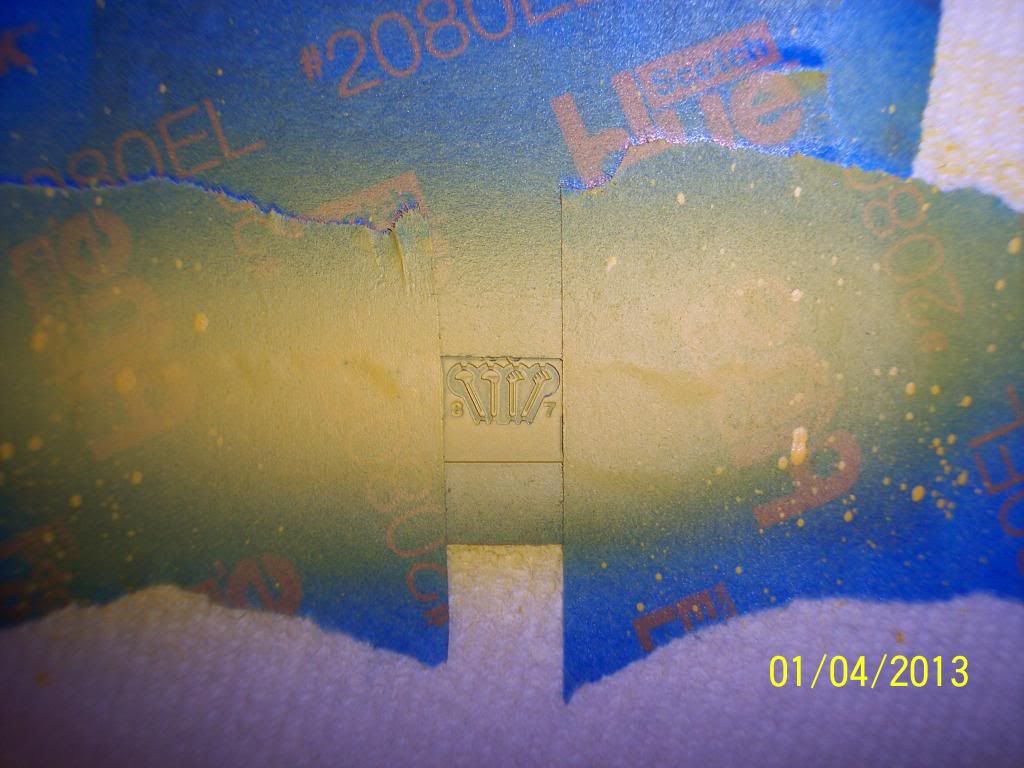
 And here is the sheet that will be the black handles with yellow trim:

 Model Master's acrylic takes 24 hours to completely dry.  So this is where I will leave off for tonight to wait for this to dry.

Ken

  • Member since
    April 2011
  • From: Dayton, OH
Posted by tcepilot on Thursday, January 3, 2013 4:08 PM

IMPORTANT MESSAGE TO ALL PILOTS: Pm me for my email to send me the finished pics of your aircraft to post on the front page.

-tcepilot


 just make a gif here


  • Member since
    April 2011
  • From: Dayton, OH
Posted by tcepilot on Thursday, January 3, 2013 3:45 PM

Updates are great and yes Theuns always room in this GB. I would love to see another A-4. Is it the new one by Airfix?

-tcepilot


 just make a gif here


  • Member since
    November 2010
  • From: Lafayette, Indiana
Posted by Son Of Medicine Man on Saturday, December 29, 2012 9:23 PM

Hi Everyone,

I guess I just don't know when to quit on this cockpit.  I decided to add a few placards and paint the red trigger buttons on the control sticks.

Here is the port side wall with a couple of placards added:

 And here is the rear cockpit control stick with the trigger button painted red:

 And here is the front cockpit control stick epoxied into place with placard attached and trigger button painted red:

 Ken

  • Member since
    November 2010
  • From: Lafayette, Indiana
Posted by Son Of Medicine Man on Thursday, December 27, 2012 8:35 PM

Hi Everyone,

Here is today's progress.

In this first picture I have the front ejection seat epoxied into place:

 This next picture shows the rear ejection seat epoxied into place:

 Here is a close up of the rear control stick epoxied into place.  It was a real bear since I had to hold it in position waiting for the 5 minute epoxy to setup:

 Here is an overhead shot of the cockpit so far:

 And finally a view from the starboard side:

 Ken

  • Member since
    November 2010
  • From: Lafayette, Indiana
Posted by Son Of Medicine Man on Wednesday, December 26, 2012 9:44 PM

Hi Everyone,

It has been sometime since I posted any pictures of my progress.  I have managed to put a little time in at the bench and took some pictures along the way.  But with everything else going on I have not had time to post them.  So here they are.

In this first one I have painted the knobs on the rear cockpits scope:

  In the next picture I have the right side of the cockpit wall still attached to the resin base mold:

 Here it is again with the resin base mold removed, sanded to fit the cockpit:

 In the next picture I have epoxied the scope into the rear cockpit:

 This next picture shows the left cockpit wall still attached to the resin base mold:

  And here it is again with the resin base mold removed, sanded to fit the cockpit:

  The next picture shows the front ejection seat still attached to the resin base mold:

 And here it is again with the resin base mold removed:

 And the next picture shows the rear ejection seat with the resin base mold still attached:

 And here it is with the resin base mold removed:


I epoxied the front ejection seat into the cockpit and now waiting for it to cure.  I will take more pictures tomorrow.

Ken

  • Member since
    April 2010
Posted by Theuns on Friday, December 21, 2012 11:04 AM

Hi guys, since it goes til late 2013, any space for me and my 1/72 Airfix A-4b Scooter in USN VA-95 sceeme?

Theuns

  • Member since
    January 2012
  • From: Hatfield
Posted by Misty on Sunday, December 16, 2012 5:05 PM

Obligatory sprue shot taken at work during lunch.


F104sprues by omgpainful, on Flickr

No idea how it will finish up. ideally it will be an interceptor with underwing tanks and sidewinders, "possibly" just after takeoff with gear cycling as its the only time the main bays are fully open (yeah right, i can hear my inner voice mocking me already) or with gear up (more likely as ill probably write off the u/c trying the former.)

  • Member since
    April 2011
  • From: Dayton, OH
Posted by tcepilot on Friday, December 14, 2012 2:27 PM

talentless

is it too late to come in? If its ok ill be doing a f104-c

You're in! I have been watching this GB from afar and I'm happy to say GREAT work everyone. I will have many updates within the next few days. My "Seahorse" is nearly finished updates on that coming later today. Sorry I have been a little busy and things will get up and running at full speed shortly.

-tcepilot


 just make a gif here


  • Member since
    January 2012
  • From: Hatfield
Posted by Misty on Friday, December 14, 2012 11:16 AM

is it too late to come in? If its ok ill be doing a f104-c

  • Member since
    September 2010
  • From: California
Posted by mikeymize on Wednesday, December 12, 2012 11:37 PM

I thought it was usually a grey color but it appeared to be a NMF or something on the box photo. Also the MM enamel cap issue you had made me laugh as the last time I had a super stuck lid I used vise grips on top and channel locks on bottom; the glass broke! Good thing it was in the garage over some newspaper.

"Time you enjoy wasting is not wasted time".


JOIN OUR COMMUNITY!

Our community is FREE to join. To participate you must either login or register for an account.

SEARCH FORUMS
FREE NEWSLETTER
By signing up you may also receive reader surveys and occasional special offers. We do not sell, rent or trade our email lists. View our Privacy Policy.