SEARCH FINESCALE.COM

Enter keywords or a search phrase below:

The Mustang and Corvette Group Build

38805 views
354 replies
1 rating 2 rating 3 rating 4 rating 5 rating
  • Member since
    January 2005
  • From: Portland, Oregon
Posted by fantacmet on Tuesday, December 3, 2013 8:35 PM

Got my molding compound today, so I have 2 wheel molds and a tire mold going right now.  Tomorrow I have to get some wax to keep the two pieces of the mold from sticking together and then pour the other halves of the mold.  Then I can cast my wheels for this build, and get a move on.  I also gotta figure out what int he world I did with the radiator.  I don't feel like scratchbuilding one.


  • Member since
    March 2011
Posted by ewheeler454 on Tuesday, December 3, 2013 8:27 PM

Rommel,

I really like the look and stance. Were the fenders already flared like that??

  • Member since
    February 2013
  • From: Podunkville, USA
Posted by rommelkiste on Tuesday, December 3, 2013 8:12 PM

Gord if that was your first solder headers I am sure you learned to say a few new words.  The next will be a little easier just by what you learned from the first try.  With a little practice, you can make em lots better than what comes in the kit!  Don't give up on em!!

Nothing ever fits……..and when it does, its the wrong scale.

To make mistakes is human.  To blame it on someone else shows management potential. 


  • Member since
    November 2013
  • From: Jerseyville, ON
Posted by elass0wyp0 on Tuesday, December 3, 2013 4:47 PM

Looking good boys. 

I don't have any pics to share yet but I did have 2 days off this weekend and was able to get the under carriage sorted out a bit. I also made solder headers.  What a pain that was.  Not the best, but it's done and I learned something new.  Mostly never to do solder headers again.

I have also been trying a few methods of weathering the frame -I'm not too sure how well they turned out but I did a coat of rust, that chipping stuff, then matte black coat, then chipped the matte away and dry brushed some silver, rust, and finally some black, focusing on what would have been metal under the fibreglass flyer.  I also gave it an "oiled earth" wash.  I've never used that before so I wanted to try it out.  I think it's passable. 

The body is cleaned up and primed ready for the final squirt as well as the interior pieces.  That's about it for me. 

I'm going to try to upload my limited pics with apologies for quality, and quantity.

Gord


  • Member since
    February 2013
  • From: Podunkville, USA
Posted by rommelkiste on Monday, December 2, 2013 8:29 PM

I got to get back to the peace and quiet of the work bench after the big gathering.  I got some body work done on the Vette and got it in some primer.  I did a mock up and I'm happy with the stance after all the mods and I guess I will keep the kit tires, they seem to work well.  I haven't yet decided on a wheel choice but will work on that.  I think it looks kinda crappy in primer but maybe it will look like a racer when I get the white on and the blue graphics.  This is it for now until I can grind out more.  Good luck with the gauge faces Tony!

Nothing ever fits……..and when it does, its the wrong scale.

To make mistakes is human.  To blame it on someone else shows management potential. 


  • Member since
    April 2005
  • From: Australia
Posted by taxtp on Monday, December 2, 2013 6:08 PM

Reminds me I have to finish my Jaguar XJR-9 for that group too. I seem to be doing a lot of masking lately, and that one needs heaps. Might try to get it done next.

My '53 Corvette gauge faces arrived. Must get on with it.

Cheers

Tony

I'm just taking it one GB at a time.

  • Member since
    March 2011
Posted by ewheeler454 on Sunday, December 1, 2013 10:13 PM

HI,

Builds are looking good. I've got a Chevelle I need to finish for the other group build that ends DEC. 31 so I will be concentrating on that one. I'll work on the vette as time permits.

L8TR,

Eric.

  • Member since
    February 2013
  • From: Podunkville, USA
Posted by rommelkiste on Sunday, December 1, 2013 9:48 PM

I understand that.  There are some nice Stang kits out there that won't give you as much of a Kopfschmerzen as this one.  I wouldn't blame you if you hid it in the closet and chose another.

Nothing ever fits……..and when it does, its the wrong scale.

To make mistakes is human.  To blame it on someone else shows management potential. 


  • Member since
    February 2005
  • From: Proctor. MN
Posted by 65ss on Sunday, December 1, 2013 9:02 PM

Rommel, Yes it is the old Firefighter kit. Thanks for the pic. I have been really brief with my comments on this kit for a reason. I will say I almost thought of not starting it.

Dale

  • Member since
    February 2013
  • From: Podunkville, USA
Posted by rommelkiste on Sunday, December 1, 2013 8:05 PM

Dale, is that the old MPC Firefighter kit?  I have one in the box that I didn't finish because I wasn't pleased with what I was creating.  I will PM you a pic so you can see the stance of the kit on wheels.  That might give you a chance to change something if you don't like the looks.  The suspension has not been altered its box stock.  Good luck with it.   Your re-paint looks great on the Vette.  Got mine in primer and some front suspension work done and that's it.  Been on an Alka- Seltzer diet the last couple of days.  Glad there are only two get-togethers a year with the group.

Nothing ever fits……..and when it does, its the wrong scale.

To make mistakes is human.  To blame it on someone else shows management potential. 


  • Member since
    February 2005
  • From: Proctor. MN
Posted by 65ss on Sunday, December 1, 2013 7:21 PM

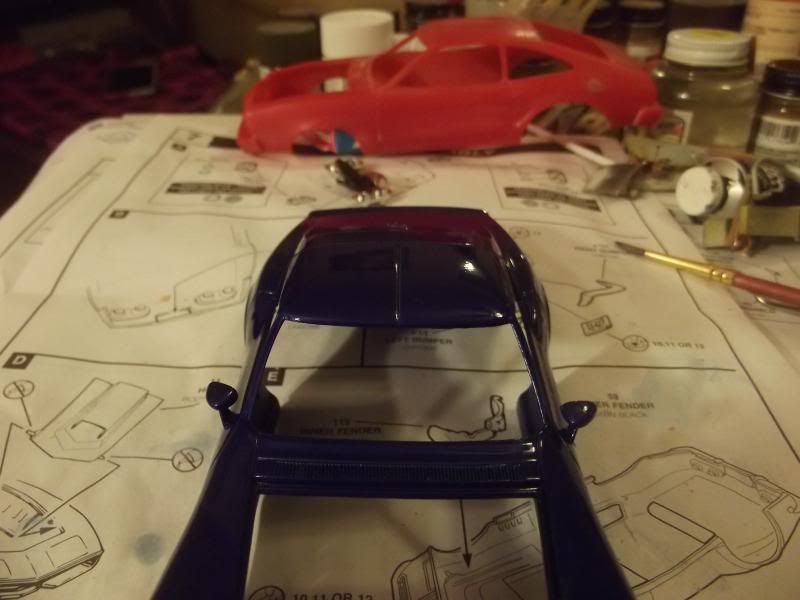
Well I got the roof painted again. I think it came out ok.

Well I was waiting for paint to dry I was surfing the net, trying to decied what I was going to do with the Mustang II. I decieded to go with these decals from slixx.

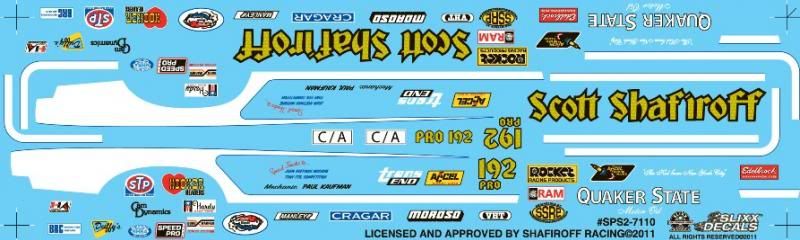
I'm not sure if their made to work with this kit. I hope they will be ok. Well at their site I ordered a hood scoop that was closer to the one that was on the car from the pictures I was able to find on line. I also ordered a seat, and a parachute. Well on the net I also ordered a Car Craft from the 70's that had a Feature on Shafiroff racing with a picture of that car on the cover. I hope it has a picture or two engine compartment, and interior, as I can't find any online.

I started on the kit. Where to start, I've put together to many modern kits, The detail on the kit is pretty soft. If I had the skills I think the only thing I would use is the body. That being said I started putting the engine together, and getting the body ready for paint.

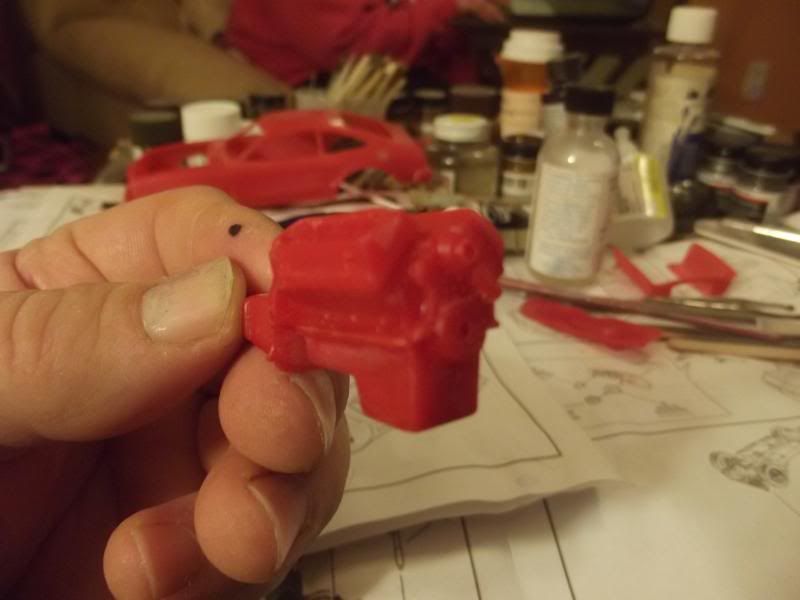
I also sanded all the detal off the fire wall, and inner fender wells.

Dale

  • Member since
    November 2013
Posted by MRME on Sunday, December 1, 2013 9:53 AM

The m80 method also works!!!! I've given up on foiling dont have the steady enough hands for it anymore!!!!!!  And that really sucks

anyone needing/wanting info about me contact me a richduddy@gmail.com. I only give info about myself on a need to know basis.

  • Member since
    February 2013
  • From: Podunkville, USA
Posted by rommelkiste on Sunday, December 1, 2013 8:27 AM

fantacmet, I have used the "Mossberg" method.  It's VERY effective.

Nothing ever fits……..and when it does, its the wrong scale.

To make mistakes is human.  To blame it on someone else shows management potential. 


  • Member since
    January 2005
  • From: Portland, Oregon
Posted by fantacmet on Saturday, November 30, 2013 10:39 PM

Oh man that SUCKS.  I've had that happen to me.  Though I didn't fix it the same way.  My solution was to reduce the length of the kit from about 7.5 inches to about 1.5 inches in about 0.68 seconds, with the aid of the wall.


  • Member since
    February 2005
  • From: Proctor. MN
Posted by 65ss on Saturday, November 30, 2013 8:40 PM

Well I thought I would give a reverse progress report. I got the roof sanded and ready for clear. I also buffed some dust spots to shoot with clear.

Some what to my surprise the decals laid down nice over the raised emblems. Got the hole body shot with a couple more coats of clear, and I was already for some foil. I had no luck with the foil, even with a brand new #11 blade the foil would tear. Apparently 3 strikes and your out with Bare Metal Foil. As I was pealing off the third attempt disaster struck. A chunk of paint came off well I was trying to peal off a stubborn piece of foil.

I did have it ready for primmer in about 20 minutes.

Hopfully I'll have some pictures tomorrow showing how it came out.

Dale

  • Member since
    January 2005
  • From: Portland, Oregon
Posted by fantacmet on Wednesday, November 27, 2013 11:23 PM

You can order shielded wire, which is all the braided hose is from detail master.  You remove the core and then stick some solder in it, stretch it, glue it, shape it, add fittings, done.


  • Member since
    March 2011
Posted by ewheeler454 on Tuesday, November 26, 2013 7:59 PM

Rommel,

Love the engine work. I was looking st braided fishing line to use as braided line but the unbonded stuff is expensive.

Ken, I haven't tried the embossing powder yet. I haven't had much time this week due to work and Thanksgiving.

L8TR,

Eric

  • Member since
    April 2005
  • From: Australia
Posted by taxtp on Tuesday, November 26, 2013 6:47 PM

Good luck with the feast Rommel, you'll be glad to get some glue on your fingers after that lot is done. Good progress on the 'Vette again.

Cheers

Tony

I'm just taking it one GB at a time.

  • Member since
    February 2013
  • From: Podunkville, USA
Posted by rommelkiste on Tuesday, November 26, 2013 12:00 PM

Ken- I know some guys that always foil before paint and get great results, I have never tried it, I'm too chicken!  Best of luck.

Tony- I have come to realize that nothing ever fits nothing!  I just end up doing the same task 5 or 6 times.  Good luck with the Corvette PE items.

This will be the last update until after the yearly feast.  I will have to fire up the old smoker and become a Chef for the next few days so no modeling for me.  After the big get together and listening to lies, B.S., and screaming kids I will be ready to get to the bench and drill my fingers and mess up parts!

I did some work on the Corvette fat block and I was happy to find that it still fits with all the dry-sump plumbing and detail items.  This is the stopping point as my eyes are protesting.  Fantacmet, the plug wire boot  idea is great, worked out for me.  That is some time consuming work but it looks cool.  Here is some pics, I gotta go find my apron.

Nothing ever fits……..and when it does, its the wrong scale.

To make mistakes is human.  To blame it on someone else shows management potential. 


  • Member since
    April 2005
  • From: Australia
Posted by taxtp on Monday, November 25, 2013 8:19 PM

Ken - I'm really keen to see how your foil before paint technique works out, I'll be watching avidly.

Rommel - I've never experienced that sort of cold, I'm with you on the chassis, it never, ever fits as well on the final fit as it did on the dry run. Why is it so ?

The P/E set for my Corvette arrived yesterday, now I just need the gauge faces to come too.

Cheers

Tony

I'm just taking it one GB at a time.

  • Member since
    February 2013
  • From: Podunkville, USA
Posted by rommelkiste on Monday, November 25, 2013 7:51 PM

LOL!  Welcome to my world Dale!  I hope I didn't jinx this crew with my fumbling around at the start.  Seems the older I get the more of it I do.  I'm going slow, I have gone too far to throw this one back in the box!!

Nothing ever fits……..and when it does, its the wrong scale.

To make mistakes is human.  To blame it on someone else shows management potential. 


  • Member since
    February 2005
  • From: Proctor. MN
Posted by 65ss on Monday, November 25, 2013 7:17 PM

Looking good Rommel, that's going to be a fun one to watch.

I forgot to mention in my progress post I'm really starting to feel like a part of this GB. After spraying the last coat of clear on Sat. the body came off my homemade jig for painting and landed on the roof!Crying Looks like a little sanding and it will be ready for decals, and more clear.Geeked

Dale

  • Member since
    February 2013
  • From: Podunkville, USA
Posted by rommelkiste on Monday, November 25, 2013 4:04 PM

Everything here is iced over so I'm stuck in the house, gives me time to do some building!  Been getting the Chassis all roughed in and I think everything fits.  I am sure that when the body goes on for the last time something will surprise me---never fails.  Think I will give the chassis a break and do some on the engine.  I'll post a pic or two when I get something done with it.   Keep glooin guys, love the updates!

Nothing ever fits……..and when it does, its the wrong scale.

To make mistakes is human.  To blame it on someone else shows management potential. 


  • Member since
    August 2013
Posted by Ktkrow on Monday, November 25, 2013 2:32 PM

Hey all!

Fan, thanks for the links to the tip.  I'll definitely use that one.  super genius idea!

Dale, looking good!!!  Great color and the engine and interior look great as well.

Eric, how'd the powder work (if you had the chance to try it)?

I managed to get the foil on (per my pre-body paint technique I am trying).  I'm going to try to get the body painted tonight.  Here's just one pic.

My tape was too tacky for the interior black, but fortunately, mostly in places you will never see.

Ken

On the bench: Dragon's 1/35 M1A1 AIM   &    Revell '69 Ford Mustang Mach I Cobra Jet

  • Member since
    January 2005
  • From: Portland, Oregon
Posted by fantacmet on Sunday, November 24, 2013 11:10 PM

I did come up with it independently a few years ago, but never did it as I never had a need for it and I wasn't building cars at the time.  Then the other day I saw a tip on it and remembered it.

I might add the firing order is correct too.


  • Member since
    March 2011
Posted by ewheeler454 on Sunday, November 24, 2013 9:29 PM

Dale,

Lookin' good. I like the color.

fantacmet, thanks for the tip on the plug boots.

L8TR,

Eric.

  • Member since
    February 2005
  • From: Proctor. MN
Posted by 65ss on Sunday, November 24, 2013 5:32 PM

Fantacmet, the Mustang is looking good. I really like the motor.Yes Thanks for the link for the plug wires.

I got some work done on the Vette this weekend. I got the interior put together. I think it will look good in the car with dark windows.Embarrassed

I also got the motor, and suspension glued to the chassis. I didn't get a picture of it, but the front suspension looks like it might be a little higher than the back.Angry I might have to drop the front spindles a bit.

I also spryed the body with Testors The Wet Look, I think that turned out alright.

Also did some detail painting that I don't have pictures of.

I'll have to give the body a couple more clear coats as I have some decals to add and want to get them under some clear. Also no wet sanding on this one. I left the raised emblems on the body and I'm afraid I'll sand through them............ I'm learning.

Dale

  • Member since
    February 2013
  • From: Podunkville, USA
Posted by rommelkiste on Sunday, November 24, 2013 2:17 PM

fantacmet, Thanks for that post.  I have toyed with that very idea in my wee brain but never went to the bench with it.  I just hope my antique eyes, along with the Tri-focals and opti-visor will last long enough to do 8!  If thats your idea, Kudos to you sir!  If its one you picked up somewhere, Kudos for posting it for us!  I will give this a try.  If I get it to work, they will be on the Vette build, if not, you will see straight ones!

Nothing ever fits……..and when it does, its the wrong scale.

To make mistakes is human.  To blame it on someone else shows management potential. 


  • Member since
    January 2005
  • From: Portland, Oregon
Posted by fantacmet on Sunday, November 24, 2013 1:33 PM

Ok well here's a tutorial on how I made them.   The video was far too long so I just posted this.

cs.finescale.com/.../157195.aspx


  • Member since
    January 2005
  • From: Portland, Oregon
Posted by fantacmet on Saturday, November 23, 2013 9:06 PM

I used the insulation that came with the distributor kit.  I'll see if I can do a video on how to make them 90 degree's like that.


JOIN OUR COMMUNITY!

Our community is FREE to join. To participate you must either login or register for an account.

SEARCH FORUMS
FREE NEWSLETTER
By signing up you may also receive reader surveys and occasional special offers. We do not sell, rent or trade our email lists. View our Privacy Policy.