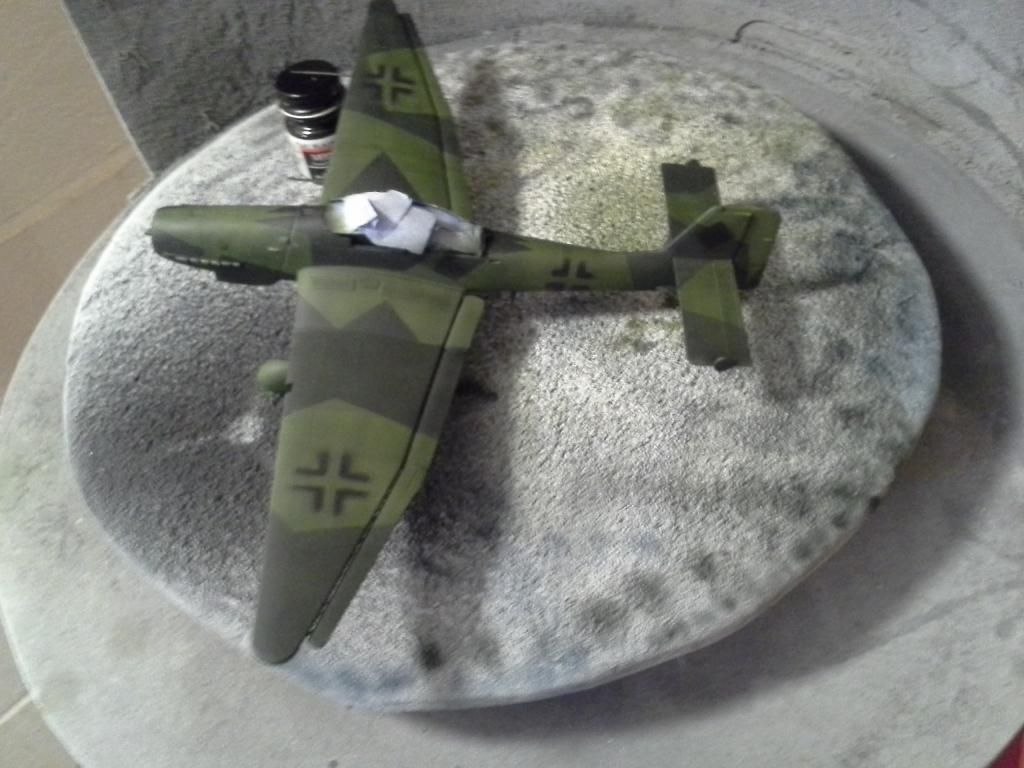
Last update for the weekend, I have the national insignias painted on. I'll be saving time with decals since mostly likely all the stencils would have been painted over as well. I'll just put one of the markings on the fuselage behind the insignia and hope that will work since the decals in the kit are probably older than I am. I also painted the canopy and started working on the exhaust shrouds.