SEARCH FINESCALE.COM

Enter keywords or a search phrase below:

FineScale Modeler Orphaned Armor Group Build 2014

91658 views
1167 replies
1 rating 2 rating 3 rating 4 rating 5 rating
  • Member since
    November 2009
  • From: SW Virginia
Posted by Gamera on Thursday, October 30, 2014 9:36 AM

Garzonh: That looks terrific, one of the best looking worn and beat-up effects I've seen in awhile, Just enough and not overdone.

"I dream in fire but work in clay." -Arthur Machen


  • Member since
    September 2006
  • From: Dripping Springs, TX, USA
Posted by RBaer on Thursday, October 30, 2014 10:15 AM

Garzohn, looks properly beat-up.

Apprentice rivet counter.

  • Member since
    March 2013
  • From: Puebla, Mexico
Posted by garzonh on Thursday, October 30, 2014 11:35 AM

jibber, Gamera and Rbaer, thank you very much.

The front is the most damage part, I still need some mud and filteting and I really need to start thinking on the base... getting a wooden base has been a daunting task...

Moderator
  • Member since
    September 2011
Posted by Tim Kidwell on Thursday, October 30, 2014 12:24 PM

Chuck, RBaer, John, Garzonh: <speechless> Absolutely amazing work, you guys. Seems we're hitting our stride now!

--

Timothy Kidwell
Editor
Scale Model Brands
Kalmbach Media


  • Member since
    March 2013
  • From: Puebla, Mexico
Posted by garzonh on Friday, October 31, 2014 12:48 PM

HI Tim,

Thanks for your appreciation.

Jibber,

Nice looking kits....in fact Im almost done with the kit and painting, just final touches. Im going slow, is too easy to make a mistake at this point and throw everything to the can..

So, I just need to find the correct  color of mud, I want a "chocolate" color, not too dark not too sandy..

So Im stuck there...for now...

  • Member since
    January 2013
Posted by jibber on Friday, October 31, 2014 1:52 PM

It looks great just a thought to bust it up a little more. I think these are the most interesting builds because you use almost the entire shelf to make it look real. I think yours is going to be fantastic.

  • Member since
    July 2004
  • From: Sonora Desert
Posted by stikpusher on Saturday, November 1, 2014 1:48 PM

Wow, lots of good stuff here. I must admit that I have not been keeping up with this GB at all and my looking thru the recent work here is quite eye opening and impressive. I need to go back and look thru all the pages here for the rest of the past work. 

As we begin the home stretch here, I finally was able to begin work on my ARVN M113 over the past week or so and finally able to get some photos made yesterday.

So off we go...

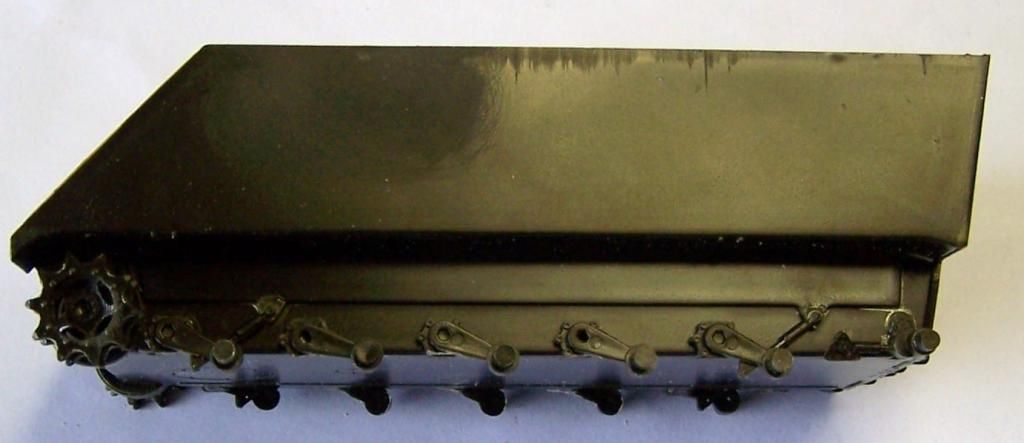
first off I added the suspension- road wheel arms, sprockets, etc.

interstingly enough, Italeri/Revell Germany actually molded thiskit without the later M113A2 style suspension and the shock absorber on the 2nd roadwheel arm, like they did on their M901 and M163 kits, so I did not have to modify that.

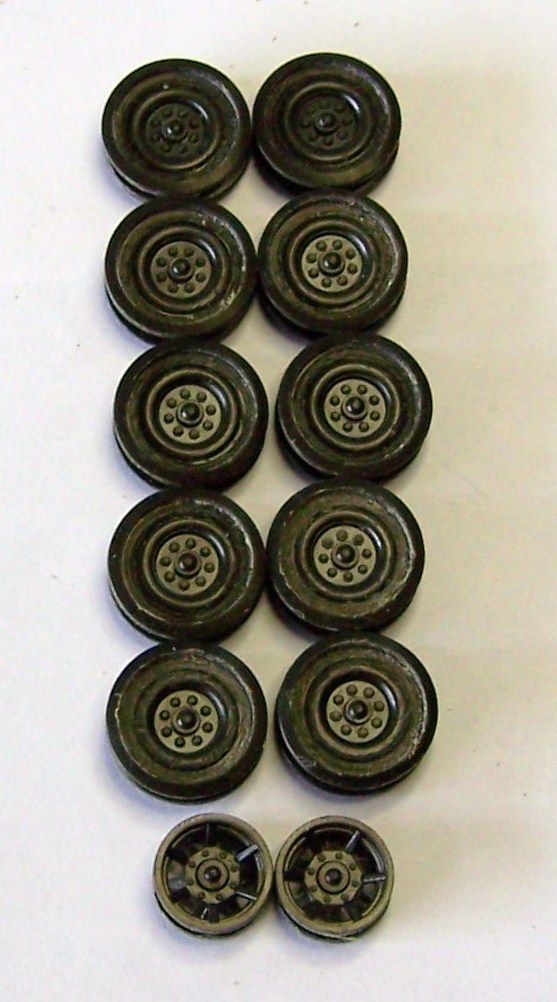
Then I made up the road wheels. The kit has the rivetted type road wheels and the rivets are way oversize, so I used my rotary tool to remove the rivets and change the road wheel to the non rivetted type.

later I added to cargo hatch and ventilator dome to the top deck

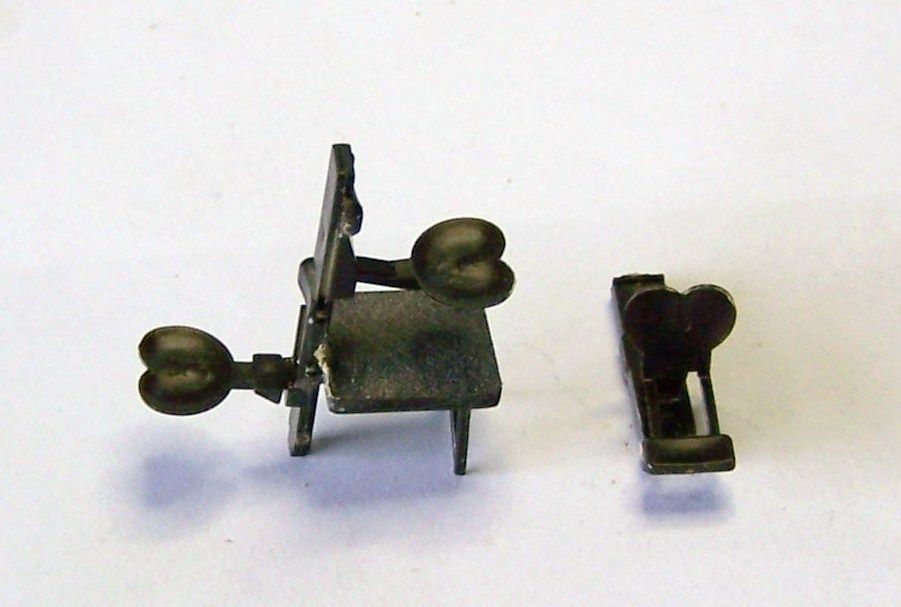
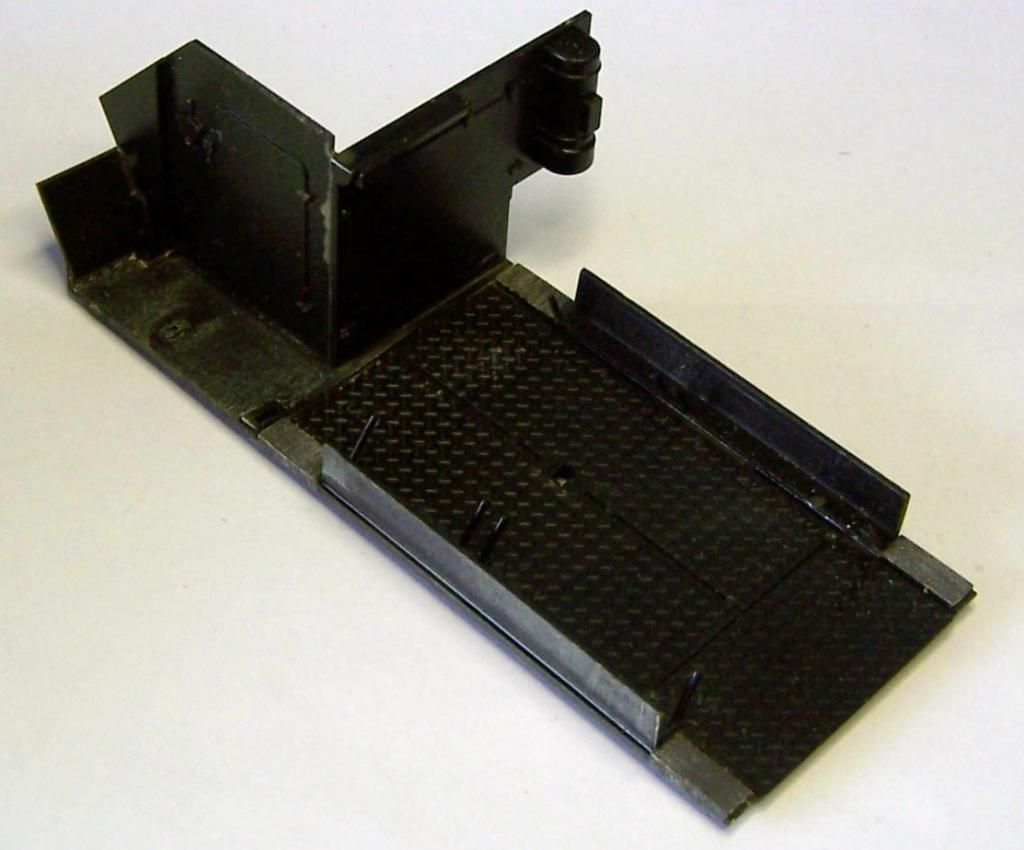
and I made up the driver's, commander's and squad leader's seat... the TC stand had a cross hatch pattern molded on there that is not presesnt on a real 113, (The real vehicles have either grip tape or a rubber mat there) so I sanded that stuff off.


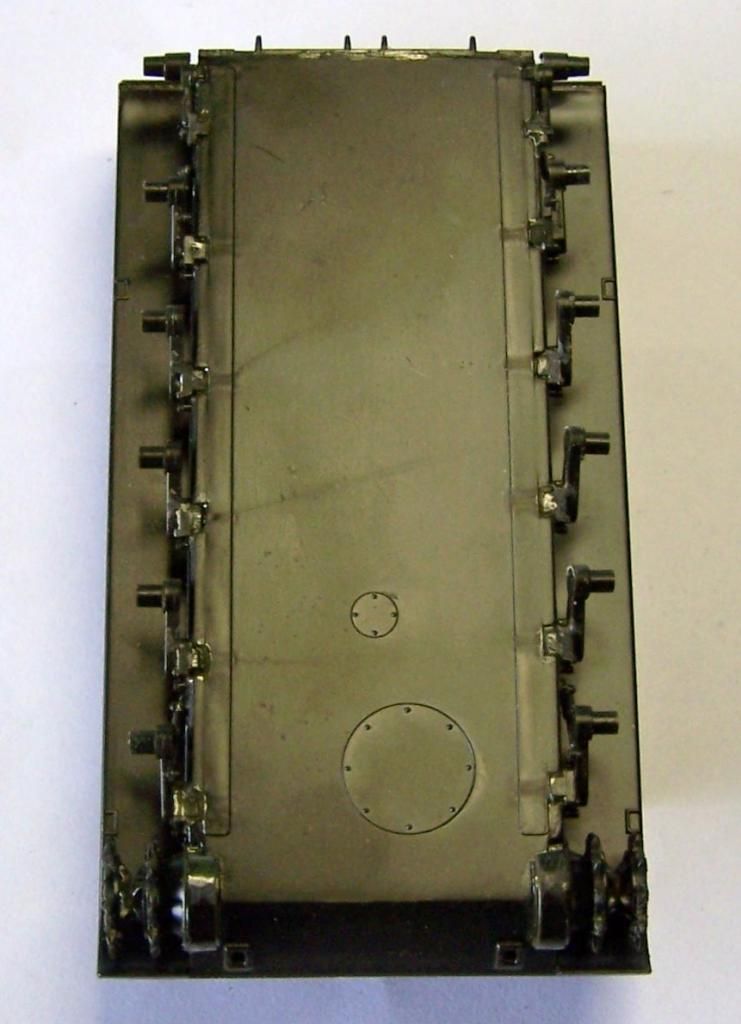
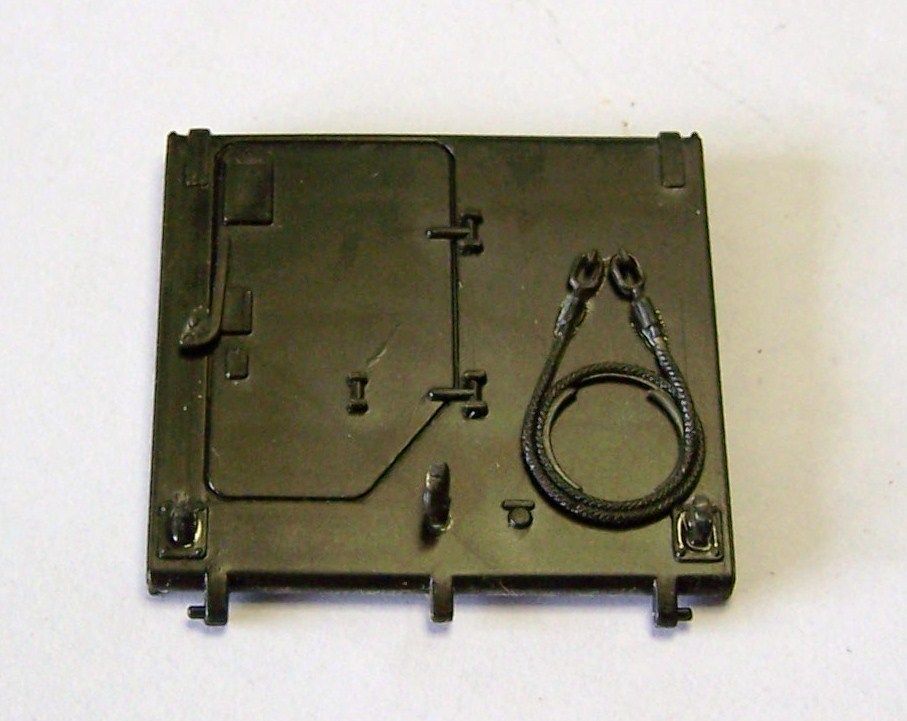
 and I added the fittings to the exterior of the ramp

and I started adding the fittings to the troop compartment interior- the seat backs, battery box and fuel tank

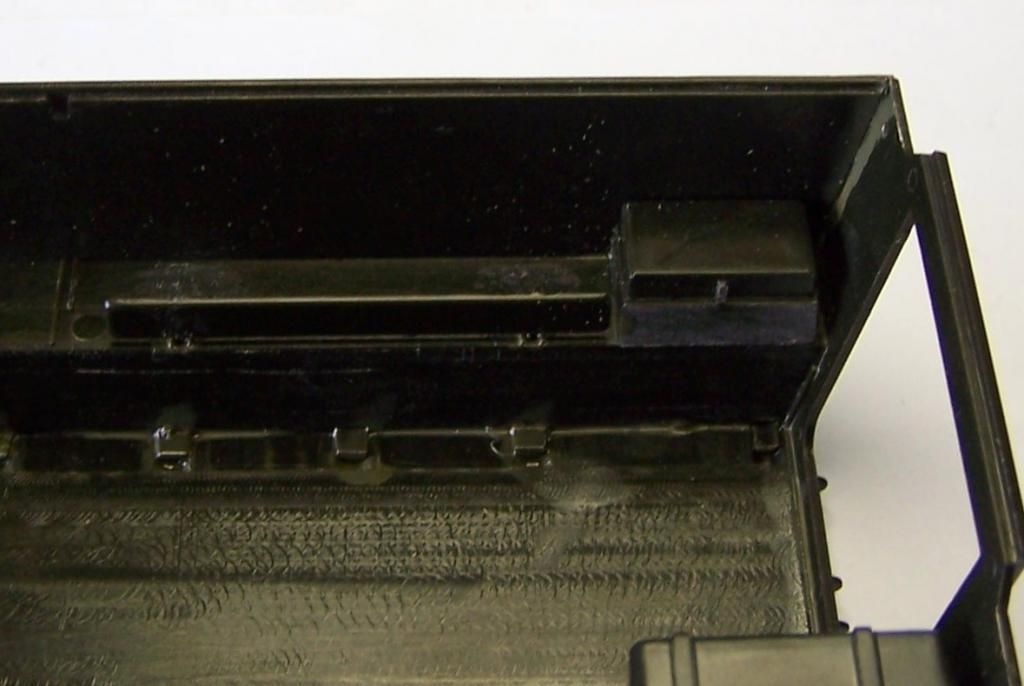
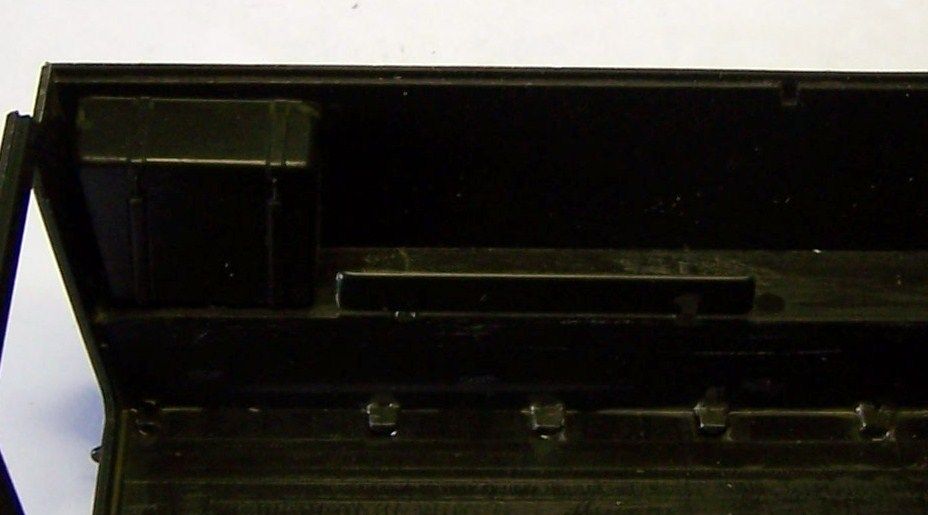
I added the engine compartment firewalls to the interior, troop seat bases, and sanded the floor tread pattern away from where it did not belong in the drivers compartment

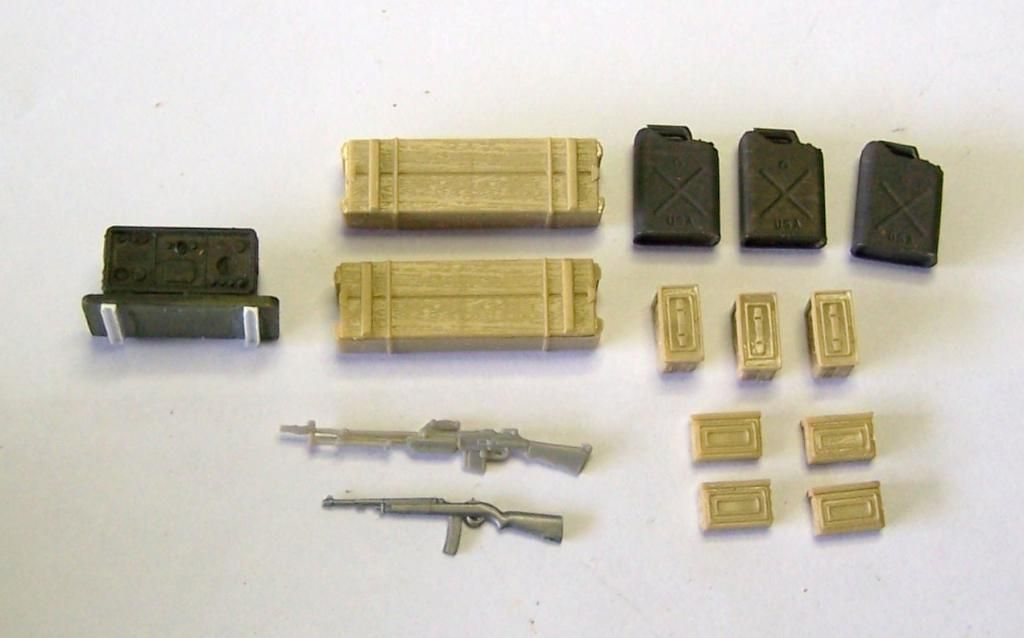
then it was time to start hitting the spares for internal dress up stowage. I found and old radio that looked the part in my spares bin and added some channel strip styrene to teh base for support arms... and since the ARVN was equipped with surplus WWII US gear at the time that I am depicting I grabbed some water cans, ammo cans and weapons on the appropriate type...

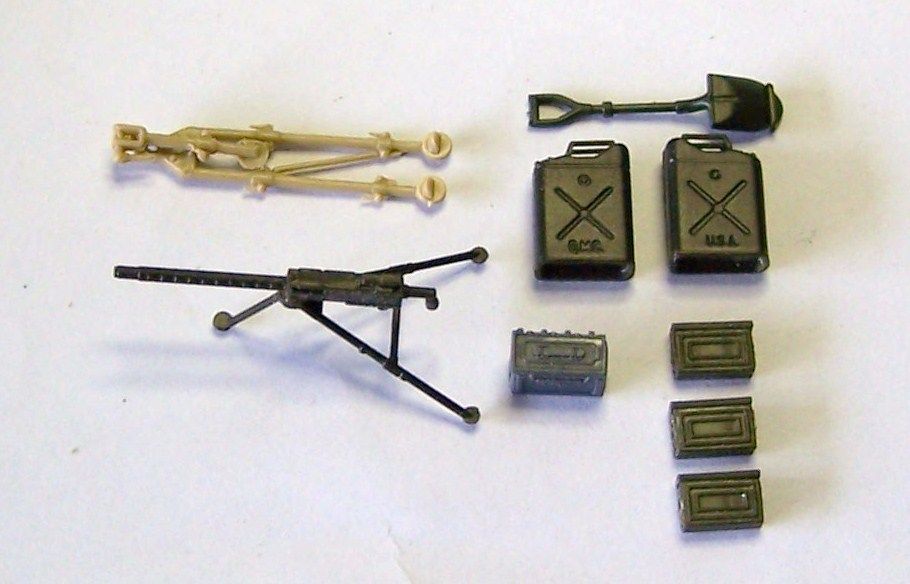
and some similar items for the exterior that the kit was either lacking (jerry cans, .50 tripod, & shovel) as well as a tripod mounted .30 cal. that photos show ARVN 113s often carried to the right of the TC hatch.

more to come once I have have begun painting on my days off next week...


F is for FIRE, That burns down the whole town!

U is for URANIUM... BOMBS!

N is for NO SURVIVORS...

       - Plankton

LSM


  • Member since
    December 2002
  • From: Bury St Edmunds, Suffolk, England
Posted by Bish on Saturday, November 1, 2014 1:50 PM

Nice to see another one under way Stik.

I am a Norfolk man and i glory in being so


On the bench: Airfix 1/72nd Harrier GR.3/Fujimi 1/72nd Ju 87D-3

  • Member since
    December 2002
  • From: Bury St Edmunds, Suffolk, England
Posted by Bish on Saturday, November 1, 2014 1:51 PM

garzonh

Hi guys!

Small update, still working on getting the tracks with right colors, since it will have oil washes it will take days between colors to let it dry.

in the meantime, lot of work done on my "orphaned" Hummel, abused and not maintained for obvious reasons.

a small teaser of where Im at...

cheers!

As much as I hate seeing German armour all beta up, that's looking real nice.

I am a Norfolk man and i glory in being so


On the bench: Airfix 1/72nd Harrier GR.3/Fujimi 1/72nd Ju 87D-3

  • Member since
    July 2004
  • From: Sonora Desert
Posted by stikpusher on Saturday, November 1, 2014 1:52 PM

Thanks Bish. The 113 is near and dear to my heart, so this is gonna be a fun one for me.


F is for FIRE, That burns down the whole town!

U is for URANIUM... BOMBS!

N is for NO SURVIVORS...

       - Plankton

LSM


  • Member since
    November 2009
  • From: SW Virginia
Posted by Gamera on Saturday, November 1, 2014 7:29 PM

Very cool SP!

"I dream in fire but work in clay." -Arthur Machen


  • Member since
    December 2002
  • From: Bury St Edmunds, Suffolk, England
Posted by Bish on Sunday, November 2, 2014 3:05 AM

I know the feeling Stik. One of these days I am going to have to build a Warrior.

I am a Norfolk man and i glory in being so


On the bench: Airfix 1/72nd Harrier GR.3/Fujimi 1/72nd Ju 87D-3

  • Member since
    January 2013
Posted by jibber on Sunday, November 2, 2014 8:03 AM

Love all the accessories Stik.

  • Member since
    September 2006
  • From: Dripping Springs, TX, USA
Posted by RBaer on Monday, November 3, 2014 10:48 AM

Apprentice rivet counter.

  • Member since
    November 2009
  • From: SW Virginia
Posted by Gamera on Monday, November 3, 2014 2:33 PM

Wash came out great, wish mine looked that good! Is it just regular brown oil paint?

"I dream in fire but work in clay." -Arthur Machen


  • Member since
    December 2002
  • From: Bury St Edmunds, Suffolk, England
Posted by Bish on Monday, November 3, 2014 4:03 PM

I like the look of that RB.

I am a Norfolk man and i glory in being so


On the bench: Airfix 1/72nd Harrier GR.3/Fujimi 1/72nd Ju 87D-3

  • Member since
    March 2013
  • From: Puebla, Mexico
Posted by garzonh on Tuesday, November 4, 2014 6:53 AM

Hey, very nice Rbaer, I have a lot of trouble on knowing when to stop weathering. Yours looks very good. I like the subtle dirty and how clean and aligned the build is.

I would only add just a little bit mor of dust on the bags on the back of the armor, but again, Im a weathering creep...heheh..

Very nice Sir.

  • Member since
    September 2006
  • From: Dripping Springs, TX, USA
Posted by RBaer on Tuesday, November 4, 2014 10:19 AM

Thanks guys.

The wash is Tamiya acrylic, thinned 50% with alcohol, then the excess is scrubbed off with a Q-tip moistened with clean alcohol. It's more like what the airplane guys used to call a "sludge wash", I think.

Garzohn, that's the next step, after I finish the detail painting, an overall dust coat, using dry pigments, made from pastel chalks.

Apprentice rivet counter.

  • Member since
    November 2009
  • From: SW Virginia
Posted by Gamera on Tuesday, November 4, 2014 11:47 AM

Hmmm, I've tried a sludge wash on a Crusader I did and was kinda 'eeeehhhhh' on it. Guess I should give it another go, I really like how it worked out for you.

"I dream in fire but work in clay." -Arthur Machen


  • Member since
    September 2006
  • From: Dripping Springs, TX, USA
Posted by RBaer on Tuesday, November 4, 2014 4:08 PM

Thanks.

I've been doing it for quite a while, and have favorite methods. Since I use rattle cans and not an airbrush, I'm always going over enamel or lacquers with the acrylic wash, so I don't have any problems with paint lifting. Another benefit is that the alcohol-thinned wash leaves a dead-flat finish after the scrub, saving me a layer of flat. The final step, after pigments, is a very light coat of Testor's clear flat, btw.

Apprentice rivet counter.

  • Member since
    October 2011
  • From: Lake Villa, Illinois
Posted by Chuck Davis on Tuesday, November 4, 2014 4:08 PM

Garzonh and RBaer - excellent weathering guys!  Lookin' great

Chuck Davis

  • Member since
    April 2013
Posted by SchattenSpartan on Tuesday, November 4, 2014 4:08 PM

You guys have been really busy during my absence... Some really great looking builds in here!

  • Member since
    March 2013
  • From: Puebla, Mexico
Posted by garzonh on Tuesday, November 4, 2014 7:06 PM

Hi to all!!

Happy to say Im finally 90% done, the model is almost completed, since Im now in the process of building the base and setting up the scenario, for my Hummel in mud. So the model will still receiv mud in the tracks and wheels., but other than that Im finished!! Big Smile

Maybe I will make a cover for the gun, but still thinking if it will be good. Sorry if Im posting many pics but I wanted to show all the details, I added some leafs here and there and some slightly mud in the interior.

Hope you enjoy it as much as I did Wink, lots of PE and my first individual links tracks, which look real nice but were a painSuper Angry to glue and pose them.

This might be my last completed build for the year, unfortunately I only build two kits in this year, the previous dio I build and this one. So definitely my next one will be a OOB Merkava. Need to pick up pace on my stash.

See you!! YesBeer

  • Member since
    November 2009
  • From: SW Virginia
Posted by Gamera on Tuesday, November 4, 2014 8:20 PM

Wow, she looks great to me!!! Love the chipping and weathering, I really need to learn more about this technique. The bent-up fenders came out great too.

"I dream in fire but work in clay." -Arthur Machen


  • Member since
    July 2004
  • From: Sonora Desert
Posted by stikpusher on Wednesday, November 5, 2014 12:42 AM

Beautiful work Garzon!!! You sure put a LOT of extra effort and items into that beast...


F is for FIRE, That burns down the whole town!

U is for URANIUM... BOMBS!

N is for NO SURVIVORS...

       - Plankton

LSM


  • Member since
    March 2013
  • From: Puebla, Mexico
Posted by garzonh on Wednesday, November 5, 2014 6:35 AM

Gamer and stikpusher,

Thank you very much, I appreciate your comments and taking the time to do it.

Gamera, the chipping technique is not that hard, it is very easy, just prime the model in Tamiya red brown, then use any liquid mask with a sponge and then cover everything with the final color and once all is dry just brush off the liquid mask. I did find that the liquid mask in the PE was impossible to peel off.

Have a nice rest of the week.!

  • Member since
    November 2010
  • From: Florida-West Central
Posted by Eagle90 on Wednesday, November 5, 2014 7:08 AM

Hey everyone!  Great work on the builds! 

Had some time to do a little on the T34.  Did some preliminary mudin' and got the flag on!  Got the flag from Archer.  Great stuff!  Hope to finish the mud and weathering soon and finish her up by the weekend.  We shall see how that turns out!  Thanks for looking!

Eagle90


  • Member since
    January 2013
Posted by jibber on Wednesday, November 5, 2014 7:49 AM

Garzonh what a job on that Hummel, every part of it was well built and thought out. Your finishes are second to none and all I can say is WOW. So cool, very nice build. Congrats. Terry

  • Member since
    January 2013
Posted by jibber on Wednesday, November 5, 2014 8:01 AM

Eagle if its a muddy environment, surely the wheels and track will also show some. But that effect can be over used, still love the broken wheel. Terry

JOIN OUR COMMUNITY!

Our community is FREE to join. To participate you must either login or register for an account.

SEARCH FORUMS
FREE NEWSLETTER
By signing up you may also receive reader surveys and occasional special offers. We do not sell, rent or trade our email lists. View our Privacy Policy.