SEARCH FINESCALE.COM

Enter keywords or a search phrase below:

50th Anniversary Vietnam War Group Build

78949 views
896 replies
1 rating 2 rating 3 rating 4 rating 5 rating
  • Member since
    December 2002
  • From: Bury St Edmunds, Suffolk, England
Posted by Bish on Sunday, December 21, 2014 4:10 PM

Interesting looking build jibber, nice to see something a bit different.

Nice work stik, reminds me of the 432, but the wrong way round Big Smile

I am a Norfolk man and i glory in being so


On the bench: Airfix 1/72nd Harrier GR.3/Fujimi 1/72nd Ju 87D-3

  • Member since
    July 2004
  • From: Sonora Desert
Posted by stikpusher on Sunday, December 21, 2014 4:46 PM

Yes, the 113 and 432 do bear a strong resemblance to one another... Except of course for the swapping of the drivers side.


F is for FIRE, That burns down the whole town!

U is for URANIUM... BOMBS!

N is for NO SURVIVORS...

       - Plankton

LSM


  • Member since
    March 2010
  • From: MN
Posted by Nathan T on Sunday, December 21, 2014 7:12 PM

I have a few Ordinance questions on my Hun, but first, some progress pics.

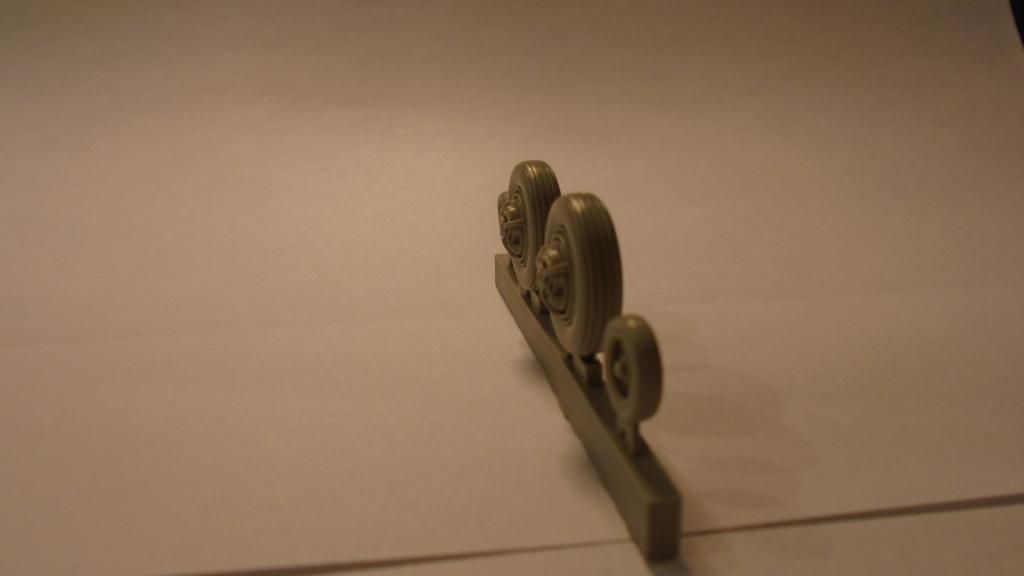
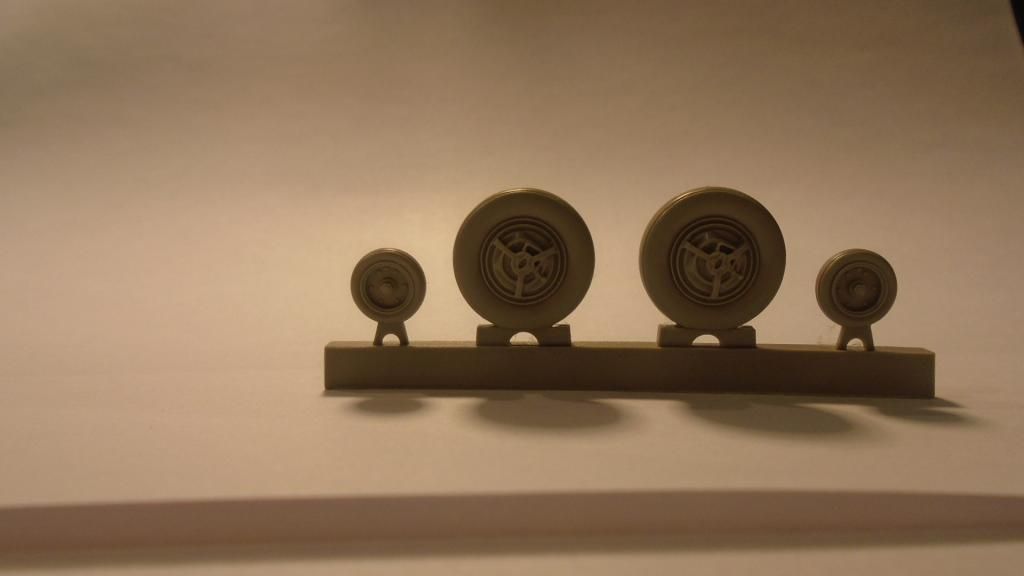
Comparison between the kit wheels and ones from Aires:

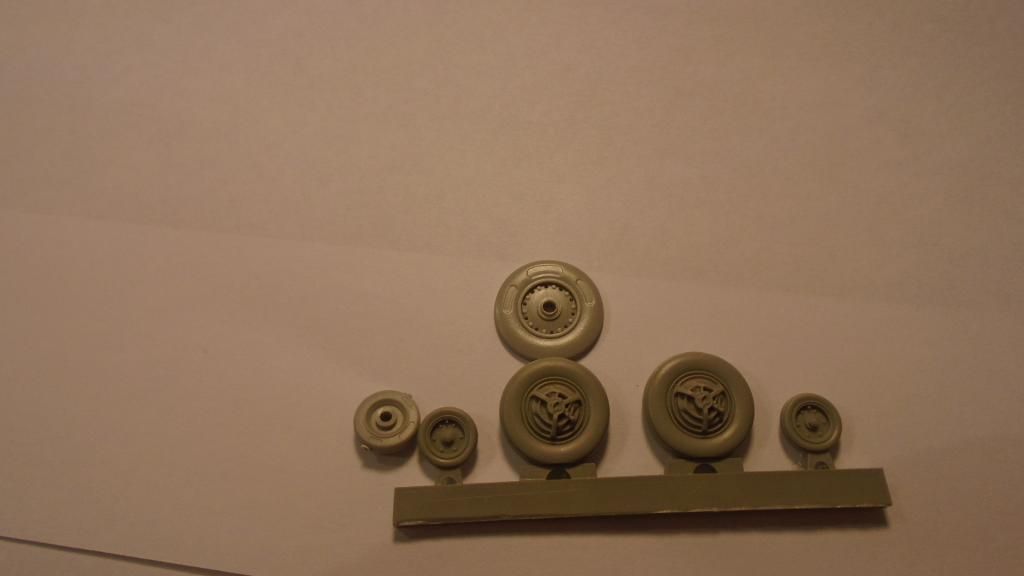
The kit wheels are a bit oversized, and the detail in the aires wheels and tread is worth it:

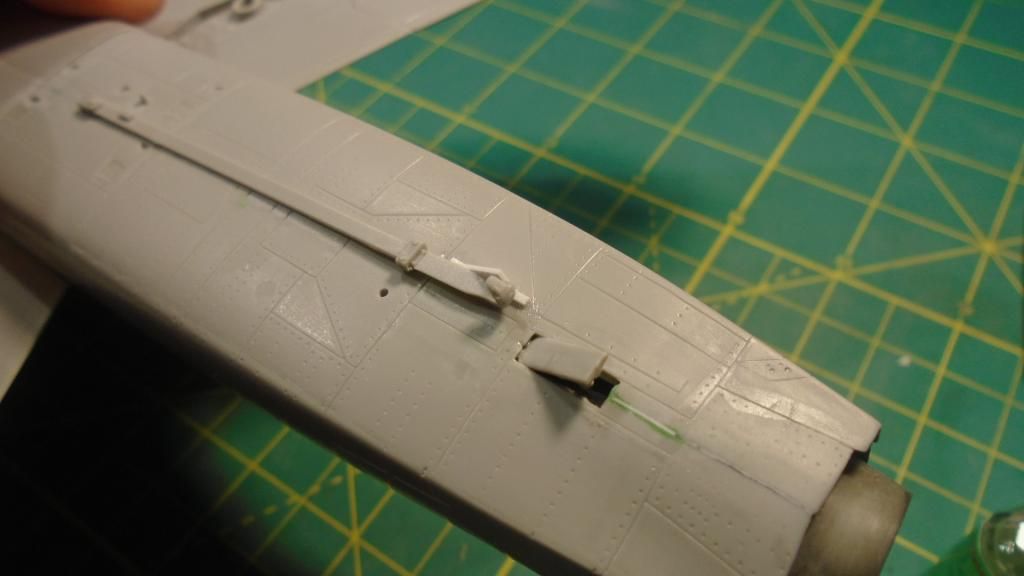
I've been busy correcting a few mistakes in the kit. I started with moving the arresting gear bracket to the port side, by cutting it off and making a new one with sprue. Trumpeter had it where my tweezer's is pointing:

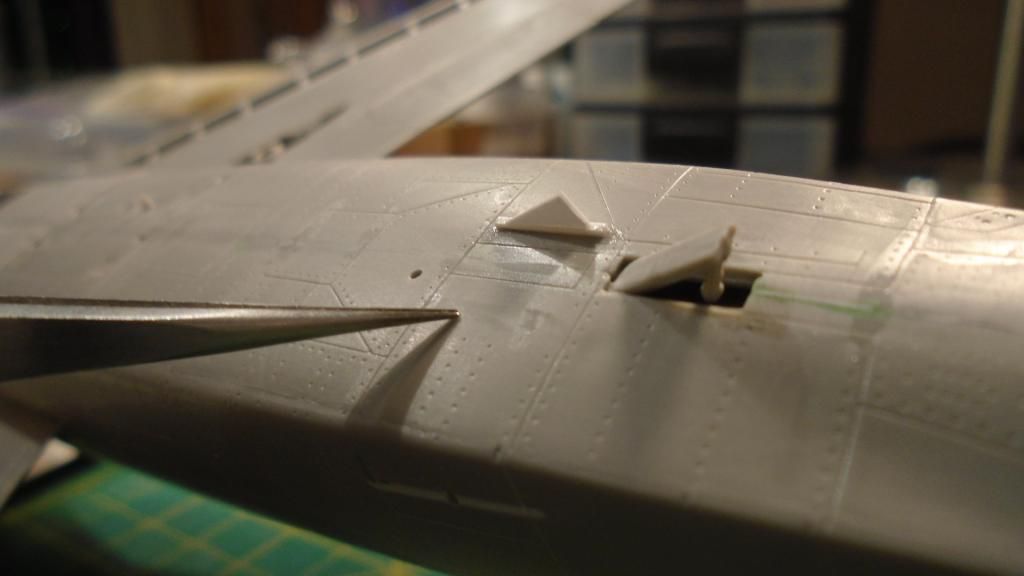
Should look like this:

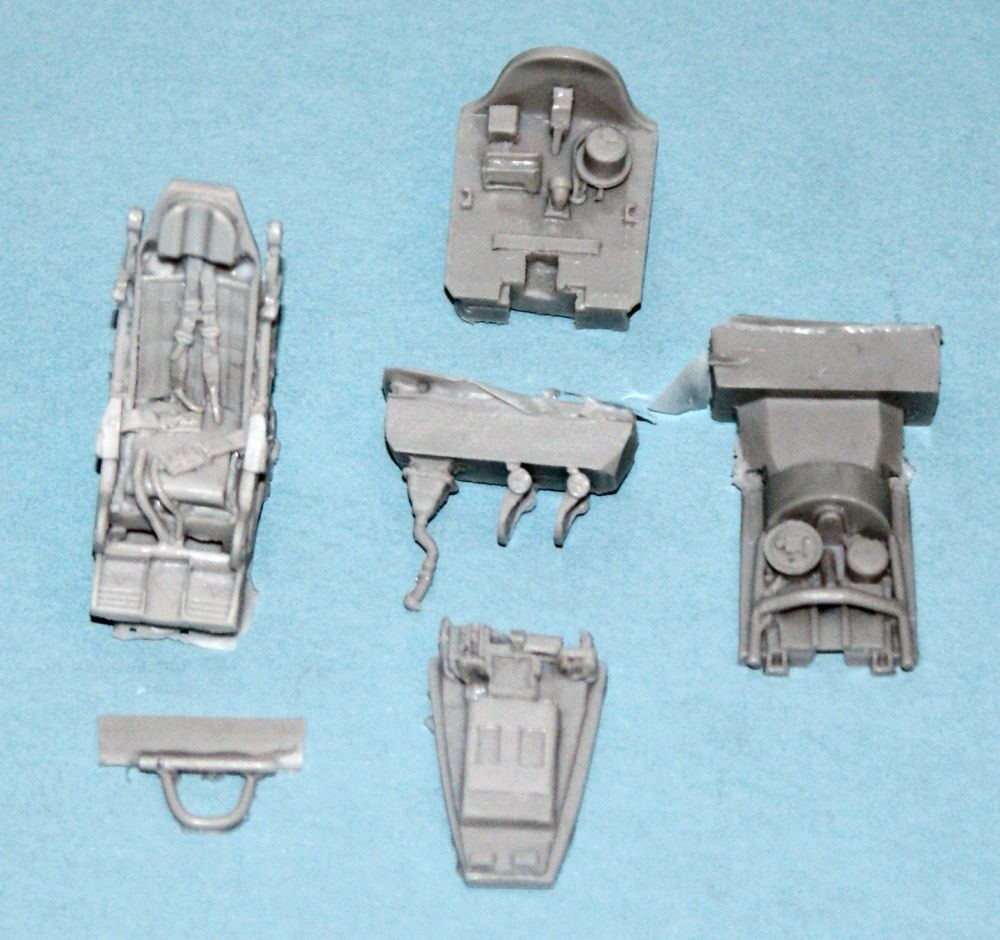
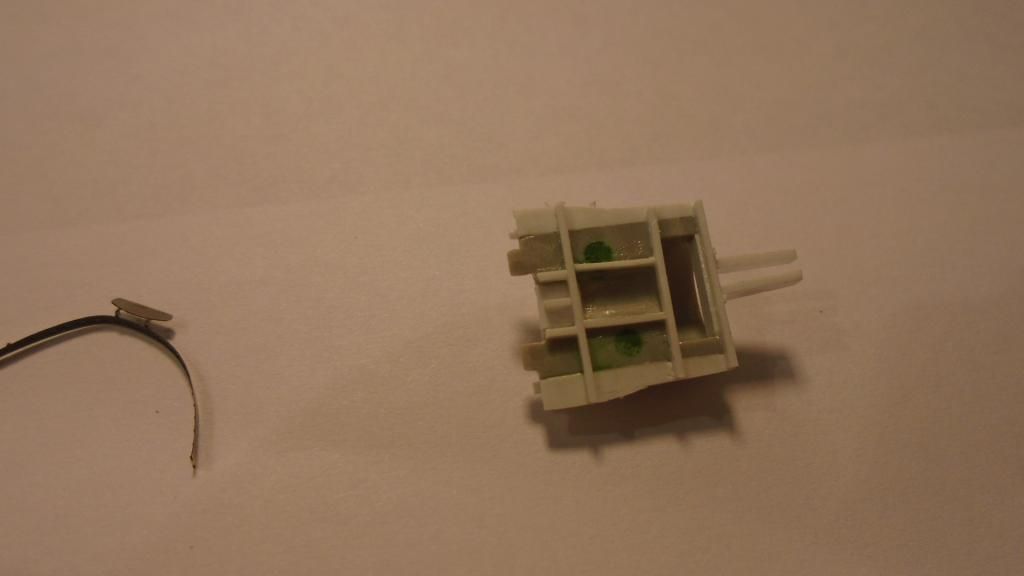
The next kit mistake is the canopy frame and bulkhead parts are for a D, and not a C. I started by cutting off the pointed bit that doesn't belong on a C:

I added details based off the AMS Resin parts and some photos:

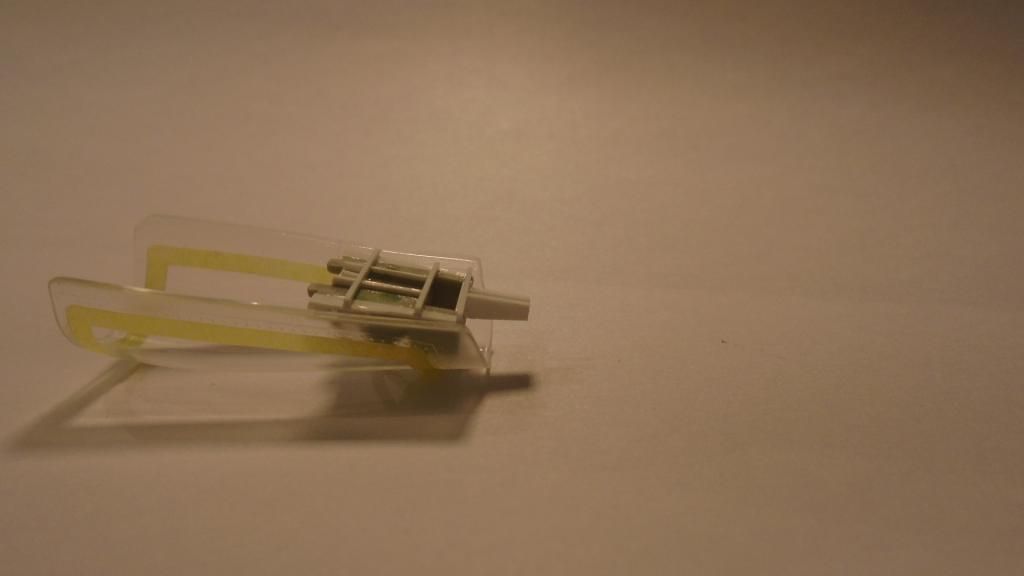
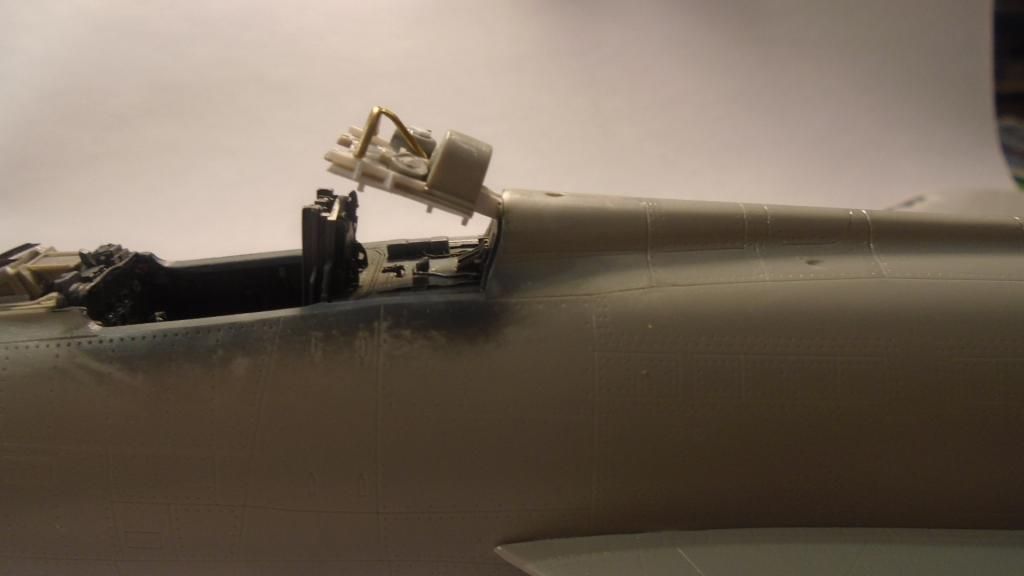
I used some brass tube to make the roll cage like thing and some sprue strip and spare parts for the round looking parts, then trimmed it to fit inside the canopy. I also assembled the pe canopy rails and locks from the Aires set:

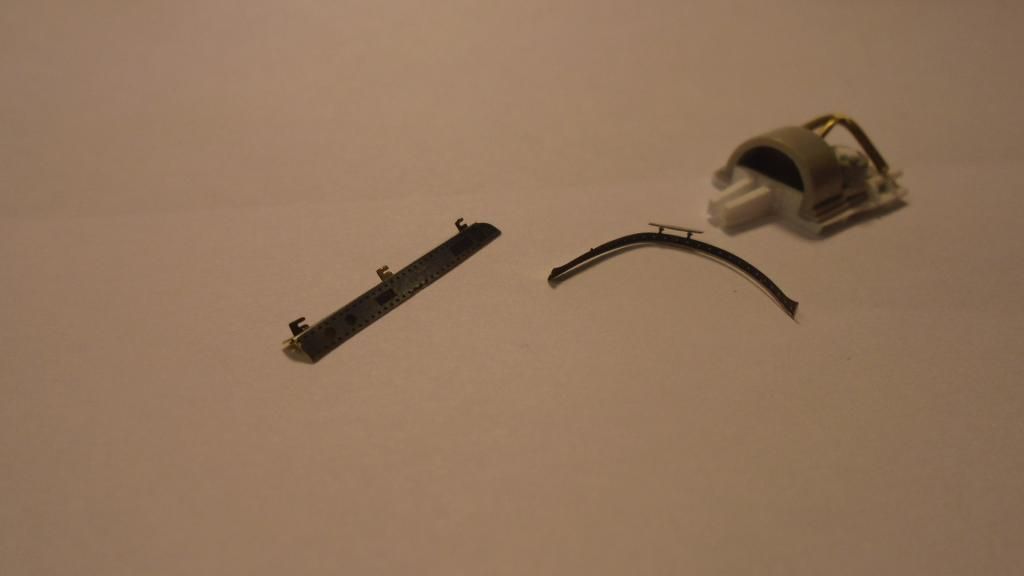
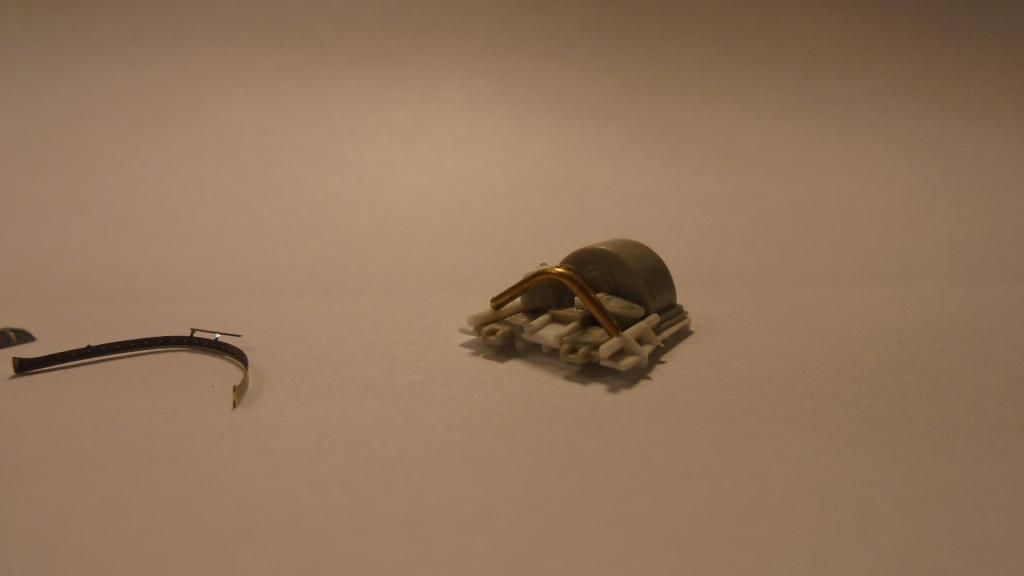
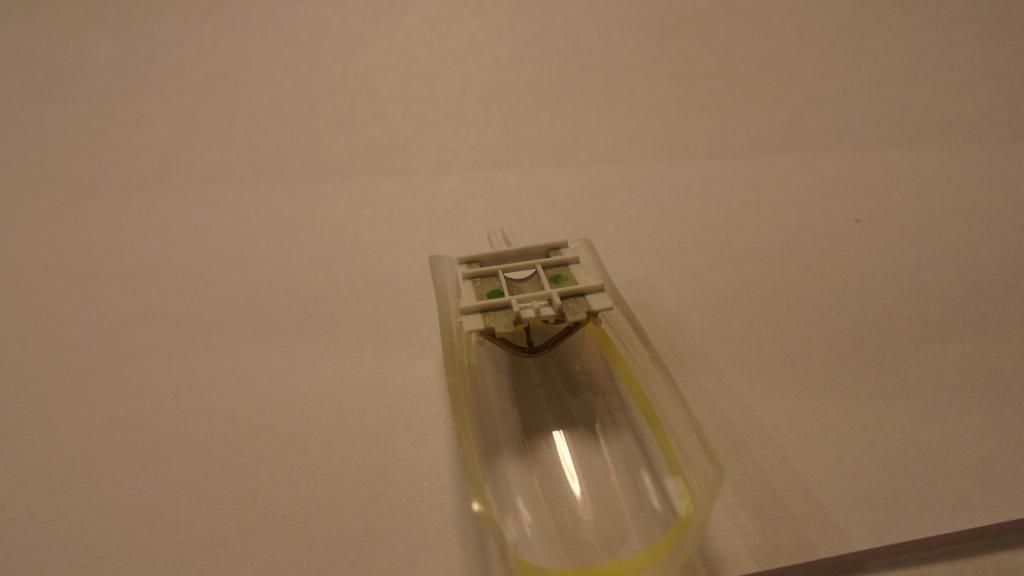
Here's how its meant to fit in the canopy and on the airplane:

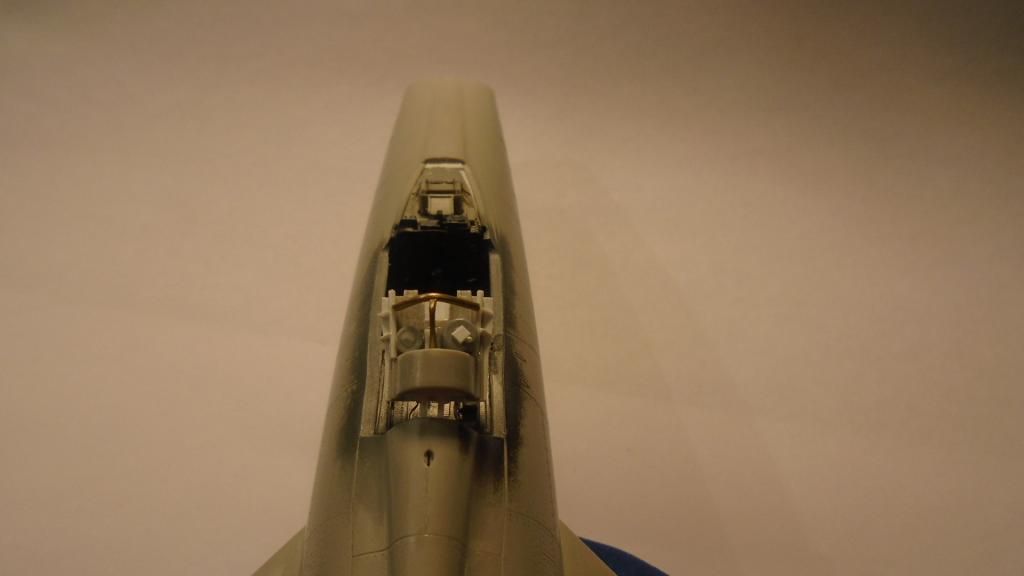
The last part to make is the canopy retraction cylinder. I finally found a pic that shows where this goes.


  • Member since
    March 2010
  • From: MN
Posted by Nathan T on Sunday, December 21, 2014 7:27 PM

Now on to the ordinance Questions. I got decals to make this bird from the 120th TFS at Phan Rang from Xtradecal:

A pic of the real machine shows no ordinance:

Looks like the 335 gal drop tanks, correct? I know it shows no ordinance, but I'd like to make it like one of the other jets in the same Squadron, like these:

Any Idea whats on the outer pylons on this 746 jet?

or on these other machines?:

Can anyone see whats about to be loaded on this planes outer pylon?:

Looks like this last jet carries the small 275 gal drop tanks?


  • Member since
    February 2014
  • From: Michigan
Posted by silentbob33 on Sunday, December 21, 2014 7:47 PM

Looks some some great progress Nathan!  I'll leave the ordnance questions to those that could give you a better answer than I. 

Here are the finished pics of my F-4C.  I made a few mistakes along the way, and didn't catch them until it was too late, but I'm still pretty happy with it. 

Thanks for hosting Stik!

On my bench: Academy 1/35 UH-60L Black Hawk

  • Member since
    January 2014
  • From: Toronto
Posted by Rob S. on Sunday, December 21, 2014 8:08 PM

Great looking work guys. Silentbob...magnificent finish on the Phantom!! What a beauty. Inspires me to do an AF and Navy version to match my Marines offering. Well done!! YesYes

______________________________________________________________________________


On the Bench: Nothing on the go ATM

  • Member since
    February 2014
  • From: Michigan
Posted by silentbob33 on Sunday, December 21, 2014 8:48 PM

Thanks Rob!

On my bench: Academy 1/35 UH-60L Black Hawk

  • Member since
    October 2010
  • From: Australia Brisbane
Posted by peterjb on Monday, December 22, 2014 9:45 AM

Hi, I would like to join in with 1/48 Airfix Canberra B.20 RAAF out of Phan Rang Bay 1970 thanks.

  • Member since
    April 2010
Posted by Theuns on Monday, December 22, 2014 9:55 AM

That is one very good looking F-4 there !

Theuns

  • Member since
    July 2004
  • From: Sonora Desert
Posted by stikpusher on Monday, December 22, 2014 1:53 PM

Jibber, your '88 is looking outstanding! I love the look of those beasts... such an imposing machine. I finally got one of those kits recently and will build it up form my old Mech Infantry Battalion's markings one day.

Silentbob, your F-4C is Phreakin' Phabulous! Now we have two up front! Simply gorgeous. Although if I must critique, i will say that the Sidewinders you have are the post Vietnam variant of the 'all aspect' AIM-9Ls. Sugar Foot at that time would have carried -9Bs or -9Es. The -9J did not enter combat until late 1972 near the end of Linebacker I.

Great work guys!


F is for FIRE, That burns down the whole town!

U is for URANIUM... BOMBS!

N is for NO SURVIVORS...

       - Plankton

LSM


  • Member since
    July 2004
  • From: Sonora Desert
Posted by stikpusher on Monday, December 22, 2014 2:06 PM

Nathan, I can't say for certain what those out board pylon pieces of ordnance are, but I believe that they are SUU-7 CBU dispensers.

have a look at these two links for more info and photos

http://www.designation-systems.net/usmilav/asetds/u-s.html

http://www.f-100.org/hun008.shtml

Sorry that I cant hot link them, but lately there seem to be issues between this site and Google Chrome. At least on my desktop.


F is for FIRE, That burns down the whole town!

U is for URANIUM... BOMBS!

N is for NO SURVIVORS...

       - Plankton

LSM


  • Member since
    February 2014
  • From: Michigan
Posted by silentbob33 on Monday, December 22, 2014 2:17 PM

Thanks for the kind words guys!  Thanks for the info Stik, I didn't know there was a difference.  I just chose the more detailed of the options I had in the box Smile

On my bench: Academy 1/35 UH-60L Black Hawk

  • Member since
    January 2013
Posted by jibber on Monday, December 22, 2014 4:00 PM

Stik it's going together nicely but the instructions are a little vague but I have a Squadron Book on the 88 that solved all my issues. I'll post some pics of the tracks but they may be one of the best I've seen using single tracks and outside connectors. I've assembled both tracks and test fitted them without one drop of adhesive. I just finished priming and may not need any.

  • Member since
    December 2002
  • From: Bury St Edmunds, Suffolk, England
Posted by Bish on Monday, December 22, 2014 4:02 PM

Bob, sweet work on the Phantom., that's another really nice F-4.

I am a Norfolk man and i glory in being so


On the bench: Airfix 1/72nd Harrier GR.3/Fujimi 1/72nd Ju 87D-3

  • Member since
    January 2013
Posted by jibber on Monday, December 22, 2014 4:11 PM

[URL=http://s1346.photobucket.com/user/kingtiger11/media/M88/DSC01120_zps66a4304b.jpg.html] [/URL[URL=http://s1346.photobucket.com/user/kingtiger11/media/M88/DSC01123_zps09f7e957.jpg.html] [/URL[URL=http://s1346.photobucket.com/user/kingtiger11/media/M88/DSC01122_zps18b6b027.jpg.html] [/URL[URL=http://s1346.photobucket.com/user/kingtiger11/media/M88/DSC01124_zpse6768d7d.jpg.html] [/URL[URL=http://s1346.photobucket.com/user/kingtiger11/media/[URL=http://s1346.photobucket.com/user/kingtiger11/media/M88/DSC01128_zpse3150e9d.jpg.html] [/URL

I assembled and attached the operational spade on my M88. In order to give the upper hull a cast look, I gave it a primer coat of Mr. Surfacer, then started working on tracks. These tracks are individually removed from the sprue and assembled into the outside cleats, then repeated on the other side. Once connected, I used my blade to remove the length of track, all without a drop of glue.  Terry

  • Member since
    February 2014
  • From: Michigan
Posted by silentbob33 on Monday, December 22, 2014 4:57 PM

Thanks Bish! Terry that is looking really cool, especially how well the tracks are going together for you

On my bench: Academy 1/35 UH-60L Black Hawk

  • Member since
    January 2013
Posted by jibber on Monday, December 22, 2014 5:13 PM

Bob thanks, that Phantom looks awesome!!! Great build, great colors, one nice jet. I'd love to see that on a small piece of lined tarmac. Nice build and congrats in getting it completed.

Nathan those resin pieces are the real deal, nice catch on those mistakes.  

  • Member since
    February 2014
  • From: Michigan
Posted by silentbob33 on Monday, December 22, 2014 5:58 PM

Thanks!

On my bench: Academy 1/35 UH-60L Black Hawk

  • Member since
    November 2008
  • From: Central Florida
Posted by plasticjunkie on Monday, December 22, 2014 6:59 PM

Sorry gents for being AWOL but my computer caught a nasty virus from an ARC decal review site. Just got my sanitized computer back and will be posting update pictures soon.

 GIFMaker.org_jy_Ayj_O


Too many models to build, not enough time in a lifetime!!

  • Member since
    July 2004
  • From: Sonora Desert
Posted by stikpusher on Monday, December 22, 2014 7:16 PM

No worries PJ. Just curious, but what site infected your computer?


F is for FIRE, That burns down the whole town!

U is for URANIUM... BOMBS!

N is for NO SURVIVORS...

       - Plankton

LSM


  • Member since
    November 2008
  • From: Central Florida
Posted by plasticjunkie on Tuesday, December 23, 2014 6:36 AM

stik

Can't remember the exact site. I do recall googling for 'Show time 100" Yellow Hammer decal reviews and remember seeing one on ARC site which is the one I clicked on. The ESET antivirus that I have which is pretty good was disabled by it. The same thing happened about 5 years back while looking at a Master Box review.

 GIFMaker.org_jy_Ayj_O


Too many models to build, not enough time in a lifetime!!

  • Member since
    December 2014
Posted by SargeUSMC on Tuesday, December 23, 2014 6:05 PM

Holycrap...what a scribe job!! I could learn a thing or 2 from you, sir!

  • Member since
    April 2010
Posted by Theuns on Wednesday, December 24, 2014 5:46 AM

Whoever has this kit should buy metal undercart for it. the kit ones are very flimzy.
Mattcoat on, a few more pieces to put onand it is done.
Image
Image
Image

Here is my attempt at building a CL MER with 6 Mk 81's complete with fuse safety wires and flags.
Image
Image

  • Member since
    January 2014
  • From: Toronto
Posted by Rob S. on Wednesday, December 24, 2014 7:53 AM

Yes

______________________________________________________________________________


On the Bench: Nothing on the go ATM

  • Member since
    January 2013
Posted by jibber on Wednesday, December 24, 2014 8:02 AM

Theuns, nice camo and scribe lines. Thats another beautiful jet, seems like I'm seeing a lot lately.

  • Member since
    March 2010
  • From: MN
Posted by Nathan T on Wednesday, December 24, 2014 8:36 AM

Awesome work on the centerline pylon Theuns. How did you make it?


  • Member since
    February 2014
  • From: Michigan
Posted by silentbob33 on Wednesday, December 24, 2014 8:41 AM

Looks great Theuns!

On my bench: Academy 1/35 UH-60L Black Hawk

  • Member since
    April 2010
Posted by Theuns on Wednesday, December 24, 2014 8:59 AM

Nathan, I took the kit's wing MER that had lugs for only one side and bottom and added the other side's lugs from plastic sheet.

The pylon is simply a piece of plastic sheet sanded to shape and glued to the MER.

The "wire" to the fuses are from stretched sprue and the flags are red painted lead foil from the top of wine a bottle.

Theuns

  • Member since
    May 2009
  • From: Poland
Posted by Pawel on Thursday, December 25, 2014 3:26 PM

Gennnulmen, beautiful work here! Congratulations on the completed machines!

I for myself am just about to finish my scooter. For now I wanted to show you the underside of my model, where I added all the gear needed for takeoffs and landings on a carrier - I installed the hook with a scratchbuilt simple holdback fitting, catapult bridle attachment hooks (that weren't there in the kit) and a landing light on the undercarriage doors - also scratchbuilt. I also installed the "boards" - speed brakes. What's left out are the guns, pitot tube and stores - and those are coming soon. So here's the photo:

Hope you like it, thanks for reading and have a nice day

Paweł

All comments and critique welcomed. Thanks for your honest opinions!

www.vietnam.net.pl

JOIN OUR COMMUNITY!

Our community is FREE to join. To participate you must either login or register for an account.

SEARCH FORUMS
FREE NEWSLETTER
By signing up you may also receive reader surveys and occasional special offers. We do not sell, rent or trade our email lists. View our Privacy Policy.