SEARCH FINESCALE.COM

Enter keywords or a search phrase below:

World at War 1939-1940 Group Build

65529 views
1023 replies
1 rating 2 rating 3 rating 4 rating 5 rating
  • Member since
    April 2014
  • From: Australia
Posted by lostagain on Thursday, December 10, 2015 6:16 AM

Jack,

The spit looks great with an unusual scheme and back story.

Dan,

Dan the '52 is coming along very nicely. As Bish says, kudos on the sharp paintwork over the corrugations.

The 7TP is building up quickly for the main parts. Adding extra details is taking most of the time. So far the additions have been stainless mesh on the air intakes, and a hundred or so rivets added.

Next will be replacement wire handles, fender supports and light wires. Then building should nearly be done...

  • Member since
    December 2002
  • From: Bury St Edmunds, Suffolk, England
Posted by Bish on Thursday, December 10, 2015 6:42 AM
Theres a lot going into there lost. What did you use for the rivets.

I am a Norfolk man and i glory in being so


On the bench: Airfix 1/72nd Harrier GR.3/Fujimi 1/72nd Ju 87D-3

  • Member since
    February 2006
  • From: Cincinnati Ohio
Posted by DantheMan85 on Thursday, December 10, 2015 11:37 AM


Thanks Bish, Checkmateking.


Thanks Jack: All those rivets you have added, have brought some very good detail. Along with the stainless mesh.

Before the Junkers was in primer, I did some testing with Tamiya tape to see how it would work on the corrugated surface. You first lay the tape down on the surface to be masked, then run your finger or thumb along the edge to be painted, just to make sure that it's making good contact. Then by using a tooth pick, run it down the corrugated surface, along the tapes edge to be painted. I'm using a round tooth pick and it fits good in between the corrugated groves. Seems to work better to start in the middle of the tape and work towards the outside. I didn't do it on this one but you could cut out the rear rudder and position it, the plastic is pretty thin and should be able to cut through it with ease.


On my Work Bench: Tamiya Ford GT 1/24

Up Coming: ?


  • Member since
    September 2003
  • From: AandF in the Badger State
Posted by checkmateking02 on Thursday, December 10, 2015 12:30 PM

Very nice, petite, detailed work, lostagain. That will be looking great when painted.

Thanks, Dan. It's a good technique to know. I have a couple of TBD Devastators, and they have corrugations in the wings, so this will come in handy when I get to them.


  • Member since
    December 2002
  • From: Bury St Edmunds, Suffolk, England
Posted by Bish on Thursday, December 10, 2015 12:41 PM
Ye, nice tip on that Dan. I did consider a Ju 52 for the 41 Gb but really want to add to my Norfolk airfields collection. But if time allows, I might try and fit one in next year.

I am a Norfolk man and i glory in being so


On the bench: Airfix 1/72nd Harrier GR.3/Fujimi 1/72nd Ju 87D-3

  • Member since
    February 2006
  • From: Cincinnati Ohio
Posted by DantheMan85 on Friday, December 11, 2015 11:34 AM

My pleasure gentlmen.  After post shading Tamiya XF-27 last evening, this morning I removed the Tamiya tape. I'm pretty happy with the way it turned out, but in some spots the Tamiya tape pealed up small dots of paint, and on the left side as you can see it took up a good chunk off. Amazing the light colored masking tape I used as filler did not peal up any paint. Now I'm masking for RLM 65 light blue on the bottom.


On my Work Bench: Tamiya Ford GT 1/24

Up Coming: ?


  • Member since
    December 2002
  • From: Bury St Edmunds, Suffolk, England
Posted by Bish on Friday, December 11, 2015 11:58 AM
Nice Dan, really nice.

I am a Norfolk man and i glory in being so


On the bench: Airfix 1/72nd Harrier GR.3/Fujimi 1/72nd Ju 87D-3

  • Member since
    September 2003
  • From: AandF in the Badger State
Posted by checkmateking02 on Friday, December 11, 2015 12:28 PM

Very nice work. I think those particular combinations of green used by the Germans is very eye-catching.

I hate when the masking pulls up paint!


  • Member since
    April 2014
  • From: Australia
Posted by lostagain on Sunday, December 13, 2015 6:04 PM
Dan, That's so frustrating to see the paint coming up. Looking good otherwise, can't wait to see it completed. Bish, the rivets/bolts are just slices of stretched sprue. Variable height but we'll see how they look under paint.

  • Member since
    December 2002
  • From: Bury St Edmunds, Suffolk, England
Posted by Bish on Monday, December 14, 2015 12:32 AM

They look very effective lost.

I am a Norfolk man and i glory in being so


On the bench: Airfix 1/72nd Harrier GR.3/Fujimi 1/72nd Ju 87D-3

  • Member since
    September 2003
  • From: AandF in the Badger State
Posted by checkmateking02 on Monday, December 14, 2015 11:50 AM
Dan: so you painted the top side first, and now are going to paint the undersides? I've never tried that. I'll be very interested to see how that works, since I've always started by painting the bottom first.


  • Member since
    February 2006
  • From: Cincinnati Ohio
Posted by DantheMan85 on Monday, December 21, 2015 4:54 PM

Thanks Bish, lostagain.

Thanks Checkmateking: Yes I could have started either side first, just taped around the top side edges to protect the leading edges.

Sorry for no updates on my Iron Annie, on the bottom I airbrushed two coats of Polly Scale 65 light blue. That stuff is almost like water, the paint is so thin. Followed up with Model Master Acrylic 65 light blue for post shading. After letting it sit over night I removed the masking, and just like on the top sides, some light blue paint pealed off. I thin proceed on touching up the spots that had pealed off. Started with Tamiya XF-61 Dark Green, thinned it to a free hand camouflage consistence, and used 10psi for my airbrush. Working from area to area and masking with tamiya tape, did the same with Tamiya XF-27 Black Green. All that's left are small dots that I can touch up with a fine tip brush, tomorrow I'll work on the light blue touch up.


On my Work Bench: Tamiya Ford GT 1/24

Up Coming: ?


  • Member since
    September 2003
  • From: AandF in the Badger State
Posted by checkmateking02 on Monday, December 21, 2015 11:09 PM
That's looking very nice, Dan. You've been fixing the paint problems up very well. Should be looking great as you complete the finish.


  • Member since
    December 2002
  • From: Bury St Edmunds, Suffolk, England
Posted by Bish on Tuesday, December 22, 2015 12:42 AM
That's looking really nice Dan. And you certainly can't see where you have had to fix the paint.

I am a Norfolk man and i glory in being so


On the bench: Airfix 1/72nd Harrier GR.3/Fujimi 1/72nd Ju 87D-3

  • Member since
    April 2014
  • From: Australia
Posted by lostagain on Wednesday, December 23, 2015 5:08 AM

Nice work Dan, Annie is coming along very nicely. Excellent recovery, and looking forward to the end. I suppose getting the decals into the corugations is the next challenge...

7TP is all stuck together now and we are ready to go to the paint shop.

Next photos should be more colourful.

  • Member since
    September 2003
  • From: AandF in the Badger State
Posted by checkmateking02 on Wednesday, December 23, 2015 11:36 AM
Really nice job of construction, lostagain. Looking very pretty!


  • Member since
    February 2006
  • From: Cincinnati Ohio
Posted by DantheMan85 on Wednesday, December 23, 2015 7:28 PM

Thanks Checkmateking.

Thanks Bish: I think the touch up work adds to the post shading.

Thanks Lostagain: Yeah think I'm going to test some spare decals on a corrugated sheet, to see how they lay down. Your 7TP Is lookin' good, getting your model to the painting stage is always exciting.

Have been continuing touch up painting with the airbrush, this evening I worked on the dark green areas. Last evening the light blue over sprayed a bit on the noise, as you can see in the black green area. Some of the small dot spots can be touched with it a tooth pick, but larger areas need the airbrush. The main landing gear covers and wheels are finished, and the last picture shows a dry fit of the engine assembly.

The other day I watched the 1969 Battle of Britain, there are two shots of Spanish built Ju 52's. First one shows one of them flying and landing in France, second shot is in Berlin at night. And check out all those Spanish built He 111's!


On my Work Bench: Tamiya Ford GT 1/24

Up Coming: ?


  • Member since
    September 2003
  • From: AandF in the Badger State
Posted by checkmateking02 on Wednesday, December 23, 2015 7:51 PM
Great recovery, Dan! Looking good!


  • Member since
    September 2003
  • From: AandF in the Badger State
Posted by checkmateking02 on Wednesday, December 23, 2015 8:02 PM

Christmas--75 years ago:

Merry Christmas and a Happy New Year to all of you!

Please remember, the GB will now run until the 75th anniversary of the victory year, 1945. Plenty of time now till 2020 to do a kit for each year of the war.


  • Member since
    April 2014
  • From: Australia
Posted by lostagain on Thursday, December 31, 2015 5:38 AM

Thanks CMK

Hope everyone had a good christmas and is having a great new year's eve.

Had the past week off, and amongst doing all the festive family stuff managed to get a deal done on the 7TP - first was the buff base.

Next were the olive green and red brown sections - I used a lot of Blu Tack to mask off the different areas:

Next was a dot filter, lightening the mix of colours as I got higher up the tank. Then a pin wash using oil paints, followed by a Flory dart dirt sludge wash down low on the left side, and to compare, the same thing on the other but using the Vallejo equivalent. Both went well, just prefer the Flory on balance.

I also added steel to the rims of the idler wheels, the drive teeth and the tools.

Then I stuck it all together. The rubber tracks were a pain, had them covered with silver tamiya spray paint, then treated with the flory wash. As soon as I tried to get the tracks on, a lot of the paint peeled off and had to be recovered. And bits of silver got stuck everywhere.

And so it is finished - until I notice what I may have missed.

So Thanks CMK for hosting this group build. I like the annual GBs, I do have a models in mind for the '41 build, the '42 build,  how many i complete will depend on heavily on what sort of work I gather during the year...

And I have the '46 and Aces GBs to finish off first...

  • Member since
    April 2006
  • From: ON, Canada
Posted by jgeratic on Thursday, December 31, 2015 12:23 PM

lostagain, great job on the tankette, I really like those colours!  Yes

regards,

Jack


  • Member since
    December 2002
  • From: Bury St Edmunds, Suffolk, England
Posted by Bish on Thursday, December 31, 2015 12:31 PM

Ye, i do like that scheme lost, nice work on that.

I am a Norfolk man and i glory in being so


On the bench: Airfix 1/72nd Harrier GR.3/Fujimi 1/72nd Ju 87D-3

  • Member since
    January 2015
Posted by BrandonD on Thursday, December 31, 2015 3:14 PM

Hey all,

In perusing this, I am loving all the work I'm seeing. With the change in end date, I'd like to jump in with a 1/48 Mirage Lublin R.XIIIter Hydro. It's a polish floatplane, and I'll be building No. 714, which, in 1939, tried to find one of the German warships in the Baltic to sink but, having no luck, flew back over Gdansk (Danzig at the time), saw Germans celebrating in the streets, and made several low passes so the observer/gunner could strafe them.

I've got the kit and the Part PE set for it. Looks a bit daunting, but should be fun.

I chose to build this plane, and No. 714 specifically, because I was able to visit Gdansk earlier this year, and I really loved the city and Poland in general, so it's a fun way to cross the two things I dump the most money on - travel and modeling.

-BD-

  • Member since
    April 2014
  • From: Australia
Posted by lostagain on Thursday, December 31, 2015 3:58 PM

Gents,

Thanks for the kind words

And a happy new year - well it is here at least

Managed to edit out the strange photos this am, and have noticed how shiny the tankette came up in the photos, so I will give it a flat coat and see if it is improved.

Cheers

  • Member since
    September 2003
  • From: AandF in the Badger State
Posted by checkmateking02 on Thursday, December 31, 2015 4:40 PM

Great work, lostagain!  That really is an attractive paint scheme, and well-applied.  It's truly a little gem!

Do you have a preference for the "finished" photo?  Personally, I like either of the last two you posted--but I'll leave the choice up to you!

Thanks very much for being part of the '39/'40 GB.  I'll look forward to seeing you and your project in '41 and '42.  The war is still young yet!


  • Member since
    September 2003
  • From: AandF in the Badger State
Posted by checkmateking02 on Thursday, December 31, 2015 4:45 PM

Welcome to the GB, Brandon!  It's a pleasure to have you join us.  That's a truly interesting subject.  You just don't see a lot of Polish aircraft being modeled, and it sure fits in with the subject at hand.  Fascinating background, too.  I'll be looking forward to seeing the progress.

I've updated the front page, and added you to the roster!


  • Member since
    September 2003
  • From: AandF in the Badger State
Posted by checkmateking02 on Thursday, December 31, 2015 4:50 PM

And for everyone who's participated in the 1939-40 GB, here's wishes for a:


  • Member since
    April 2014
  • From: Australia
Posted by lostagain on Friday, January 1, 2016 7:49 PM

Nice New Year's card CMK!

As I said last post, thought the photos made the tankette look shinier than it was. This was the original:

A similar photo after a flat coat (Gunze), taken inside under lights:

And a third, taken outside in indirect sunlight on an overcast morning:

So the shiny appearance may be down to the strong lighting inside rather than the finish on the model.

Other photos taken outside - can I have this first one on the honour board please:

Thanks again CMK and have a great 2016

Regards

Piers

  • Member since
    September 2003
  • From: AandF in the Badger State
Posted by checkmateking02 on Friday, January 1, 2016 8:20 PM

Excellent photos, Piers.  I've updated the front page with the one you chose.

You picked an great subject to model, and I'm glad you took part in the GB so we could all get a look at this.  Polish subjects don't seem to happen very often, so this was a welcome addition.


  • Member since
    January 2015
Posted by BrandonD on Saturday, January 2, 2016 2:12 AM

Piers - I love that Tankette! Nice job on the finish.


Ok, my Lublin R.XIIIter Hydro will be my first build of 2016 (well, at least the first one I'm starting. I may build another simultaneously).

So far, it's a lot of PE madness. I glued the wing together. It's four parts, and just like the real thing, Mirage molded this single wing as left and right halves. So I have a bit of seam cleanup ahead, but I was pleasantly surprised at how well the parts fit.

The floats went together well for the most part, but will need some seam cleanup. More importantly, it looks like Mirage molded deep panel lines where there should be a smooth surface with rivets. All my reference photos show a slick surface, so I plan on filling all the lines, sanding them smooth and then hitting them with my new rivet tool.

The kit cockpits basically include two seats mounted to bulkheads, and instrument panel with little detail and a control stick that just goes into the floor. Some framework is molded on the insides of the fuselage.

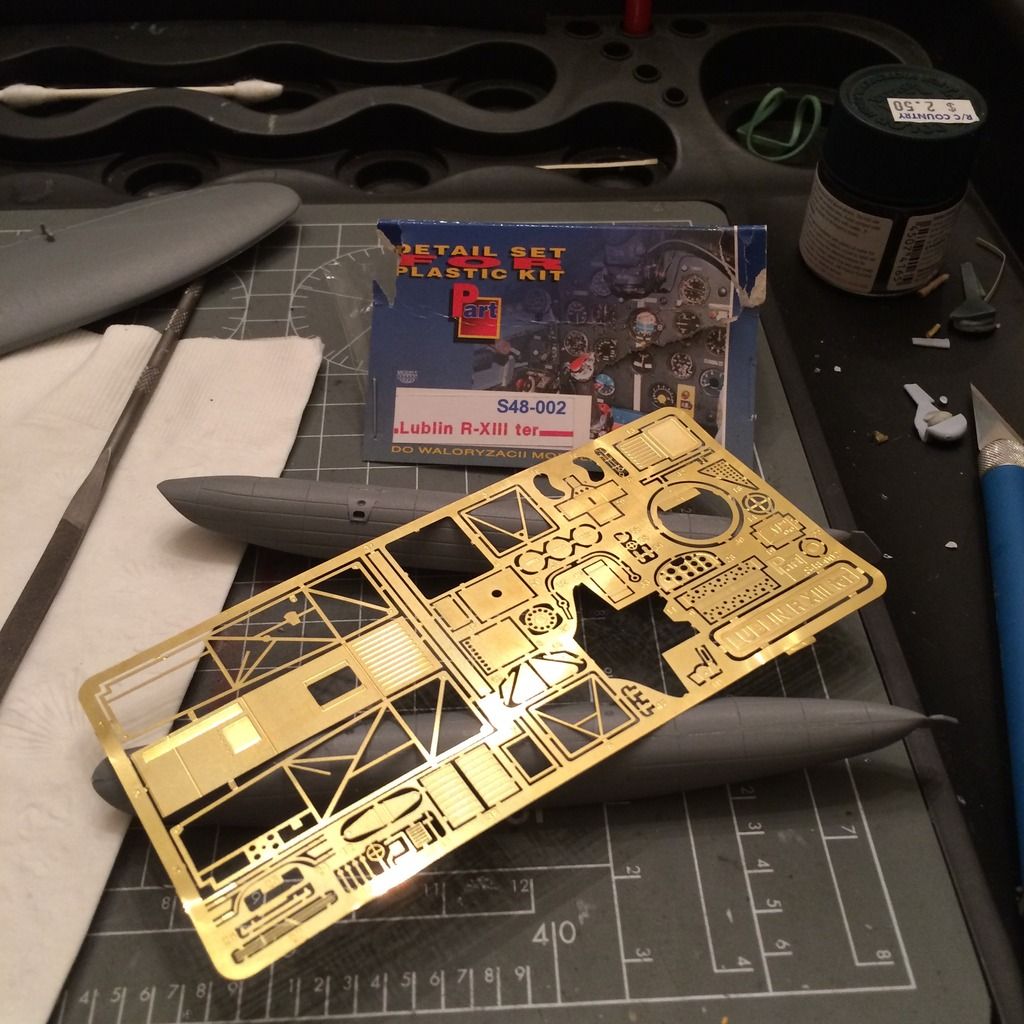
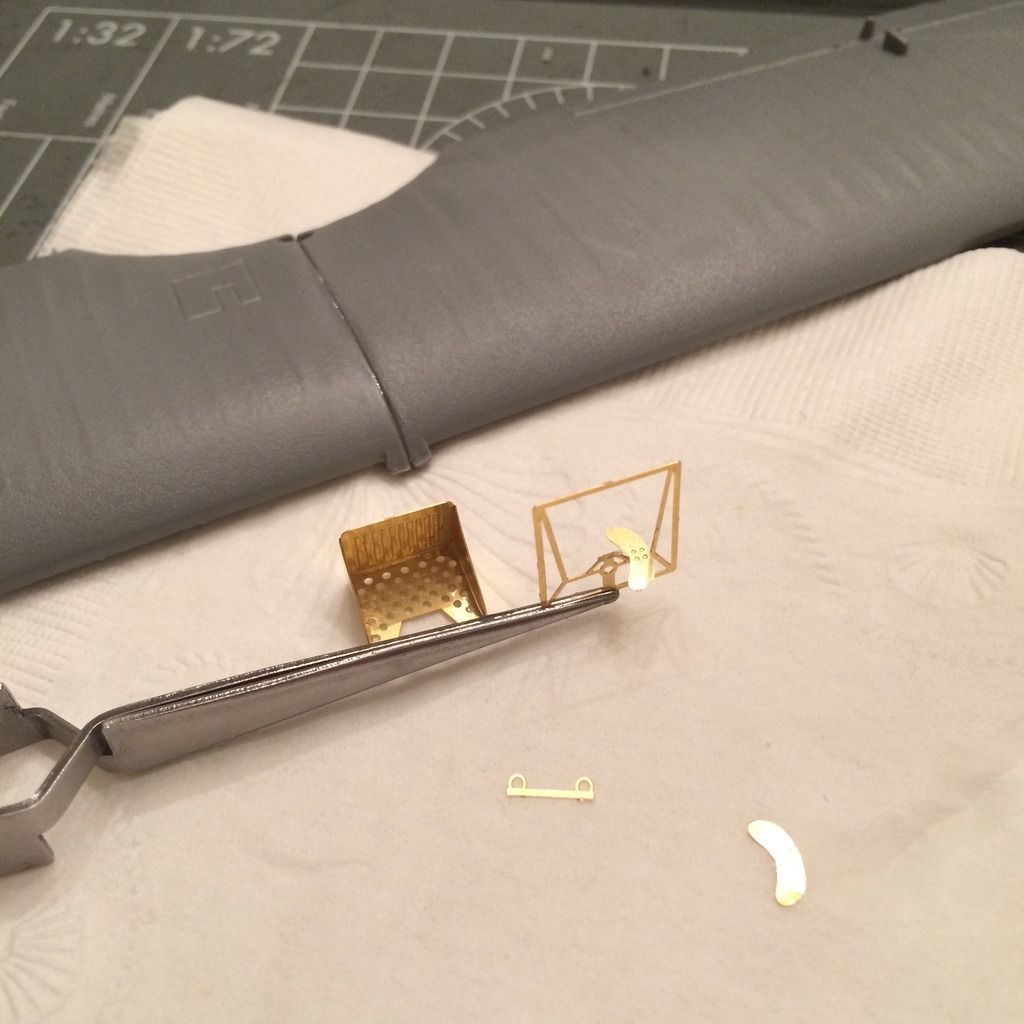
In short, I'm glad I ordered the Part PE set, even though its instructions are rather vague.

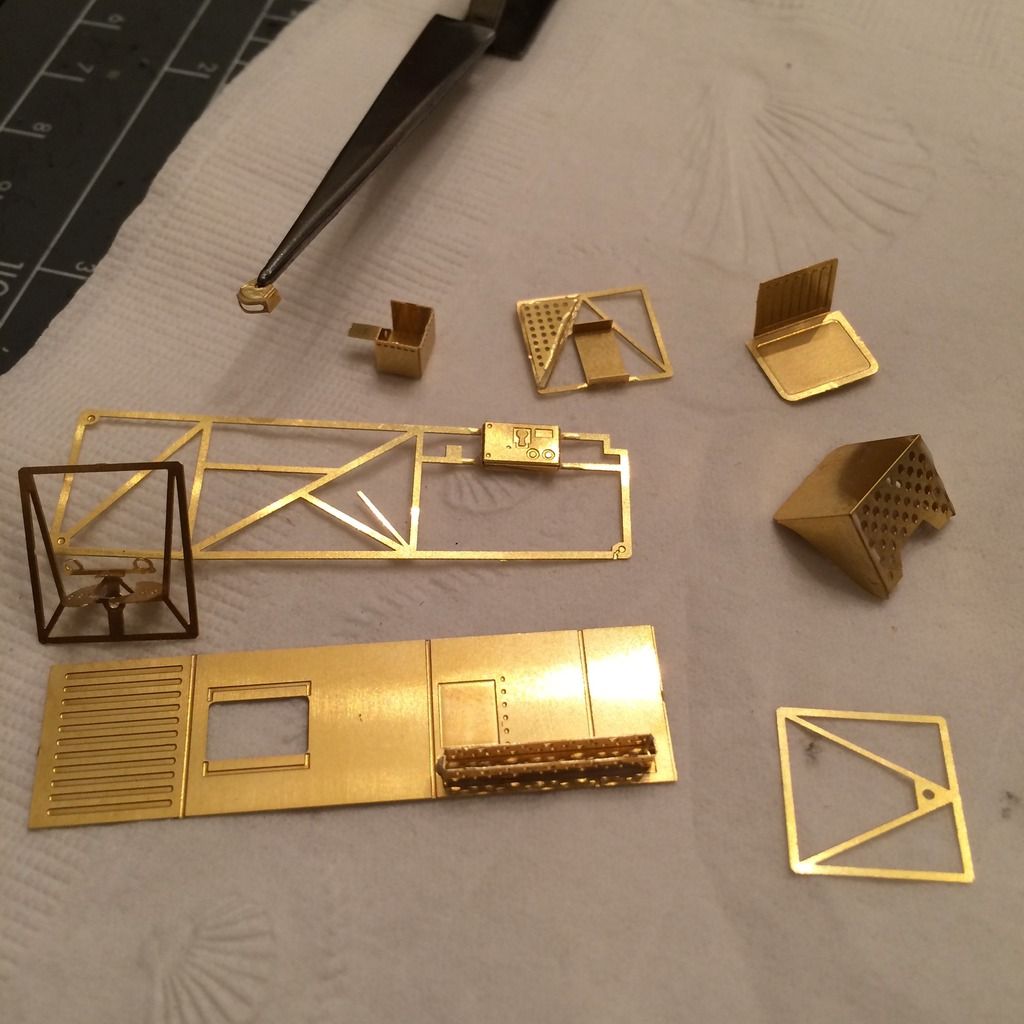
The only part of the kit cockpit I will be using is the control stick, as the PE set comes with the control wheel. When the Polish Navy ordered the last of its R.XIII hydros (numbers 714-719), they ordered them with standard control columns. As I'll be building 714, I grafted the kit column onto the PE linkage.

That's all for now. Thanks for having me in the build. I'm looking forward to starting my 1941 project, and I'm glad you've opened it up to builders for the duration!

-BD-

JOIN OUR COMMUNITY!

Our community is FREE to join. To participate you must either login or register for an account.

SEARCH FORUMS
FREE NEWSLETTER
By signing up you may also receive reader surveys and occasional special offers. We do not sell, rent or trade our email lists. View our Privacy Policy.