SEARCH FINESCALE.COM

Enter keywords or a search phrase below:

Boeing Build

39485 views
832 replies
1 rating 2 rating 3 rating 4 rating 5 rating
  • Member since
    July 2014
Posted by modelcrazy on Thursday, March 31, 2016 11:17 AM

Looking good Ghost.

Steve

Building a kit from your stash is like cutting a head off a Hydra, two more take it's place.


http://www.spamodeler.com/forum/

  • Member since
    August 2010
  • From: Beaverton, OR
Posted by Ghostrider114 on Friday, April 1, 2016 1:03 AM

nose section is assembled and preshaded.

  • Member since
    July 2014
Posted by modelcrazy on Friday, April 1, 2016 9:14 AM

Nice white nosecone. What did you use?

Steve

Building a kit from your stash is like cutting a head off a Hydra, two more take it's place.


http://www.spamodeler.com/forum/

  • Member since
    August 2010
  • From: Beaverton, OR
Posted by Ghostrider114 on Saturday, April 2, 2016 12:00 AM

just testors gloss white enamel in a rattle can. I figured that the high contrast preshading under the top coat would help the nose stand out.

  • Member since
    August 2010
  • From: Beaverton, OR
Posted by Ghostrider114 on Monday, April 4, 2016 7:38 PM

I airbrushed alclad on the underside of the engines for the bare titanium, now all I need to do is install the CFTs and I can start painting this thing gunship grey.

  • Member since
    August 2015
  • From: the redlands Fl
Posted by crown r n7 on Tuesday, April 5, 2016 8:09 AM

that will give it a burned metal look. Here is my E4B engine up date


 Nick.

  • Member since
    July 2014
Posted by modelcrazy on Tuesday, April 5, 2016 9:07 AM

Nice work, did you drybrush the impeller blades? the spinners must have been tough considering their size.

Steve

Building a kit from your stash is like cutting a head off a Hydra, two more take it's place.


http://www.spamodeler.com/forum/

  • Member since
    August 2015
  • From: the redlands Fl
Posted by crown r n7 on Tuesday, April 5, 2016 10:28 AM

I used metalizer tianium then SNJ power followed by tamiya black wash. the decals are a pain needed to apply future on the cone place decal then micro sol and leave it alone that's what happens when you don't follow instructions and place the decal BEFORE assembly  Angry

e


 Nick.

  • Member since
    August 2010
  • From: Beaverton, OR
Posted by Ghostrider114 on Tuesday, April 5, 2016 7:09 PM

Since I'm almost ready to paint the main coat on the mudhen, I decided to start with a test on the tails.

It went ok, but I think the paint came out of the rattle can too thick and just about obliterated the preshading. To save time I traced all the lines with a sharpie instead of airbrushing on the tails.  You can just barely make out the preshade lines in this pic, they're all but invisible in person.  I'm not sure the airbrushed lines will do any better against a rattle can, so I'll use an airbrush for the grey on the rest of it instead.


Interesting development: I hit the tails with glosscoat and suddenly all the sharpied panel lines appeared, bright purple and clear as day.  I won't be using sharpie to draw those in again.

  • Member since
    January 2014
  • From: Nampa, Idaho
Posted by jelliott523 on Wednesday, April 6, 2016 11:36 AM

Sharpies do not play well with most paint, they will bleed through almost anything. Sharpie does make an enamel-type marker that "supposedly" will not bleed through; however, I'm not quite enough of a risk taker to give it a shot. I did the same thing with a model a few years ago thinking it would be a cool way to get panel lines. I quickly learned from that mistake. You might be able to strip the paint and get the Sharpie marks off with lacquer thinner.

On the Bench:  Lots of unfinished projects!  Smile

  • Member since
    August 2010
  • From: Beaverton, OR
Posted by Ghostrider114 on Wednesday, April 6, 2016 11:42 PM

I may end up doing that, I painted over it again and the sharpie stayed down on one, but showed up again on the other fin.  Which is wierd, since I didn't do anything different between the two.

  • Member since
    December 2013
Posted by CodyJ on Thursday, April 7, 2016 3:17 PM

modelcrazy

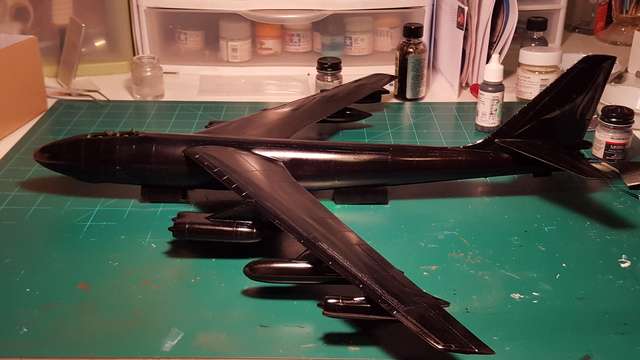
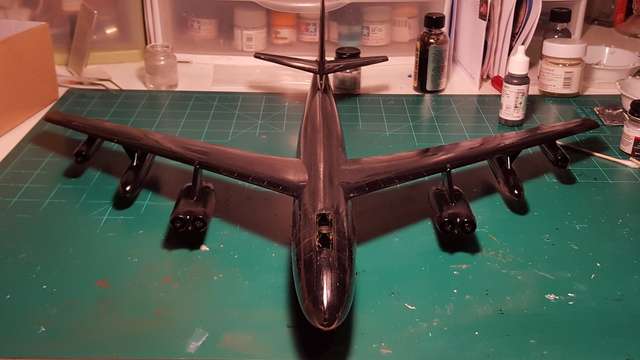
I painted the B-47 with Alclad gloss black. It goes on well but the build is so big I had to paint it in two sections.


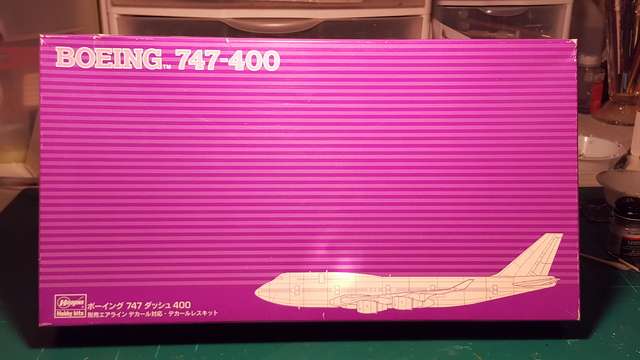
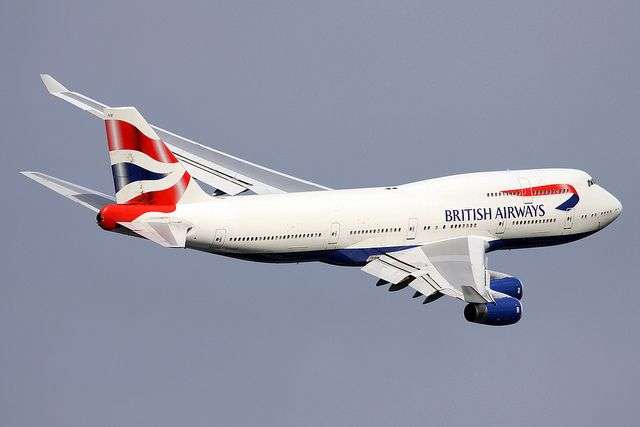
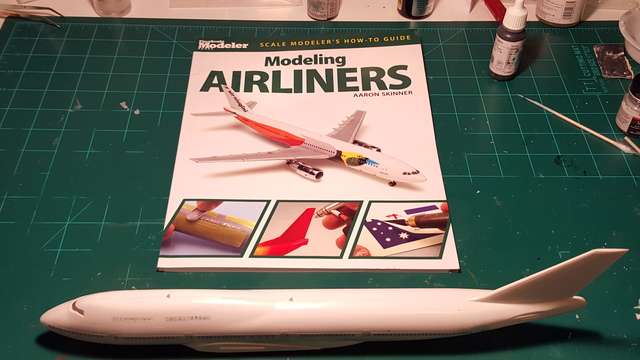
I also figured that I needed to build an airliner for the build. Since the Braniff 727 was a bust I wanted to do something else. Well I saw this last Saturday at our IPMS meeting for $3 and just couldn’t pass it up. So I snatched it and ordered decals for British Airways from Airline-hobby.com. So using Aarons excellent airliner guide I bought for myself for my birthday I got to work.


Steve


Nice Work Steve.  Thanks for showng that book too.  Never seen it before..  I may need that eventually....  who am I kidding....  I need it now.  LOL

  • Member since
    December 2013
Posted by CodyJ on Thursday, April 7, 2016 3:20 PM

By the way-  I have just got here from about 2 weeks of being tied up.  Great work and love seeing the way everyone helps each other.  Very Cool.  Some of the talent in here is simply amazing!

  • Member since
    August 2010
  • From: Beaverton, OR
Posted by Ghostrider114 on Thursday, April 7, 2016 8:29 PM

don't you just hate it when your decals stick instantly to the model and don't budge no matter how hard you try to refloat them?


  • Member since
    July 2014
Posted by modelcrazy on Thursday, April 7, 2016 9:21 PM

Man that sucks GR. I never had that hard of a time sliding decals although I can imagine what you went through. Micro sol helps decals slide until you get it where you want and helps remove them. 

Steve

Building a kit from your stash is like cutting a head off a Hydra, two more take it's place.


http://www.spamodeler.com/forum/

  • Member since
    August 2010
  • From: Beaverton, OR
Posted by Ghostrider114 on Thursday, April 7, 2016 10:00 PM

Yeah, I didn't have any trouble with the decals on the other tail, just those ones.  I found a new sheet of decals for the same kit on Ebay, so I'll just strip this tail and start over.

  • Member since
    July 2014
Posted by modelcrazy on Sunday, April 10, 2016 5:39 PM
I calling the B47 done. It was a pretty simple kit for its size. The raised details were difficult to work with and I tried to replace any that were knocked off by seam fulling.
Anyway, here is, not supper happy with it and it will be donated to my 3-year-old and 1-year-old grandson’s ceiling. That should be a sight for them to look at night.
I’m also updating the 747. I painted gray primer it prep for the white.


Steve


Steve

Building a kit from your stash is like cutting a head off a Hydra, two more take it's place.


http://www.spamodeler.com/forum/

  • Member since
    April 2006
  • From: ON, Canada
Posted by jgeratic on Sunday, April 10, 2016 11:11 PM

Steve, that looks really slick - seriously, nice work on this one. Yes

regards,

Jack

  • Member since
    January 2014
  • From: Nampa, Idaho
Posted by jelliott523 on Monday, April 11, 2016 4:30 PM

Ghostrider114

don't you just hate it when your decals stick instantly to the model and don't budge no matter how hard you try to refloat them?


If you still need some of these decals and dont want to spend money for them, I have a set of those tail codes that I am not going to use. I just built two of these kits and only used one of the Bold Tigers tail codes. Let me know if you'd like to have them.

On the Bench:  Lots of unfinished projects!  Smile

  • Member since
    August 2010
  • From: Beaverton, OR
Posted by Ghostrider114 on Monday, April 11, 2016 6:06 PM

jelliott523

If you still need some of these decals and dont want to spend money for them, I have a set of those tail codes that I am not going to use. I just built two of these kits and only used one of the Bold Tigers tail codes. Let me know if you'd like to have them.


Hmm
Thanks for the offer, but I already got a second sheet from ebay.
 
I got the tail stripped and am in the process of repainting it.

  • Member since
    August 2010
  • From: Beaverton, OR
Posted by Ghostrider114 on Thursday, April 14, 2016 8:03 PM

Ok, so I re-decalled the bad tail.  I had the same issue on some of the decals, but fortunately, I think I got them down in the right spot on the first try this time.  If anything, this tail now looks better then the one I didn't have to redo.


I also started airbrushing the body of the plane.  I had to move it into the garage on acount of the rain, but it worked, I was lucky my dad's car wasn't here.

At first glance it looks like all that preshading still didn't show through, we'll see how it looks when it cures.

If you're wondering, the left variable intake fell off when I masked the inside, I'll reinstall it after I finish painting.

  • Member since
    July 2014
Posted by modelcrazy on Thursday, April 14, 2016 10:56 PM

Keep plugging GR you're getting there

Steve

Building a kit from your stash is like cutting a head off a Hydra, two more take it's place.


http://www.spamodeler.com/forum/

  • Member since
    January 2014
  • From: Nampa, Idaho
Posted by jelliott523 on Friday, April 15, 2016 11:43 AM

Okay, finally have some completed shots of the Double F-15E build I did representing aircraft based at Mt. Home AFB, Idaho. Sorry if this is a little picture heavy, and some of the pic quality isnt the greatest. These were taken with the camera on my phone.


On the Bench:  Lots of unfinished projects!  Smile

  • Member since
    July 2014
Posted by modelcrazy on Friday, April 15, 2016 12:19 PM
Nice looking pair Jeremy, they certainly resemble the MH jets. My son-in law used to arm those same puppies. Man, those are some big birds.
Now you need to build some MH F-35’s Stick out tongue
Thank you for joining us in the Boeing Build, I hope you enjoyed it.
Steve

Steve

Building a kit from your stash is like cutting a head off a Hydra, two more take it's place.


http://www.spamodeler.com/forum/

  • Member since
    April 2006
  • From: ON, Canada
Posted by jgeratic on Friday, April 15, 2016 3:19 PM

A fine looking pair, I like the overall soft colour modulation . Yes

regards,

Jack

  • Member since
    August 2010
  • From: Beaverton, OR
Posted by Ghostrider114 on Friday, April 15, 2016 9:52 PM
awesome! If mine turns out half that good, I'll be happy.

  • Member since
    January 2014
  • From: Nampa, Idaho
Posted by jelliott523 on Saturday, April 16, 2016 8:45 AM

GR, your's are looking great as well! You'll be just fine.

On the Bench:  Lots of unfinished projects!  Smile

  • Member since
    August 2010
  • From: Beaverton, OR
Posted by Ghostrider114 on Monday, April 25, 2016 8:56 PM

Ok, I've had an eventful couple of weeks.  but, between the rain, a balky can of glosscoat and some airbrush issues(fortunately, once I figured it out it was a really simple fix), I've made a little progress on the mudhen.  I got a set of AIRES exhausts for it.  I painted them with Alclad (which was a pain with aformentioned airbrush issues) and just finished assembling the first one.  Boy are all those push-rods fiddly.  I'm glad I went with the AIRES cans though, the kit cans look like they'd be almost as much effort without as much detail.


  • Member since
    August 2010
  • From: Beaverton, OR
Posted by Ghostrider114 on Tuesday, May 10, 2016 2:50 AM

Over the past couple of weeks I got a little work done.  I added some weathering to the exhaust cans, here's both of them dryfit:

Next I painted and installed some of the ordinance on stations 2, 5 and 8, since I haven't installed them on the jet yet.  I also painted and installed the two LANTIRN pods.  All the ordinance comes from the Hasegawa weapons packs except the drop tanks, which are stock.  For a little bit of added color variation, I painted the drop tanks as if they were from War Reserve Stock, hence the lighter F-15C style Agressor Grey.

I think I'm also going to have a mix of 500 lb dumb bombs and LGBs on the CFT stations, just to load it up with more variety.  I'm not sure why it'd be carrying a BLU-109, I just liked the look of that JDAM better then the Mk-84 version.  The general idea with this loadout was to showcase the subject's flexability.

I've also installed the landing gear, so I don't have to balance the airframe on paint cans anymore.


  • Member since
    April 2005
  • From: Australia
Posted by taxtp on Tuesday, May 10, 2016 8:03 AM

I've just realised that I really need to get going with my build if I'm going to beat the deadline. It's on the list as a Hasegawa 1/200 727 in Ansett colors. I hope it can measure up to some of the other fine work here.

Here's the current status:

I'm just taking it one GB at a time.

JOIN OUR COMMUNITY!

Our community is FREE to join. To participate you must either login or register for an account.

SEARCH FORUMS
FREE NEWSLETTER
By signing up you may also receive reader surveys and occasional special offers. We do not sell, rent or trade our email lists. View our Privacy Policy.