SEARCH FINESCALE.COM

Enter keywords or a search phrase below:

1946 What If GB

55230 views
1775 replies
1 rating 2 rating 3 rating 4 rating 5 rating
  • Member since
    November 2009
  • From: SW Virginia
Posted by Gamera on Tuesday, July 26, 2016 7:47 AM

Thanks Bish. Hopefully the base will be done this weekend. 

BTW, lost the senior officer's (in green) katana, hopefully it will show up when I'm tossing all the left-over parts in the spare parts drawer.  

"I dream in fire but work in clay." -Arthur Machen


  • Member since
    May 2013
  • From: From the Mit, but live in Mason, O high ho
Posted by hogfanfs on Tuesday, July 26, 2016 8:44 AM

Cliff,

The figures look really good! Are these the MiniArt figure set?

 Bruce


 On the bench:  1/48 Eduard MiG-21MF

                        1/35 Takom Merkava Mk.I


  • Member since
    November 2009
  • From: SW Virginia
Posted by Gamera on Tuesday, July 26, 2016 9:29 AM

Hey Bruce, thanks! 

The two small guys (1/35th) are from FineMolds sets. The two bigger officers are from Verlinden (they're labeled as 1/35th but they're actually 1/32th). The geisha is from a Japanese company called Aurora Models, I had to special order her. She is also 1/32nd (she'd come out about 6'6- 2 metres tall in 1/35th...) Indifferent  

I'm want to get the MiniArt figures but it seems everytime I go to order them they seem to be out of stock.

"I dream in fire but work in clay." -Arthur Machen


  • Member since
    May 2013
  • From: From the Mit, but live in Mason, O high ho
Posted by hogfanfs on Tuesday, July 26, 2016 10:51 AM

I'm going to pick up the MiniArt set for the Type 4. I'm starting to think how I want to finish this tank in a dio. It will be something simple.

I'm looking forward to seeing what you have planned Cliff, with the Geisha in the dio.

 Bruce


 On the bench:  1/48 Eduard MiG-21MF

                        1/35 Takom Merkava Mk.I


  • Member since
    November 2009
  • From: SW Virginia
Posted by Gamera on Tuesday, July 26, 2016 11:24 AM

Thanks Bruce, looking forward to seeing you get more done on the Type 4. I think you'll love the MiniArt figures, I've got a few of their US and British tank crews and infantry and they are really nicely molded, fit well, and the poses look really good- not stiff like the old Tamiya figures. 

Actually, the geisha is little unrealistic but I went with some artistic license here. There were no geisha from mid '44 to the end of the war. The government shut down all the geisha parlours and tea houses and drafted them to work in munitions factories. I figured what the hey, maybe some big shot political leader or officer got a special exemption for his favorite entertainer. Plus I've got a tank that never entered service so hey we're not really dealing in reality here anyway! 

"I dream in fire but work in clay." -Arthur Machen


  • Member since
    December 2002
  • From: Bury St Edmunds, Suffolk, England
Posted by Bish on Tuesday, July 26, 2016 12:09 PM

G, i know what you mean about Verlinden figures, i have thoguht the same for a few years. I find its ok as long as you don't put them to close to proper 32nd ones. Though it can be a pain trying to fit them into vehicles.

I am a Norfolk man and i glory in being so


On the bench: Airfix 1/72nd Harrier GR.3/Fujimi 1/72nd Ju 87D-3

  • Member since
    May 2013
  • From: From the Mit, but live in Mason, O high ho
Posted by hogfanfs on Tuesday, July 26, 2016 1:19 PM

Cliff,

O wise one in the way of Japanese Armor, I need your help! I have not been able to find AM tracks for the Type 4, and I'm not looking forward to the rubber bands suppiled in the kit. I have seen Fruils for the Fine Molds Type 97. Wouldn't these work outside of not having enough links for a Type 4 tank? 

They are the same type of link (I think) except the Type 4 was longer and would need more links added, correct? Maybe?

 Bruce


 On the bench:  1/48 Eduard MiG-21MF

                        1/35 Takom Merkava Mk.I


  • Member since
    November 2009
  • From: SW Virginia
Posted by Gamera on Tuesday, July 26, 2016 1:29 PM

Bruce: As I've got a Type 4 and Type 97 in the stash I'll dig them out tonight and look at the tracks. Should be able to get back with you either tonight or tomorrow morning. 

BTW: Before you invest in the Fruils you might want to check with the Vision Models set. They're plastic and with a little clean-up around the sprue gates they simply snap together. They're the best aftermarket ones I've ever used. You can leave them loose for workable tracks but the links are a little fragile, it's probably better once you have them the way you want them to flow on a little liquid cement and lock them in place. Still gee friggin' whiz the snap together feature is about a zillion times easier to work with than the normal ones. Only big problem I've seen with them is actually finding them, looks like HobbyLink Japan is out of stock and not many companies carry them. 

http://www.perthmilitarymodelling.com/reviews/vehicles/visionmodels/va9003.html

"I dream in fire but work in clay." -Arthur Machen


  • Member since
    May 2013
  • From: From the Mit, but live in Mason, O high ho
Posted by hogfanfs on Tuesday, July 26, 2016 1:42 PM

Cliff,

Wow! I'm losing it! LOL! I have a Type 97 at home too, I can check it out tonight. I can't believe I didn't think of that myself, duh!

I will check out the Vision Model sets (thanks for the link!) And there was another company that made metal tracks for the Type 4 name Zitader. But, it doesn't look they are around any longer.

I pulled the trigger on the MiniArts figures. And I have a Vallejo face painting set coming. Really hoping I can bring this all together in a nice dio. Ha, then I have to start the motorcycle for your Japanese V GB!

 Bruce


 On the bench:  1/48 Eduard MiG-21MF

                        1/35 Takom Merkava Mk.I


  • Member since
    November 2009
  • From: SW Virginia
Posted by Gamera on Tuesday, July 26, 2016 2:16 PM

Lol, no worries Bruce- probably the heat, I've been in and out all day and I'm sweating like a pig. 

I think you'll enjoy the Vallejo paint too, it's some of the best stuff out there for brush painting. 

"I dream in fire but work in clay." -Arthur Machen


  • Member since
    January 2015
Posted by BrandonD on Tuesday, July 26, 2016 5:18 PM

Steve - that ship looks awesome! Some of thos pics made me do a double take, because between the quality of the model and the background, it doesn't look like a model at all. Nicely done.

Joe - great start on the Corsair. That's one of my favorite planes, and I can't wait to see you tackle it.

-BD-

  • Member since
    March 2015
Posted by qlabs on Wednesday, July 27, 2016 9:32 AM

I've managed to get some more sub assemblies done and well as some fiddly bits.

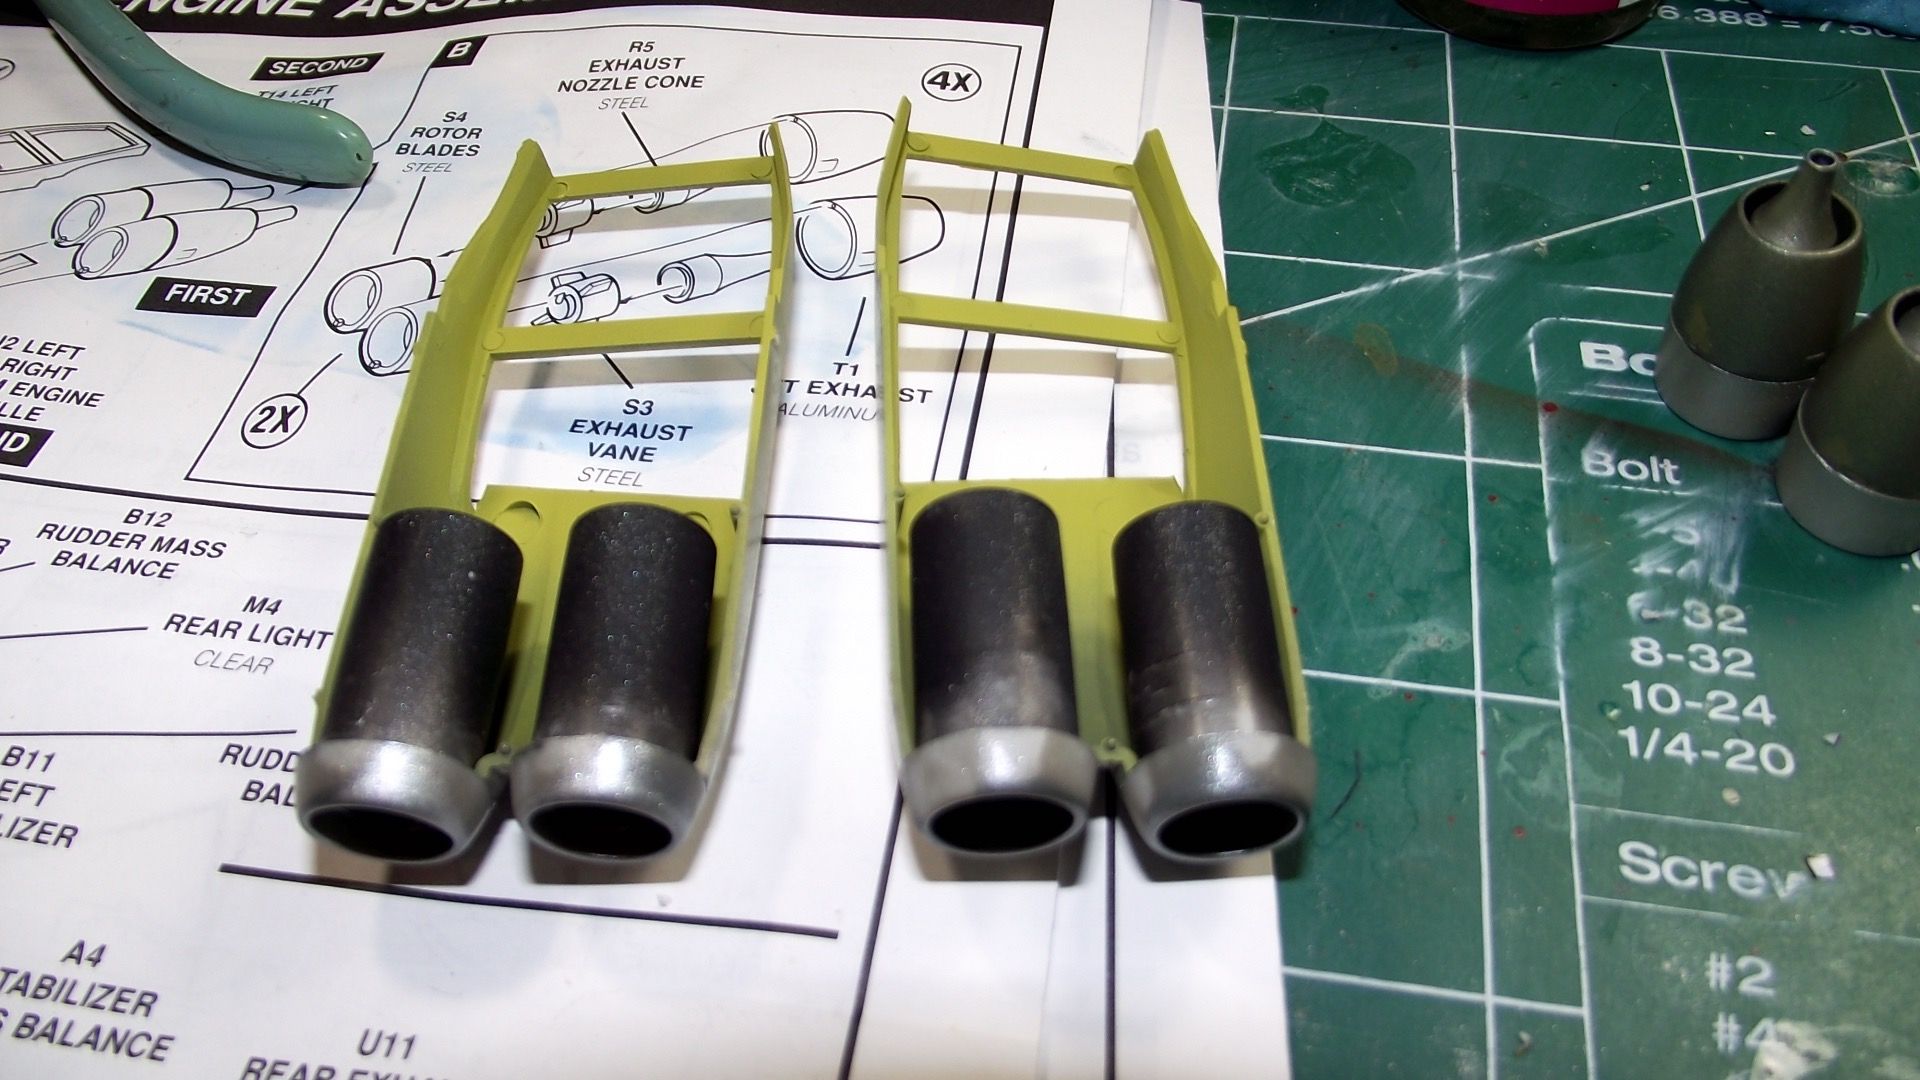
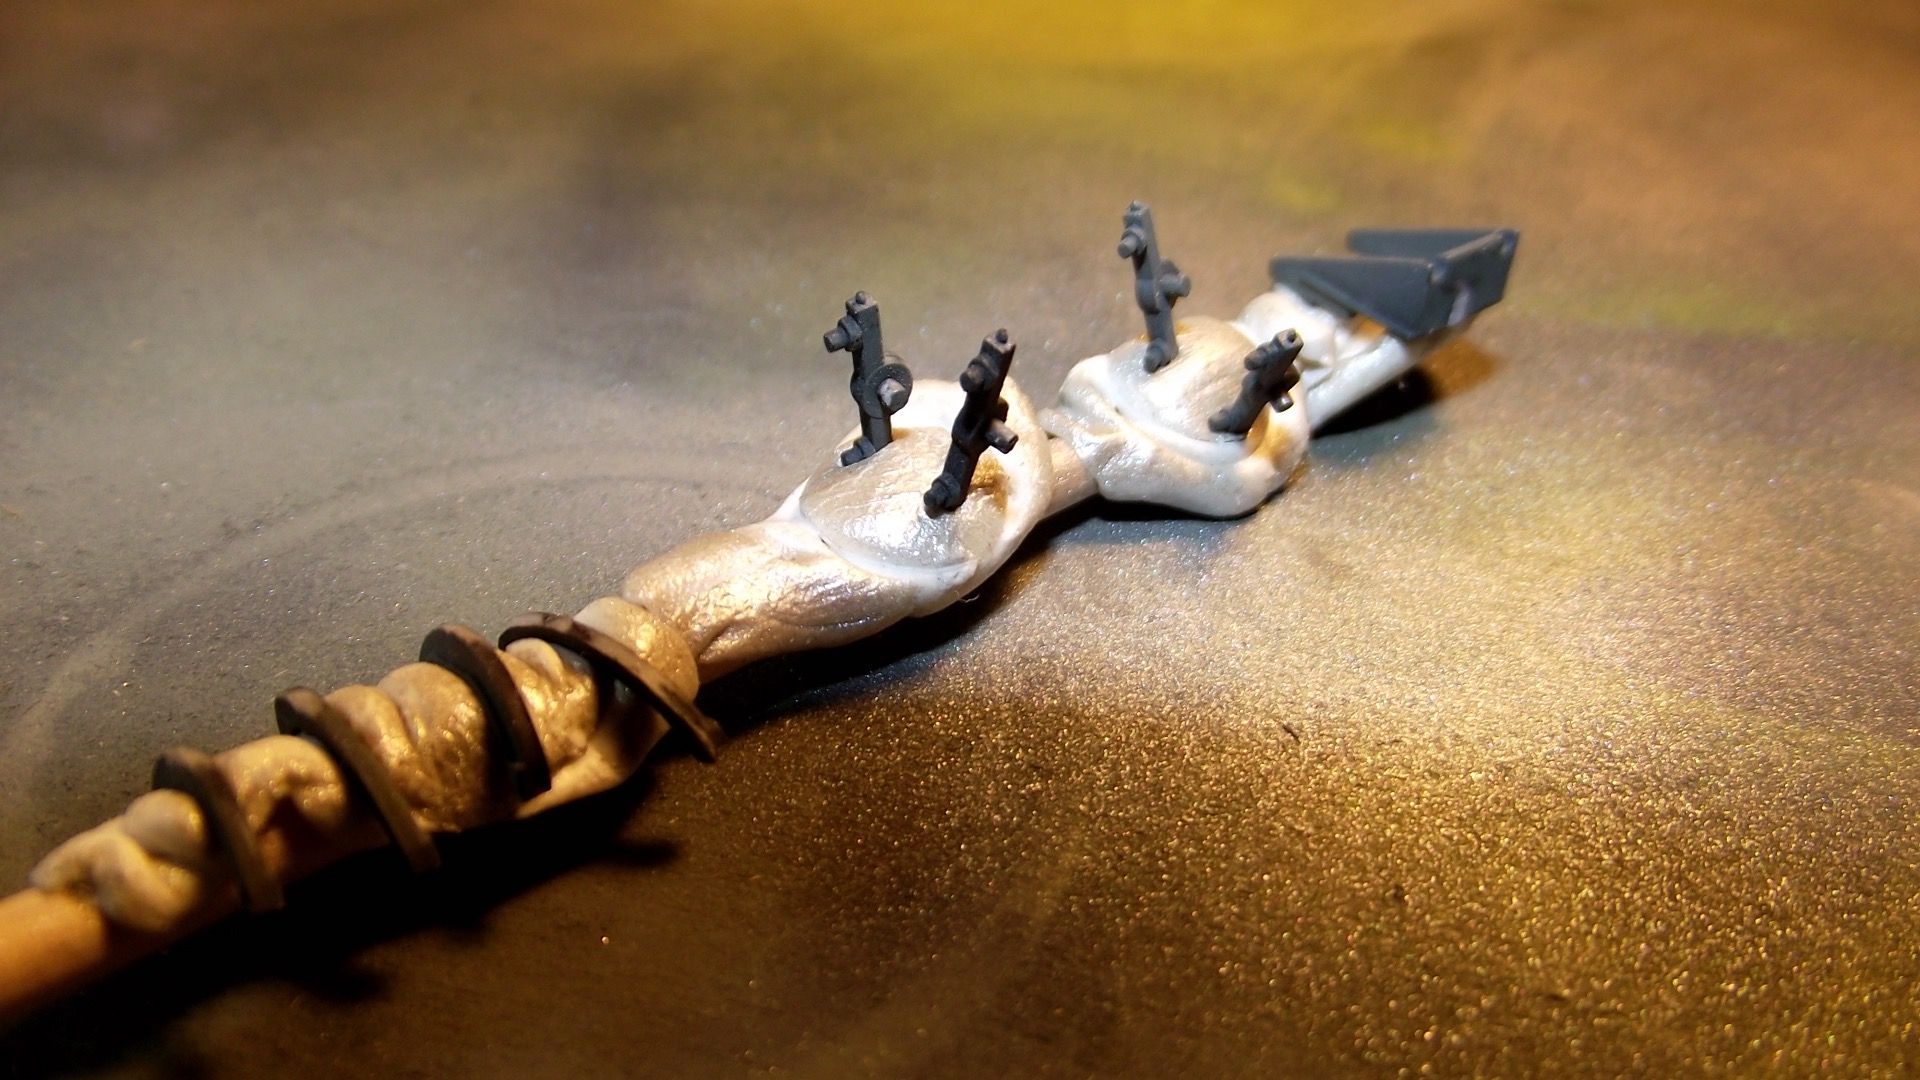
Engine bits done and ready to be installed.

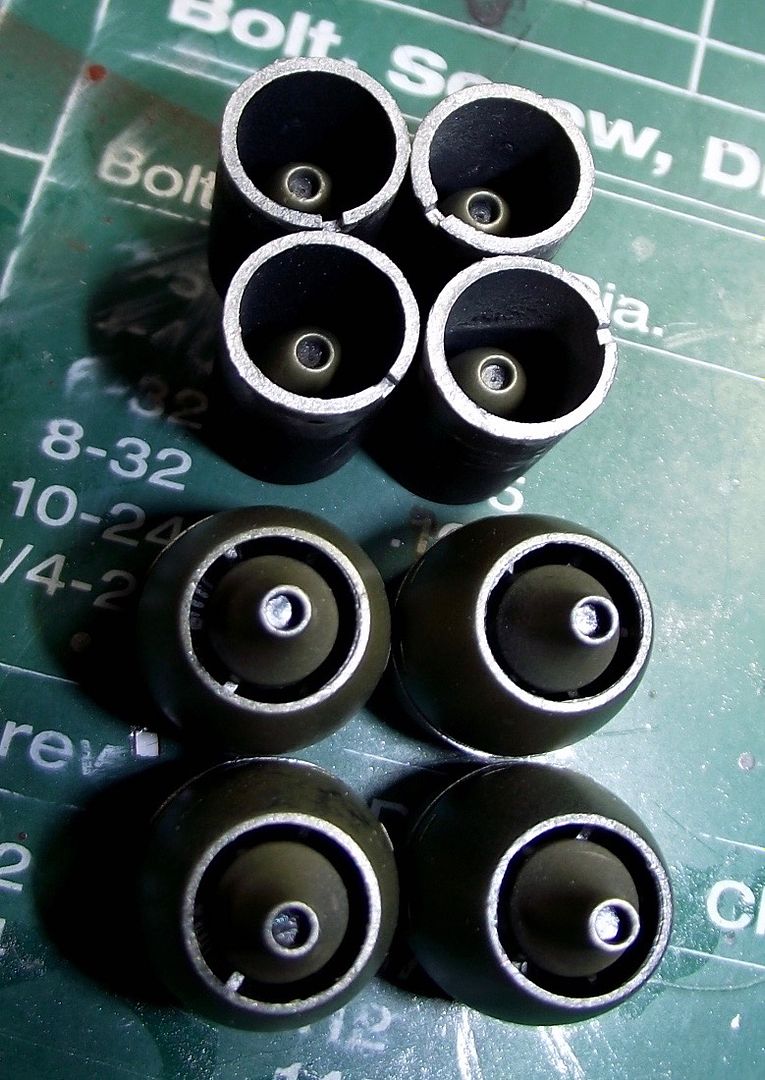
Intakes in the nacelles.

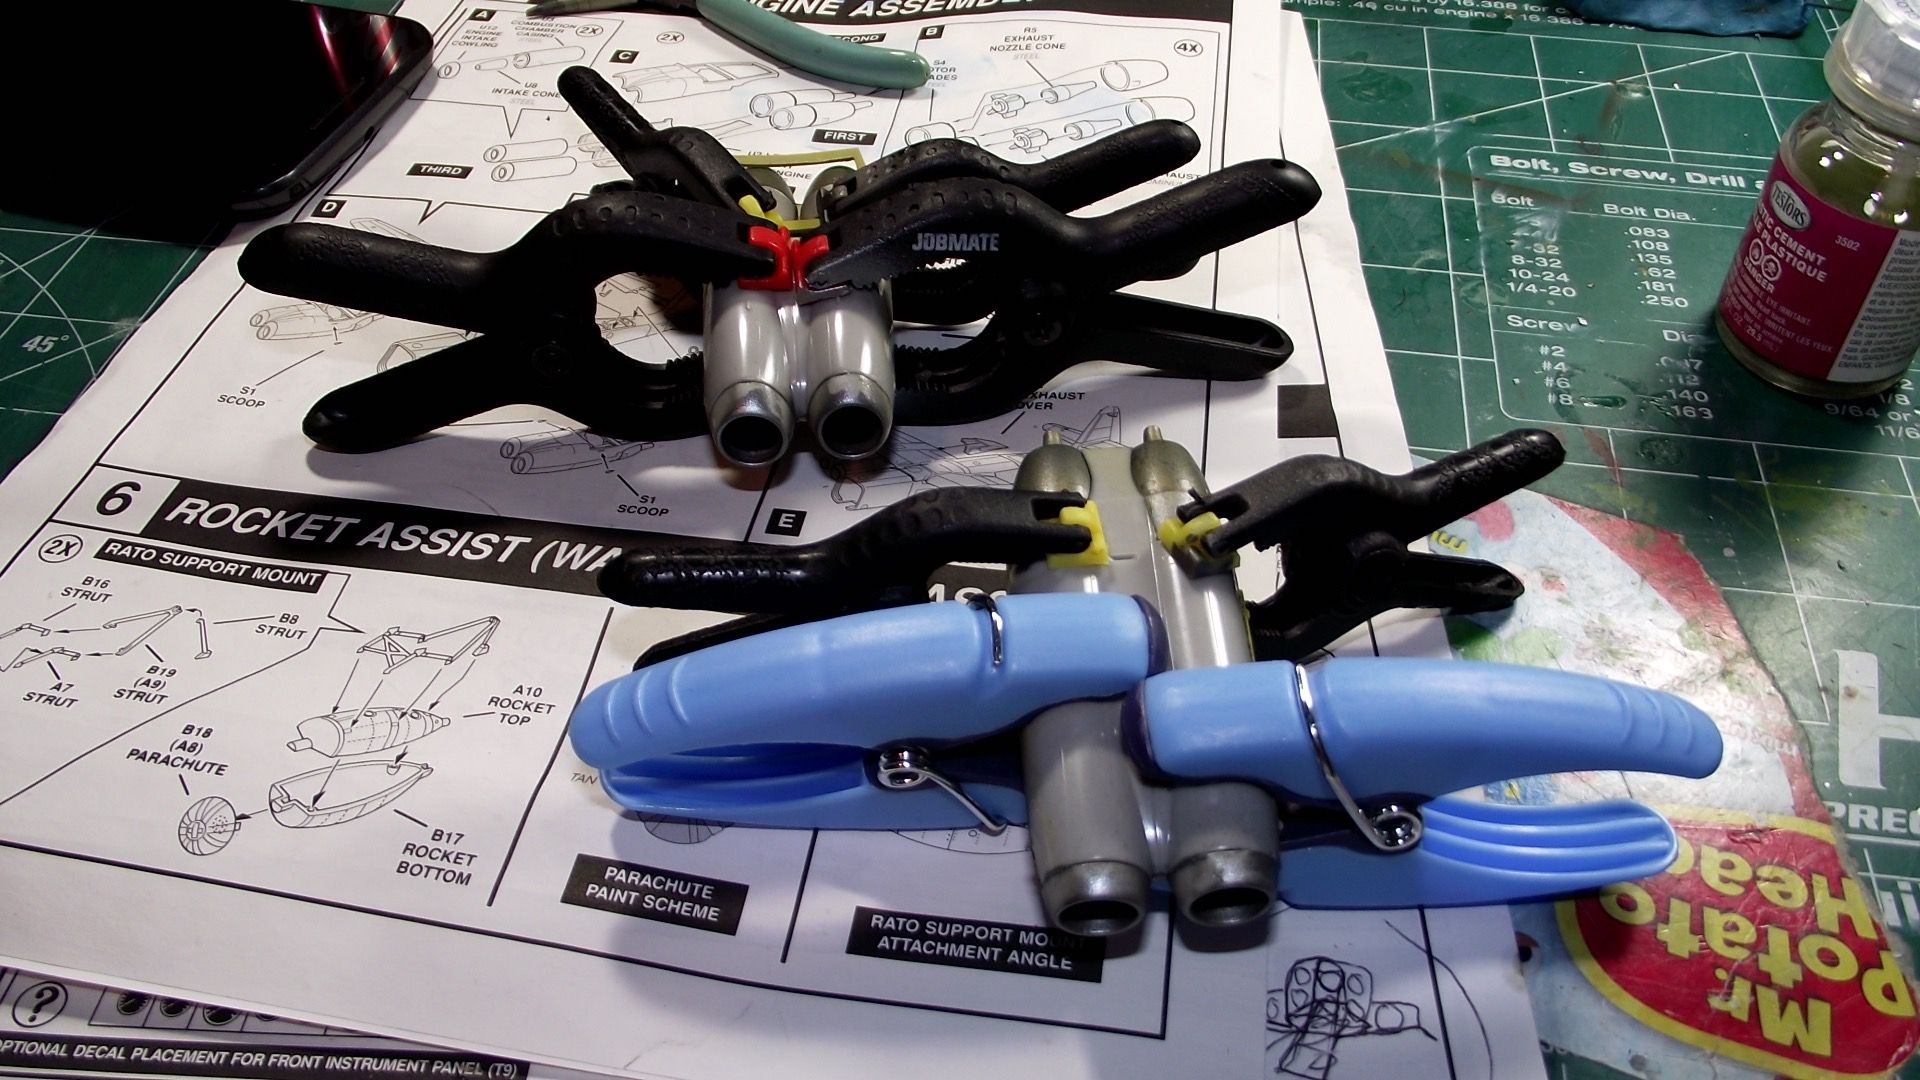
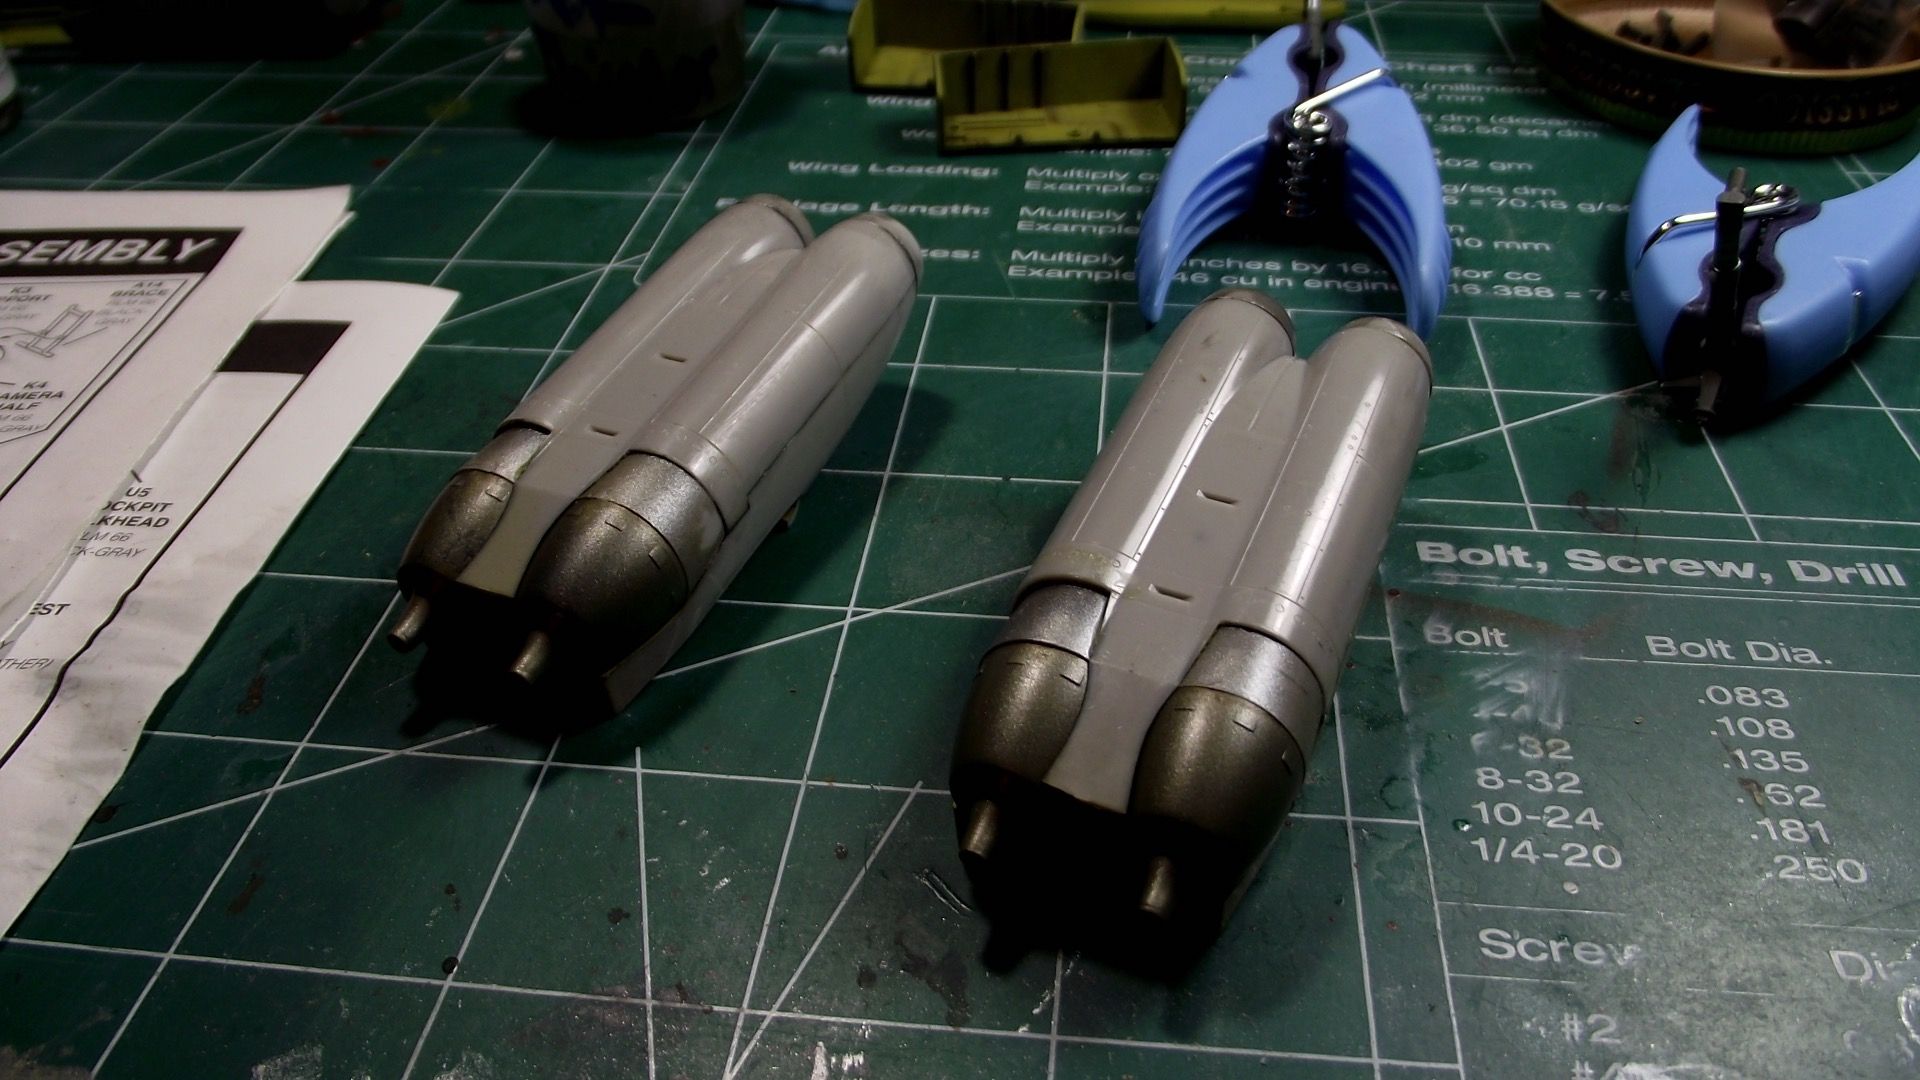
Everything sandwiched together.

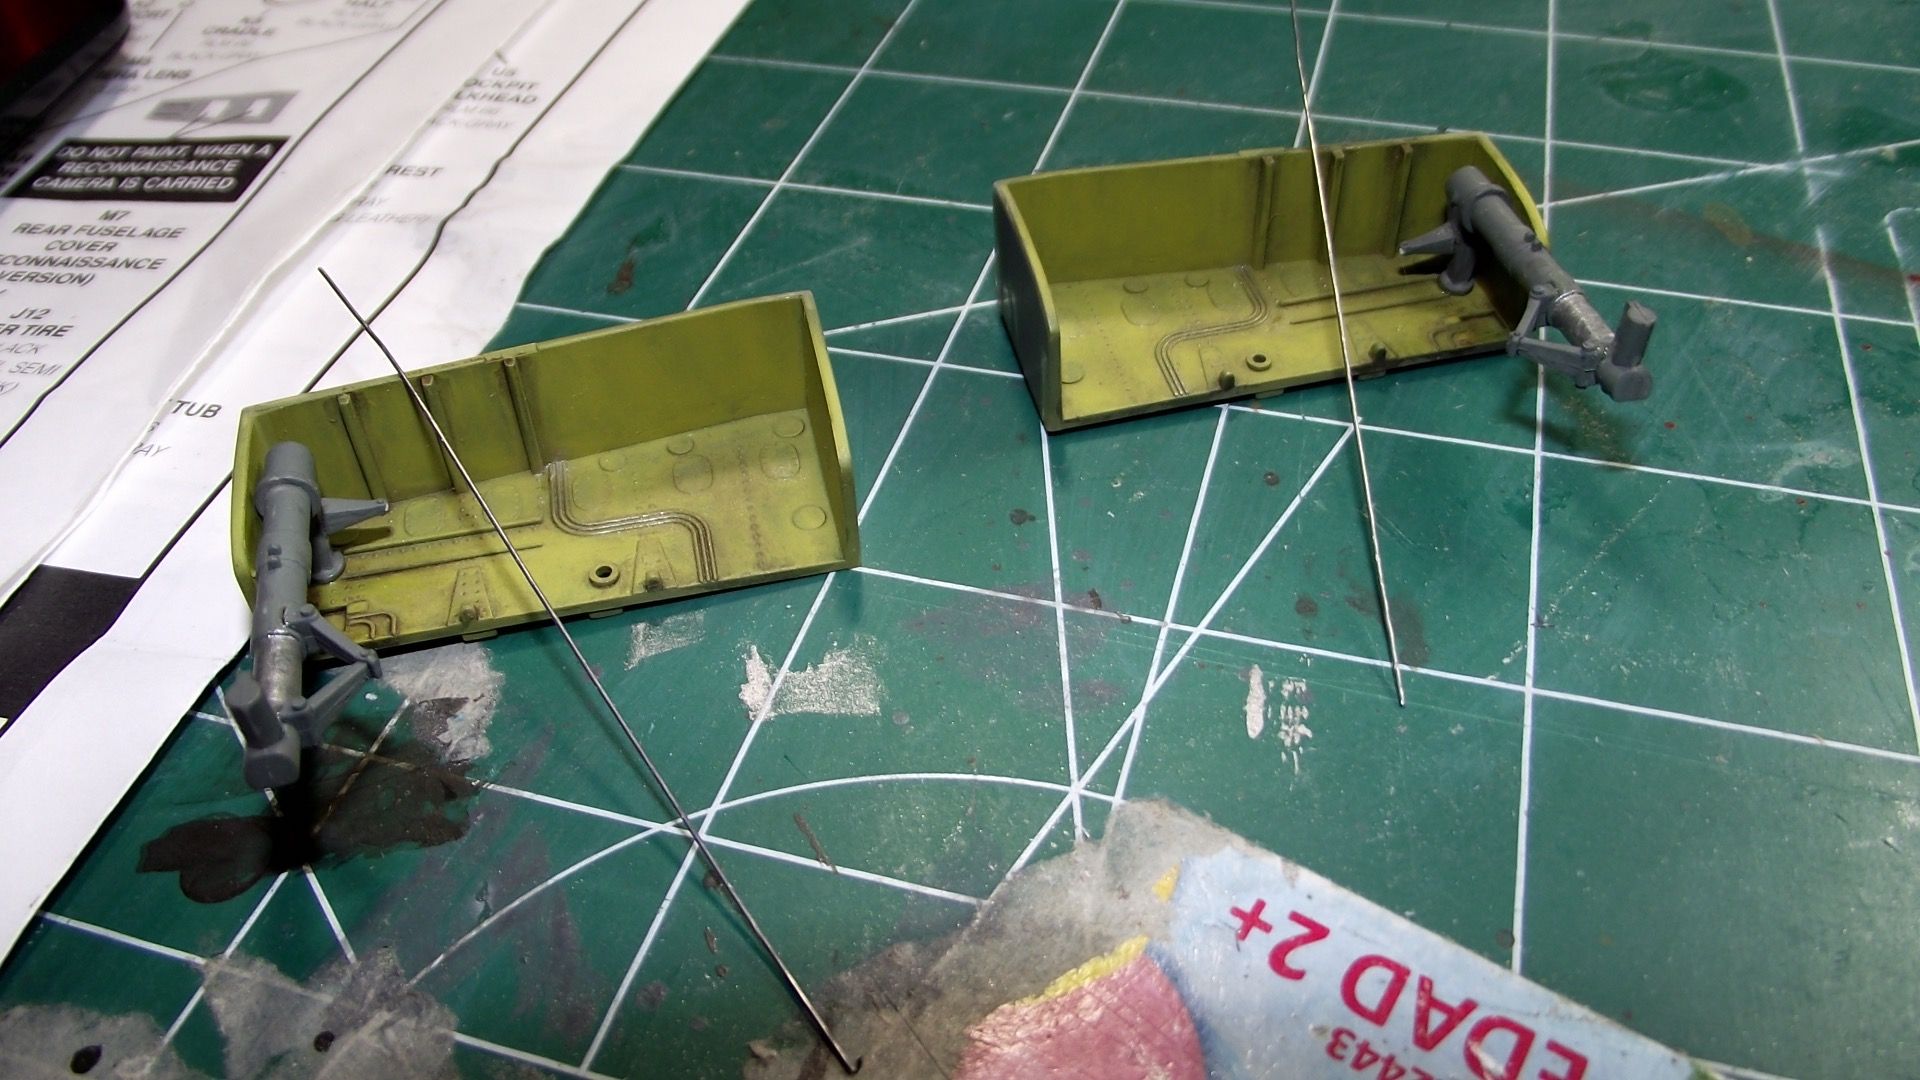
The camera's have been painted after sanding.

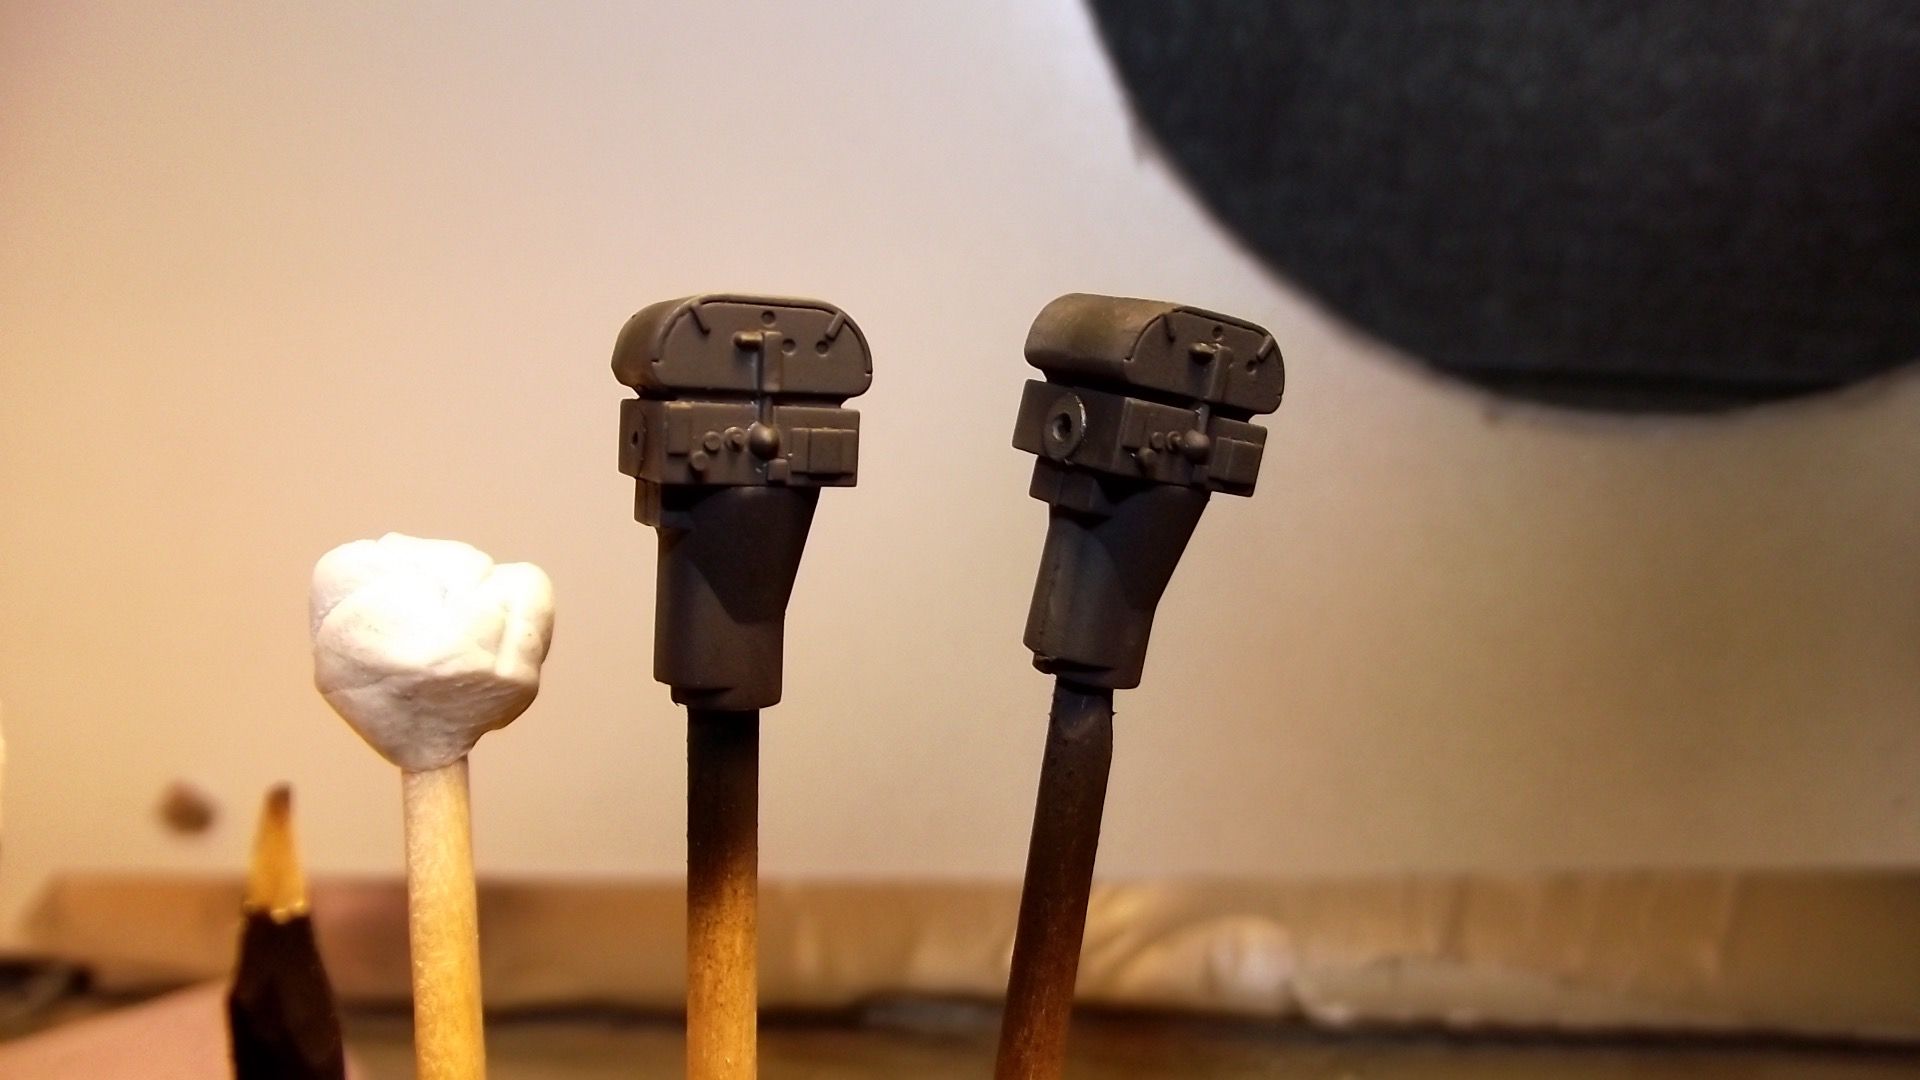
Camera mount/frames sanded and waiting for paint.


And with a good coat of RLM66.

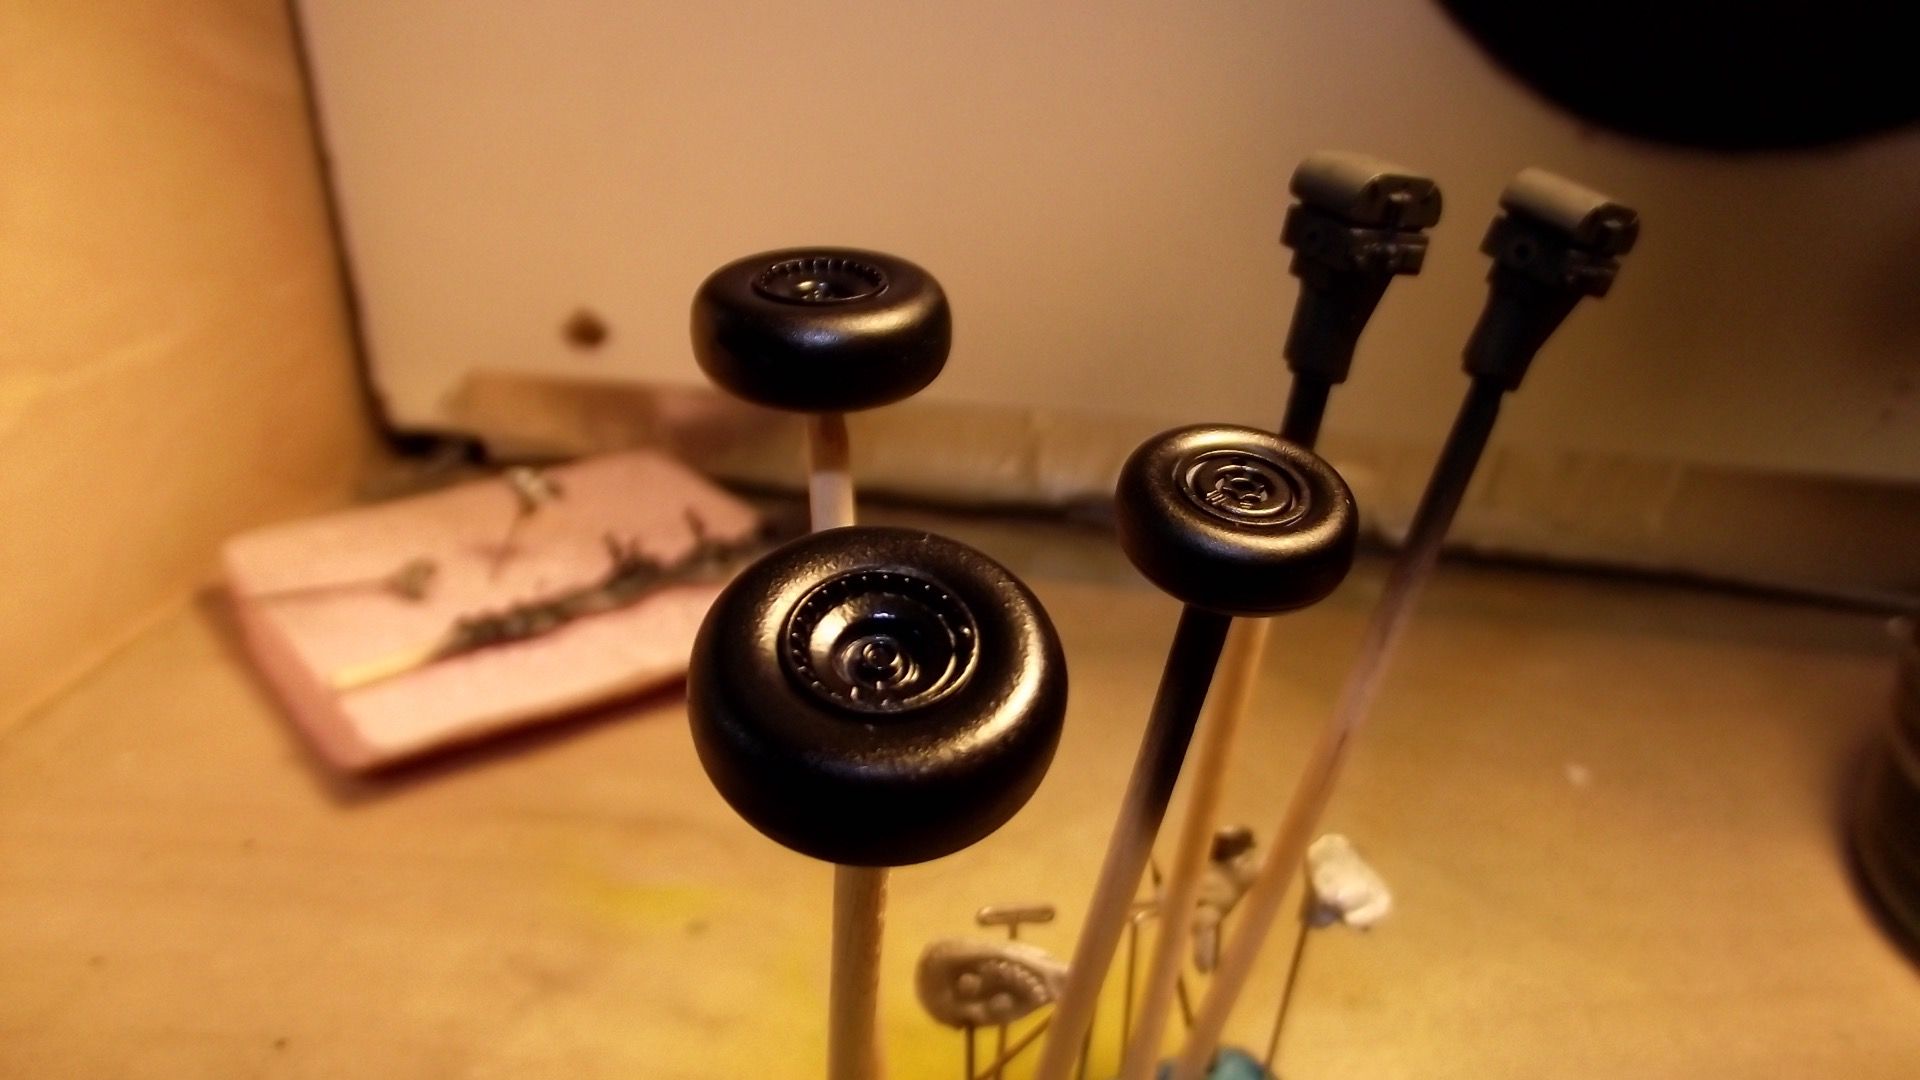
Next up the wheels get a coat of semi-gloss.

And now to really dig into the most finicky bit of the whole project, the cockpit.
The "office" glued into the right half so I can get the lines installed and judge the angles of the bends before the glass goes in.

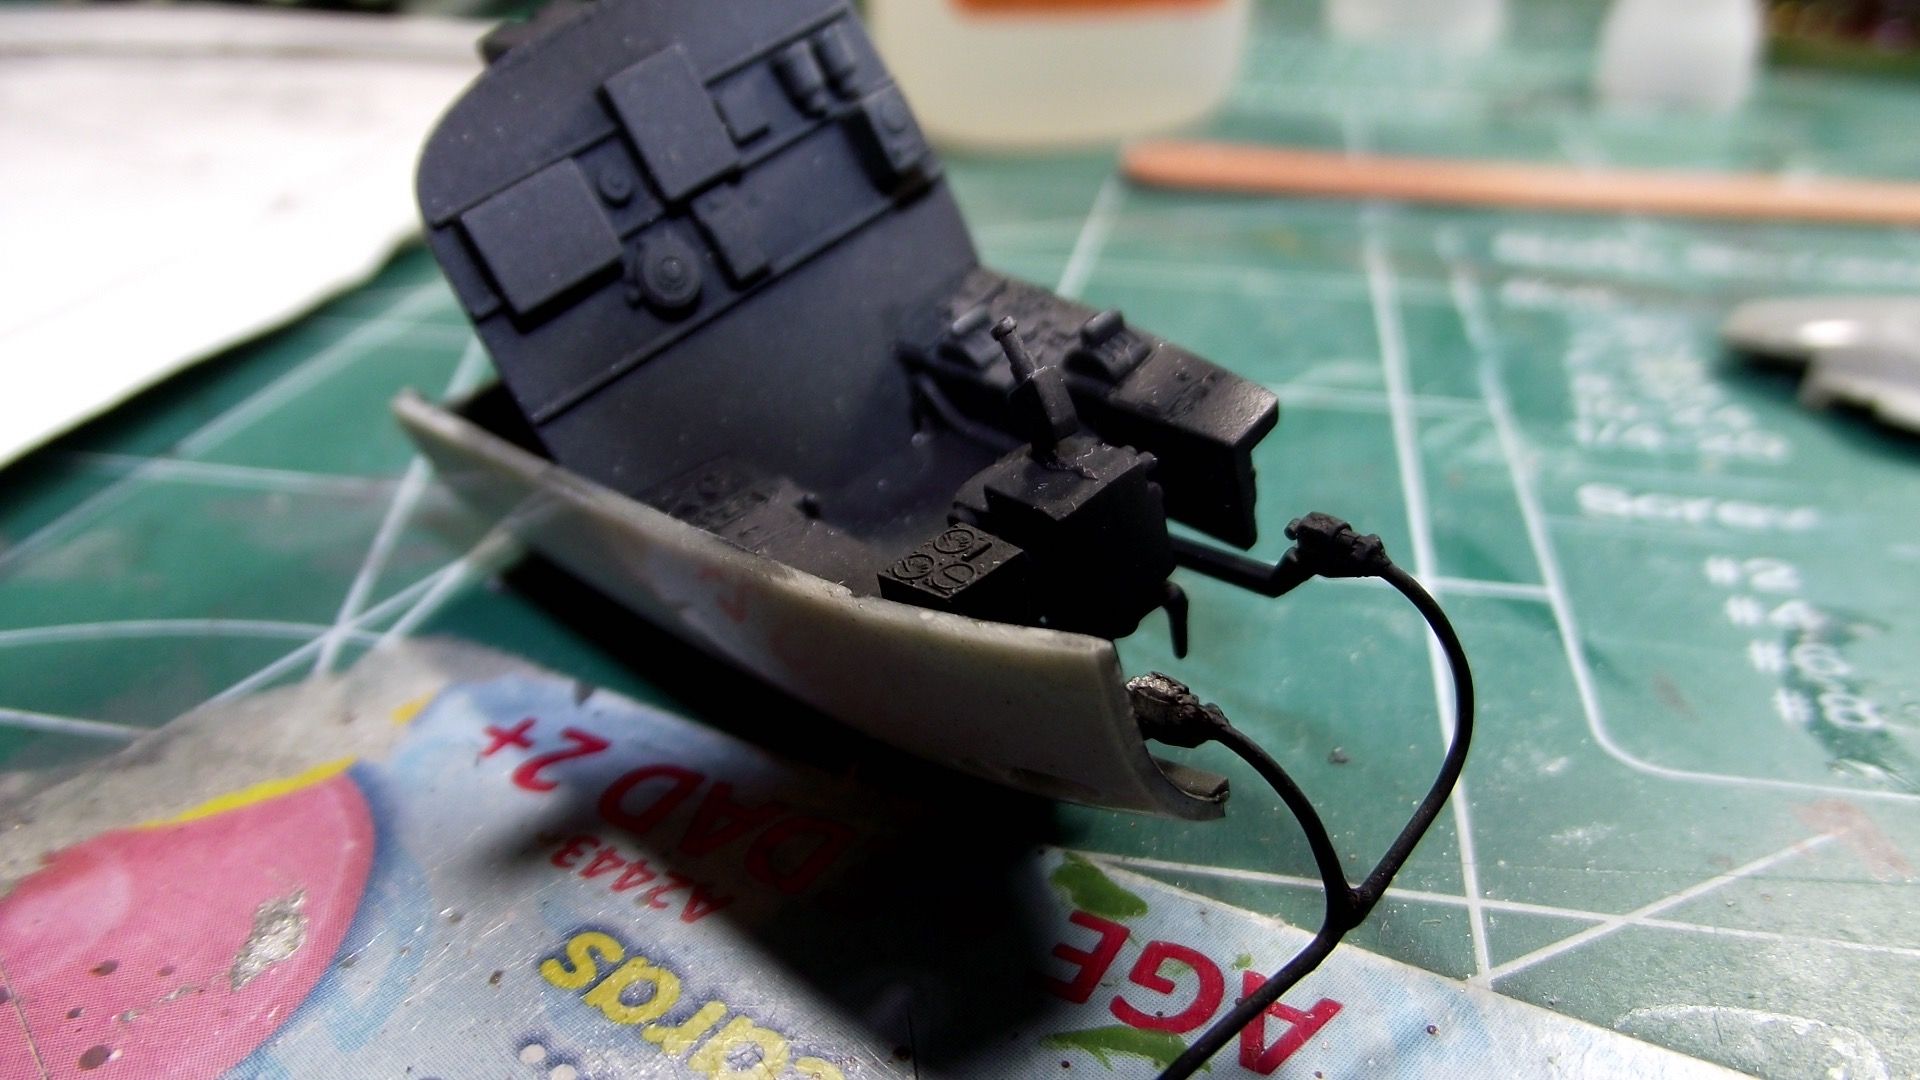
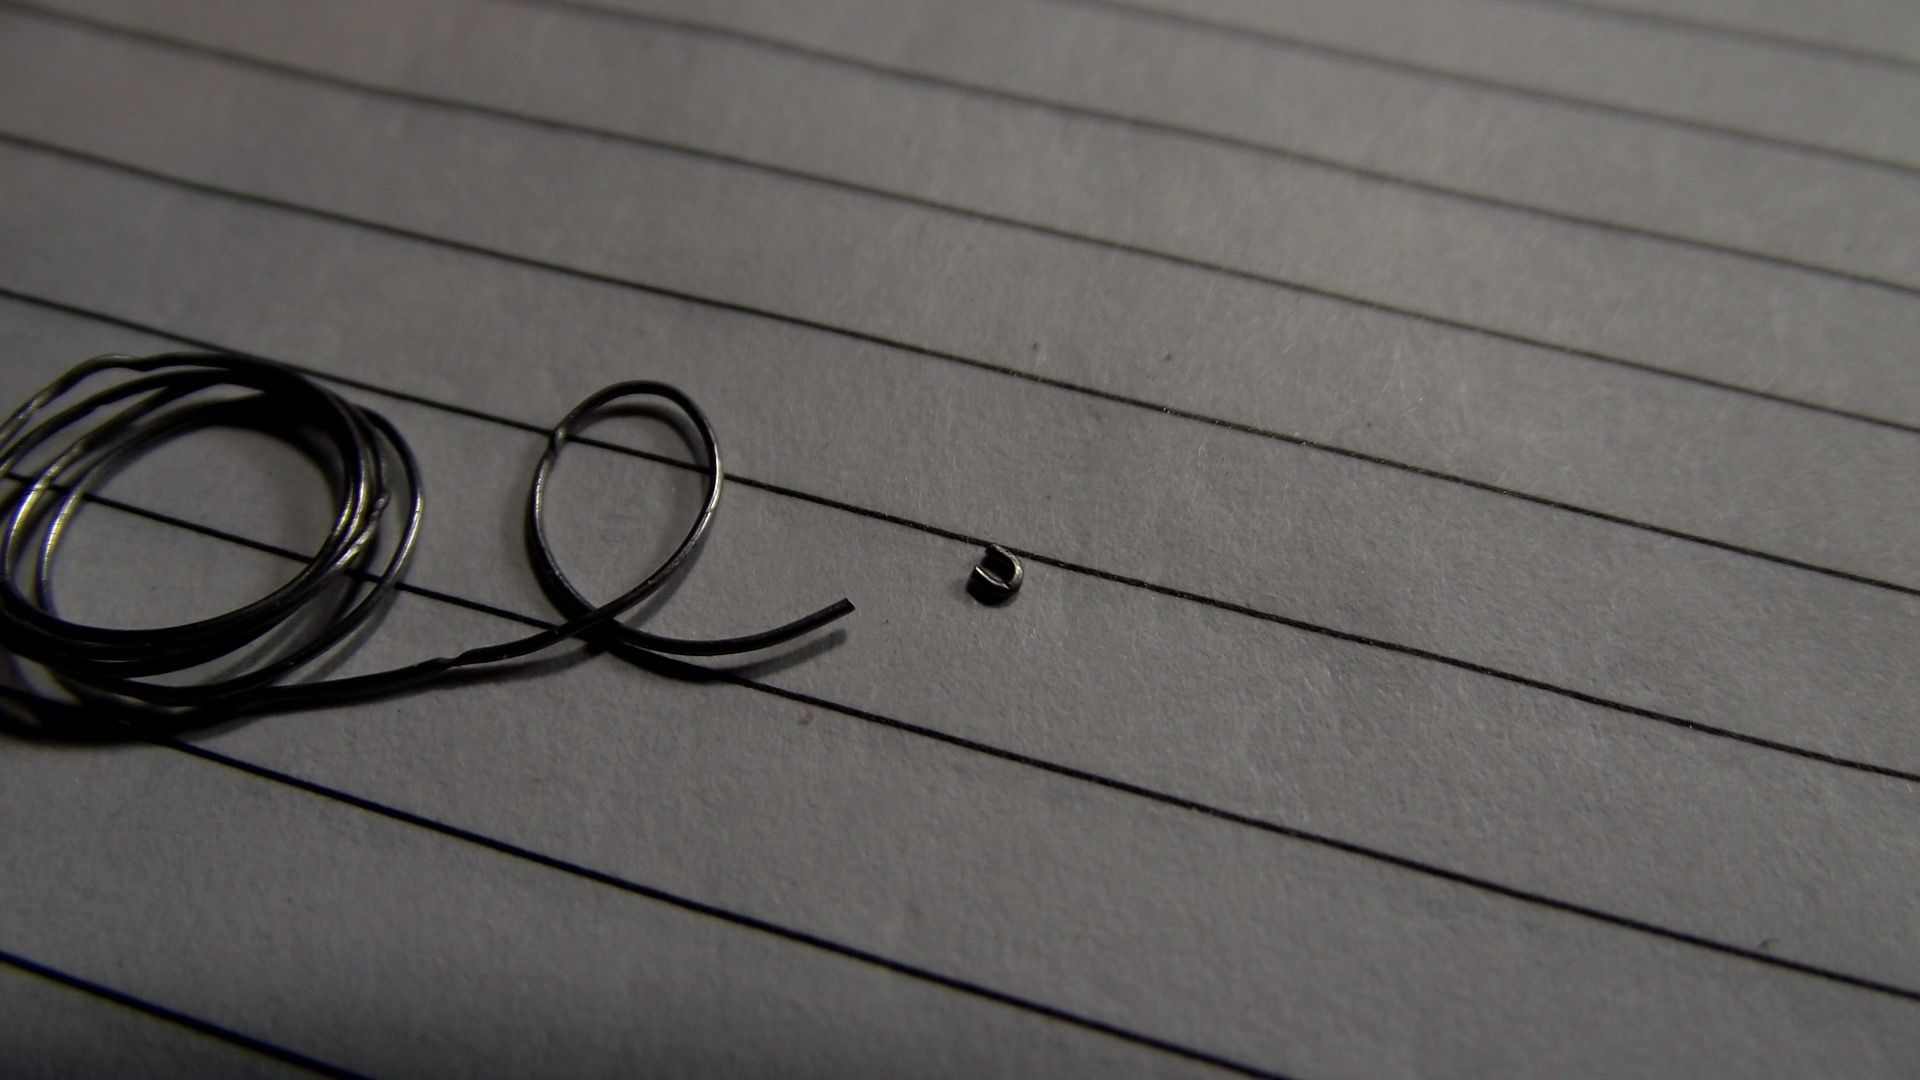
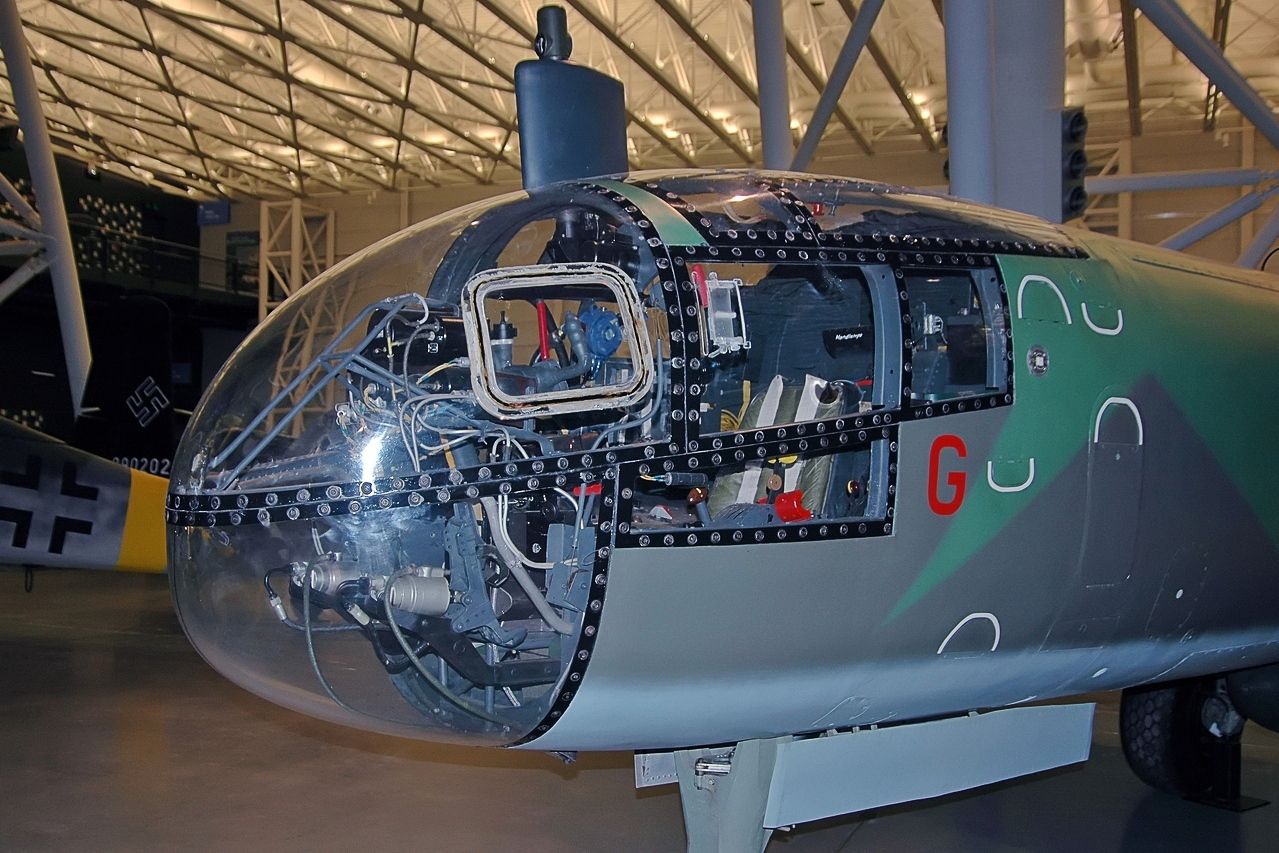
And some hoses cut from some very fine solder for the pedals. Trying to match my reference photo's from the NASM example. I think I might need to redo the main lines as they don't look quite right.

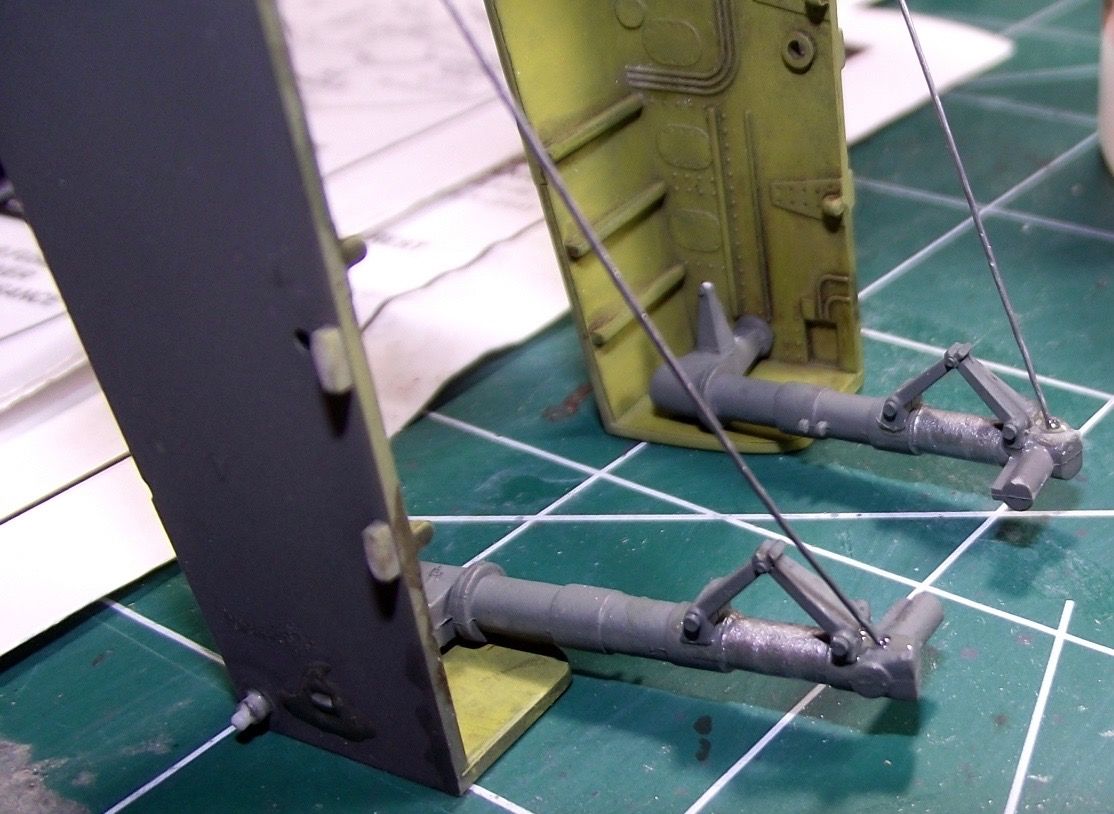
While I've got the solder out I drilled some holes in the gear for the brake lines.

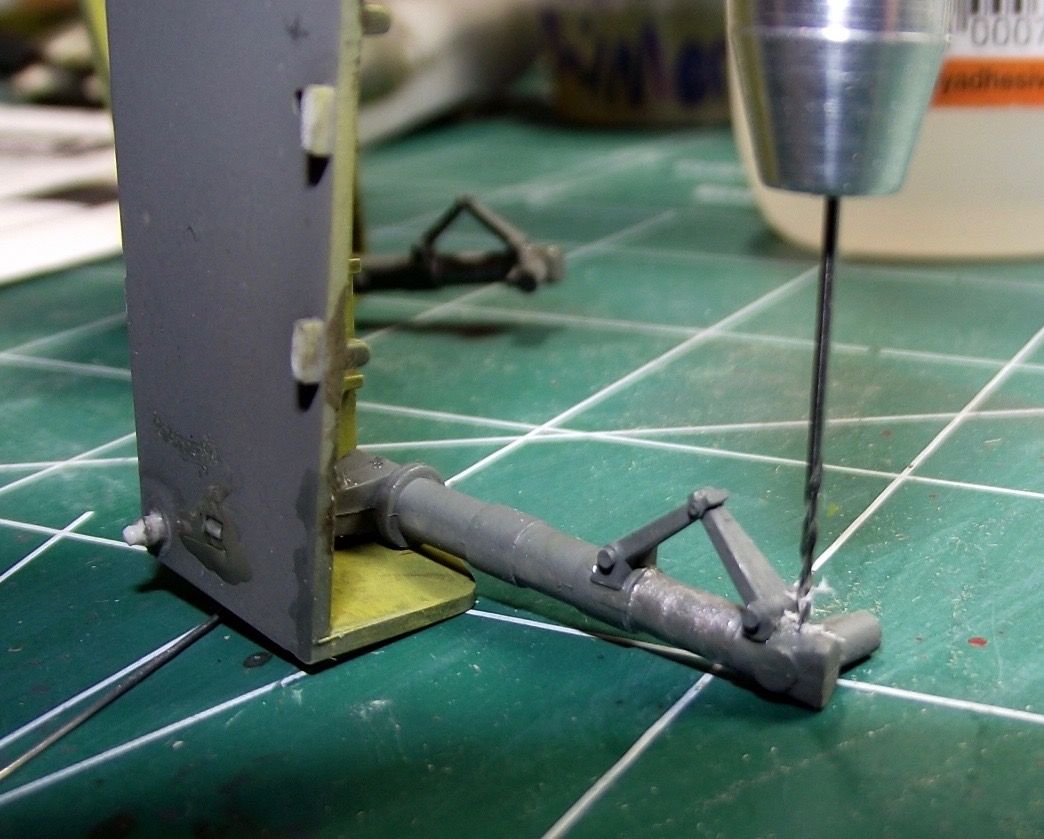
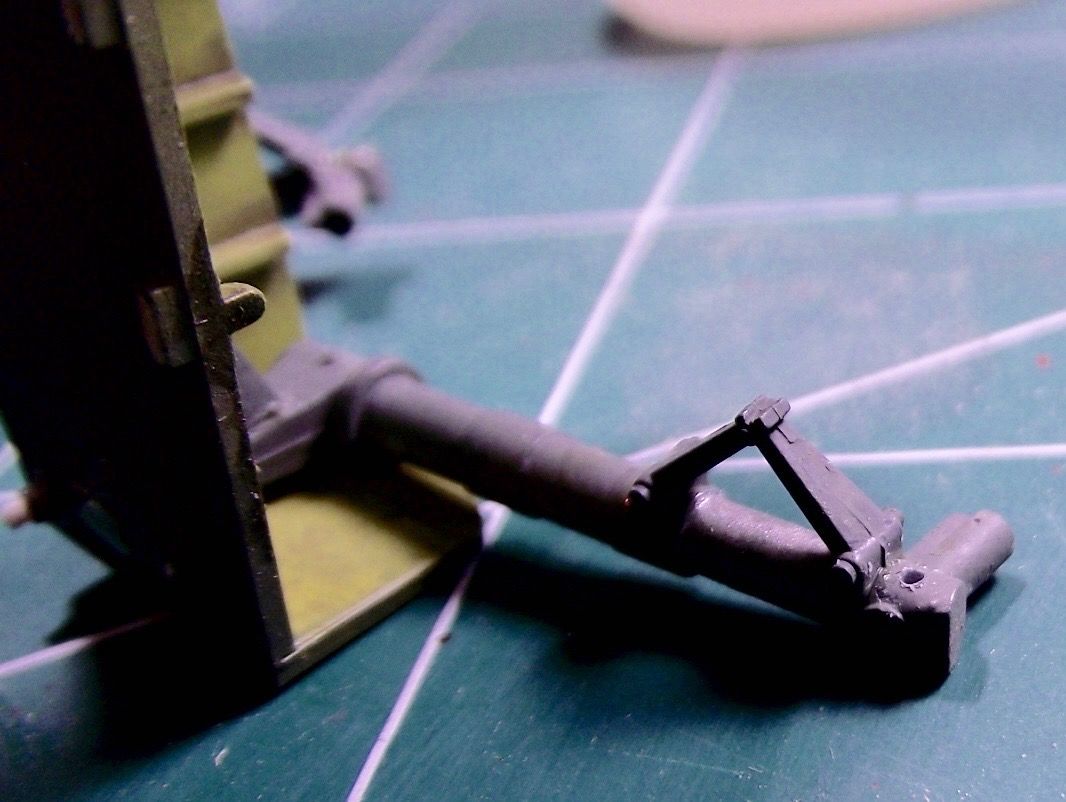
Then measured, cut and glued them in place. Having the holes drilled makes it much easier on placement, you don't need to worry about them drifting all over the place.
Once the glue is good and dry I'll give them some paint and then carefully bend them into place.


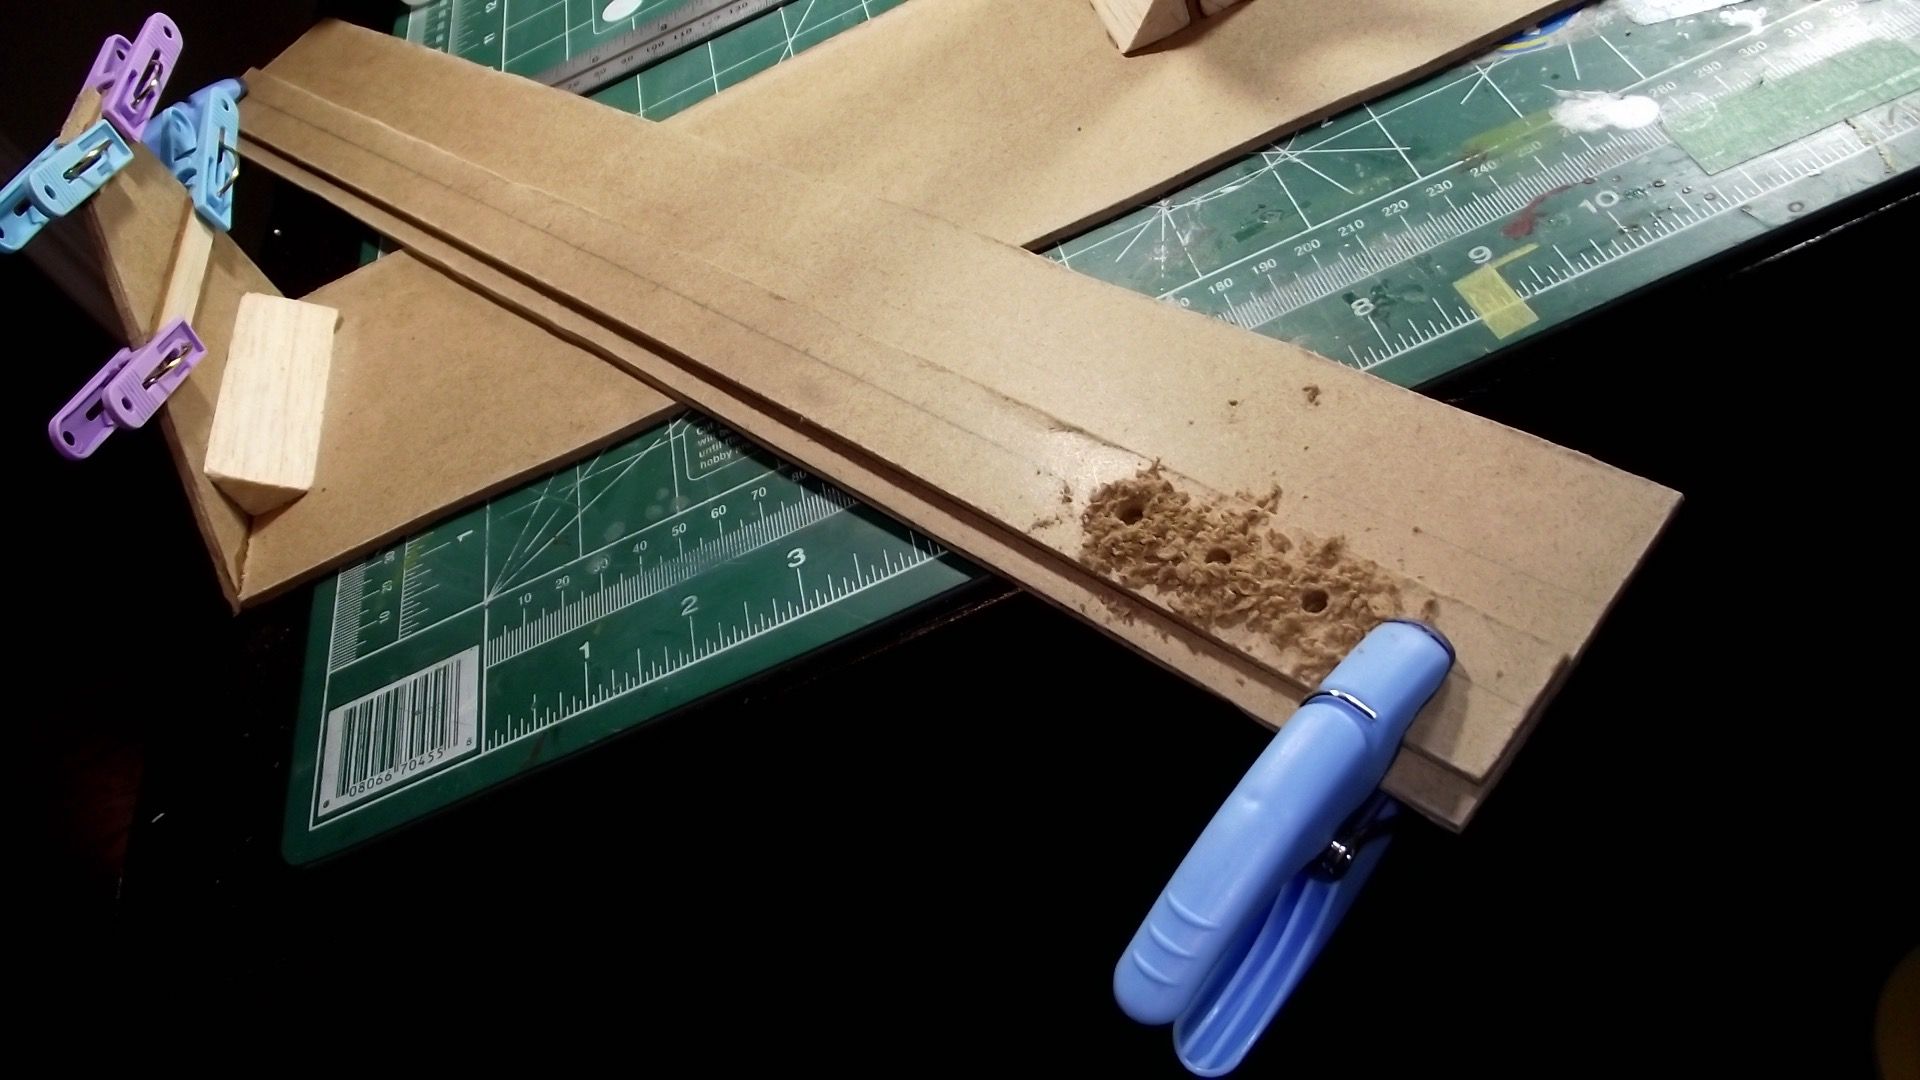
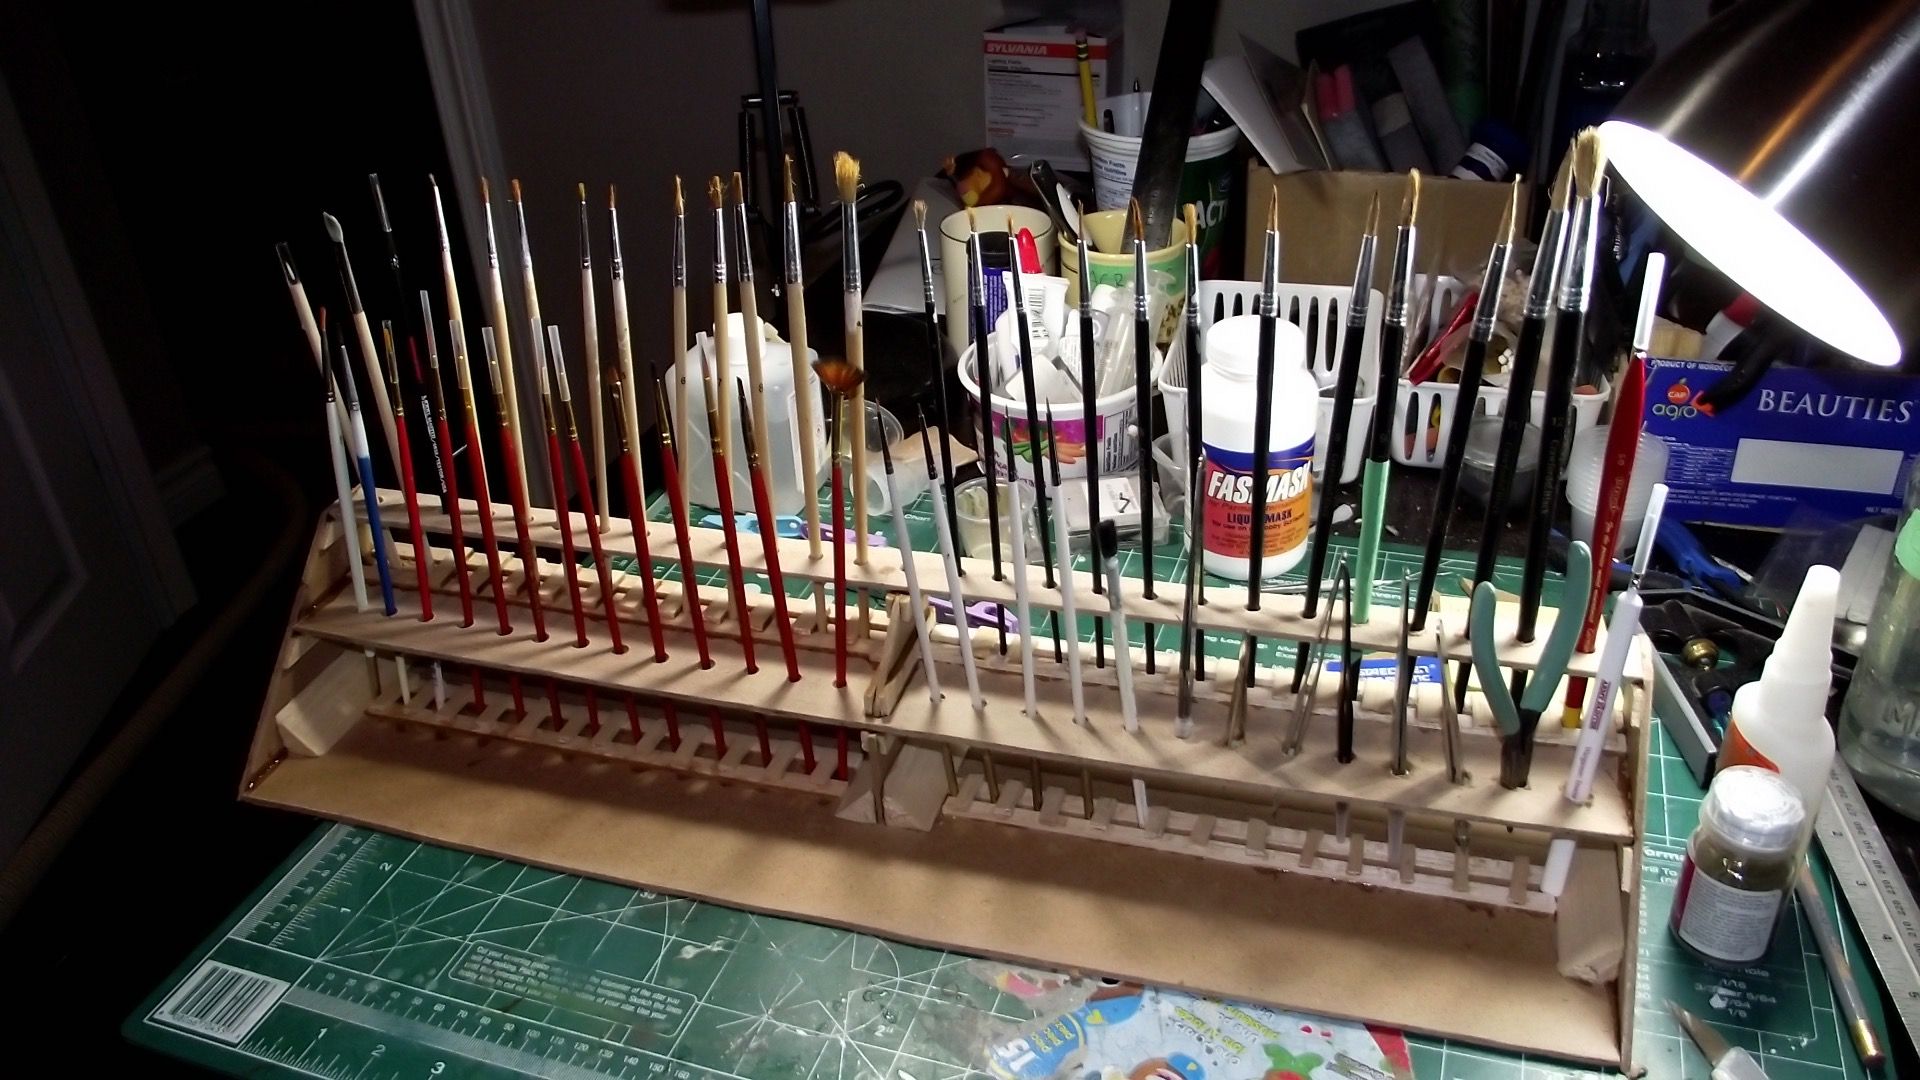
And after this I got tired of all my brushes sitting in the old mugs I was using so I made a brush and tool holder from some scrap I had kicking around.
It was a quick and dirty build, not winning any beauty contests but it's functional and does its job :)  ...and it didn't cost anything.


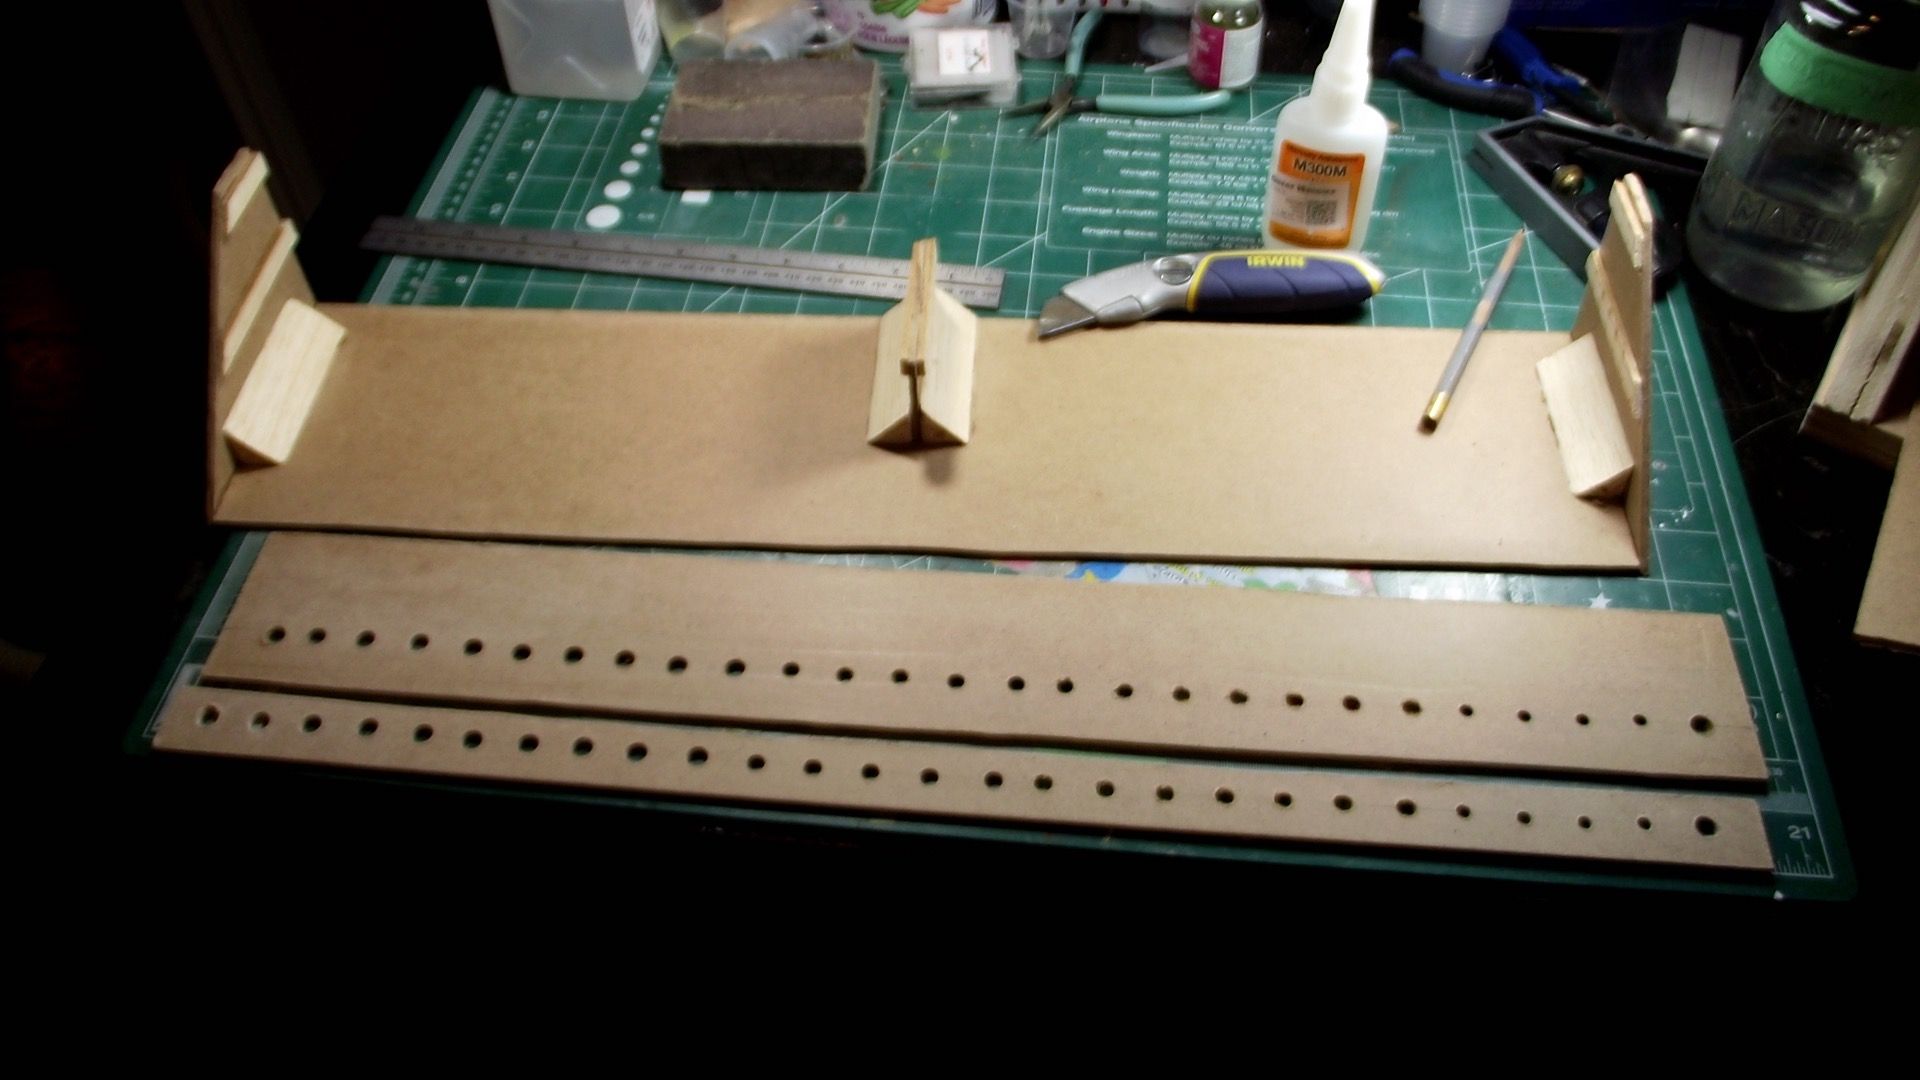
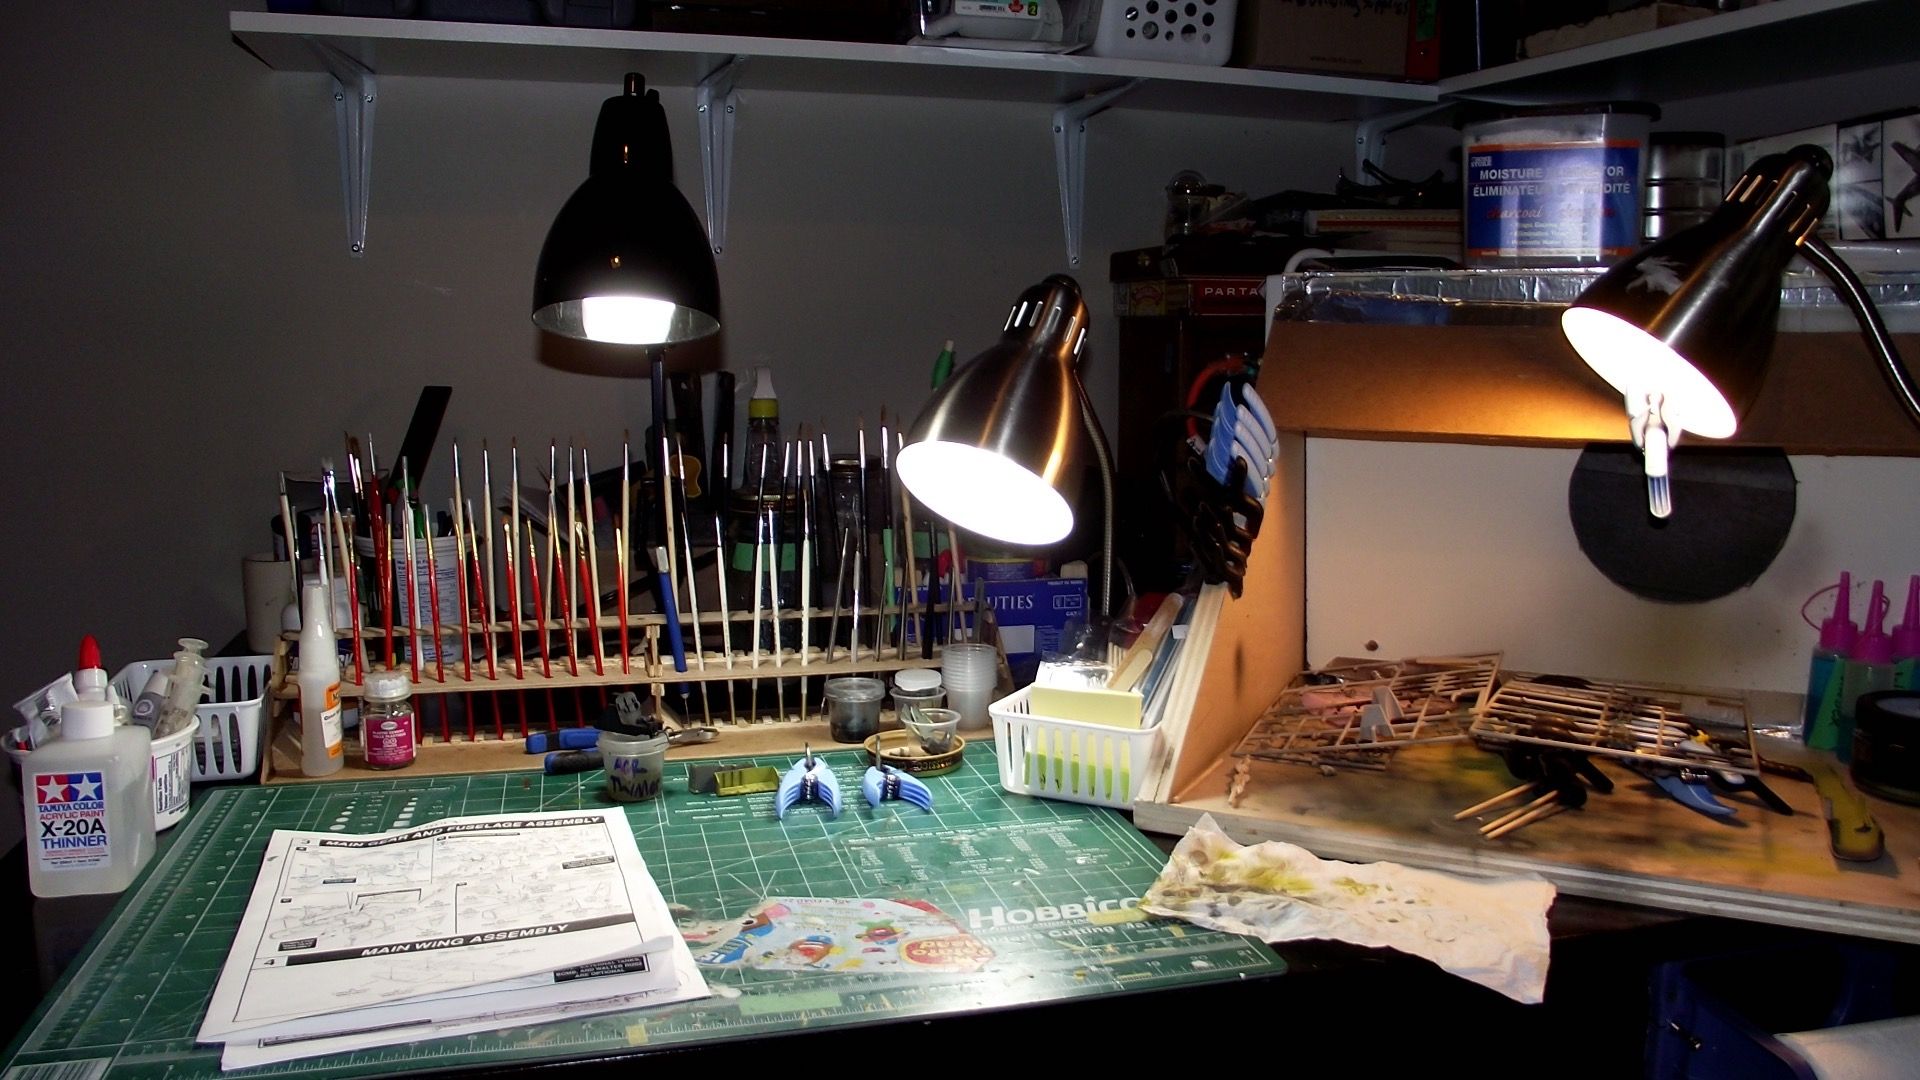
In place and everything a bit more organized.

That's about it for now, hoping to get a little more time this week to tackle some more.


  • Member since
    March 2015
Posted by qlabs on Wednesday, July 27, 2016 9:35 AM

JOE RIX

Hey Gang. Finally feel as though I have some viable progress to share. The other day I shot a gloss coat on the cockpit parts and fuselage with Alclad aqua gloss in preparation for an oil wash:

I actually got a healthy dose of time at the bench today mainly due to the fact that it was a 102 here and I was none to keen on working in the yard. I applied the oil wash and finished all of the cockpit PE. Thanks for having a look.


Joe, looks great!
Instrument panel is fantastic and the belts look the part. What did you use for them/how did you make them?

  • Member since
    November 2009
  • From: SW Virginia
Posted by Gamera on Wednesday, July 27, 2016 9:44 AM

Colin: Nice work, esp the gear bays. 

And cool paintbrush holder too. Yes

"I dream in fire but work in clay." -Arthur Machen


  • Member since
    March 2015
Posted by qlabs on Wednesday, July 27, 2016 10:39 AM

Thanks :)
Chipping away at it a little at a time.

  • Member since
    January 2015
Posted by BrandonD on Wednesday, July 27, 2016 12:07 PM

Ok, this 1/48 Tamiya He-162 Salamander is done. I really enjoyed building this kit - typical Tamiya fit that made it a dream, with the only real seam cleanup being on the fuselage seam, and that was minimal. I love the inclusion of the steel ball to keep it from sitting on its tail, and I really find the subject matter interesting.

To think that they were able to build so many of these (I think something like 150 actually survived the war), it's just a cool plane.

The paints are Mr. Paint RLM 81, Tamiya Flat Green for RLM 82 and the Tamiya-recommended mix for RLM-76. Exhaust staining aft of the engine was Alclad Jet Exhaust. Aftermarket inclusions were the HGW harness and markings from Kagero. Unfortunately, the Cartograf decal sheet Kagero provided did not include stencils, national insignia or swastikas, so I used the (thick) Tamiya decals for those. It was a little annoying, as I bought the Kagero book and decals to get away from using Tamiya's decals. Oh well, they came out ok, and I was able to score them along panel lines so you can't tell they didn't sink down on their own.

Let's go with the first one for the front page, and I'll get cracking on that La-7 when I get a chance.

Thanks for looking!

-BD-

  • Member since
    March 2015
Posted by qlabs on Wednesday, July 27, 2016 12:21 PM

Fantastic build!
Really nice finish.Big Smile

  • Member since
    December 2002
  • From: Bury St Edmunds, Suffolk, England
Posted by Bish on Wednesday, July 27, 2016 12:53 PM

Some great work there Coin, likeing what your doing here. And i like the idea for the brush rack. I am moving the modelling den son, i might have to pinch that idea.

I am a Norfolk man and i glory in being so


On the bench: Airfix 1/72nd Harrier GR.3/Fujimi 1/72nd Ju 87D-3

  • Member since
    December 2002
  • From: Bury St Edmunds, Suffolk, England
Posted by Bish on Wednesday, July 27, 2016 12:56 PM

Love that 162 BD, really nice finish, thank you. Front page has been updated and will be wzthcing out for the La-7.

I am a Norfolk man and i glory in being so


On the bench: Airfix 1/72nd Harrier GR.3/Fujimi 1/72nd Ju 87D-3

  • Member since
    May 2013
  • From: From the Mit, but live in Mason, O high ho
Posted by hogfanfs on Wednesday, July 27, 2016 1:04 PM

@Colin,

Some very nice detailing going on there! This build will be impressive when complete! And I like your ingenuity in building the brush holder!

@BD,

Your 162 looks outstanding! I very much like the subtle weathering! Great job!

 Bruce


 On the bench:  1/48 Eduard MiG-21MF

                        1/35 Takom Merkava Mk.I


  • Member since
    March 2012
  • From: Corpus Christi, Tx
Posted by mustang1989 on Wednesday, July 27, 2016 1:41 PM

Brandon: That lil' Heinkel turned out pretty sweet. Thats one that I need to add to the stash. Nice work.

Bish: If I could, I'd like to toss my hat in the ring with this one. I'll be 90 years old by the time I finish it and be the only one in here building next year (unless there'll be an extension / continuation of this GB next year) but what tha hay....

Image


 Forum | Modelers Social Club Forum (proboards.com) 

  • Member since
    May 2013
  • From: From the Mit, but live in Mason, O high ho
Posted by hogfanfs on Wednesday, July 27, 2016 1:44 PM

Welcome aboard, Mustang! Glad to have you! That 234 is something I'd like to add to my stash, looking forward to your progress.

 Bruce


 On the bench:  1/48 Eduard MiG-21MF

                        1/35 Takom Merkava Mk.I


  • Member since
    December 2002
  • From: Bury St Edmunds, Suffolk, England
Posted by Bish on Wednesday, July 27, 2016 1:47 PM

Well, i suppose i can fit you in Wink. And of course, you welcome to keep posting as long as it takes, i am sure you won't be the only one.

I am a Norfolk man and i glory in being so


On the bench: Airfix 1/72nd Harrier GR.3/Fujimi 1/72nd Ju 87D-3

  • Member since
    November 2009
  • From: SW Virginia
Posted by Gamera on Wednesday, July 27, 2016 1:57 PM

BD: Very sharp work there! Kudos! Yes

Mustang: Looks cool! 

"I dream in fire but work in clay." -Arthur Machen


  • Member since
    April 2006
  • From: ON, Canada
Posted by jgeratic on Wednesday, July 27, 2016 2:05 PM

BrandonD, great looking build. Yes  It is odd looking, but in  a cool sort of way.

regards,

Jack

  • Member since
    March 2012
  • From: Corpus Christi, Tx
Posted by mustang1989 on Wednesday, July 27, 2016 4:23 PM

The goody list:

Image

with a masking set:

Image

and reference material:

Image

Image


Image

and a set of these:

Image


 Forum | Modelers Social Club Forum (proboards.com) 

  • Member since
    March 2015
Posted by qlabs on Wednesday, July 27, 2016 5:27 PM

mustang, the goody list is drooltacular. i really can't wait to see that come together.

  • Member since
    August 2009
  • From: MOAB, UTAH
Posted by JOE RIX on Wednesday, July 27, 2016 6:04 PM

Oooh baby, we have us some lively activity a goin' on here.

Bish, Cliff, Bruce, Brandon & Colin, I thank you all very much for the positive encouragement. As for using Alclad aqua gloss, I like it so far. Now, I've only used it on the Corsair cockpit to this point. Overall, it applies a very nice gloss coat and cures fairly quickly (6 hrs). The one issue I found using it is that it dries quickly, as in, in your airbrush. It has the tendency to tip dry easily and, as recommended on the label, immediately flush with water when done. This helped but, I had to run Testor's acryl solvent through it and then tear it down and clean it with acryl solvent to get it completely clean. Given that, I will definitely use it again.  

Colin, the instrument panel and seat belts are Eduard PE.

Cliff- The figures look fabulous. Good job. Certainly far better than anything I'd be able to turn out.

Colin - That is some really great stuff you have going on, especially in the detailing department. Very impressive. And that is a right nice paintbrush stand you knocked out. Quite ingenious. Unfortunately, I'm very attached to my collection of paintbrush/tool coffee cups and jars.Tongue Tied

Brandon - Absolutely fantastic work and finish on the 162. It looks excellent. Congrats on a fine finish and I'm excited to watch your La-7 build.

Joe - So excited to have you choose to come join us. The fact that you are back building a Luftwaffe aircraft simply means that..well.. life is normal again. The fancy car stuff was fun and all but, it's good to have you come back to your senses.Big Smile. And that there 234 is going to be awesome!

"Not only do I not know what's going on, I wouldn't know what to do about it if I did". George Carlin

  • Member since
    March 2012
  • From: Corpus Christi, Tx
Posted by mustang1989 on Thursday, July 28, 2016 5:20 AM

Thanks Colin and Joe.

I think I’m going to test fit this kit together first to see how it’s supposed to go together and then install my resin goodies here and there. I figure it’ll give me a slight edge when things aren’t going together so smoothly when installing the resin pieces. Painting this sucker on the bottom will be a unique experience for me as I’m used to painting my exteriors with no landing gear installed. Judging by the fit of the fuselage halves together and the wing to fuselage joint I’d say it might be a slight bit easier of a kit than I’d originally thought.


 More test fitting with the Aires interior detail set. Looks like it's going to fit good at the firewall/ fuselage joint. Will have to see how everything is going to behave with the glass installed ..........

Image

This is a fairly well complimented set and I'm looking forward to working with it:

Image

Image

Image

Image

Image


 Forum | Modelers Social Club Forum (proboards.com) 

  • Member since
    November 2009
  • From: SW Virginia
Posted by Gamera on Thursday, July 28, 2016 8:26 AM

Joe: Thanks!

Mustang: Looks like a very complete cockpit, gonna look sharp all painted up! 

And I wonder if it will be heavy enough to serve as nose weight? 

"I dream in fire but work in clay." -Arthur Machen


JOIN OUR COMMUNITY!

Our community is FREE to join. To participate you must either login or register for an account.

SEARCH FORUMS
FREE NEWSLETTER
By signing up you may also receive reader surveys and occasional special offers. We do not sell, rent or trade our email lists. View our Privacy Policy.