SEARCH FINESCALE.COM

Enter keywords or a search phrase below:

Thunderbolt GB 2016

19897 views
473 replies
1 rating 2 rating 3 rating 4 rating 5 rating
  • Member since
    December 2002
  • From: Bury St Edmunds, Suffolk, England
Posted by Bish on Monday, June 5, 2017 6:48 AM

Nice job on the pit BK, thpose belts do look the part.

Got mine all laid out on the bench last night after the tradional post build clean up, so i am already to make a start tonight.

I am a Norfolk man and i glory in being so


On the bench: Airfix 1/72nd Harrier GR.3/Fujimi 1/72nd Ju 87D-3

  • Member since
    December 2002
  • From: Bury St Edmunds, Suffolk, England
Posted by Bish on Tuesday, June 6, 2017 3:12 PM

Time for me to get started, just a couple of pics for now as i only got to it last night.

First, the good old box shot.

For extras i am useing Aires resin sets for the pit, wheel bays and gun bays and True detail resin wheels. Markings are from LPS Hobby for an aircraft from the 396th FS, 359th FG, based at East Wretham in Norfolk. The decal sheet says june 44, but from the lack of invasion strips on the upper wings and the ragged lok of those under the fuselage, i would say somtime time later.

So far its been some resin clean up and puting a few pars together in the pit. The is a seat for the pit, i just forgot to put it in the picture.

And the wheels bays and gun bays. No assembely here just the usual clean up.

And thats it. they are no all in the shed having had a coat of primer, tomorrow i should be able to get them painted. Just need to do some research on the pit colour.

I am a Norfolk man and i glory in being so


On the bench: Airfix 1/72nd Harrier GR.3/Fujimi 1/72nd Ju 87D-3

  • Member since
    July 2014
Posted by modelcrazy on Tuesday, June 6, 2017 3:42 PM

The T-Bolt has a huge pit. Room enough to play some football.

Steve

Building a kit from your stash is like cutting a head off a Hydra, two more take it's place.


http://www.spamodeler.com/forum/

  • Member since
    December 2002
  • From: Bury St Edmunds, Suffolk, England
Posted by Bish on Tuesday, June 6, 2017 3:45 PM

Ye, even in this scale you can see its a god size. Not like the cramped pit of a 109.

I am a Norfolk man and i glory in being so


On the bench: Airfix 1/72nd Harrier GR.3/Fujimi 1/72nd Ju 87D-3

  • Member since
    July 2014
Posted by modelcrazy on Tuesday, June 6, 2017 10:39 PM

Started the decals tonight. I'll let those dry and get the rest on.

Steve

Building a kit from your stash is like cutting a head off a Hydra, two more take it's place.


http://www.spamodeler.com/forum/

  • Member since
    September 2014
Posted by rooster513 on Wednesday, June 7, 2017 6:36 AM

Nice start on the decals Steve!

-Andy

  • Member since
    December 2002
  • From: Bury St Edmunds, Suffolk, England
Posted by Bish on Wednesday, June 7, 2017 7:03 AM

modelcrazy

Started the decals tonight. I'll let those dry and get the rest on.


Good to see the decals going on Steve, looking very nice.

I am a Norfolk man and i glory in being so


On the bench: Airfix 1/72nd Harrier GR.3/Fujimi 1/72nd Ju 87D-3

  • Member since
    June 2014
Posted by BrandonK on Wednesday, June 7, 2017 9:16 AM

Wow Steve, I can't put into words how COOL that scheme is and you've totally pulled it off. Great work.

BK

On the bench:

A lot !! And I mean A LOT!!

2024 Kits on deck / in process / completed   

                         14 / 5 / 2  

                              Tongue Tied

  • Member since
    July 2014
Posted by modelcrazy on Saturday, June 10, 2017 10:11 PM
Thanks BK, Rooster and Bish.
I’m done with Gabby’s T-bolt. This was a fun kit although not to Hase or Tamiya standards, but then again it was a fraction of the cost.


Well there it is, my second and final offering for this GB. Thank you Rooster for hosting it. It was a fun idea for a GB with many options.

Steve

Building a kit from your stash is like cutting a head off a Hydra, two more take it's place.


http://www.spamodeler.com/forum/

  • Member since
    December 2002
  • From: Bury St Edmunds, Suffolk, England
Posted by Bish on Sunday, June 11, 2017 2:00 AM

That is really wel done Steve. Got to love that scheme.

I am a Norfolk man and i glory in being so


On the bench: Airfix 1/72nd Harrier GR.3/Fujimi 1/72nd Ju 87D-3

  • Member since
    July 2014
Posted by modelcrazy on Sunday, June 11, 2017 8:59 AM

Thanks Bish, I'm looking forward to seeing yours.

Steve

Building a kit from your stash is like cutting a head off a Hydra, two more take it's place.


http://www.spamodeler.com/forum/

  • Member since
    December 2002
  • From: Bury St Edmunds, Suffolk, England
Posted by Bish on Sunday, June 11, 2017 2:20 PM

managed to get quite a bit done in the last week, going together pretty quick. After priming the pit, i used a mix of Zinc yellow and black, which is one of the possabilities suggested by IPMS Stockholm. Followed this with some dry brushing and flory wash.

And got some chopping done on the wings. Wheel wells removed and gun bays opened up.

And then time to get everything fitted. Went togetehr prtty wel. Had to doa lot of thinning on the wings. The Aires set tells to to chop some of the fuselage where the wing joins it so the resin wheel wels fit in. But you have to cut a lot more than it says.

As you can see from the silver paint, i have been working on the seams. Still got a bit to do on those and get to work on the engine useing lawdogs tut.

Thats all for now.


I am a Norfolk man and i glory in being so


On the bench: Airfix 1/72nd Harrier GR.3/Fujimi 1/72nd Ju 87D-3

  • Member since
    November 2003
  • From: Naples, FL
Posted by tempestjohnny on Monday, June 12, 2017 6:39 AM

Steve. Now that looks great.


Bish. Can't wait too see what you can do with those open gun bays


  • Member since
    December 2002
  • From: Bury St Edmunds, Suffolk, England
Posted by Bish on Monday, June 12, 2017 7:08 AM

I saw a couple of larger scales ones with gun bays open at a model show yesterday, looked really nice. So that has given me somthing to aim for.

I am a Norfolk man and i glory in being so


On the bench: Airfix 1/72nd Harrier GR.3/Fujimi 1/72nd Ju 87D-3

  • Member since
    September 2014
Posted by rooster513 on Monday, June 12, 2017 11:29 AM

modelcrazy
Thanks BK, Rooster and Bish.
I’m done with Gabby’s T-bolt. This was a fun kit although not to Hase or Tamiya standards, but then again it was a fraction of the cost.


Well there it is, my second and final offering for this GB. Thank you Rooster for hosting it. It was a fun idea for a GB with many options.
 

That turned out great Steve! Not an easy scheme and you did very well with it. Thanks for joining!

-Andy

  • Member since
    September 2014
Posted by rooster513 on Monday, June 12, 2017 11:37 AM

Coming along nicely Bish!

So the silver paint/sharpie does a good job of revealing ghost seams? I'm fighting those right now on my current build. Would be nice to see them before hitting it with primer.

-Andy

  • Member since
    December 2002
  • From: Bury St Edmunds, Suffolk, England
Posted by Bish on Saturday, June 17, 2017 2:46 AM

Guys, i am after a bit of help here. I have finished painted the 47, i now need to decide what to do about the invasion stripes.

According to my decal instructions, at the time of portrayal, the stripes under the fuselage and wings were crudley over painted. But we know the order to remove stripes was not given until some time after D-day and this only applied to the upper surfaces.

The problem is that the 359th FG seems to have been in the process of converting to P-51's at the time of D-Day. I know the 368th and 370th FS had some P-51B's in June and the Group commander had a D in July. But i can't find anything on the 369th FS. I would imagine the switch over would be done in stages.

So, does anyone know when the 369th FS of the 359th FG switched to P-51's. And second, what do you make of this pic which is the only one i can find of the aircraft i am doing. I am starting to think that what you see under the fuselage star and bar is not the remains of invasions stripes but somthing else, and the makers of the decals have made an error.

I am thinking about not ading the invasions stripes at all, and just going with a before d-day look and just removing a few of the mission marks from the supplied decal.

I am a Norfolk man and i glory in being so


On the bench: Airfix 1/72nd Harrier GR.3/Fujimi 1/72nd Ju 87D-3

  • Member since
    July 2014
Posted by modelcrazy on Saturday, June 17, 2017 6:29 AM

The only thing I can find is on a memorial site that was memorizing a pilot who died on June 8 in his P-51B. It seems the 359th was deep in transition during D-day.

As far as the fuse stripes, those do look like invasion stripes under the insignia however the spacing dosn't look right. The 3 white and 2 black usually only spand the length of the bar on the star and bar. But with there being only one published picture of it, who knows. Pre-invasion may be thr way to go. 

Steve

Building a kit from your stash is like cutting a head off a Hydra, two more take it's place.


http://www.spamodeler.com/forum/

  • Member since
    December 2002
  • From: Bury St Edmunds, Suffolk, England
Posted by Bish on Saturday, June 17, 2017 8:02 AM

Thanks Steve. Thats the conclusion on the 359th i came to as well.

I know what you mean about those stripes. I have seen images of the stripes going in front of the insignia but not behind it. I also can't see any evidance of white on the undercarrage doors.

I think i will go with the pre D-Day look, still got the white stripes to add on the tail anyway, so that wil give it some thing other than OD and grey.

I am a Norfolk man and i glory in being so


On the bench: Airfix 1/72nd Harrier GR.3/Fujimi 1/72nd Ju 87D-3

  • Member since
    December 2002
  • From: Bury St Edmunds, Suffolk, England
Posted by Bish on Saturday, June 17, 2017 8:02 AM

rooster513

Coming along nicely Bish!

So the silver paint/sharpie does a good job of revealing ghost seams? I'm fighting those right now on my current build. Would be nice to see them before hitting it with primer.


Ye, does it ever. One of the guys sent me a Testors one across the pond, works a treat.

I am a Norfolk man and i glory in being so


On the bench: Airfix 1/72nd Harrier GR.3/Fujimi 1/72nd Ju 87D-3

  • Member since
    June 2014
Posted by BrandonK on Saturday, June 17, 2017 11:47 AM

Bish, if you look at the total distance of those stripes they start just passed the wing root and end just shy of the vert stab. Here is another example of what I am describing. Your photo only has the belly, and it may be painted over on the bottom and not the side. But the length from front to back of all the stripes is the same. That's what lends me to conclude that they are indeed present. As far as the the wings, that's a bit more difficult.

BK

On the bench:

A lot !! And I mean A LOT!!

2024 Kits on deck / in process / completed   

                         14 / 5 / 2  

                              Tongue Tied

  • Member since
    November 2003
  • From: Naples, FL
Posted by tempestjohnny on Sunday, June 18, 2017 8:48 AM

Bish I concur with BK. I tried to zoom in on your pic as much as possible. There does seem to be invasion stripes below the insignia. They look worn and ragged. Also it almost looks like part of the blue on the insignia is a different shade. From what I've read, especially the fighter bomber units, the crews were going 24/7 just keeping the planes in the air. They really didn't have time to deal with the stripes so they did the best they could do.

2 cents


  • Member since
    December 2002
  • From: Bury St Edmunds, Suffolk, England
Posted by Bish on Sunday, June 18, 2017 9:25 AM

Thanks for the input guys. I have decided to play it safe and go with a pre d-day finish. As PJ mentioned, there could be any number of reasons for the poor finish of the stripes. One possability i have conclude is that with the unit being in transition to P-51's, the ground crews may have done a very quick job knowing they were soon be doing it again on new aircraft.

I guess we will never know. Thanks again for the feedback.

I am a Norfolk man and i glory in being so


On the bench: Airfix 1/72nd Harrier GR.3/Fujimi 1/72nd Ju 87D-3

  • Member since
    May 2017
  • From: Denver, Colorado
Posted by MrStecks on Monday, June 19, 2017 1:49 PM

Hey Rooster, count me in on this GB.  "Somebody" in another thread pointed me in this direction.  Wink

I'll be building the Tamiya 1/48 P-47 Thunderbolt Bubbletop.  Frankly, I'm a little worried after looking at all the beautiful work I've seen in this thread, but willing to give it a go.  Still waiting for a couple of AM things to arrive in the mail.  Will probably post first WIP pics later this week.

Cheers, Mark


On the bench:  Revel 1/48 B-25J Mitchell

In the queue: Tamiya 1/48 F4U-1A Corsair

  • Member since
    December 2002
  • From: Bury St Edmunds, Suffolk, England
Posted by Bish on Tuesday, June 20, 2017 2:05 PM

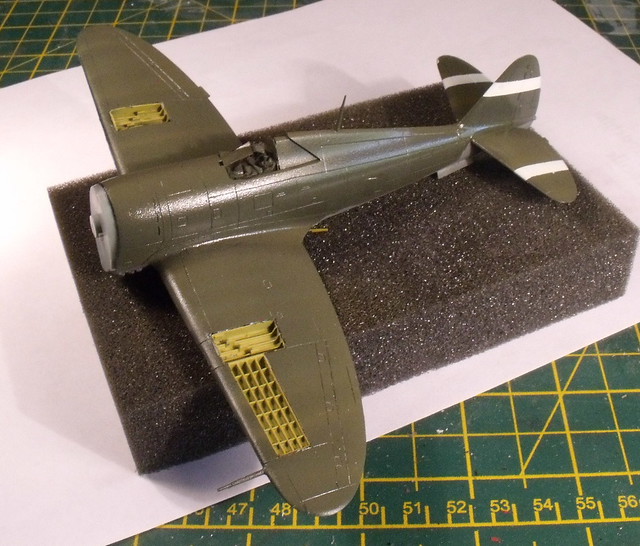
Got quite a bit done to my build in the last week. So after finishing off the seams and other small bit, got it masked up ready for primer and paint.

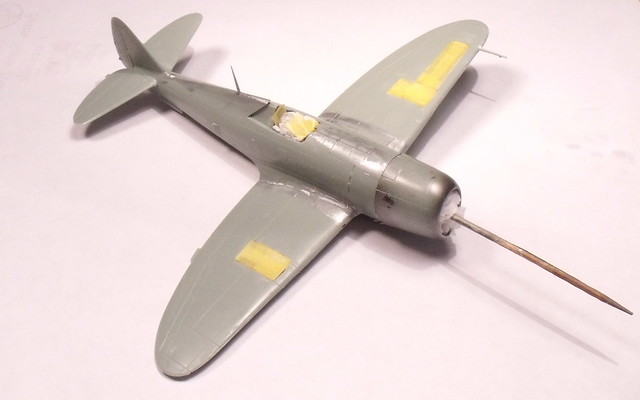
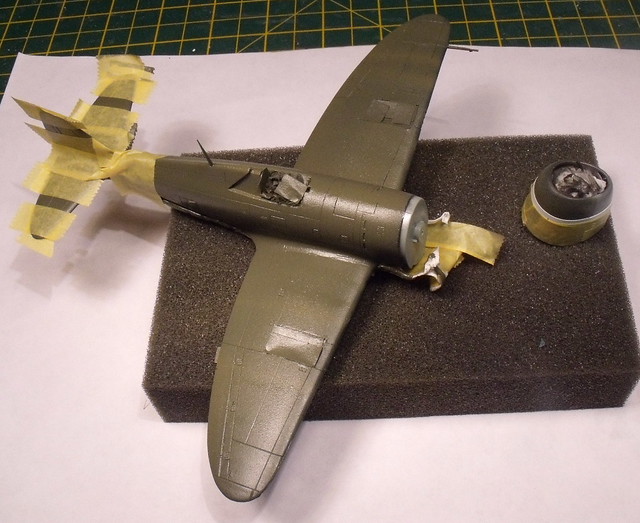
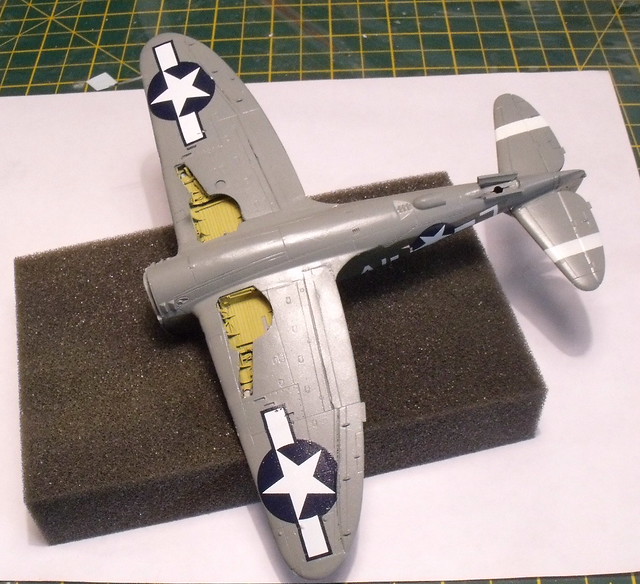
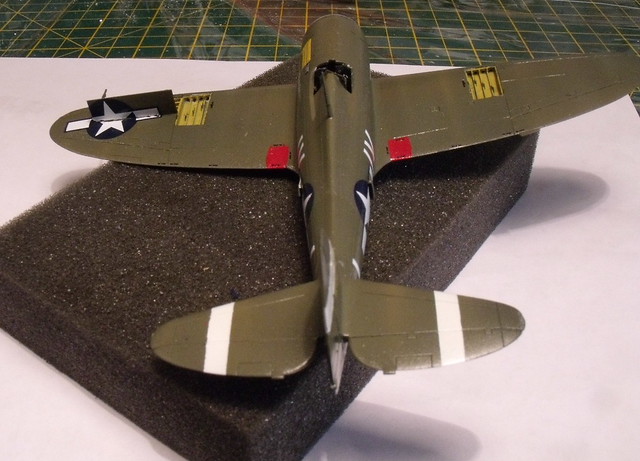
After a coat of black primer, it was painted with my usally brand of Xtracolor, grey underside and OD on top. I got a bit carried away and started masking for the white tail stripes before takeing pics. Those nose was also masked for the green band.

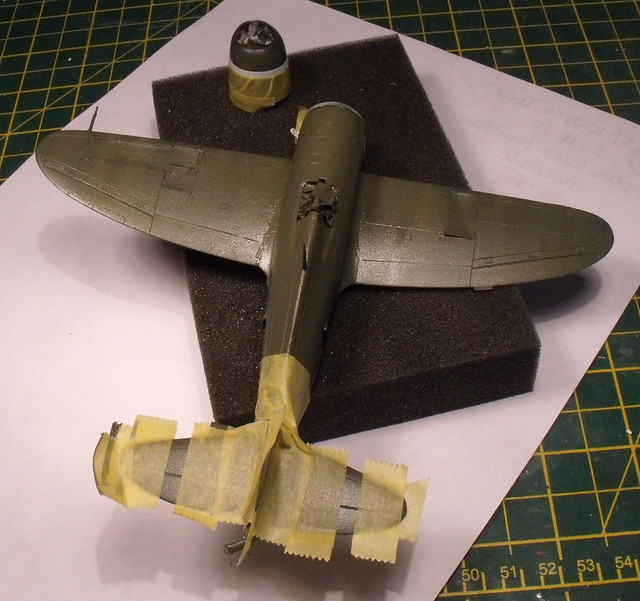
For the white bands, i started out with a coat of Alclad clear gloss. I have had issues in the past with Alclad primer bubbling when applied on enamel paint, so better safe than sorry. This was followed with a coat of white primer and a coat of white Humbrol gloss enamel.

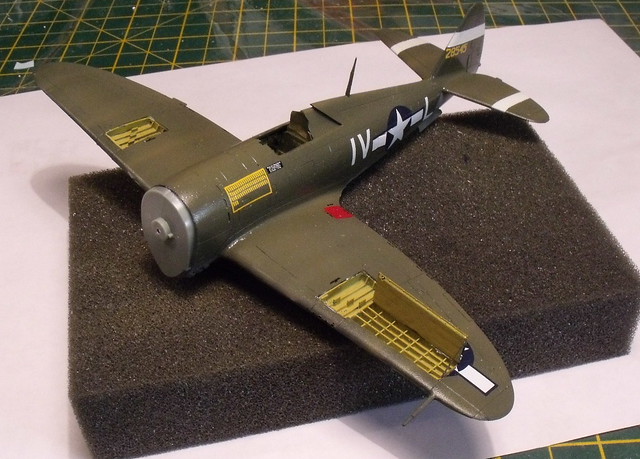
I made up my own mix for the green nose band.

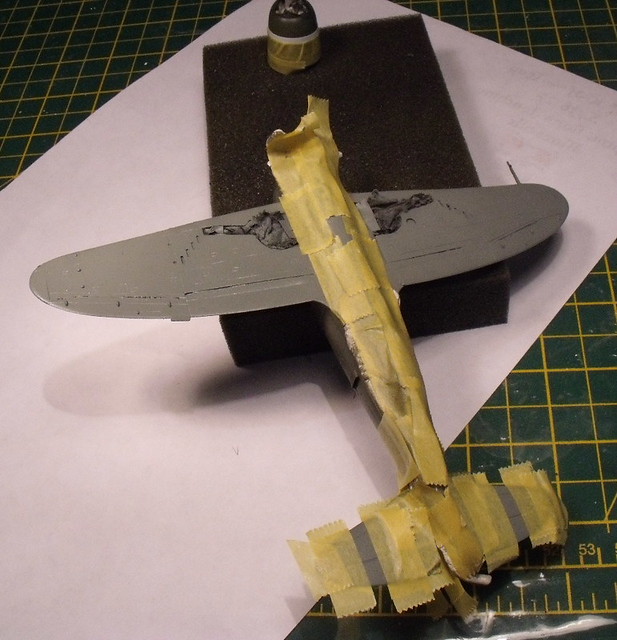
Blurred pic alert, sorry about that.

Then my favorite bit, dcals. These are from LPS Hobby and were really nice to use. I didn't go to mad with the stencils.

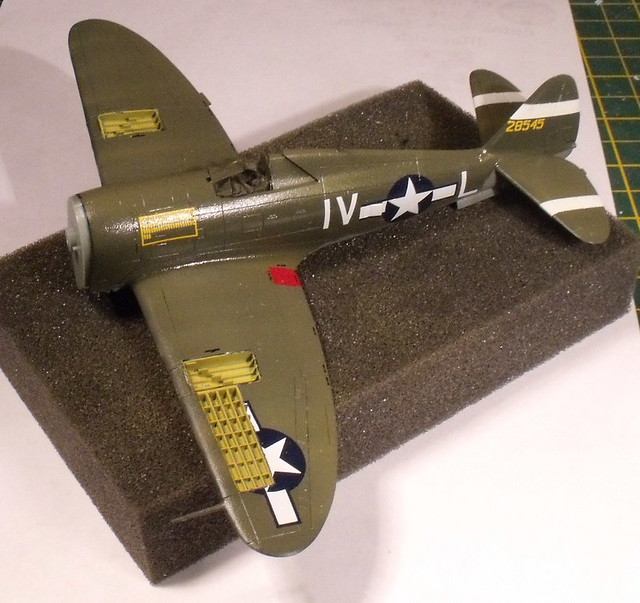
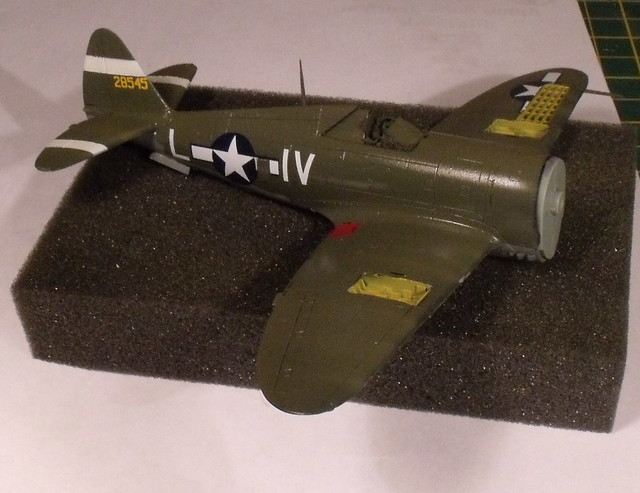
And yes, i have just this moment spotted that i have missed a piece of the national insignia. Will fix that.

And i added the door for the ammo section of the gun bay before weathering.

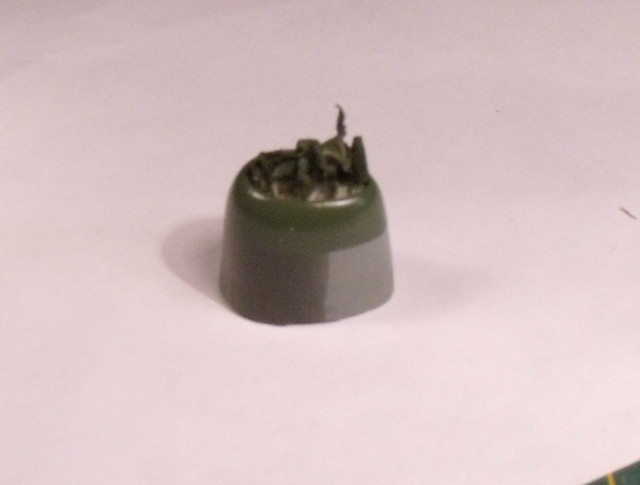
I just have to finish off wiring the engine, then i can get that and the nose fitted and then start on the weathering.

So thats all for now.

I am a Norfolk man and i glory in being so


On the bench: Airfix 1/72nd Harrier GR.3/Fujimi 1/72nd Ju 87D-3

  • Member since
    July 2014
Posted by modelcrazy on Tuesday, June 20, 2017 2:18 PM

That's awsome Bish. Huge gun bay.

Steve

Building a kit from your stash is like cutting a head off a Hydra, two more take it's place.


http://www.spamodeler.com/forum/

  • Member since
    December 2002
  • From: Bury St Edmunds, Suffolk, England
Posted by Bish on Tuesday, June 20, 2017 2:26 PM

Thanks Steve.  know what you mean, 4 guns worth of those large .50Cal shells must take up a lot of space.

I am a Norfolk man and i glory in being so


On the bench: Airfix 1/72nd Harrier GR.3/Fujimi 1/72nd Ju 87D-3

  • Member since
    December 2002
  • From: Bury St Edmunds, Suffolk, England
Posted by Bish on Tuesday, June 20, 2017 3:41 PM

Right guys, another question. Well, actually two. The portrusion on the underside of the fuselage just ahead of the tail wheel. I understand thats an exhaust for the turbine. Would there be any exhaust staining around it. I can't make anything out on period pics.

Also, according to my decals instructions it was a differant colour to the grey underside. They don't indicate a colour but it is the same shade on the instructions as the OD top. Any idea what colour it should be.

Thanks guys.

I am a Norfolk man and i glory in being so


On the bench: Airfix 1/72nd Harrier GR.3/Fujimi 1/72nd Ju 87D-3

  • Member since
    July 2014
Posted by modelcrazy on Tuesday, June 20, 2017 3:53 PM

There may be some staining from the turbo. I thought the color at the exhaust was metal but could be wrong.

Steve

Building a kit from your stash is like cutting a head off a Hydra, two more take it's place.


http://www.spamodeler.com/forum/

  • Member since
    September 2014
Posted by rooster513 on Tuesday, June 20, 2017 8:58 PM

MrStecks

Hey Rooster, count me in on this GB.  "Somebody" in another thread pointed me in this direction.  Wink

I'll be building the Tamiya 1/48 P-47 Thunderbolt Bubbletop.  Frankly, I'm a little worried after looking at all the beautiful work I've seen in this thread, but willing to give it a go.  Still waiting for a couple of AM things to arrive in the mail.  Will probably post first WIP pics later this week.

Cheers, Mark


wonder who that could have been??Wink Glad to have you on board Mark! I'll get you added to the roster shortly.

-Andy

JOIN OUR COMMUNITY!

Our community is FREE to join. To participate you must either login or register for an account.

SEARCH FORUMS
FREE NEWSLETTER
By signing up you may also receive reader surveys and occasional special offers. We do not sell, rent or trade our email lists. View our Privacy Policy.