SEARCH FINESCALE.COM

Enter keywords or a search phrase below:

FSM New Years Resolution — Build More Models GB

18707 views
374 replies
1 rating 2 rating 3 rating 4 rating 5 rating
  • Member since
    December 2002
  • From: Bury St Edmunds, Suffolk, England
Posted by Bish on Monday, January 16, 2017 10:28 AM

Theuns

"Even Theun's Spitfire is looking good.

(please tell me i didn't just type that Bang Head)"


LOL, dont stress mate, it must be that Brittish Humor ;-)

Here in SA we have almost the same "dry humor", I think John Cleese is one of the funniest guys arround.


As for the Spitfire, the first setback with the kit - the decals are horrible! Hard ,brittle and some had to be pieced toghether as they broke up, I hope they dont silver under the matcoat.


Theuns


Cleese IS the messiah, no argument.

Bad news on those decals, hope they turn out ok.

I am a Norfolk man and i glory in being so


On the bench: Airfix 1/72nd Harrier GR.3/Fujimi 1/72nd Ju 87D-3

  • Member since
    April 2010
Posted by Theuns on Monday, January 16, 2017 10:33 AM

Funniest movie he ever made was "Clockwize" where he is a school head master...can just see it now LOL

As for the decals, I used tamiya thin cement applied CAREFULLY to the stencles and the walkways to desolve the carrierfilm. It was risky but I think after this and an application of microsol it will be OK I hope.


Theuns

  • Member since
    November 2010
  • From: Florida-West Central
Posted by Eagle90 on Monday, January 16, 2017 12:23 PM

Hey everyone.  Wow!  Some awesome work being done here!  Very inspiring.

Well, here is my first installment of progress pics.  The ARK kit is very simple and I must say not extremely impressive.  The instructions are a bit odd.  The cockpit has no detail at all, but the detail on the outside is very nice.  The fit....well, it takes a bit of work, but it comes out alright.  In other words, there are some fit issues.  Whistling.  There is no pilot with the kit either.  The decals look a little "weak", so we shall see how they go on.  Like I said, pretty simple build, so not many pics, but here they are.  Enjoy.

Bobby


  • Member since
    December 2003
  • From: 37deg 40.13' N 95deg 29.10'W
Posted by scottrc on Monday, January 16, 2017 12:56 PM

Great work everyone, Steve, the Hornet build is going great and hopefully keeping me motivated to continue working on the Enterprise.

Bish, you and Theuns crack me up, keep the spirit going.

I shot the Lt. Gray on the bottom of the TBD yesterday afternoon and then shot the Navy Lt. Sea Blue over the top.  All are MM enamels.  I also took advantage of this paint session to paint the planes for my Enterprise.  I am liking the way this little model is turning out.  

  • Member since
    December 2003
  • From: 37deg 40.13' N 95deg 29.10'W
Posted by scottrc on Monday, January 16, 2017 1:03 PM

Since this build has been coming along easily and enjoyable, I feel the need to challenge myself.  I want to mark this plane from the Enterprise right before Midway, and to do so, it will require the tail to be white and red.  I do not have decals to do this, so I plan to paint it.  I have seen many tutorials on how to achieve it, but all are on 1/48 or larger planes where as this is 1/72.  I think it might be a fun exercise and who knows, I might just try the roudels as well.


  • Member since
    December 2002
  • From: Bury St Edmunds, Suffolk, England
Posted by Bish on Monday, January 16, 2017 2:33 PM

I had planned an update over the weekend. But i had a paint issue and PB was not playing ball anyway. I painted with Tamiya acrylics over an Alclad black primer. After letting it dry for a couple of days, i started doing some oil dot filtering. But my solvent, white spitits, started to strip away the paint. No idea why, the acrylic should have been fine. So, i had to strip back that wing and re paint. So this is it before weathering, this time with flory washes.

I have since got on with the weatherign and hopefully will have some more pics tomorrow.

I am a Norfolk man and i glory in being so


On the bench: Airfix 1/72nd Harrier GR.3/Fujimi 1/72nd Ju 87D-3

  • Member since
    December 2016
Posted by dwsrazor on Monday, January 16, 2017 4:07 PM

Loving all the work here.  That shuttle looks fantastic Bish! 


I haven't been added to the front page yet but I'm going to post some progress pics anyway. 

The box art.  Love the postion of those tow cables... or are they guard rails???

Had some spare hand holds so those lumps came off.


Some paint and starting on the roadwheels.


  • Member since
    November 2010
  • From: Florida-West Central
Posted by Eagle90 on Monday, January 16, 2017 5:33 PM

Super work everyone!  I'm liking that KV-2!

Right!  So I was going through my Excel spreadsheet that I have of my stash moving my builds from the stash page to the in-work/completed page....(yeah, I'm that way.  LOL!)  And noticed I have a HobbyCraft I-16 Type 24........you guessed it.  I figured, why not do both at the same time!  Call me crazy, but I think it will be a blast.  So far, the the fit is much better then the ARK kit.  The cockpit does have an instrument panel, but you can't see a bloody thing in there anyway.  LOL!  I can only imagine how small and cramped that aircraft must have been.  Some of the exterior detail is better on the ARK kit, but over all the HC kit is a bit better I think.  So, here is some extra bonus pics for you.

The pic with both planes has the ARK kit on the left and the HC on the right.  More to come!

Bobby


  • Member since
    January 2015
Posted by BrandonD on Monday, January 16, 2017 6:48 PM

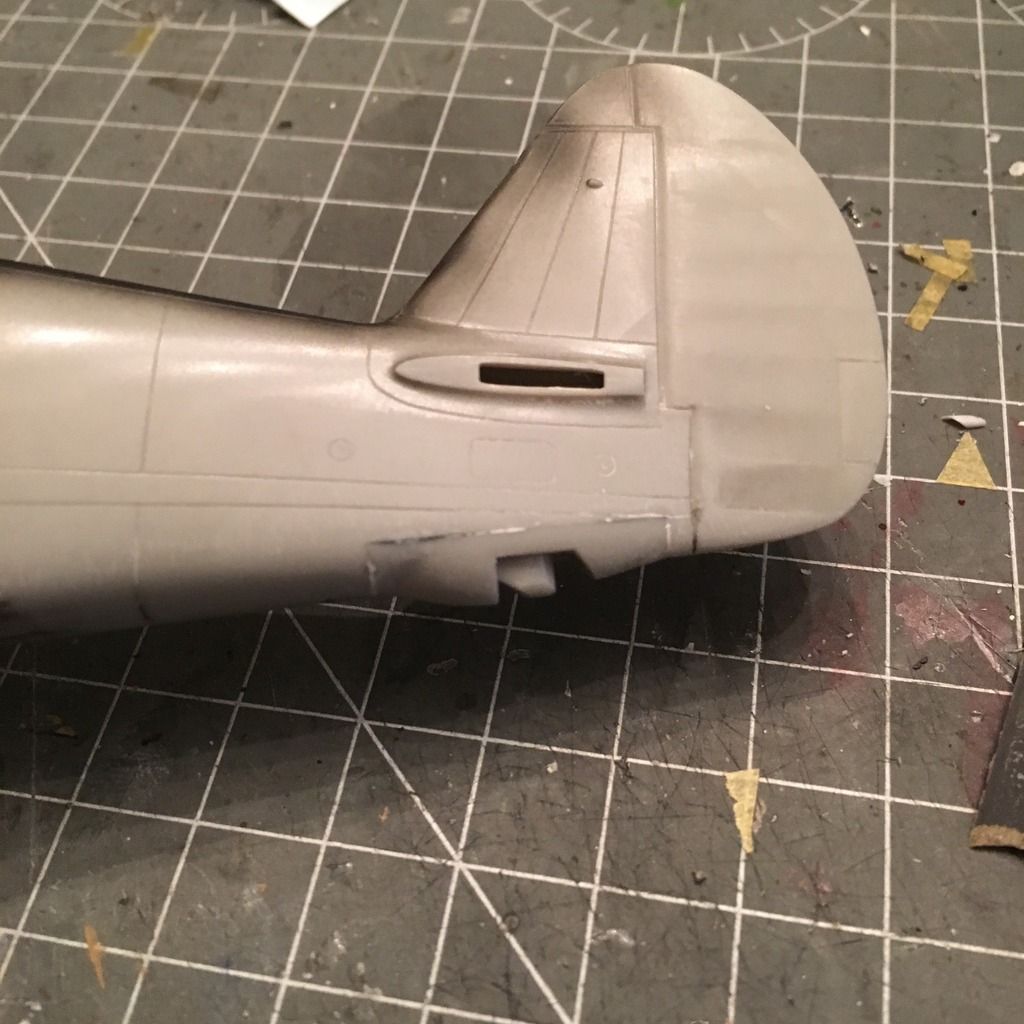
Ok, here we go. This kit mostly fits well, but the rear wheel insert was kind of a chore, and the molded-on landing gear doors in the open position made it impossible to fix the inevitable seam, which of course doesn't fall on a panel line.

So, out came the razor saw and off went the doors. I glued it in, then had to work up the seam before I could proceed.

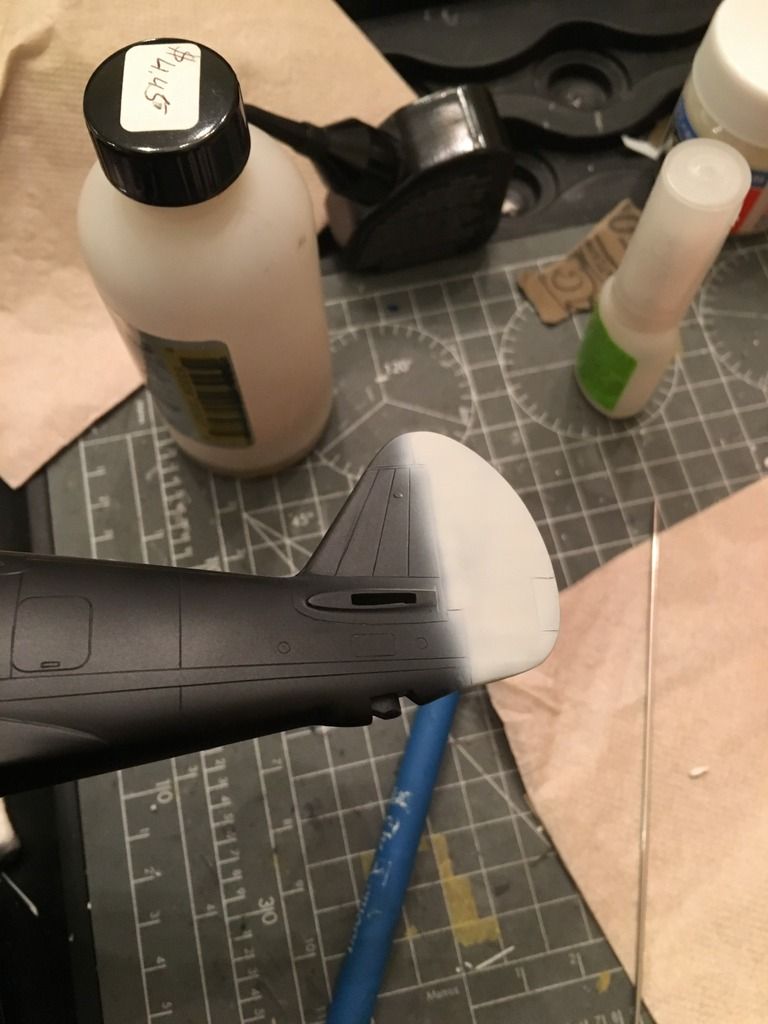
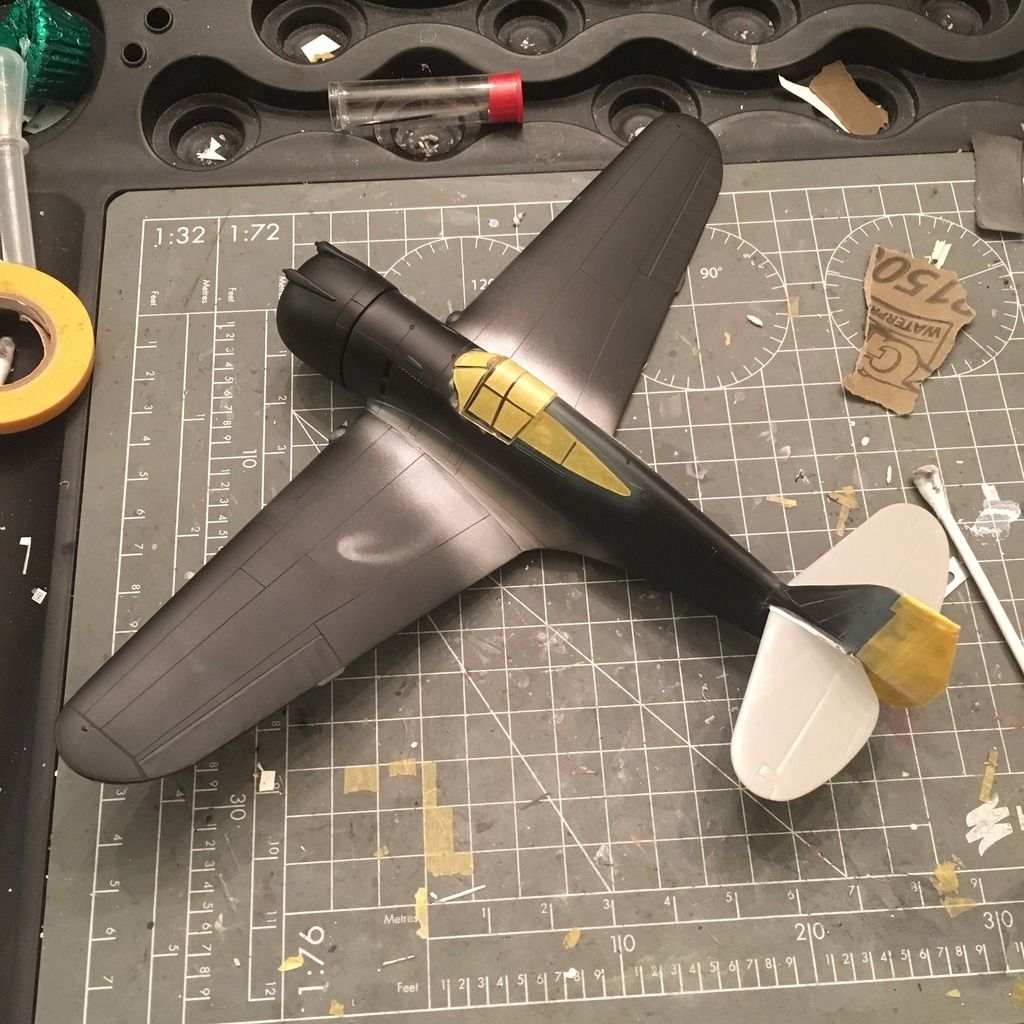
Once I got the seam right, I gave the rudder a light gray base for easier coverage of the tricolor stripes.

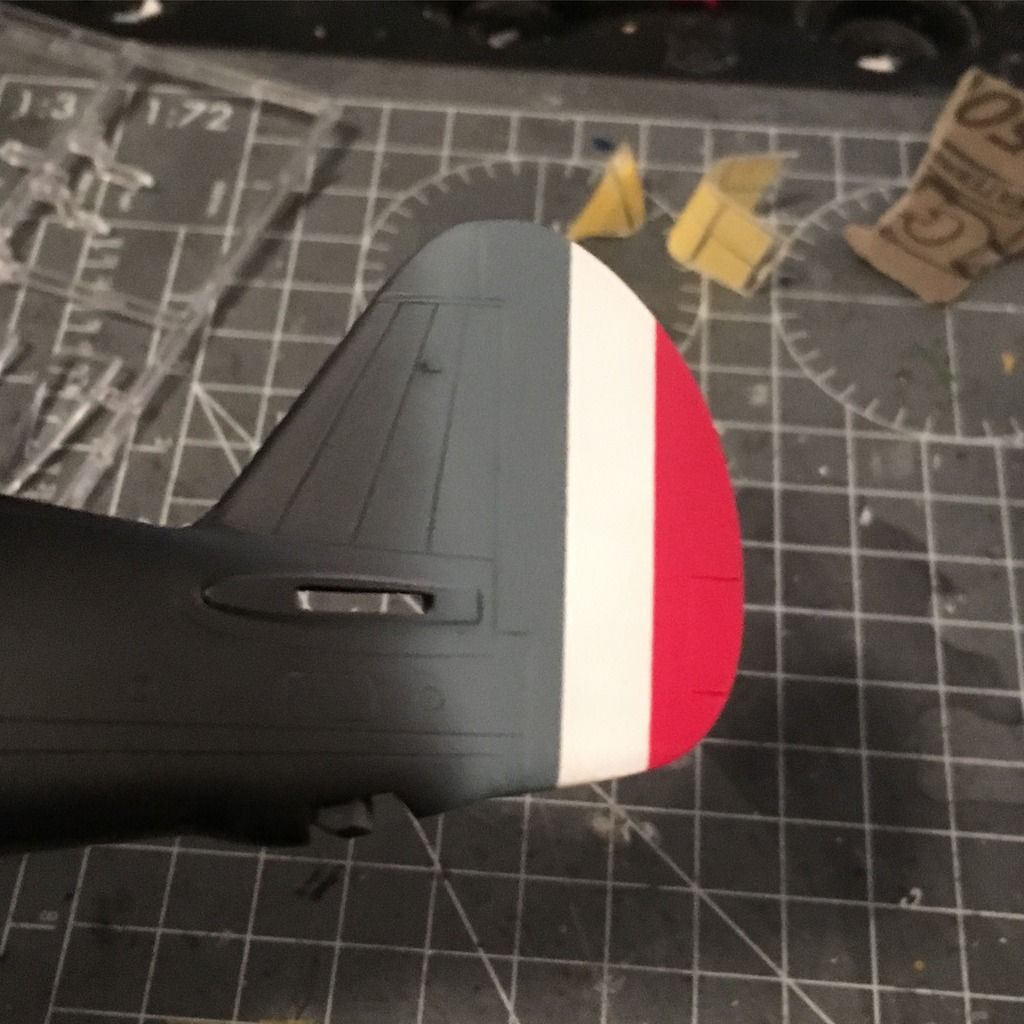
For the stripes, I used Model Master Intermediate Blue, Insignia White and Insignia Red. Nothing special here, and this pic is pretty bad for color representation.

With that masked, the horizontal stabilizers went on, and then I slid the cowling into place (you can mount the engine before attaching the cowling, which I did).

I also added the Ultracast (or maybe it's True Details) seat once the cockpit was in and fuselage halves together.

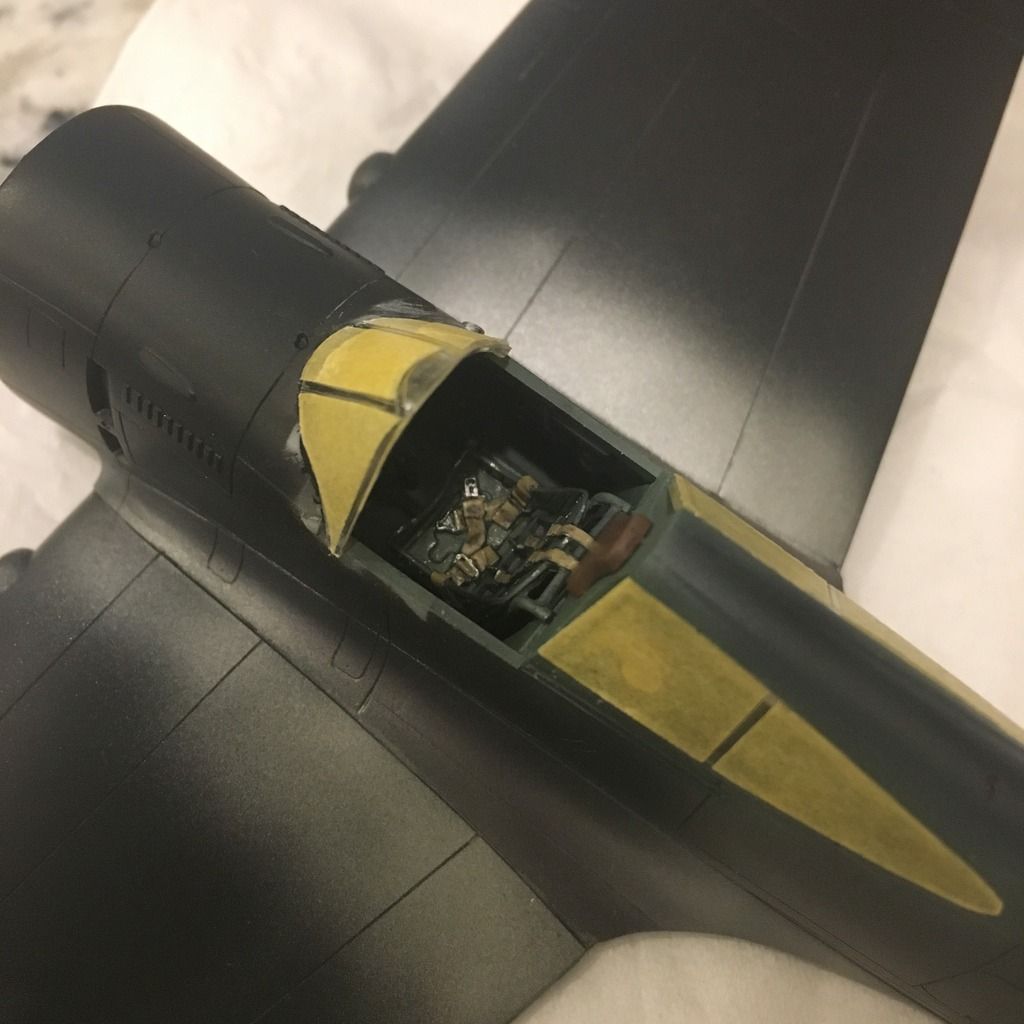
The canopy shouldn't have vertical framework up front, but the spare I have from my Airfix P-40 is about 2mm too narrow, and I just don't care that much.

Next up, it was time to paint.

I went with Model Master colors for all but the brown on the topside, which was straight Tamiya Brown.

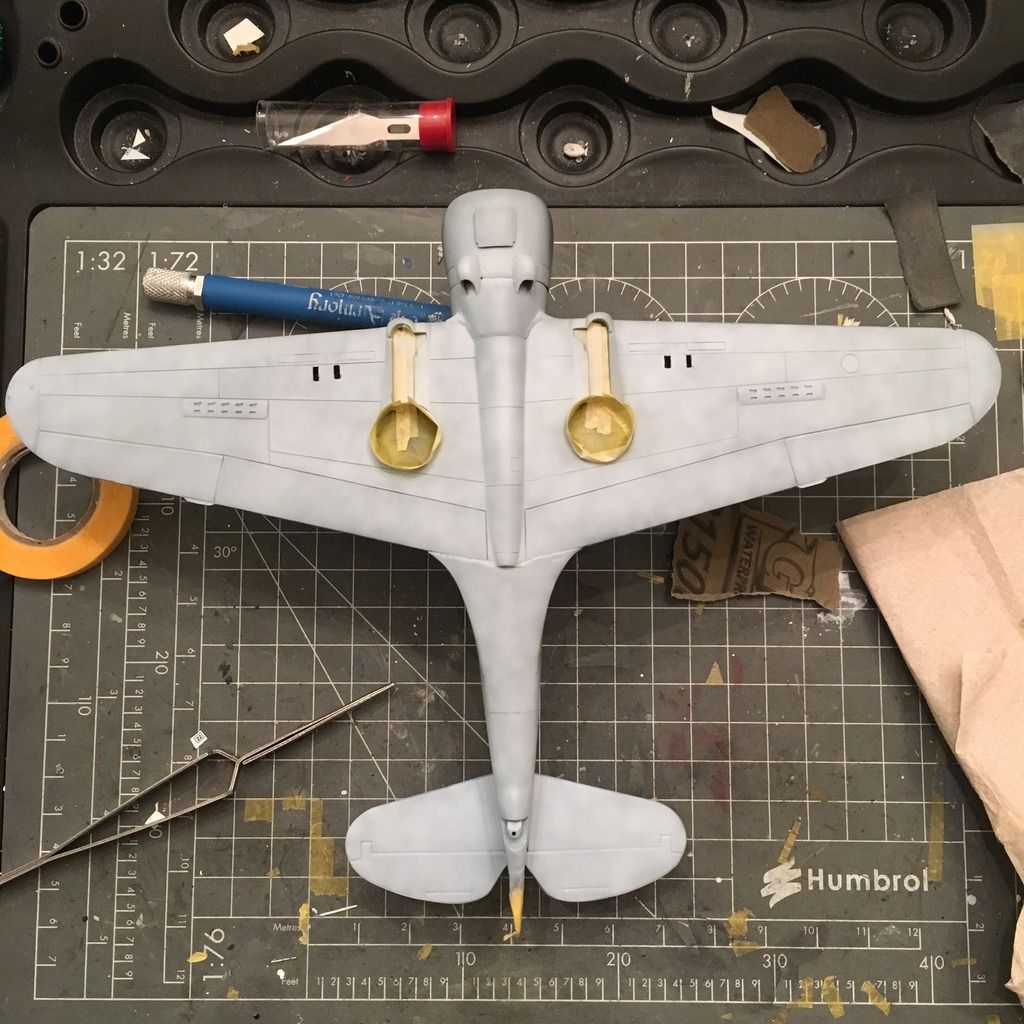
Light Blue Grey takes care of the Gris Bleu Clair for the bottom, sprayed over Mr. Surfacing Finisher 1500 Black.

On the topside, I decided to use Vallejo Chipping Medium. Much like I've found with Vallejo model color, this is awful to airbrush. Thinned with distilled water, it beaded up on the surface and left a texture about like a basketball. So I wet a rag and wiped it off.

My next attempt was to thin it with Windex to break the surface tension, which worked, and it layed flat after I misted it with Windex and let it sit a while. (end result is this works, but is way too much effort for me to use in the future. I'd rather just add "chipping" with paint after the fact).

Once the chipping medium had dried, I went ahead and sprayed the topside colors freehand. I'm not overly thrilled with the paint depth, but will use oils, washes and filters to break it up.

I chipped off paint at the wing root with a toothpick, proving that it does work with enamels, which is good, I suppose. I did not wet it prior to chipping as I was afraid I'd have a gummy mess on my hands.

At this point, I have clear coated it and will be putting decals on it this evening.

-BD-

  • Member since
    January 2015
Posted by BrandonD on Monday, January 16, 2017 6:49 PM

Man there is some great work going on in here. That Spitfire looks fantastic, as does the Sci Fi stuff. I get so caught up in planes that I sometimes forget to see the Sci Fi and vehicles, and this is nice to see so much variety in one build.

-BD-

  • Member since
    December 2002
  • From: Northern California
Posted by jeaton01 on Monday, January 16, 2017 7:06 PM

jgeratic

Thank you Justin and Steve.  The Hornet and seascape are coming along great.

Actually, there is plenty nice working coming off the work benches here.  Just wonder what the FSM staff are up to, and the rest of the roster?   Only couple weeks to go ...

regards,

Jack


Yeah, where are these FSM staffers!

I see a lot of people having fun.  Well, I'm doing a bazillion little bitty decals, 8 on each drop tank alone on the Airfix 1/48 Meteor F.8.  I have to say the quality of the printing is really great, take a close look at the pictures.  I also popped the nose off and installed the nose gear assembly now that all the masking and painting is done.  Nose is on permanently now.


John

To see build logs for my models:  http://goldeneramodel.com/mymodels/mymodels.html


  • Member since
    December 2003
  • From: 37deg 40.13' N 95deg 29.10'W
Posted by scottrc on Tuesday, January 17, 2017 7:48 AM

Great post Brandon on documeting you painting steps.  I am of coarse partial to you painting your tail stripes since I will be doing it as well.  The P-36 looks superb.  John, I also like how your yellow tail came out on your Meteor. 

  • Member since
    November 2008
  • From: Hatboro, PA
Posted by Justinryan215 on Tuesday, January 17, 2017 7:35 PM

Uuuggghhh....my least favorite tank to face in world of tanks, blitz!  That thing has one shot killed me more times than I care to admit, although, I just added one to my garage, and really enjoy blowing stuff up with it!


Looking good so far!  Keep up the good stuff, I can't wait to see it finished!

Justin

"...failure to do anything because someone else can do better makes us rather dull and lazy..."

Mortal as I am,I know that I am born for a day.  But when I follow at my pleasure the serried multitude of the stars in their circular course, my feet no longer touch the Earth...


  • Member since
    July 2014
Posted by modelcrazy on Wednesday, January 18, 2017 1:21 PM

A small update on the Hornet.

I'm finishing the water base and need to apply several more coats of thin gel to give some depth.

The B-25's are coming along and need to attach the wheels, props and add some weathering to the ship and bombers (the plane was just placed there for looks). I ordered the crew from GGM but had to send a check so hopefully they will be here by the end of the month. They will be coming for Lopez Washington so that's not too far away.

The deck looks brown but is weathered blue in reality.


Steve

Building a kit from your stash is like cutting a head off a Hydra, two more take it's place.


http://www.spamodeler.com/forum/

  • Member since
    December 2002
  • From: Bury St Edmunds, Suffolk, England
Posted by Bish on Wednesday, January 18, 2017 2:28 PM

Looking great Steve, and thanks for the info on the water. So, after its painted you add a couple more layers and leave that clear. Its amazing how you already have the lok of depth just from the painting.

I am a Norfolk man and i glory in being so


On the bench: Airfix 1/72nd Harrier GR.3/Fujimi 1/72nd Ju 87D-3

  • Member since
    July 2014
Posted by modelcrazy on Wednesday, January 18, 2017 2:48 PM

Bish,

Yes after the painting is complete, add several coats of acrylic gloss varnish or thin gloss gel. This gives a look of depth. Also, along with adding the cotton (I went back to cotton instead of Poly-fil due to the fibrous nature of Poly-fil) spray a small bit of white in areas such as the wake, along the hull and bow wave as well as a light dry brushing of white all over.

Also you can add some more cotton to the foamy areas after the last coat of varnish. This give the illusion of foam on top of the water. The cotton under the varnish will look like turbulence under the waves. The more attention you give to the different layers the more realistic it looks. I study water pictures and all the nuances of the waves to get an idea of what to do. Also I study several builders build such as Chris Flodberg and Kostas Katseas for ideas.

Steve

Building a kit from your stash is like cutting a head off a Hydra, two more take it's place.


http://www.spamodeler.com/forum/

  • Member since
    December 2002
  • From: Bury St Edmunds, Suffolk, England
Posted by Bish on Wednesday, January 18, 2017 2:51 PM

Great info Steve, thanks. I am planning to do a 72nd Ar 196 on the ocean for the float plane GB, so i'll be picking your brains Wink

I am a Norfolk man and i glory in being so


On the bench: Airfix 1/72nd Harrier GR.3/Fujimi 1/72nd Ju 87D-3

  • Member since
    January 2015
Posted by BrandonD on Wednesday, January 18, 2017 3:07 PM

Just a small update on the 1/48 Hobbycraft French Hawk 75 – decals and panel line wash are on.

-BD-

  • Member since
    December 2002
  • From: Bury St Edmunds, Suffolk, England
Posted by Bish on Wednesday, January 18, 2017 3:20 PM

Looking really nice there BD, great job on the paint work and those decals look to have gone down really well.

I am a Norfolk man and i glory in being so


On the bench: Airfix 1/72nd Harrier GR.3/Fujimi 1/72nd Ju 87D-3

  • Member since
    December 2002
  • From: Bury St Edmunds, Suffolk, England
Posted by Bish on Wednesday, January 18, 2017 3:23 PM

Theuns

Funniest movie he ever made was "Clockwize" where he is a school head master...can just see it now LOL

As for the decals, I used tamiya thin cement applied CAREFULLY to the stencles and the walkways to desolve the carrierfilm. It was risky but I think after this and an application of microsol it will be OK I hope.


Theuns


I like that but its not my favorite. I do like his Centurion in Life of Brian.

Thats looking really nice, didn't realise you were doing a US version. Nice job.

I am a Norfolk man and i glory in being so


On the bench: Airfix 1/72nd Harrier GR.3/Fujimi 1/72nd Ju 87D-3

  • Member since
    April 2010
Posted by Theuns on Wednesday, January 18, 2017 10:11 PM

Dang that water looks so cool, I have never tried it , but oneday I will have a go LOL


Theuns

  • Member since
    November 2003
  • From: Naples, FL
Posted by tempestjohnny on Thursday, January 19, 2017 4:40 AM

Steve you are truly the master of water. Bish nice save on the shuttle. Bobby the I-16 twins are coming along nicely. BD now that's a paint job. John great Meteor.  Theuns really like the desert scheme. Scott you've really done justice to the old kit. Dave good start


  • Member since
    April 2006
  • From: ON, Canada
Posted by jgeratic on Thursday, January 19, 2017 11:50 PM

Bish

Jack, greats posts as always and again great attention to detail.


Hi Bish, thanks.  Look forward to more of your shuttle work - I like the slight staining of the main colour you have got going on there.

--------------------------

Construction of the 109F-1 is pretty much done.  Wheels, exhaust and prop nose will be painted separately before final assembly.

The kit had no gunsight nor balance arms for the ailerons, so those were scratchbuilt.  I've filled the holes in were the prop blades would sit in the nose.  Trying this method for the first time, as the build will be an inflight pose.

regards,

Jack


  • Member since
    December 2002
  • From: Bury St Edmunds, Suffolk, England
Posted by Bish on Thursday, January 19, 2017 11:54 PM

Thanks Jack. Its just about done now, just sitting in the shed drying after a clear coat last night. Just got the base and vader figure to finish off.

Nice work there, looking forward to seeing how you do the moving prop. I have never done that either and want to do one on the floatplane later this year.

I am a Norfolk man and i glory in being so


On the bench: Airfix 1/72nd Harrier GR.3/Fujimi 1/72nd Ju 87D-3

  • Member since
    December 2002
  • From: Northern California
Posted by jeaton01 on Friday, January 20, 2017 6:21 PM

Jack, the 109 is going to be exceptional as always from you.

After several days of applying decals (I didn't count but it was well north of 100) I think I am done with the F.8.  I always find things to touch up after the pictures are taken, like the scratches on the drop tank pylon.  At this point it is called weathering.   This was a fun kit to work with.   There were a few minor issues that just seem odd considering the overall quality.  The ejection seat sat up too high, the mounting lugs were trimmed a little to fix that.   The seat was not permanently installed until the masking was removed after the final matte clear coat (Alclad Matte Clear) as that made it easier to mask the cockpit opening.  The nose gear door would not fit until I trimmed back the mounting lug on the strut and opened up more of the nose gear bay in front of the strut.  The nose was attached for painting with UV glue and then after painting the nose was popped off and the nose gear strut assembly was added and the nose reattached permanently.  This was done to avoid the potential breakage of the strut during handling.  The model sits a little more nose low than I thought it would, but many pictures of Meteor F.8's show this posture.  The wing tip position lights were represented as scribed marks.  They were cut out and white glue was applied to simulate clear lenses.


John

To see build logs for my models:  http://goldeneramodel.com/mymodels/mymodels.html


  • Member since
    December 2002
  • From: Bury St Edmunds, Suffolk, England
Posted by Bish on Friday, January 20, 2017 6:34 PM

Great work there John, she's looking really nice.

I am a Norfolk man and i glory in being so


On the bench: Airfix 1/72nd Harrier GR.3/Fujimi 1/72nd Ju 87D-3

  • Member since
    April 2006
  • From: ON, Canada
Posted by jgeratic on Friday, January 20, 2017 10:17 PM

Hi John, thanks, and excellent work on yours - looks to be a fine example of the Meteor. Yes  I like the the splash of yellow on the tail.

regards,

Jack

  • Member since
    April 2010
Posted by Theuns on Friday, January 20, 2017 10:59 PM

Getting the engine to fit was really an issue, It had the wrong upwards angle when mated to the firewall, this had the effect that the side cowls had a gap between the top and bottom cowls at the front.

Eventually with enough cyno and force I got this sorted out but I can still not get all of the cowls to fit correctly at the same time, my P-51 had the same issues.


My plan was to leave off the one side and bottom anyway so i can live with that. Sofar this is the second "issue" I had with the kit but overall a very pleasant build.

I started exactly 2 weeks ago and I plan to complete it this weekend :-)


Theuns

  • Member since
    April 2011
  • From: Silver Spring, MD
Posted by badlanguage on Saturday, January 21, 2017 9:35 AM

Nice Spitfire, Theuns. I haven't built a WWII airplane in a long time, but I'm being inspired! Lots of really nice builds on here! In contrast, I've just gotten the dark blue parts of my Dom primed and preshaded. Hope to get the dark blue color on them today!

  " alt="" />


There are just a lot of parts in this kit, but once they're all painted the thing will go together pretty quickly. That's the hope, at least.

  • Member since
    November 2010
  • From: Florida-West Central
Posted by Eagle90 on Saturday, January 21, 2017 2:37 PM

Man, there is some spectacular work here.  Awesome work everyone!

Have a couple of progress pics.  Got some paint on the I-16 's.  Doing one in the traditional Dark Green over Light Blue and going to try my hand on a "winter washed" plane!  Wish me luck!

Bobby


JOIN OUR COMMUNITY!

Our community is FREE to join. To participate you must either login or register for an account.

SEARCH FORUMS
FREE NEWSLETTER
By signing up you may also receive reader surveys and occasional special offers. We do not sell, rent or trade our email lists. View our Privacy Policy.