SEARCH FINESCALE.COM

Enter keywords or a search phrase below:

Weekend GB 2017-Closed for the season

20098 views
512 replies
1 rating 2 rating 3 rating 4 rating 5 rating
  • Member since
    July 2006
  • From: San Francisco Bay Area
Posted by bufflehead on Wednesday, December 13, 2017 3:56 AM

Thanks for your comments everyone!  It was a fun build and went much quicker than I anticipated....could have been done much sooner if not for losing the headlight guard and those troublesome kit decals!

Lewbud - Thanks again for being the host!  If not for this GB I would not have completed one model this year! Embarrassed  I'm glad you like the photography!  Amazing how much a sheet of graduated background material and some daylight rated lightbulbs can help with taking decent photos.  Nothing fancy for the camera...just my Galaxy S7 phone! Please use pic #2 since the jacked up windshield doesn't show up so badly!  Also, very nice work on the captured FW-190Ds!  I had no idea that these existed until now! 

Rigidrider - man, that is one awesome looking Tojo fighter, all the more so since you completed it so quickly!  I love the camo pattern on it!

DasBeav - the Ki-27 came out great!  Gotta luv the contrast between the light grey paint and the bright red markings!  The Tamiya G.P.A is a nice little kit.  Very simple, but it actually looks pretty good when built and can usually be found pretty cheap (I think I picked mine up at a local hobby/model show for less than $10).  I would recommend using better decals as the kit decals are very thick and some were cracked (the USMC markings).

I wasn't planning on doing another build, but after seeing all the great aircraft being built I am sorely tempted to join Round 4....gotta check the stash!!

Ernest

Last Armor Build - 1/35 Dragon M-26A1, 1/35 Emhar Mk.IV Female


Last Aircraft Builds - Hobby Boss 1/72 F4F Wildcat & FW-190A8


  • Member since
    April 2015
Posted by Mopar Madness on Tuesday, December 12, 2017 8:56 PM

Ok, now that’s a really cool take on a couple captured 190’s!  

Chad

God, Family, Models...

At the plate: 1/48 Airfix Bf109 & 1/35 Tamiya Famo

On deck: Who knows!

  • Member since
    June 2008
Posted by lewbud on Tuesday, December 12, 2017 8:22 PM

Mopar,

My apologies for not getting your completion pic up earlier.  Front page is updated.

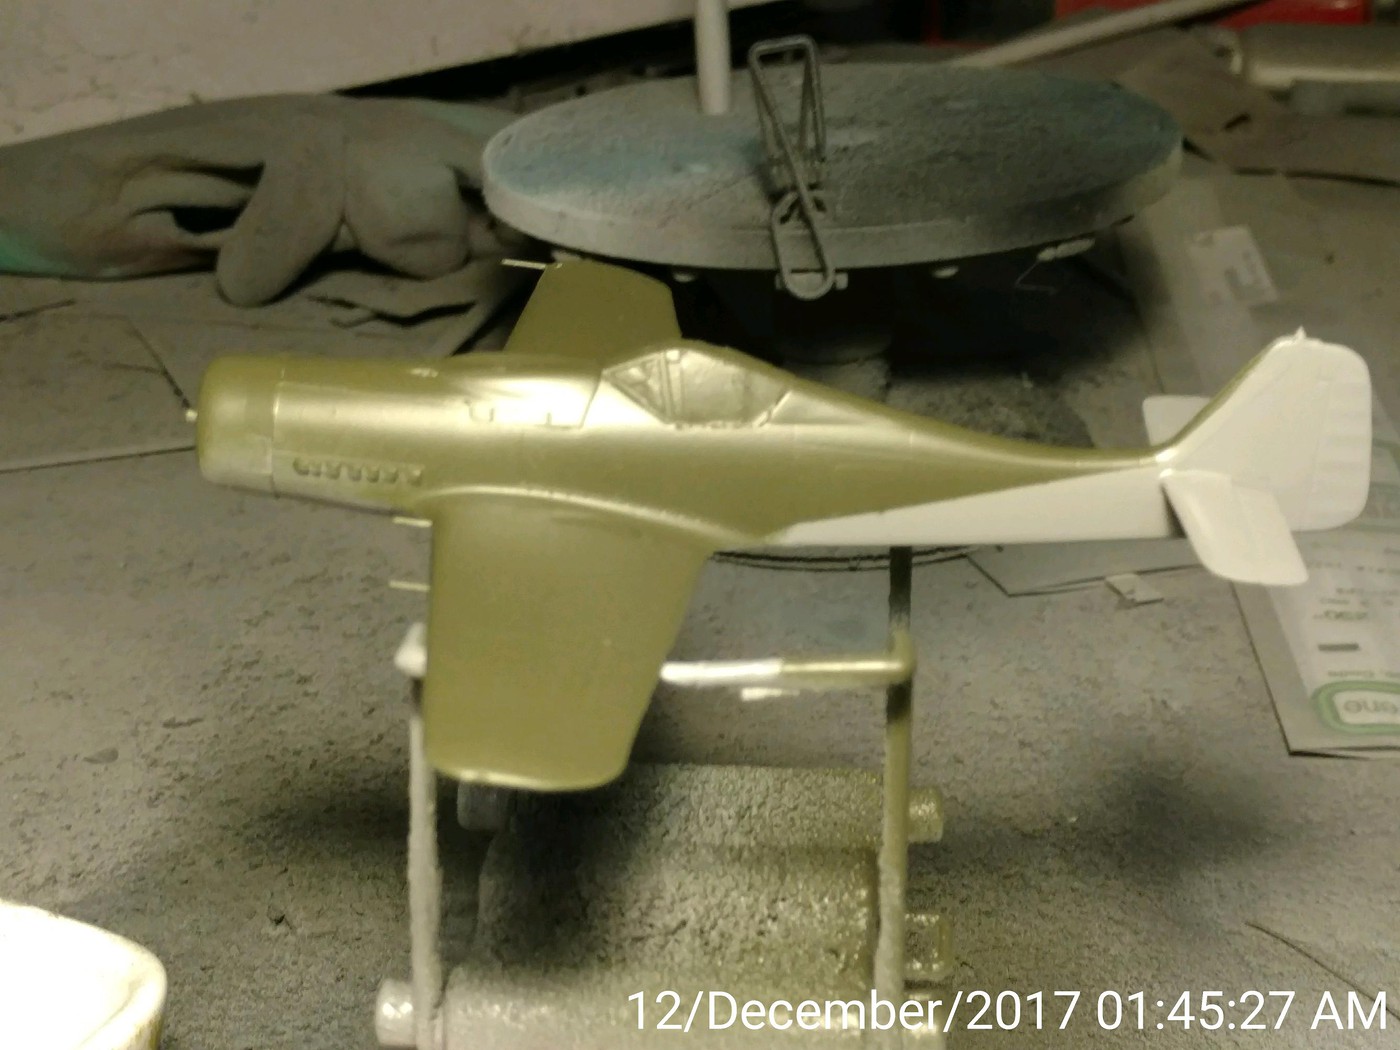
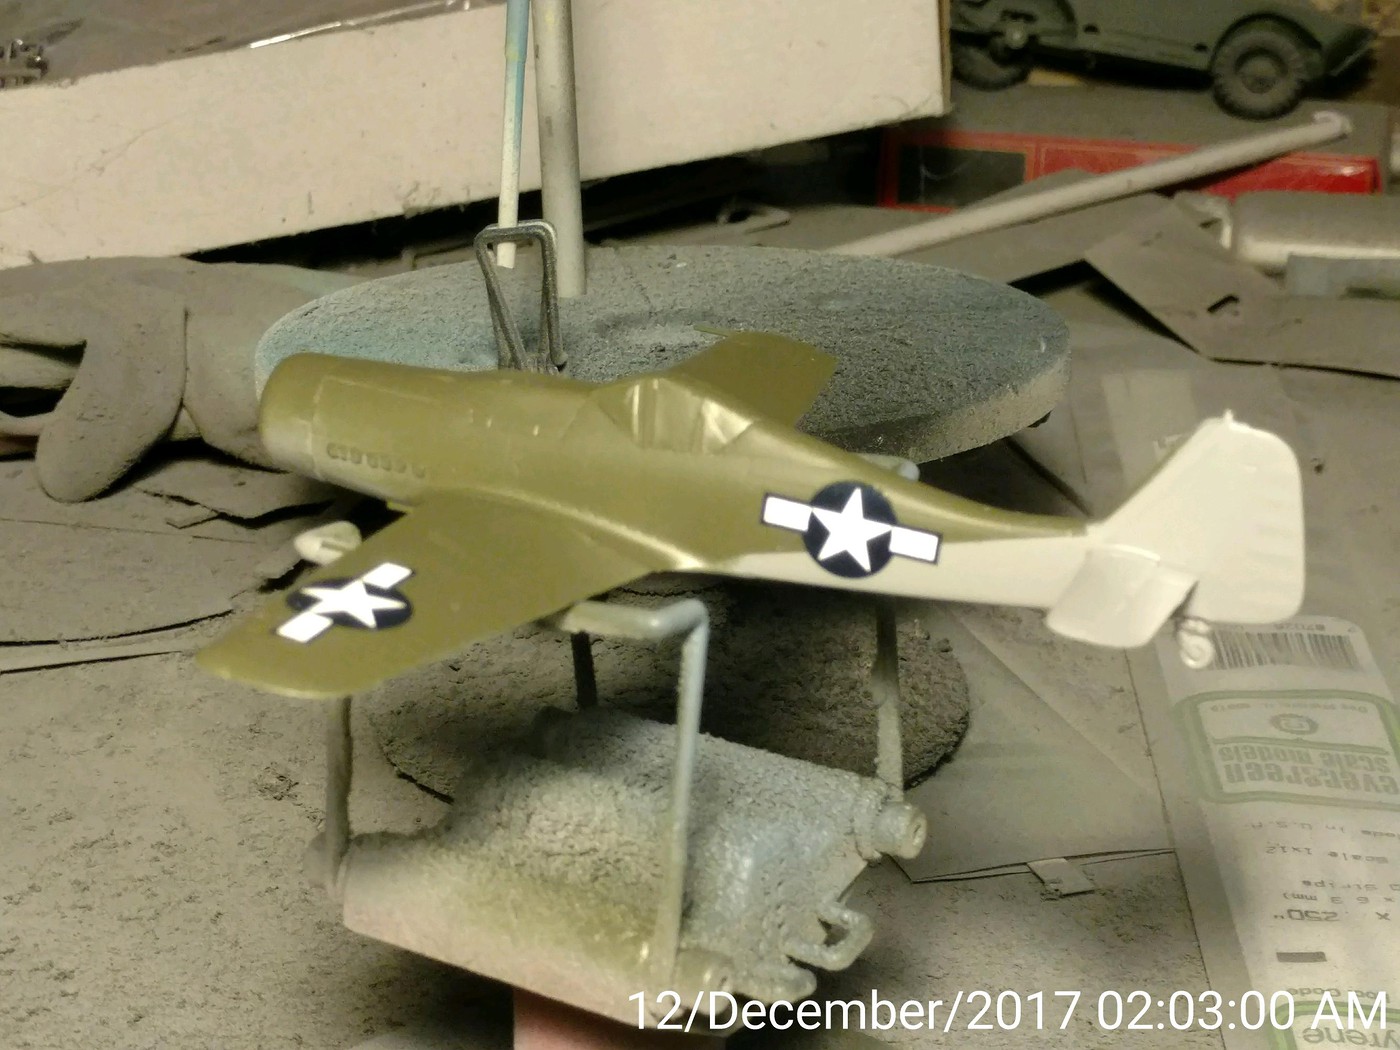
Finished with five hours to spare!  When I got home last night, the Tamiya Intermediate Blue still looked wrong so I mixed up some Model Master Intermediate Blue.  I should have reprimed and shot the MM rather than overcoating the Tamiya, but by then the paint locker was out of Tamiya's finest gray primer. While the MM was drying, I painted the USAF bird OD and Neutral Gray. No pics were taken of the Navy bird while it was being painted.

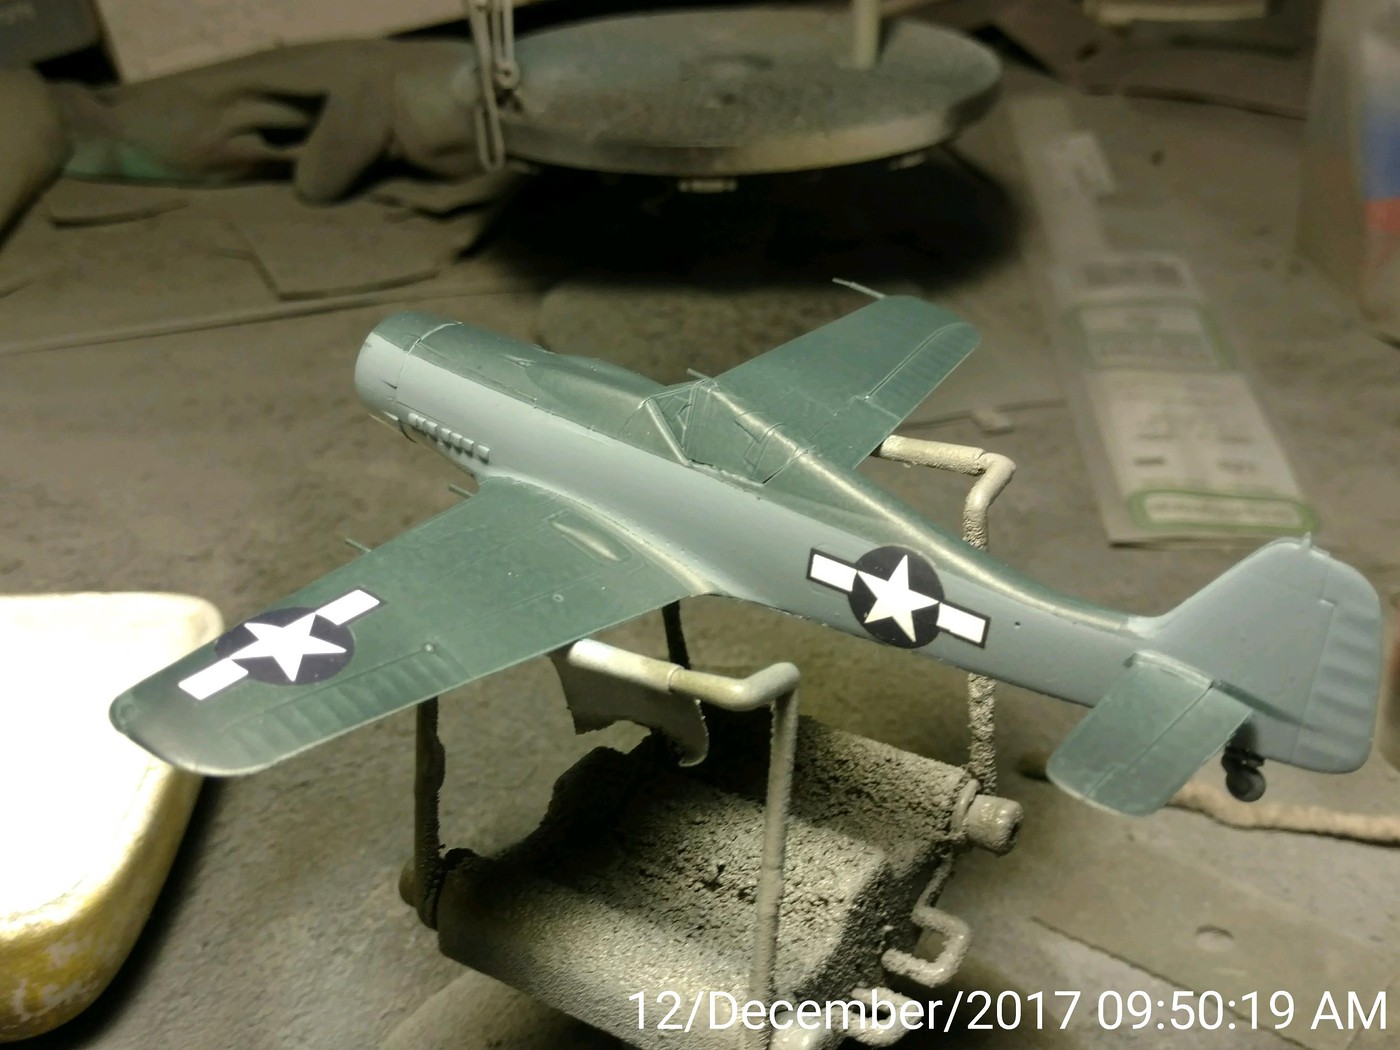
I did better this time with the glossy sea blue, but I overthinned it a bit and wasn't happy with it either.  Onto the decal stage for the USAF bird.

At this stage Hubris began to strike.  First it started with the landing gear for the USAF bird.

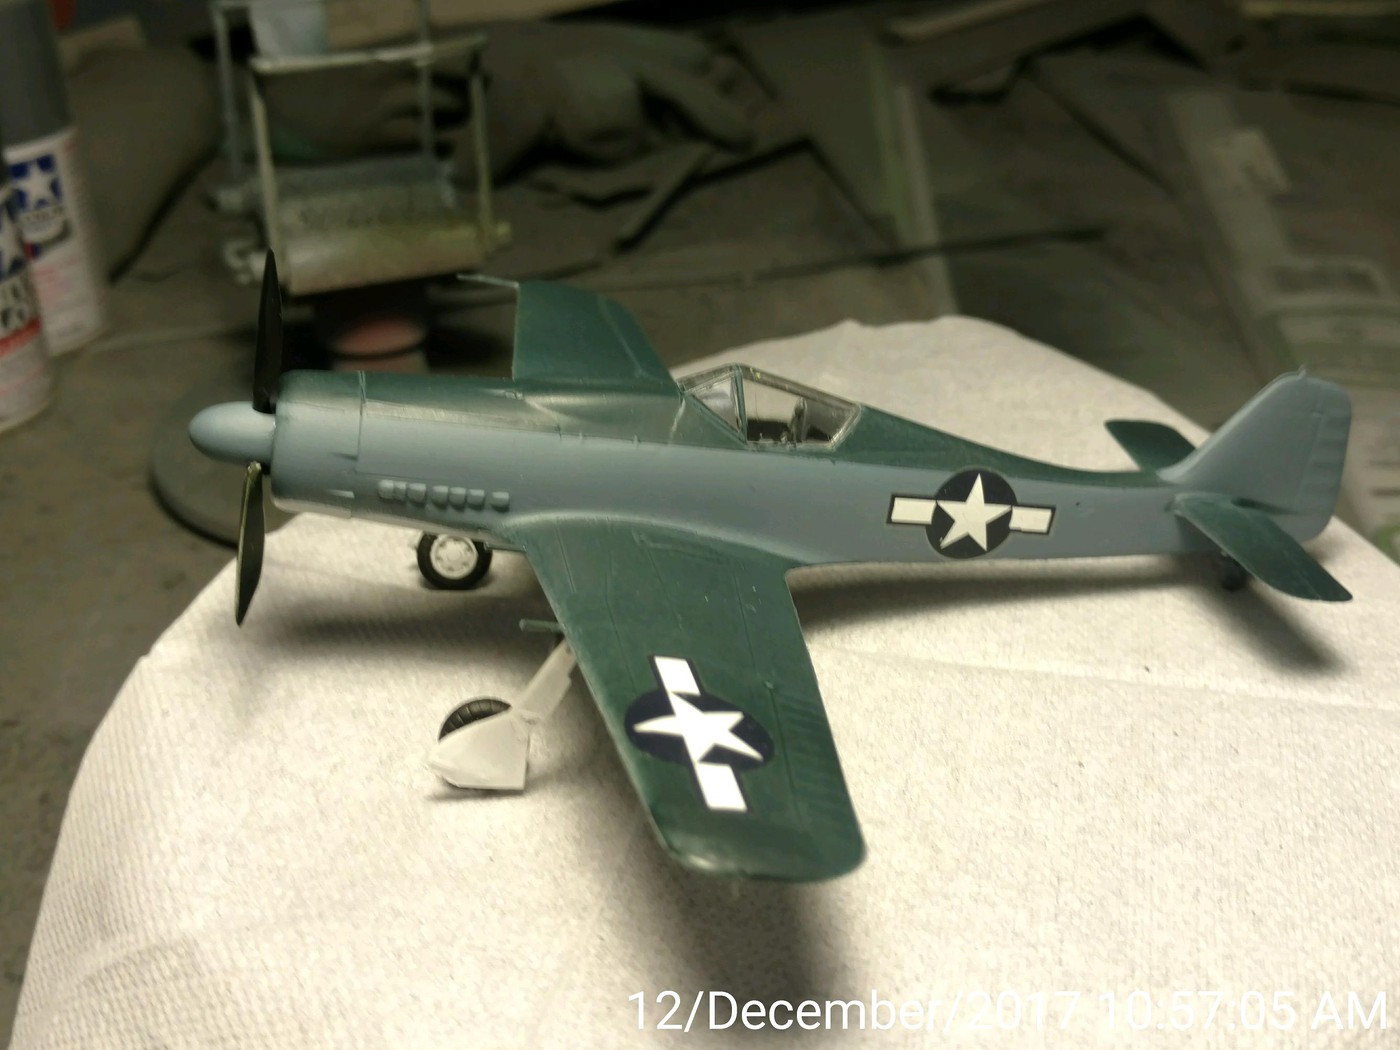
I was unhappy with the stance of the USAF bird, but I got the gear doors on and called it a night.  I woke up this morning to a rather smooth and shiny USN bird, so I began the decalling process.  

When it came time to do the landing gear for the USN bird, I had an epiphany as to what happend with the landing gear on the USAF bird. I had a moment of I'm a model builder dammit, I don't need no stinking instructions and installed them backwards. I fixed this on the USN bird and it looked a lot better.
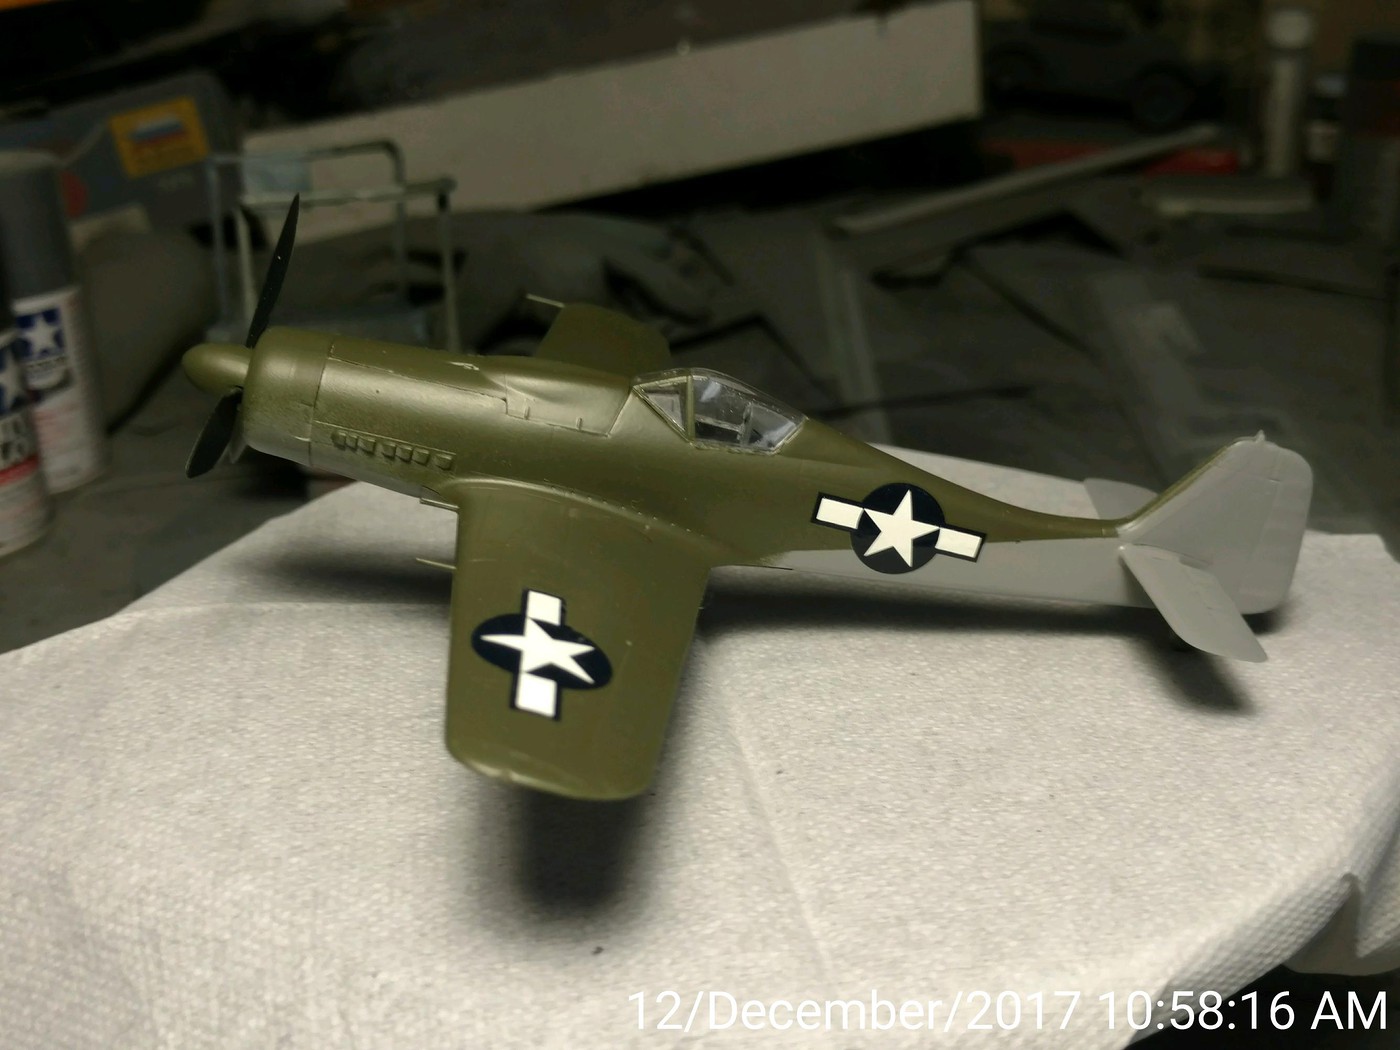
The USAF bird.

Together.

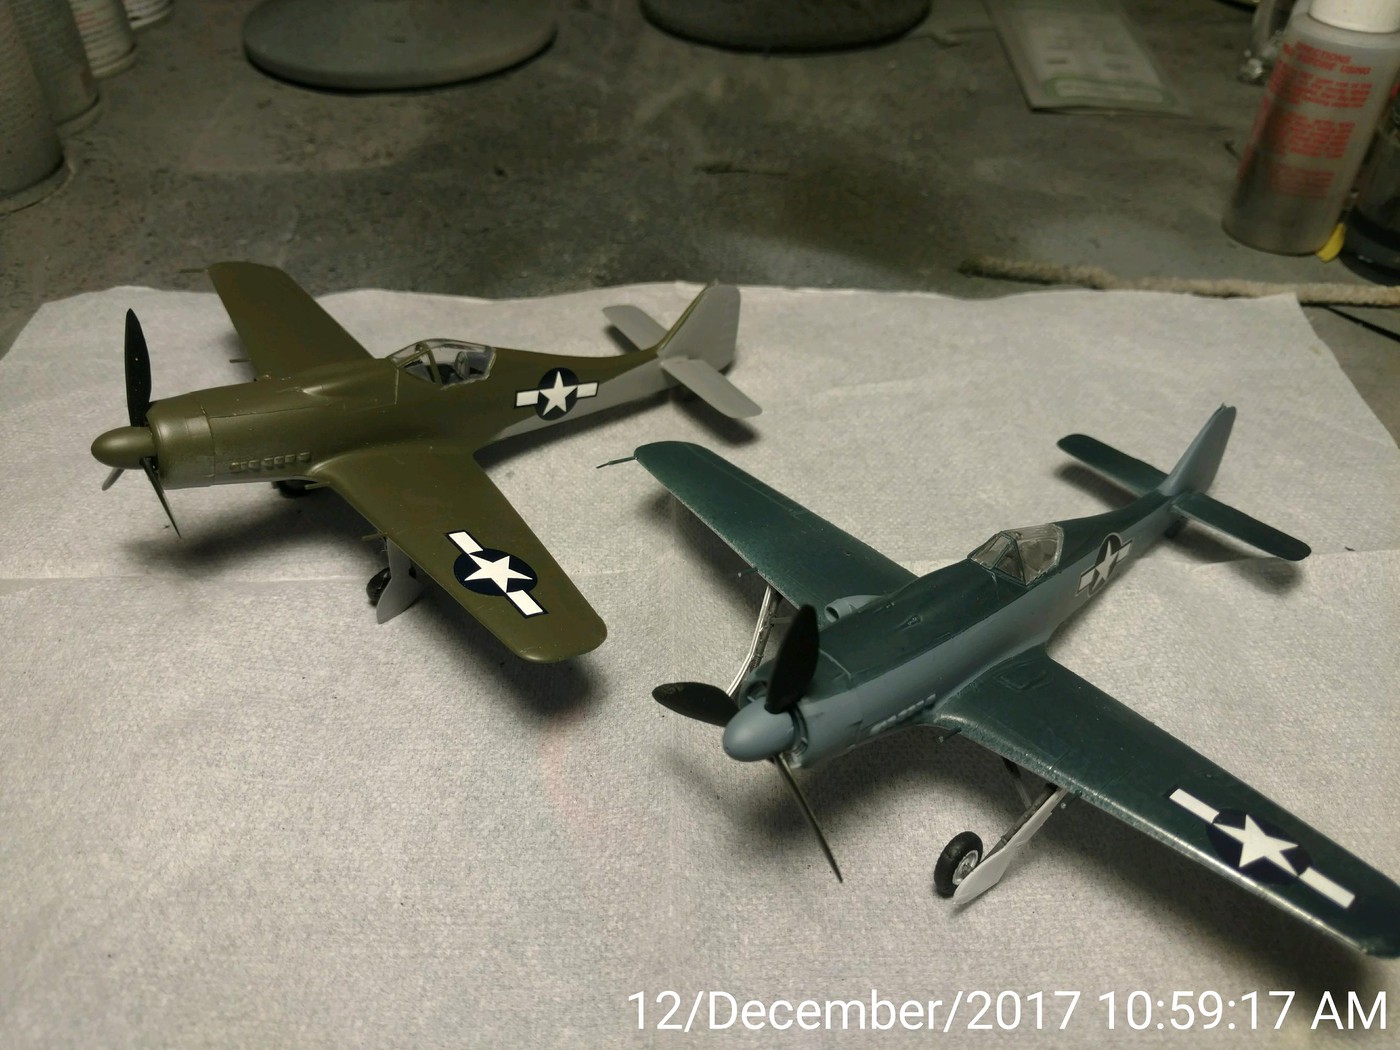
All in all, these aren't bad kits.  Fit wasn't a major issue.  The panel lines are finely molded.  If you want a D-9 for your shelf, these might be a way to go if you come across them cheap.

Tony,

The decals I used were from an old Eagle Strike set for the 357th FG.  I just took the Stars and Bars.  I thought I had the appropriate font decals for the USAF bird, but they were the modern font.  The decals for the USAF bird went on with no problem.  Of the decals for the USN bird, one totally shattered and had to be replaced, two broke into two or three big pieces, and one went on like it should.  The idea came from a series of decals issued by Karaya.  There are six or seven sets in their Captured Butcher Bird series, some are extremely colorful and unique.  The USN bird was base on one that was studied at NAS Anacostia, the USAF bird was based on one that went to Wright Field.  I'll be sitting out Round Four.  Hope to get the Hellcat and Ascender finished.

Buddy- Those who say there are no stupid questions have never worked in customer service.

  • Member since
    April 2005
  • From: Australia
Posted by taxtp on Tuesday, December 12, 2017 6:23 PM
Interesting work on those 190s Bud, where are the decals from ? Cheers Tony

I'm just taking it one GB at a time.

  • Member since
    October 2008
  • From: Georgia
Posted by Rigidrider on Monday, December 11, 2017 9:19 PM

Lewbud... Thank you, Not just for the compliment but for the GB! I really hope There may be some more in the coming year. As far as the Arii/Otaki kits other then a serious lack of pit detail and detail in other areas, The main parts like the fuselage, wings and such, are very nicely rivited and detailed, and Very nicely molded. The man who started the company wanted a nice, inexpensive easy to build kit.He achived that! His whole problem (which drove him out of business) was not quality, but distribution. He couldn't get his kits to the public. I feel in time he would have produced some fine kits in the upper skilled class.

GMorris.... Thank you sir! The Ki44 "Shoki" (Tojo) has always been my favorite WWII Japanese fighter. I guess I just like the looks of it. It had its weaknesses like everyother aircraft, but it also had its strong points. 

Thanks again guys...

Doug

When Life Hands You A Bucket Of Lemons...

Make Lemonade!

Then Sell It Back At $2 Bucks A Glass...

  • Member since
    September 2012
Posted by GMorrison on Monday, December 11, 2017 8:25 PM

Big wows.

The Tojo (?) is really nice, the GPA is one of those models that makes me want to sell my #11s.


All well done.

 Modeling is an excuse to buy books.


  • Member since
    June 2008
Posted by lewbud on Monday, December 11, 2017 7:48 PM

Bufflehead,

My apologies sir!  That is a fine job on an ancient kit.  I plan to rob the decals out of a more recent Tamiya Jeep kit when I get around to building mine.  I hope mine comes out as nice as yours.  Also, let me compliment you on your photography skills as well.  Yours are some of the best pics I've seen.  Which pic would you like for the front page.

Rigidrider,

I know that the Otaki kits tend to get a bad rap, but you built the heck out of that one.  I really like the camo you did.

Now for my misadventures.

Proof of life.

Got to love all that detail in the pit.

First airframe done.

A little over eight hours in and both are ready for primer.

Gloss white on the bottom of the Navy bird. 

Put your mask on, there's going to be a paint fight.  Intermediate Blue is on the way.

I'm so blue. Used Tamiya's Intermediate Blue out of the AS rattle can. Not real happy with the color as it more resembles the Blue-gray used on ac in late 1940-1941.  Unless it did a major color shift from this morning, it's getting repainted with Model Master Int. Blue when I get home from work.

The Air Force bird will be interesting.  The leading edge of the tail is OD, while the tail and rear fuselage up to the trailing edge of the is neutral gray, and the separation line is angled from the tail to the trailing edge.  The Tamiya AS colors for the OD and Neutral Gray are pretty spot on.

Buddy- Those who say there are no stupid questions have never worked in customer service.

  • Member since
    April 2005
  • From: Australia
Posted by taxtp on Monday, December 11, 2017 7:25 PM
Great effort on the GPA and those two Japanese aircraft. Well done to everyone who has participated so far. Cheers Tony

I'm just taking it one GB at a time.

  • Member since
    October 2008
  • From: Georgia
Posted by Rigidrider on Monday, December 11, 2017 4:56 PM

Thanks Griffin! Yeah these littlo ole Arii kits don;t have a ton of parts, but like I said, they are better detailed then some higher priced kits, and are really nice to build. Thanks again...

Doug

When Life Hands You A Bucket Of Lemons...

Make Lemonade!

Then Sell It Back At $2 Bucks A Glass...

  • Member since
    October 2008
  • From: Georgia
Posted by Rigidrider on Monday, December 11, 2017 4:24 PM

Thank you Caveman.... much appreciated!

Doug

When Life Hands You A Bucket Of Lemons...

Make Lemonade!

Then Sell It Back At $2 Bucks A Glass...

  • Member since
    May 2015
Posted by Griffin25 on Monday, December 11, 2017 4:17 PM

Great job and with 24hrs to spare. Impressive! 


Griffin

  • Member since
    March 2008
Posted by Caveman on Monday, December 11, 2017 4:11 PM

Nice paint work.  Looks sharp!  Great job.

  • Member since
    October 2008
  • From: Georgia
Posted by Rigidrider on Monday, December 11, 2017 9:37 AM

Morning all! Just put the finishing touches on mine... So, Here it is...

Very minor wing root seams, no real issue...

Well, That was the abreviated verson... Had lots of fun doing this build! These Arii, /Otaki kits are really nicely detailed for cheap kits... Just a tad bit of pe and some time can turn one of these into a nice build. The rest are the finish pics... choise of "finish pic" is all yours Lewbud. Thanks for a fun build! 

When Life Hands You A Bucket Of Lemons...

Make Lemonade!

Then Sell It Back At $2 Bucks A Glass...

  • Member since
    April 2003
  • From: USA
Posted by keavdog on Monday, December 11, 2017 5:57 AM

Wow - what a nice looking piece.  And in 2 days - you guys kill me!


Thanks,

John

  • Member since
    June 2008
Posted by lewbud on Monday, December 11, 2017 1:36 AM

DasBeav,

Got it! Great job sir!

Keavdog,

Congratulations!  The GPA looks great.  Which pic would you like for the front page?

Eight and a half hours into the build and there are two airframes ready for paint.  I thought the carpet monster had a holiday feast and ate a prop and both of the instrument panels, but I found the prop. I did manage to break both of the RDF loops off the bottom of the fuselages. Will be in primer before bed.

Buddy- Those who say there are no stupid questions have never worked in customer service.

  • Member since
    October 2016
  • From: .O-H-I-O....
Posted by DasBeav on Sunday, December 10, 2017 9:11 PM

First picture, sir.

 Sooner Born...Buckeye Bred.


  • Member since
    July 2006
  • From: San Francisco Bay Area
Posted by bufflehead on Sunday, December 10, 2017 9:05 PM

First, my apologies for not responding to any comments and to the other builds in the GB.  Been really focused on getting this kit done on time! 

And it's done with 90 minutes to spare! 

The kit decals were a b***h!  I should have trusted my instincts and found some better decals in the stash, but I stubbornly stuck with the kit's original thick, obstinate decals that must be 30 yrs old!! Took several applications of Solvaset to get them to somewhat snug down over the ridges all over the vehicle.  That alone consumed 4-5 hrs today and there wasn't much else to do with the kit until the decals were dry.

When the decals were done and coated with Future to protect them I gave the whole model a wash with Flory Black.  At this point it was quite the mess!

Although it takes time, Flory washes clean up nicely and after that  it was just getting all the little details painted, added, adjusted, etc!  All I did to weather it was to dry brush it with a mix of olive/naples yellow oil paint. Here she is all done:

You can see the marred area of the windshield.  I don't know how to fix this quickly so I just left it as is, sorry.  I could have done more to weather it and add some items or figures, but to be honest I am beat and need to call it quits for today.

I'll report back in tomorrow to get caught up on everyone else's builds!


Ernest

Last Armor Build - 1/35 Dragon M-26A1, 1/35 Emhar Mk.IV Female


Last Aircraft Builds - Hobby Boss 1/72 F4F Wildcat & FW-190A8


  • Member since
    June 2008
Posted by lewbud on Sunday, December 10, 2017 4:47 PM

DasBeav,

She looks great!  Which pic would like for the front page?  

KD, 

While kit choice is important, time management skills are even more so.  That's what killed me on the Hellcat.  It's a fairly easy build and that gave me a false sense of security.  I should have been doing the little things like painting the prop and wheels, masking the canopy, etc. while waiting for the putty or paint to dry.  As for kit selection, I've seen some crazy builds get completed in earlier builds. I remember double builds (I attempted a trilpe my first time and failed miserably), a 1/48 Tamiya Lancaster, some Anigrand resin kits, and a couple of Mach 2's so kit selection while important, isn't as necessary as time management.  Just my somewhat humble opinion, your milage may vary.

Bufflehead,

The GPA is looking good.  I have that in my stash and thought about building it.  It's good choice for this build, as is their regular Jeep.  

Now, on to my attempt at Round Three. I'm going to step out and build something I don't normally build, a German aircraft.  Actually, I'm going to build two, with a twist.  At a local contest earlier this fall, I picked up a 1/72 Italeri Flanker and inside the box were two ancient Hasegawa  Fw190 D-9's.  Since they have no decals, and I don't have the paint to do a typical German paint scheme, I'm going to do a couple of what ifs.  Karaya did a series of Captured Butcher Bird decal sheets, so I'm going to steal from them.  One was a captured bird that was sent to NAS Anacostia for study and it was done in the Vought three color blue scheme.  The other was simply OD over gray.  Pics to follow.  Work on the Hellcat continues.

Buddy- Those who say there are no stupid questions have never worked in customer service.

  • Member since
    July 2004
  • From: Sonora Desert
Posted by stikpusher on Sunday, December 10, 2017 4:06 PM

keavdog


I've never done the weekend build - but assume kit choice is paramount.


Bigtime! You want something that goes together easy, fits well, and does not have a complicated finish scheme.

First time out I chose the 1/48 Academy F-16, (a clone of the early Hasegawa Viper kits) which was good for the first two. But being a Thunderbird, did not qualify on item 3. That part dragged me past the deadline. Buildwise it was a perfect candidate.


F is for FIRE, That burns down the whole town!

U is for URANIUM... BOMBS!

N is for NO SURVIVORS...

       - Plankton

LSM


  • Member since
    October 2016
  • From: .O-H-I-O....
Posted by DasBeav on Sunday, December 10, 2017 4:03 PM

Oops forgot a time stamp to prove it...I swear I am trustworthy and a upright citizen.

 Sooner Born...Buckeye Bred.


  • Member since
    October 2016
  • From: .O-H-I-O....
Posted by DasBeav on Sunday, December 10, 2017 4:00 PM

Finished?!?! Technically, it has more decals and needs cleaned up....alot. (Every time I touched it, paint came off) This GB was fun in a masochistic sort of way.

 Sooner Born...Buckeye Bred.


  • Member since
    October 2016
  • From: .O-H-I-O....
Posted by DasBeav on Sunday, December 10, 2017 7:39 AM

Looks great, Bufflehead. I thinking about bidding on one on Ebay. Is it an OK kit?

Keavdog, this is my first go and my first choice of a "Weekend Edition" Eudard Me 110 with over 300 parts would have been a bad choice.

Masking, paint, and decals and this one is finished. Still scared about decals. I am guessing, I will have to dig through the stash of decals.

It was a nice kit and somewhat regret doing it as a GB. It has some nice detail I would have liked to do some "justice" to.

 Sooner Born...Buckeye Bred.


  • Member since
    April 2003
  • From: USA
Posted by keavdog on Sunday, December 10, 2017 6:02 AM

I'm so tired after spending 4 hours on ordnance for my Hasegawa 1/48 F-16 kit, I'm so amazed at how you guys can do a kit over a weekend - and with such quality.  Keep on!

I've never done the weekend build - but assume kit choice is paramount.

Thanks,

John

  • Member since
    July 2006
  • From: San Francisco Bay Area
Posted by bufflehead on Sunday, December 10, 2017 2:12 AM

Hoowee!  Its midnight and the G.P.A is moving right along!

Primered everything with Tamiya NATO Black thinned with Tamiya Lacquer Thinner:

Used the Black & White technique to get a little preshading/highlighting on it:

And finally a coat of Tamiya OD lightened with Dark Yellow:

Before going to bed I gave it a coat of Future in preparation for decals tomorrow, but no pics...sorry, I'm pooped!

Ernest

Last Armor Build - 1/35 Dragon M-26A1, 1/35 Emhar Mk.IV Female


Last Aircraft Builds - Hobby Boss 1/72 F4F Wildcat & FW-190A8


  • Member since
    April 2015
Posted by Mopar Madness on Saturday, December 9, 2017 10:14 PM

That’s a nice clean build.

Chad

God, Family, Models...

At the plate: 1/48 Airfix Bf109 & 1/35 Tamiya Famo

On deck: Who knows!

  • Member since
    July 2006
  • From: San Francisco Bay Area
Posted by bufflehead on Saturday, December 9, 2017 9:27 PM

Almost 24 hrs in and assembly of the G.P.A. is done.  Its missing the passenger side headlight because the guard mysteriously disappeared after cleaning up both guards....Confused.  I spent over three hours looking for it, it not for that there would be paint on it by now. Bang Head.  Also I marred the windshield because there was glue on my finger when I picked the jeep looking for the guard!  I'll figure out how to deal with that once I get some paint on the vehicle.

Hopefully the guard will miraculously appear before the end of the build!

Ernest

Last Armor Build - 1/35 Dragon M-26A1, 1/35 Emhar Mk.IV Female


Last Aircraft Builds - Hobby Boss 1/72 F4F Wildcat & FW-190A8


  • Member since
    April 2015
Posted by Mopar Madness on Saturday, December 9, 2017 2:16 PM

Buff - Great progress in a short time!

DB -  Nice detail on the engine!


Chad

God, Family, Models...

At the plate: 1/48 Airfix Bf109 & 1/35 Tamiya Famo

On deck: Who knows!

  • Member since
    October 2016
  • From: .O-H-I-O....
Posted by DasBeav on Saturday, December 9, 2017 1:56 PM

 First minor setback. The parts I have don't match the instructions. Looks like I have to cut a piece off and drill a hole myself to fit the prop....Sad

 Sooner Born...Buckeye Bred.


  • Member since
    October 2016
  • From: .O-H-I-O....
Posted by DasBeav on Saturday, December 9, 2017 9:37 AM

Sorry, no pictures of the "pit". Forgot to take them in the rush. I had to handbrush because some people do not like the sound of my Harbor Freight "leaky" air compressor at 11 o'clock. The fuselage fit quite well, a little tight. No putty needed. I do have to clean up a little glue...It was dark in the "Cave" and I was so tired. The pushrods got clipped...couldn't find two pieces. Still not a bad kit for being old and probably hasn't seen light in 30 years.

 Sooner Born...Buckeye Bred.


  • Member since
    April 2015
Posted by Mopar Madness on Saturday, December 9, 2017 6:55 AM

I really like those markings!

Chad

God, Family, Models...

At the plate: 1/48 Airfix Bf109 & 1/35 Tamiya Famo

On deck: Who knows!

JOIN OUR COMMUNITY!

Our community is FREE to join. To participate you must either login or register for an account.

SEARCH FORUMS
FREE NEWSLETTER
By signing up you may also receive reader surveys and occasional special offers. We do not sell, rent or trade our email lists. View our Privacy Policy.