SEARCH FINESCALE.COM

Enter keywords or a search phrase below:

Scratch Built 1/6th scale M26 Pershing project

62258 views
106 replies
1 rating 2 rating 3 rating 4 rating 5 rating
  • Member since
    July 2008
  • From: Florida
Posted by Railfan 233 on Thursday, August 5, 2010 4:17 PM

Let me take a swing at bat: an all-metal Panzer IV?

(Please post the link here so I can find it quickly)


http://i6.photobucket.com/albums/y211/razordws/GB%20Badges/WMIIIGBsmall.jpgRed, White, and YOU! group build of 2010

  • Member since
    April 2005
Posted by armourguy on Thursday, August 5, 2010 3:12 PM

Thanks guys, I have finished creating the tank's Gallery web page. It has all of the diorama images posted, and a section for the construction archive. http://www.eastcoastarmory.com/m26/m26.htm


The completion of the gallery marks the end of the project. Beofore I close the book on the M26 Project I would like to give special thanks to Plastic Panzers Tim. If it wasn't for Tim's hull this project would not be here today.

I will be posting my next project within one week, I'm not going to say what it is. I will say it's German, Tracked, and will not be made out of plastic

  • Member since
    January 2008
  • From: Bournemouth UK
Posted by Bodge on Monday, August 2, 2010 3:44 PM

Awsome mate just awsome.Yes

  • Member since
    March 2006
Posted by simpilot34 on Friday, July 30, 2010 11:51 PM

Armour those are some stunning pics!!!! Looks like you had fun setting everything up!! Looking forward to your next endeavour!!! btw what is it going to be?

Cheers, Lt. Cmdr. Richie "To be prepared for war, is one of the most effectual means of preserving the peace."-George Washington
  • Member since
    July 2008
  • From: Florida
Posted by Railfan 233 on Friday, July 30, 2010 1:46 PM

Great photos. I have a question, though: Where did you get the 1/6 scale FW-190 from?

 I love that M-1 Grand in the last photo (Yep, just mount a firing cannon on your tanks, and you'll have a nice, free security plan for as long as you wantWink)

I can't wait to see the next tank


http://i6.photobucket.com/albums/y211/razordws/GB%20Badges/WMIIIGBsmall.jpgRed, White, and YOU! group build of 2010

  • Member since
    March 2010
Posted by Bocks Suv on Friday, July 30, 2010 1:21 PM

Those 30-06 shells look like they'd fit perfectly. Mount your tanks with RC controls and a light; any home invasion dikwads will think "Oh how cute a toy tank." Then BLAMMO!  No left arm.    

  • Member since
    April 2005
Posted by armourguy on Friday, July 30, 2010 12:52 PM

I was able to take out the tank for some out door diorama images.

I will now be creating the tank's gallery webpage. After the webpage is complete I will be giving the shop a good sweeping, then I will be able to start the next tank :D

  • Member since
    October 2009
  • From: Fort Collins, Colorado, USA
Posted by Njal Thorgeirsson on Thursday, July 29, 2010 1:13 PM

armourguy

 Njal Thorgeirsson:

Since you're definitely not short of praise, I hope you don't mind if I toss in a bit of skepticism. I'd hate to build a gargantuan tank (on which I would spend thousands [or at least more than a thousand] of dollars), and then neglect to add a single scratch, chip, or speck of dust. Of course that's your own personal opinion, but to me, the fundamental aspect of armor modeling is the addition of weathering and wear. Yes, you've done some fine shading, but it still looks like it just rolled off of the assembly line- well, it does besides the rust on the tracks, which looks a bit out of place. Some might feel that the size of the tank compensates for the lack of depth in the paint job, but I for one do not.


Yes I do mind with your statements. First weathering is a matter of taste. I have weathered and scratched the tank to my own needs and desired levels. If my scratches are not enough for you’re liking, that is simply your opinion. If you like to add more scratches and dirt to your tank models that's your personal choice, and you are free to do so. The way I build and paint my models is my choice and taste which apparently differs from yours. however to say that my build "lacks depth" simply because it doesn’t resemble one of your builds is condescending.   


I didn't say it lacks depth because it doesn't resemble one of my builds, nor did I say the build itself lacks depth. I know that no one's models are perfect- especially my own. I never even suggested that you should change anything about your process, just because I would have done it differently. As I said in my original post, it is of course a matter of opinion, so I gave my opinion- and I never said my opinion was correct, or that it was any better than your own. I know that for me, people's criticism, even if I disagree with it, is greatly appreciated, and it usually helps me improve aspects of my models that I never knew needed improvement. It was only food for thought, and no offense was indended to be taken.

FACEBOOK: Ryan Olson Thorgeirsson for pics of all my builds.

"There are two kinds of people in this world; those who put fries/chips on their sandwiches, and those who don't enjoy life."

PhotobucketPhotobucket

  • Member since
    July 2003
  • From: On my kitchen counter top somewhere in North Carolina.
Posted by disastermaster on Thursday, July 29, 2010 2:32 AM

Ponder Here's my take on it.

 Consider that a model is and can only be built to represent a specific "minute in time" (since it obviously cannot be built as a movie). With that said, this beautifully done creation has evidently been built to honor a nearly new example of American industrial technology from that era.


 I'm a huge advocate of realism and weathering but I always take into consideration what point in time any model has been built to represent.

 If he had built this tank and beat it all up while pronouncing it as a "new tank"; well, that would make no more sense than giving it a pristine finish and pronouncing it as a vehicle that had been through many campaigns.

Hear YeMy hat's off to Armorguy for his "off the chart talent" and his sharp eye for detail.

What am I doin' here? I should be in bed.

  http://i210.photobucket.com/albums/bb252/Ronnies_Pets/smileys%20emoticons/2007-05-03_160719_cantsleep.gif

http://i20.photobucket.com/albums/b232/gluetank/Decorated%20images/th_T1-4-copy.jpg

Sherman-Jumbo-1945

"I was so much older then, I'm younger than that now"


  • Member since
    March 2010
Posted by Crapgame on Thursday, July 29, 2010 1:19 AM

EZ armorguy EZ..

Weathering is a "fine line".. I think your pershing looks fantastic. I have seen many models that are "over weathered".. People tend to forget that part of weather is rain. Which will clean up a vehicle quite a bit except tracks and wheels. No vehicle gets dirty and than just stays dirty, it's a cycle of dirty and sort of clean ( I know I have to park my car on the street :)

Excellent work .. By the way, this guy makes a boat load of very cool 1/6th Tiger parts that I used on my project for those unaware..

Crap Game

  • Member since
    April 2005
Posted by armourguy on Wednesday, July 28, 2010 11:13 PM

Njal Thorgeirsson

Since you're definitely not short of praise, I hope you don't mind if I toss in a bit of skepticism. I'd hate to build a gargantuan tank (on which I would spend thousands [or at least more than a thousand] of dollars), and then neglect to add a single scratch, chip, or speck of dust. Of course that's your own personal opinion, but to me, the fundamental aspect of armor modeling is the addition of weathering and wear. Yes, you've done some fine shading, but it still looks like it just rolled off of the assembly line- well, it does besides the rust on the tracks, which looks a bit out of place. Some might feel that the size of the tank compensates for the lack of depth in the paint job, but I for one do not.

Yes I do mind with your statements. First weathering is a matter of taste. I have weathered and scratched the tank to my own needs and desired levels. If my scratches are not enough for you’re liking, that is simply your opinion. If you like to add more scratches and dirt to your tank models that's your personal choice, and you are free to do so. The way I build and paint my models is my choice and taste which apparently differs from yours. however to say that my build "lacks depth" simply because it doesn’t resemble one of your builds is condescending.   


  • Member since
    October 2009
  • From: Fort Collins, Colorado, USA
Posted by Njal Thorgeirsson on Wednesday, July 28, 2010 10:01 PM

Since you're definitely not short of praise, I hope you don't mind if I toss in a bit of skepticism. I'd hate to build a gargantuan tank (on which I would spend thousands [or at least more than a thousand] of dollars), and then neglect to add a single scratch, chip, or speck of dust. Of course that's your own personal opinion, but to me, the fundamental aspect of armor modeling is the addition of weathering and wear. Yes, you've done some fine shading, but it still looks like it just rolled off of the assembly line- well, it does besides the rust on the tracks, which looks a bit out of place. Some might feel that the size of the tank compensates for the lack of depth in the paint job, but I for one do not.

FACEBOOK: Ryan Olson Thorgeirsson for pics of all my builds.

"There are two kinds of people in this world; those who put fries/chips on their sandwiches, and those who don't enjoy life."

PhotobucketPhotobucket

  • Member since
    July 2003
  • From: On my kitchen counter top somewhere in North Carolina.
Posted by disastermaster on Wednesday, July 28, 2010 8:33 PM

DAMN.....

http://i613.photobucket.com/albums/tt213/sekacorn/469_jaw_dropping.gif

beyond description.

http://i20.photobucket.com/albums/b232/gluetank/Decorated%20images/th_T1-4-copy.jpg

Sherman-Jumbo-1945

"I was so much older then, I'm younger than that now"


  • Member since
    April 2004
Posted by Jon_a_its on Wednesday, July 28, 2010 8:28 AM

Jaw dropping work,

but,  so on the shelf behind, r-to-l, 3 jeeps & a ???, eh?

East Mids Model Club 32nd Annual Show 2nd April 2023

 http://www.eastmidsmodelclub.co.uk/

Don't feed the CM!


  • Member since
    July 2008
  • From: Florida
Posted by Railfan 233 on Tuesday, July 27, 2010 10:10 PM

I can't wait to see your next tank. (Can you please send me a PM or something to remind me about it? I always forget about different up-coming threds, untill they are 1/2 way done)


http://i6.photobucket.com/albums/y211/razordws/GB%20Badges/WMIIIGBsmall.jpgRed, White, and YOU! group build of 2010

  • Member since
    March 2006
Posted by simpilot34 on Tuesday, July 27, 2010 9:41 PM

Armour that is stunningly gorgiously massive!!!!!!!!!! WHat a fine fine finish!!!!!!!!Bow DownBow DownBow DownToastToastToast It has been a pleasure following along on your build and am looking forward to seeing what's next!!!!!

Cheers, Lt. Cmdr. Richie "To be prepared for war, is one of the most effectual means of preserving the peace."-George Washington
  • Member since
    April 2005
Posted by armourguy on Tuesday, July 27, 2010 9:09 PM

Railfan 233

The nest up-date is the last one!?

Oh, man. this was one of my favorite threds,too. (Why must every good thing end too soon?)

don't worry I got another big project on deck next ;)   

I have added the last of the detail parts, and the detail part painting. Which means that the M26 is now complete and ready for action!!


The 50.cal tripod and the tools were completed and weathered. They have all been mounted into their places in the fenders.


There are a few parts of equipment that are missing; these would include the fire extinguisher, a small stove, jerry can, cloth buckets, bags, and sleeping bags. most of the parts can be found as aftermarket parts and can easily be added in a few minutes.


The M26 had a 30.cal tripod mounted in the front left hand fender. The only tripod that I have on hand is the larger 50.cal tripod that came with the Dragon 50.cal kit. The larger tripod doesn't fit in the front fender but I was able to store the tripod in the rear fender box.


The inner hatches were all painted and the panzerwerk periscopes have been installed


The tank's spare track was inverted. I originally had the chevrons on the same side as the guide teeth. This was done because I was working with an image of an M26 that had the same arrangement of spare track, only the track was the rubber chevron T84E1.


After doing more research I found that this configuration was only done with the T84E1 track because the track didn't fit on the spare track rack if they were placed the normal way with the guide teeth facing towards the track rear. All M26s with the T80E1 track had the spares stored in the standard position with the rear track pads facing outwards.


The last part that was added was the search light mount cover and chain.


Tomorrow I'll take some long awaited out door shots. After the images are taken I can create the M26's gallery webpage. Once the gallery is complete I can clean the shop, and then start the next 1/6th scale tank.


  • Member since
    December 2008
  • From: Northern Va
Posted by psstoff995's lbro on Tuesday, July 27, 2010 8:41 PM

Great work as usual armorguy! 

Bow DownBow Down

-Will young modeler Test fit master
  • Member since
    July 2008
  • From: Florida
Posted by Railfan 233 on Tuesday, July 27, 2010 1:13 PM

The nest up-date is the last one!?

Oh, man. this was one of my favorite threds,too. (Why must every good thing end too soon?)


http://i6.photobucket.com/albums/y211/razordws/GB%20Badges/WMIIIGBsmall.jpgRed, White, and YOU! group build of 2010

  • Member since
    April 2005
Posted by armourguy on Tuesday, July 27, 2010 12:57 PM

Thanks Guys, I'm aware that the spare track is inverted. I did this on purpose after I saw this image in the M26 walk around book of a restored M26 with the T84 E1 track. I liked the look of the exposed chevrons better than the reverse rubber pads. The reason why the center tooth is missing is because where the middle tooth would go is where the spare track get secured to the spare track rack via a bracket mounts and bolts  

I;m curently adding the finishing touches to the tank's tools. The next time I post the tank will be finished!!. Cool

  • Member since
    March 2006
Posted by simpilot34 on Tuesday, July 27, 2010 11:03 AM

Armour , that is some exquisite work!!!! Beautiful!!!Toast However I have a question bout the spare track link, the middle guide teeth seem to be missing and the rest of them are upside down. Aren't they suppose to be pointing up on the rubber pad side?

Cheers, Lt. Cmdr. Richie "To be prepared for war, is one of the most effectual means of preserving the peace."-George Washington
  • Member since
    July 2008
  • From: Florida
Posted by Railfan 233 on Tuesday, July 27, 2010 10:41 AM

That M2 Browning .50 is one of the main reasons why I want to get into 1/6 scale armor. I love the detail on that thing.

I love all the detail. Great work (I really got to get some of those Browning .50s)


http://i6.photobucket.com/albums/y211/razordws/GB%20Badges/WMIIIGBsmall.jpgRed, White, and YOU! group build of 2010

  • Member since
    January 2007
Posted by the doog on Tuesday, July 27, 2010 7:44 AM

A real tour-de-force of modeling, armorguy. Outstanding and impeccable work.

  • Member since
    April 2005
Posted by armourguy on Monday, July 26, 2010 11:46 PM

Thanks guys, The tracks streched out are about 6 and a half feet long. Each track is made out of 72 links, eack link is made out of 5 resin parts and two steel rods, and each resin part was casted by myself.  

The tank is now 98% complete,


I completed the tank's 50.cal MG. For the 50.cal I again used the Dragon M2HB 50.cal plastic kit. I did the same modifications to the kit that I did when I built the 50.cal for my last M4 Sherman.


These mods would include adding a compression spring to the charging handle,


Removing the molded in nubs on the feed tray with a wire brad. (the molded in nubs are not adequate in securing the feed tray to the gun's receiver.


and the wrench slits added to the barrel.


Unlike the Sherman I will use the tank's tripod. The tripod will be stowed inside the tank's fender boxes.


The Gun was painted / weathered and mounted to the cradle. On the gun's handles I wanted them black to replicate the black Bakelite that was used on weapon grips of the time. 


As I stated on my M4 Sherman post the 50.cal kit gives you an ammo belt length that is made out of non flexible plastic. The belt was not used so currently I don't have any ammo for my gun. Once I find a DID ammo belt. I can add it to the ammo tray with tracers. 


In addition to the 50.cal detailing I also added the tank's fuel and fluid caps, with lock pin and retention chains. The caps themselves are fabricated out of turned Aluminum.


Retention chains were also added to the tank's tow hitch,


and the the head light guards,


The travel lock cushion pads were also painted, These pads are molded into the resin casting, on the real tank they add some cushion preventing the main gun from getting scratched.


Finaly the tank's spare track was assembled and installed.


All that remains now is the tank's tools, and to paint the periscopes. Then I will be able to place a nice done stamp on this model :D. 

  • Member since
    April 2003
  • From: Newfoundland, Canada
Posted by rodc on Sunday, July 25, 2010 6:47 PM

Wow.....wow.....wow........unbelievable work!  Good lord, the wife grumbles because I build 1/48 scale planes and 1/350 ships.  I think I will show here this thread and tell her I think I am going to take the leap into 1/6 scale..........ha, ha, ha.........that should get me evicted to the 1/1 scale doghouse!

Great work!  Really enjoyed following your progress!

RODC

  • Member since
    July 2008
  • From: Florida
Posted by Railfan 233 on Sunday, July 25, 2010 7:53 AM

Thanks for the kit recomendation. I'll start getting prices for the Dragon kits, and I'll go from there.

Exelent work.


http://i6.photobucket.com/albums/y211/razordws/GB%20Badges/WMIIIGBsmall.jpgRed, White, and YOU! group build of 2010

  • Member since
    March 2006
Posted by simpilot34 on Saturday, July 24, 2010 11:11 PM

Bow DownBow DownBow DownWOW what a looker!!!! Stunning work mate!!! Do you have any shots of you assembling the tracks? How long are they stretched out on the floor???

Cheers, Lt. Cmdr. Richie "To be prepared for war, is one of the most effectual means of preserving the peace."-George Washington
  • Member since
    April 2005
Posted by armourguy on Saturday, July 24, 2010 10:58 PM

Railfan 233

Thanks for the link. I've always been interested in 1/6 scale tanks, because I like the detail I've seen in them (I collect 1/6 scale wepons and equipment, and seeing how some rifles I got could possibly fire real 1/6 scale ammo, I have been drooling over how much I could possibly add to the adverage tank)

Do you, by any chance, have any tips you could pass on to me (a 16 year old teen-ager) when it comes to getting a 1/6 scale armored vehicle?

Do you also have any reccomendations for a good first kit in this scale?


Thanks guys. Railfan, when it comes to 1/6th scale kits there are a few options. Besides being large, most of the 1/6th scale kits can be expensive, with aftermarket parts the price can go up further. 

The easiest 1/6th scale kits that I can recommend are the 1/6th kits from Dragon. They have several soft skin vehicles, and artillery pieces. The beauty about these kits is that they are very simple to put together, and are nice kits built OOB. They are probably the most cost effective kits on the market. 

If you are looking for something a bit larger there is an ABS plastic kit of a SDKFZ 250. If you want something American the only mass produced plastic tank that requires little scratch building or aftermarket parts is the 1/6th scale M5 Stuart tank from 21st century. These have been out of production for some time, but can still be found on ebay.

There are also several other kits on the market made out of metal and rotomolded plastic. These kits are for the more experienced model builder, and I don't recommend these models for a 1/6 scale beginner.  


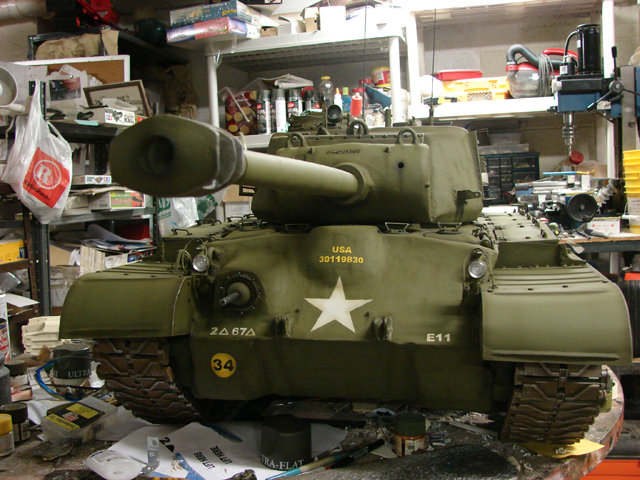
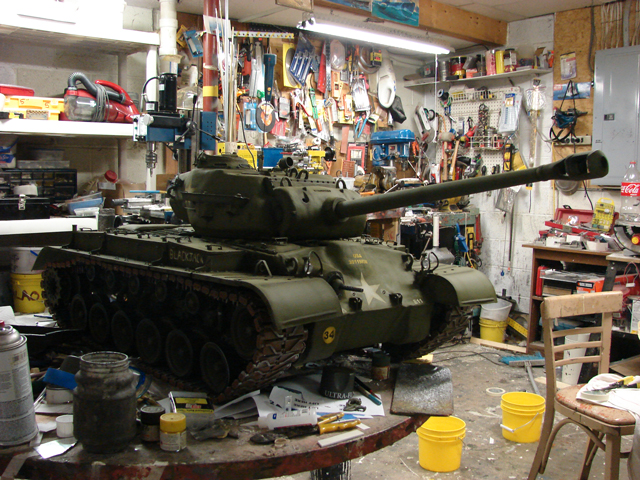
I have completed more of the model.

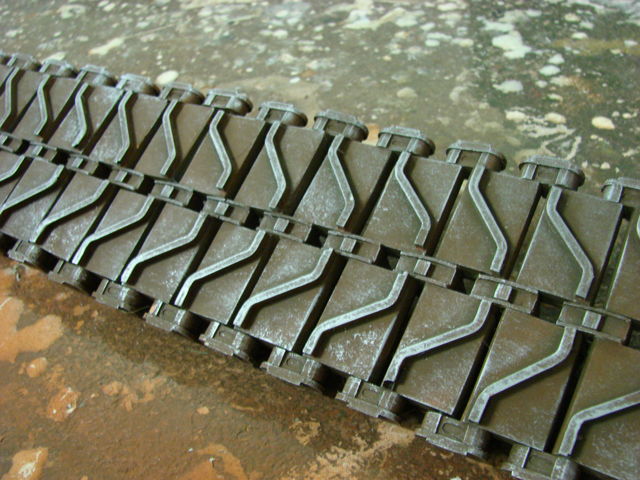
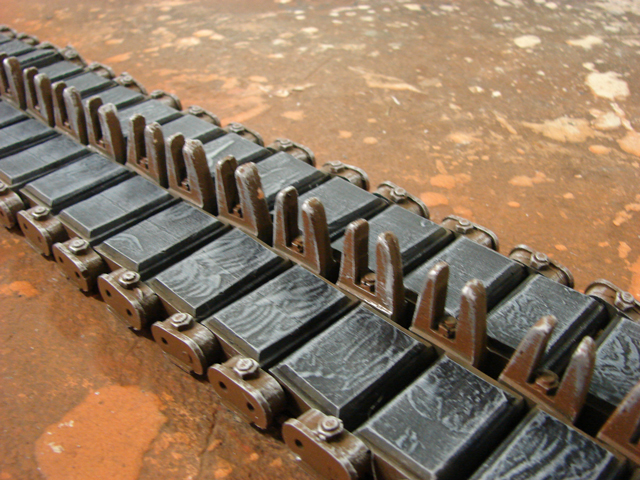
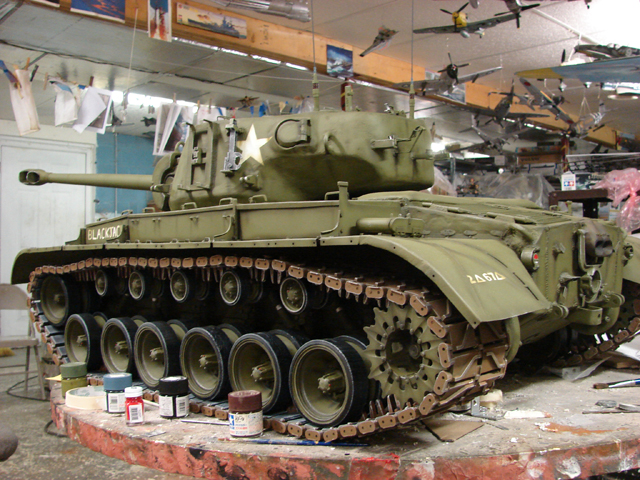
The tank's tracks has been assembled and painted.

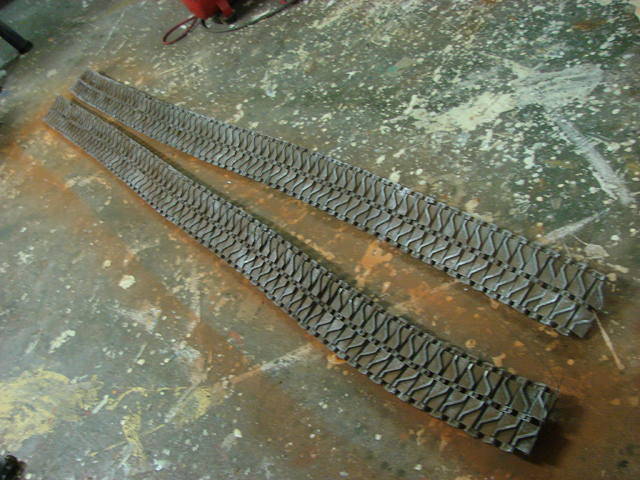
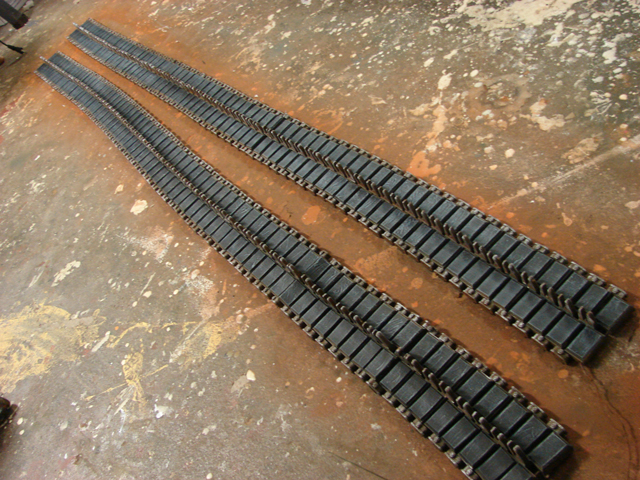
On the real tracks the track's exterior is steel, and the inner portion is rubber clad. This detail was molded in and painted into the tracks

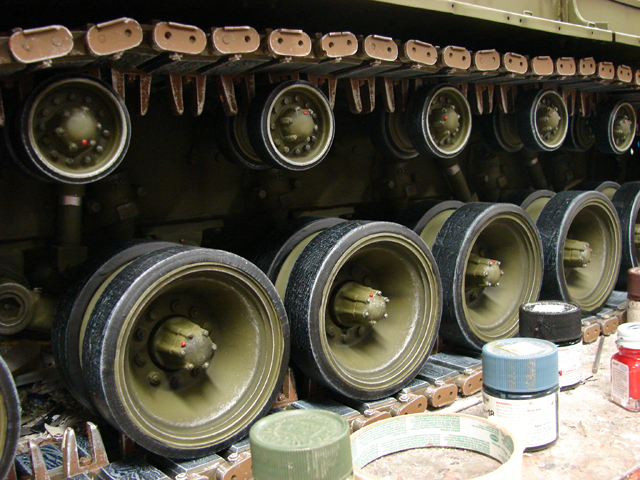
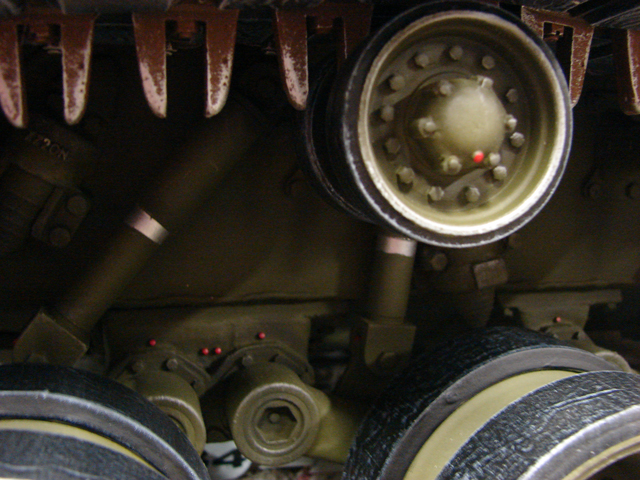
The tank's road wheels have been painted and weathered. Also all of the grease fittings on the road wheels and suspension were painted in red.

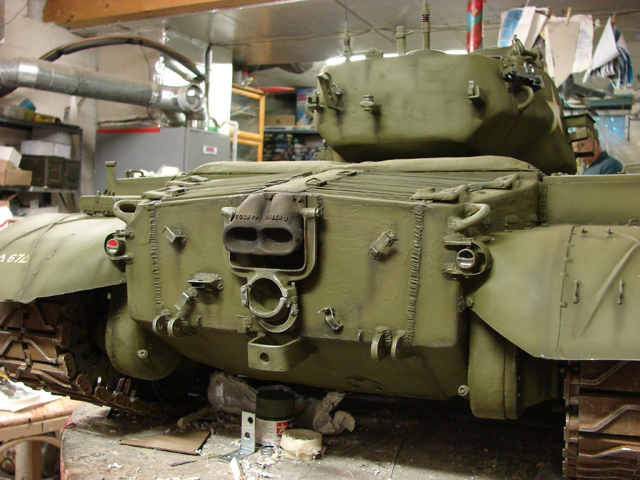
The tank now sits on its own suspension and it's own weight.

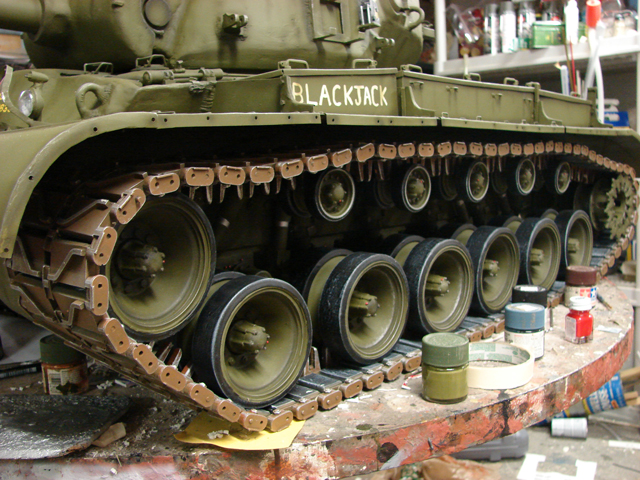
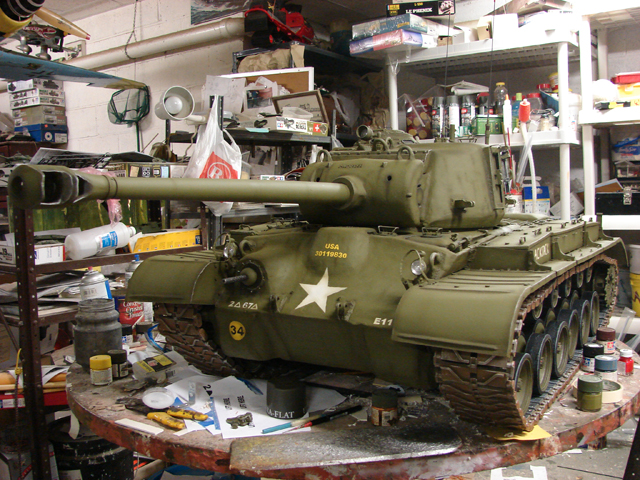
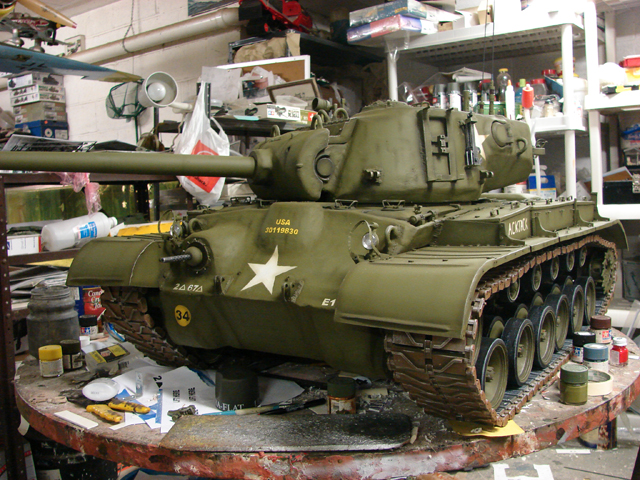
With the tracks out of the way I was able to finish off many of the small paint details.

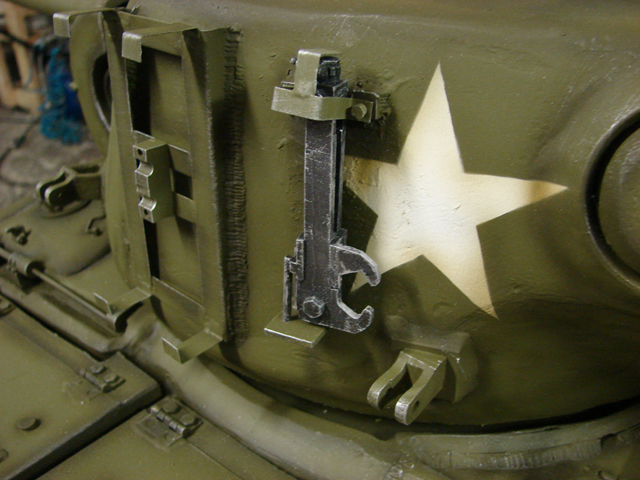
These would include the red fire extinguisher handle

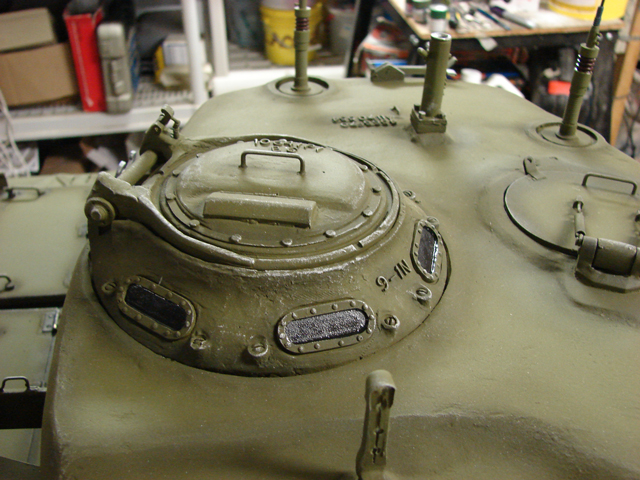
The commander’s copula periscopes.

The tail lights

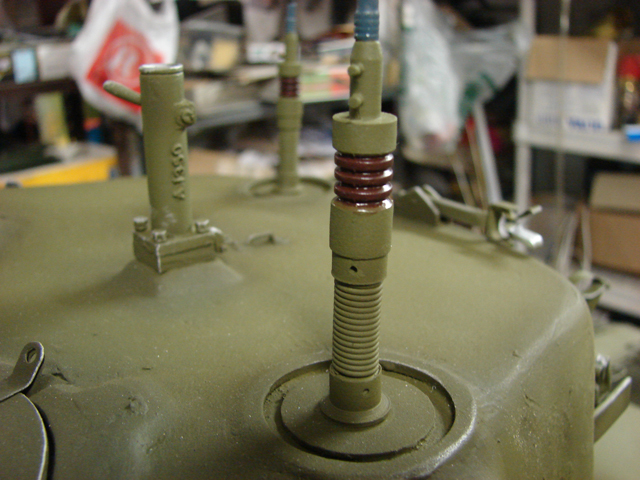
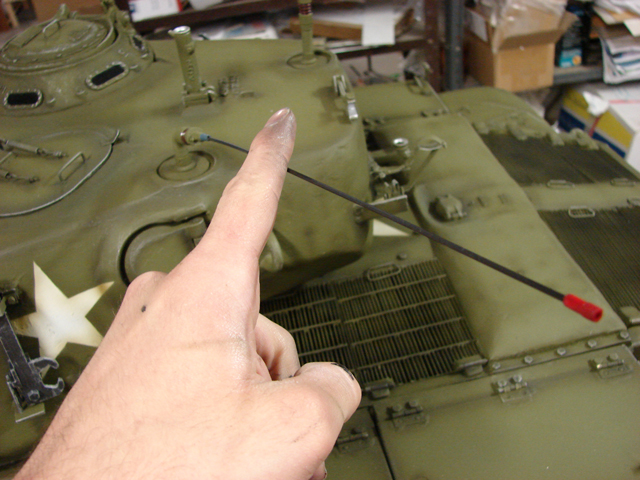
the Mp-48 spring antenna base insulator, and antenna rod.

The bow 30.cal MG

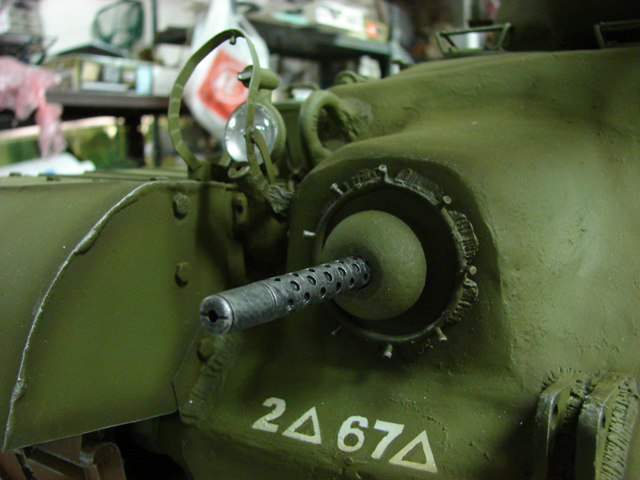
and the track tension ratchets

All that remains now to finish the tank is the spare track, chain work, tools, fuel caps, and the 50.cal. More to come soon.


  • Member since
    March 2006
Posted by simpilot34 on Monday, July 19, 2010 9:28 AM

WOW she's really coming to life now!!!! BEAUTIFUL!!!!Toast

Cheers, Lt. Cmdr. Richie "To be prepared for war, is one of the most effectual means of preserving the peace."-George Washington
JOIN OUR COMMUNITY!

Our community is FREE to join. To participate you must either login or register for an account.

SEARCH FORUMS
FREE NEWSLETTER
By signing up you may also receive reader surveys and occasional special offers. We do not sell, rent or trade our email lists. View our Privacy Policy.