SEARCH FINESCALE.COM

Enter keywords or a search phrase below:

Bronco Pzkpfw I Ausf. F VK 18.01

19488 views
141 replies
1 rating 2 rating 3 rating 4 rating 5 rating
MrT
  • Member since
    December 2010
Posted by MrT on Sunday, May 11, 2014 6:43 PM

I'm liking this little panzer.

Terry

  • Member since
    July 2006
  • From: New Jersey
Posted by redleg12 on Sunday, May 11, 2014 7:32 PM

All that great inside work and it will be so hard to see....sadness....nice to see the hull assembly moving along.

Rounds Complete!!

"The Moral High Ground....A Great Place to Emplace Artillery."

  • Member since
    January 2007
Posted by the doog on Monday, May 12, 2014 7:51 AM

That's gorgeous, BIll! All neat and tidy! A great start!

  • Member since
    July 2004
  • From: Texas
Posted by wbill76 on Monday, May 12, 2014 12:56 PM

Thanks Terry!

Mike

I hear you there...but if you pop the turret off and/or use a dental mirror through the side hatches, it's all there! Wink

Karl

thanks for the comments as well. Almost to the exterior paint stage! Beer
  • Member since
    July 2004
  • From: Texas
Posted by wbill76 on Sunday, May 18, 2014 4:40 PM

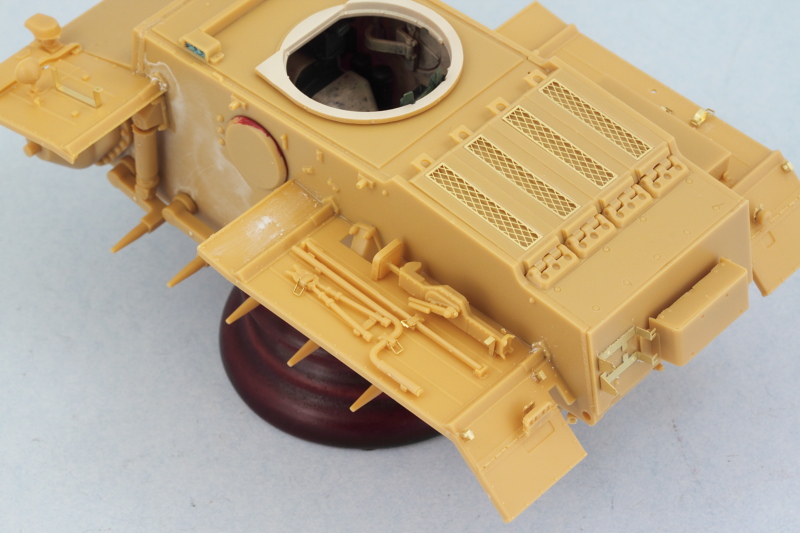
Made some solid headway on the remaining details on the pocket Tiger, although as usual I thought I would get further along than I did because this little kit is deceptive in the amount of time it takes to assemble all the little detail parts and get things just so. Part of that is the need to assemble a little bit, let the glue set, then come back and assemble some more. It means a lot of jumping around to different areas and I'm rapidly running out of those, so there was more 'wait' than 'hurry' this time around.

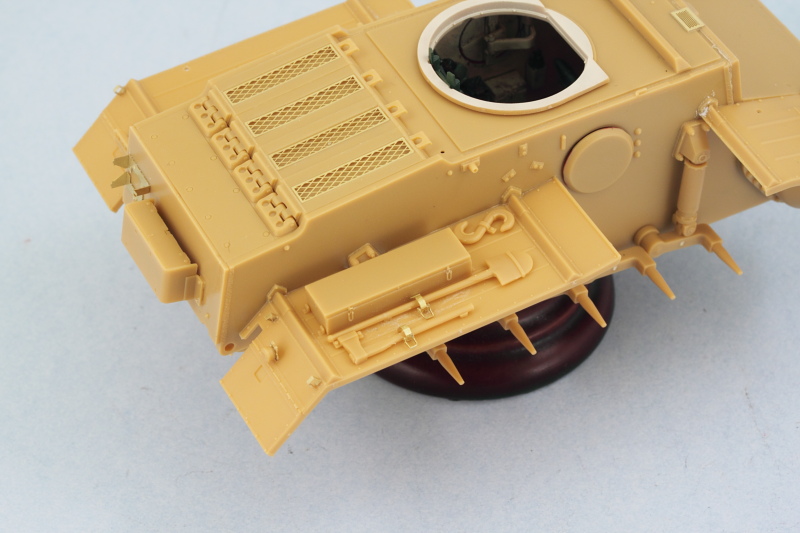
On to the fun! Progress continued on the fenders, I cleaned up all the necessary tools, assembled the boxes, and the jack. Bronco has you assemble two stowage boxes out of 6 parts each...4 sides, top, and bottom, and have to say I'm not a fan of that approach. I got the large one together pretty easily but the smaller one didn't play nice at all...and after checking references, it doesn't appear either of those boxes were commonly used in the field and only show up on the 'factory yard' photos...so I ditched them. This has the added benefit of also showing off the tools on the left side which otherwise would've been covered up by the larger box. The tools fit very tightly together on the left fender so I used the Bronco-supplied PE clamp handles and didn't replace the clamps completely as test fits showed that my Griffon clamps were larger and wouldn't work in the space available on this fender. Some putty filled the mount hole for the smaller box that I'm not using. Tools are only dry-fit for now and will be detailed separately.  

The right side fender got more attention. Bronco has the clamp for the shovel in the wrong spot according to the layout shown in Panzer Tracts 1-2, so I shaved down both it and the axe and replaced their clamps with Griffon PE clamps. The clamps are closed and the handles of both tools can be carefully slid in and out, so I can detail the tools separately off the vehicle and install permanently later.

The last little remaining details for the hull were added in the form of the PE hooks for the tow cable mounts, the side hatch grab handles, and the antenna base. The antenna base was drilled out to prep it for an RB brass antenna later on, the kit supplied item is too short for a standard German antenna. I had planned to fit tow cables since the kit doesn't provide them but the PE hooks don't appear to be sturdy enough for me to carry through on that. In hindsight, these would've been better off removed and some strip brass used to create a stronger hook but once the fenders were fitted, getting at the molded on ones to remove them is near impossible...so no cables for this baby.

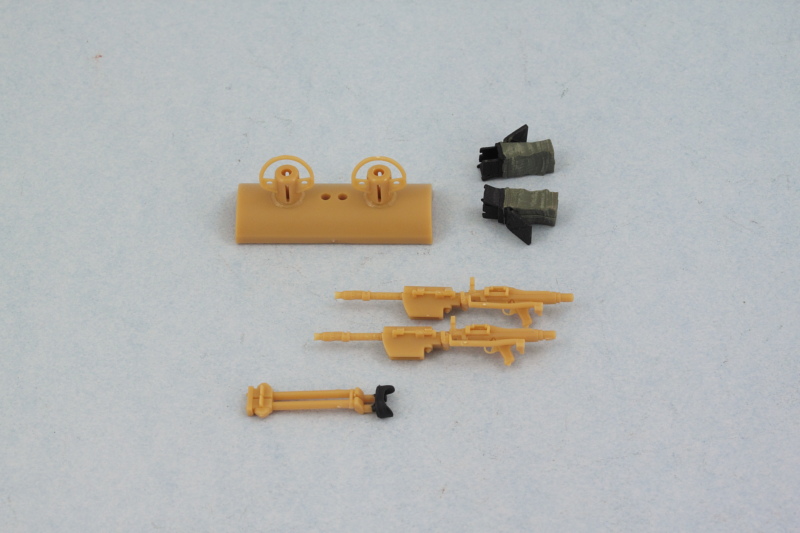
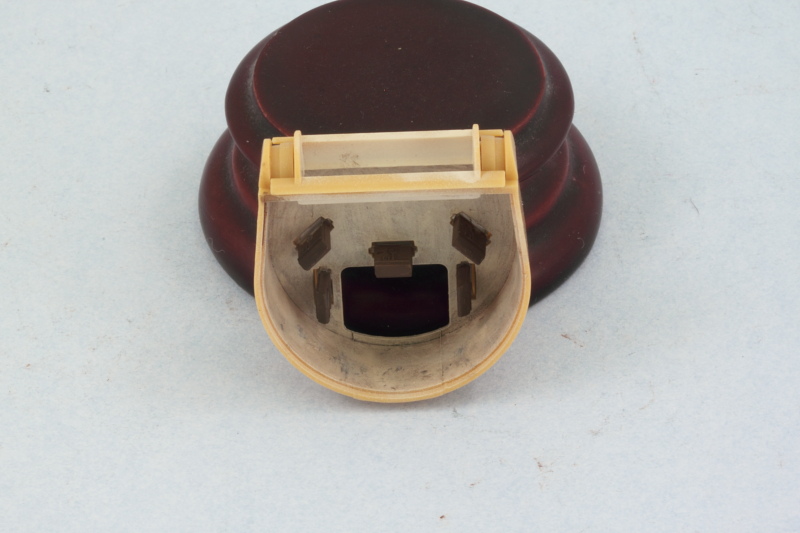
Attention also turned to the turret details, I assembled the external mantlet's MG sleeves and their little guards. The kit instructions would have you add the guards to the sleeves first and then install the sleeves to the mantlet but I did the opposite to avoid damaging them as they are a little fragile until the glue sets up. The MGs were assembled and these babies are very nicely detailed...but that also means lots of little parts for them, so these were done in stages. The instructions would have you add the ammo bags to the guns and then install the guns into the mantlet from inside the turret, but after doing some tests it's possible to install the guns into the mantlet first, then install the mantlet and guns to the turret, and then add the ammo bags from below, so that's the way I will do it.

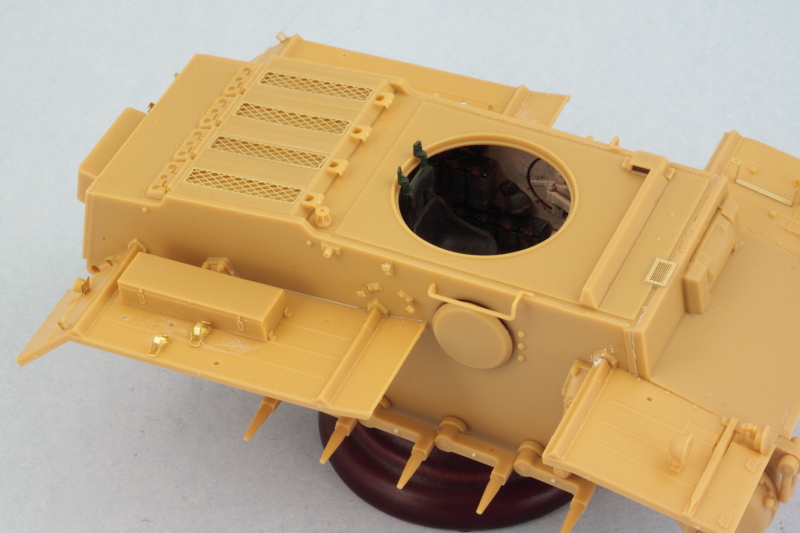
Last but not least for the day, the turret was weathered and the commander's periscopes detailed and installed.

Next up will be finishing the details on the guns and the turret bottom and then getting the turret together so exterior painting can commence.

  • Member since
    January 2007
Posted by the doog on Monday, May 19, 2014 10:24 AM

Oh man...nothin" I hate more than tool clamps that don't fit!I wish all these PE manoofacturers would get together and settle on a "standard" size already! Nothing is more annoying than trying to fit tools on a fender when the clamps are oversized!

Hang in there, Bill. It's looking really nice. Sitting here in a hotel room in Tel Aviv, I'm envying your time at the bench! :)

  • Member since
    July 2004
  • From: Texas
Posted by wbill76 on Monday, May 19, 2014 12:09 PM

Hey there world-traveler! Wink Thanks for the comments Karl, to be fair the Griffon clamps are a 'generic' set and not designed for a specific vehicle and they are generally speaking size accurate, it's just that the space dimensions available on the Bronco fender are very tight. Beer

  • Member since
    January 2007
Posted by the doog on Monday, May 19, 2014 2:29 PM

That's good to know, Bill. I think I have a sprag of them somewhere. There's quite a difference in some companies' offerings though.

I'll home in about 5 days. Trying not to get in trouble over here until we get business taken care of and get back home to the lawn care and painting that TAKOM Obiekt 279.

Hey, is this your tank, in Kubinka? I took these the last time I was there.

  • Member since
    July 2004
  • From: Texas
Posted by wbill76 on Monday, May 19, 2014 2:37 PM

Stay out of trouble! Big Smile Yep, that's the one! Beer

  • Member since
    January 2007
Posted by the doog on Monday, May 19, 2014 2:40 PM

Cool beans! Glad I had a few shots for ya!

  • Member since
    July 2004
  • From: Texas
Posted by wbill76 on Saturday, May 24, 2014 5:11 PM

The long holiday weekend means more bench time than usual and I'm taking full advantage of it! Of course it's more than a three-day weekend, this is also a chance to remember those who have given the ultimate in service to their country and I'd be remiss without acknowledging that and also extending my respect and admiration for all our men and women who serve in uniform.

The last remaining detail on my pocket Tiger is the turret. Earlier I'd mentioned that I was deviating a little bit from the Bronco instructions in terms of the assembly order and I elected to detail and install the twin MGs and sights into the mantlet first and then add the ammo bags after it was in place. This provide to be a good call as it made it much easier to detail them and install them properly into the mantlet while doing test fits along the way to make sure everything played nice with the rest of the turret interior. The MGs were detailed with Testors Model Master non-buffing Metalizer Gunmetal and then lightly dry-brushed with enamel Steel for their finish.

Here's the bottom up view of the turret after the mantlet was installed and the ammo bags added. I also need point out an instruction diagram-induced error that you can see in this pic. Notice that slight gap at the bottom of the mantlet? Turns out way back when I installed the rear part of the mantlet, part D44, into the turret, I used the instruction diagram as a guide and it shows the larger part of the piece on the bottom with the thinner piece on top. Problem is that the external mantlet is designed to fit that part the other way around...and the MG barrel sleeves are keyed as are the MG mounts on the inside to specific alignments...which will result in everything being upside down. Not a good thing...and once I realized the problem, it was no good trying to get the mounts out and flip it around...so I had to trim the part instead to allow it to fit correctly and remove the 'extra' that hung over the bottom...and produced that slight gap. Once painted it will look fine and of course will only be visible if the turret is off and flipped over...but a word of caution to anyone coming along behind!

The base of the turret came next. The elevation and traverse wheels and gears were assembled and installed...they are delicate multi-part assemblies and were actually done last weekend and left off to the side to fully dry before handling. They were detailed and installed and the underside given a dose of red-oxide primer. After the paint was dry, the turret floor was installed in place.

Moving back topside on the turret, I detailed the commander's hatch using a 50/50 mix of Light Gray/Panzer Dunkelgelb so it will match what eventually will be the vehicle's exterior color and detailed the head pad. Bronco designed the hatch to remain workable and relies on a tight friction fit on the hinge to achieve this. A small note, the hatch stops on the edge of the turret swiveled on the real vehicle but Bronco has you position them in the 'open' stance, so a word to the wise if you decide to pose your hatch closed. Mine will be left open on the final display but will be kept closed during painting to help protect the interior.

The add-on armor for the turret was also installed along with the lifting eyes to round things out.

The key to the add-on armor is that it only touches the actual turret at the top edges and where the angled front pieces meet the turret sides. Be careful with the fit at the back, reference photos showed this was smooth so after the glue set, I did some light sanding to remove the join line that is inevitable.

A quick test fit shows the turret sits properly in the hull and can be easily removed for painting and detailing...just have to remember that the commander's chair supports stick up slightly so you have to use the turret ring to push that forward slightly when you go to add the turret in place. The turret will rotate but not 360 degrees obviously because of interference with other detail items in the turret hull and the fact that the commander's chair itself doesn't rotate with the turret, so don't try to do too much here or you may knock something loose in the process!

Next up will be getting everything ready for paint!

  • Member since
    January 2013
Posted by jibber on Monday, May 26, 2014 11:28 PM

Bill those MG's and the mantlet turned out to be a real pain, nice job working out those problems. You really have to study these instructions and think them through because to many times they're just wrong and leaves us with a heck of mess to deal with. Coming along nicely.

Terry  

  • Member since
    July 2006
  • From: New Jersey
Posted by redleg12 on Tuesday, May 27, 2014 5:21 AM

Bill - All that turret detail....the most important thing is you know its there!! Keep it going.

Rounds Complete!!

"The Moral High Ground....A Great Place to Emplace Artillery."

  • Member since
    July 2004
  • From: Texas
Posted by wbill76 on Tuesday, May 27, 2014 11:43 AM

Thanks Terry! I suppose that's what makes the difference between building and just 'assembling'! Wink Always have to keep an eye out for the little pitfalls from time to time in the instructions!

BeerMike

I hear you there...but since the turret's easily removed for viewing, it's there to be seen for anyone who's curious down the road as well. Smile

  • Member since
    July 2004
  • From: Texas
Posted by wbill76 on Tuesday, May 27, 2014 1:53 PM
Made some more progress over the last couple of days in the paint-slinging department. First up was the usual prep work to get things ready...so some poster blue-tack was used to mask off the wheel mount points on the suspension and to create the ever-necessary 'wheels on a stick' for those components. I also used very small amounts of the blue-tack to mask the periscope faces on the turret and some painter's blue tape on the fighting compartment interior and it was time for paint.  First up was a primer coat of MM enamel Italian Dark Brown.  Then a base coat of a custom mix of 50/50 MM enamel Light Gray/Panzer Dunkelgelb.  Road wheels got their rubber rims done after the primer coat using MM enamel Gunmetal. The hubs were masked using a draftsman's circle template and the base coat airbrushed on the outer facing wheels while the inner surfaces were left in the primer color.  Next up will be applying the camo pattern.
  • Member since
    August 2012
  • From: Parker City, IN.
Posted by Rambo on Tuesday, May 27, 2014 2:01 PM

Looking great Bill glad to see the road wheels out of the way

Clint

  • Member since
    January 2007
Posted by the doog on Tuesday, May 27, 2014 4:20 PM

Geez, that's alot of detail packed into that turret---I couldn't imagine trying to actually fit in, an operate those guns in there!

  • Member since
    July 2004
  • From: Texas
Posted by wbill76 on Tuesday, May 27, 2014 7:01 PM

Thanks Clint! Road wheels are a necessary evil on these vehicles for sure. Wink

Karl

Pretty tight space between the guns and periscopes, not exactly a 'creature comfort' environment! Big Smile
  • Member since
    January 2013
Posted by jibber on Wednesday, May 28, 2014 3:24 PM

Bill when you spray MM, what are you thinning it with and at what ratio? I've always sprayed Tamiya but I like the shades you get and it's really going on nicely. I've sprayed enamels and maybe I didn't have the right mix but I never got it as smooth as what I see here. I know there are a lot of others using MM and I'd like to give it another try. Thanks, Terry

  • Member since
    July 2004
  • From: Texas
Posted by wbill76 on Wednesday, May 28, 2014 4:40 PM
jibber

Bill when you spray MM, what are you thinning it with and at what ratio? I've always sprayed Tamiya but I like the shades you get and it's really going on nicely. I've sprayed enamels and maybe I didn't have the right mix but I never got it as smooth as what I see here. I know there are a lot of others using MM and I'd like to give it another try. Thanks, Terry

I thin MM paints with their Universal Enamel Thinner. The ratio isn't an exact thing, I try to get it the consistency of skim milk and then adjust air pressure and work with my double-action Aztek where needed to adjust the needle settings, nozzle type, etc. for the result I'm after. HTH! Beer
  • Member since
    July 2004
  • From: Texas
Posted by wbill76 on Wednesday, May 28, 2014 4:54 PM

More paint progress to report today. Camo pattern is on. I applied it free-hand and used MM enamel Khaki for the green splotches first then added the brown splotches with a custom mix of 50/50 MM enamel Leather and Military Brown. Some adjustments with the basecoat mix here and there and then a light misting coat of highly thinned basecoat mix to tie it all together.

Next up will be getting the suspension installed and start work on the other remaining details.

  • Member since
    July 2004
  • From: Texas
Posted by wbill76 on Friday, May 30, 2014 2:02 PM

More progress to report, this time in the suspension and tracks department. I removed all the blue tack that had masked the mounting points and then did some 'pre-weathering' on the lower hull and suspension areas. I stippled some enamel MM Burnt Umber to create some scuffing/chipping given where the tracks would run and likely wear that would occur. Much of this area is going to be obscured by the road wheels but some of it will still be visible and of course more weathering will be applied later with pigments.

Next up where the road wheels, these were installed and the track runs used to ensure that the outermost wheels set up level since their attachment points to the inner hubs isn't very large and the wheels have a tendency to bow out slightly as a result. The contact surfaces on the sprocket teeth and idler wheel were treated with a base of non-buffing MM Metalizer Steel and then dry-brushed with enamel Burnt Umber to create their foundation for the later weathering. The sprockets were carefully glued in place on the rotating pins so that they could move freely to facilitate fitting the workable tracks. The idler wheels aren't adjustable in terms of their position so they weren't glued down and only dry fit to make sure everything lined up correctly.

Earlier when I was airbrushing the primer coat I got a little ahead of myself and also airbrushed the 60-link runs with some MM enamel Burnt Umber. I say I got ahead because they hadn't been test-fitted to the suspension yet and I knew I was going to need more links, just not sure how many...so these will get some more paint attention now that the runs are the right length. Bronco's instructions call for 66 links per side but I only needed 65 per side to get the right amount of sag. If you do use 66, then the idler will have to be modified to be adjustable to take up the extra slack of that added link...you can do that by removing the raised pin on the tension rod (part F28) that the idler attaches to. This will allow the idler to move in its mount but of course the rod won't adjust with it...not a big deal really but I didn't need to do this since the 65 links worked out just fine.

Tracks will get more weathering attention later as well before their final installation. Baby's got her shoes on now!

  • Member since
    December 2002
  • From: Bury St Edmunds, Suffolk, England
Posted by Bish on Friday, May 30, 2014 2:08 PM

Really nice work here Bill. I'll be following the weathering closely.

I am a Norfolk man and i glory in being so


On the bench: Airfix 1/72nd Harrier GR.3/Fujimi 1/72nd Ju 87D-3

  • Member since
    July 2006
  • From: New Jersey
Posted by redleg12 on Saturday, May 31, 2014 6:29 AM

Bill - You are having way too much fun. 3 updates in one week. Looking fine. always good to get the shoes on.

Rounds Complete!!

"The Moral High Ground....A Great Place to Emplace Artillery."

  • Member since
    August 2006
  • From: Oromocto, Canada
Posted by Gun Tech on Saturday, May 31, 2014 8:38 AM

Very nice all around Bill!

I'm going to pay a lot of attention to the next steps.......         

Cool


Jean-Michel    "Arte et Marte"

  • Member since
    July 2004
  • From: Texas
Posted by wbill76 on Saturday, May 31, 2014 10:35 AM

Thanks Bish and J-M!

Mike

it's one of those rare occasions where I have the closest thing to a 'vacation' available to me this week so making the most of it! Wink
  • Member since
    January 2006
  • From: California
Posted by SprueOne on Saturday, May 31, 2014 11:39 AM

Yes, a 'Stay-cation" at the bench is always time well spent. 

Steady progress on the panzer Yes

For some reason, the first thing I think of when I see this build is 'cute' Smile 

Anyone with a good car don't need to be justified - Hazel Motes


Iron Rails 2015 by Wayne Cassell Weekend Madness sprueone

  • Member since
    July 2004
  • From: Texas
Posted by wbill76 on Saturday, May 31, 2014 1:34 PM

Thanks SP! Have to agree with you there. It's definitely got a 'cute' pocket-size feel to it...but the real deal weighed in at 21 metric tons! Big Smile

  • Member since
    July 2003
  • From: On my kitchen counter top somewhere in North Carolina.
Posted by disastermaster on Saturday, May 31, 2014 2:33 PM

 Absolutely PAR for the course.

                                     http://www.picgifs.com/smileys/smileys-and-emoticons/golf/smileys-golf-883735.gif

Sherman-Jumbo-1945

"I was so much older then, I'm younger than that now"


  • Member since
    July 2004
  • From: Texas
Posted by wbill76 on Sunday, June 1, 2014 3:45 PM

Thank you kindly Steve! Beer

Today's 'regular' Sunday update isn't too heavy on pics but does cover an essential step, the install of the on-board tools and equipment. All of the tools were hand detailed using different methods. For the metal portions, these were base coated with MM non-buffing Metalizer Gunmetal and lightly dry-brushed with MM enamel Steel. For the wood portions, these were base coated with the 50/50 Dunkelgelb/Light Gray mix used earlier and then given a light wash of MM enamel Leather followed by a dusting of Burnt Umber artist pastels to create their look. On the jack block, I scribed in some wood-grain detail using the point of a needle file to add some extra detail. Bakelite handles on the wire cutters and the engine crank were done with MM enamel Italian Dark Brown. For the jack and fire extinguisher, I mixed up a slightly darker shade of Dunkelgelb/Light Gray to provide some contrast for those parts as they would've come from a different manufacturer/supplier so their shade would naturally be different from the vehicle itself. For good measure, I also detailed the turret MGs while I was at it.

So without further ado, here's where the pocket Tiger stands for now:

Next up will be working on the rear hull details like the spare tracks, exhaust, tail lights, etc. before this one's ready for the decals and the weathering process to begin.

JOIN OUR COMMUNITY!

Our community is FREE to join. To participate you must either login or register for an account.

SEARCH FORUMS
FREE NEWSLETTER
By signing up you may also receive reader surveys and occasional special offers. We do not sell, rent or trade our email lists. View our Privacy Policy.