SEARCH FINESCALE.COM

Enter keywords or a search phrase below:

1/35 MaxxPro w/ scratch built RPG netting - Afghanistan 2014 * WIP

11964 views
38 replies
1 rating 2 rating 3 rating 4 rating 5 rating
  • Member since
    December 2003
  • From: Colorado
Posted by psstoff995 on Wednesday, April 22, 2015 11:42 PM

Pawel- that is pretty cool, there's actually a full size M728 CEV on the side of the road a few blocks from my barracks, I probably couldn't climb into it, but I could take some photos of the exterior if you'd need them. Though I will say it's been used and most likely updated post-Vietnam because it has tan paint on top of the old green.

Mike! Hey, thanks for dropping in. I appreciate your feedback, I always remember looking to you for any kind of artillery/military knowledge and a real museum quality in the way you present your models in their natural military environment. It's pretty cool to see some of the 11Cs set up their mortar pits and lay the guns in having seen you build bigger artillery pieces in 1 35 scale first.

Quick update, I don't know why I've been putting this rear ramp off so much... the PE wasn't complicated at all, I think I've just been concerned with the fact that the kit stairs are so bad and the only real reason I bought the Voyager PE set was for these replacement stairs so if I screwed them up it would have been real upsetting.

But they came out fine, at least as good as I'd expect or want them too. Maybe some solder in the holes, but I can weather that into dirt and gunk as plenty of the holes got clogged on muddy days.

Here's a close up of the real thing. You'll maybe notice that our real ramp had one detail I'm not too worried about, and that was that under every step, there was a hinged door that allowed the crew in the back to use the voids under the steps (kind of behind the steps once the ramp is closed) as a storage locker (we packed them all full of MREs). This way with the ramp up, you could open the hinged door up, and reach down into the void to pull out whatever it was. Interestingly enough, even with the ramp down, we cram packed so many MREs into that void that we could open the door up without them all spilling out, grab the one we wanted, and close the door. The locking mechanism was a pain, and prone to breaking, two spring loaded pins on either end of the door, that (as you can see) were tight enough that even when they weren't locked in place, would have enough force to scrape the paint, making the doors very annoying, even if they weren't broken...

-Chris

US Army Infantryman

  • Member since
    July 2006
  • From: New Jersey
Posted by redleg12 on Saturday, April 18, 2015 9:57 AM

Chris

just dropping in from the old timers club.....outstanding work. love it. Glad to see you back. I will be watching from my observation bunker!

Rounds Complete!!

"The Moral High Ground....A Great Place to Emplace Artillery."

  • Member since
    May 2009
  • From: Poland
Posted by Pawel on Friday, April 17, 2015 3:51 PM

Hello Chris!

Thanks for looking at the website and your kind words! Right now I'm tackling an aircraft - a Vietnam-era EKA-3B Tanker/Electronic Warfare aircrtaft. Parallel to that there's a Volkswagen Bus - I guess you could call that related to Vietnam, but it's really related to my new job at VW. Next up is an M728 CEV - that could be interesting to you. I'll let you know when I start the thread here.

So good luck with your project and see you on the forums, have a nice day

Paweł

All comments and critique welcomed. Thanks for your honest opinions!

www.vietnam.net.pl

  • Member since
    December 2003
  • From: Colorado
Posted by psstoff995 on Thursday, April 16, 2015 6:55 PM

Thanks I appreciate it! I can't take too much credit on the straw, got the idea from an old Verlinden HMMWV update set. They suggested the straw in their instructions. Good Verlinden suggestions? In their instruction?!? I didn't even think half their kits came with instructions.. Who knew!

-Chris

US Army Infantryman

  • Member since
    September 2006
  • From: Dripping Springs, TX, USA
Posted by RBaer on Thursday, April 16, 2015 10:35 AM

Chris-

PE work looks great, good job. I have to say PE gives me heartburn....    I'm also impressed with the flexi-straw duct, it really looks the part. I'd thought about using one for the accordion boot at the base of a gun tube, I think I need to.

Apprentice rivet counter.

  • Member since
    December 2003
  • From: Colorado
Posted by psstoff995 on Thursday, April 16, 2015 1:14 AM

Thanks for the tip Pawel! Love that Duster detail, I remember that one. By the way, do you have anything on the bench? I'm an avid reader on the Vietnam war and it's one of my favorite modeling subjects, I'd love to see anything if you're on a project right now. Just went through your website, I've missed a lot over the years.

-Chris

US Army Infantryman

  • Member since
    May 2009
  • From: Poland
Posted by Pawel on Monday, April 13, 2015 1:52 PM

Hello Chris!

Nice work on the PE! I usually glue them together and there's a trick to it - wipe the parts to be glued with lacquer thinner (also works great for plastic glue) and then apply the CA - sets faster and holds much stronger then. But soldering is a very handy technique, too - you can either use the paste mentioned earlier - like the one used for so called reflow soldering, where you put some paste between the eleectronic parts and the board and then put the whole thing in an oven to solder itself, so to say. You can also use the soldering wire, just be sure to use the really thin one. Whenyou already buy it, you can also do very realistic cabling with it, it's very pliable - painted black looks just like electrical cables or hydraulic lines. The soldering wire has some flux in it's core, so if done right the soldered spot doesn't need no corrections like sanding or filing. But it can be done easily - like you noticed solder is very soft. I usually solder things that I fabricate from wires. Like those babies on my M42 Duster:

Hope it helps, good luck with your build and have a nice day

Paweł

All comments and critique welcomed. Thanks for your honest opinions!

www.vietnam.net.pl

  • Member since
    December 2003
  • From: Colorado
Posted by psstoff995 on Monday, April 13, 2015 7:28 AM

I hadn't seen that, I noticed you used a lot of cool products from him on your Vorpanzer build. I'll have to go through that page and see what else he has. The flux I've been using has been more like a paste and much harder to control with any kind of precision.

And thanks for the regulator tip, when I picked up the new airbrush, I got myself a new compressor too. It's got a 1 gallon tank attached to it, and then the airs fed from the tank through a combination regulator/moisture trap. I just need to figure out what kind of PSI I should be setting it at for different applications. Right now pressure sits around 30 PSI when the AB isn't in use, and as soon as I start spraying it drops down to a steady 10-13 PSI which I've found gives me enough control to either do coverage work or finer detail depending on how I play with the double action leaver. But I still need to figure out how I should adjust it for more control in ether setting.

Here's a link to some test work I did with it on my Hetzer-Starr if you hadn't seen that yet.

-Chris

US Army Infantryman

  • Member since
    January 2007
Posted by the doog on Monday, April 13, 2015 6:43 AM

Chris, that soldering looks great! I don't know if you know or not, but Adam Wilder has a superb liquid solder that makes solder just flow like water into your parts joins. I have used it on some PE, and couldn't believe how much easier it made everything. It's in his NitroLine stuff.

Soldering Flux

I would say that the most important thing I have bought for my airbrush in the last five years is an air regulator. If you don't have one, get one. It makes controlling your flow and spray so much easier.

  • Member since
    December 2003
  • From: Colorado
Posted by psstoff995 on Sunday, April 12, 2015 10:22 PM

Thanks a lot Karl! What's really cool is I haven't been on one of these in over 6 months so every now and then, I'll be going through the kit and my photos and remember details I've forgotten.

Quick update: I've managed to solder together this tricky piece of photoetch nightmare- probably my most elaborate photoetch contraption successfully put together to date. Without the solder I don't think superglue would have done the trick and I probably would have given up and gone with the plastic part.

It's the radio rack that goes behind the driver. In our vehicles, the rack was shorter, and the old radio mounts were there, but the radios themselves had long been pulled out. I just decided to act like this vehicle still had all the bells and whistles, so I included them. I still need to add some wire detail. I appreciate the comments Gamera! I kind of feel the same way, I really don't even remember how these things were wired up, and I had been the Platoon's RTO for a few months at the start of the deployment, so I figure making an attempt is the best I can do as far as detailing goes.

Here's the front bumper/rhino mount, soldered this together before the radio rack just to get a feel for it. Both this and the radio rack are real practice for assembling the rear stairs and the OGPK turret shield to come.

The key was the fact that even after the solder, I was able to drill out some of the holes that got filled in. As soon as I figured out the solder was soft enough for that, it gave me the confidence to knock out that radio rack. The Voyager PE is working out really well so far, folding decently on the lines, and not too tricky to fit together, but the solder really helps to lock it in place.

Quick check on the holes!

Anyone on the fence about soldering PE sets (as I've been for years) let me go ahead and encourage you to try it. I think it takes a little more work, but you only have to do it once and it alleviates the frustration of super glueing it time after time as parts fall (or fling!) off. Only wish I could solder it to the vehicle!

Karl- I'm really looking forward to painting this! It's getting to the point where I can start painting the subassemblies, so this weekend I took my new airbrush out for a spin with the Hetzer Starr kit I've mentioned on here a few times. Really like it, an iwata Eclipse gravity feed, lots of control and detail can be achieved with the double action. I know I'm not yet using it to its full potential. Still need to work out the kinks of paint/thinner ratios and watching for paint drying on the needle (using Vallejo Air acrylics). Not to mention figuring out the right distance from the model, PSI... done lots of test spraying though! If I stay on top of it (and considering this is all solid color application) I should be good to go. Next weekend I'll be on a two day fishing trip somewhere in the Rockeys so probably no updates for a bit Crying

-Chris

US Army Infantryman

  • Member since
    November 2009
  • From: SW Virginia
Posted by Gamera on Thursday, April 9, 2015 7:56 AM

Chris, the wiring does look really good, doesn't have to be perfect just nice to have the detail there esp for guys like me who have no idea if it's right or wrong!

"I dream in fire but work in clay." -Arthur Machen


  • Member since
    January 2007
Posted by the doog on Thursday, April 9, 2015 7:14 AM

That's looking juicy and sweet, Chris!

Some real mouthwatering detail!!! That straw detail is just killer!

Again, all I can think is, what a blast to be able to "see" the real machine as you're modeling it--it's a rare treat to be able to model "from real life". I am really looking forward to seeing this painted!!

  • Member since
    December 2003
  • From: Colorado
Posted by psstoff995 on Thursday, April 9, 2015 2:36 AM

Hey!! Thanks, how've you been? I know right? I guess it's about 4 years now though... got anything on the bench?

-Chris

US Army Infantryman

  • Member since
    October 2004
  • From: Northern Virginia
Posted by ygmodeler4 on Monday, April 6, 2015 9:53 PM

Looks great Chris and welcome back...seems like just yesterday we were right down 81 from each other

-Josiah

  • Member since
    December 2003
  • From: Colorado
Posted by psstoff995 on Saturday, April 4, 2015 9:29 AM

goldhammer- thanks a lot! I really appreciate it. As for the screens, I think what I have is the plastic, maybe nylon mesh, I'll see how much sag I can get into it, but I think even a little wont be enough for scale. These nets were loose I mean imagine 'flapping in the breeze' loose. I'm not too worried about it though, I think it will look alright even if it's stiff.

Gamera- thank you! Here's another Harris radio/Blue Force Tracker/DAGR update

Put in some wiring. The brass is .51mm rod and the styrene is .3mm rod.

I could have added a lot more and it still would have looked too clean.

I filled the void under the Truck Commander's dashboard with the bendy part of a juice box straw. Give it that utilitarian, military industrial look.

As I knew I wasn't going to be able to wire this thing and do justice to a full scale version, instead of going for accurate I just went for the easiest route. By no means is this all inclusive- and even in the cases of the wires I did add, maybe 20% of them are in the right general spot. Maybe.

(To note: These things had 7 years of wiring and rewiring on top of each other. Plenty of old wires to no where. These vehicles stayed in country even as different units switched out every year or so. So the new unit's commo guys would come in, rewire stuff, leave the old junk, and so on and so on. Lots of dead ends and undone connections, empty radio mounts, etc. There was no real sense of ownership, at least with our unit, and we knew when we were done with these vehicles, they would be sold or scrapped, so we really didn't treat them very well. More on that in the weathering stages to come...)

-Chris

US Army Infantryman

  • Member since
    November 2009
  • From: SW Virginia
Posted by Gamera on Friday, April 3, 2015 9:57 PM

Very nice work there on the radio and seat belts!

"I dream in fire but work in clay." -Arthur Machen


  • Member since
    August 2014
  • From: Willamette Valley, Oregon
Posted by goldhammer on Friday, April 3, 2015 6:36 PM

First off, welcome back home in one piece and a big THANK YOU is in order.

For sag in the screens, take a look at the nylon/plastic version of window screen.  Might be just what you are looking for since the metal stuff is about right for scale. Looking good so far.

  • Member since
    December 2003
  • From: Colorado
Posted by psstoff995 on Friday, April 3, 2015 6:04 PM

Thanks Karl! Going slower than I would have liked, but then it always seems to be like that haha

Almost forgot to reply to this, saw it the other day and got distracted

the doog

I am currently contemplating building my 1984 Chevette Scooter, and will have to change the grille and add trim, etc. That's about as close to any "tank" I've ever driven ,lol.

The grill work sounds tricky but I'd imagine the trim wouldn't be too bad (??) I've never really delved too deep into autos. I'm working on a 1/35 scale Ming SF pick up (which looks suspiciously like a Tacoma...) and had tried to do a 1/24 scale Ford Expedition (or Explorer? I don't remember) modified into the First Responder vehicle I volunteered with in my college days, but that got hung up as I was trying to figure out good ways to paint and construct. Will probably try again on that one day.

As for the 1984 Chevette Scooter "tank"- I know it's not what you meant but now I'm just picturing some kind of Mad Max zombie apocalypse modifications..... Whistling

-Chris

US Army Infantryman

  • Member since
    January 2007
Posted by the doog on Friday, April 3, 2015 5:53 PM

Man, that's some seriously impressive detailing, Chris! That's going to look stunning when it's all painted up and detailed!

  • Member since
    December 2003
  • From: Colorado
Posted by psstoff995 on Friday, April 3, 2015 5:45 PM

A later update than I wanted. But I've been going slow on some of the photo etch (love/hate relationship)

I managed to finish the exhaust modification

...and just got in my resin AM parts from Pro Art Models today! Really nice radio set. The stretchers look good too. Will be using one on the finished build. Still haven't decided what color I'm going to paint it though... Hmm

Here's an overhead shot, took me most of the week after work and school to get all the seat belts in. I modified the Voyager PE to give the impression of an unbuckled 5 point set up. Still need to go in with sheet styrene and add some more buckles for the shoulder straps, and then use some putty to build the required locking mechanism that would be hanging off the front of the seats. (The extra straps are made of masking tape by the way)

Pro Art Models makes a really nice PE set that replicated our seat belts perfectly http://www.proartmodels.be/productgallery/product_gal_052.html but I wasn't going to spend even more money on that, and I think they're only included in the MAT-V detail set.

Another view of the seat belts, tried to get quite a few of them dangling off the sides of the seats as that's how they would often be found.

And a front cabin detail shot

The dash and the Harris radios/bench are just mocked up there now, will probably leave them off for painting.

-Chris

US Army Infantryman

  • Member since
    January 2007
Posted by the doog on Monday, March 30, 2015 8:14 AM

psstoff995

I'm sure you know how cool the feeling is though having built that German castle you visited, your own pick up truck with your dirt bike in the back, that rusty old stock class Impala from the abandoned race track (and maybe more that I missed?)

ALTHOUGH I'm sure you also know just how frustrating it can be when the kit doesn't recreate all those little details that you know are supposed to be there. Or in my case, when it's a real decent representation of the first generation vehicle and I wound up spending 7 months in a third or fourth (??) generation...

Actually, Chris, you're 100% right! I guess I never thought of it that way, but come to think of it, it's really the same thing!

And yes, I know the feeling of wanting to make every little detail..I am currently contemplating building my 1984 Chevette Scooter, and will have to change the grille and add trim, etc. That's about as close to any "tank" I've ever driven ,lol.

  • Member since
    December 2003
  • From: Colorado
Posted by psstoff995 on Sunday, March 29, 2015 9:35 PM

Thanks a lot Karl! It is a pretty cool feeling, two of my buddies have been vying for 1/35 versions of themselves to go with it! haha

I'm glad I got as many photos as I did, some of these vehicles were sold off to various militaries (or even melted down as the rumors went) as we pulled out at the end of last year. I think it wasn't cost effective to ship them all back stateside. But there's still US troops over there so who really knows...

I'm sure you know how cool the feeling is though having built that German castle you visited, your own pick up truck with your dirt bike in the back, that rusty old stock class Impala from the abandoned race track (and maybe more that I missed?)

ALTHOUGH I'm sure you also know just how frustrating it can be when the kit doesn't recreate all those little details that you know are supposed to be there. Or in my case, when it's a real decent representation of the first generation vehicle and I wound up spending 7 months in a third or fourth (??) generation...

But I'm having fun with it! Thanks for the welcoming message :)

-Chris

US Army Infantryman

  • Member since
    January 2007
Posted by the doog on Sunday, March 29, 2015 9:01 PM

Wow, what a BEAST of a vehicle! Cool that you can post your own personal photos of it. It must be so cool to build something that you have personal knowledge of!

Welcome back to the forums too, Chris!

  • Member since
    December 2003
  • From: Colorado
Posted by psstoff995 on Sunday, March 29, 2015 7:35 PM

I'm trying to order some Pro Art Model sets for this, anyone ever order through them before or have a good way to go about doing it through a distributor? The main thing I'm interested in is their MRAP radio set...

www.proartmodels.be/.../product_gal_055.html

It's designed for the M-ATV, but probably 90% of the components in that set work in the MaxxPro as well.

I really need the DAGR, Kinetic didn't supply one, and the BFT screen looks a lot better than the one in the kit. Plus the keyboard is necessary. The dual Harris radio mounts, again, look a lot nicer in resin. I'm not too worried about the DUKE box as I'm going to have to scratch a shelving bracket that closes it in.

I've already contacted the guys at R&J Enterprises (the only US distributor listed on Pro Art's website) so even though the sets I'm looking at aren't listed on their site, it'd be cool if they could order them as the Pro Art's ordering page seems a little iffy at best.

Have gotten a little farther along... need to take some pictures and I'll upload them tonight or tomorrow.

-Chris

US Army Infantryman

  • Member since
    December 2003
  • From: Colorado
Posted by psstoff995 on Saturday, March 28, 2015 7:05 PM

Nice! Good to know, if I ever revisit it I'll make sure to snag a Mk23 as well. Thanks for the nomenclature. I'm sure it'll help anyone else that stumbles across this wanting to build more of a corrected later version.

-Chris

US Army Infantryman

  • Member since
    December 2002
  • From: Valrico, FL
Posted by HeavyArty on Saturday, March 28, 2015 5:24 PM

Looking good.  The coil spring suspension is known as TAC-4 suspension.  It is a later mod; the original MaxxPro had the leaf springs.  It is the same suspension on the USMC Mk23 MTVR truck.  Trumpeter's Mk23 suspension could be modified to fit on the MaxxPro.

Gino P. Quintiliani - Field Artillery - The KING of BATTLE!!!

Check out my Gallery: https://app.photobucket.com/u/HeavyArty

"People sleep peaceably in their beds at night only because rough men stand ready to do violence on their behalf." -- George Orwell

  • Member since
    December 2003
  • From: Colorado
Posted by psstoff995 on Saturday, March 28, 2015 4:01 PM

And a quick update before I head out to do some cardio...

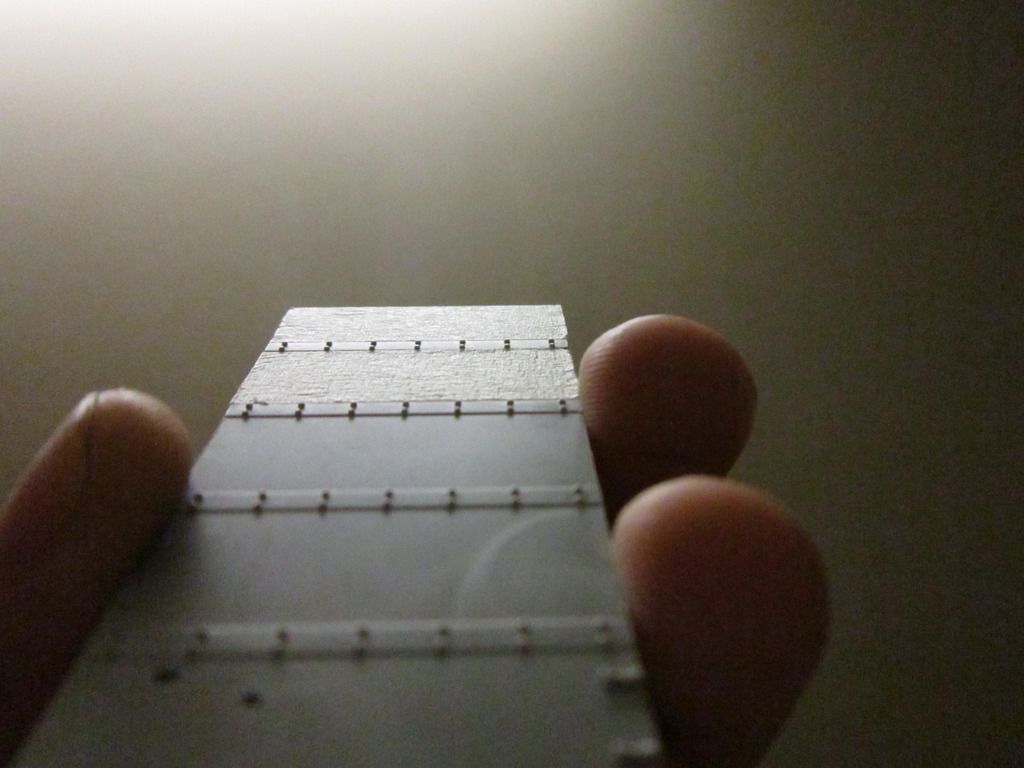
Bug screen (in a pretty good scale I think!)

So this was cool enough for me to stop and take a photo...

All these little bolts are kind of a strange addition for the inside of the undercarriage, you'll never see it right? So it might be accurate to have them there, but why not use a simpler, more traditional mounting system for the cover part?

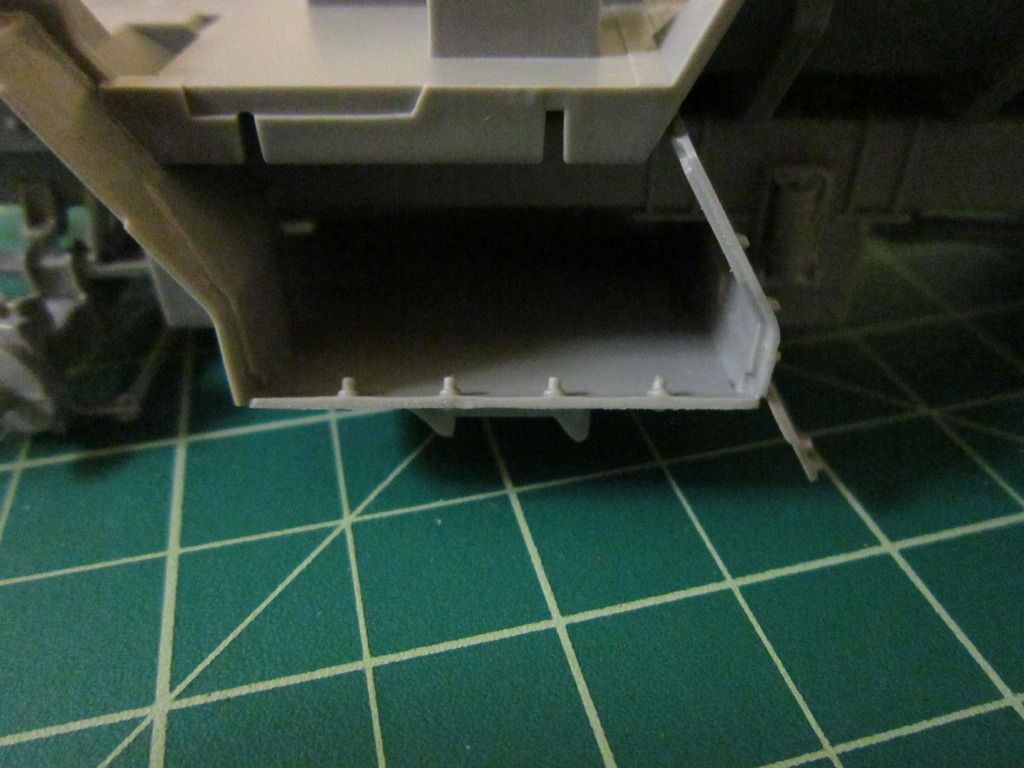
Because you can actually see it, the folded piece of plate armor actually has a visible gap (maybe 1/2" on the 1/1 scale MaxxPro) and by building the kit the way they did, it accuratly represents the fact that you can see through that gap to the bolts that hold the plating in place. Too cool! I had actually forgotten about that detail until I noticed the kit had replicated it. So good work on that Kinetic. I applaud your efforts.

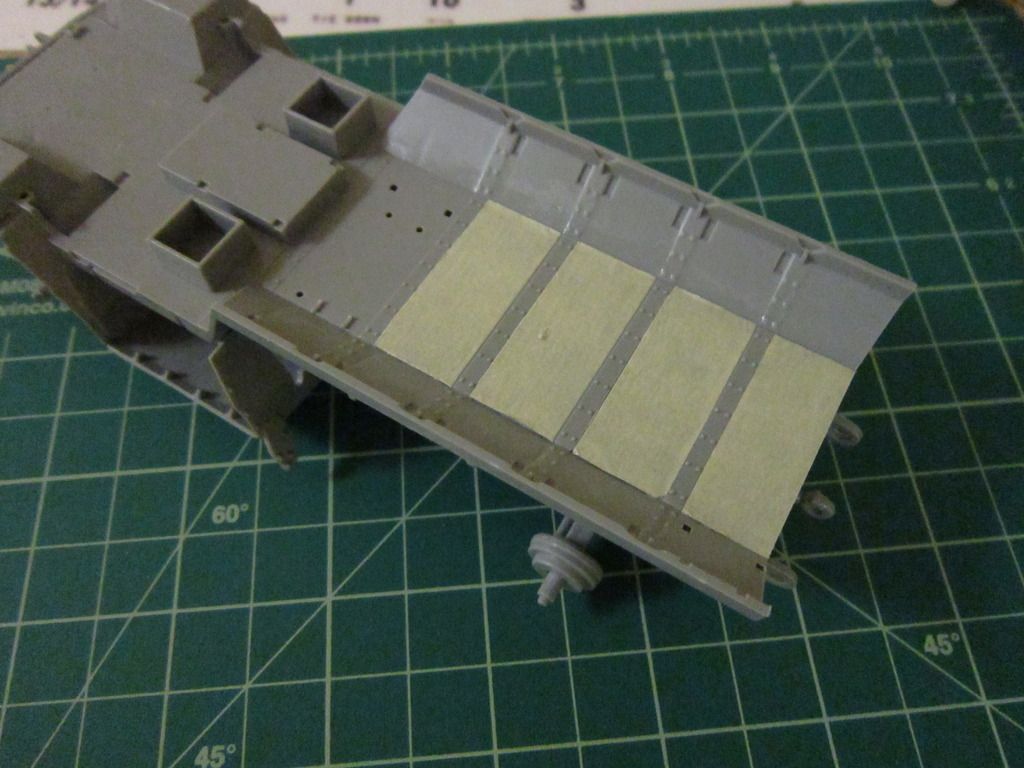
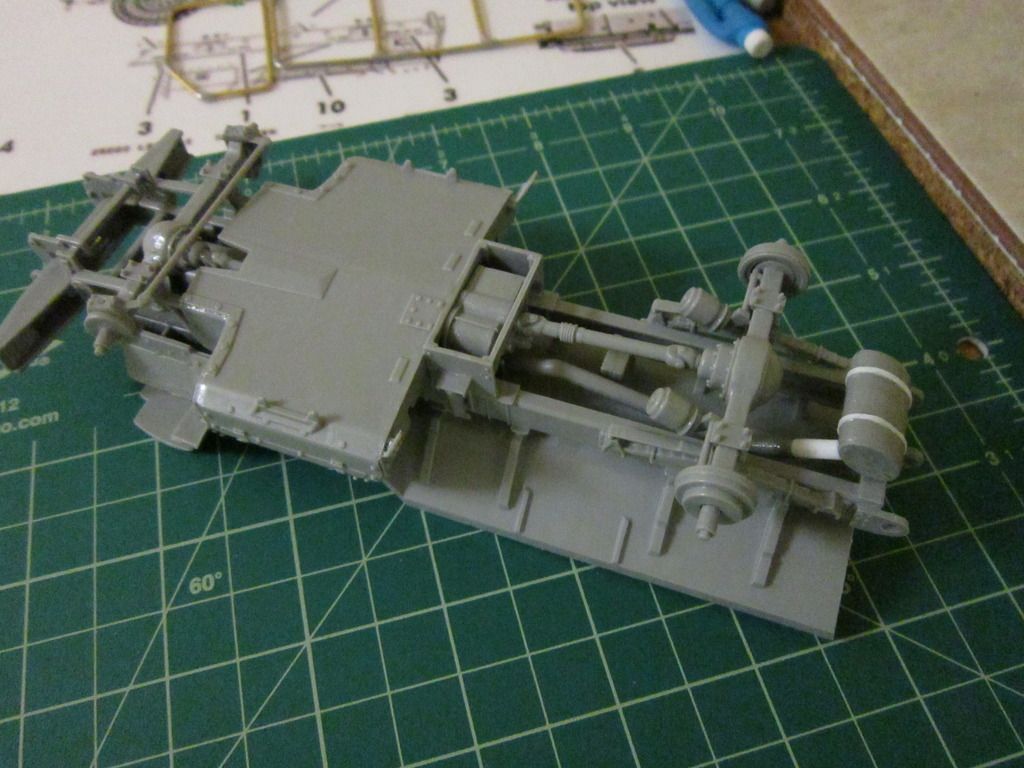
Now this masking tape isn't for painting, I'm actually going to leave it in place and paint over it. It's just going to give some texture to what would be padded flooring material designed to take some force of an IED blast without transferring it to the feet of soldiers that sit in the back. The cross beams that are bolted to the frame in between these padded mats on the frame floor are actually painted in red and are stenciled in white to the effect of "No Feet" or something like that- don't put your feet on the cross bars, they are a part of the frame and an IED blast will transfer directly through your foot.

I took a picture halfway through to try and show the difference in texture. Some people use putty or Mr Surfacer, I think masking tape is much simpler.

Hopefully you can see what I was getting at.

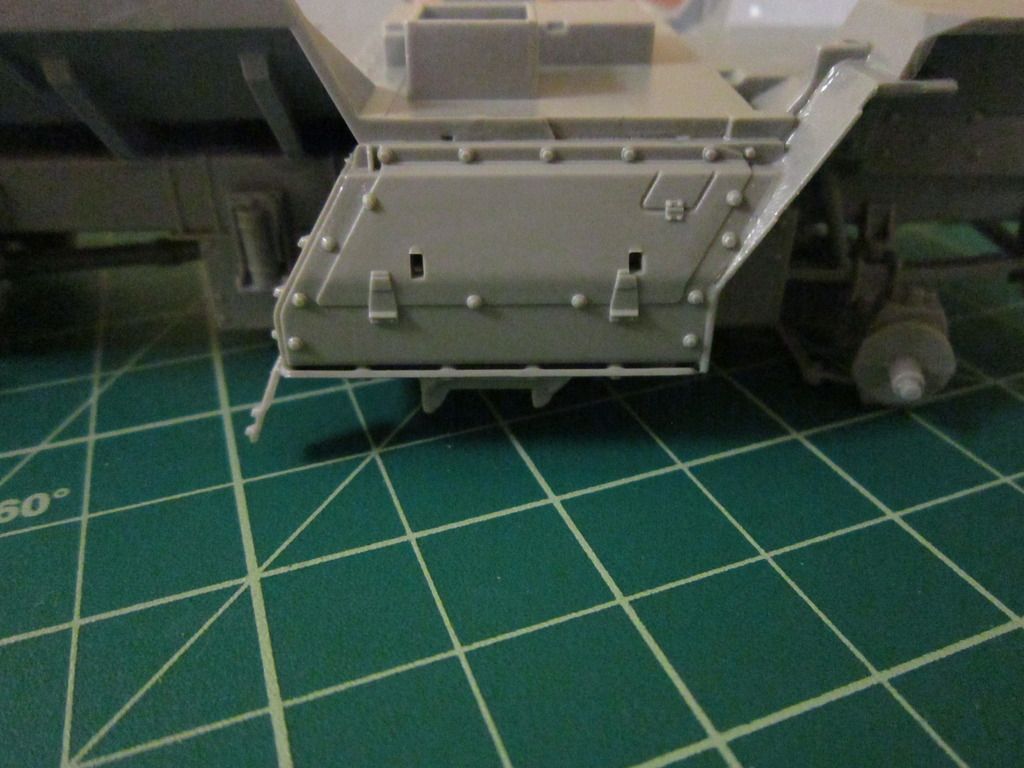
Here's a shot of the bottom-

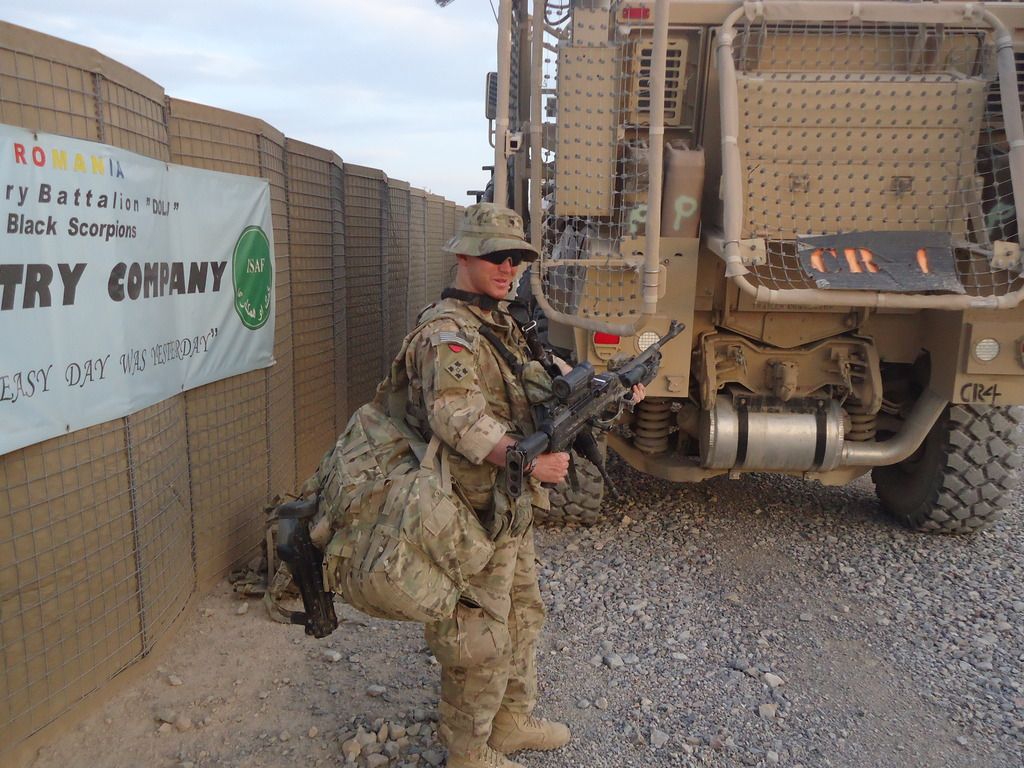
And you can tell I've had to readjust the muffler. In the next two pictures you'll see that although the original 2007 MaxxPro (still in service with at least the Romanian Army, probably others) has the exhaust like the kit would have you install it- flat and out the back left- our upgraded vehicles had the muffler rotated up at an angle and out the back right.

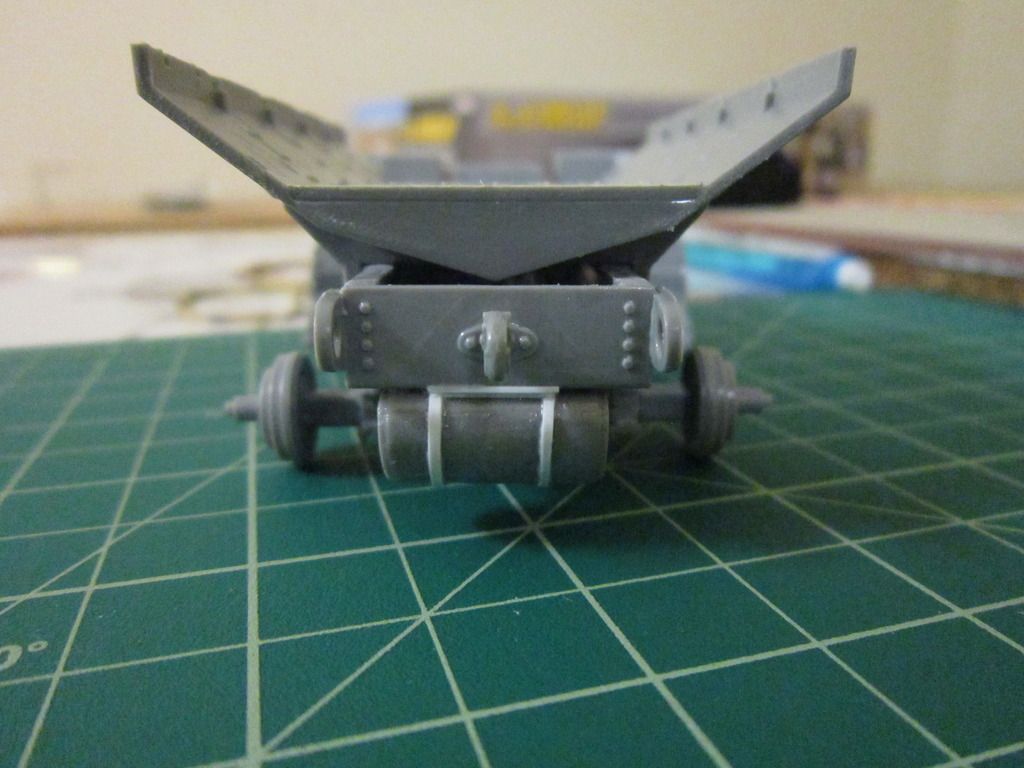
You can also see in this reference shot, the frame is actually different, as is the rear suspension. It's not leaf springs but an actual coil, looks similar to what you'd find on a HMMWV. I'm sure one could recreate the more accurate frame curve and the updated suspension. Honestly I'm not sure if the leaf design is found on the original MaxxPro or if Kinetic just made it up, but I imagine it's accurate given the other details they've gotten right. Anyway, I didn't realize the difference in the frame/suspension myself until I got to the exhaust. Even if I had noticed it sooner, that's too much modification for me to tackle.

*By the way- That's me posing for a joke photo carrying everything I was assigned at the time.

-M240L

-M4

-M320

-PAS13

-PVS14

-Helmet and plate carrier

-Backpack full of ammo

You know- just the typical quick swap load out from the Call of Duty video games...

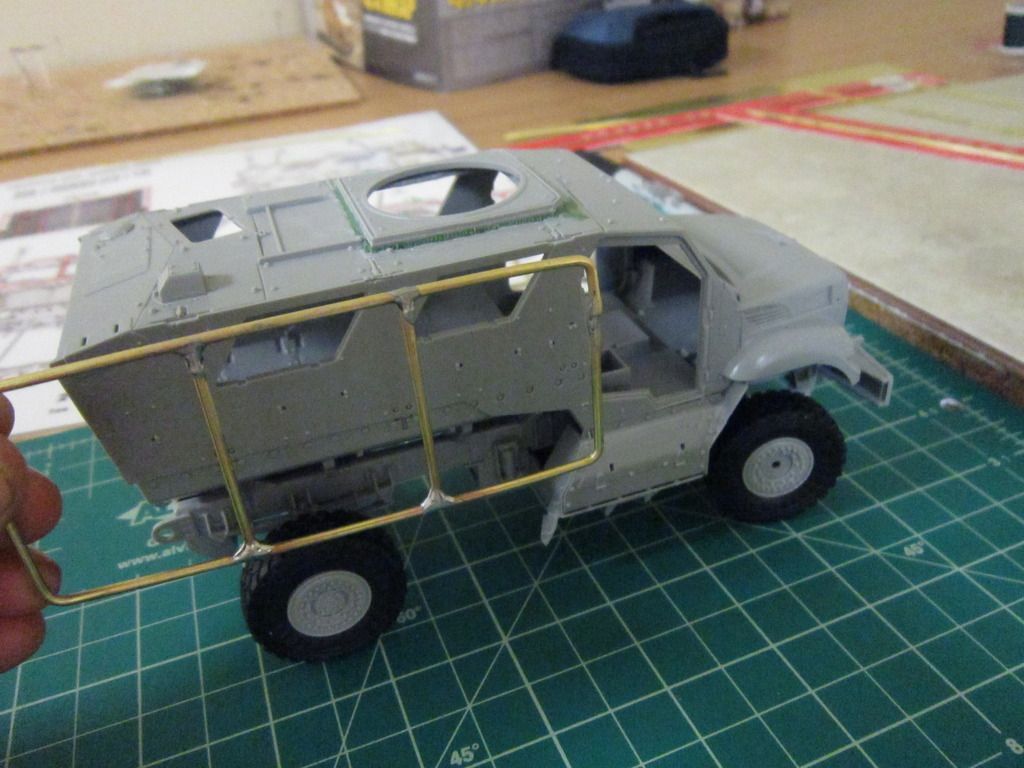
And I'll leave you guys with a quick mockup

-Chris

US Army Infantryman

  • Member since
    December 2003
  • From: Colorado
Posted by psstoff995 on Friday, March 27, 2015 10:35 PM

Thanks so much for all the support and tips on the products out there guys! I really appreciate it

RBaer, that actually sounds like an ideal mesh, as it's not rigid like the the PE or bug screen. That being said, I did wind up finding some bug screen (for free- always a benefit) that looks like its actually dead on in terms of the scale size square holes I needed. It's a little too rigid but I think that's the price I'll pay for the right size. It doesn't look flat like how some PE mesh (grills really) tend to look. And again, it was free.

Thanks for the link GMorrison, my Dad's a big HO modeler, I think he actually has a similar kit back home if not the same one. I'd have to hold it in my hand though to see how the holes look in 1/35 and if they were square or that diamond shape that real chain-link has. But I do appreciate it.

Gino, that'd be nice if it came in square mesh instead of octagonal- but that being said octagonal might work for a chicken-wire look if I ever wanted to make some old school WWII allied panzerfaust type mesh (like Steve did with that Sherman build in his signature!)

Thanks Don, that scalelink catalog has some really cool stuff, even foliage, will definitely bookmark that for later.

But as I said, I did get some bug screen and will post a picture of it with the framework as a reference by the end of the weekend, along with some more progress on the styrene.

-Chris

US Army Infantryman

  • Member since
    October 2007
  • From: Louisville, KY
Posted by pordoi on Thursday, March 26, 2015 5:39 PM

Here's a link to a thread on teh Military Modeling site that may give you some additional photo etch options;

http://www.militarymodelling.com/forums/postings.asp?th=52014

Don

JOIN OUR COMMUNITY!

Our community is FREE to join. To participate you must either login or register for an account.

SEARCH FORUMS
FREE NEWSLETTER
By signing up you may also receive reader surveys and occasional special offers. We do not sell, rent or trade our email lists. View our Privacy Policy.