SEARCH FINESCALE.COM

Enter keywords or a search phrase below:

Tamiya 1/35 SU-76M--Complete 04/10/16

8770 views
101 replies
1 rating 2 rating 3 rating 4 rating 5 rating
  • Member since
    July 2004
  • From: Texas
Posted by wbill76 on Monday, April 4, 2016 5:28 PM

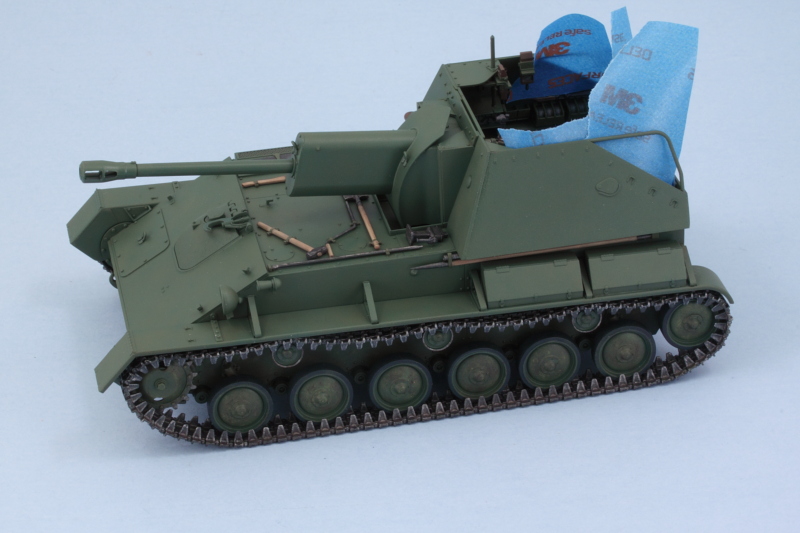
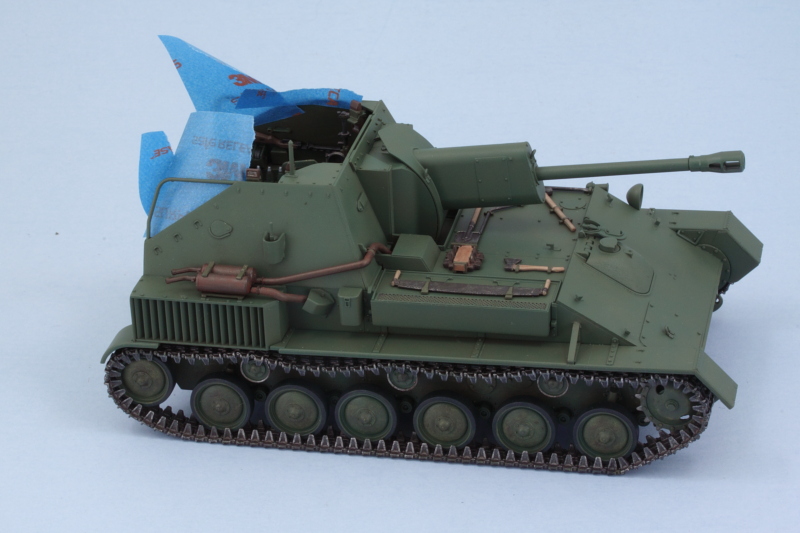
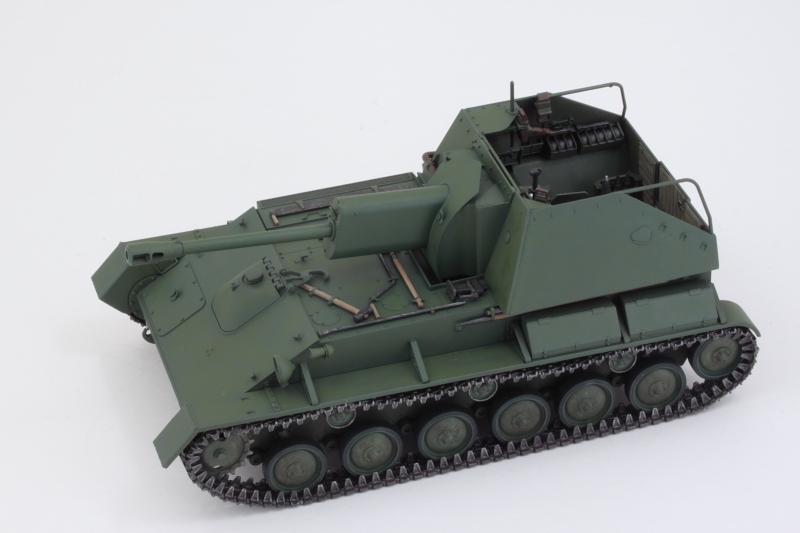
After the tracks had set up, I installed the fenders permanently into place. This went relatively smoothly, I just needed to add a little bit of putty to the left rearmost mount since it attaches right up against the hull side edge. As you can see, there's not a whole lot of clearance tolerance between the fenders and the tracks. Trying to work the indy links with the fenders already in place would probably have been possible since the sprocket can move but it would be a very tight space for sure. I also decided to do a little more tonal work on the hull color, so the masking tape around the fighting compartment was a prep for that. 


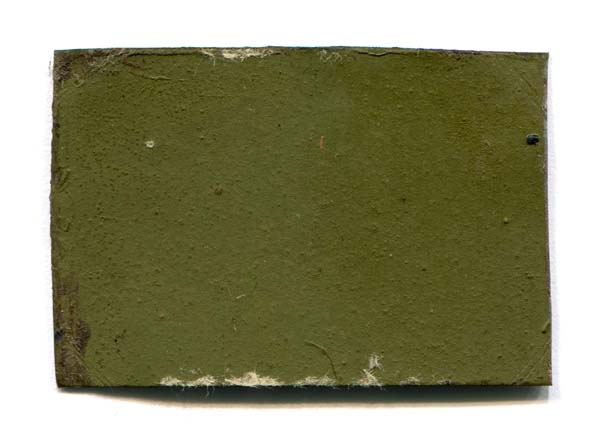
I have to issue a small disclaimer here for the next little bit as it involves the whole 4BO 'correct shade' debate...which I'm not an expert on and have no interest in trying to litigate. In searching around the 'net, I did find a handy 4BO color chip and this was the 'green' that I've been using as a mental guide in relation to the finish. 


Easier said than done, but I've been waiting until I had the fenders on to add the last little touch. I took the 50/50 OD/Russian Armor Green mix mentioned previously and combined it with another 50% MM enamel Medium Field Green. Here's how it looks in the bottle: 


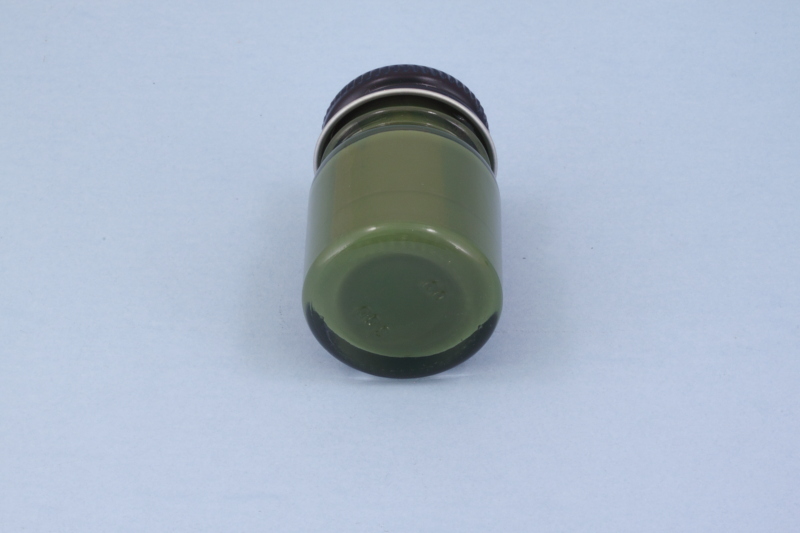
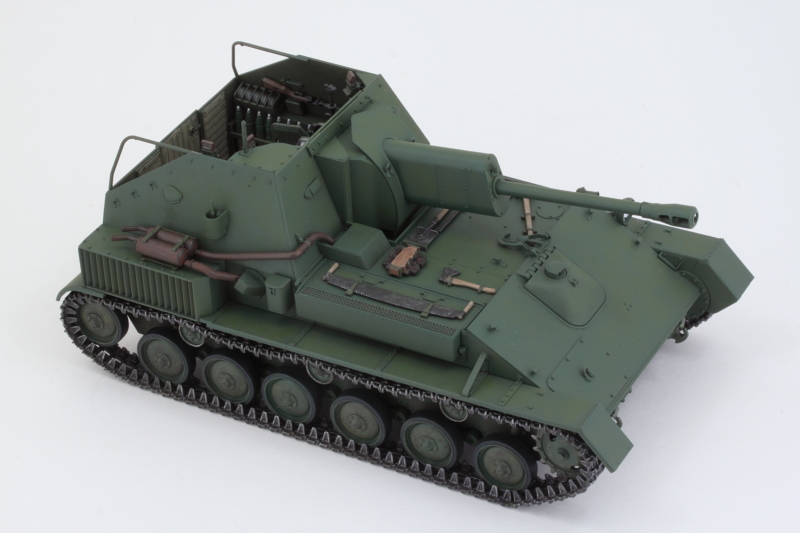
I loaded up the airbrush and worked with a very fine detail nozzle (I use an Aztek airbrush, so this is the 'tan' tip) to add this shade over the previous work. I switched to a white background as the blue was playing some tricks and it's hard to capture it effectively, with the white, the photos are closer to what it looks like 'in hand'. Monitor settings of course may cause a variance, but I'm happy with the approximation and subtle changes it introduced to the overall green finish. 


While that's all curing (and before I tackle the last remaining hull detail, the tow cable), I decided to give the kit-supplied crew figures a shot. These are covered in Step 37 and are multi-part assemblies depending on the figure in question. They go together easily without the need of much clean-up and are, of course, designed to occupy specific positions/poses in the vehicle with no real room to modify/adapt them. Pictured left to right are the commander, gunner, and loader. The commander's arms had molded solid sleeves on his coat, so I opened them up for a little better detail using a combination of micro drills and needle files. 


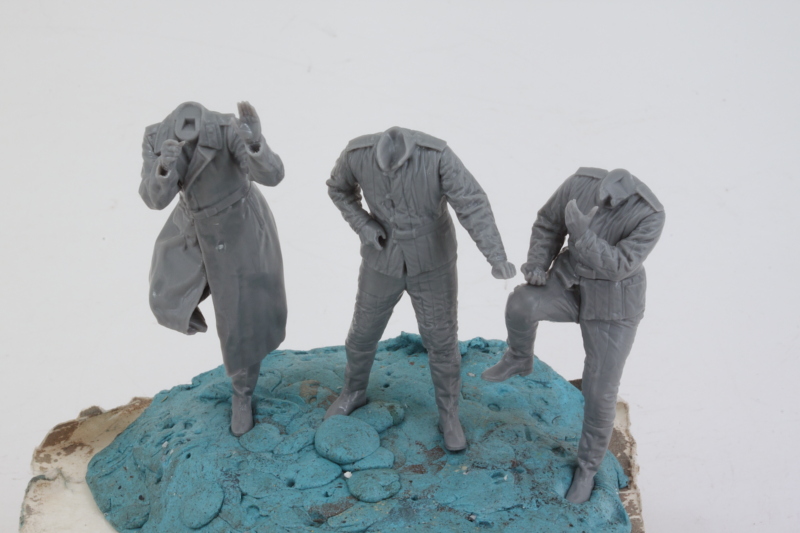
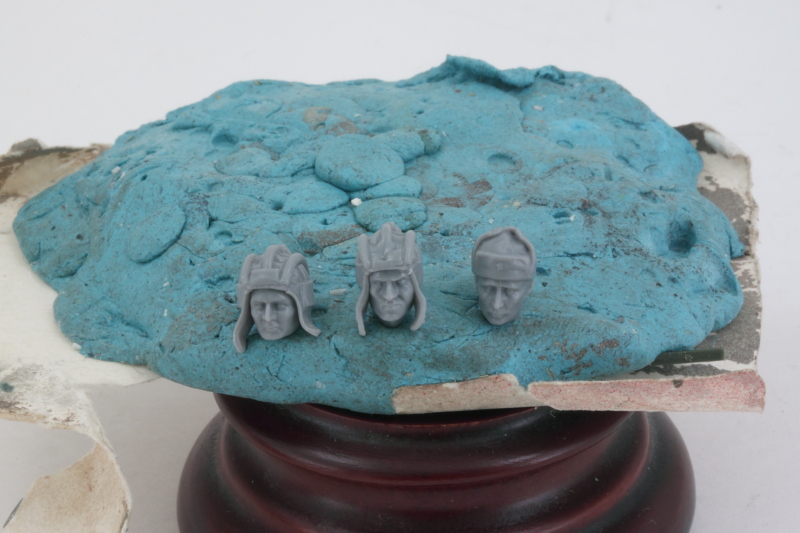
The commander (aka Comrade Putin) had his hat molded in place along with the head while the other two crew have the padded tanker's helmets as three-piece assemblies that build up around the head. The details on Putin's hat are a little soft as a result when compared to the other two crewmen but each one has their own features/character instead of being cookie-cutter heads. All three have shaped tabs on their bases that are designed to fit their respective torsos, so no swapping around without a lot of work if you wanted to go that route. 


I did a test fit with the gang to see how they would all go into the compartment. As I suspected, the gunner is the hardest to position correctly and I found it necessary to remove the C77 gun-control wheel that was installed back in Step 29 in order to be able to move him in and out of position. Once he's painted and positioned, the wheel will go back on so it can match up to his hand to boot. 


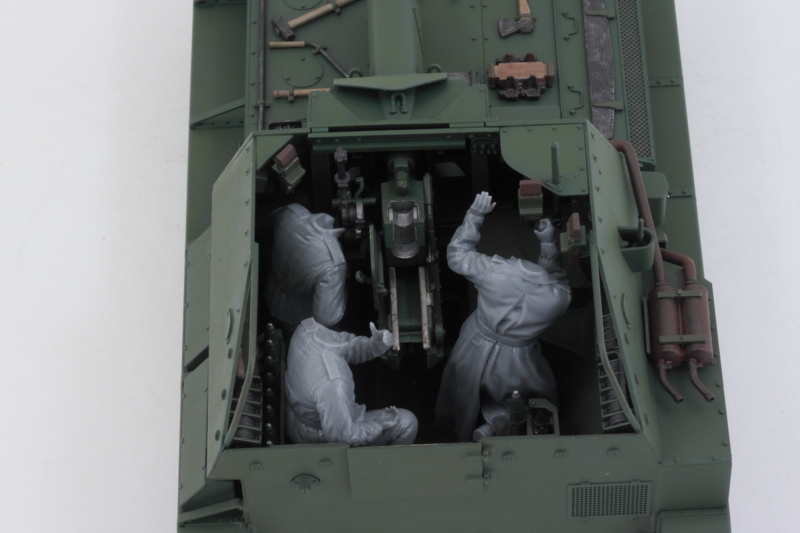
The loader is going to be holding a round, the instructions want you to fit an HE round but I did a test fit and one of the AP rounds fits just as well, so you can really take your pick since the sprues have 'clean' rounds of both type available for use. As you can see, the crew had to be on good terms with each other, not a lot of room to spread out! 

  • Member since
    July 2004
  • From: Texas
Posted by wbill76 on Tuesday, April 5, 2016 8:06 PM

One of the last remaining details for the hull involved the tow cable that the instructions deal with in Step 32. The kit provides a long length of braided string for this and two separate cable loop ends. 100mm of the string is all that's needed and the length of string provided is 500mm long so there's plenty to work with. That's a good thing as the length in my kit had started to unravel on one end, so I cut my length from the opposite end to avoid any problems. Some CA did the trick to combine the string with the plastic ends. 100mm is the perfect length (it includes the amount needed to go inside the cable ends in that requirement) and the string is flexible enough to feed around the storage hooks and over the other kit features. The end that sits on top of the glacis access panel has to sit at a specific angle for it to sit flat, so I started there and looped it around to the other side to see how it would look. 


The string doesn't have any 'fuzzing' issues and I tested a short length of the extra (another good reason for the length to be plenty) string with MM Non-Buffing Gunmetal Metalizer to see how it would behave. The metalizer is lacquer-based so I wanted to be sure it wouldn't dissolve the string or do anything else unexpected. It didn't! The metalizer had the added bonus of stiffening the string slightly but not making it unmanageable. I glued the access panel end of the cable in position first since it was the key element and after it set, glued the opposite end to install the cable permanently in place. The movable gun travel lock also showed its value as a feature in this step. While you can't engage the lock to the barrel, the cable needs to pass underneath it and that's done much easier with the lock flipped over on top of the driver's hatch then flipped back once the cable is in place. 


With that taken care of, I returned my attention to the crew figures. The heads were hand detailed and brought to life, the irony being that only one of the crewmen (the loader) is positioned so that their face is fully visible, but I couldn't have them feeling neglected despite that fact. For the tanker helmets, I applied a base of Flat Black and then dry-brushed a medium gray over that to bring out the excellent details in the kit parts. For Comrade Putin's 'ushanka', I discovered in doing a little research that these were typically a combination of brown and gray wool and not fur, so I did my best there to replicate that with some custom paint mixes.


The uniforms were hand detailed as well, again with some custom mixes and use of internet research images as a guide to get a close approximation to shoot for. I decided to give the loader an HE round to hold and painted it up to match the other rounds in the ammo bins. A quick dose of Lusterless Flat had the break-dance trio ready to take their places.   


I have to say that I'm really impressed with the level of detail that Tamiya provided in the figures...even to the point of detail that would be invisible once the figures were in place. The best example of this was providing pants detail for the commander underneath his great coat. It would'be been all too easy to just leave that as a blob of plastic. They also provided excellent facial detail on the crew and I was a little saddened by the fact that the one with the most expression, the gunner, becomes totally invisible once he's in place in the fighting compartment. He's got an intense look as he peers through that sight!


I placed the gunner first as it took some fiddling to get the elevation wheel to fit his hand and have him stand properly in place. Worth the effort though to have that little detail included. The commander was added 2nd and then the loader positioned in his comfy spot to round things out. Last but not least, I added the crossbar for the fighting compartment as directed in Step 37. It took a bit of finger pressure to coax the two sides of the compartment to meet up properly with the bar. Once it was set, I painted it to match the rest of the hull.


The whole vehicle is now assembled except for the headlight lens. Next up will be sealing it up and adding the decals. 

  • Member since
    March 2003
  • From: Rain USA, Vancouver WA
Posted by tigerman on Wednesday, April 6, 2016 1:08 AM

Nice work on the figures Bill. I can't say I've ever seen you build any. An your SU-76 is just rolling along. 

   http://i7.photobucket.com/albums/y269/wing_nut_5o/PANZERJAGERGB.jpg

 Eric 

  • Member since
    November 2009
  • From: SW Virginia
Posted by Gamera on Wednesday, April 6, 2016 7:36 AM

Nice work there Bill on the tow cable and other fiddly bits- but I esp love the figures. 

"I dream in fire but work in clay." -Arthur Machen


  • Member since
    July 2004
  • From: Texas
Posted by wbill76 on Wednesday, April 6, 2016 9:29 AM

Thanks Gamera! Tamiya did a great job on the figures, almost resin level of detail! 


tigerman

Nice work on the figures Bill. I can't say I've ever seen you build any. An your SU-76 is just rolling along. 


Thanks as well Eric! I don't normally do figures as they typically also involve a base and added expense and storage complications but neither of those applied here since they were included in the kit. Beer

  • Member since
    December 2002
  • From: Bury St Edmunds, Suffolk, England
Posted by Bish on Wednesday, April 6, 2016 11:59 AM

Looking good Bil, and nice job on the figures, next thing we know, you will be doing a whole diorama Wink. Good to hear the string tow rope came out ok, i usually am not that keen on those.

I am a Norfolk man and i glory in being so


On the bench: Airfix 1/72nd Harrier GR.3/Fujimi 1/72nd Ju 87D-3

  • Member since
    July 2004
  • From: Texas
Posted by wbill76 on Wednesday, April 6, 2016 5:12 PM

Thanks Bish! I've done small dioramas and vignettes in the past but it's not a regular occurrence, just not something that I'm all that into but occasionally it's a nice diversion! Wink 

I hear you on the string approach to cables...the trick is getting them to stiffen up just enough (and not fuzz!) to remain flexible but not lose their braided look. The fuzzing typically happens with cotton-based string...for that, I will dip the string in Future and let it air dry before painting. Any fuzz that happens can then be dealt with before painting. The string that Tamiya provided seemed to be synthetic/nylon-based although don't quote me on that. Beer 

  • Member since
    July 2004
  • From: Texas
Posted by wbill76 on Thursday, April 7, 2016 8:25 PM

The kit includes two markings options and I decided to go with the 'Unit Unknown, Karlshorst district, Berlin, 1945' as I also decided to put the vehicle on a small base (more on that in just a second) and a Berlin vehicle was going to fit nicely with that plan. The markings are simple, just vehicle numbers on the sides and rear. I also liked the '27' option since the rear number is different from the sides, gives it a little more character vs. the uniform '30' option that was the other choice for that unit. 


Usual drill with an airbrushed coat of Future, decals applied, dosed with Solvaset for them to snug down, then a 2nd coat of Future to seal them in and protect from the weathering process. 


While all that was in the 'hurry up and wait' phase, I also worked on a simple base over the last couple of days. I had a shaped wood base laying around that was just the right size, so it was stained and given some basic ground work...only about 10% of the base will actually be visible once the vehicle is placed, so no need to get super fancy. My idea is the 'road to victory', so it's a road pointing towards Berlin in April 1945. The vehicle will get weathered to match up to it in the steps to come. I used some Woodland Scenics 'field grass' and scratch built the road sign. The post is a sanded down bamboo skewer that I stained with real wood stain and the signs were done in Photoshop, printed out on paper, and then taped to a sheet of styrene. I cut out the arrows using the printed templates and then glued the paper to the styrene with Gator Grip thin blend glue. A bit of detail painting and some careful dry-brushing added the black borders and a little wear and tear. Google helped with the Km distances so that all three signs would be accurate on the assumption that you were 50 km from Berlin at that particular spot. 


Getting much closer to the finish line on this little guy, now the fun begins! 

  • Member since
    January 2007
Posted by the doog on Thursday, April 7, 2016 8:48 PM

Love it, Bill! And like everyone has said, I love the figures as well--they look great, and the base is perfect too. Another one for the ol' display case!

  • Member since
    July 2004
  • From: Texas
Posted by wbill76 on Thursday, April 7, 2016 9:25 PM

Thanks Karl! It's been a fun project, almost done! Beer

  • Member since
    July 2004
  • From: Sonora Desert
Posted by stikpusher on Friday, April 8, 2016 3:06 AM

Yes

Even on a display base, these things do not take up much room. Looking real good as you near the finish line!


F is for FIRE, That burns down the whole town!

U is for URANIUM... BOMBS!

N is for NO SURVIVORS...

       - Plankton

LSM


  • Member since
    October 2015
Posted by Modelrob on Friday, April 8, 2016 6:49 AM

Bill it looks great and the base came out nice.

Robert

  • Member since
    November 2009
  • From: SW Virginia
Posted by Gamera on Friday, April 8, 2016 7:35 AM

Whoa almost there now!

And nice work on the base, somehow even a small one seems to put the tank 'in it's element' and thus look much better than just plopping the tank down on the table. 

"I dream in fire but work in clay." -Arthur Machen


  • Member since
    July 2004
  • From: Texas
Posted by wbill76 on Friday, April 8, 2016 11:14 AM

Thanks Rob!


stikpusher

Yes

Even on a display base, these things do not take up much room. Looking real good as you near the finish line!

 
Definitely not a huge vehicle. The base in question is 7" x 5" only, not a space hog at all! Wink
 

Gamera

Whoa almost there now!

And nice work on the base, somehow even a small one seems to put the tank 'in it's element' and thus look much better than just plopping the tank down on the table. 


I agree Gamera, since I had added the figures, it seemed like a small base was also in order. Ordinarily I don't include bases for storage reasons among others but in this case it didn't substantially increase the space footprint in the display cabinet. Smile 

  • Member since
    July 2004
  • From: Texas
Posted by wbill76 on Friday, April 8, 2016 5:27 PM

Today was a 'Darth Vader' day that meant I spent virtually the entire session with the breather mask on. I started in on the weathering process and applied dot filters using a combination of MM enamel Faded Olive Drab and the last 'green' shade that I had mixed up for the hull. The Faded OD was added at about a 2-to-1 ratio so that it would do it's job in terms of fading and adding in some color variation but without going too crazy. It did the trick beautifully and created a nice subtle tonal variation in the process, something that's not so easy to capture in the photos but which should show up a little more pronounced once a flat coat is applied over it. 


Next up, I added a pin wash using Ammo's Africa Korps Wash and a 10/0 pointed brush. After the initial application, I used the same brush and clean thinner to tighten it up and make adjustments where necessary. 


Here's where it stands now, I'll let it sit overnight and look at it with 'fresh eyes' to see if there are any other adjustments I want to make before moving on to the pigment stage. 


One step closer to the finish line! :)

  • Member since
    December 2002
  • From: Bury St Edmunds, Suffolk, England
Posted by Bish on Saturday, April 9, 2016 3:15 AM

Thanks for the info on the string. I will keep the future trick in mind.

Looking very nice, great little base you have there, really sets it off well.

I am a Norfolk man and i glory in being so


On the bench: Airfix 1/72nd Harrier GR.3/Fujimi 1/72nd Ju 87D-3

  • Member since
    July 2004
  • From: Texas
Posted by wbill76 on Saturday, April 9, 2016 10:58 AM

Thanks Bish! I discovered that little trick when using crochet thread for tiedowns. Works well enough if you don't want to spring for ship rigging type thread or similar! ;)

  • Member since
    July 2004
  • From: Sonora Desert
Posted by stikpusher on Saturday, April 9, 2016 1:38 PM

Bish, If you need a good source for nylon string, get ahold of parachute cord. It is sold in many camping sporting good stores around here in lengths of 50 feet or so for pretty cheap. You cut off a length, remove the "guts" from the braided sheath and have plenty of high quality nylon line for making cables. I have plenty left over from my service time, supply used to give us tons of the stuff and we mostly used the sheathing for "dummy cord", tying down  equipment or adding a wrapped cord cover to handles for better non slip grips, leaving me with lots of inner line. Hit the cut end of the line with some heat to keep it from unravelling and your in business.


F is for FIRE, That burns down the whole town!

U is for URANIUM... BOMBS!

N is for NO SURVIVORS...

       - Plankton

LSM


  • Member since
    July 2004
  • From: Texas
Posted by wbill76 on Saturday, April 9, 2016 4:49 PM

Put the final touches in on this project today. First order of business after making some minor adjustments to the dot filter and pin wash treatment was a dose of MM Lusterless Flat. 


The pigment weathering objective was to get the tracks/suspension and hull to match up with the base, so to that end I applied some Mig Dark Mud pigments. I applied it as a wet mix using ordinary tap water as the carrier with a drop of liquid dish soap added to break the surface tension. 


After it had air dried, I used a stiff bristled brush to remove the excess. I had to be careful not to be too harsh on the track runs, especially the top portions, and had to reattach a couple spots that came loose in this process. 


More adjustments were done with a combination of wet and dry q-tips. For the tight spaces around the road wheels where the q-tip couldn't fit, I used a small round sable brush and clean water to make changes where needed. 


The end result  looks good, but the ultimate check was with the base.


That meant I could turn to the last couple of details remaining. I used some black artist pastels to add some more exhaust soot and staining to the right side of the hull. 


The headlight finally got its clear lens as well. I installed it with liquid glue, then brushed a light coat of Future over the front. Once that was dry and protecting the clear part, I ran some thinned green around its edge so that it would look integrated with the rest of the housing. 


That meant it was time for the walkarounds to check for any other small things that I might have missed. 


And then the placement on the base! 


  • Member since
    February 2011
Posted by knox on Sunday, April 10, 2016 8:24 PM

Nice job.  I really like the looks of your tank and you did a great job on your figures.    gk

  • Member since
    July 2004
  • From: Texas
Posted by wbill76 on Sunday, April 10, 2016 10:47 PM

Thanks Knox, appreciate the comments. 


The Hobbyist

Not bad...don't care for the base much...it's so small (not much bigger than the AFV footprint) as to really add nothing, and, in fact, detracts from the AFV.  IMO, of course.Yes Figures are slightly above average. 

I agree in regards to the base size, but the display cabinet space available dictates that I normally don't add a base at all to my builds. It's very rare for me to include one in fact. This one was small enough on its own to allow for a simple base of this size but nothing bigger. In a perfect world it would occupy a proper dio sized base with more elements to create a more visually interesting scene, but that takes up real estate I don't have available. 

Figures aren't my strong suit either and to hear they are slightly above average means I'm improving there as well considering I'm still learning and trying out things each time I decide to work with them. They are about as rare as bases for inclusion on projects.  Beer  They made an appearance this time around since they were like Everest...they were there in the kit. Wink


  • Member since
    January 2013
Posted by jibber on Sunday, April 10, 2016 11:57 PM

Bill I think this is one of those times when the figures and vehicle compliment each other. I think all too often the figures are just thrown in without too much thought, but these look coordinated and functioning while the vehicle does its own job. I think its just the harmony between the two that strikes me. Super clean, super detailed and just a super build. Bill thanks for bringing us along. 

Terry

  • Member since
    July 2004
  • From: Texas
Posted by wbill76 on Monday, April 11, 2016 1:08 AM

Thanks Terry! Tamiya really did a great job all around with this kit IMHO. Was a real pleasure to build. Beer

  • Member since
    March 2003
  • From: Rain USA, Vancouver WA
Posted by tigerman on Monday, April 11, 2016 2:04 AM

I like the addition of the crew Bill. As per usual, your WIP will come in handy for any future builds. Well done my friend.

   http://i7.photobucket.com/albums/y269/wing_nut_5o/PANZERJAGERGB.jpg

 Eric 

  • Member since
    November 2009
  • From: SW Virginia
Posted by Gamera on Monday, April 11, 2016 7:46 AM

Nice simple clean straight-from-the-box build, I love it. I have a habit to keep adding stuff to any build till it becomes so complex I never finish it, something like this is good inspiration on how less can be more. And I like the figures, they give a sense of scale and a 'lived-in' look if that makes any sense.  

"I dream in fire but work in clay." -Arthur Machen


  • Member since
    July 2004
  • From: Texas
Posted by wbill76 on Monday, April 11, 2016 10:08 AM

Thanks Eric, glad to hear the SBS will be helpful! Beer


Gamera

Nice simple clean straight-from-the-box build, I love it. I have a habit to keep adding stuff to any build till it becomes so complex I never finish it, something like this is good inspiration on how less can be more. And I like the figures, they give a sense of scale and a 'lived-in' look if that makes any sense.  

I hear you on how easy it is to fall victim to AMS on a build! It was a fun reminder on how enjoyable a good OOB kit build can be. I agree about the figures too especially since the Russians tended to take shorter guys for the Tank Regiments, they had to be on good terms with each other in those tight quarters! Big Smile

  • Member since
    January 2016
  • From: A Galaxy Far, Far Away
Posted by Hunter on Monday, April 11, 2016 12:31 PM

The Hobbyist

Not bad...don't care for the base much...it's so small (not much bigger than the AFV footprint) as to really add nothing, and, in fact, detracts from the AFV.  IMO, of course.Yes Figures are slightly above average. 


REALLY?? 


Bill,

Wonderful build Sir, and I immensely enjoyed every aspect of your build. The entire build turned out fantastic. 

Hunter 


  • Member since
    July 2004
  • From: Texas
Posted by wbill76 on Monday, April 11, 2016 2:51 PM

Hunter


Wonderful build Sir, and I immensely enjoyed every aspect of your build. The entire build turned out fantastic. 


Thanks, appreciate the kind words. Beer

  • Member since
    April 2013
  • From: Eleva, Wisconsin
Posted by Greatmaker on Monday, April 11, 2016 3:37 PM

Beautiful Build! and your figures look like they are seriously ticked off.. My last figures looked like they fell down face first into a latrine. Yours are super


  • Member since
    July 2004
  • From: Sonora Desert
Posted by stikpusher on Monday, April 11, 2016 4:22 PM

Beautiful finish! Toast And here I was thinking it was gonna be too clean for the base. Your final weathering tied the two together nicely!Yes Adding the figures gives a nice sense of animation to the completed build.

I think my only critique point would be to leave off the Moscow and Warsaw signs in the sign post. Those strike me not quite pausible. Perhaps a German town to the east would fill that role better on the post.


F is for FIRE, That burns down the whole town!

U is for URANIUM... BOMBS!

N is for NO SURVIVORS...

       - Plankton

LSM


JOIN OUR COMMUNITY!

Our community is FREE to join. To participate you must either login or register for an account.

SEARCH FORUMS
FREE NEWSLETTER
By signing up you may also receive reader surveys and occasional special offers. We do not sell, rent or trade our email lists. View our Privacy Policy.