SEARCH FINESCALE.COM

Enter keywords or a search phrase below:

Mack RW rebuild

2067158 views
239 replies
1 rating 2 rating 3 rating 4 rating 5 rating
  • Member since
    May 2009
  • From: Poland
Posted by Pawel on Thursday, January 31, 2013 6:31 AM

Dogfish7 - thanks again! Let's see what you'll say to this following update:

Vincent - Thanks a lot, good to have you aboard!

So I had a little time and I used it to put the radiator in - but it was, by no means, a drop-in. As I wrote before, it took some serious surgery to squeeze it under the hood, and now I also had to fight with the fan and the lower radiator hose. The hoses, btw, were made out of 2mm soldering wire.

I painted the radiator Humbrol 85 (black, satin) and dry brushed it with Humbrol 32 (dark grey). After installation it looks like this:

I hope you like it, thanks for reading and have a nice day

Paweł

All comments and critique welcomed. Thanks for your honest opinions!

www.vietnam.net.pl

  • Member since
    December 2002
  • From: Northern California
Posted by jeaton01 on Thursday, January 31, 2013 5:57 PM

Pawel, it is coming along nicely.  That lower hose looks too close to the vibration dampner to suit me.  Might be better routed along next to the crossmember?

John

To see build logs for my models:  http://goldeneramodel.com/mymodels/mymodels.html


  • Member since
    May 2009
  • From: Poland
Posted by Pawel on Sunday, February 3, 2013 10:57 AM

Hello John!

Thanks a lot for your comment! It shows right away you did it in 1:1 Big SmileYou probably mean under the motor mount, and then parallel to the frame rail? I've been thinking about it, too, but now that it's glued in place i suppose it will be very hard to move without breaking some other stuff. I'll see what I can do - thanks again for the heads up and have a nice day

Paweł

All comments and critique welcomed. Thanks for your honest opinions!

www.vietnam.net.pl

  • Member since
    October 2010
  • From: Hoodsport, WA
Posted by Dogfish_7 on Monday, February 4, 2013 5:23 AM

Fantastic detail work on the motor!

Bruce

  • Member since
    May 2009
  • From: Poland
Posted by Pawel on Monday, February 4, 2013 10:49 AM

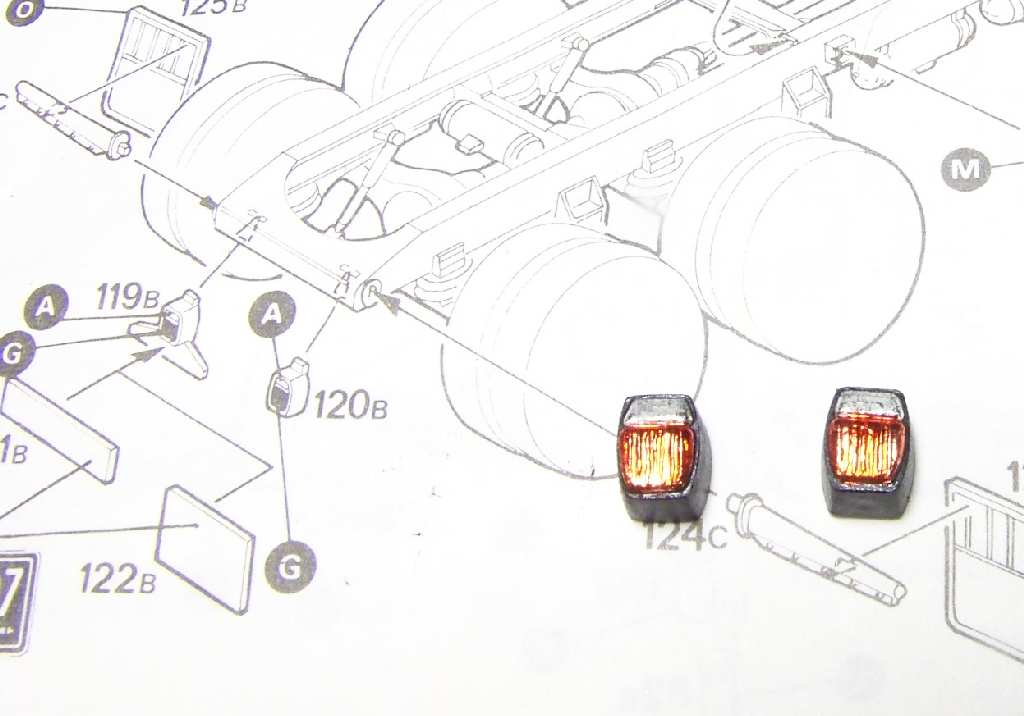
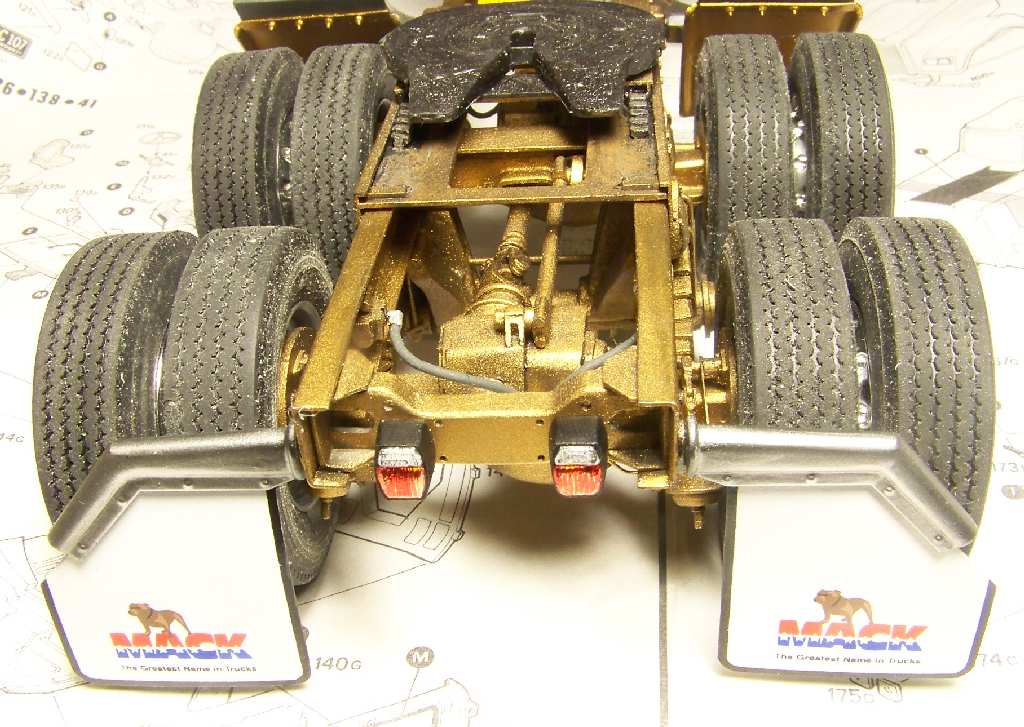
Thanks a lot, Dogfish7! I upped the tempo a little, and I already have a new updete for you! I tackled the taillights - modified the kit parts a little by boxing them, I also covered the lenses with BMF, and then painted the red portion with clear red by Humbrol, the white portion with matt white, also by Humbrol, just so that the silver would look through. Ended up like this:

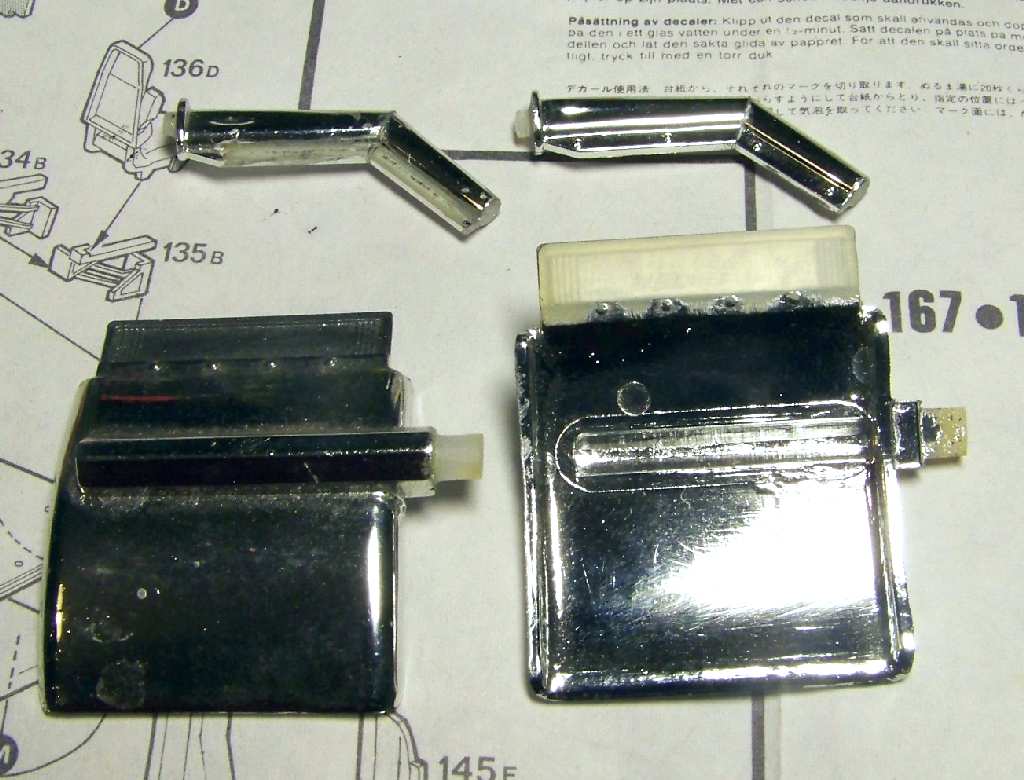
Then I continued the work on the fenders. Like I already shown you loong time ago, here's what I started with:

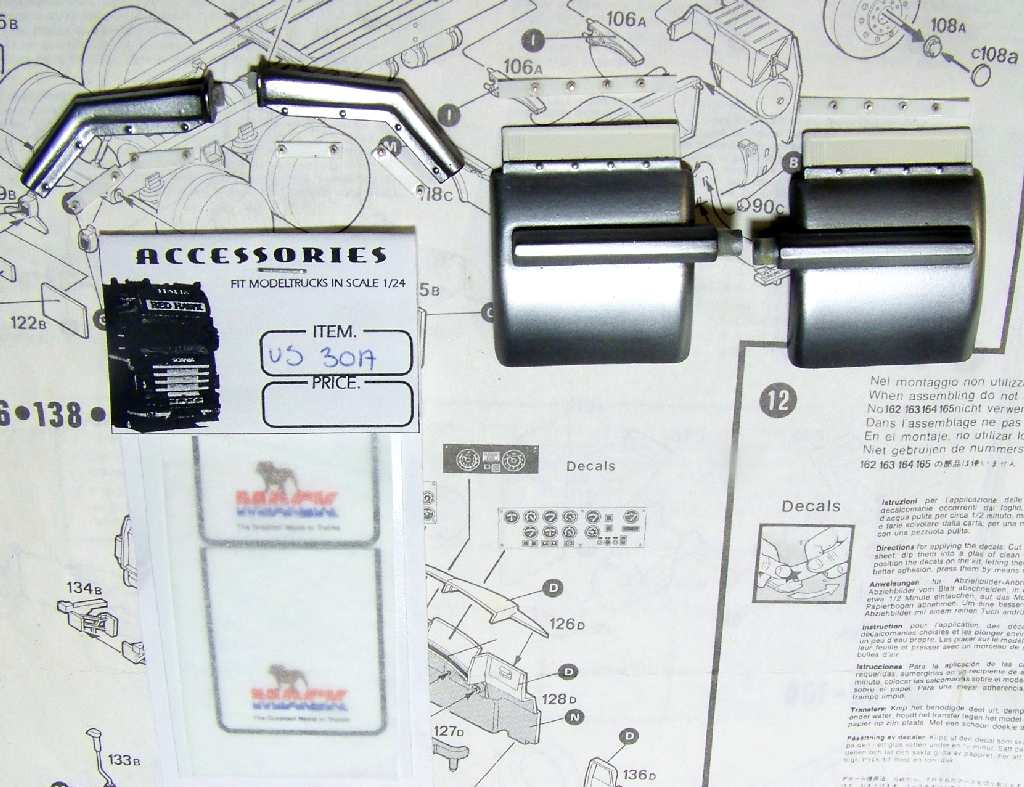
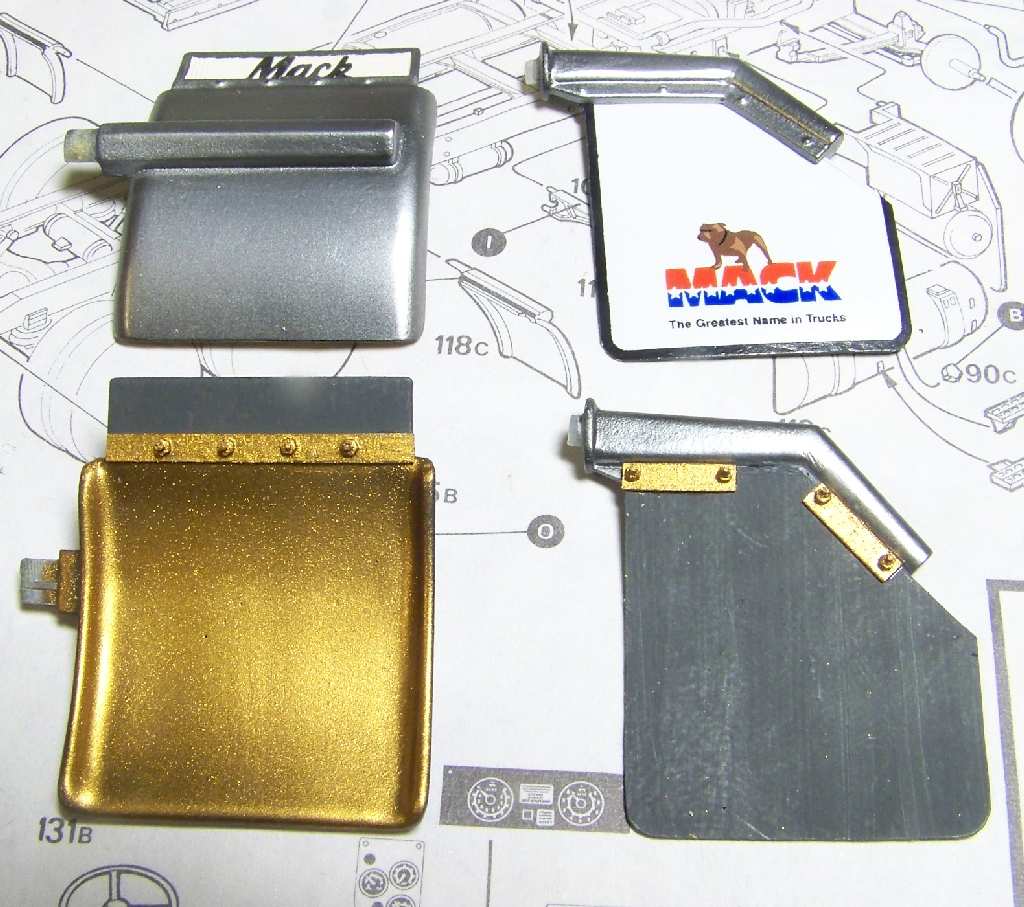
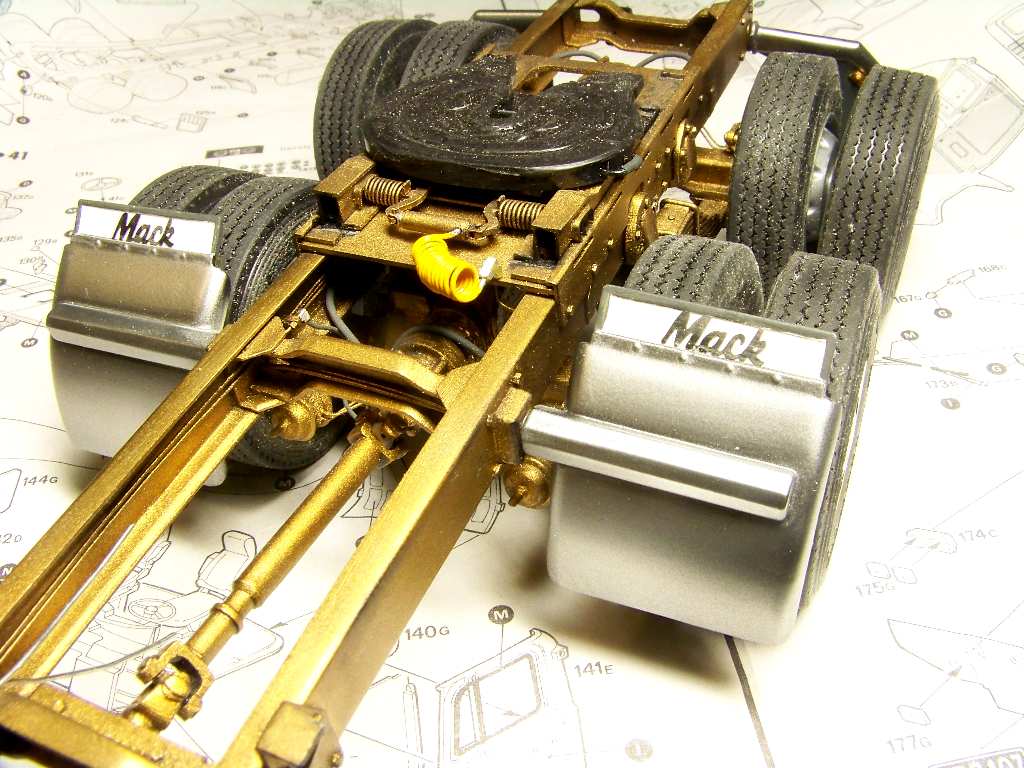
On the top you see the hangers, modified "Mack style", on the bottom the quarter fenders. All the parts were dechromed, puttied, and Alcladed. After that (took mem months!), they looked like this:

You can also see I bought the rear skirts, printed on white vinyl. It's a product number US30A from a small company called Flemming Pedersen. I also fabricated fittinb brackets with bolts to show mounting hardware for the vinyl. I painted the back of the vinyl sheet with Humbrol 32 (dark grey), and assembled the fenders. Done they looked like this:

I was a pure pleasure, to dry-fit them to the chassis. Together with the taillighs they look like this:

I think it's high time I did something about putting the cab on the frame - scary as that may seemBig Smile

Thanks for reading, hope you liked it. Please stay tuned and have a nice day

Paweł

All comments and critique welcomed. Thanks for your honest opinions!

www.vietnam.net.pl

  • Member since
    May 2009
  • From: Poland
Posted by Pawel on Tuesday, March 5, 2013 8:17 AM

Hello again!

Recently I've been working on the sleeper cabin again. First, I put some magazines on the bed:

Then I put on the final coat of clear and started detailing the exterior - lights (like Chris - dirkpitt77 told me - thanks a lot!), vents and chrome. Still have to add handrails and TV antenna though:

I also scratchbuilt the frame deck - the place where the driver is standing while hooking up the trailer. First I have built a frame from 0.5 mm sheet styrene, then I added the aluminium mesh:

The deck already has places prepared for mounting the "pogo stick", air lines and the electric receptacle. After painting it looks like this:

Hope you like it, thanks for reading and have a nice day

Paweł

All comments and critique welcomed. Thanks for your honest opinions!

www.vietnam.net.pl

  • Member since
    May 2009
  • From: Poland
Posted by Pawel on Wednesday, March 13, 2013 9:18 AM

Hello everybody!

Movin' on with the sleeper - I fabricated the hand grips from brass. Used rair stanchions from Billing boats and 1mm brass wire for that. Here's what they look like:

Thanks for looking, have a nice day

Paweł

All comments and critique welcomed. Thanks for your honest opinions!

www.vietnam.net.pl

  • Member since
    May 2009
  • From: Poland
Posted by Pawel on Wednesday, March 27, 2013 9:31 AM

Hello again!

I've got a minor update for you - I've been working on the air cleaner:

In the lower left corner of the photo you can see the kit-supplied part - it's wrong size and stuff, so I scratchbuilt a new one, the air ducts also had to be rearranged, as Italeri incorrectly moved the air intake to the right when it should be on the left side. I also have another photo of the scratchbuilt air cleaner housing:

Thanks for reading and have a nice day

Paweł

All comments and critique welcomed. Thanks for your honest opinions!

www.vietnam.net.pl

  • Member since
    May 2009
  • From: Poland
Posted by Pawel on Thursday, April 11, 2013 9:14 AM

And another one!

The air cleaner is going to hang under the hood like this:

The mounts on its sides double as attachment points for the radiator struts. I also alcladed the rails on the sleeper - now they look like this:

I also (finally!) started building the mirrors, with brackets. I was afraid about the results, but in the end they turned out just fine:

The brackets are bent out of silver-coated copper wire - available at electronics stores (at least in Poland). They were soldered together. The mirror heads are from A.I.T.M. and the little round mirrors were scratchbuilt. All four mirrors are lined with mirror self adhesive foil to show just what they are.

I hope you liked it, thanks for reading and have a nice day

Paweł

All comments and critique welcomed. Thanks for your honest opinions!

www.vietnam.net.pl

  • Member since
    December 2002
  • From: Northern California
Posted by jeaton01 on Friday, April 12, 2013 12:11 AM

It's looking real nice, Pawel!

John

To see build logs for my models:  http://goldeneramodel.com/mymodels/mymodels.html


  • Member since
    May 2009
  • From: Poland
Posted by Pawel on Saturday, April 13, 2013 6:47 AM

Thanks John, it's good to know you're still with me on this one! Have a nice day

Paweł

All comments and critique welcomed. Thanks for your honest opinions!

www.vietnam.net.pl

  • Member since
    August 2007
  • From: back country of SO-CAL, at the birth place of Naval Aviation
Posted by DUSTER on Monday, April 15, 2013 1:02 AM

Another triumph in modeling skill.  


Steve

Building the perfect model---just not quite yet  Confused

  • Member since
    January 2007
Posted by the doog on Monday, April 15, 2013 6:23 AM

WOW< Pavel---this is indeed a "Modeling triumph"!  I hope that the magazine editors are paying attention to this--this deserves an article!

I recognize something in this model--"love". There's a love or the subject, and a love for modeling that shines through.

Some of the best work I've seen on this site in any forum. Spectacular!!

  • Member since
    May 2009
  • From: Poland
Posted by Pawel on Monday, April 15, 2013 9:54 AM

Thanks a lot, gentlemen!

Steve - thanks a lot, that was nicely said!

Karl - thank you for your comment! I really got to love the Superliner (I'm not the only one, there are many Mack fans around), and I sure love to build. I'm glad you like it!

Have a nice day

Paweł

All comments and critique welcomed. Thanks for your honest opinions!

www.vietnam.net.pl

  • Member since
    May 2009
  • From: Poland
Posted by Pawel on Thursday, May 9, 2013 7:33 AM

Hello again!

Not much progress lately, because of my business trips to Germany, but I managed to design the patterns and print the decals at decalprint.de, and yesterday I applied them to my model. Those are fictious markings, but based on my research of the regulations regarding current trucks. Here's what the cab looks like with the decals on:

Hope you like'em, thanks for reading and have a nice day

Paweł

All comments and critique welcomed. Thanks for your honest opinions!

www.vietnam.net.pl

  • Member since
    May 2009
  • From: Poland
Posted by Pawel on Friday, July 12, 2013 12:13 PM

Hello again!

Today I've got a small update - I overcoated the decals with clear coat and put on a few details. The overcoating was a bit tricky, as I was almost sure the clear I spray from the can would et up the decals. So first I airbrushed two coats of Alclad 2 clear, which turned out a little foggy, and on top of that came the motip, that I later sanded with 1000 and 2500 grades sanding paper and polished. All the surface flaws can be seen on the photo below:

In reality it looks a lot better. I also added the doorhndles and the grabhandles to the cab, all of them slvaged from my old model and rechromed with Alclad 2:

I also added the windshield wipers made from PE parts by KFS company from the UK:

I was also busy coercing the air cleaner to fit under the hood and figuring out a way to mount the toolboxes on the frame. But for now that would be it - thanks for reading and have a nice day

Paweł

All comments and critique welcomed. Thanks for your honest opinions!

www.vietnam.net.pl

  • Member since
    May 2009
  • From: Poland
Posted by Pawel on Wednesday, September 18, 2013 8:01 AM

Hello again!

Taking advantage of a short break I have now from my business trips, I went on to build the fuel tank steps. I used PE parts from a company called KFS, but with a modification to better show the steps as mounted on Macks. I also made my own supports for the steps out of 0,5 mm styrene sheet, rather than the KFS's photoetched supports. Here's how the steps turned out:

Then I concentrated my courage and glued the steps on the tanks. Here's what they look like now:

And looking from below:

Hope you like it, thanks for reading and have a nice day

Paweł

All comments and critique welcomed. Thanks for your honest opinions!

www.vietnam.net.pl

  • Member since
    August 2007
  • From: back country of SO-CAL, at the birth place of Naval Aviation
Posted by DUSTER on Saturday, September 21, 2013 3:40 AM

  Very Nice

Steve

Building the perfect model---just not quite yet  Confused

  • Member since
    May 2009
  • From: Poland
Posted by Pawel on Monday, September 23, 2013 2:05 PM

Hello!

Thanks a lot, Steve! Your comment means a lot to me! Have a nice day

Paweł

All comments and critique welcomed. Thanks for your honest opinions!

www.vietnam.net.pl

  • Member since
    December 2002
  • From: Northern California
Posted by jeaton01 on Tuesday, September 24, 2013 10:44 PM

Great steps.

John

To see build logs for my models:  http://goldeneramodel.com/mymodels/mymodels.html


  • Member since
    January 2007
Posted by the doog on Wednesday, September 25, 2013 6:28 AM

An epic build, Pawel. Really gorgeous work all around. It's really looking terrific!

  • Member since
    May 2009
  • From: Poland
Posted by Pawel on Wednesday, September 25, 2013 3:55 PM

John - thanks a lot for your comment and for your patience staying with me on this one!

Karl - thanks a lot for your kind words, they mean a lot to me!

Please stay tuned and have a nice day!

Paweł

All comments and critique welcomed. Thanks for your honest opinions!

www.vietnam.net.pl

  • Member since
    May 2009
  • From: Poland
Posted by Pawel on Thursday, December 5, 2013 2:50 AM

Hello everybody!

After a long break caused by business trips, I'm back with a small update. I've been working on the pogo stick and the trailer connection. I've scratchbuilt the pogo stick out of copper wire and sprue (the base and the ball), and then put some Alclad on it. The lines (blue and red for air, green for electricity) are made of telephone wire:

I still have to terminate the lines in some way. I was thinking about a "dummy socket" to connect the lines while not in use, but made so as to reserve me the possibility of connecting a trailer on some fine day. Maybe somebody has a nice photo of such a holder/dummy socket? Thanks for reading and have a nice day

Paweł

All comments and critique welcomed. Thanks for your honest opinions!

www.vietnam.net.pl

  • Member since
    May 2009
  • From: Poland
Posted by Pawel on Wednesday, January 22, 2014 4:41 PM

Hello!

It's been a long time!

After lots of thinking I decided to replace the telephone wire with something thinner. Found a material called Kynar - it's much better, just 0,5 mm diameter with insulation. Here's how it turned out:

I also did the plumbing from the underside:

Then I tackled the front wheel hubs. The kit ones were long gone, and inaccurate anyhow. So I have scratchbuilt new ones:

And after painting and a black wash:

And after installation - please forgive the dust:

I also mounted the tool boxes. Strenghtened the joint with 0.8mm brass bolts - the boxes are solid resin and a little heavy. Now the chassis looks like below. The rear wheels and quarter fenders are dry-fitted yet:

Now I have to get ready to mount the cab! Hope you liked it, thanks for reading and have a nice day

Paweł

All comments and critique welcomed. Thanks for your honest opinions!

www.vietnam.net.pl

  • Member since
    January 2007
Posted by the doog on Wednesday, January 22, 2014 5:08 PM

The dedication and detail that you're putting into this build is just inspirational, Pawel. I hope that you make sure to write this up as an article for the magazine--this deserves to be published!

  • Member since
    May 2009
  • From: Poland
Posted by Pawel on Thursday, January 23, 2014 8:06 AM

Hello Karl!

Thanks a lot for your kind words! I'm not quite sure how to go about that publication - I'll ask around. Thanks again for your comment, have a nice day

Paweł

All comments and critique welcomed. Thanks for your honest opinions!

www.vietnam.net.pl

  • Member since
    April 2013
Posted by minimagneto on Thursday, January 23, 2014 9:57 PM

Wow. Just wow, once again. I have a started truck build (GMC Astro) that I'll be taking back out of the box one day. Will definitely be re-reading this thread for inspiration then!

Blake

  • Member since
    September 2013
Posted by Les.61 on Saturday, January 25, 2014 3:41 AM

Certainly doing a fantastic job on this project. Harping back to when you did the engine, what did you use for the "plumbing" on the engine. The small pipes that look solid?

Look forward to seeing more photos as work progresses.

  • Member since
    May 2009
  • From: Poland
Posted by Pawel on Saturday, January 25, 2014 7:59 AM

Hello! Thanks a lot for your comments!

Blake - you're welcome. You also might want to check those two links:

www.modelwork.pl/viewtopic.php

www.modelwork.pl/viewtopic.php

Although they are in Polish, I think the photos could interest you. You might want to double check the fit of the cab, to avoid the gap between the cab and the bumper - it happened to my coleague who wrote the above threads.

Les.61 - Usually I used soldering wire to depict flexible lines like hoses and such, and thin copper wire to show hard lines with their regular bending pattern. You can get the best copper wire by stripping auto wiring, the big battery cables sometimes have nice stuff in them. Just watch it, some newer, cheaper cables have aluminum wires that are just copper plated - you don't want those, because they break too easily.

Thanks again and pleas stay tuned, good luck with yourr projects and have a nice day

Paweł

All comments and critique welcomed. Thanks for your honest opinions!

www.vietnam.net.pl

  • Member since
    August 2007
  • From: back country of SO-CAL, at the birth place of Naval Aviation
Posted by DUSTER on Monday, January 27, 2014 6:00 PM

Pawel

 Great job on the truck.   I guess it is like they say, quality takes time.

Good hints for finding copper wire; just don't forget to disconnect the cable from the battery before stripping it     

Steve

Building the perfect model---just not quite yet  Confused

JOIN OUR COMMUNITY!

Our community is FREE to join. To participate you must either login or register for an account.

SEARCH FORUMS
FREE NEWSLETTER
By signing up you may also receive reader surveys and occasional special offers. We do not sell, rent or trade our email lists. View our Privacy Policy.