SEARCH FINESCALE.COM

Enter keywords or a search phrase below:

Revell 56 Ford F-100-COMPLETED PHOTOS!! 01/23

15612 views
200 replies
1 rating 2 rating 3 rating 4 rating 5 rating
  • Member since
    March 2012
  • From: Corpus Christi, Tx
Revell 56 Ford F-100-COMPLETED PHOTOS!! 01/23
Posted by mustang1989 on Thursday, July 30, 2015 10:09 PM

I've been tinkering around with this build now in the Red Hot and Rollin' GB for about 4 months.

. I built this kit as a kid and had a blast with it even though it turned out mediocre.......well.......bad. Here's the kit I'll be starting a WIP here with.


 I have been working on getting the rear suspension lowered and the rear tires to tuck under the rear fenders and so far have had some decent luck at it.. I have narrowed the rear end and repositioned the rear spring perches to drop it a scale 6" and am going to tub the inside of the fender area / truck bed to get this to work.  It'll be a slow build because I'm taking my time on this bad boy so I don't mess it all up. The paint job will be exactly as it appears on the box top but the stance and wheels will all be different/ better. With that, it's going to be a catch up game to get to where I'm at right now with it but am looking forward to having this sucker done so I can show it possibly in October in Austin. At this point it's a long shot but we'll see.


 Forum | Modelers Social Club Forum (proboards.com) 

  • Member since
    March 2012
  • From: Corpus Christi, Tx
Posted by mustang1989 on Thursday, July 30, 2015 10:10 PM

I'll see if I can catch up to my current progress fairly quickly.


I bought a total of 4 kits for this build. I'll explain here:


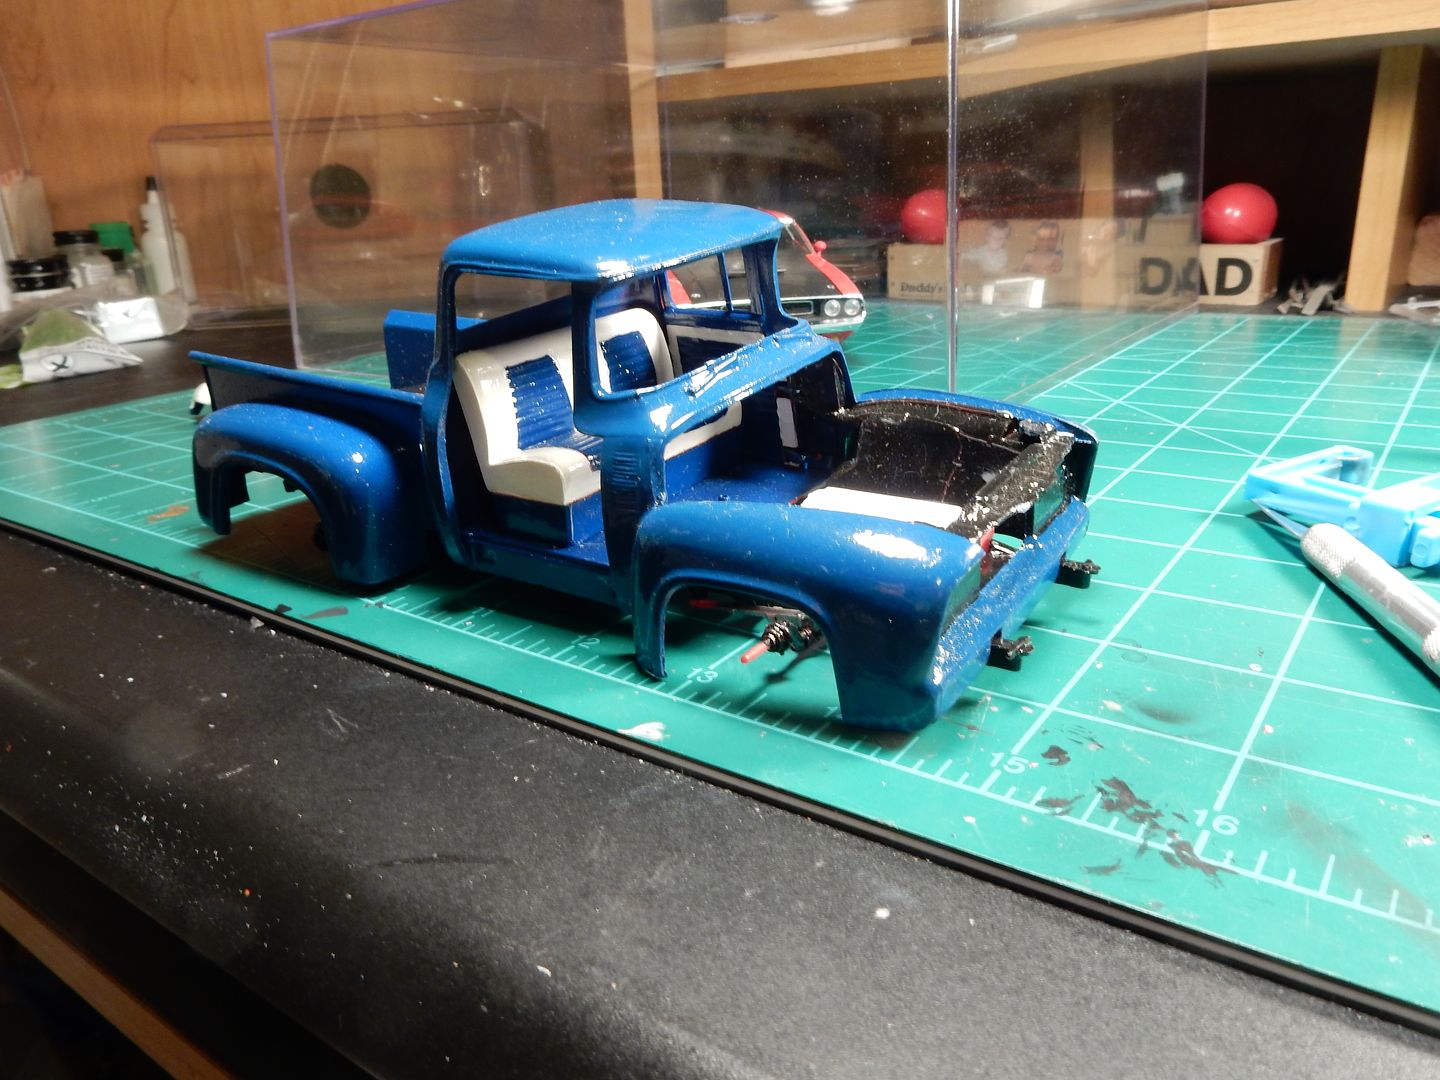
Kit #1: This is my main kit where all productive assembly will take place:


DSCN1403_zpswowjbjk2.jpg


Kit #2 : I will be using various parts that kit#1 does not have. The brake calipers are one example.


revell08811400.jpg


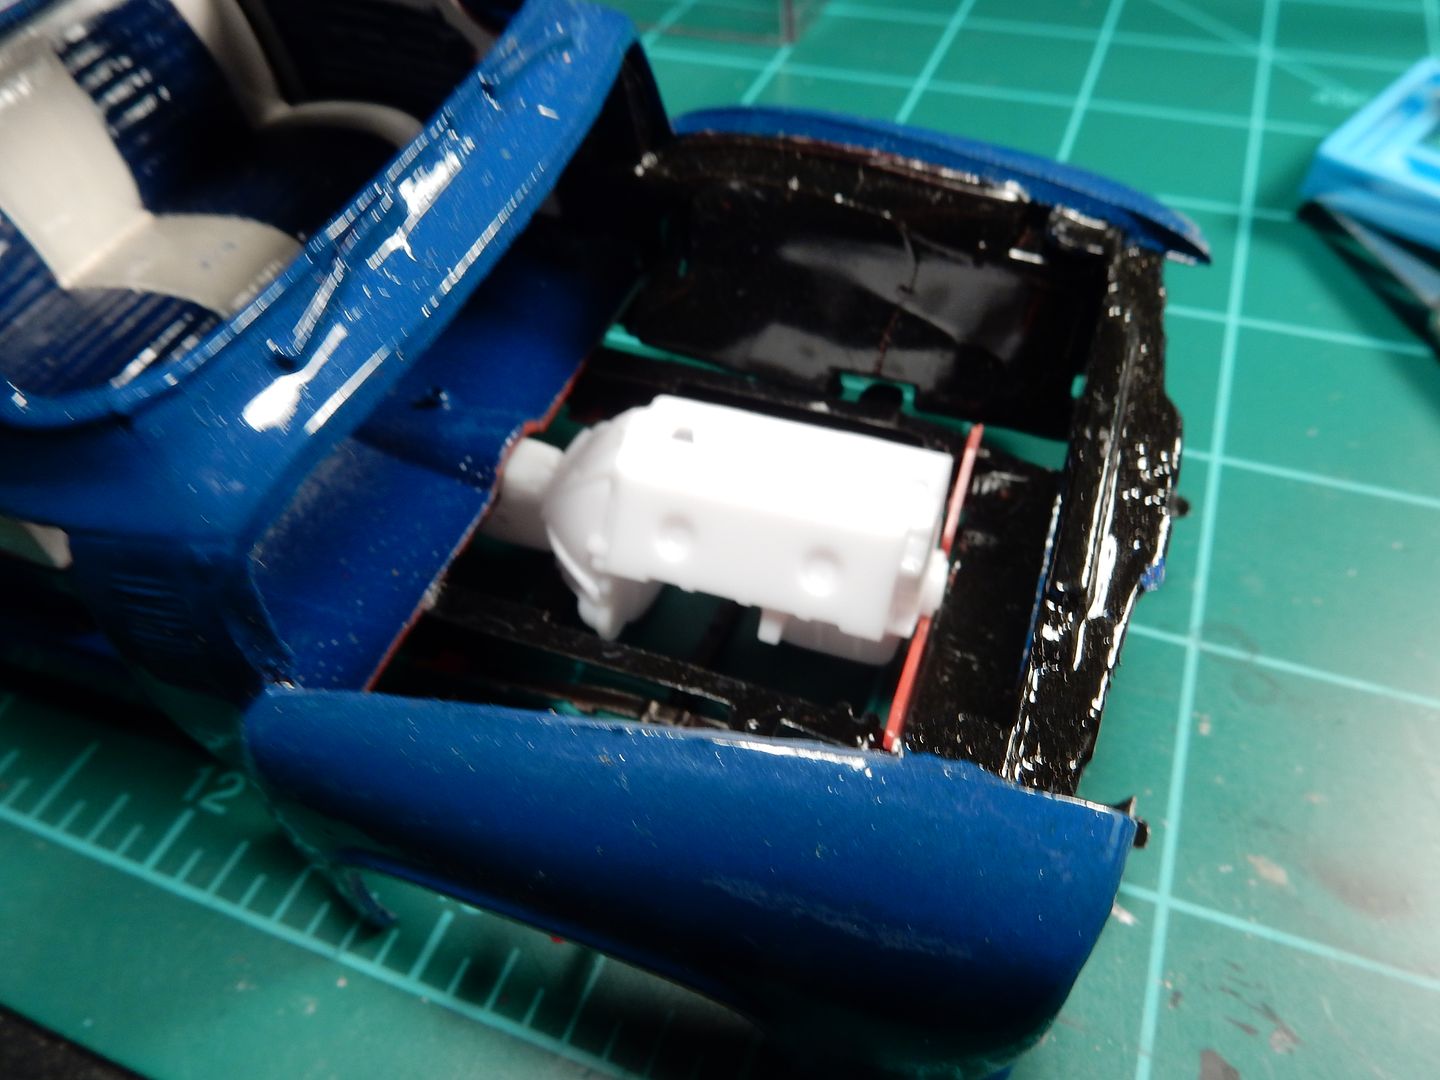
Kit #3 is a copy cat of kit #1 but has been half built (it was a terrible effort on somebody's part but the kit is PERFECT) that I got off of ebay. This kit will be the sacrificial donor for all initial cutting / hacking and placement of the powertrain and drivetrain components as well as where and how much to cut out of the bed for the wheel tubs. I couldn't care less about the appearance of this thing but it serves its purpose in this build. I'll post pics of this thing in a minute...


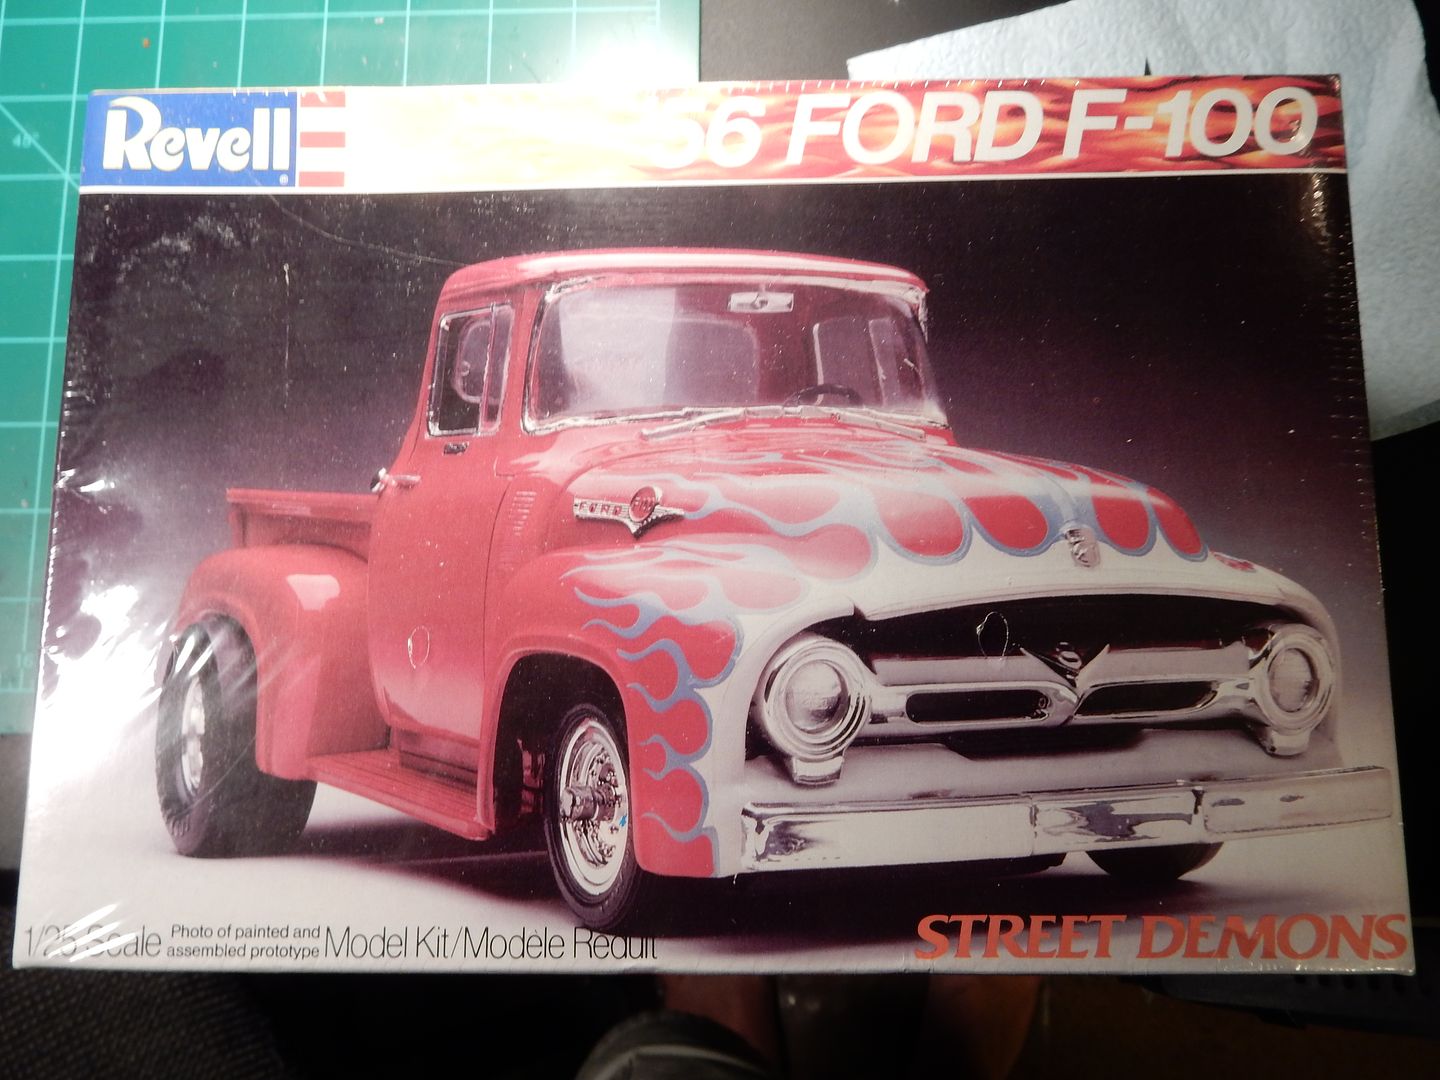
Kit#4 I have just in case something breaks or if I need another part (which happens a lot with my modified builds):


Roth_Pickup.jpg


With all this in mind I've got the 429 test fitted into the donor kit ....aww man! I forgot kit #5 for the hood scoop, 429 Boss decals and the engine donor:

111912-11132.jpg?nr=85-2149&company=reve

Here's the sacrificial donor kit:( I only hope the original builder was 6 years old!!!!LOL)sSig_DOH.gif_zpsiyz57xcc.png


DSCN1450_zpswhrauany.jpg


and the 429 bare block and transmission test fit. I'll haf to move the transmission crossmember back a little and fabricate some motor mount bosses. The engine had to go back a tad in this photo.


DSCN1451_zpsivm0dh3g.jpg


 Forum | Modelers Social Club Forum (proboards.com) 

  • Member since
    March 2012
  • From: Corpus Christi, Tx
Posted by mustang1989 on Thursday, July 30, 2015 10:13 PM

I am using some Weld Draglites that I got from Competition Resins. These wheels are my faves and will be used on most of my builds.


WeldWheels_zps512cad94.jpg


Here's where I'll be going with this:


RSCN1411_zpsyuxrzoss.jpg


 Forum | Modelers Social Club Forum (proboards.com) 

  • Member since
    March 2012
  • From: Corpus Christi, Tx
Posted by mustang1989 on Thursday, July 30, 2015 10:15 PM

 I had run up against an issue already in the build and I hadn'teven started yet. The rear tires are a two piece design so I either needed to use another set of one piece design tires or work with these. I chose to work with these and use Permatex gasket sealer (thanks to a tip from a friend here) to assemble the tire halves and help with getting rid of that nasty seam that runs right down the middle of the tires.


DSCN1412_zpsfxb3xdnv.jpg

What I did next was, from my way of thinking, a little unorthodox in the fact that I removed the original spring perches from the build frame and graphed the ones from the spare parts frame onto the one from the build. I know it's not icon_quotes.GIFcorrect icon_quotes.GIFbut I'll be able to lower the rear suspension down about 1/4" to put the wheel/ tire assy where I want it and have about 1/8" tweeking room. I've still got to brace them up a little better with some spare resin stock that I've got to clean up the appearance and have to trim up some on the truck bed so that it sits all the way down on the frame in the front (about 1/32"-1/16") but here's the current progress so I can at least show that I'm building on this.


DSCN1456_zpsvd95qpyk.jpg


and a little closer:


DSCN1455_zpsfbg4ys0y.jpg


 Next I graphed a few things from one frame to another so I'll post the major update pic first that has green callout lines. I didn't label the lines but I'll start with the lines starting at the front of the frame and work towards the rear.
Here we go:
Pointed%20out%20mods_zpsgdjhwoag.jpg
For line #1 at the radiator core support area I cut out the large area so that my belt, pulleys and fan would have a place to sit in place.
At line #2 I cut out the transmission cross member and relocated the cross member to the 4 speed transmission mount location.
At the 3rd line I relocated the rear leaf spring front perch on top of the frame and the 4th line is where I relocated the rear spring perch on top of the frame.
The transmission sits in like so:
Frame%20comparisons%20001_zpsa4h2u0zy.jp
I've still gotta install fabricated motor mounts from the frame to the engine but this is where that's gonna sit: (this body is ONLY used as part of the test fitting)
Engine%20test-fit%20001_zpsm8lruipn.jpg
A little crooked but I'll straighten that out:
Engine%20test-fit%20002_zpsp5f8cxoo.jpg
Next up will be motor mount boss fabrication and rear suspension and driveline work....................


 Forum | Modelers Social Club Forum (proboards.com) 

  • Member since
    March 2012
  • From: Corpus Christi, Tx
Posted by mustang1989 on Friday, July 31, 2015 4:11 AM

Ok fellas at this point I felt like I was finally getting somewhere here with this build! The rear springs were set into place with white glue just for test fitting and measurement purposes and the axle was just about where I wanted it as it's around 1/4" lower than what it was. I got the fabricated motor mount bosses glued into position also. The engine was still sitting at a weird angle even after motor mound mods so I added a transmission mount to the cross member which fixed the front high angle problem I was having out of the engine.


So far here are all the parts so far in white that have been added and/ or modified....


DSCN1469_zpsyyyqissz.jpg


and here's a comparison from frame to frame on even levels where the rear end is supposed to be if I were to build it how I was supposed to and where it is currently on this build. I just had to clean up and narrow the rear end to move the tires inward. icon_bored.GIF


FSCN1468_zpsmkxyec8e.jpg


 Forum | Modelers Social Club Forum (proboards.com) 

  • Member since
    November 2003
  • From: State of Mississippi. State motto: Virtute et armis (By valor and arms)
Posted by mississippivol on Friday, July 31, 2015 9:36 AM

Looking great so far

  • Member since
    February 2003
  • From: East Bethel, MN
Posted by midnightprowler on Friday, July 31, 2015 4:41 PM

Cool. Got a stock version of this in the works.

Hi, I am Lee, I am a plastiholic.

Co. A, 682 Engineers, Ltchfield, MN, 1980-1986

1 Thessalonians 4:13-18 1 Corinthians 15:51-54

Ask me about Speedway Decals

  • Member since
    March 2012
  • From: Corpus Christi, Tx
Posted by mustang1989 on Friday, July 31, 2015 5:00 PM

Thanks Mississippi and Lee! Do you have that stock F-100 that's red kit?


 Forum | Modelers Social Club Forum (proboards.com) 

  • Member since
    March 2012
  • From: Corpus Christi, Tx
Posted by mustang1989 on Friday, July 31, 2015 5:01 PM

All of this has proven to be a lot more tedious than I originally thought but I think it's going to pay off.........................................eventually. A lot of time has been spent on other things like getting the wheels to fit the front AM tires and smoothing out the two piece rear tires (this all boiled down to money folks-I could have just bought another kit with one piece tires in it or gone AM with this but I've already exceeded the budget BIG TIME with this build so if it aint paint related stuff I'm buying then it aint gonna happen) and drilling the holes out in the Draglite wheels. I did manage to narrow the rear end and get a couple of pieces glued on to the frame though.


DSCN1471_zpspzkurbwg.jpg


Here's the difference after removing some off of the differential mounting pads. I think we're going to be ok in the "lowering department".


RSCN1476_zpsmvcssy17.jpg


and then the difference in the tires from before and after seam filling and sanding work:


FSCN1478_zpsrvdz5cjb.jpg


again , slow progress but the trains a comin' !!


 Forum | Modelers Social Club Forum (proboards.com) 

  • Member since
    March 2012
  • From: Corpus Christi, Tx
Posted by mustang1989 on Saturday, August 1, 2015 6:37 AM

I test fitted the carberators and air horns on top of the engine.in addition to prepping and priming the front suspension parts. I've got the exhaust mostly figured out so that's all but in the bag. Engine build up will commence shortly! sSig_Muahaha_zps56835599.gif


FSCN1481_zpsjqrhqq8n.jpg


FSCN1484_zps0xdnacro.jpg


RSCN1487_zpsefl9niju.jpg


I'm wondering if this is gonna work from the Mustang Boss 429 kit? It's growing on me by the second...................................


RSCN1491_zpsawnccf2r.jpg


 Forum | Modelers Social Club Forum (proboards.com) 

  • Member since
    March 2012
  • From: Corpus Christi, Tx
Posted by mustang1989 on Saturday, August 1, 2015 6:38 AM

I've got most of the frame and suspension set up the way I want it. I'm not as far along as what I wanted to be but I'm one heck of a lot further than what I was. I kept the front suspension OOB for two reasons: 1) I wanted to keep it that way for nostalgia's sake and 2) in keeping it OOB it made things a lot easier so I'll be able to concentrate most of my efforts on under the hood the same way I did my recent Challenger build( Oh man! This is gonna take forever!!)


FSCN1496_zpsoas4isom.jpg


Then engine assy was next. I primed the long block in black in my typical fashion. I like walking my shades of paint dark to light rather than the other way around and this offers some level of pre-shading for the dark crevices and all.


I've already smoothed out most of the seams on the pan and transmission. The ones behind the water pump will be hidden.


FSCN1502_zpsezre19we.jpg


FSCN1501_zpsza04rzgg.jpg


The first few coats of paint. At this point I still needed to apply a few coats of paint to bring it to the right shade.


FSCN1507_zpssnyaorrz.jpg


Ok I applied the wash and let it dry for 3 hours.........................did I mention I had been up since 1:00 AM on that particular morning???? Couldn't sleep so I hit the benchsFun_mornincoffee_zps97291756.gif......I figured, oh well, I'll pay for it later! After drying I hit the engine with a coat of Vallejo Matte Finish. It worked like a charm. Then I Easy Off'd the chrome rocker covers as these will ultimately get an Aluminum Silver coating. A few cups of coffee later sFun_coffeeaddict_zps647000ec.gifI managed to base coat the starter and the exhausts. I installed the steering linkage on the front end (this may give me a little trouble later but I think I can tweak things a little and get by with the oversight), sand the other rear tire and spray another coat of gloss black on the front wheels in preparation for the Alclad that will be applied next week. 


In the pic below if you look closely you can see subtly darkened areas on the timing cover. Just enough to get the effect going. The intake manifold side of the L/H head shows the residue left behind by the wash. I also did some carving on the rocker covers to get them to fit flush.


RSCN1517_zpsb8znu1tz.jpg


 Forum | Modelers Social Club Forum (proboards.com) 

  • Member since
    March 2012
  • From: Corpus Christi, Tx
Posted by mustang1989 on Saturday, August 1, 2015 6:40 AM

Here's with the engine block pretty much done. I still have some weathering to do to the exhausts and I have the intake and rocker covers just resting on the engine. I also have some touch up to do to the rocker covers and the intake but I've gotta show some progress to show that I'm still active in this WIP. The funny thing is that this pic does not show the weathering that I've done. I didn't go overboard with that but wanted to at least make the truck look like it had been driven.


Still a long ways to go but I'm gonna get there:


RSCN1672_zps8x1nbwa5.jpg


 Forum | Modelers Social Club Forum (proboards.com) 

  • Member since
    February 2003
  • From: East Bethel, MN
Posted by midnightprowler on Saturday, August 1, 2015 6:56 AM

Yes, the stock kit is molded in red, at least the one I have. Looking good sir.

Hi, I am Lee, I am a plastiholic.

Co. A, 682 Engineers, Ltchfield, MN, 1980-1986

1 Thessalonians 4:13-18 1 Corinthians 15:51-54

Ask me about Speedway Decals

  • Member since
    March 2012
  • From: Corpus Christi, Tx
Posted by mustang1989 on Saturday, August 1, 2015 7:00 AM

Thanks Lee! If I'm not mistaken this is the kit you have....

It was re-boxed and put on the market in 1995. If you need any help with some of the pitfalls and niceties of this kit regarding the build let me know. I've got spare parts out the wazzoo as well. lol


 Forum | Modelers Social Club Forum (proboards.com) 

  • Member since
    March 2012
  • From: Corpus Christi, Tx
Posted by mustang1989 on Saturday, August 1, 2015 8:47 AM

Well I chucked up my 12mm deep socket again, mounted the front tires on it one by one and spun 'em up a piece of sandpaper to give the tread that worn look like I did on my Challenger build.


Here's the Challenger tire mounted up on the drill:


Tires001_zpscb939ded.jpg


After that I shot a coat of dull coat on the sidewalls of the tires and mounted my wheels on 'em:


Here's the tires and wheels for this build after all the sandpaper and dull coating:( the funny thing is that you can't see any of the coverage problems on the wheels with the naked eye. If I were going off of these pics I'd start over on the wheels. Believe me, they look a helluva lot better in person)


RSCN1687_zpsgzpttxoe.jpg


Then I started back on the motor a little. I sanded the distributor cap down a little on the top and started drilling holes to put the ignition wires in to:


DSCN1688_zpsb2erkyno.jpg


 Forum | Modelers Social Club Forum (proboards.com) 

  • Member since
    November 2003
  • From: State of Mississippi. State motto: Virtute et armis (By valor and arms)
Posted by mississippivol on Saturday, August 1, 2015 9:04 AM

Whew!

  • Member since
    March 2012
  • From: Corpus Christi, Tx
Posted by mustang1989 on Saturday, August 1, 2015 4:33 PM

"Whew" about sums up that mouthful of posting I just did! lol

I spent a whole afternoon  (while I was working around the house) daydreaming up ideas to get the wheels mounted up on the axles and finally got it. I have a piece of brass tubing that's going to fit perfect inside the front wheel center hole(after I cut the tubing to fit the width , they'll ride perfectly on the front axle spindles)  and ended up JB welding some washers to the rear brake backing plates to space the rear tires out just enough to clear the springs (took too much off of the rear diff) and not be seen.


 Here's a mock up so far. ( So far I'm happy with it)


FSCN0002_zpse7wtvmy4.jpg


FSCN0001_zpstvbs23vp.jpg


FSCN0004_zpsj0euumzu.jpg


 Forum | Modelers Social Club Forum (proboards.com) 

  • Member since
    March 2012
  • From: Corpus Christi, Tx
Posted by mustang1989 on Saturday, August 1, 2015 4:34 PM

 Here's with the spark plug wires and boots installed. I used wire from Lex's scale modeling and cut sections of wire insulation one gauge thicker than the spark plug wires and slid over the wires to create the "boots".


FSCN0015_zpsc3lrayaa.jpg


I really started getting the hang of this whole alclad thing at this point and was freekin' loving it!!! I also had just installed the brass rod section in the center of the front wheels to take up the extra "slack".

The rear wheels are painted!!! I'm happy!!!! sSig_Muahaha_zps56835599.gif

FSCN0021_zpsaegcjjfa.jpg


and the product of the planning and suspension re-work so far.....(I've been just waitin' for the opportunity to do this) and to recap I 'm going from this:

Revell-Street-Demons-56-Ford-F-100-Plast


to this:


FSCN0030_zps8upvafef.jpg


 Forum | Modelers Social Club Forum (proboards.com) 

  • Member since
    February 2003
  • From: East Bethel, MN
Posted by midnightprowler on Saturday, August 1, 2015 8:53 PM

Way cool, and yes, that is the version I have.

Hi, I am Lee, I am a plastiholic.

Co. A, 682 Engineers, Ltchfield, MN, 1980-1986

1 Thessalonians 4:13-18 1 Corinthians 15:51-54

Ask me about Speedway Decals

  • Member since
    March 2003
  • From: Northeast Washington State
Posted by JCon on Saturday, August 1, 2015 10:02 PM

Looking like you are getting it to sit quite nicely!

Happy Modeling, Joe Favorite Quote: It's what you learn after you know it all that counts!
  • Member since
    March 2012
  • From: Corpus Christi, Tx
Posted by mustang1989 on Sunday, August 2, 2015 7:38 AM

Thanks Lee and Joe!!!

Got the distributor in and the L/H bank of plug wires on...


(these were a pain in the butt to do!!! Normal V-8's I can just drill a hole in the head and have somewhere to put 'em. These? Not a chance!)


FSCN0040_zps6ccjmq34.jpg


 Forum | Modelers Social Club Forum (proboards.com) 

  • Member since
    March 2012
  • From: Corpus Christi, Tx
Posted by mustang1989 on Sunday, August 2, 2015 7:44 AM

I had been slackin' on progress pics of this thing at this point. I had "modelers block" but worked my way through it after a few days. I was trying to figure out the whole brake system dilemma and  finally got something started. I found a master cylinder / power brake booster combo that is going to work. The problem was that the bottom of the power brake booster was hollow as seen from the bottom but the benefit here is that instead of being rounded on the bottom , it's flat. This is perfect in the fact that I cut the master cylinder from the booster and rotated the master cylinder 180 degrees in order to mount the flat portion of the brake booster to the bottom of the cab floor. I also cut an L bracket out from some spare parts of another frame and drilled a hole in it for the booster to "mount" to.

 Perhaps I could explain it better in photos. Here's the brake booster/ master cylinder assy: (sorry for the blurred image on the first pic)

RSCN0136_zpshlf69iqe.jpg


Here is the brake booster and L bracket test fitted. I pinned the brake booster so that the master cylinder mount up to the booster would be a bit more solid. I also had to thin that L bracket a bit to scale thickness as well.


RSCN0135_zpsnawhpju5.jpg


While keeping in mind that my results aren't going to look exactly like it, this is what I'm going for but with a slightly longer rod and another stand off L bracket for a brake booster actuating rod guide that's coming soon:


Brake%20pedal%20linkage_zpsgz7a6j3y.jpg


From a different angle.............


Power%20brake%20booster%20setup_zpsuykzi


 Forum | Modelers Social Club Forum (proboards.com) 

  • Member since
    August 2009
  • From: MOAB, UTAH
Posted by JOE RIX on Sunday, August 2, 2015 12:59 PM

Absolutely fantastic work Joe. All the detail you have put in is just stunning. Kudos to you for the exceptional creativity you are demonstrating. I have complete confidence in you Joe, that you will have a show stopper in time for the awards ceremony in Austin. Might as well start writing the acceptance speech now.Wink

"Not only do I not know what's going on, I wouldn't know what to do about it if I did". George Carlin

  • Member since
    March 2012
  • From: Corpus Christi, Tx
Posted by mustang1989 on Sunday, August 2, 2015 3:10 PM

Thanks Joe! I appreciate the votes of confidence bud! I don't know about all that award business but I'll take it to the show nonetheless. Speech? LOL

I almost forgot to go through the front wheel to spindle fit problem I had. Here is the wheel as it sits on the kit supplied spindle-not exactly fitting here:


RSCN0139_zpsf3wkh7bc.jpg


So..........I got some 1/8" brass rod and cut about a 1/4" long section and slid it onto the spindles and cut and rounded the ends of the spindle:


DSCN0140_zpsv6lfrvy7.jpg


and although it looks rough here in the macro photo, you can't see anything but perfect fit with the naked eye. No worries though as there are fabricated chrome wheel bearing caps coming in the future that'll cover all that mess up there......


RSCN0145_zpsocjphi2x.jpg


I sanded my L bracket for the power brake booster/master cylinder assy this morning and set that aside. While all that was drying I flattened some concave washers I found with rubber backing on them. After flattening the washers I sanded all of the rubber backing off of them and will polish them up over the weekend to give them that "brake rotor look".  I robbed some brake rotors from a 1/24 scale Monogram F-100 kit , trimmed them to scale length a little and cut a groove in the middle of them with my dremel to get them to fit over the rotor. At this point I still had to cut one side of the outside edge of the washer flat so the calipers would look like they were mounted correctly instead of one the edge of the rotor. I'm also unhappy with the wheel bearing caps but I'm workin' on it.


RSCN0147_zpsdyxcsl6w.jpg


 Forum | Modelers Social Club Forum (proboards.com) 

  • Member since
    February 2003
  • From: East Bethel, MN
Posted by midnightprowler on Sunday, August 2, 2015 4:12 PM

Very well done. Feel free to pass along to me info on fit issues. Keep in mind mine will be stock.

Hi, I am Lee, I am a plastiholic.

Co. A, 682 Engineers, Ltchfield, MN, 1980-1986

1 Thessalonians 4:13-18 1 Corinthians 15:51-54

Ask me about Speedway Decals

  • Member since
    March 2012
  • From: Corpus Christi, Tx
Posted by mustang1989 on Sunday, August 2, 2015 7:40 PM

Thanks Lee! If you need anything I'll do whatever I can to help you.

The basic set up here with the master cylinder/ brake booster set up:


RSCN0156_zps3taw1odh.jpg


FSCN0152_zps5l3b3rjy.jpg


 I primed the front brake rotors (washers) with black gloss and shot 'em with a coat of Alclad . You'll notice that I flattened one side of the washers. This allows my calipers to sit perfectly on the rotors instead of looking like they are resting on the outside edge of them.  I also cut some brass rod to .180" length to mount the rotors onto. The short length allowed for the "step down" to mount up the wheels later.  I'll be drilling out the brake calipers for brake lines and painting the calipers red. I removed the chrome from both of the calipers yesterday in order to prep for all of the painting.


RSCN0158_zpst75wj8ef.jpg


 Forum | Modelers Social Club Forum (proboards.com) 

  • Member since
    June 2010
  • From: Australia
Posted by OctaneOrange on Sunday, August 2, 2015 10:40 PM

some nice work here. i built the street demon 56 f100 ages ago, one of my oldest surviving kits. it's currently a rotting field wreck.

also thanks for sharing the tip for the split vinyl tires - it's gold.

  • Member since
    March 2012
  • From: Corpus Christi, Tx
Posted by mustang1989 on Monday, August 3, 2015 4:15 AM

Thanks Octane! I got that silicone trick from a good friend of mine (Jim Daniels) over at Model Car Magazine.

At this point  I had to work on something that would yield tangible results...............so I switched over to the rear tires. I painted the white lettering, lightly sanded the letter tops after the paint dried to level the paint out a bit, applied a coat of dull coat onto the tires and dry brushed some ground up black pastel across the sidewalls to give 'em that added "used" look.


RSCN0161_zpsqfp3hnvi.jpg


 Forum | Modelers Social Club Forum (proboards.com) 

  • Member since
    March 2012
  • From: Corpus Christi, Tx
Posted by mustang1989 on Monday, August 3, 2015 6:10 PM

 I had then managed to get the brake rotors installed and the brake calipers mounted up on that. I guess I could have made mounts for them but where does one stop? LOL. I did drill holes for brake lines to be installed and will be working on that coming up. I also applied some alclad to the inner rim edges and painted the backs of the wheels.


 Here's the front suspension / brake setup:


DSCN0165_zps6x1ehczk.jpg


And another mock up just to make sure I'm still tracking straight here. Never enough test fitting I'll tell you that............


DSCN0163_zpswk5whqhb.jpg


DSCN0164_zpspxdiaely.jpg


 Forum | Modelers Social Club Forum (proboards.com) 

  • Member since
    March 2012
  • From: Corpus Christi, Tx
Posted by mustang1989 on Wednesday, August 5, 2015 5:00 AM

Folks at this point the motor was NOT done yet. I had to install it to figure out all the electrical ckt , fuel and brake line routing I've gotta do with this build. I've got it in there though! default_biggrin.png


FSCN0206_zpsvw1d6wjj.jpg


 Forum | Modelers Social Club Forum (proboards.com) 

JOIN OUR COMMUNITY!

Our community is FREE to join. To participate you must either login or register for an account.

SEARCH FORUMS
FREE NEWSLETTER
By signing up you may also receive reader surveys and occasional special offers. We do not sell, rent or trade our email lists. View our Privacy Policy.