SEARCH FINESCALE.COM

Enter keywords or a search phrase below:

Revell 56 Ford F-100-COMPLETED PHOTOS!! 01/23

15612 views
200 replies
1 rating 2 rating 3 rating 4 rating 5 rating
  • Member since
    July 2015
Posted by nicknkim14 on Monday, October 12, 2015 11:28 AM

That's a rear I don't mind staring at...(lol)

plastic addict

  • Member since
    February 2003
  • From: East Bethel, MN
Posted by midnightprowler on Monday, October 12, 2015 5:54 PM

Looking good.

Hi, I am Lee, I am a plastiholic.

Co. A, 682 Engineers, Ltchfield, MN, 1980-1986

1 Thessalonians 4:13-18 1 Corinthians 15:51-54

Ask me about Speedway Decals

  • Member since
    March 2012
  • From: Corpus Christi, Tx
Posted by mustang1989 on Tuesday, October 13, 2015 3:44 AM

Thanks Joe, Nick and Lee! I plan on shortening the rear bumper to accommodate the license plate. We'll see what happens here.


 Forum | Modelers Social Club Forum (proboards.com) 

  • Member since
    March 2012
  • From: Corpus Christi, Tx
Posted by mustang1989 on Tuesday, October 13, 2015 6:23 AM

This morning I cut about a 1/2" off of each side of the rear bumper and currently have it immersed in brake fluid to remove the chrome plating. After it comes out of there I'll clean it up and treat it to a coat of Alclad II chrome and buff it out. Hmm...looks like some license plate retaining hardware is in order. I'll get to work on that....

The overall fit and look:
Image


 Forum | Modelers Social Club Forum (proboards.com) 

  • Member since
    March 2012
  • From: Corpus Christi, Tx
Posted by mustang1989 on Saturday, October 24, 2015 8:26 AM

All I've gotta say is that when I did the gloss coat on my Challenger build a few months back either 1.) God was with me , 2.) the stars were all lined up just right, 3.) Hell did in fact freeze over or 4.) it must have been pure dumb luck because this paint job here has given me a run for my money!!! I'm still in the fight and aint giving up though!!! This morning I wet sanded all the minor cracking I saw in the gloss finish over the flames on the body and polished the heck out of it with Novus 2. I also repainted the flames on the 4th friggin paint job on this hood and will be letting that all gas out for 3 or 4 days before attempting another gloss coat on it. The roof got a wet sanding and polishing as well and I glued two retaining screw heads onto the rear license plate to tidy that up a little. It was a busy morning since 3:30 a.m. and I got to spend 4 solid hours on this thing so I feel like I got a lot done with it.

I ended up lightening the pics up a little so the flames can be seen a little better. Under the right lighting these things jump out at you.

Image

You can see where the finish is a lot smoother in this photo particularly at the front of the fender area. I'm surprising myself with these results.

Image

The flames on the hood came out better this time around IMO because I thinned the decanted paint a little more and got it to come out a little smoother.

Image

Here's a shot with everything installed as it's gonna be. So far I've got good feelin's about this time 'round.....

Image


 Forum | Modelers Social Club Forum (proboards.com) 

  • Member since
    February 2003
  • From: East Bethel, MN
Posted by midnightprowler on Saturday, October 24, 2015 1:41 PM

Looks great!

Hi, I am Lee, I am a plastiholic.

Co. A, 682 Engineers, Ltchfield, MN, 1980-1986

1 Thessalonians 4:13-18 1 Corinthians 15:51-54

Ask me about Speedway Decals

  • Member since
    March 2014
Posted by kpnuts on Saturday, October 24, 2015 2:57 PM
Man that is outstanding. I am truly gobsmacked
  • Member since
    August 2009
  • From: MOAB, UTAH
Posted by JOE RIX on Sunday, October 25, 2015 12:33 AM

Wow Man! I have to say that your persistence has paid off in spades. Absolutely gorgeous paint job. You've become quite the master at these glossy paint schemes Joe. Impressive. Very impressive.

"Not only do I not know what's going on, I wouldn't know what to do about it if I did". George Carlin

  • Member since
    March 2012
  • From: Corpus Christi, Tx
Posted by mustang1989 on Sunday, October 25, 2015 6:54 AM

Thanks Lee, kp and Joe! Little by little I'm gettin' there! lol


 Forum | Modelers Social Club Forum (proboards.com) 

  • Member since
    March 2012
  • From: Corpus Christi, Tx
Posted by mustang1989 on Monday, October 26, 2015 5:06 AM

I got to re-looking at the hood and scoop and decided that the scoop needed some engine numbers on it. I had a set of decals that said "BOSS 429" on them so I decided to cut the BOSS part out and trim up the 429 numbers and apply them. I'll let 'em dry out and clear it in the coming days. I think it added a nice touch to the front of the truck.

Image

I now have all the Street Demons kits as of last Thursday. I see another 429 going into at least one of these...possibly the 54 Chev or the 41 Willys. Decisions, decisions, decisions....... Hmm.... :hmm:

Image


 Forum | Modelers Social Club Forum (proboards.com) 

  • Member since
    August 2009
  • From: MOAB, UTAH
Posted by JOE RIX on Monday, October 26, 2015 6:51 AM

The 429 decal was a sweet move there Joe. It definitely makes it look..well..Boss.Big Smile

Really glad you were able to fill out the Demons collection. As for which one to put the 429 in, I'd like to see it in the Model A pickup. It is , however, a Ford. Just sayin'....

Everything is Awesome my friend.

"Not only do I not know what's going on, I wouldn't know what to do about it if I did". George Carlin

  • Member since
    April 2015
Posted by Scarecrow Joe on Monday, October 26, 2015 4:51 PM

Thats some nice work man!

  • Member since
    March 2012
  • From: Corpus Christi, Tx
Posted by mustang1989 on Monday, October 26, 2015 8:55 PM

Thank you Joe! I can say that I'm not going to put the Boss in the truck just because it's got a cool lil' 4 banger I'm going to use. Maybe in the Willys.... Wink

Oscar: Thanks a mil and it's good to see you again.Yes


 Forum | Modelers Social Club Forum (proboards.com) 

  • Member since
    March 2012
  • From: Corpus Christi, Tx
Posted by mustang1989 on Friday, November 6, 2015 7:43 AM

I was applying BMF to the passengers door window trim and looked over at the truck bed and realized I haven't posted any pictures of the wood planks and mini wheel tubs that I fabricated in the bed yet. I figured I'd get that posted up this morning.

Image

Image

and then a close up of the license plate retaining hardware:

Image


 Forum | Modelers Social Club Forum (proboards.com) 

  • Member since
    February 2003
  • From: East Bethel, MN
Posted by midnightprowler on Saturday, November 7, 2015 5:50 PM

Well done. How did you do the tubs?

Hi, I am Lee, I am a plastiholic.

Co. A, 682 Engineers, Ltchfield, MN, 1980-1986

1 Thessalonians 4:13-18 1 Corinthians 15:51-54

Ask me about Speedway Decals

  • Member since
    August 2015
  • From: the redlands Fl
Posted by crown r n7 on Saturday, November 7, 2015 6:05 PM
Where is the registration sticker on the tag ! Lol !!!


 Nick.

  • Member since
    August 2007
  • From: back country of SO-CAL, at the birth place of Naval Aviation
Posted by DUSTER on Saturday, November 7, 2015 11:38 PM

crown r n7
Where is the registration sticker on the tag ! Lol !!!


Maybe it'll be covered by the licence plate holder he probably is  creating right now  

Steve

Building the perfect model---just not quite yet  Confused

  • Member since
    August 2009
  • From: MOAB, UTAH
Posted by JOE RIX on Sunday, November 8, 2015 12:57 AM

Superb work Joe. I like it.

"Not only do I not know what's going on, I wouldn't know what to do about it if I did". George Carlin

  • Member since
    March 2012
  • From: Corpus Christi, Tx
Posted by mustang1989 on Monday, November 9, 2015 4:37 PM

That was definitely an oversight on my part. Got it covered now though...Wink

Thanks everyone for the encouragement! Yes


 Forum | Modelers Social Club Forum (proboards.com) 

  • Member since
    July 2015
Posted by nicknkim14 on Tuesday, November 10, 2015 7:09 AM

YesLookn good!

plastic addict

  • Member since
    August 2009
  • From: MOAB, UTAH
Posted by JOE RIX on Tuesday, November 10, 2015 7:17 AM

Well, never let it be said that you aren't detail oriented. That's awesome.

"Not only do I not know what's going on, I wouldn't know what to do about it if I did". George Carlin

  • Member since
    September 2005
  • From: Illinois: Hive of Scum and Villany
Posted by Sprue-ce Goose on Sunday, November 15, 2015 8:46 PM

mustang1989

I was applying BMF to the passengers door window trim and looked over at the truck bed and realized I haven't posted any pictures of the wood planks and mini wheel tubs that I fabricated in the bed yet. I figured I'd get that posted up this morning.

Image

Image

and then a close up of the license plate retaining hardware:

Image


Very Nice Detail on those license plates !

Even a registration sticker........Big SmileYes.....

I'm looking forward to seeing the completed truck.Stick out tongue

  • Member since
    June 2003
  • From: Cavite, Philippines
Posted by allan on Sunday, November 15, 2015 9:15 PM

Its got screws. Whoa. Man, Im getting a headache just looking at it. 

No bucks, no Buck Rogers

  • Member since
    March 2012
  • From: Corpus Christi, Tx
Posted by mustang1989 on Monday, November 16, 2015 9:16 AM

Thanks fellas.

Lee I used part of a Thunderbird pro stock kit for the tubs. I'll come up with a step by step after a bit here.

Over the weekend I got a little progress on this. I was going to install those inner wheel wells that I had been working on a couple of months ago and the suckers wouldn't fit. All that work to them and the body could not be installed with them in place. I had pondered the idea of leaving them out but that looked cheap and unfinished. The initial thoughts to remedy this started here....


Followed by some action with cutting out a part that resembled the plastic piece except only from the firewall forward.


So far I'm liking the results. In the foreground you can see what the lack of the inner fender wells makes the engine compartment look like and the update on my "test mule". (This is the same blue body that I started out with. I stripped most of the blue off it with brake fluid)


I managed to get the R/H side cut out and formed this morning. More shots with the test mule...


Now I'm at the point to where I don't know if I want to Alclad them or cover the inner sides with Chrome BMF. I still have some learning to go with Chrome Alclad......we'll see....


 Forum | Modelers Social Club Forum (proboards.com) 

  • Member since
    September 2005
  • From: Illinois: Hive of Scum and Villany
Posted by Sprue-ce Goose on Monday, November 16, 2015 9:29 AM

Cool!

Wouldn't be the first time somebody had to do body work on a Ford to replace missing sheet metal.

Of course, I'm more used to seeing that kinda work needed on Ford passenger cars rather than the pickups.Hmm

  • Member since
    March 2012
  • From: Corpus Christi, Tx
Posted by mustang1989 on Friday, November 20, 2015 11:10 AM

Thanks Spruece!

...............so I got to thinkin'....this is aluminum you know. Why Alclad when all I have to do is polish? I had to go backwards a step here but I think it's going to be worthwhile. I cut another fenderwell out, removed the protective coating with steel wool, sanded it down using the typical 3200grit -12000 grit sanding pads and polished it up.

Image

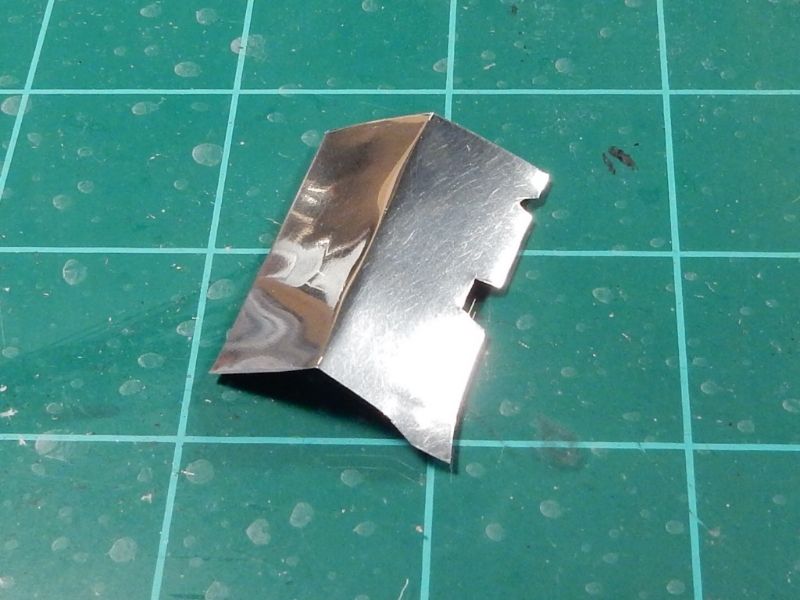
I think I'm going to like this ALOT better:

Image

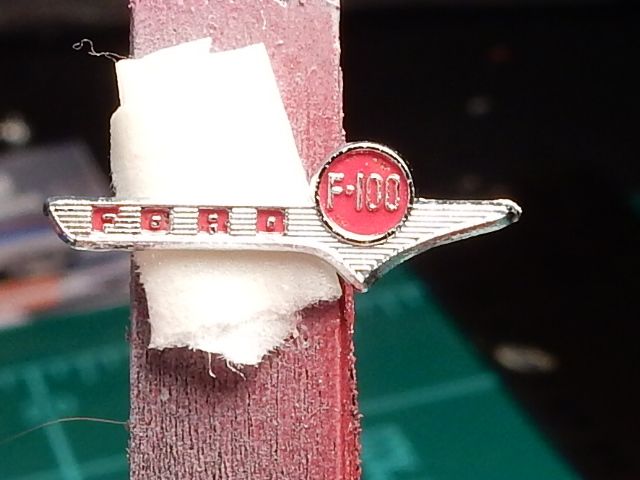
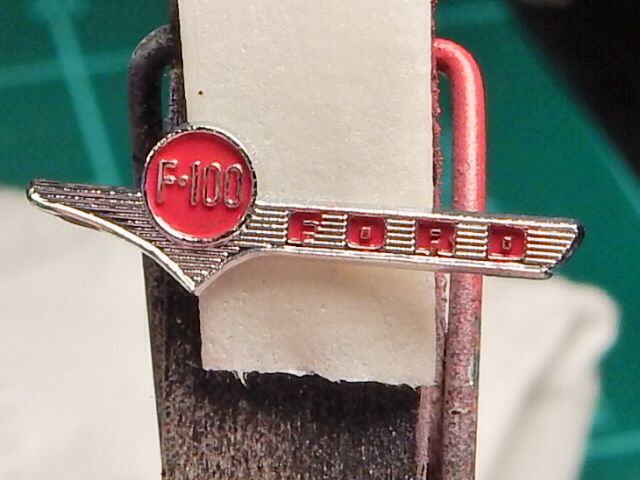
Then I cleaned up the hood emblems, painted the low lying areas and shot a coat of gloss clear over each one.

Image

Image


 Forum | Modelers Social Club Forum (proboards.com) 

  • Member since
    September 2005
  • From: Illinois: Hive of Scum and Villany
Posted by Sprue-ce Goose on Friday, November 20, 2015 11:17 AM

Really nice shine on that aluminum..................makes me think it would make nice fuel tank material if it could be formed and soldered........Hmm


I especially like te detail work on those Ford hood emblems. Big SmileYes

  • Member since
    March 2012
  • From: Corpus Christi, Tx
Posted by mustang1989 on Friday, November 20, 2015 11:24 AM

'Preciate that Spruece. I was thinking more like aluminum paneling in a drag car......hmmmm. I do have an upcoming "Hemi Under Glass" Barracuda build..


 Forum | Modelers Social Club Forum (proboards.com) 

  • Member since
    February 2003
  • From: East Bethel, MN
Posted by midnightprowler on Friday, November 20, 2015 4:40 PM

Very well done, both aluminum and badges.

Hi, I am Lee, I am a plastiholic.

Co. A, 682 Engineers, Ltchfield, MN, 1980-1986

1 Thessalonians 4:13-18 1 Corinthians 15:51-54

Ask me about Speedway Decals

  • Member since
    August 2009
  • From: MOAB, UTAH
Posted by JOE RIX on Sunday, November 22, 2015 10:11 AM

Excellent effort on the aluminum wheel wells my friend. They turned out great. I have to say that you becoming quite the master scratch builder. Then there's your emblems. Those are just awesome. I just love your attention to detail Joe. It elevates your models to some truly masterful work.

"Not only do I not know what's going on, I wouldn't know what to do about it if I did". George Carlin

JOIN OUR COMMUNITY!

Our community is FREE to join. To participate you must either login or register for an account.

SEARCH FORUMS
FREE NEWSLETTER
By signing up you may also receive reader surveys and occasional special offers. We do not sell, rent or trade our email lists. View our Privacy Policy.