SEARCH FINESCALE.COM

Enter keywords or a search phrase below:

Photos of my super-detailed 1:12 scale Lotus 49.

4927 views
21 replies
1 rating 2 rating 3 rating 4 rating 5 rating
  • Member since
    March 2015
  • From: Close to Chicago
Photos of my super-detailed 1:12 scale Lotus 49.
Posted by JohnnyK on Saturday, January 2, 2016 11:51 AM

I am a retired architect. If you happen to know an architect, you know that architects have the patience of a saint and love to get mired in the details. The perfect attributes for building model cars. I enjoy building large scale cars because I can get absorbed in the details. Last Spring I finished my first 1:12 kit, the Trumpeter Ford GT40 MK II.  I learned a lot about detailing a 1:12 kit from that experience. Most importantly, I learned that it is really essential to include a large quantity of detailing to prevent the finished model from looking like a toy. This summer I decided to super detail the Tamiya Team Lotus Type 49 in 1/12 scale. The original kit was first released in 1973, and re-released in 1991 with new photo-etched parts. That means that the basic kit is 42 years old and a lot of the parts show the age in the way of mold lines and flash.  


Before starting on the Lotus I downloaded numerous photos of the 1:1 car. I then visited Home Depot and my local craft store to purchase wires in a number of gauges. The wire can be used as fuel lines, break lines, battery cables and general electrical wires. I then stocked up on steel bolts, compression fittings, tire valve stems, seat belts, clamps, stainless steel braided lines from Pro Tech, Scale Hardware, and Detail Master. Following are photos of the finished product.


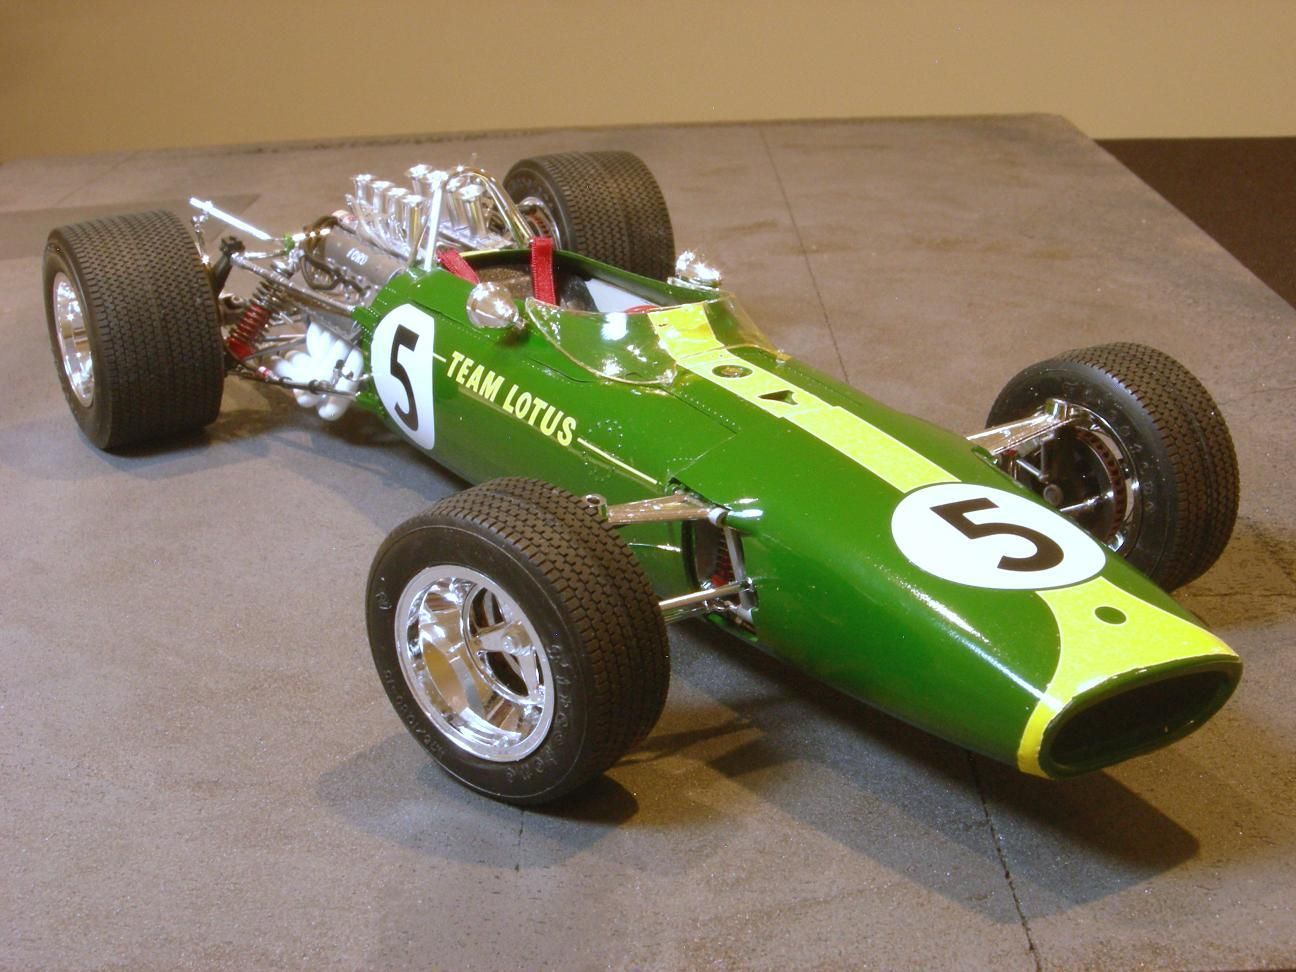
I used Tamaya rattle can Racing Green paint. I polished out the orange peel as best as I could and then polished the car with wax. The decals are too thick and would not conform to the shape of the car's nose.


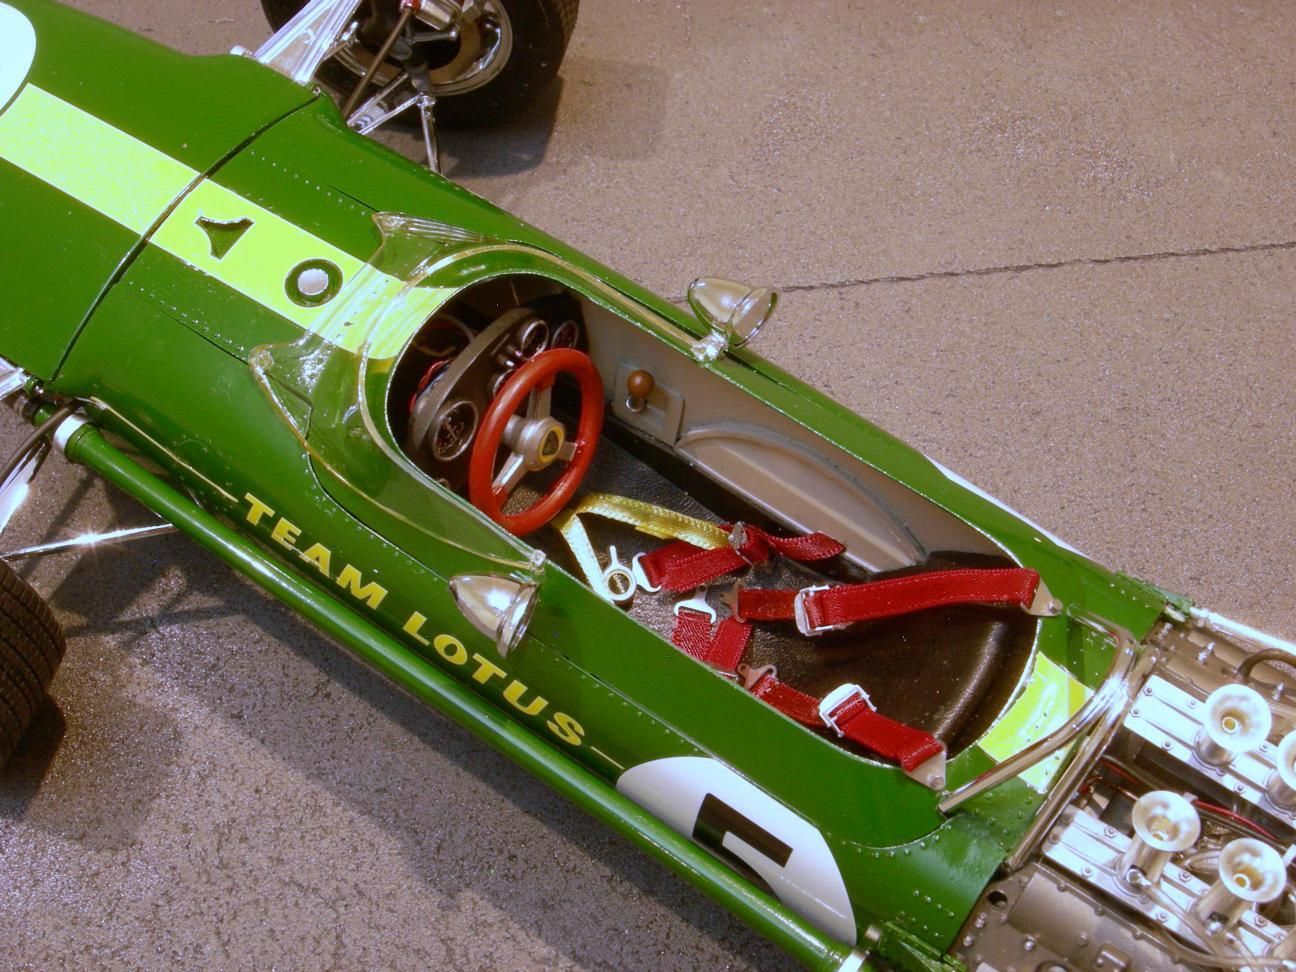
The model did not include seat belts, so I bought some on-line. The leather texture that is molded into the seat looks bad, so I purchased an old black leather purse from a Good Will Store, cut it to size and glued it onto the plastic seat. I think it really looks good. Since the back side of the instrument panel is visible I added wires in a varity of sizes. 


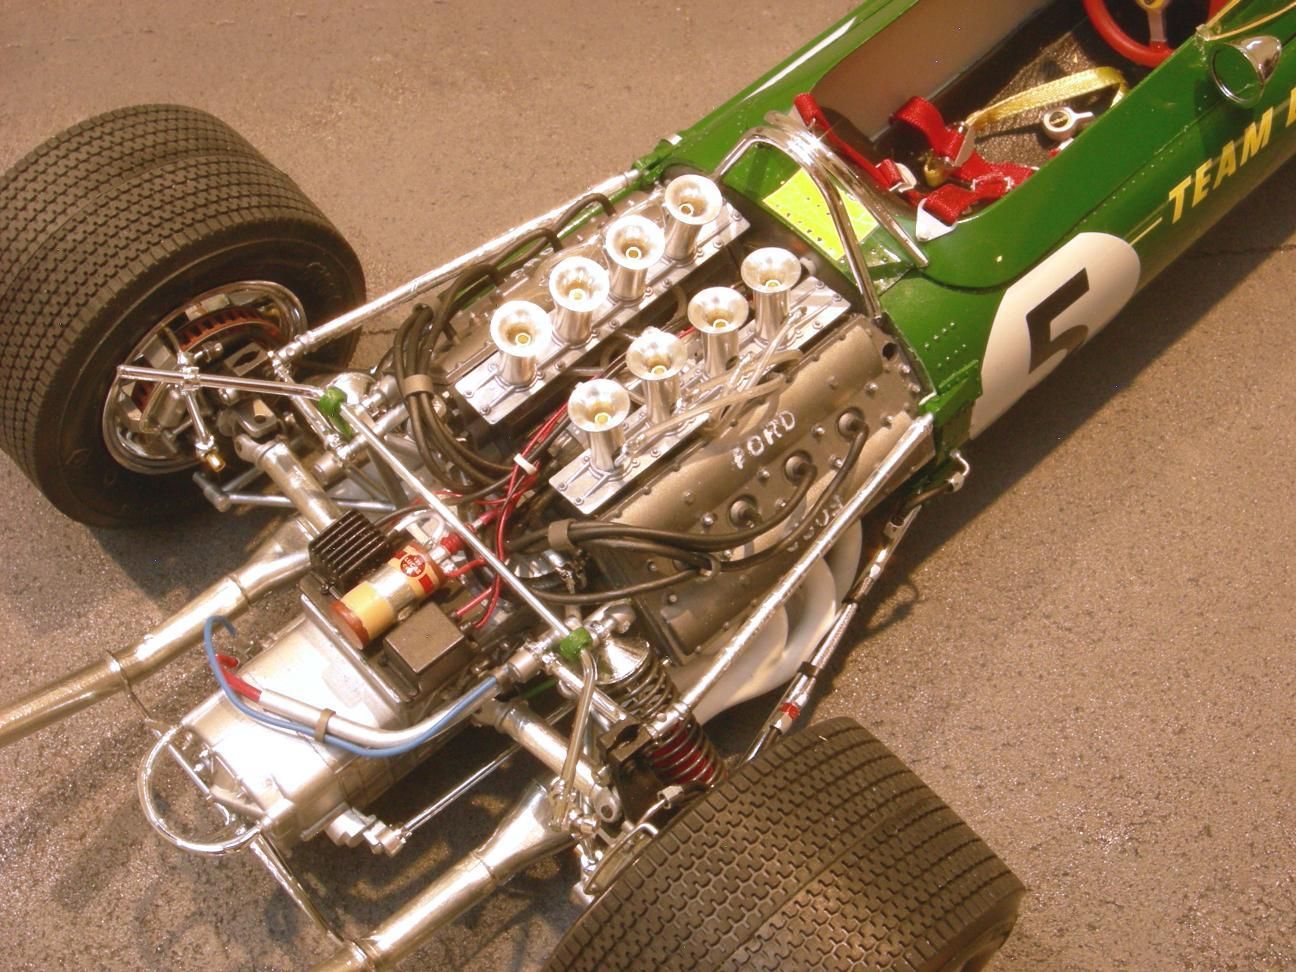
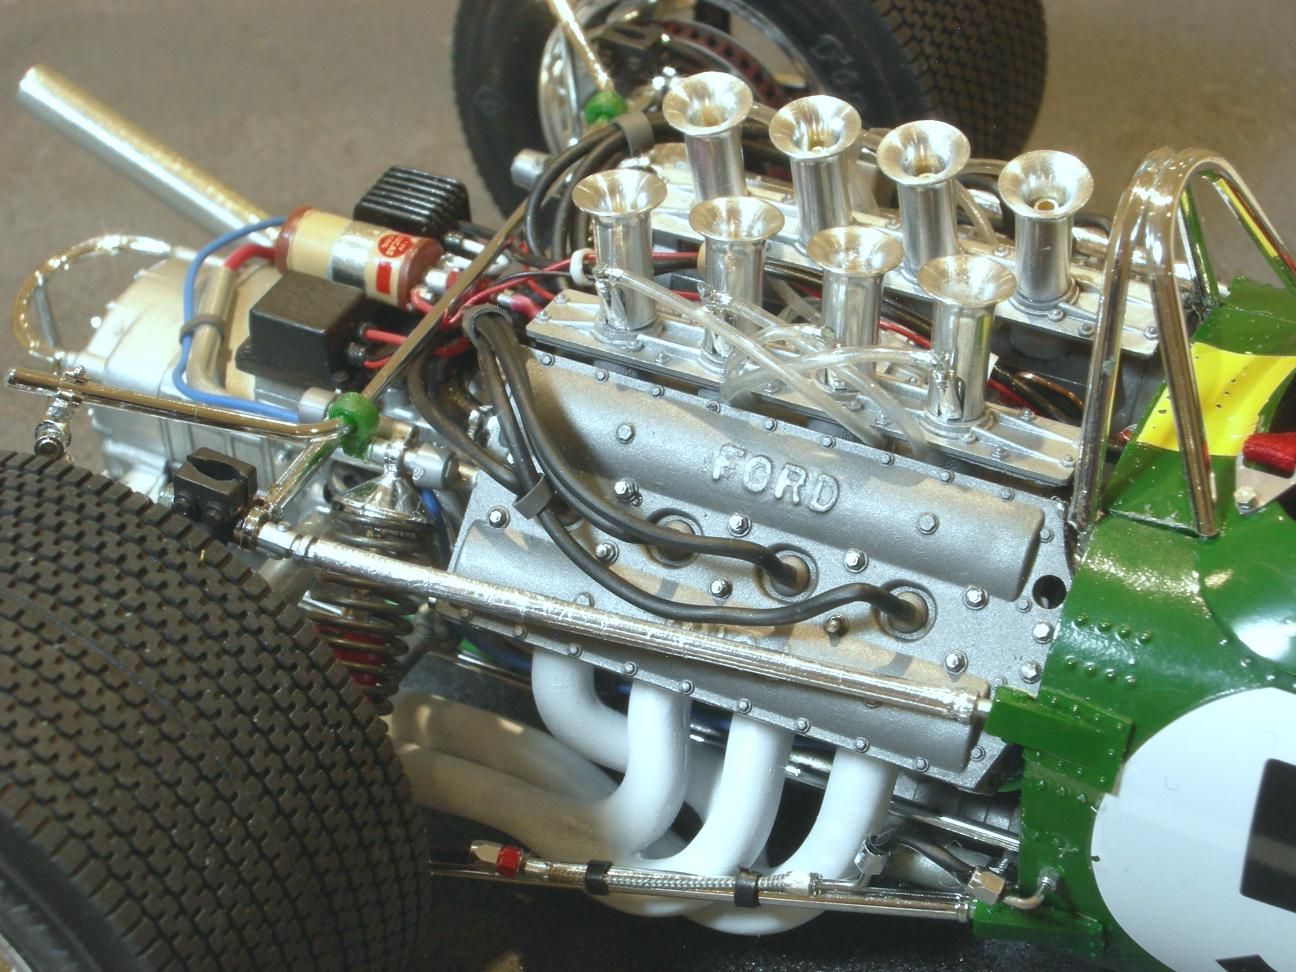
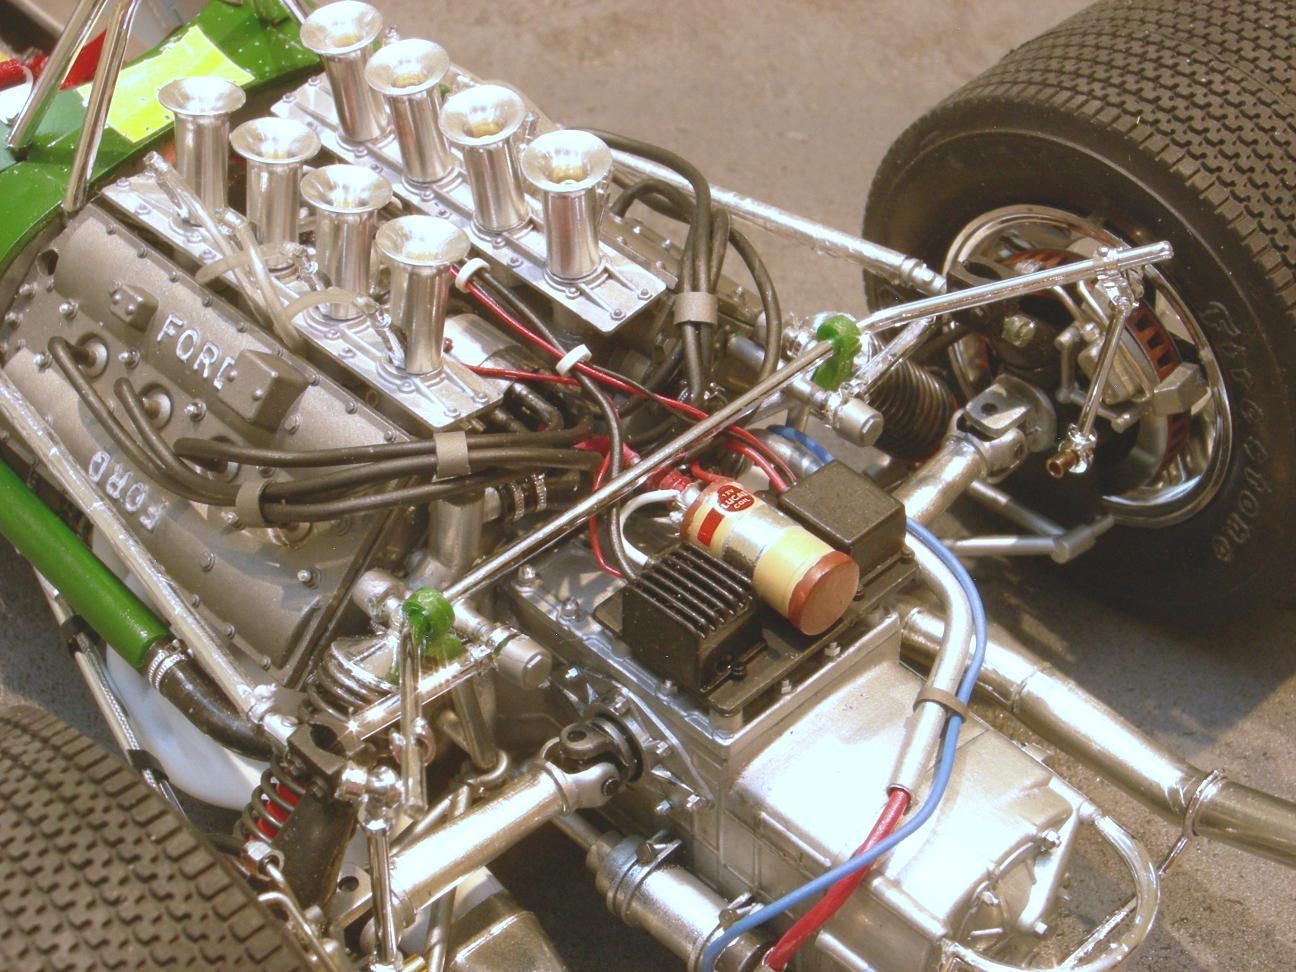
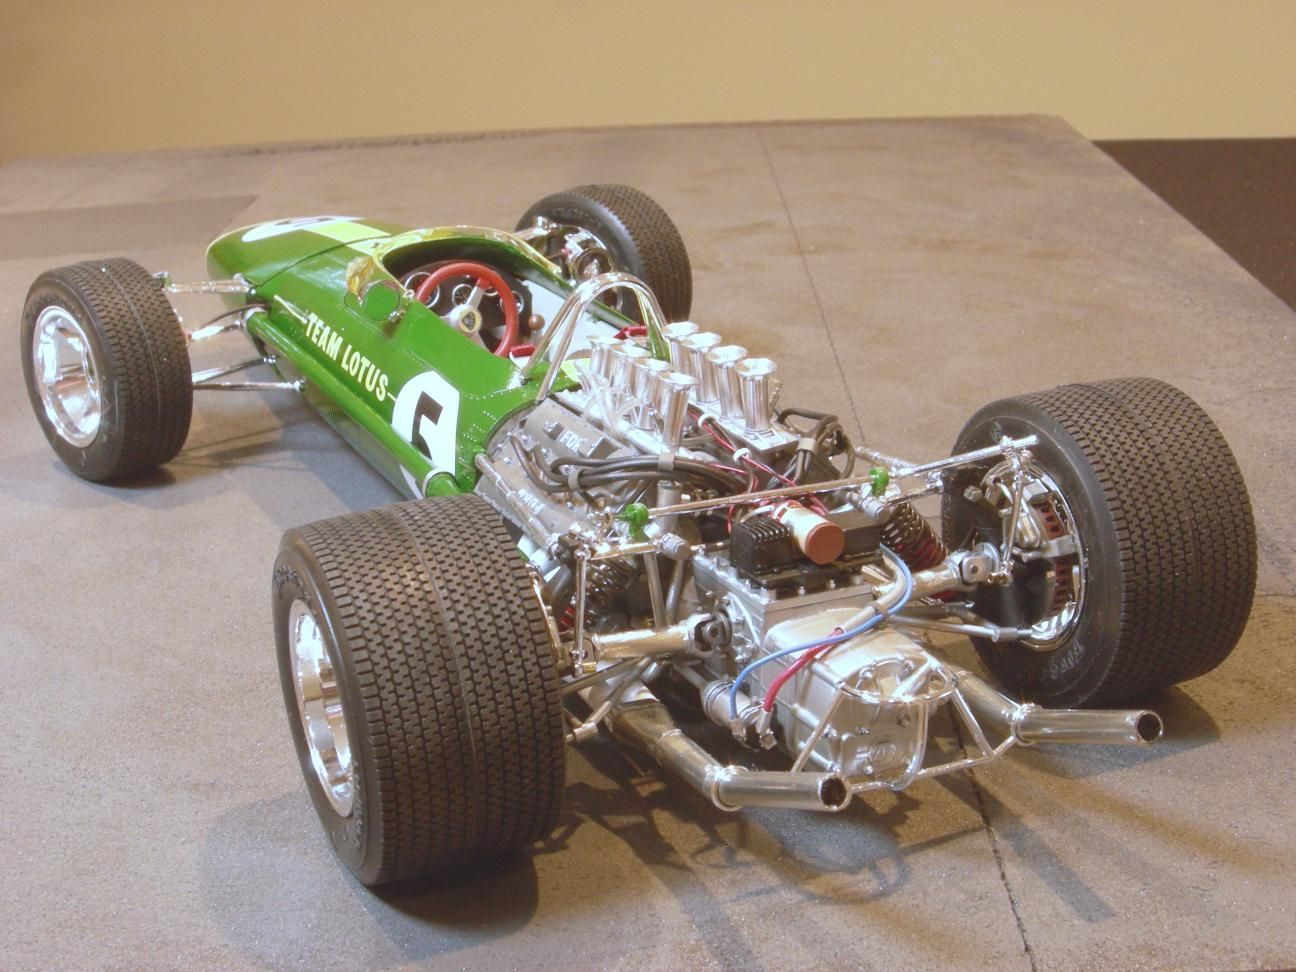
Now the fun part. I added as much detail to the engine and breaks as possible. I removed as many of the plastic nuts as possible and replaced them with metal bolts. Check out the bolts on the starter clamp and on the transmission. The 1:1 car had a metal conduit for the starter cables, so I bought some aluminum tubing at Hobby Lobby and used that as the conduit. I threaded a heavy wire through the conduit and surface mounted a wire that would have been attached to the ignition switch. I used some leftove hose clamps from the Ford GT on the cooling hoses on the Lotus model. Wires in a number of sizes were added to the ignition system. The rubber band wire looms were cut from wire insulation. These closely match those found on the 1:1 car. The rear brake lines are composed of stainless steel braided lines, rubber hoses, wires for brake lines and compression fittings. It took hours of trial and error to make these look correct. I think that they add a lot to the looks of the model. The drive shafts and exhaust pipes had terrible mold lines, so I decromed them, sanded down the mold lines and covered them in metal foil. I found some small brass tubes at Hobby Lobby and glued them into the inside of the fuel injection trumpets.  


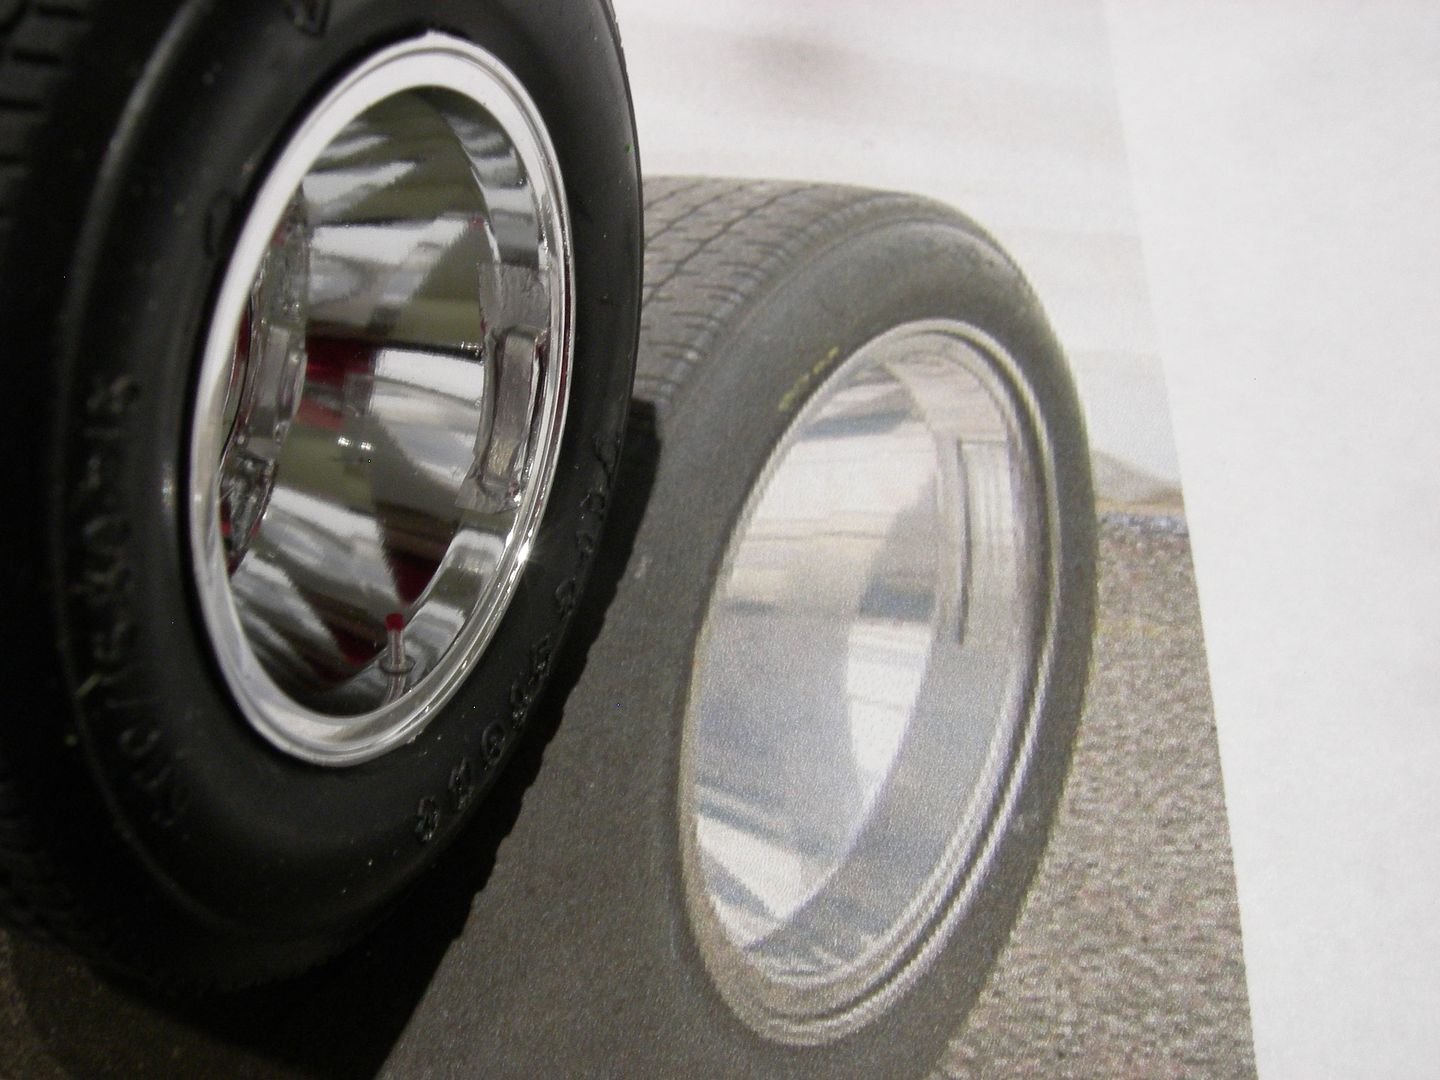
I added valve stems to the wheels and balancing weights just like the 1:1 car. In the photo abpve the model's tire is to the left and a picture of the 1:1 tire is to the right. I cut some small pieces of the foil cap that is used on wine bottles to simulate the wheel weights.   I then used some metal foil to simulate the duct tape that was used on the 1:1 car. I think that it really looks good and adds a lot of pop to the model.

Your comments and questions are always welcome.

  • Member since
    November 2003
  • From: Nashville, TN area
Posted by bobbaily on Wednesday, January 6, 2016 11:42 AM

Very impressive build indeed-you've done a fine job.  The wiring you chose looks so much better than the wiring/hoses supplied with the kit.

Bob


fox
  • Member since
    January 2007
  • From: Narvon, Pa.
Posted by fox on Wednesday, January 6, 2016 11:55 AM

Outstanding build!  

Jim  Captain

 Main WIP: 

   On the Bench: Artesania Latina  (aka) Artists in the Latrine 1/75 Bluenose II

I keep hitting "escape", but I'm still here.

  • Member since
    August 2007
  • From: back country of SO-CAL, at the birth place of Naval Aviation
Posted by DUSTER on Wednesday, January 6, 2016 5:09 PM

Well Done, the attention you paid to the details is most impressive.


Steve

Building the perfect model---just not quite yet  Confused

  • Member since
    May 2013
  • From: Indiana, USA
Posted by Greg on Wednesday, January 6, 2016 5:38 PM

Nicely done.

I want one of these. Built one as a kid and I swear I can still smell that box.

Last time I looked they were out of stock everywhere.

  • Member since
    March 2015
  • From: Close to Chicago
Posted by JohnnyK on Wednesday, January 6, 2016 6:35 PM

Greg, 

Amazon has the kit in stock. If you buy one, make sure it has the photoetched parts. 


John

Your comments and questions are always welcome.

  • Member since
    March 2015
  • From: Close to Chicago
Posted by JohnnyK on Wednesday, January 6, 2016 6:39 PM

I bought a whole bunch of different sized wires at Home Depot before I started the build. I used the spark plug wires that came with the kit. The problem with those wires is that the do not have a solid wire core so they kink real easy. That is not a good look. I inserted a solid copper wier into the kit's spark plug wires which solved the kinking problem.  

My next kit is a Tamyia 1:12 scale Ferrari 312. 

Your comments and questions are always welcome.

  • Member since
    November 2009
  • From: Twin Cities of Minnesota
Posted by Don Stauffer on Thursday, January 7, 2016 8:58 AM

Love it- very nice!

Don Stauffer in Minnesota

  • Member since
    March 2012
  • From: Corpus Christi, Tx
Posted by mustang1989 on Thursday, January 7, 2016 9:21 AM

There aint a dang thing wrong with that!!


 Forum | Modelers Social Club Forum (proboards.com) 

  • Member since
    January 2007
Posted by the doog on Thursday, January 7, 2016 2:34 PM

Absolutely and utterly outstanding job of presenting this model. It's gorgeous!

  • Member since
    March 2015
  • From: Close to Chicago
Posted by JohnnyK on Thursday, January 7, 2016 3:30 PM

Thanks for the nice words. I really appreciate them. 

Your comments and questions are always welcome.

  • Member since
    May 2013
  • From: Indiana, USA
Posted by Greg on Thursday, January 7, 2016 5:16 PM

JohnnyK

Greg, 

Amazon has the kit in stock. If you buy one, make sure it has the photoetched parts. 


John


Oh oh, now I'm in trouble. I never thought to check Amazon.

Thank you, John!

  • Member since
    April 2005
  • From: Roanoke, Virginia
Posted by BigJim on Friday, January 8, 2016 5:58 PM

JohnnyK
The model did not include seat belts, so I bought some on-line.

Johnny,
Some nice work, but, among other things, did you know that the original car did not have seat belts?


  • Member since
    March 2015
  • From: Close to Chicago
Posted by JohnnyK on Friday, January 8, 2016 10:50 PM

I had no idea that the car had no seat belts. That is nuts!!!  I guess that I should remove the belts. Especially the crotch belt.

Your comments and questions are always welcome.

  • Member since
    November 2003
  • From: State of Mississippi. State motto: Virtute et armis (By valor and arms)
Posted by mississippivol on Friday, January 8, 2016 10:56 PM
That is an excellent build.
  • Member since
    April 2005
  • From: Roanoke, Virginia
Posted by BigJim on Saturday, January 9, 2016 5:15 AM

JohnnyK

I had no idea that the car had no seat belts. That is nuts!!!  I guess that I should remove the belts. Especially the crotch belt.

Look down your velocity stacks and see what else you need to remove.


  • Member since
    March 2014
Posted by kpnuts on Saturday, January 9, 2016 5:42 AM

OUTSTANDING work as for the seat belts, you've just bought it upto modern legal standards. I love it.

  • Member since
    February 2003
  • From: East Bethel, MN
Posted by midnightprowler on Saturday, January 9, 2016 6:39 AM

Outstanding. The photo they use to say no seatbelts, that is probably a staged photo, and he is sitting on them. The only suggestion I have to improve the look is imo the kit spark plug wires are a little overscale. Not your fault, the build is steller sir.

Hi, I am Lee, I am a plastiholic.

Co. A, 682 Engineers, Ltchfield, MN, 1980-1986

1 Thessalonians 4:13-18 1 Corinthians 15:51-54

Ask me about Speedway Decals

  • Member since
    April 2005
  • From: Roanoke, Virginia
Posted by BigJim on Saturday, January 9, 2016 9:06 AM

midnightprowler

Outstanding. The photo they use to say no seatbelts, that is probably a staged photo, and he is sitting on them.

No, he wasn't sitting on them as they did not have them at this time. If you looked closely at the photo/s, you can see there are no attachment points for seat belts.

  • Member since
    March 2015
  • From: Close to Chicago
Posted by JohnnyK on Saturday, January 9, 2016 9:37 AM

You are correct about the sparkplug wires. The photo above shows spark plug wires that are much thinner than the ones on my model.

Your comments and questions are always welcome.

  • Member since
    March 2015
  • From: Close to Chicago
Posted by JohnnyK on Saturday, January 9, 2016 9:42 AM

When I built the model I couldn't find a really good photo of the 1:1 engine. However, I think that my brass inserts add a nice bit of "bling" to the engine.Wink

Your comments and questions are always welcome.

  • Member since
    August 2007
  • From: back country of SO-CAL, at the birth place of Naval Aviation
Posted by DUSTER on Monday, January 11, 2016 12:04 AM

Still and all an impressive build.


munble to self: first its rivet counters now its seatbelt barons and spark plug gage guys  HOH, Boy

Steve

Building the perfect model---just not quite yet  Confused

JOIN OUR COMMUNITY!

Our community is FREE to join. To participate you must either login or register for an account.

SEARCH FORUMS
FREE NEWSLETTER
By signing up you may also receive reader surveys and occasional special offers. We do not sell, rent or trade our email lists. View our Privacy Policy.