Photos of my super-detailed 1:12 scale Lotus 49.
I am a retired architect. If you happen to know an architect, you know that architects have the patience of a saint and love to get mired in the details. The perfect attributes for building model cars. I enjoy building large scale cars because I can get absorbed in the details. Last Spring I finished my first 1:12 kit, the Trumpeter Ford GT40 MK II. I learned a lot about detailing a 1:12 kit from that experience. Most importantly, I learned that it is really essential to include a large quantity of detailing to prevent the finished model from looking like a toy. This summer I decided to super detail the Tamiya Team Lotus Type 49 in 1/12 scale. The original kit was first released in 1973, and re-released in 1991 with new photo-etched parts. That means that the basic kit is 42 years old and a lot of the parts show the age in the way of mold lines and flash.
Before starting on the Lotus I downloaded numerous photos of the 1:1 car. I then visited Home Depot and my local craft store to purchase wires in a number of gauges. The wire can be used as fuel lines, break lines, battery cables and general electrical wires. I then stocked up on steel bolts, compression fittings, tire valve stems, seat belts, clamps, stainless steel braided lines from Pro Tech, Scale Hardware, and Detail Master. Following are photos of the finished product.
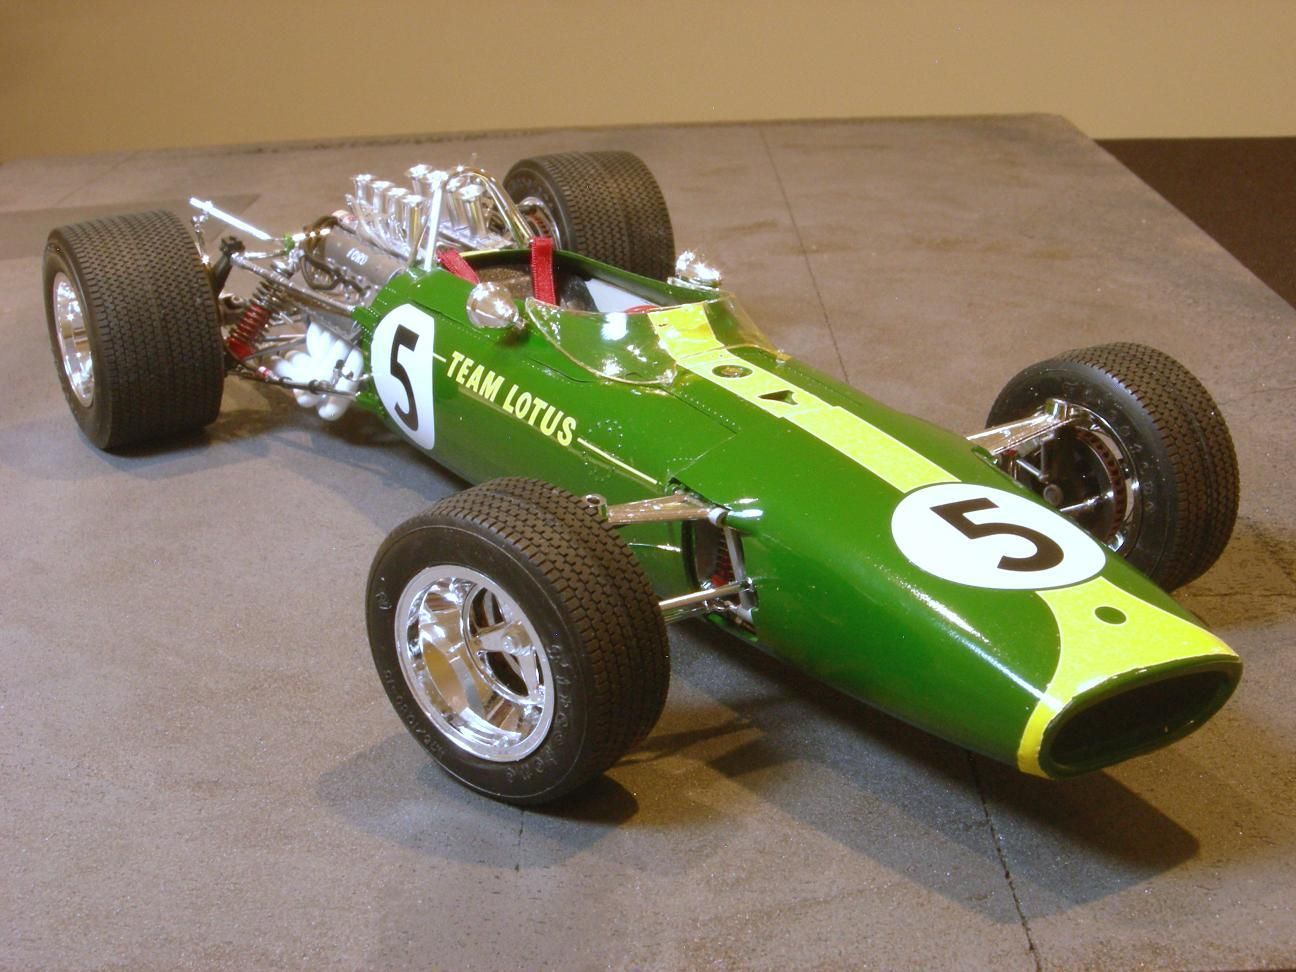
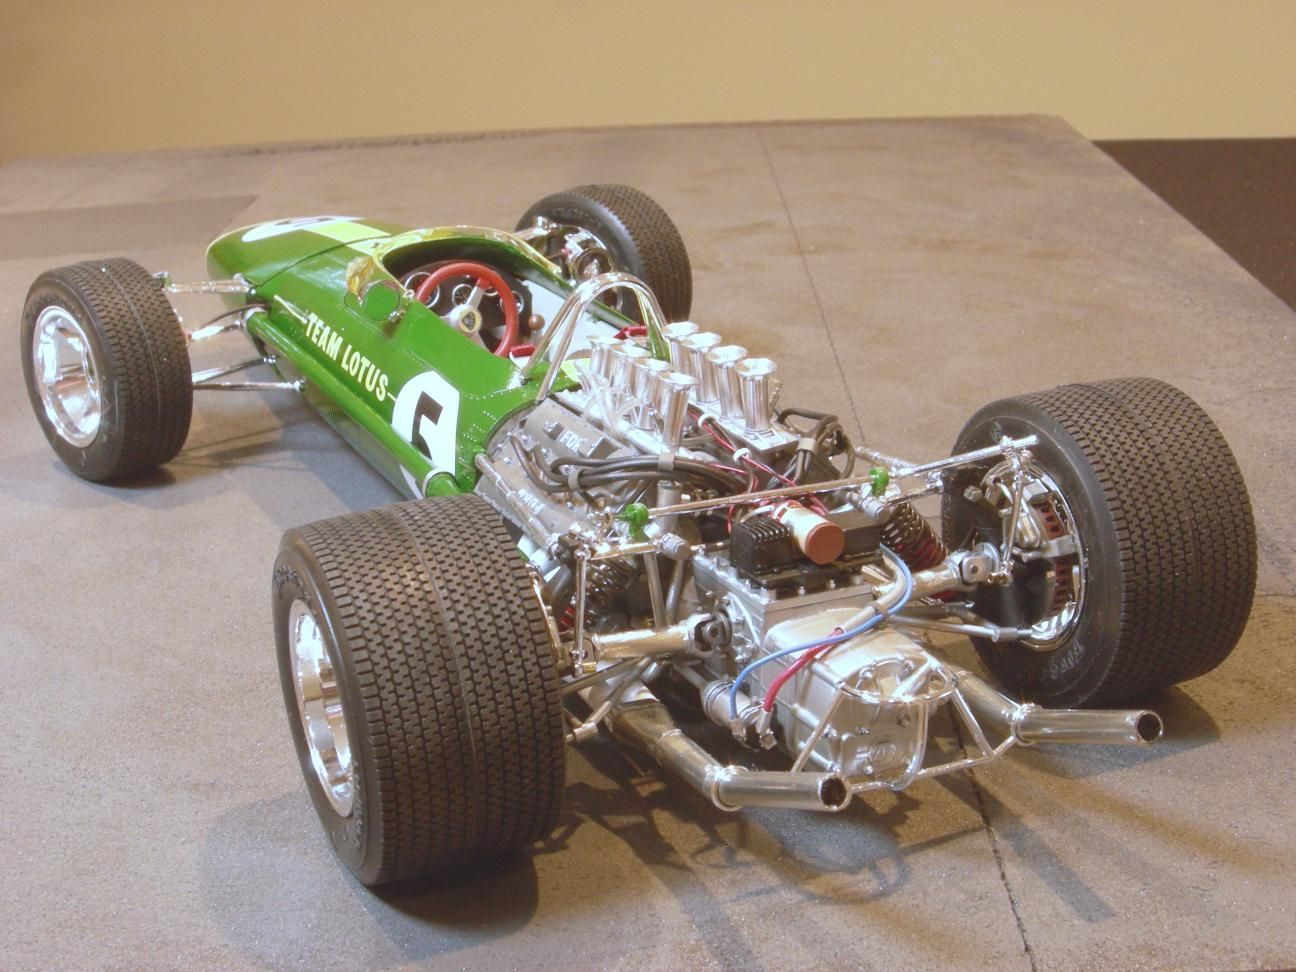
I used Tamaya rattle can Racing Green paint. I polished out the orange peel as best as I could and then polished the car with wax. The decals are too thick and would not conform to the shape of the car's nose.
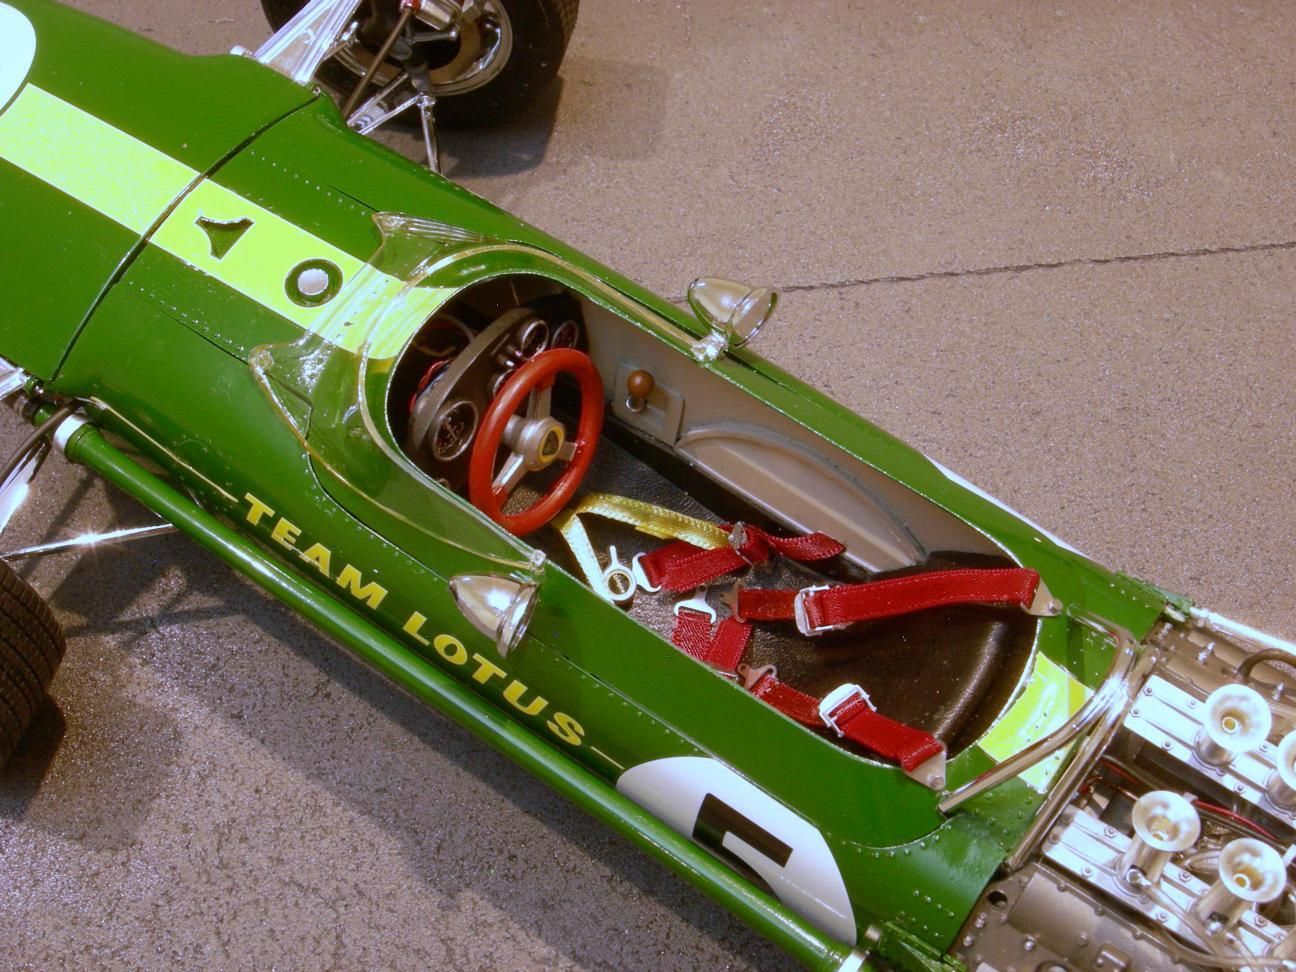
The model did not include seat belts, so I bought some on-line. The leather texture that is molded into the seat looks bad, so I purchased an old black leather purse from a Good Will Store, cut it to size and glued it onto the plastic seat. I think it really looks good. Since the back side of the instrument panel is visible I added wires in a varity of sizes.
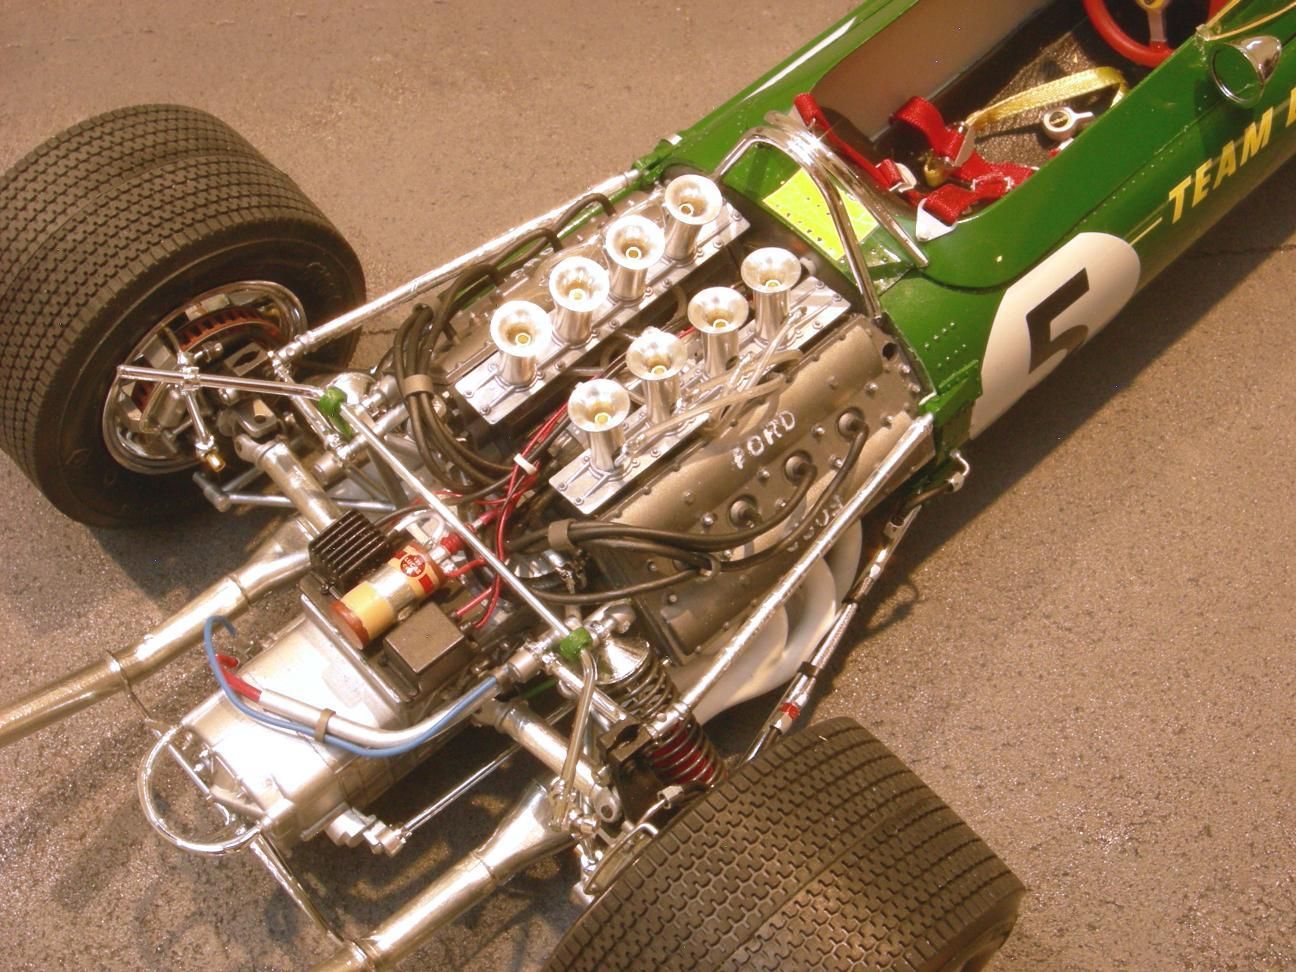
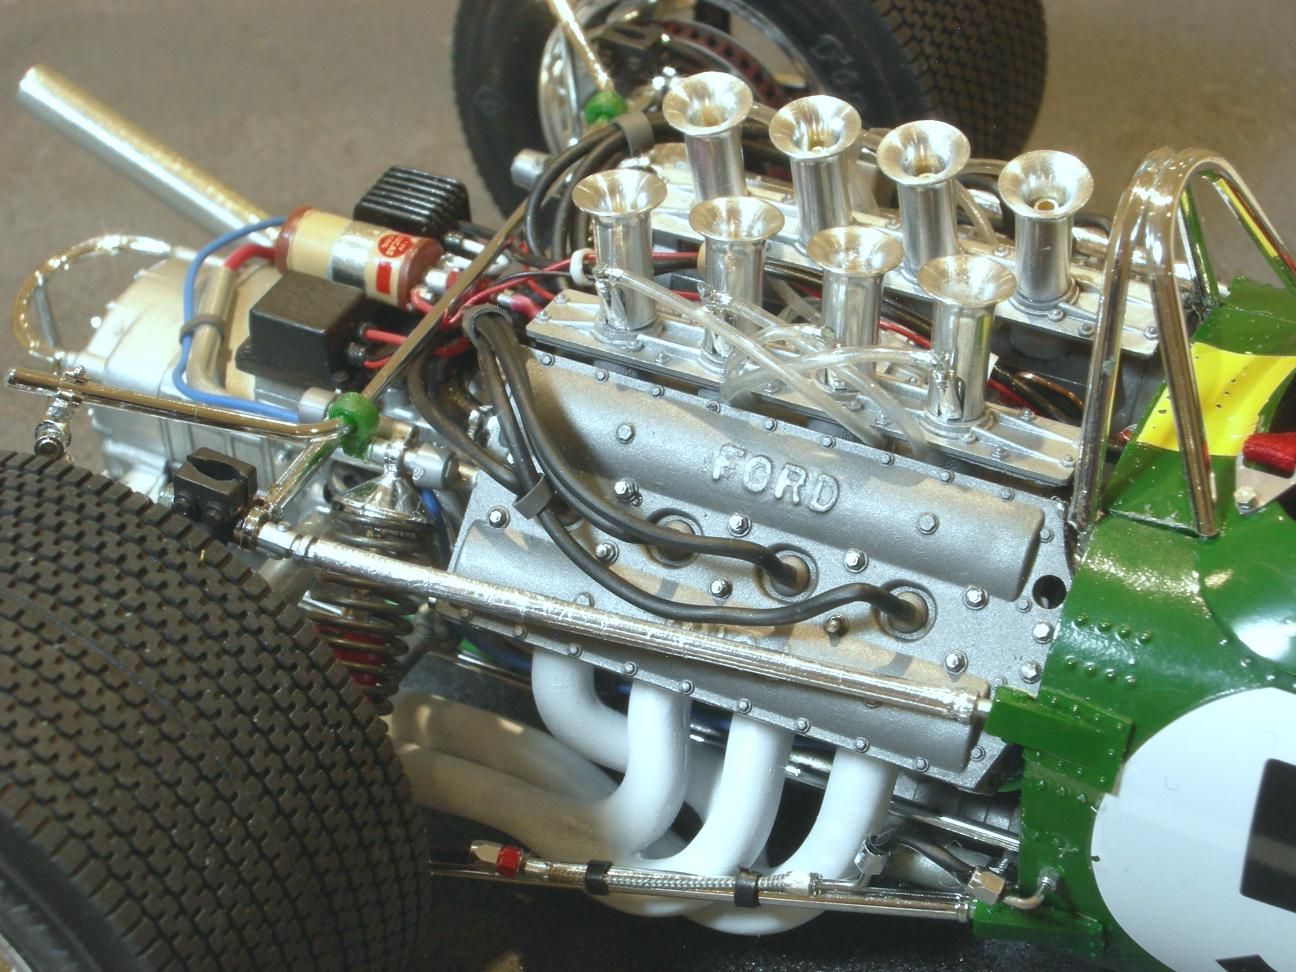
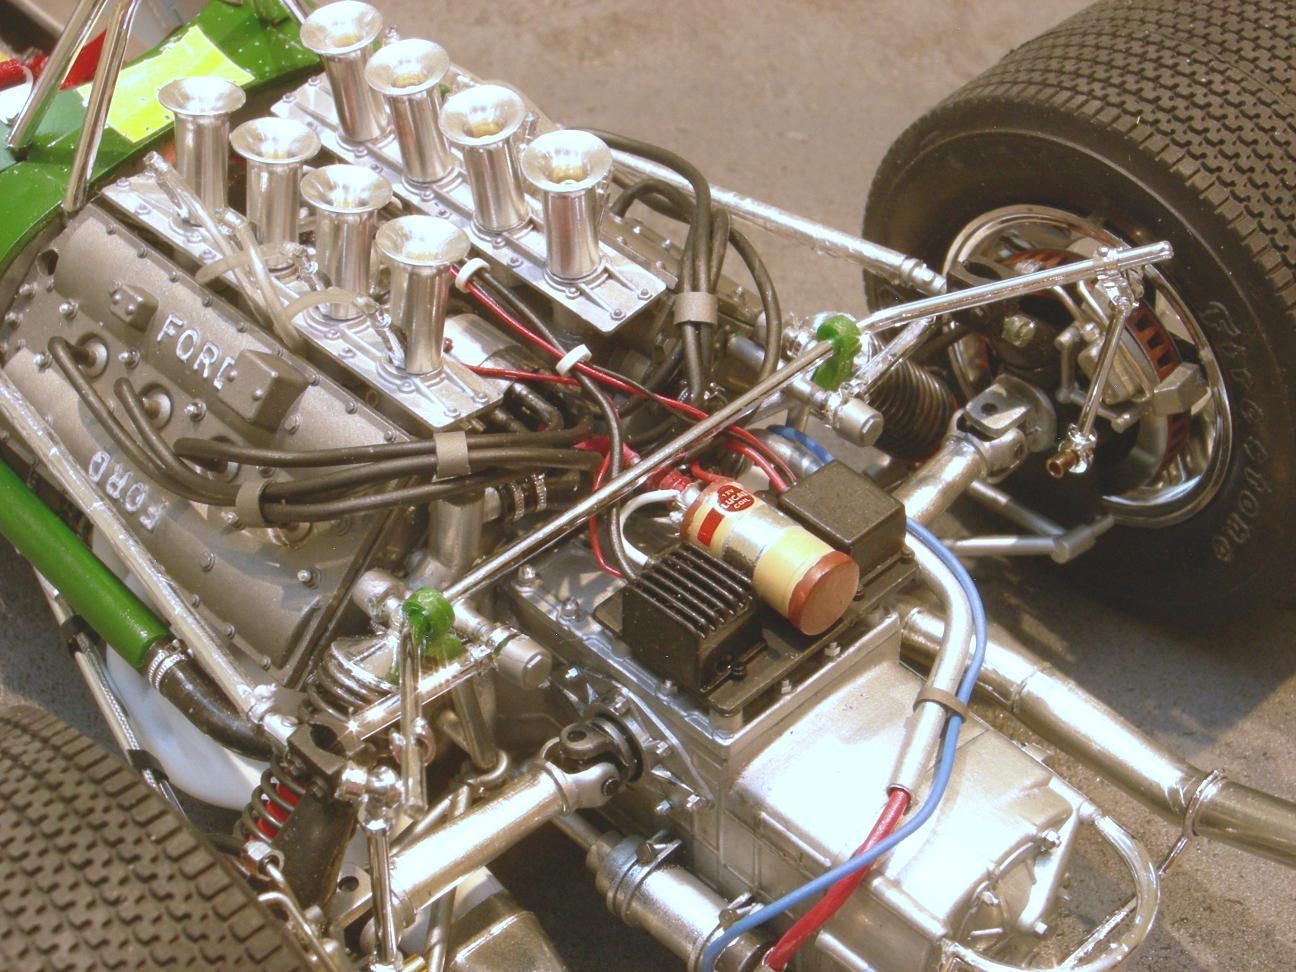
Now the fun part. I added as much detail to the engine and breaks as possible. I removed as many of the plastic nuts as possible and replaced them with metal bolts. Check out the bolts on the starter clamp and on the transmission. The 1:1 car had a metal conduit for the starter cables, so I bought some aluminum tubing at Hobby Lobby and used that as the conduit. I threaded a heavy wire through the conduit and surface mounted a wire that would have been attached to the ignition switch. I used some leftove hose clamps from the Ford GT on the cooling hoses on the Lotus model. Wires in a number of sizes were added to the ignition system. The rubber band wire looms were cut from wire insulation. These closely match those found on the 1:1 car. The rear brake lines are composed of stainless steel braided lines, rubber hoses, wires for brake lines and compression fittings. It took hours of trial and error to make these look correct. I think that they add a lot to the looks of the model. The drive shafts and exhaust pipes had terrible mold lines, so I decromed them, sanded down the mold lines and covered them in metal foil. I found some small brass tubes at Hobby Lobby and glued them into the inside of the fuel injection trumpets.
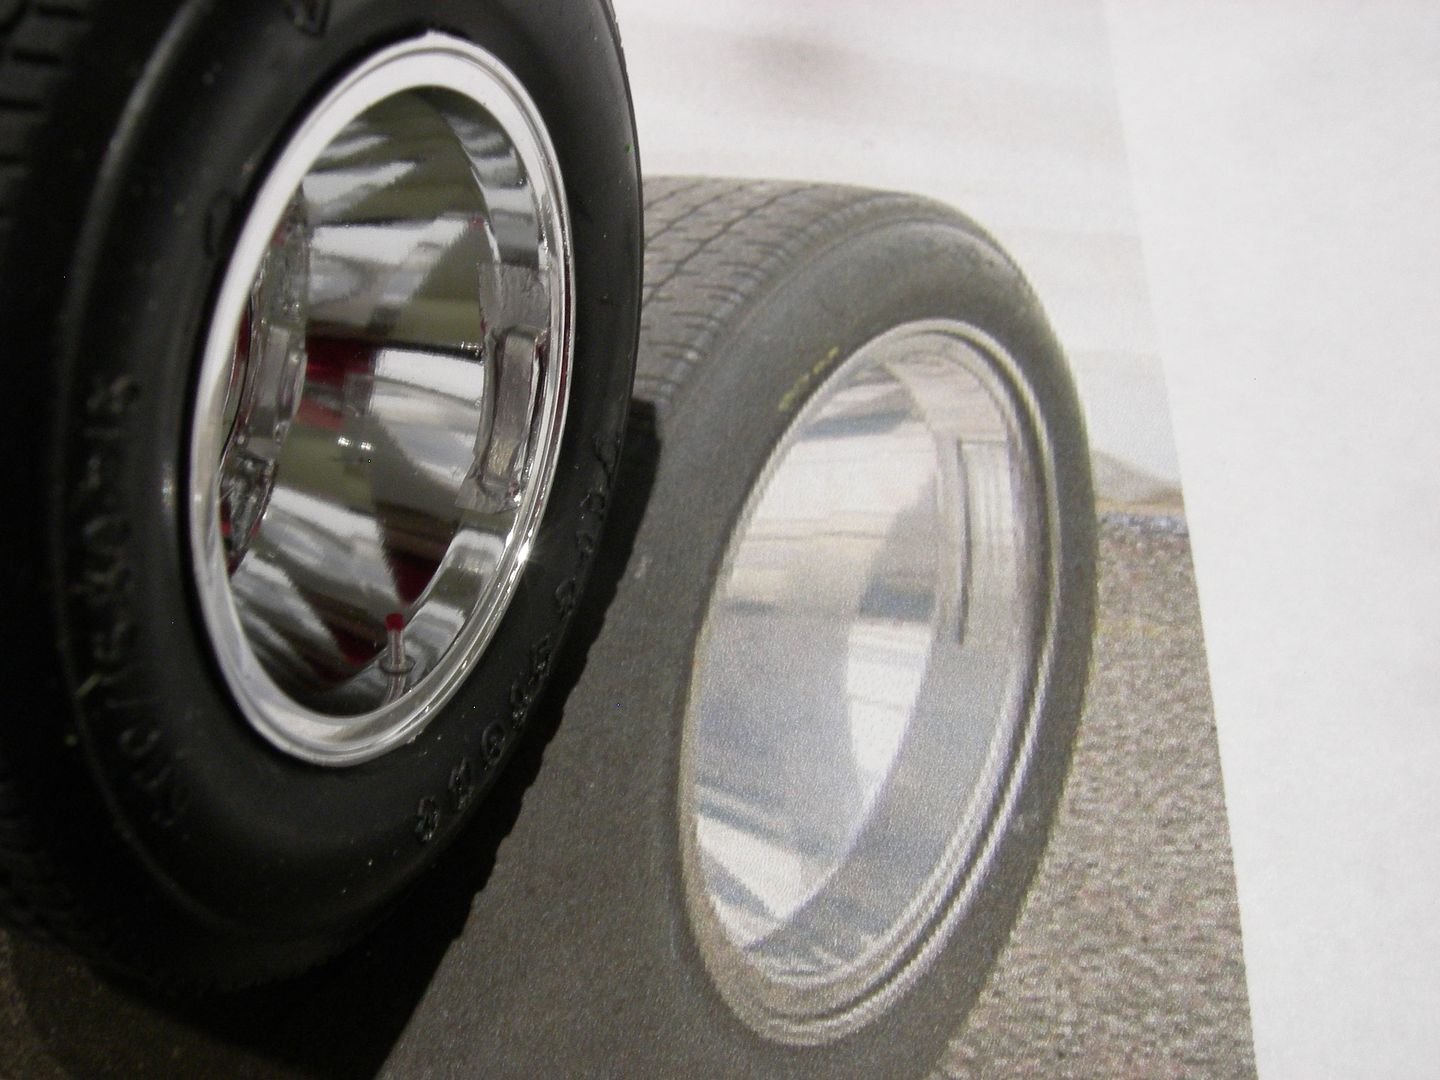
I added valve stems to the wheels and balancing weights just like the 1:1 car. In the photo abpve the model's tire is to the left and a picture of the 1:1 tire is to the right. I cut some small pieces of the foil cap that is used on wine bottles to simulate the wheel weights. I then used some metal foil to simulate the duct tape that was used on the 1:1 car. I think that it really looks good and adds a lot of pop to the model.