SEARCH FINESCALE.COM

Enter keywords or a search phrase below:

AMT Space 1999 Eagle finished

41463 views
124 replies
1 rating 2 rating 3 rating 4 rating 5 rating
  • Member since
    January 2012
Posted by I make stuff on Thursday, February 26, 2009 2:47 AM

to swipe a line from a favorite movie, Man on Fire, Some men work with oils, some with clay, others with food.  Doog works with plastic, and he's going to make a masterpiece.

You, sir, have talent. I'd watch a WIP if you were making a 1/16 lawn mower.

  • Member since
    January 2007
Posted by the doog on Wednesday, February 25, 2009 10:02 PM

Well, I'm ready for painting--I think.....if anybody sees anything glaring here, shout it out before I commit! Smile [:)]

Here's the finished cockpit before I sealed it up...

The finishing of the landing gear started with two parallel .040 strips glued to an .040 X .010 strip wrapped around the leg there....

And then two bars of .040 rods to support them.

I can't believe I got them all to sit evenly!


Then, I fashioned some springy things to go on them like shock absorbers or something....hey, I don't know how this stuff works!? Whistling [:-^] I decided to keep the kit's "shoes"--the landing pads themselves.I'm just trying to make a decent representation out of this model, nnot necessarily use it in the remade series! LOL!


I added some mounting strips to the cockpit attachment, and to the tops of the girders joining the body to the upper girder...

...and in the rear, here...

I finished all the duct work and pipes in the engines...top;


...bottom...

.....additional views.....

Alan Carter in the house!!!

And a view from the side and top!

Well, that's where I've taken this build so far, as far as correcting and detailing. I'm pretty happy with the improvements I've made in making it a decent representation of an Eagle.

Next up; priming and painting....

Any comments or suggestions are more than welcomed! Anybody out there?!? Alpha?


  • Member since
    January 2007
Posted by the doog on Wednesday, February 25, 2009 8:17 PM

Thanks, terry!

I appreciate the info here; I ordered some decals from eBay; that should be a big help!

Oh my god---that guy's Eagle on the forums there-the one that he's accurizing from the ground up? WOW! AMAZING!!!!

I"m not too crazy or disappointed about having less than 100% accuracy on this one--this kit was really a "gift to myself", one that I wanted to build to take me back to my childhood. I just wanted to detail and correct some of the more egregious errors and simplifications, like the engines and the landing gear legs. I even thought about correcting the actual pads, but decided they look fine as they are.

Thansk for the measurement too--mine comes up just a shade short; actually, I measured the height of the kit legs before I cut them off, and it's shorter by about 2mm's from your measurement  I'm about to do n update here; you'll be able to see it; I think it looks pretty ok...

Thanks, again!

  • Member since
    May 2005
  • From: Dublin Rep Of Ireland
Posted by terry35 on Wednesday, February 25, 2009 4:05 PM


Oh yeah look up Colin Taylor, he is a member here and would be a person I would regard very highly in recreating studio props.

forgot this...really check out this one there is good build ups as well.

http://www.starshipmodeler.com/tech/1999_ref.htm

http://www.starshipmodeler.com/other/jw_1999.htm


Terry.

  • Member since
    May 2005
  • From: Dublin Rep Of Ireland
Posted by terry35 on Wednesday, February 25, 2009 4:04 PM

Try ebay for decals I know there is a guy doing a set. Worst case try buying letraset, dont ask me the set numbers.

As for a year, one or two, the kit your working on is just offensive. Its more of a toy.

no matter how much effort you put in it just kicks back but don't despair....

http://www.eagletransporter.com/forum/showthread.php?t=4861

this is somebody trying to superdetail one of these.

As you may know the box art shows a rescue eagle, that only appeared in year one.

you would be better off buying a product enterprises eagle on ebay and repainting it yourself.

I make it 18mm from the base of the foot to the bottom of the shoulder pod. thats for an 11 inch model,

This may be of help with the main engines, its a match to the layout of one my friend photographed in the 70's when people wore flares and watched Space1999.

Try this site its a goldmine, the jackpot and the motherload. this guy owns the original.

http://homepages.tesco.net/d.sisson/eagle1.htm

try this one aswell....

http://www.eagletransporter.com/

If you need anything else just mail me.

Terry


  • Member since
    January 2007
Posted by the doog on Monday, February 23, 2009 5:27 PM

LOL, Thanks, Woody!

And thanks Paul, Huxy, and Terry, for keeping tuned in! I appreciate your comments! 

Terry, I emailed you, buddy! If you can help, I'd appreciate it!

I might need some help too, with the coloring of alll the panels--what little squares or circles, etc, are gray, or red, etc. That guy isn't accepting orders for his decals on that site, so I have to improvise.... I'm also wondering what "version" Eagle is this? First year? Second year?

Karl

  • Member since
    December 2002
  • From: Third rock from the sun.
Posted by Woody on Monday, February 23, 2009 5:14 PM
I'm not sure what this thing "armor" is but I can't wait to see more of your eagle.

" I wish to have no connection with any ship that does not sail fast; for I intend to go in harm's way." --John Paul Jones
  • Member since
    April 2008
  • From: Kristiansund, Norway
Posted by Huxy on Monday, February 23, 2009 4:57 PM
I do indeed like it! Smile [:)]

"Every War Starts And Ends With An Invasion".

  • Member since
    May 2005
  • From: Dublin Rep Of Ireland
Posted by terry35 on Monday, February 23, 2009 4:39 PM

Nice shooting so far Karl, if you need any info on this subject, PM me or terry35@gmail.com its my favourite subject in the  world, I have 17 Eagles and thats just not enough, from 3 inch to twenty three and 22inch models Studio replicas kits, you name it.

Thats my kitchen table.

If you want better shots just ask and i will deliver.


Terry.

  • Member since
    October 2008
  • From: SE Pennsylvania
Posted by padakr on Monday, February 23, 2009 2:31 PM
And the next one you are going to go the whole nine yards with, right? This one is just a warm up? Wink [;)]
  • Member since
    January 2007
Posted by the doog on Monday, February 23, 2009 12:52 PM

Here's an update for anyone still following this thread?

I've decided that I can't live with the weird suspension that they put on this model. It's "simplified" to say the least! This should have been done while the parts were separate, but as usual, I do things the hard way! Whistling [:-^] LOL! I had to really think how the heck to achieve this while the pods were glued closed.

I started by cutting off the little boxes that are molded on, and completely inaccurate, by the way...


Then, I took a plug of .080 styrene, cut into a square slightly larger than the hole, and dropped it in.

Hold it up, and let it settle into the hole as a plug....

In order to hold the plug in place whil eI glued it, I drilled a small hole in the top, and pressed the drilll against the plug. The I flipped the model over, quickly applied cement, and then held the drill against the plug, sealing it tightly as it dried. Couldn't phtograph that, though--I woulda needed three hands!

Then, a separate plug of exactly the same size as the remaining square hole was shaped and dropped into the depression remaining there. I cut the second square plugjust slightly larger than the space it needed to fill, chamfered the edges a little bit, and with a liberal shot of Tenax R7, the plug sealed the hole tightly. It worked like a charm.


The holes were then plugged with styrene rod melted into the holes.


Then, the centers were located, and drilled out.


Tubes of .125 diameter were inserted, and then the legs of the "feet" were made with .080 rod--these fit into the .125 tubes. Now all I have to do is to figure out how to sit them all correctly after adding the landing strut details!


The egine bays are all finished too--I added 4 more strut coming off the corners of the cages there. It looks appropriately busy in there! 

More to come! Anyone with suggestions or comments, I'm always happy to hear from you!


  • Member since
    January 2007
Posted by the doog on Sunday, February 22, 2009 10:23 AM
Thanks, Huxy, and Phil H--and thanks for commenting! Whistling [:-^] I appreciate you weighing in!
  • Member since
    August 2005
  • From: Sydney, Australia
Posted by Phil_H on Friday, February 20, 2009 2:55 AM

Great progress Karl, I love the additional pipework.

This is going to be spectacular when you're done with it. Thumbs Up [tup]

  • Member since
    April 2008
  • From: Kristiansund, Norway
Posted by Huxy on Friday, February 20, 2009 12:21 AM

Pretty sweet! I like it so far


I have a plastic sheet from the same company, but it doesen't bend Tongue [:P]


Can't wait for more!! Big Smile [:D] 

"Every War Starts And Ends With An Invasion".

  • Member since
    January 2007
Posted by the doog on Thursday, February 19, 2009 11:36 AM

Ok, so here's some of the work I'm doing on the engine. This is one of the most lacking of parts in the kit; after really looking at a slew of photos on the net, I was shamed into wanting to produce a more accurate representation. I am working strictly from photos from the internet sites, not from blueprints, so everything you're going to see is my own approximation of what seems to be the ductwork and tubing on these beautiful ships.

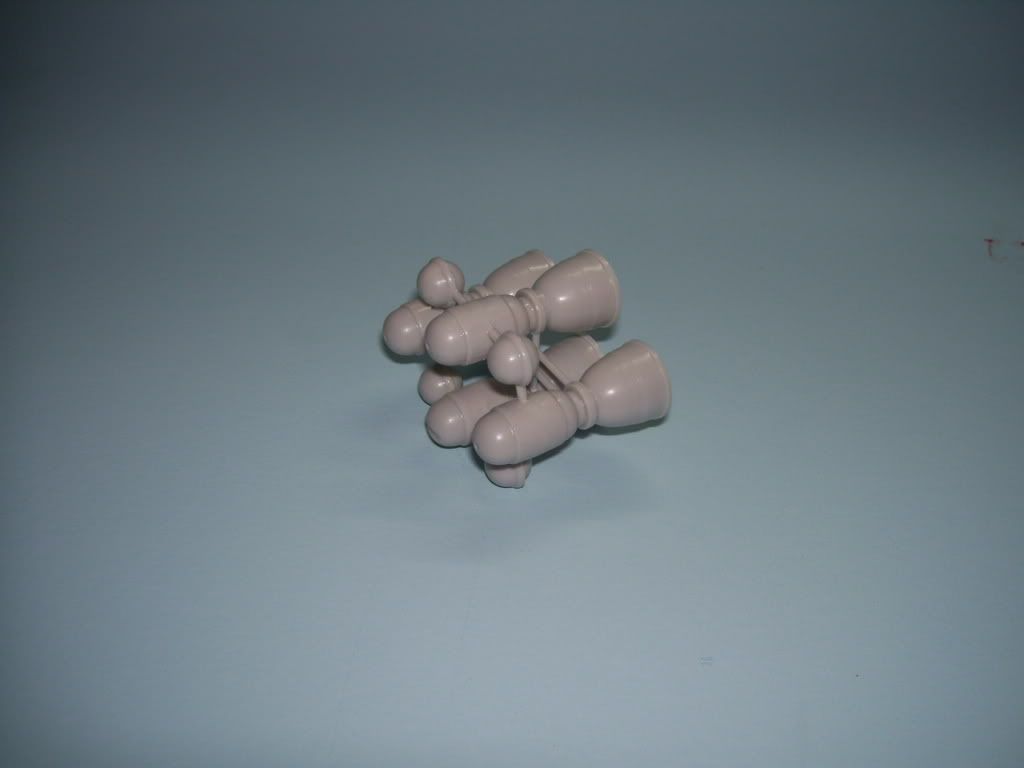
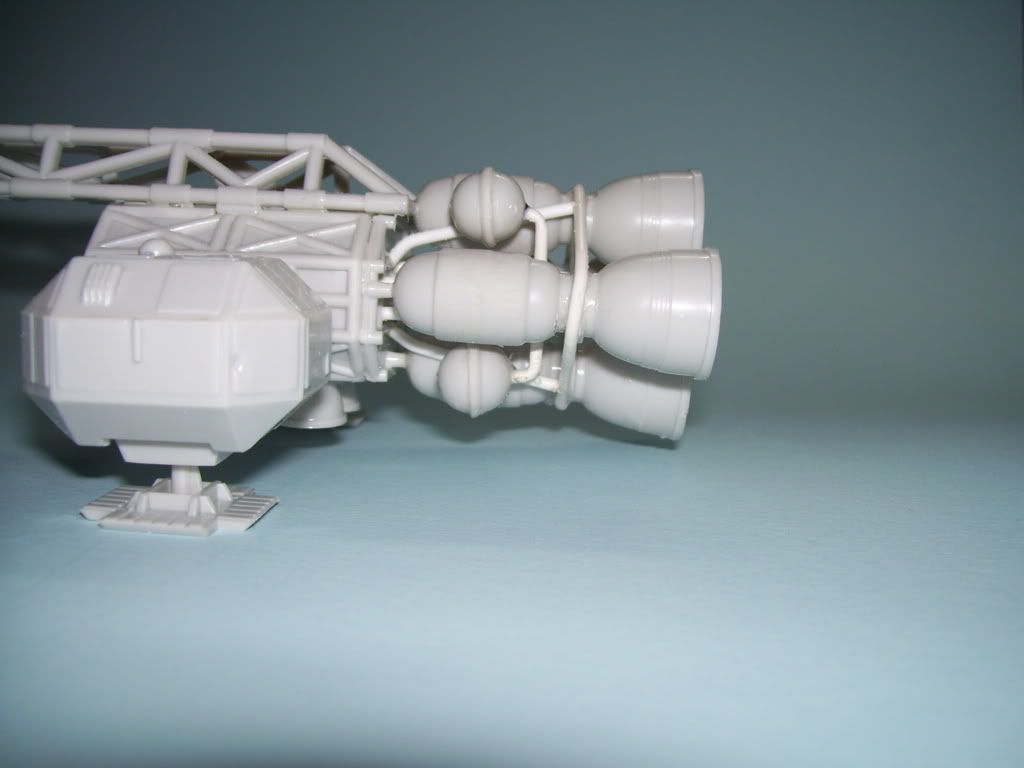
Here's what you start with in the kit.

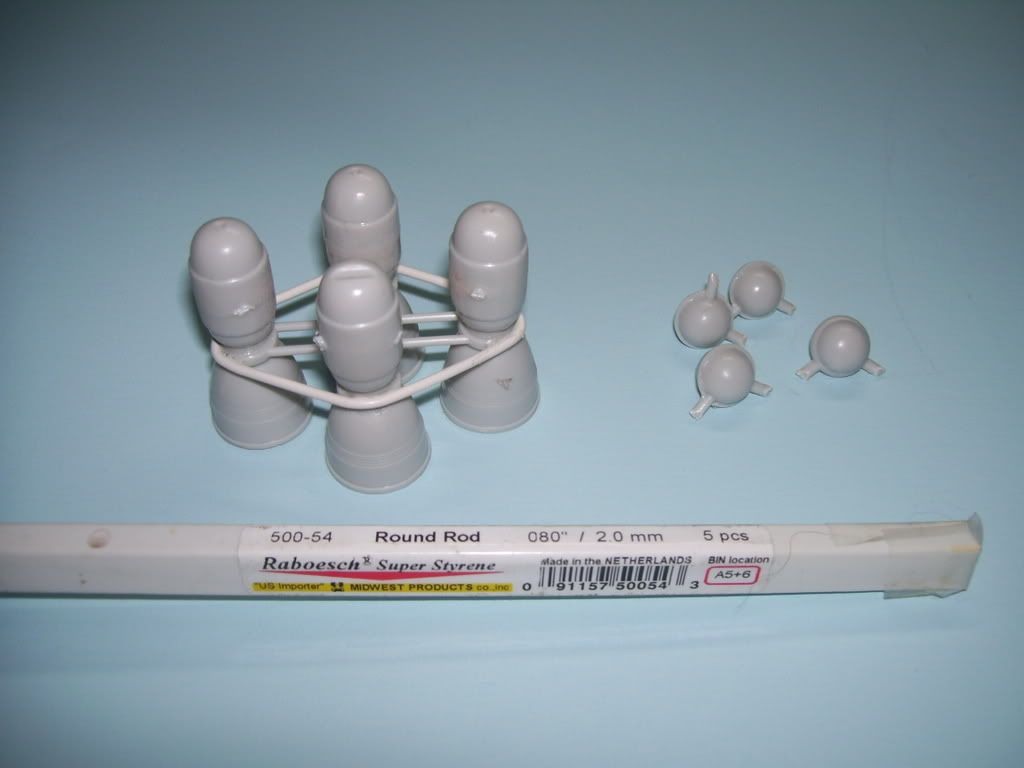
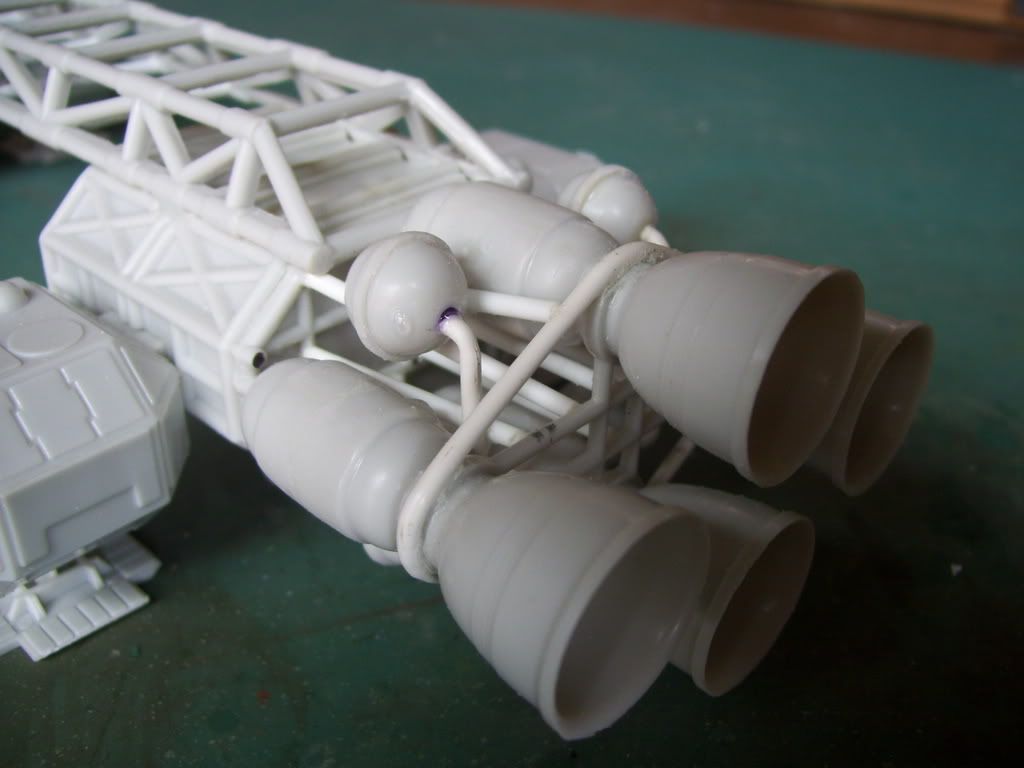
Next, I removed the incorrect joining of the smaller balls, and using some Super Styrene, wrapped a .080 tube around the exterior of the engine nacelles (?). This stuff is fabulous for scratchbuilding; ordinary styrene, but it bends like solder without breaking! I picked up a small stash of it a year or so ago; alas, they've discontinued it, but I'm glad I had the perfect size for this application! 

I mounted the engine to the body, and using regular .080 styrene, started adding the bracing to the interior of the engines, I also connnected the two little--I'm going to call them fuel cells(?)--with tubing.

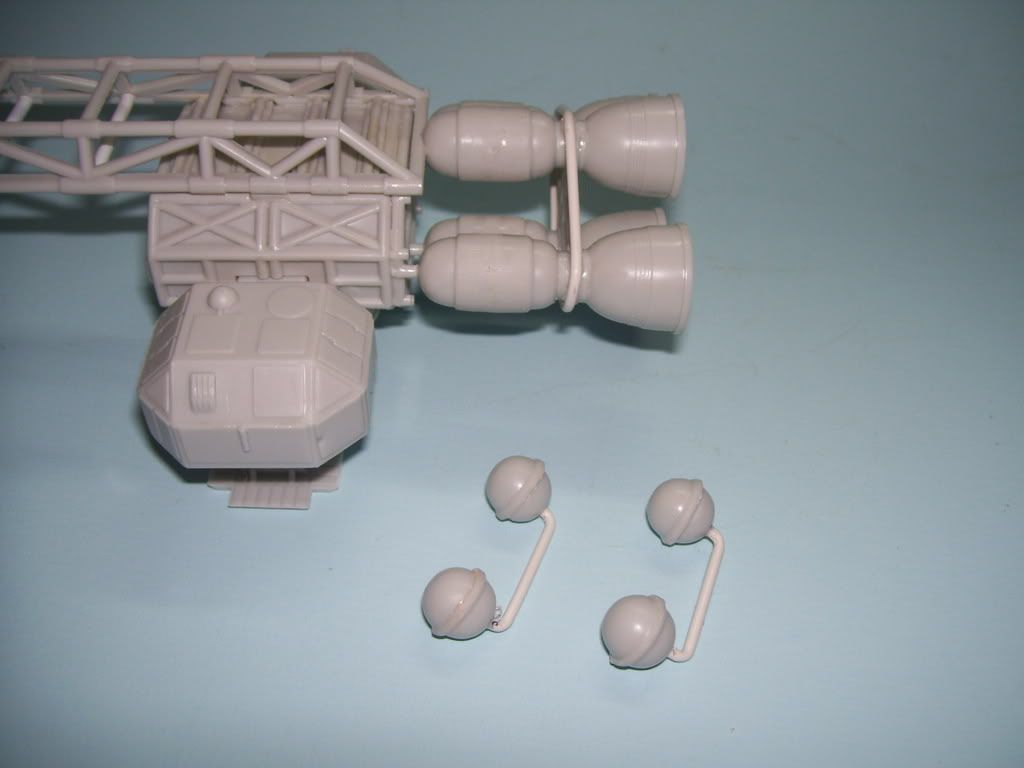
Next, added some inner braces. Thankfully, I have a good colllection of tweezer! This was all very tedious cut, insert, measure, file one millimetre, check fit, insert, glue....VERY tedious! You'll notice that the fuel cells had to be inserted and draped over the engine nacelles while I added the bracing; otherwise I wouldn't have been able to get them in later.

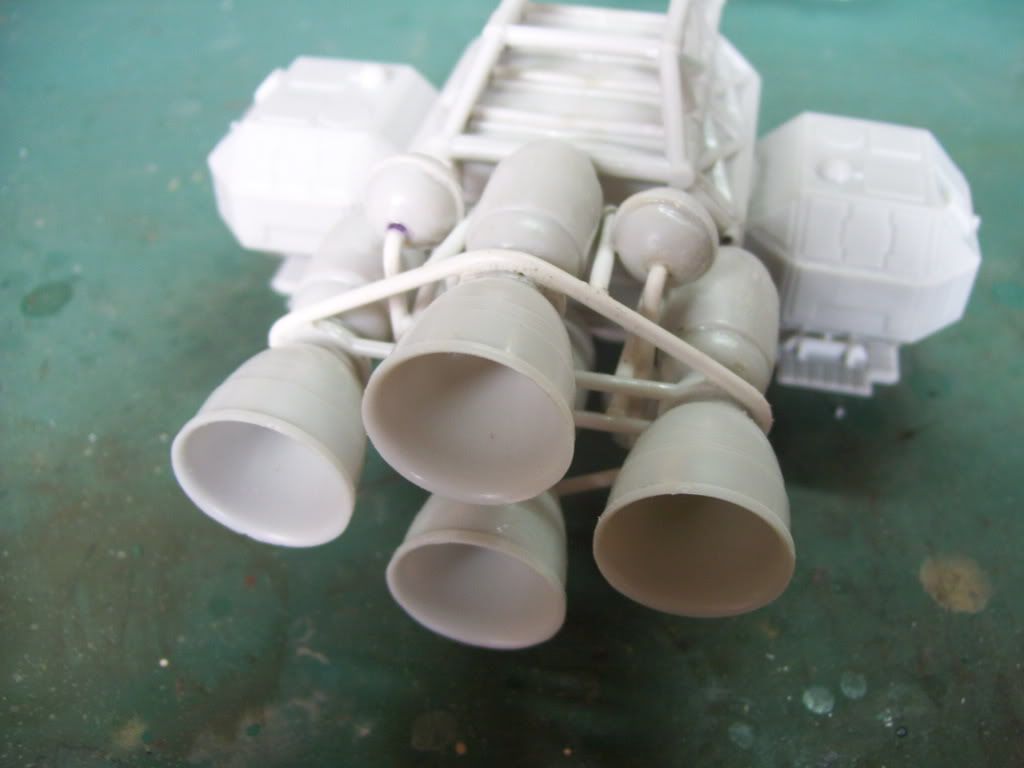
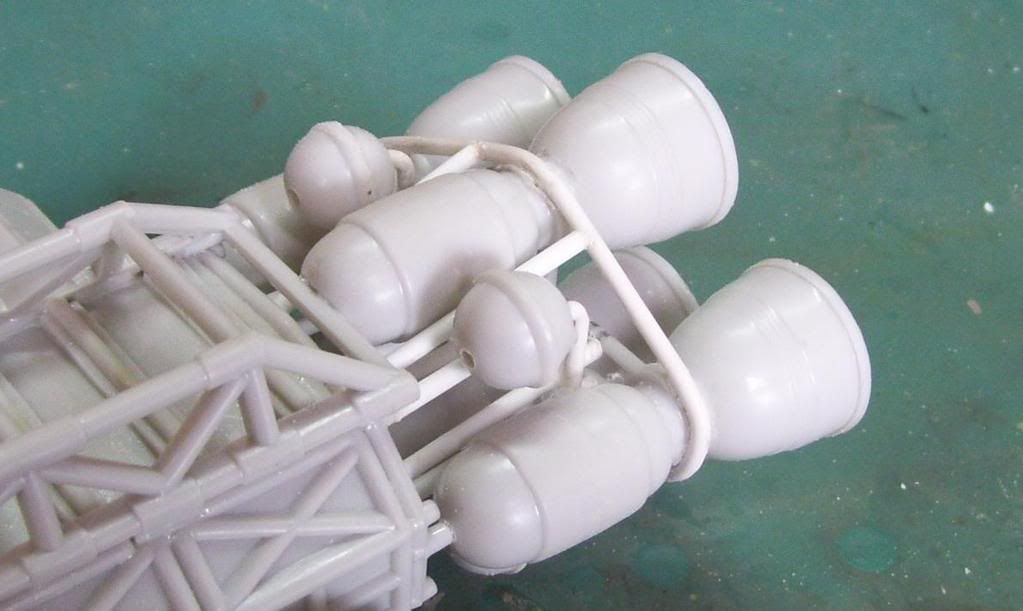
Next, the step that almost drove me crazy--I had to fix the tubing that cnnected the fuel cells to the two inner braces that I'd added. In this shot, you can see the cross bars that served as the mounting points.


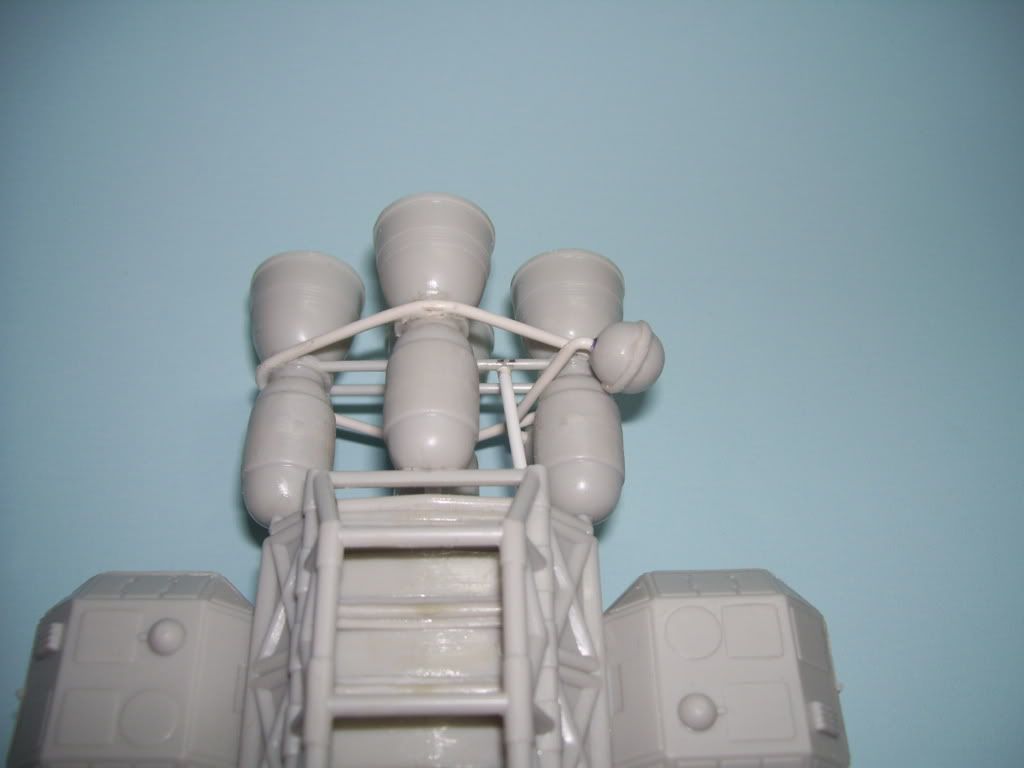
Here you can see them mounted and another set of tubes added above and below the fuel cells.

You can see theprogress so far. Additional "caging: was added; some more braces above and below, forming a "U" around the interior. There's still some more tubes and ducts to be added, plus smaller details on the engine nacelles themselves.

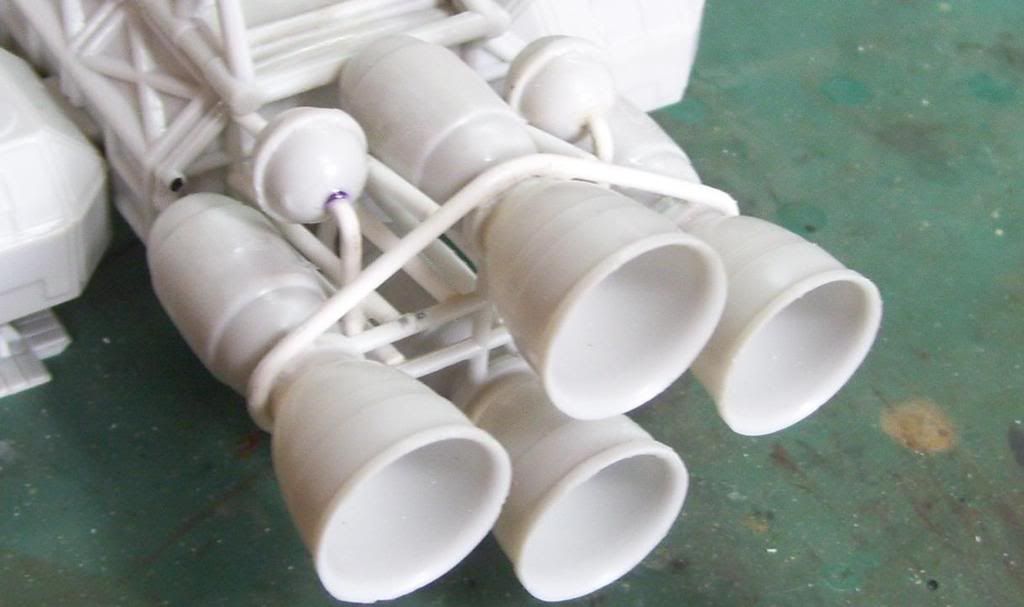
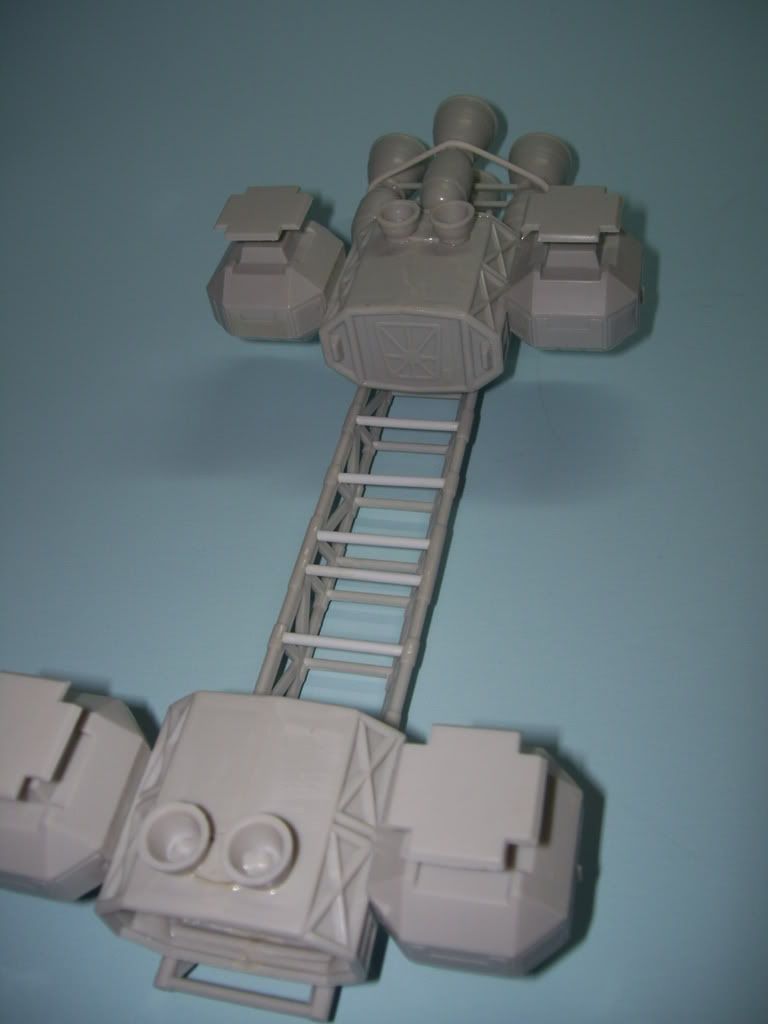
I'm satisfied that, while maybe not 100% "correct", it at least addresses and dresses up one of the weakest parts of the kit. 

Now, I'm kicking myself for not having Dremeled-out those body cages....Sigh [sigh] Oh well; like I said--the NEXT one will get the "full treatment"! By the way, I DID also add the bracing to the long fuselage brace on the top. 

I won't be around this weekend, so there will not be an update til maybe Tuesday or so. Thanks for everyone's help and advice so far! Keep the comments and tips coming!  Big Smile [:D]


  • Member since
    April 2008
  • From: Kristiansund, Norway
Posted by Huxy on Thursday, February 19, 2009 1:37 AM
More pictures now! Wink [;)]

"Every War Starts And Ends With An Invasion".

  • Member since
    January 2007
Posted by the doog on Wednesday, February 18, 2009 9:37 PM
 Jagdwolf wrote:

doog: JBOT has the decals for the Eagle and Hawk kits, in case you want to put the correct markings on.

http://www.jbot.ca/space/eagle.shtml

As a side note, the Eagle kit is considered 1/96, and not 1/72 as many have erronously presumed over the years. An extra kit? Hmmm...I'll check my stash and see if I can pull one up for you.

Aaronw: I still have the Dinky renditions of the Eagle, SHADO Interceptor (2), the Spectrum Pursuit Vehicle (SPV), Spectrum Maximum Security Vehicle (MSV), and the Spectrum saloon car. I intend of refurbishing them as they should be, in both colours and markings.

For those who wondered about the end of Moonbase Alpha:

http://www.youtube.com/watch?v=5UJu0_NSt8Y&feature=related 

This was included in the Space:1999 DVD Megaset.

Thanks, Klaus! I tried to order some, but he's not accpeting orders until he finishes printing more for customers who are still waiting; bummer! I appreciate your hel and recommendations so far!

Padakr--I actually have the first two box sets; man, there's a lot of memories in there! The effects were a but cheesy, but you gotta love those Eagles!

AaronW--hey, I built that Moonbase Alpha kit too! LOL! 

Bill--don't worry; I'll still be watching the Armor forums! 

Cosmic J--now you just behave yourself! Wink [;)]...Big Smile [:D]

Thanks guys, I'm making some good progress on the engines and the capsule; more pics maybe tomorrow? 

  • Member since
    January 2007
Posted by the doog on Wednesday, February 18, 2009 9:31 PM
 Division 6 wrote:

You might be intrested on the Eagle Transporter Forum.


Eric... 

Hey, thanks a lot, Eric! That site was a real help! I got some cool ideas for detailing the engines a little more correctly! Big Smile [:D]


  • Member since
    April 2006
  • From: Navan, Ontario
Posted by Jagdwolf on Wednesday, February 18, 2009 8:00 PM

doog: JBOT has the decals for the Eagle and Hawk kits, in case you want to put the correct markings on.

http://www.jbot.ca/space/eagle.shtml

As a side note, the Eagle kit is considered 1/96, and not 1/72 as many have erronously presumed over the years. An extra kit? Hmmm...I'll check my stash and see if I can pull one up for you.

Aaronw: I still have the Dinky renditions of the Eagle, SHADO Interceptor (2), the Spectrum Pursuit Vehicle (SPV), Spectrum Maximum Security Vehicle (MSV), and the Spectrum saloon car. I intend of refurbishing them as they should be, in both colours and markings.

For those who wondered about the end of Moonbase Alpha:

http://www.youtube.com/watch?v=5UJu0_NSt8Y&feature=related 

This was included in the Space:1999 DVD Megaset.

  • Member since
    September 2015
  • From: The Redwood Empire
Posted by Aaronw on Wednesday, February 18, 2009 6:53 PM
When I was a kid I had Dinky toys of the Eagle, Eagle crane (it came with some radioactive waste buckets), the UFO interceptor, some Captain Scarlett vehicles and a Thunderbirds ship. I wish I knew what I did with all those. I did build a Space 1999 Moonbase Alpha kit but never knew there was a model kit of an Eagle.
  • Member since
    January 2012
Posted by I make stuff on Wednesday, February 18, 2009 6:32 PM

What the...!?!?!?!??!?!??!?!??!?

OK, I had the 3 foot version, and the little orange, 3 inch suited astronauts, too.

But posting in Sci Fi?!??!?!?!?

J/K

Bill (your secret is safe with me). 


  • Member since
    October 2008
  • From: SE Pennsylvania
Posted by padakr on Wednesday, February 18, 2009 6:29 PM

Very cool Doog.

We have the Blockbuster "mail the DVD to your house" service, and my wife and I got a couple of the CDs from the series about a year or so back.  Watched them for a trip down memory lane.  Our 18-year old son commented on the "chessy CGI" and I had to explain to him that those were actual scale models that some very talented craftsmen created.


  • Member since
    January 2009
  • From: Central CA
Posted by Division 6 on Wednesday, February 18, 2009 5:08 PM

You might be intrested on the Eagle Transporter Forum.


Eric... 

  • Member since
    December 2007
  • From: Louisville, KY.
Posted by Cosmic J on Wednesday, February 18, 2009 4:42 PM
 the doog wrote:

Hi, uh.....strangers..? Wink [;)]

Well, after reading some of the responses to the thread "Why is the Armor forum the best forum?" that ran over there a few days ago (Claim is sole responsibility of the author!--not ME!) I'm a little skeered to post over here in this "Wild West" forum, but I hope you'll enjoy this real departure for me.


Heehee! Cool [8D]

  • Member since
    March 2006
Posted by TD4438 on Wednesday, February 18, 2009 4:20 PM

Why keep it a secret when it's gonna look as awesome as anything else you've done?No way,dude!

  • Member since
    January 2007
Posted by the doog on Wednesday, February 18, 2009 11:13 AM
 Phil_H wrote:

Nice progress so far Karl.

You may wish to add the crossbeams on the lower section of the truss. There's actually a crude representation of the crossbeams on the roofs of the engine and cockpit modules, but none above the "pod".

I had the Airfix boxing of this kit many (30+) years ago. Wish I could get hold of one now... Sigh [sigh] 

This article might be helpful: http://www.starshipmodeler.com/other/md_eagle.htm

Thanks for that link, Phil! WoW, I wish I had the knowledge and patience to trick this out like that guy did! I would have attempted it, but to be honest, afterhow log it took me to score this kit on eBay, and for themoney I paid for it, I don't think I would have risked ruining it without some serious blueprints or something to actually see what I'm supposed to add or do to it. I would have liked to dremel out the service pods....oh well....I think I will add those truss bars; that's a pretty easy fix.

I'm just going to build this pretty much OOB besides the cockpit mod. I'm going to rely on my finishing skills to bring it up to par. If I can score a second one, I will attempt a more accurate build according to that tutorial there!

TD4438--let's keep this our secret, ok?! Whistling [:-^] LOL!

  • Member since
    March 2006
Posted by TD4438 on Wednesday, February 18, 2009 8:34 AM
Nice!We got doog to flip!I also have an eagle in the stash.It's not AMT,but Bandai I think????I'll be watching this build for sure.

  • Member since
    August 2005
  • From: Sydney, Australia
Posted by Phil_H on Wednesday, February 18, 2009 4:06 AM

Nice progress so far Karl.

You may wish to add the crossbeams on the lower section of the truss. There's actually a crude representation of the crossbeams on the roofs of the engine and cockpit modules, but none above the "pod".

I had the Airfix boxing of this kit many (30+) years ago. Wish I could get hold of one now... Sigh [sigh] 

This article might be helpful: http://www.starshipmodeler.com/other/md_eagle.htm

  • Member since
    January 2007
Posted by the doog on Tuesday, February 17, 2009 10:23 PM
Cool, Jagdwolf! Thanks for that info and the pic! Big Smile [:D]
  • Member since
    April 2006
  • From: Navan, Ontario
Posted by Jagdwolf on Tuesday, February 17, 2009 9:50 PM

The model's command module inset ports should look like this, top and bottom, with the attendant white trim:


JOIN OUR COMMUNITY!

Our community is FREE to join. To participate you must either login or register for an account.

SEARCH FORUMS
FREE NEWSLETTER
By signing up you may also receive reader surveys and occasional special offers. We do not sell, rent or trade our email lists. View our Privacy Policy.