SEARCH FINESCALE.COM

Enter keywords or a search phrase below:

Revell 1:83 Mayflower

50275 views
601 replies
1 rating 2 rating 3 rating 4 rating 5 rating
  • Member since
    May 2003
  • From: Greenville, NC
Posted by jtilley on Thursday, April 28, 2016 2:52 PM

I'm not going to blow a hole through your theory, steve, because it's almost unquestionably right.

From what I can tell, almost nothing is known about seventeenth- century ships' bottom colors. Alittle later than that we do have references to "dark stuff" and "white stuff." It's generally thought that dark stuff was some sort of stinking concoction of tar, sulpher, and horsehair (I have no appetite for reproducing that on a model) and white stuff contained white lead paint and tallow. Recent research has established that the Wasa, the only surviving good-sized  vessel of that period, didn't have any paint on her bottom (though she probably had a coat of tar on all her unpainted hull timbers). There isn't even a mark at her waterline. (developments after her launching raise the possibility that the designers hadn't figured out where the waterline was.)

So you're on your own. Model Shipways makes acolor called "hull tallow," which is a very pale cream. That's probably as good a guess as anybody can make. Or you could try to represent dark stuff. Either way, nobody will be able to say you're wrong.

Hang in there.

Youth, talent, hard work, and enthusiasm are no match for old age and treachery.

  • Member since
    July 2014
  • From: Franklin Wi
Posted by Bakster on Thursday, April 28, 2016 3:50 PM

As always John, your help is greatly appreciated.

PS: I hope things are well with you. I know that retirement is looming close for you, if not already here. Before I forget. Congratulations on that!

  • Member since
    May 2003
  • From: Greenville, NC
Posted by jtilley on Thursday, April 28, 2016 4:10 PM

Thanks Steve. I'm giving my last final exam next Tuesday; grading that stack of exams will be my last official duty. Since I'm on a ten-month contract, with my paychecks coming twice a month for all twelve months, I'll be on the payroll through August 31.

There are lots of things I won't miss about that job. But I definitely will miss a lot of it - especially the students.

Youth, talent, hard work, and enthusiasm are no match for old age and treachery.

  • Member since
    July 2014
  • From: Franklin Wi
Posted by Bakster on Thursday, April 28, 2016 8:16 PM

That sounds great John. I hope that this new chapter in your life will be even better.

  • Member since
    April 2016
Posted by Staale S on Friday, April 29, 2016 3:02 AM

jtilley

Recent research has established that the Wasa, the only surviving good-sized  vessel of that period, didn't have any paint on her bottom (though she probably had a coat of tar on all her unpainted hull timbers). 


Well, Wasa is a bit of a special case. She was meant to operate in the Baltic, which is blessedly free from teredo and other nasty things that want to eat the bottom of your ship's hull out from under you. Nor is there very much marine growth there, it is cold and brackish water. This is not the case in normal salt water - there you must take steps to protect your hull or you will regret it later.


  • Member since
    May 2013
  • From: Indiana, USA
Posted by Greg on Saturday, April 30, 2016 10:23 AM

Steve, just letting you know I'm still quietly watching. You are making good progress and as usual your attention to detail is impressive.


  • Member since
    July 2014
  • From: Franklin Wi
Posted by Bakster on Saturday, April 30, 2016 11:06 PM

Greg, thanks for following along and your kind words. With some luck I will be shooting the base color tomorrow. Fingers are crossed.

Steve

  • Member since
    July 2013
Posted by steve5 on Saturday, April 30, 2016 11:09 PM

looking forward to this steve


  • Member since
    July 2014
  • From: Franklin Wi
Posted by Bakster on Wednesday, May 4, 2016 9:39 PM

Using NASA flight control lingo, I have a no go status for paint. In other words, I have another build delay.

I have a pretty solid process in place for airbrushing MM acrylic paints, apparently not so much using Tamiya. I am trying to use Tamiya because they have the colors that more closely match what I am looking for with this build. Unfortunately, the paint is not reacting the way that I want it to. I am getting closer by trying different things, but more work needs to be done before I can AB the model with it. To be continued...


Let there be light


One screw to access the battery compartment.


Pull the battery. Then two screws to release the decorative top.


With the two screws removed, it is just a matter of prying off the top section. The two pieces are somewhat press-fit. I was glad that they did not glue them together.


Whats inside.


Power on. I was surprised to see that they are using two LEDs. You can't see this from the photo but the lower LED remains in a constant state of being on, while the upper LED does all the flickering of light.


I disassembled things to give you a clearer picture of what these parts look like and how they connect to each other.


With the diffuser.


The more that I look at this, the more that it seems it should be an easy deal. What I will probably do on the final assembly is to keep everything intact, with the exception of the LEDs. I will re-use the base assembly by mounting it to a wooden stand that the model will rest on. Then, maybe, make a cutout in the wood for the base to rest in, making it somewhat hidden. The LEDs will of course be mounted within the ship. I will solder wires to the LEDs and run them out of the ship into the base assembly. 

Lastly, I have an idea to fabricate a (more to scale) lantern that the LED light will shine through, and a table for the lantern to rest on. The LEDs will be hidden within the table, and the light from the LEDs directed up into the lantern via something called a light pipe. A light pipe is nothing more than a piece of clear plastic that is used to direct LED light. It is commonly used in the electronics industry to direct light through panels from off of PC board mounted LEDs. The caveat to this idea is if there is too much light dropout. In that case, what is the point. More on this as I progress.

I just have to say that I really enjoyed taking this tea light apart to see how they made it. These are really cool and ingenious gadgets.


  • Member since
    July 2013
Posted by steve5 on Wednesday, May 4, 2016 10:07 PM

I have agood friend like you steve , I don't dare leave anything lying around , or he will take it apart , to see how it work's , lol

love what you are doing

steve5


  • Member since
    April 2016
  • From: Russia, St.Peterburg
Posted by kirill4 on Thursday, May 5, 2016 4:56 AM

Good day Steve,

sounds good,this idea... to arrange light....regarding to fitt this size of  LED into lantern, need to take in consideration heat generating...excessive could damage plastic...I saw on electronic market ,there are LEDs  smth in two times smaller,than this, which You shown...I think , micro size LED, will be possible to be powered frm ordinary AA batteries...? wire connections could be made from laqued hair size wiring...may be such staff,for model lighting You can found in railways modelling adds?

I fabricated lantern from medical syringe casing...they are differnt in size, and cutting piece of its casing,we can make simulation of ship lantern...

Here is I left visual information which could be usefull when ness-ry to take decission, how/which colors to use,when painting galleon model...including color of the hull bottom part,there was discussion abt it early...at least, what I can see on all of those pictures of contemporary artists,  it is in bright colors...not exactly white,but sort of white-grey-yellowish...

https://cloud.mail.ru/public/4j7m/4TQ4jHs2s

there is some info/drwngs of MF

https://cloud.mail.ru/public/5ud9/zhgLYc4FW


All the Best!

Kirill

  • Member since
    April 2016
  • From: Russia, St.Peterburg
Posted by kirill4 on Thursday, May 5, 2016 5:44 AM

my suggestion, how to fabricate lantern from waisted plastic,antimoscito net,and piece of medical syringe...

 " target="">

 " target="">

 " target="">


  • Member since
    July 2014
  • From: Franklin Wi
Posted by Bakster on Thursday, May 5, 2016 1:46 PM

Steve5, that is pretty funny about your friend. I don't think that I have reached that level of curiosity, YET.

Glad you like it, sir.


BTW Steve, part of my Tamiya paint issue might end up being fixed as a result of one of your recent posts. You asked about using lacquer thinner with Acrylic. As a result of reading that post I went and tried doing that. You may find it interesting to know that the best results that I have achieved thus far was by using the lacquer thinner. I have one more thing to try before I can declare that. But, the lacquer thinner helped the paint spray smoother and it laid down flatter. More to follow.

  • Member since
    July 2014
  • From: Franklin Wi
Posted by Bakster on Thursday, May 5, 2016 2:24 PM

Kirill--that is a beautiful lantern on what looks like a beautiful ship!

Thank you, for your post.

  • Member since
    July 2014
  • From: Franklin Wi
Posted by Bakster on Thursday, May 5, 2016 2:25 PM

Kirill, thank you for your input. I will consider your thoughts on this.

  • Member since
    July 2014
  • From: Franklin Wi
Posted by Bakster on Sunday, May 8, 2016 8:04 PM


Another process learned


Last week I had mentioned about the Tamiya paint problem that I was having. This problem is solved. Here is a synopsis of how it all played out. I warn you, this is a long posting.

1. As mentioned last week, I was not happy with the way that the paint was reacting. In short, it was coming out of the AB too dry. At the time I did not have Tamiya's acrylic paint thinner on hand. My local HS had it on backorder. However, I have read numerous times that people often use IPA. I started there. I played with the air pressure, paint viscosity, and I even added acrylic paint leveler. I reached a point where the result was just ok. That won't do.

2. I then tried using hardware store lacquer thinner to thin the paint. I was surprised at how much that improved the paint spray and how it laid the paint down. I was able to get a pretty decent finish. Still, I was not quite satisfied. It was better, but not quite there yet. Also, I would prefer to limit my exposure to caustic chemicals like lacquer. On with the search I went.

3. I decided that I should at least try Tamiya's acrylic thinner. I had my doubts that it would be much better because people have commented that what Tamiya sells as a special thinner is in fact just IPA, and it's sold at a please bend over price.

Yesterday, the thinner came in and last night I had tried it. I started with 50% paint and 50% thinner mixture. I had fully expected to see the same problems as with the IPA. Boy, I was wrong. I thought that I had died and gone to AB heaven. The paint sprayed perfectly. It went on wet, laid down smooth, and it gave really good coverage. I can't say if this is just IPA. What I can say is that it works! I suspect that they have engineered the prefect blend of paint leveler. Whatever the case, I will pay their price if it means that I will have predictable and dependable results.

Below: The hull, rudder, and the bulkheads are painted. The decks will be painted in a different hue. That will be a different paint session. And yes. This session using the Tamiya thinner worked just as well as in yesterdays testing. It was a real joy to paint.

The paint formula used:

50% Tamiya brown.

50% Tamiya flat brown. I mixed flat to reduce the gloss from the Tamiya brown.

An unknown amount of Tamiya flat white to provide a lighter shade of brown.

50% thinner to the total paint by volume.


Since that I am on the subject of paint. Here is another tip that some of you may like. First, I have to describe what you are looking at. Many years ago now I had purchased this rechargeable hobby tool. I think that I paid about $15 for it. After about 1-1/2 years the batteries had stopped taking a charge. Go figure. Not to be defeated by a crummy product, I had hard wired the tool to a homemade battery pack. This tool does not get used for grinding and such, but I do use it as a paint mixer. Notice the alligator clip. I put that on so that I can insert mixing sticks for stirring. What I like about this is that it is easy cleanup. When done mixing, toss the stick.  That is the Bakster tip for the day.


Crimped it on.


Toss the stick.


Below: Here is a commercial mixer that I have purchased. I thought that I would give it a try because it is much smaller and more wieldy than my makeshift one. This runs on a AA battery, and I thought that the price is right at about $10. What I didn't realize though is that it does not have a variable speed control. It only has on/off. My other tool has a variable speed control and I like that feature. Long story short... I have not tried using it, but I will. This unit could easliy be adapted to use an alligator clip. Just in case anyone is interested. 


Below: My mixer in action.


I am a big believer in thorough paint mixing. This leads me to another point. Some of you may have experienced or heard of MM Acryl paints not sticking well. I have personally experienced this. Here is the thing though. Since I started using my mixer to mix their paint, the problems seem to have gone away. It is night and day difference. I think that MM paint has to be mixed really really really well. If you look closely at the image below you can see a white color at the edges, and even some wisps from the center. It takes a long time of mixing with my mixer to completely blend that into the paint. I can't imagine how long this would take to blend that if mixing by hand. I suspect that white stuff is a binder that separates while in storage. 


  • Member since
    July 2013
Posted by steve5 on Sunday, May 8, 2016 10:21 PM

I never stop learning from you steve ,


  • Member since
    July 2014
  • From: Franklin Wi
Posted by Bakster on Monday, May 9, 2016 10:57 AM

Hey Steve-- I am glad that I can help!

  • Member since
    July 2014
  • From: Franklin Wi
Posted by Bakster on Saturday, May 14, 2016 11:51 PM

Mixer test


I mentioned that I would test the Badger paint mixer. Today I did that. There is one correction that I want to make before I get into things. In my last post I noted that this mixer uses 1 AA battery. That is incorrect. It uses 2 AA batteries. Sorry for the error. 

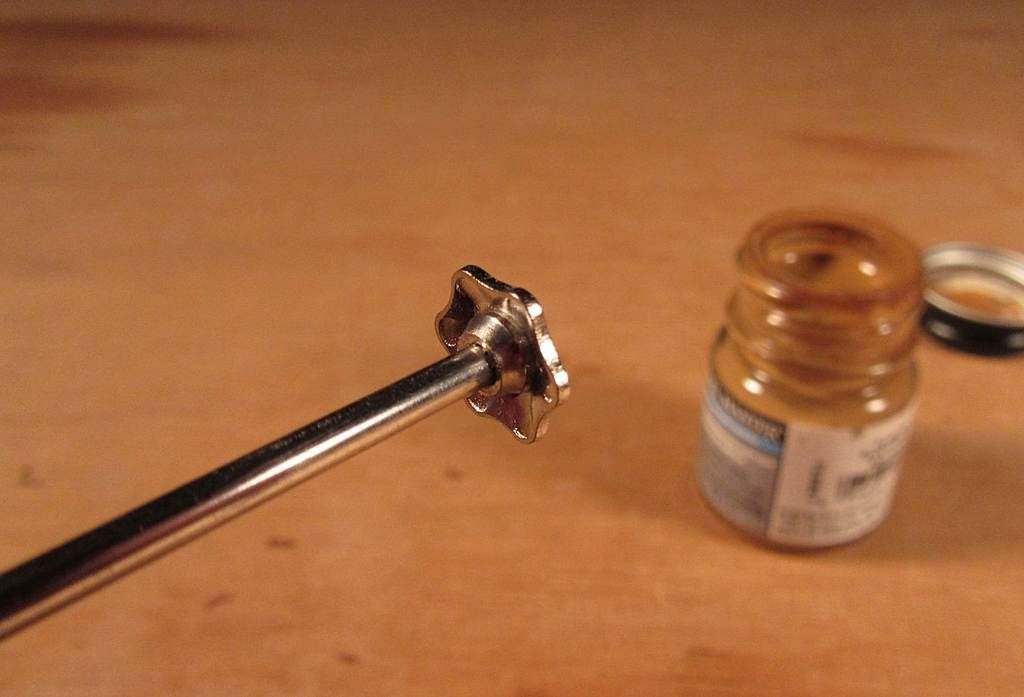
This is how the agitator looks like close up.


Here is one of the reasons why I like the variable speed control on my hobby tool mixer. What you see below won't happen unless you make it happen. It gives you more control.

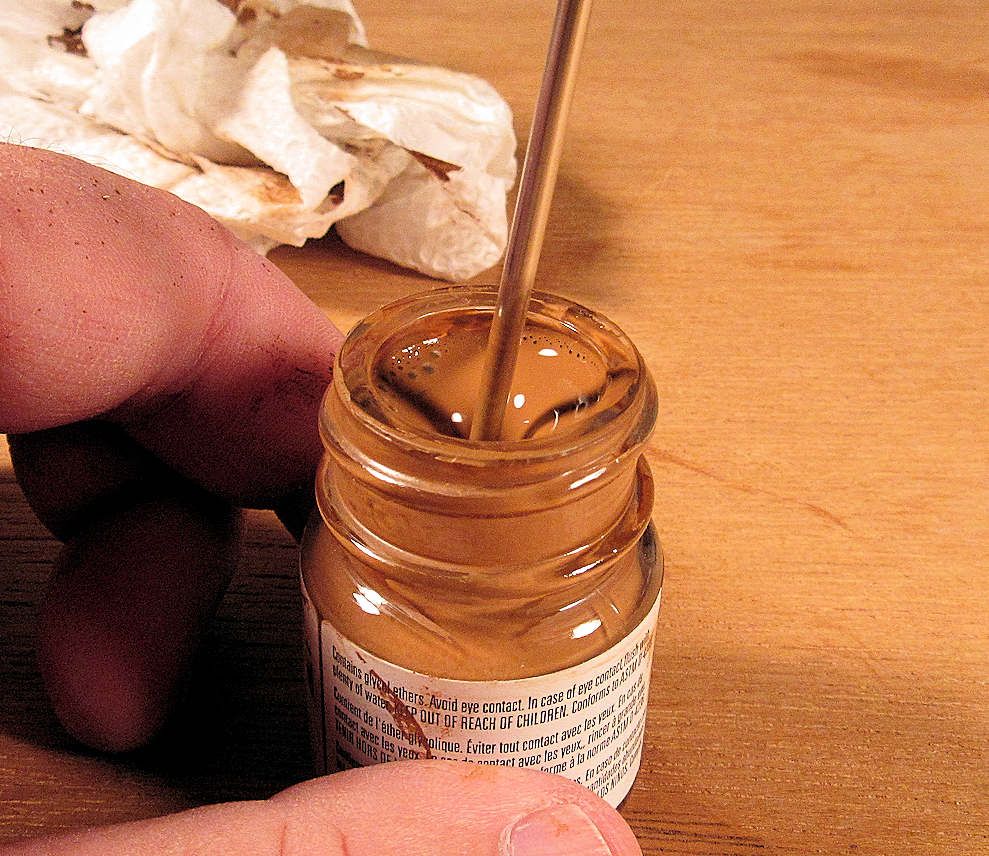
Right out of the gates I was surprised at how fast the Badger mixer is designed to spin. It is a buzzsaw, and at that RPM, you had better keep that agitator at the very bottom of the jar or you will get this. I had barely tilted the shaft and the paint came frothing out. Honestly, in my opinion, there is no need for this kind of RPM. It is major overkill and worse, it becomes problematic.


Here is how it works if you are very careful. Place the agitator in the paint and then power it on. Don't let go and don't move!

I did try using my alligator clip/mixing stick method on this mixer.  It was a disaster. Paint came flying out. The RPM is way way too high.  Don't try it with this mixer.

My thoughts:

1. The RPM is too high. Either they should cut that down or put an adjustable control to vary the speed. I would prefer the latter. If Badger would make this one change, it would move the mixer into the realm of being a very user friendly tool, and at a great price.

2. I don't like the power switch. It is a slide switch that requires a little force. It is awkward to operate making it a precarious situation by trying to hold the unit straight and steady while trying to fumble with the switch. Point 1 would fix this.

3. My thoughts about cleaning the agitator bore itself out. I had run the shaft under water under high pressure and there was still paint left behind for further cleaning. This becomes a several minute process to clean. Hence, why, I like the mixing stick method. This is the least of the issues though.  

Having said all this, this mixer is better than nothing. It does work. You just have to be careful and it is worth the price. It will really mix your paint well, and fast.


Lantern update


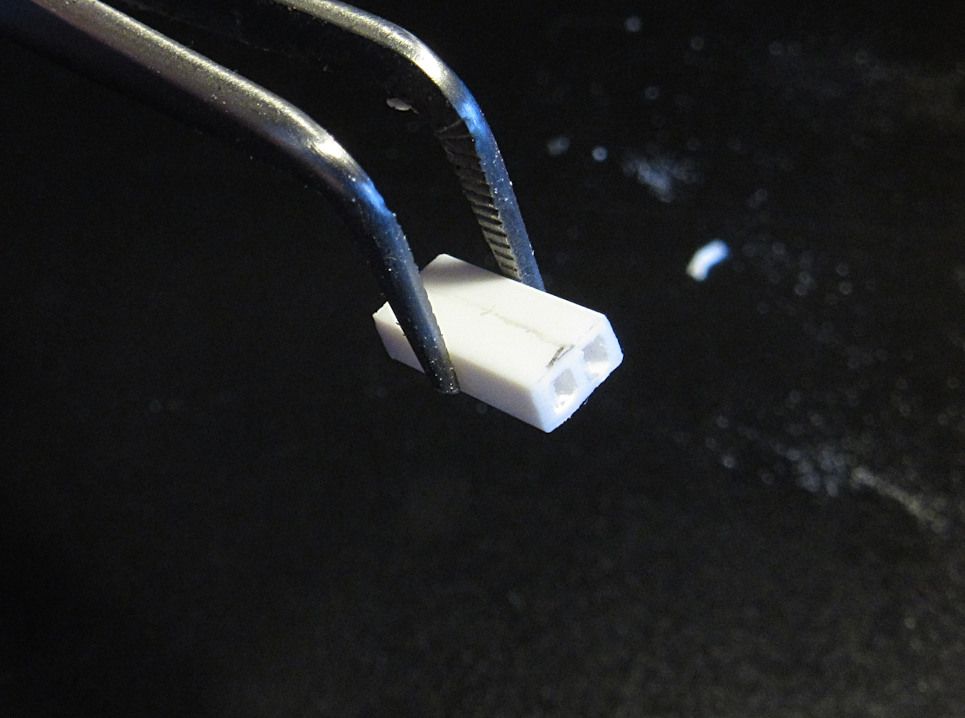
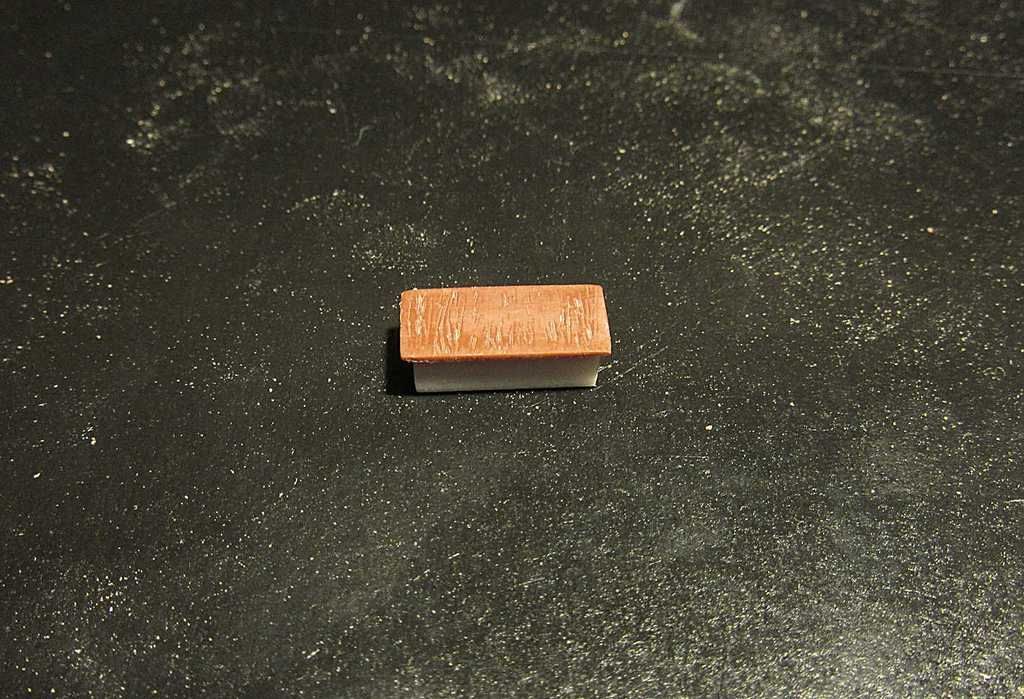
I began work on the table. This piece will be the base of the table. I had used Evergreen Scale Models square stock to make this. This one piece is made from two pieces glued together. Later, not shown in this image, I applied CA to the ends filling the holes. I applied some accelerator, filed, and then sanded until flush. 


For the table top I cut a piece of plastic from a spare bulkhead. I thought it would be nice to have a little simulated wood grain.


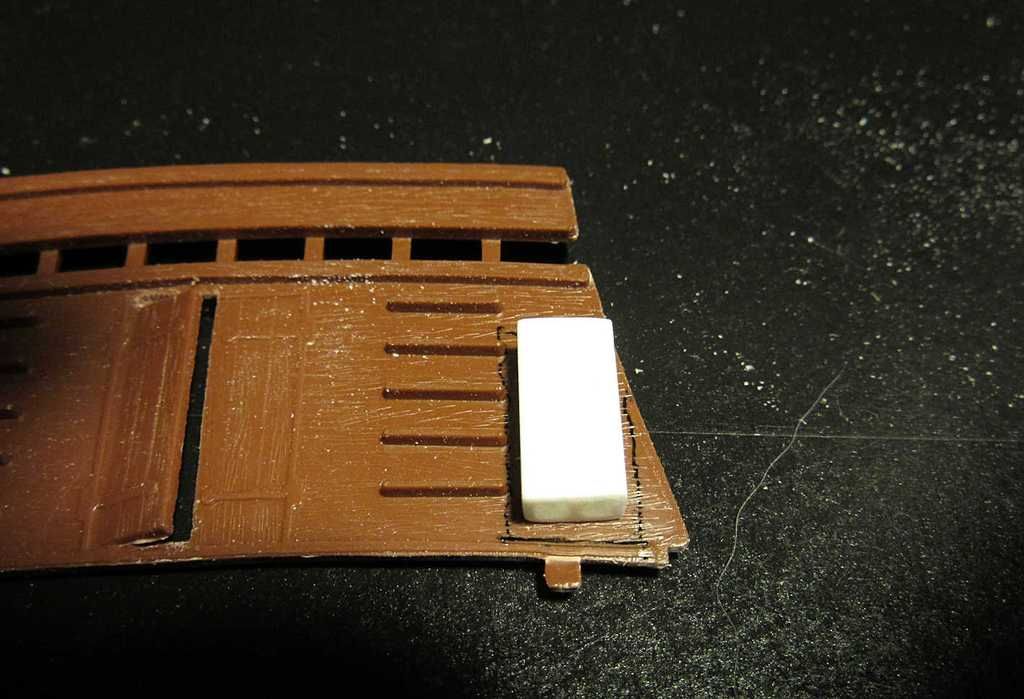
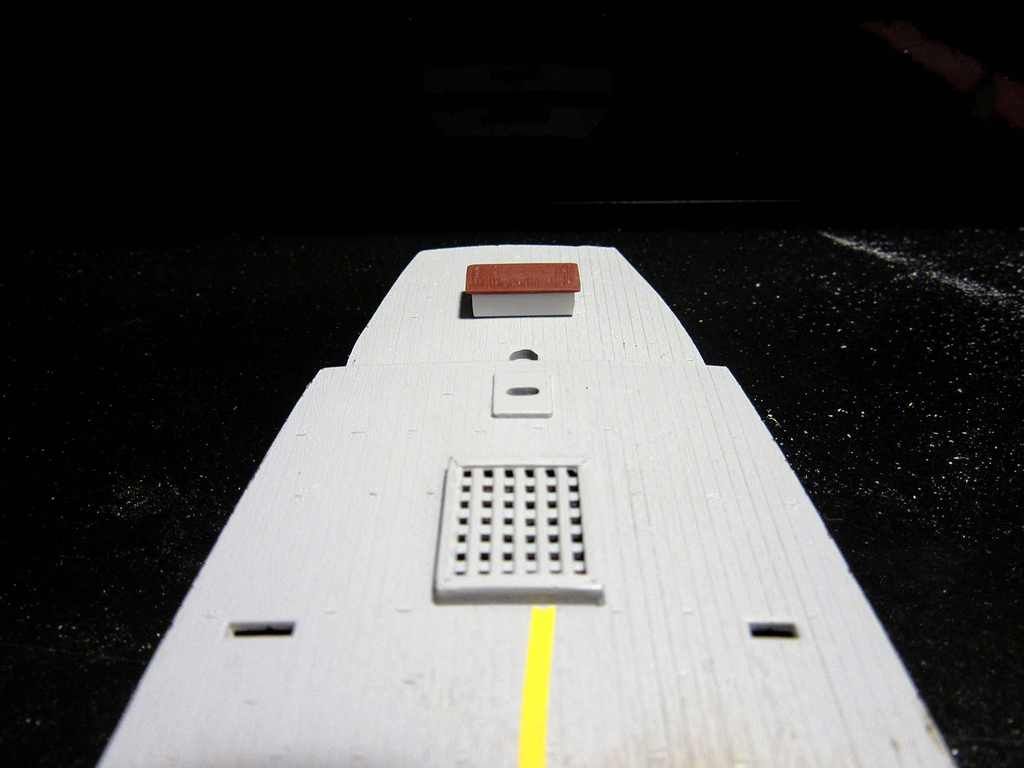
Not painted yet, nor the hole drilled for the light pipe. Oh--I already know that the LEDs will not fit into the base of the table as I first envisioned. I will mount them under the deck.


This is roughly where it will be positioned. Subject to change...


I did do some testing with the light pipe. I think that it will work. It should produce a nice flickering effect, a nice scaled down lantern, and a nice scaled down light output. It will be interesting to see how this turns out.

PS: The camera lens distorts the lines. The base looks a little off but that is not how it really looks. 


  • Member since
    July 2013
Posted by steve5 on Saturday, May 14, 2016 11:56 PM

looking good steve , but I had to laugh , did the same thing wih my mixer .


  • Member since
    July 2014
  • From: Franklin Wi
Posted by Bakster on Sunday, May 15, 2016 12:31 AM

Thanks Steve. Yeah I bet it did.  I bet it gets everyone at least once.

  • Member since
    May 2013
  • From: Indiana, USA
Posted by Greg on Sunday, May 15, 2016 10:30 AM

I have that Badger mixer, and I never made a mess like that**. I saw the problem coming, perhaps from making so many milkshakes with an old-fashioned mixer with the same agitator design that I knew what would happen if it wasn't stopped in time. So there, Steve. Smile

Your custom paint stirrer is pretty neat!

Interesting to read your experience with Tamiya less the proprietary thinner. I too have read about the wonders of using regular iso and/or lacquer thinner. To me, Tamiya with X20 thinner sprays like a wet dream, and the only reason it's not my go to paint is that I'm not fond of mixing colors. (As Don reads this and cringes, sorry, Don).

Anyway, I'd never tried thinning with anything but X20 so thank your for sharing your experiences. I have often wondered and for sure will not be doing any Mr Wizardry on the subject now.

Someday when my zillion bottles of Vallejo dry up, I might just bite the bullet and switch to Tamiya.

Good progress, Steve.

** perhaps I should say ".....yet".

  • Member since
    July 2014
  • From: Franklin Wi
Posted by Bakster on Sunday, May 15, 2016 12:09 PM

Hey Greg, where were you when I needed you? Milkshake experience? That would have been handySmile

One thing that I just thought of with that mixer. The speed might be less of a problem with different paint jars. Like with Tamiya. They have the wider mouth jars. That gives the paint some room to expand within the jar. Just a thought.

So true about the Tamiya. I am not joking. If my hands were not busy with the AB I would have pinched myself to make sure that I wasn't dreaming. I have never seen a paint spray as nice as it did with their thinner. The final finish is so flawless that it doesn't even look painted. It looks like it was molded that way. BTW... I had painted all those pieces and after I was done I had checked the needle tip. It was absolutely clean. I still can't believe it. It was a good journey though. I tested both the IPA and lacquer thinner. Now I know... forget about it. 

Vallejo hey? That is a brand that I have not tried yet for airbrushing. How does that work for you? I would love to hear about that because I am sure that one day I will need to try it.

Thanks, Greg!

  • Member since
    May 2003
  • From: Greenville, NC
Posted by jtilley on Sunday, May 15, 2016 2:17 PM

I am reminded of a story I can't resist telling - though it has absolutely nothing to do with ship modeling.

It happened in a big shopping mall in Norfolk, Virginia. I was standing in line to buy an Orange Julius. (For those who don't know, an Orange Julius is a wonderful concoction of orange juice, crushed ice, and an egg all stirred up in a blender.) The two clerks behind the counter were having an argument; the female supervisor was mad at the male assistant. The more he tried to defend himself, the madder she got. Finally, she got so mad that she pushed the button on the blender in which she was making a large Orange Julius - without holding down the lid on the blender.

Oddly enough, everybody involved had the same reaction: "Gee, I always wondered what would happen if somebody did that." The blast of orange juice, egg, and crushed ice literally hit the ceiling, then ricocheted down, landing all over the counter, the customer, the two clerks, and me. One of my more spectacular memories of living in Tidewater Virginia. Almost (but not quite) outranking the moment when the Polaris missile at the Mariners' Museum fell over.

Moral: never start a loaded blender without holding down the lid. And never take a paint stirrer out of a paint jar when the stirrer is still moving.

Youth, talent, hard work, and enthusiasm are no match for old age and treachery.

  • Member since
    September 2012
Posted by GMorrison on Sunday, May 15, 2016 2:22 PM

A lot more harmless than when a friend of ours at a dinner party disconnected that thing with the grounds in it from her espresso machine before bleeding off the steam pressure.

Fortunately no serious injuries, except to her pride.

 Modeling is an excuse to buy books.


  • Member since
    July 2014
  • From: Franklin Wi
Posted by Bakster on Sunday, May 15, 2016 4:07 PM

THAT ... is a great story, JT. There may be another moral to that story. Don't get mad or you may do something stupid. Bang!

Thanks for sharing that. I loved it.

I had witnessed something too that unfortunately to the young lady, was no fault of her own. I was at Milwaukee Brewers game waiting in line at one of the many concession  stands. She was in the process of pumping out some ketchup on her hotdog in the condiments area. Something was amiss because ketchup wasn't coming out. Tried as she would to pump the dispenser, no luck. Suddenly, a pop is heard. I look at her and she now has ketchup. It is all over her nice white blouse and even on her hair. Bad news bears. The seal in the dispenser failed and so ketchup shot up all over her. Imagine smelling that the rest of the evening.

  • Member since
    July 2014
  • From: Franklin Wi
Posted by Bakster on Sunday, May 15, 2016 4:09 PM

Glad to hear she came out of that ok GM. 

  • Member since
    July 2014
  • From: Franklin Wi
Posted by Bakster on Sunday, May 15, 2016 6:18 PM

Yes it is me again. I am trying to get as much done as I can while the weather is crummy here. We had snow flurries yesterday, and frost warnings last night.  It is May 15th! Dang it.  

If you are not sick of me talking about paint and mixers yet, let me try again. Sad To tell you the truth, I am sick of it. Ha! But, I have one more thing to post and this should hopefully end the subject. 

I found a way to make the Badger mixer work with a mixing stick, without the paint gushing up like an oilwell.

First off, here is my alligator hack. I cut part of the shaft off the mixer using a dremel cutoff wheel. Then I crimped the barrel of the alligator clip as best as I could. Which by the way, is not good enough. I could not get it tight enough. I then worked epoxy down into the barrel and then installed the clip. It is holding. You have got to love epoxy.


Notice my finger against the upper part of the shaft. It does not take much to stop the motor on this. I can regulate the speed by the amount of pressure that I put on it. I just have to keep a clear mind about me or I will be wearing the flavor of the day. It is not a great option, but it works.


Today, I worked on the lantern itself. This piece is part of the upper or lower section of the lamp. I made this out of the same square tubing that I used to make the lower part of the table. The next image will give a clearer picture of what this is.


The section below the deck will have the LEDs housed in a piece of tubing.  I will probably use a brass piece that I found in my stash. I could also use Evergreen product but I am leaning towards the brass piece for two reasons. It will reflect light within it. This might strengthen the light going into the light pipe. Secondly, it will help to minimize stray light into other parts of the ship, or its walls.

That's the plan.  We will see if it works.

  • Member since
    September 2012
Posted by GMorrison on Sunday, May 15, 2016 7:08 PM

Bakster

 The seal in the dispenser failed and so ketchup shot up all over her. Imagine smelling that the rest of the evening.


Imagine free season tickets...

 Modeling is an excuse to buy books.


  • Member since
    May 2013
  • From: Indiana, USA
Posted by Greg on Monday, May 16, 2016 11:11 AM

Great stories.

Plus I finally learned what Orange Julius is. I must try one sometime. Thanks, Professor.

Steve, Vallejo paints can be a subject all their own. Folks seem to have extremely mixed results and experiences. Might make for some good PM fodder when you're in the mood. I hate to muck up your WIP thread with Vallejo ramblings.

Here's a deal for you, you contact me before you try Vallejo, I'll contact you before I butcher my trusty Badger mixer to install a custom agitator. Geeked

JOIN OUR COMMUNITY!

Our community is FREE to join. To participate you must either login or register for an account.

SEARCH FORUMS
FREE NEWSLETTER
By signing up you may also receive reader surveys and occasional special offers. We do not sell, rent or trade our email lists. View our Privacy Policy.