SEARCH FINESCALE.COM

Enter keywords or a search phrase below:

Revell 1:83 Mayflower

50231 views
601 replies
1 rating 2 rating 3 rating 4 rating 5 rating
  • Member since
    July 2014
  • From: Franklin Wi
Posted by Bakster on Monday, May 16, 2016 1:37 PM

"Here's a deal for you, you contact me before you try Vallejo, I'll contact you before I butcher my trusty Badger mixer to install a custom agitator. "

Laughing.  Where is thy faith brother. Butcher that sucker. Step out of the box my friend, the water is fine.


  • Member since
    July 2014
  • From: Franklin Wi
Posted by Bakster on Monday, May 16, 2016 1:46 PM

"Imagine free season tickets..."


Perhaps so GM.   I certainly can imagine that. 

  • Member since
    July 2014
  • From: Franklin Wi
Posted by Bakster on Wednesday, May 18, 2016 8:34 PM

Below: The LEDs are inside of this brass tube and epoxied in. There is one thing that I had to change from my original plan. The resistors need to be mounted to this light assembly. If I would prefer to leave them located with the tea light housing outside of the ship, then I would need to run another wire. It is too late for that, and there is no need to do that anyway. This assembly will be hidden inside of the hull. There are no esthetic or functional concerns to do otherwise. 


Below: A view from the top. The light pipe will rest inside of this section.


Below: My lantern/light pipe is resting inside of the LED light housing. For this photo I have used tape to hold it in place, and to block some of the light coming up from below. 

I have to say that this is working nicely. The light coming out of this lantern seems to me to be nicely scaled down. Yet, it should produce enough light to be noticed through the windows. It is difficult to photograph this and to accurately show how it looks. The lantern is a bit over-exposed in this image. What you can't see either is how it flickers like a candle.

There is a little more work to do on this, including paint. However, this phase of the project is coming along nicely. 


  • Member since
    January 2015
Posted by rdiaz on Thursday, May 19, 2016 12:38 AM

Vallejo is not bad. I use their Model Colour range, which won't work through an airbrush. What I don't like about them is that they are quite fragile once dry, i.e. prone to peeling off if you don't protect the finish. But their colour range is huge and they brush well. Tamiya is much tougher stuff and goes through an AB even without thinning.  It's hard to use them with a regular brush because they dry way too fast.

  • Member since
    July 2013
Posted by steve5 on Thursday, May 19, 2016 12:47 AM

you never cease to amaze me mate

steve5


  • Member since
    July 2014
  • From: Franklin Wi
Posted by Bakster on Thursday, May 19, 2016 9:02 AM

Rdiaz, thanks for the info about Vallejo paint. Good to know...

  • Member since
    July 2014
  • From: Franklin Wi
Posted by Bakster on Thursday, May 19, 2016 9:05 AM

Thanks Steve.

  • Member since
    July 2014
  • From: Franklin Wi
Posted by Bakster on Sunday, June 5, 2016 3:47 PM


The worm has turned


Well...the worm has turned. Our weather has finally turned for the better and this turn has kept me from working on my faithful little friend the Mayflower. Even though there are beautiful blue skies and warm temps today calling out my name, I thought that I should make a push for some progress here. 

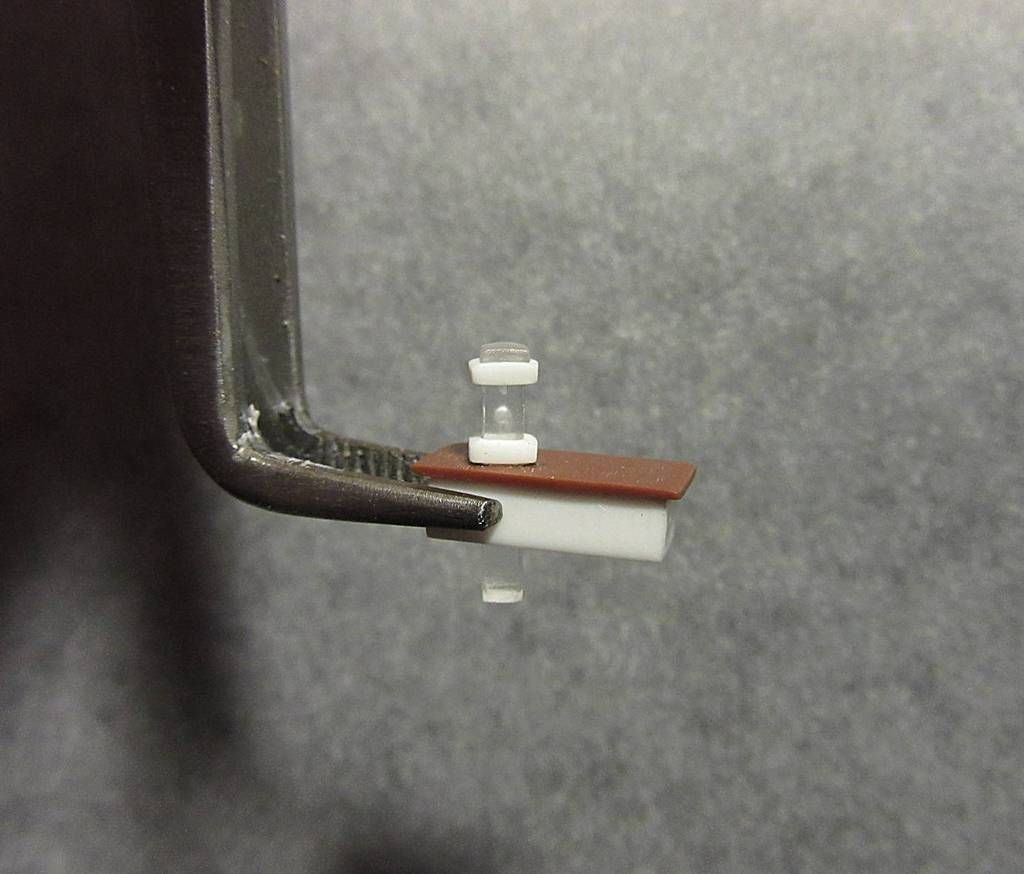
Here is how my lantern looks along with the table. I drilled a hole through the table top, then carefully filed four corners in the hole so that the light pipe will slide through snugly, minimizing light leakage through gaps.

As you can see the lantern is pretty out of scale with the table. My other option was to scale up the table so that the two are in sync. If I do that though, then both would be out of scale with the ship.

There are limits to what I can pull off. The light pipe that I used is the smallest that I could find. In truth, if I had found one smaller, I doubt that it would produce enough light to make the venture worthwhile. With that in mind I had opted for this.

One must use their imagination a little. Maybe its a magic lantern device similar to the flux capacitor used in Emmet Brown's Delorean. Thusly, the device makes my Mayflower ship a time machine. Wouldn't that be cool...


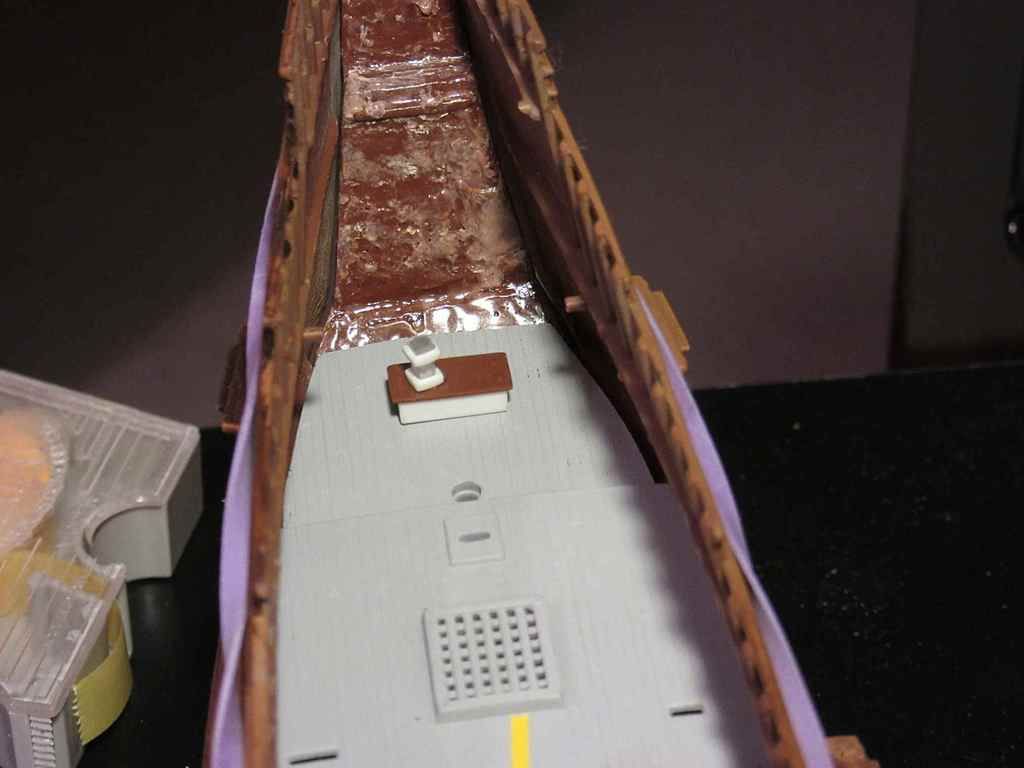
Below: Test fitting the table on my scrap hulk. Notice the melted look to the backside of the transom. You remember my Sculpey Clay story don't you? This is what it did to it. I am pretty sure that if I had left the transom on the clay for another few months that it would have melted completely.


Factoids


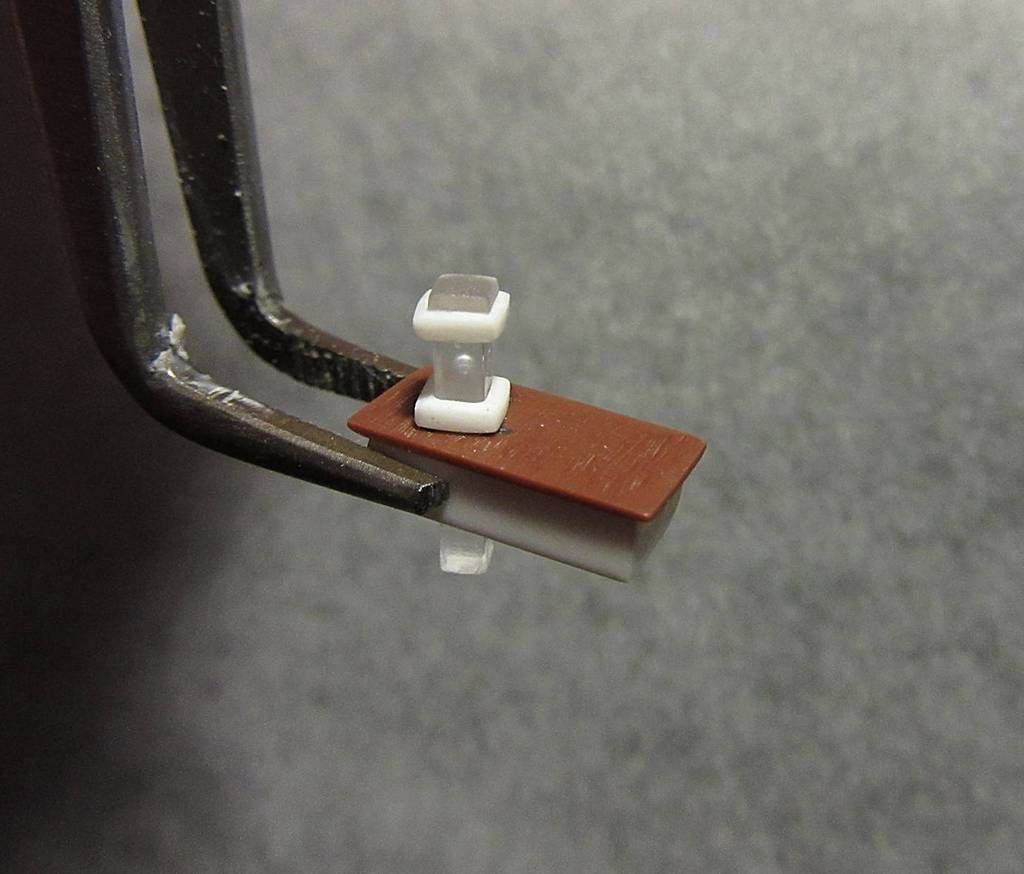
1. I angled the lantern intentionally. I thought it better to make it look like it was set down haphazardly. Also, I have offset the lantern making room for maybe a map, or other.

2. If you look closely at the lamp you can see what looks like a bubble inside of it. This inclusion, is I believe, a manufacturing defect. What is curious is that when all is said and done, the bubble aligns perfectly with where a candle would sit. In a way, it mimics the internal mechanism of the light source. It is a happy accident.

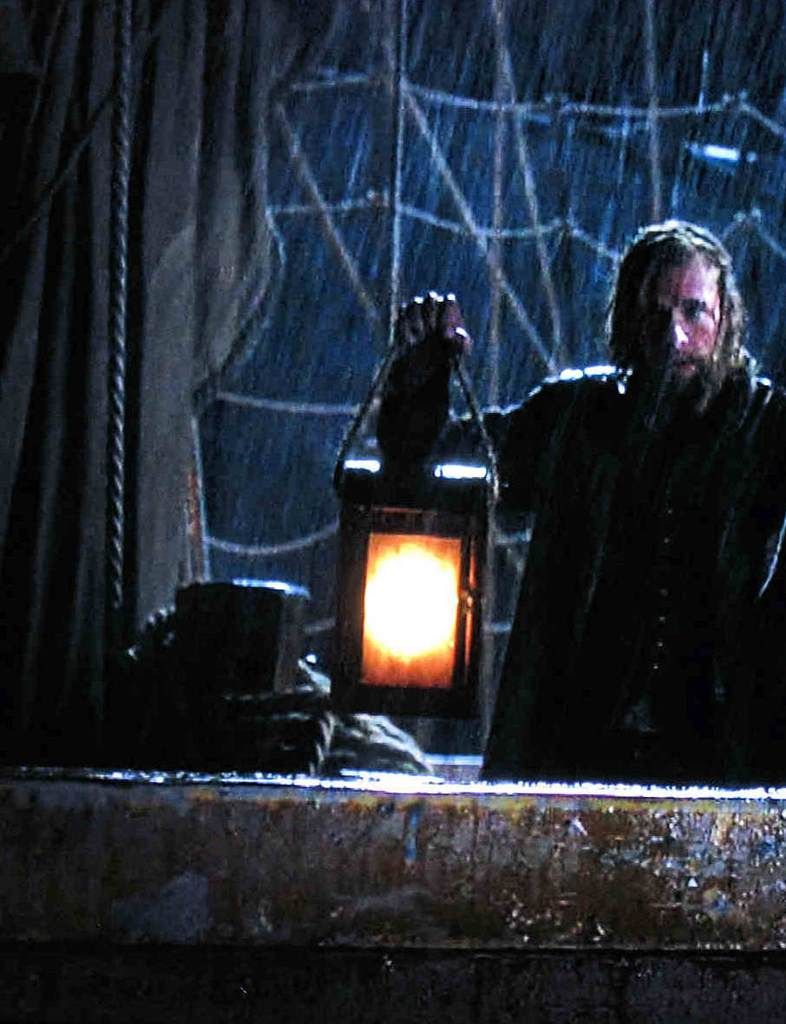
3. The lantern that I made is very loosely designed after the lantern used in the TV series I had posted on many weeks back. The image is below.  

4. The brightest section of the light pipe is at the very top, when looking at it straight on. It is designed to operate that way for the electronics industry. That portion of the pipe would be the exit point through a panel. For my project, I tested it two ways. One with covering the top leaving only the light coming out the sides. And secondly, I tested it with light coming out of both sections. What I have found is that there is enough light coming out of the sides only option. That means that I can paint over the top. That's good because that's in keeping with the actual lantern having a non-translucent top.

I painted the table today using a base color of brown. I still need to do some brush painting to add some depth and hopefully some realism to it. I also need to paint the top and bottom of the lantern.

I will do another update when that is all done. 


  • Member since
    May 2003
  • From: Greenville, NC
Posted by jtilley on Sunday, June 5, 2016 4:13 PM

Steve, you've got nothing to worry about in terms of the size of the lantern or table. Given the way the stern windows are made, on the finished model you'll just see a nice glow through them.

Looking great!

Youth, talent, hard work, and enthusiasm are no match for old age and treachery.

  • Member since
    September 2012
Posted by GMorrison on Sunday, June 5, 2016 4:16 PM

Sweet!

 Modeling is an excuse to buy books.


  • Member since
    July 2014
  • From: Franklin Wi
Posted by Bakster on Sunday, June 5, 2016 4:47 PM

John, thank you. I agree. It will produce a nice glow through the windows. Even better, it will have a flickering glow. When the model is done I will be able to imagine the captain working at his desk that is illuminated by candle light.

  • Member since
    July 2014
  • From: Franklin Wi
Posted by Bakster on Sunday, June 5, 2016 4:47 PM

Thanks, GM.

  • Member since
    July 2014
  • From: Franklin Wi
Posted by Bakster on Wednesday, June 8, 2016 9:59 AM

Here is how my paint came out.


This finishes work on the lamp for the time being. I will install the lamp and LEDs when I am ready to install the main deck.

Speaking of the main deck. I am still vacillating on what color it is that I should go for. The instructions call for a gray wash, which is fine. However, can anyone enlighten me on why decking should be gray verses a tonal variation of brown? Why gray? Is it to simulate aging? If that is true...why is the decking gray and other parts of the ship is a brown? Shouldn't the hull and bulkheads show a similar weathering? I know that different woods are used but would it make that much difference?


  • Member since
    May 2003
  • From: Greenville, NC
Posted by jtilley on Wednesday, June 8, 2016 1:31 PM

This is a tricky question - and, from the standpoint of the finished model's appearance, an important one.

As usual when we're talkin about this period, the bottom line is that nobody knows just what's "right" and "wrong" when it comes to hull and deck colors. There's plenty of room for interpretation and personal taste.

The most common wood for hull construction was, I think, oak. Raw oak is a pretty light brown. It does get a little darker as it ages - but not a lot. It was customary for hundreds of years to treat hulls with "oil" - maybe linseed oil or something similar - as a preservative. When freshly applied it has a distinctly yellow cast, but as it ages it turns much darker, and additional coats got applied fairly frequently. An old ship's oiled hull might be almost black. So there are plenty of options.

Decks were sometimes made of oak, but more often of pine or fir. There are documentary references to "oiled decks," but I think they were usually left unfinished (to give better traction for the men working on them). They got stomped on constantly by human feet, shined on by the sun, rained on, and drenched with seawater (and, in a warship or an expensive merchantman, scrubbed with holystones).

My guess, for what little it's worth, is that the typical wood deck, after a few months, was a light, slightly beige-ish grey color - about like modern pressure-treated lumber, but without the slight greenish cast one often sees in that material.

That, I think, is why so many models have dark hulls and light decks.

That's about the best I can offer.

Youth, talent, hard work, and enthusiasm are no match for old age and treachery.

  • Member since
    July 2014
  • From: Franklin Wi
Posted by Bakster on Wednesday, June 8, 2016 2:32 PM

John, your input is extremely helpful. I will probably work on the decks next. 

Thanks again, sir!

Steve

  • Member since
    September 2012
Posted by GMorrison on Wednesday, June 8, 2016 2:35 PM

Really nice work, very creative with the lamp.

 Since she'd hacked around Northern Europe for ten years prior, and one source indicates whaling around Greenland, she'd be showing her age.

Short of creating an unattractive model, I would say that the deck had the look of an old dock, not the kind of dock thats finished with creosote, but the kind you'd find at a small town or fishing factory.


 Modeling is an excuse to buy books.


  • Member since
    July 2013
Posted by steve5 on Wednesday, June 8, 2016 2:37 PM

as usual very nice work steve ,


  • Member since
    July 2014
  • From: Franklin Wi
Posted by Bakster on Wednesday, June 8, 2016 4:33 PM

Hey Steve-O.  Thanks buddy.

  • Member since
    July 2014
  • From: Franklin Wi
Posted by Bakster on Wednesday, June 8, 2016 4:58 PM

GM, thanks much for the kudos sir.

Thanks for the additional info about the deck. I plan to weather this ship a fair amount. So making the decking look drab fits right in with my vision for it.

Thank you sir!


  • Member since
    July 2014
  • From: Franklin Wi
Posted by Bakster on Monday, June 13, 2016 10:31 AM

Gray deck

Hey there guys. Yesterday I did some trial and error paint work using some scrap decking.  The best result that I could come up with looks like garbage. I DID try searching the web for references on how to get an old wood look on plastic, but I did not come up with anything useful to me.

I have another process to try...but it occurred to me, why not ask the experts before I waste more time re-inventing the wheel. I noted below what I had tried and what I am thinking to try next. If you guys have any ideas or processes that you can share, I would appreciate it.

What I have tried:

I had a piece of decking that was already painted in several colors. This was from months back when I was experimenting with stain, washes, and artist oils. One section has not been painted with the exception of primer gray. I thought that I could try using the primer gray section as the base color to build other tonal variations to. I had tried applying darker  tones by means of dry brushing and washes using Acrylic. I don't know how else to describe it other than the result was not convincing at all, no matter what I had tried.

What I will try next:

It occurred to me that maybe I am going at this the wrong way. That maybe I need to start with a dark gray base and then gradually build up the highlights from there. So, going from dark to light. The primer gray is a very light gray and that is why I had to do the opposite.

Any thoughts on what works for you?

  • Member since
    September 2012
Posted by GMorrison on Monday, June 13, 2016 11:08 AM

There's gray, and there's gray. My prefferred starting point is USN Light Gull Gray. It's pretty warm (red in it). Try that.

Try that, pick out some planks with slight variations. This is a WHOLE lot easier if the deck isn't in the ship yet...

Then flat coat it. I like acrylic clear. Then do an over all wash of pretty much clear Turpenoid with a tiny, and I mean tiny, amount of black artists oil paint. Wait a couple of minutes and wipe it off. That will bring out the detail.

 Modeling is an excuse to buy books.


  • Member since
    July 2014
  • From: Franklin Wi
Posted by Bakster on Monday, June 13, 2016 11:29 AM

Revised: I accidently hit send before I finished the post.

GM, that is exactly why I want to do this now. Further progress hinges on getting the decks done before install. 

I am fuzzy about something though.

"Try that, pick out some planks with slight variations."

So are you saying only paint certain areas LT Gull Gray? If so, what is the base color?


  • Member since
    July 2014
  • From: Franklin Wi
Posted by Bakster on Monday, June 13, 2016 11:34 AM

See my revised message.

  • Member since
    September 2012
Posted by GMorrison on Monday, June 13, 2016 2:56 PM

I'll find some photos tonight.

Basically, coat the whole thing Gull Gray.

Make a couple of shades of Gull gray on a palette. You wont need much. a Penny sized series of dots. Add a tiny bit of black to one, white to the next, maybe a little yellow to one.

For your ship, the planks are pretty wide, right? You can try freehanding, painting a few planks each color. Or take the time to mask, doing one color at a time. The idea is to paint 10% or so of the planks each accent color. It gets to be fun, maybe even mix a few together.

When you are done, it'll look a little garish, but you can spray a thin coat of Gull Gray over it.

 Modeling is an excuse to buy books.


  • Member since
    July 2014
  • From: Franklin Wi
Posted by Bakster on Monday, June 13, 2016 3:24 PM

Ah...  that makes sense. Thanks Morrison. You may have just saved me from pulling what's left of my hair out.

Geeked


  • Member since
    May 2003
  • From: Greenville, NC
Posted by jtilley on Tuesday, June 14, 2016 11:27 AM

My approach to painting "natural wood" desks has always been a little different. (Large caveat: I haven't painted a plastic deck in quite a few years.) I've never tried the artistic approach that Docidle and Dave have perfected. I'm really impressed by it, and one of these days I'll try it myself. But so far I haven't.

I'm also a commited brush painter. I've got an airbrush, but I never use it on sailing ships. I do think a spritz of Tamiya primer would be a good idea, though.

My color of choice for unfinished decks is called "Aged Concrete." It used to be part of the Polyscale acrylic line; now that Testor's has seen fit to take Polyscale off the market the color is available in Testor's Acryl ( http://www.squadron.com/Testors-Flat-Aged-Concrete-p/ts4875.htm ). If I were doing it, I'd probably start with a grey primer coat, then brush-paint a smooth coat of Aged Concrete and let it dry. Then I'd mix up three or four slight variations of the base color and pick out some individual planks with them. Then I'd apply a very thin dark grey wash, to highlight the planking seams. (In real life they're no more black than the asphalt on a street.) Finally, having given all that plenty of time to dry, I'd gently dry-brush the whole think with a slightly darker brown and/or grey.

That's not the only way to do it; maybe not even the best way. But it's worked well for me.

I'd suggest experimenting on the parts of your spare kit. Try several different tactics, and pick the one you like best. And if possible, spend a little time on board a real wood-decked boat or ship. You'll see the dull, greyish hue that we've been talking about.

Youth, talent, hard work, and enthusiasm are no match for old age and treachery.

  • Member since
    September 2012
Posted by GMorrison on Tuesday, June 14, 2016 12:12 PM

Yep, I've got an old Aged Concrete from Pollyscale. Treat it like old Scotch.

Here's an example, on my Potemkin. A little on the brown side.

Borodino; a little more gray.

 Modeling is an excuse to buy books.


  • Member since
    May 2003
  • From: Greenville, NC
Posted by jtilley on Tuesday, June 14, 2016 1:02 PM

Here's an interesting new product from Vallejo: http://www.squadron.com/Vallejo-Old-and-New-Weathered-Wood-Effects-Set-p/vj71187.htm . Note that Squadron doesn't have it yet.

Also note that the paints are in the ModelAir line, which is designed for airbrushing. Durn it.

Youth, talent, hard work, and enthusiasm are no match for old age and treachery.

  • Member since
    September 2005
  • From: Groton, CT
Posted by warshipguy on Tuesday, June 14, 2016 5:15 PM

Gentlemen,

Model Masters now offers Aged Concrete, Aged White, Burnt Umber, Burnt Sienna, and Depot Buff Acrylics that I have been using recently on my sailing ships.  Like John, I prefer to brush paint, using my airbrush for late 19th century through contemporary ships.  Unfortunately, every bottle of Burnt Umber that I have purchased has been like paste, but a little rubbing alcohol thins  it nicely. I agree that the concrete color looks good on plastic decks; it also looks terrific (along with Aged White) as the lower hull on non-coppered sailing ships.

Bill Morrison

  • Member since
    July 2014
  • From: Franklin Wi
Posted by Bakster on Tuesday, June 14, 2016 7:14 PM

Hi John, thanks for explaining your process as well. This sounds like a good way to go too!

This is all good stuff. I really appreciate you two sharing your processes. When it comes to weathering ships it just seems like that much of it is tribal knowledge. I have searched out some of the work on this forum, even with other sources, and there doesn't seem to be too much out there for detailed processes. What you two have shared is outstanding. Kudos for stepping up and sharing what you did. I am sure others will read and appreciate it as well.

So...it is time to experiment. I have some of the test pieces soaking in Superclean because I want to start with a clean slate. Superclean by the way, really does work well to strip acrylic paint. I tried it for the first time and within two hours after soaking I was able to get 95% of the paint off with a toothbrush. It came off very easily. This was a great tip that I found by searching this forum.

I will try to document this journey. More to come.

PS: thanks for the link to the weathering kit. This is something to consider.

(Update 6/15) If you use Superclean be sure to wear gloves. It attacks your skin pretty agressively. Take it from someone that didn't use gloves. Egads. 

JOIN OUR COMMUNITY!

Our community is FREE to join. To participate you must either login or register for an account.

SEARCH FORUMS
FREE NEWSLETTER
By signing up you may also receive reader surveys and occasional special offers. We do not sell, rent or trade our email lists. View our Privacy Policy.