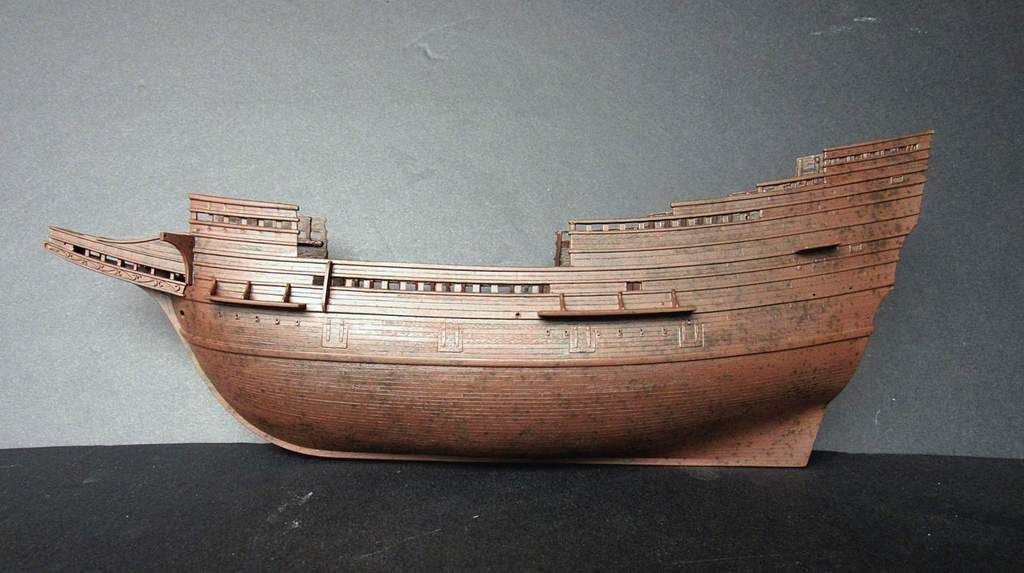
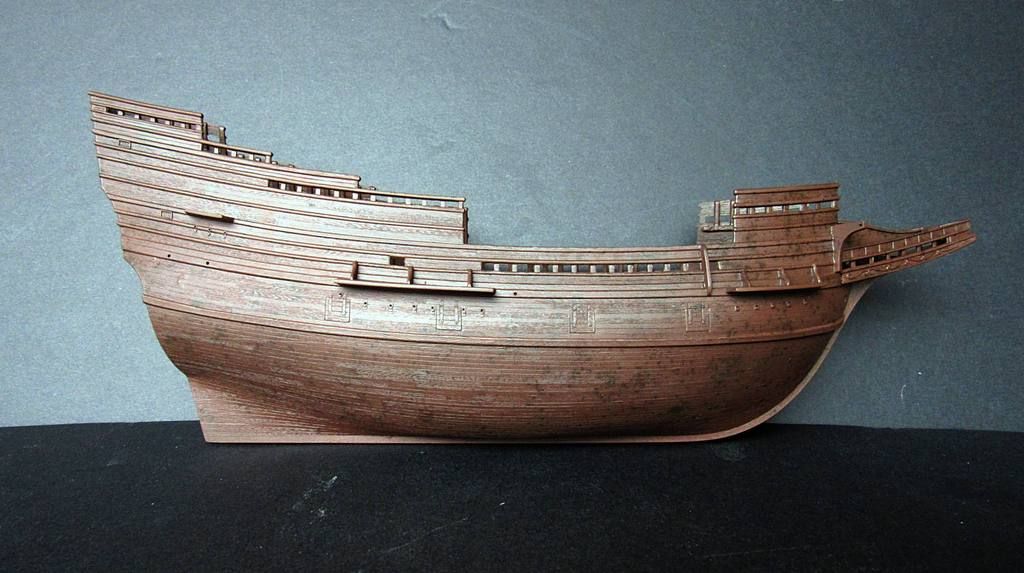
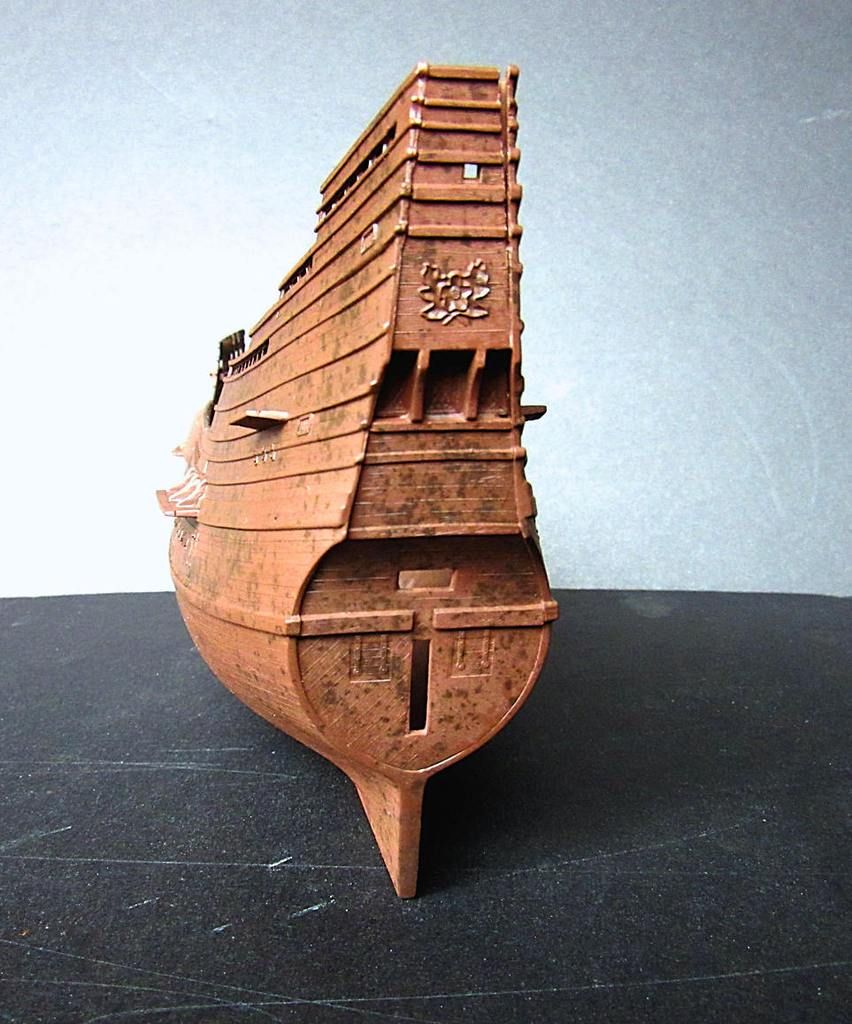
SEARCH FINESCALE.COM

Enter keywords or a search phrase below:

Revell 1:83 Mayflower

50232 views
601 replies
1 rating 2 rating 3 rating 4 rating 5 rating
  • Member since
    July 2013
Posted by steve5 on Wednesday, August 31, 2016 12:59 AM

as always , looking fabulous steve

steve5


  • Member since
    July 2014
  • From: Franklin Wi
Posted by Bakster on Wednesday, August 31, 2016 11:47 AM

Hi Steve, thank you.

The more that I looked at these images the more that I had to ask myself the question: Does what I did really look like the images that I posted?  Or am I imagining things?  I went and looked at the piece. Sure enough. Everything that I stated is accurate. The hull looks very different than the images. I am mystified at why there is such a dramatic difference. Maybe my lighting is skewing things somehow. It just occurred to me that maybe I need to diffuse the light. It might be too harsh and it's washing out the detail. I'll try changing that later.

Just venting.

Onward ho.

  • Member since
    July 2014
  • From: Franklin Wi
Posted by Bakster on Saturday, September 24, 2016 4:35 PM

Greetings-- I thought that I should drop in and show you what I have been up to since when I last posted to this WIP. It's been several weeks since my last post. Life has gotten in the way of some serious progress. 

I am in the final phase of my hull weathering experimentation, before I hit the final copy with the process. I am shooting for a sort of mottled look to the wood. This might represent a wood that has been exposed to the ocean water for a long time, maybe even depicting wood rot.

Below is what I came up with thus far. I feel like that I am pretty close to what I am looking for, but maybe not quite yet. I kind of think that maybe the dark splotches might be too extreme. I will be working on the other side of the test piece next. With this attempt I will try to blend the two extremes a little more.

Do you see what I am trying for? What are your thoughts on this?


  • Member since
    July 2013
Posted by steve5 on Saturday, September 24, 2016 6:34 PM

really nice work steve , love the effect , from what little I know it was an old ship when it made the voyage .


  • Member since
    July 2014
  • From: Franklin Wi
Posted by Bakster on Saturday, September 24, 2016 9:22 PM

Thanks Steve. I very much appreciate your input.

  • Member since
    May 2003
  • From: Greenville, NC
Posted by jtilley on Sunday, September 25, 2016 9:28 AM

It looks terrific. That being said, if (gawd forbid) I were doing it, I'd make it a bit lighter. Most (not all) woods get lighter as they age. On the other hand, there's no telling what sort of oil, tar, or other treatment may have been applied to that particular hull - and those substances tend to darken as rthey age. I'd say you're on the right track.

Youth, talent, hard work, and enthusiasm are no match for old age and treachery.

  • Member since
    September 2012
Posted by GMorrison on Sunday, September 25, 2016 12:17 PM

Well you asked for an honest review.

i think it's too dark, it doesn't seem to much look like it's in sunlight. That may just be the photo.

I was on a big wooden ship yesterday, a 21st C version of a 16th C one. It's noticeable how much reflective light comes off of the various oils, tars, wood species and grain.

Maybe you could try a dry brush with a lighter, slightly yellow highlight.


 Modeling is an excuse to buy books.


  • Member since
    July 2014
  • From: Franklin Wi
Posted by Bakster on Sunday, September 25, 2016 2:12 PM

Greetings John. Thanks for taking the time to give me your opinion. I have not been around a lot of ships. Learning about them has been a recent and steep learning curve for me. That... is why I appreciate everyones opinion.

It sounds like I am on the right track and that is good to hear. In the end it won't be perfect. That is for darn sure.  My goal is something loosely and "relatively" close. And it is  true that not much is known about the ship. That being the case, much of it conjecture and how it would really look. I wish that I could go into a time machine and see it. How cool would that be.

BTW... I created the mottle using the salt technique. 

Thanks again!


Steve

  • Member since
    July 2014
  • From: Franklin Wi
Posted by Bakster on Sunday, September 25, 2016 2:16 PM

Say G, an honest review is all that I ever want.

I hear you about the sunlight but the image was not taken under it. I used photos lights and you lose a lot of detail.

I tell you what. I will take an image using natural light and post the image. Then you can get a better idea of how it looks.

Watch for it soon.

  • Member since
    May 2003
  • From: Greenville, NC
Posted by jtilley on Sunday, September 25, 2016 2:27 PM

Suggestion: google "mayflower II" and click on "Images." You'll get a bunch of pictures taken over a long period of time. The replica is now considerably older than the original ever got.

It's obvious from those pictures that her hull planking has been painted in various eras. I imagine it's entirely possible that the original ship was painted, too.

Youth, talent, hard work, and enthusiasm are no match for old age and treachery.

  • Member since
    July 2014
  • From: Franklin Wi
Posted by Bakster on Sunday, September 25, 2016 3:03 PM

Ok.  This is taken under natural sunlight. This is a closer representation of how it looks, but only as it is viewed under direct sunlight.

There is no question that I made the finish kind of dark. In this example, it is lighter than the version that I did several weeks back. I only had 3 coats of oil wash on this one. I think that the other one was around 5.  The hull does go darker for sure if you take this piece into a darker part of the room. 

Ok...fire away. I can hear the distant canon blasts. Boom. Boom. Pirate

  • Member since
    July 2014
  • From: Franklin Wi
Posted by Bakster on Sunday, September 25, 2016 4:50 PM

Hi JT. Yes I have seen those images as well. The hull definitely seemed to be painted. I don't think that is the way that I want to go. Thanks, though. I appreciate the thought. 

  • Member since
    September 2016
  • From: north Baltimore City, Maryland
Posted by baltosale on Saturday, October 1, 2016 3:34 PM

I have been following these discussions and others for months.  I just came on board, so to speak, and I have learned more here than in many preceeding years.  Now all I need is to learn patience and develop the "eye."    What a bunch all of you are.  Keep going.

  • Member since
    July 2014
  • From: Franklin Wi
Posted by Bakster on Monday, October 3, 2016 3:17 PM

Baltosale-- I appreciate your post. Thank you for that...

You are right about patience. I can't tell you how many times that I wanted to say, ah whatever, that is good enough. Your post is timely because I am fighting that thought again. I need to slow my impatience down. Though, I suspect some readers are thinking that I am taking way too long on this build. 

BTW--since you just came on board so to speak, welcome aboard!

  • Member since
    July 2014
  • From: Franklin Wi
Posted by Bakster on Saturday, October 15, 2016 5:01 PM

A Mottled Mayflower

Like it or leave it, here is how it's looking.

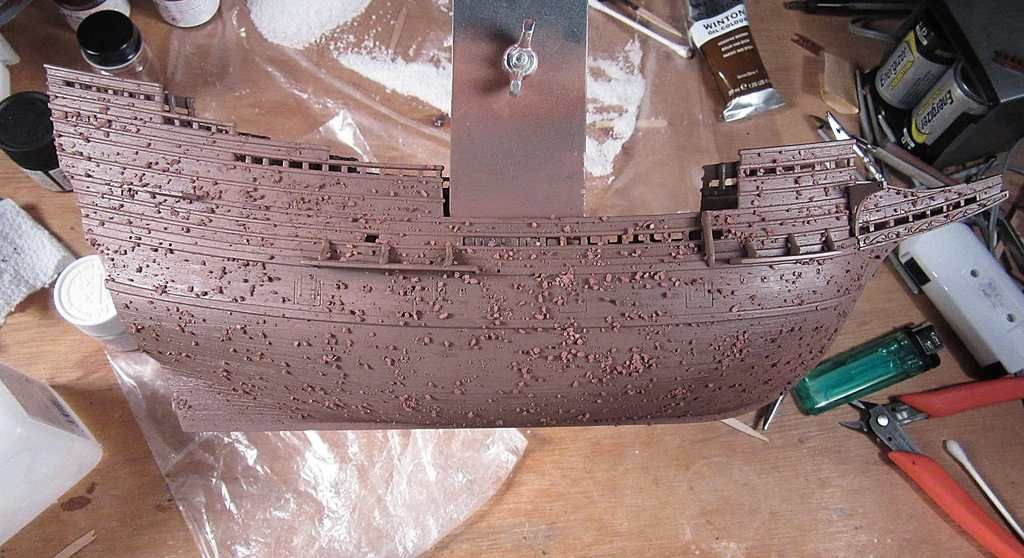
Note: I am beginning to wonder if my camera is jacked up. Once again I am having a heck of the time getting an accurate color rendition of the ship. The true color is a darker brown. I worked most of the day trying to get the images closer to how it really looks and I failed miserably. The closet that I can get is this pukey brown. These look terrible but its the best I can do.  You will have to use your imagination with the color. 


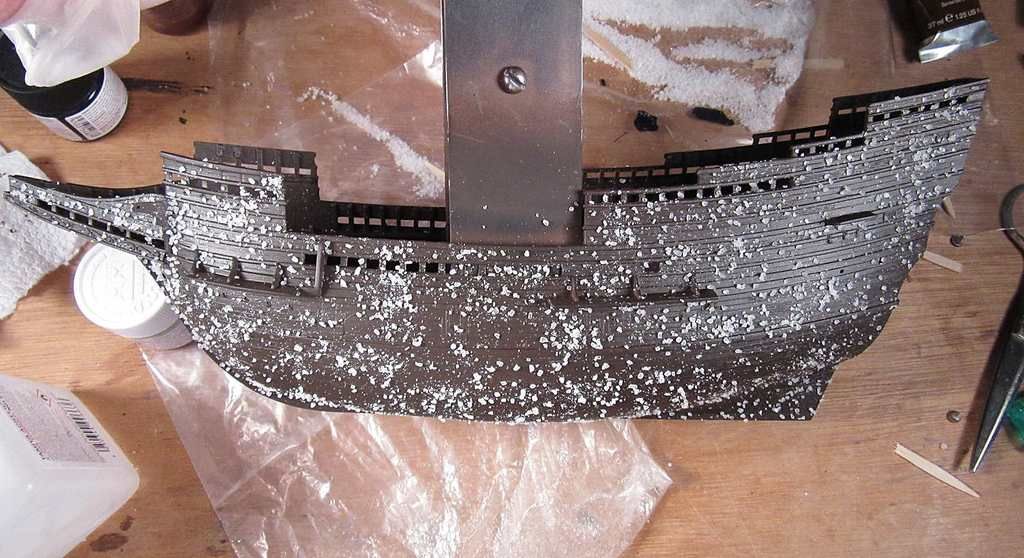
Below--a popped join. I didn't notice this until I viewed the magnified image. It is something to fix later.


For those that are interested, here is a basic outline of what I did.

1. A dark shade of brown was applied as the base color.

2. Salt was applied.

3 A lighter shade of brown was applied.

4. Salt was removed.

5. Artist oil was applied as a filter.

A few other things that I should mention:

Regarding the salt, I ground it up into varying degrees of size and then applied them accordingly.

Lastly, I made the final color about 40% lighter than my test piece. I did this by mixing a lighter shade of brown in step 3, and with step 5 I mixed a weak wash which was applied only once.


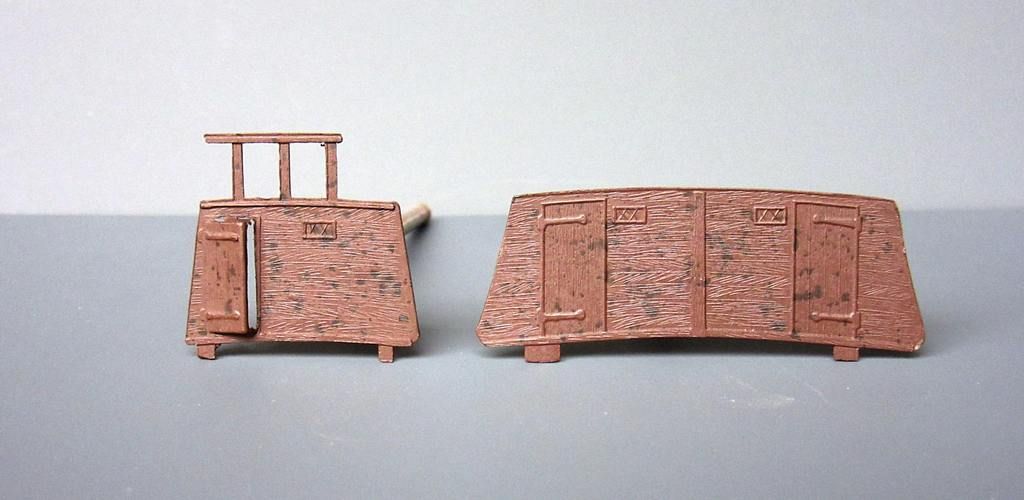
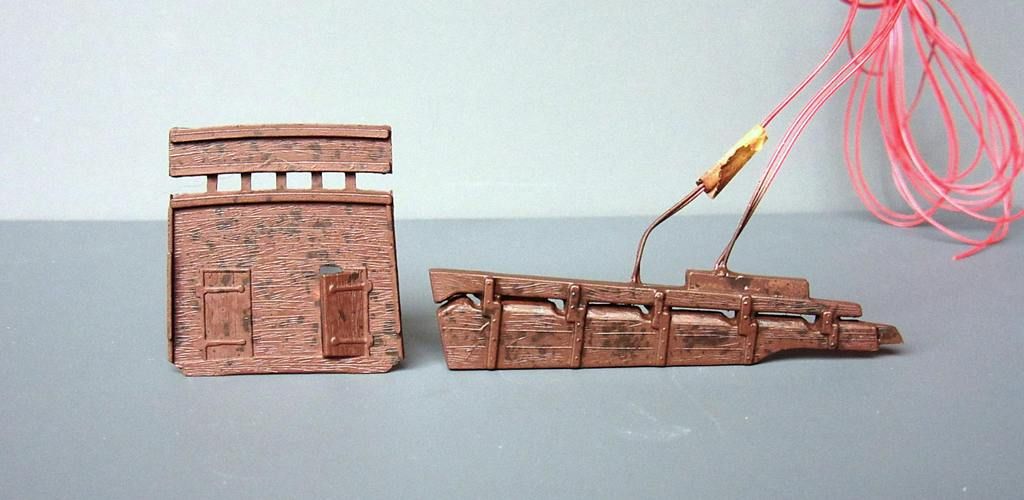
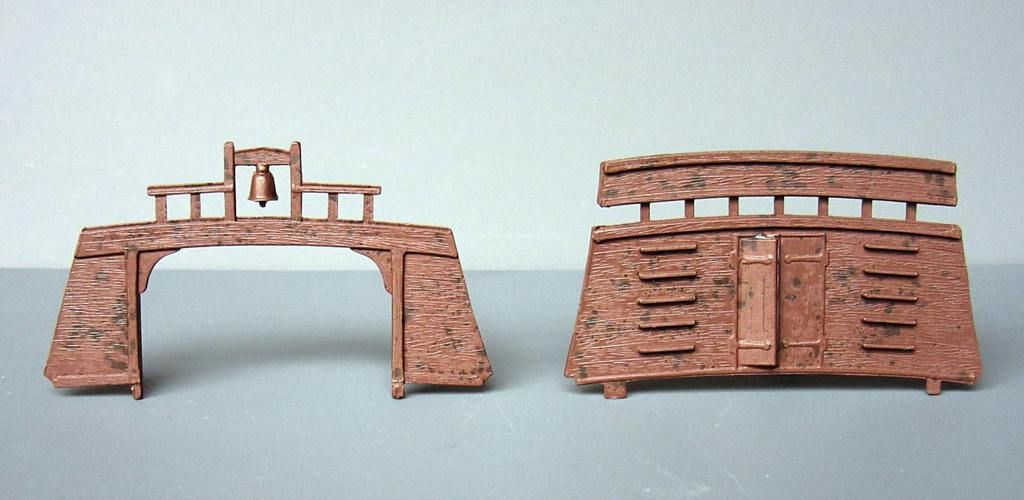
I am looking forward to painting the hinges, backing plates, etc. It will be a nice change of pace.


  • Member since
    July 2013
Posted by steve5 on Saturday, October 15, 2016 6:05 PM

pity about the popped join , easy fix though . the colouring look's good mate , will have to have a go at that salt tech. one day , love the effect .

steve5


  • Member since
    July 2014
  • From: Franklin Wi
Posted by Bakster on Saturday, October 15, 2016 7:05 PM

Hey Steve, you are right about that. It should be an easy fix. I think that I popped that when I tested putting in the main deck. I wanted to make sure that I'd be able to get it in there when the time comes, which I did. I am doing things backwards with that. The main deck is supposed to be installed when the two halves of the hull are assembled. For many reasons I waited to do it later. 

Thanks about the effect. I have not seen anyone do this on a ship and I thought that why not try it. 


  • Member since
    July 2014
  • From: Franklin Wi
Posted by Bakster on Sunday, October 16, 2016 4:06 PM

I did some research about the model camera that I own and I have found a few other owners experiencing what I am seeing. Apparently, there is an issue with the white balance of the camera. This camera does allow a person to manually set the white balance, and so I experimented with that. I had some better success doing that. So, I may have found a workaround. 

Lastly, I should clarify something about the images that I had posted. The first two images of the hull are actually much closer to what the actual piece looks like. It took some work to get there via my computer but it is a fairly close representation. It is the bulkheads and the transome that look the worst. 

Later..

  • Member since
    July 2014
  • From: Franklin Wi
Posted by Bakster on Monday, October 17, 2016 10:19 PM

Well, with luck, it may not be too far off that I will be working above deck. What a banner day that will be. So tonight, I am doing a little color research. More specifically, color schemes of items above the deck. I was digging through my replica photos and I came across this one. 

Notice the mast. It is pretty ugly looking...and probably fitting for my build. There is one other thing that I noticed. Take a look at the deck. Unless my eyes and/or monitor deceive me, it looks gray. This is yet another confirmation of what GM and JT were talking about. In this case, it is pretty flat looking, and there does not seem to be a lot of color variation. Painted maybe? Hard to tell.

  • Member since
    April 2016
  • From: Russia, St.Peterburg
Posted by kirill4 on Tuesday, October 18, 2016 2:02 AM

Good day Bakster,

I follow your build with great interest ... when I can/have internet connection... see You still making experiments with painting and aging effects... same me.. one of the solution I,ve found - this is special paints with wood aging effect and dry artists pastels (those which of wood colors)... paint with aging effect - acrylic , very handy in use! at least such color of mast , as we can see on the picture You posted, very easy to make... if You need maker and color number, I can post picture of this paints ,there are 3-4 different colors  of it...

Good Luck!!!

Kirill

  • Member since
    July 2014
  • From: Franklin Wi
Posted by Bakster on Tuesday, October 18, 2016 9:47 AM

Good day to you Kirill,

it is good to hear from you! Thank you for following along, and I appreciate your interest.

Yes, I would be VERY interested to see the pastels that you are working with. Also, I would be VERY interested to see a few images of a ship that you have used the pastels on. I would like to see how it looks, and if I can use your technique for my build. 

Thank you in advance...


Steve

  • Member since
    April 2016
  • From: Russia, St.Peterburg
Posted by kirill4 on Tuesday, October 18, 2016 3:27 PM

Good Day Steve,

here , in fotoes ... I will try to answer ... pastels itself ...I started to use them in the early begining of my building ,smthng 10 years ago,when I knew nothing abt plastic model painting,making wooden effects and aging technique...but was damn entusiastic! ;))) !!!

so I experimented a lot 

Artists Pastels need to be dry- couse there is also oiled pastels ,which we don't need - only dry pastels ... than You need to make pastels powder - I used sharp khife ...than mix with some very clean water +a little bit spirit(vodka also possible)... warning abt vodka !- need to keep proper proportion! for private use and for making pastel mix ^)))...than one small drop of dish washing detergent(this need to be realy small drop) ... than need to be well mixed... and applied with soft brush on surface... than wait when it will dried... than need to use cosmetic cotton stick for removing excess of coloring stuff... than see what happend... if You didn't like effect< You can remove everything by water and try again....

Frst I used ordinary spray acrylic paint of suitable color - I useed sand color or light grey for bottom part... and than began coloring surface with this dry pastels mix...

as soon as You reach desired effect(this stage I would reccomend to use cosmetic cotton stick instead of brush for applying pastel powder mix, than fix everything with acrylic matt warnish... the best one,which I found after several years of experiments - is this one , of Folk Arts...

Uph... very sorry for my creasy english... hope this info from my experience will be usefull Big Smile


Steve,

here, started from post #70 , You can see how I use this dry pastel when I painted ship bell http://karopka.ru/forum/forum190/topic10341/?PAGEN_1=4

  • Member since
    July 2014
  • From: Franklin Wi
Posted by Bakster on Wednesday, October 19, 2016 9:27 AM

Good day Kirill,

thank you so much for sharing your process. You made a nice presentation of what you are using, and how you are using them. I like how the pastels look, very much. You are an artist with them. The pastels produce a really really nice effect. I will take a serious look at your process. I think that I already have some Vodka! So I am halfway there!  Yes


  • Member since
    April 2016
  • From: Russia, St.Peterburg
Posted by kirill4 on Wednesday, October 19, 2016 12:09 PM

YesWink

Steve,

pastels are nice(and I think much economic than firm stuff, but a little bit more complicate in use)... but I would reccomend You to pay attention on this acrylic medium/paints with wooden aging effect, from Folk Arts... this paint , N 817, if You will use it on this stage of painting your model hull, will make really nice finish touch...( it is very handy in use, deluted with water if ness-ry , or could be removed totally or partly when ness-ry ... also with using that cosmetic cotton stiks).

After using that  medium with aging effect, better to seal final result with deep matt varnish...

All The Best!

Kirill

  • Member since
    July 2014
  • From: Franklin Wi
Posted by Bakster on Sunday, October 23, 2016 12:41 PM

There's a whole lotta masking going on.


The backing links are painted.  


  • Member since
    July 2014
  • From: Franklin Wi
Posted by Bakster on Sunday, October 30, 2016 3:25 PM

One problem that I have been mulling over is how to mask some of the complex shapes that I need to paint. For example, the ironwork on the hatches, doors, and then there is the flower located on the transom. I considered liquid mask, and even tape. Historically, I have not had good luck using some of the liquid masks. When all was said and done, they did not produce clean edges. That left tape, and trimming tape convincingly at this scale is beyond my ability. Finally, a lightbulb went on reminding me about Silly Putty. I have not worked with Silly Putty before, so I set out to try it on my test piece. 


I think that it worked pretty well. You can see that I missed the stems, but I was not worried about that for this test. I will do a few more tests, but this may be the solution to my problem. 

  • Member since
    April 2016
  • From: Russia, St.Peterburg
Posted by kirill4 on Monday, October 31, 2016 7:42 AM

Steve,

Good day,

Looks very good! but just using brush (small -for making sharp borders betwee diff.colors areas ...and acrylic paint ... we can get the same result... I mean - more easy, w/o spesial putty and masks... or may be I 'm wrong,sorry...just never thought abt using this special stuff...or there are some difficulties with brushes using? 

All the Best !

Kirill

  • Member since
    July 2014
  • From: Franklin Wi
Posted by Bakster on Monday, October 31, 2016 3:41 PM

Kirill, Good day to you as well. 

Your question is a good one, and you are absolutely correct. 

I have several reasons for doing this. The first and foremost is that I don't have a steady enough hand to brush paint some of these things. My transom flower is a bad example because I am sure that I could have accomplished it. In the case of the tiny backing links, or the hardware on the doors and hatches, I won't be steady enough. Secondly, I prefer the appearance of paint that has been airbrushed. A better modeler than myself can achieve the same result by brush painting, unfortunately, I am not one of them. Lastly, I like to try new things.

I hope that this clears it up for you. I really appreciate your interest!


  • Member since
    April 2016
  • From: Russia, St.Peterburg
Posted by kirill4 on Monday, October 31, 2016 4:53 PM

Good day Steve,

Thanks, I see... I just never used air brush, have one, but afraid to use it...so small and delicate machine is it!:) , my expirience limited only with spray paint from tin(ordinary acrylic spray paint), when I did base coat for the hull and decks... but when I look at your work ,see You did it with very good result! I think this is more important - result ... this way or another...thanks for explanation.

Did You finish with hull painting already or it is still in progress?

If not,I would like to advise,by my experience,after several years of search for the "magic" paint which give very fast and believable wooden effect on plastic(preliminary painted in base color), there is PLAID /Folk Arts medium No 817 ... there are more medium of different colors from this maker, but this one - I found more suitable ... easily deluted with water, applied by brush, could be removed during 10-15 minutes if ness-ry, and depend on concentration and base color could make various wooden effect on plastic...this medium I also added to my self made mixed paint for painting rigging...

  • Member since
    July 2014
  • From: Franklin Wi
Posted by Bakster on Monday, October 31, 2016 8:22 PM

Good day Kirill,

you asked if I am done with the hull, or is it still in progress. I think that for the most part, it is done. This is primarily true with any of the wood surfaces that I won't paint with any type of color. I am still working towards painting and weathering the gun ports, hinges, wales, and like you have already seen, the transom. Also, I will need to create the waterline to simulate the preserving coating on the hull.

You have me very intrigued about the Folk Arts no 817 paint. You are an artist with your painting, and this sounds like something really good that you have discovered. I will order some. At this point, I do not know how I could use this paint on the hull since that any paint that I add now, it will mask the weathering that I have already put in place. If I am wrong about that, please let me know. I do think, I can use this paint for as you say the rigging, masts, or maybe even on some decking fixtures.

Please feel free to share anymore ideas that you may have.

JOIN OUR COMMUNITY!

Our community is FREE to join. To participate you must either login or register for an account.

SEARCH FORUMS
FREE NEWSLETTER
By signing up you may also receive reader surveys and occasional special offers. We do not sell, rent or trade our email lists. View our Privacy Policy.