SEARCH FINESCALE.COM

Enter keywords or a search phrase below:

Messerschmitt BF109 GB 2012

245481 views
1198 replies
1 rating 2 rating 3 rating 4 rating 5 rating
  • Member since
    June 2008
  • From: Iowa
Posted by Hans von Hammer on Monday, March 12, 2012 12:44 PM

Reasoned

D @mn rivet counter.

BLASPHEMER!

You'll smoke a turd in hell for that one!

J/K lol..

Just wanna SAVE the man from the R/Cs that'll pile him for "missing a seam"...   Doesn't matter to 'em if a seam is SUPPOSED to be there...

  • Member since
    February 2011
  • From: Bent River, IA
Posted by Reasoned on Monday, March 12, 2012 12:37 PM

D @mn rivet counter.

Big Smile

Looking great satch, man I wish I was on my 109 build now.Angry

Science is the pursiut of knowledge, faith is the pursuit of wisdom.  Peace be with you.

On the Tarmac: 1/48 Revell P-38

In the Hanger: A bunch of kits

  • Member since
    June 2008
  • From: Iowa
Posted by Hans von Hammer on Monday, March 12, 2012 11:11 AM

Hans, thanks for the tip and and compliment.  The hinge runes the entire length of the panel line?  Makes sense. 

Yer welcome, by all means, Satch.. Yeah, it runs the length of the cowl..  Here's a better look, from the Revell 1/32 cowl:


Here's a shot of both the right-top and the bottom cowls open at their hinges..


  • Member since
    September 2009
  • From: Spring Branch, TX
Posted by satch_ip on Monday, March 12, 2012 9:21 AM

Hans von Hammer

Just noticed the cowl-seam.. A piece of stretched sprue, softened with liquid cement and then textured with a knife-blade running along it would go a long way in depicting the hinge there... I know you can't do it now, just a tip for futire ref, Satch...  I only mention it because somebody may think that you missed filling a seam that actaully supposed to be there (I see it all the time on P-51s, where folks fill the cowl-hinge, not knowing that there's a hinge there)..

http://i861.photobucket.com/albums/ab171/satch_ip/Hasegawa%20Bf%20109F%20%20Heinz%20Bar/IMG_0631.jpg


Colors look great, BTW..

Hans, thanks for the tip and and compliment.  The hinge runes the entire length of the panel line?  Makes sense.  I'll try that on my next 109.

Satch

  • Member since
    March 2010
  • From: MN
Posted by Nathan T on Monday, March 12, 2012 8:35 AM

Joe, I think I remember reading your thread. I've never used Techmod before. But these decals are brand new. Is it possible that Techmod changed things? These decals are printed thin with little carrier film and are very glossy. the smaller decals adhere almost too well and are hard to position, needing a ton of water. I trim off some carrier film, then as soon as the decal is ready to move(don't wait too long), position on the model. I don't use Microset(blue bottle) for these as you'll never be able to position them then. you then have to dabble with a small paper towel to dry. Then take a wide brush and start from the decals center and push out all the water and air bubbles to the edge of the decal. Then hit with Microset(red bottle). I've found these decals too delicate to score with a razorblade along the panel lines, but they seem to be settling down OK.


  • Member since
    June 2008
  • From: Iowa
Posted by Hans von Hammer on Monday, March 12, 2012 6:11 AM

Just noticed the cowl-seam.. A piece of stretched sprue, softened with liquid cement and then textured with a knife-blade running along it would go a long way in depicting the hinge there... I know you can't do it now, just a tip for futire ref, Satch...  I only mention it because somebody may think that you missed filling a seam that actaully supposed to be there (I see it all the time on P-51s, where folks fill the cowl-hinge, not knowing that there's a hinge there)..


Colors look great, BTW..

  • Member since
    February 2012
  • From: Olmsted Township, Ohio
Posted by lawdog114 on Monday, March 12, 2012 12:03 AM

Nathan T

Welcome aboard Lawdog!

Satch- touch ups look good!

Got started on the decals. These Techmod one's are impressive so far. they're goin down real well and are thin with little carrier film, still, some trimming is in

Thanks Nathan T!, I'm looking forward to it since this is my first group build.  Did I hear you correctly?  You had success with those treacherous TechMod Decals?  I used them on my Spitfire Mk IV and damn near had to scrap the kit.  Can you please explain your technique because those decals are absolute s#$t in my opinion (See my "Techmod Trap" thread in the decaling section of the forum)....

Thanks Joe

Joe

 "Can you fly this plane and land it?...Surely you can't be serious....I am serious, and don't call me Shirley"


  • Member since
    December 2011
  • From: AZ
Posted by Luft Modeler on Sunday, March 11, 2012 11:28 PM

Paint is looking great Nathan!

  • Member since
    March 2010
  • From: MN
Posted by Nathan T on Sunday, March 11, 2012 10:55 PM

Welcome aboard Lawdog!

Satch- touch ups look good!

Got started on the decals. These Techmod one's are impressive so far. they're goin down real well and are thin with little carrier film, still, some trimming is in order.

The only trouble so far is the Werk no. decals stuck on the model right away and were tough to position. Turned out good enough though.


  • Member since
    December 2011
  • From: AZ
Posted by Luft Modeler on Sunday, March 11, 2012 10:14 PM

Sure you can join in, only rule is to be done by 1/09/13 and when you finish send me a PM letting me know you completed your bird with three pictures you want showcased on the front page.

  • Member since
    February 2012
  • From: Olmsted Township, Ohio
Posted by lawdog114 on Sunday, March 11, 2012 10:02 PM

Hey PZL66, can I get into this Group Build?  I have a 1/48 Bf 109 G-14 waiting to be built.  I'll have to search the net for some interesting markings.  I've never participated in a Group Build.  Are there any rules?

Thanks,

Joe

 "Can you fly this plane and land it?...Surely you can't be serious....I am serious, and don't call me Shirley"


  • Member since
    February 2011
  • From: Monterey Bay,CA-Fort Bragg, NC
Posted by randypandy831 on Sunday, March 11, 2012 8:26 PM

looking good satch. 

im waiting for the decals to dry before hitting with future then a wash then the final flat coat.

tamiya 1/48 P-47D $25 + shipping

tamiya 1/48 mosquito $20+ shipping

hobby boss 1/48 F-105G. wings and fuselage cut from sprue. $40+ shipping. 

  • Member since
    September 2009
  • From: Spring Branch, TX
Posted by satch_ip on Sunday, March 11, 2012 7:56 PM

Re masked and re shot the grauviolett.  Fixed the tail wheel.  Gloss coated again and time for decals tonight.

  • Member since
    June 2008
  • From: Iowa
Posted by Hans von Hammer on Sunday, March 11, 2012 11:40 AM

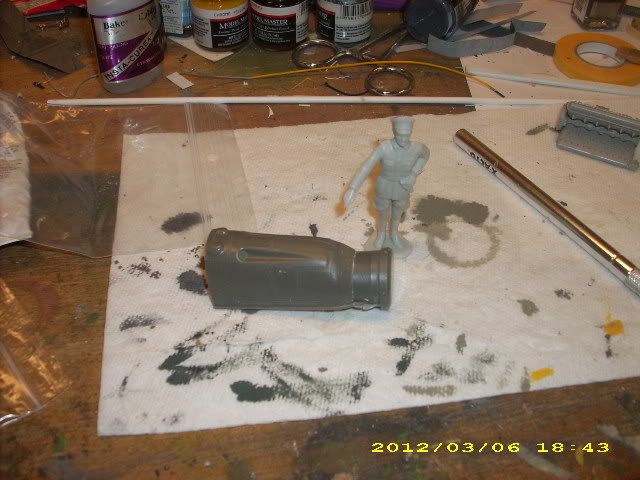
Starting on the cockpit now... Think I'm going to save the engine for another build though (It'll double nicely  as a Maybach engine block, perhaps in a future Panzer diorama..)... The diorama I have in mind won't be showing any work being done on it, so why bother I say...

  • Member since
    February 2011
  • From: Monterey Bay,CA-Fort Bragg, NC
Posted by randypandy831 on Sunday, March 11, 2012 11:27 AM

almost done. 

tamiya 1/48 P-47D $25 + shipping

tamiya 1/48 mosquito $20+ shipping

hobby boss 1/48 F-105G. wings and fuselage cut from sprue. $40+ shipping. 

  • Member since
    February 2011
  • From: Monterey Bay,CA-Fort Bragg, NC
Posted by randypandy831 on Wednesday, March 7, 2012 7:47 PM

VanceCrozier

Hammer - the red -109! I can't wait to see that one!

randypandy - MM enamels gave you problems? I've always had good results with them, but am scaling them back as I switch to the (for me) easier to clean up acrylics.

Nathan T - that's some great airbrush work, convincingly random.

Handsome Rob - no problems mixing the Tamiya acrylics so long as you have the right recipe. Don't forget your coat of Future will darken down the flat colours.

Geof - love the sand colour on your machine, nice amount of variation along the panel lines as well. Which kit is that - I see Cyrilic text on your instruction sheet!

satch ip - another mottled ME, you're closing in on the finish line as well.


Still lurking here gang, trying to clear up the bench a little before I crack into my contribution.

i think the problem was i wasn't thinning it enough and my AB skills weren't so good and made it worse. i really like how the MM enamels spray. i feel i have a lot more coverage control. 

tamiya 1/48 P-47D $25 + shipping

tamiya 1/48 mosquito $20+ shipping

hobby boss 1/48 F-105G. wings and fuselage cut from sprue. $40+ shipping. 

  • Member since
    June 2008
  • From: Iowa
Posted by Hans von Hammer on Wednesday, March 7, 2012 7:22 PM

First of all I have to strengthen and reattach the tail wheel.  It sagged and finally broke off altogether.  Any ideas?

sand both parts flat, making sure to only take off enough to ensure a good mating surface..

Then, use your pin-vise and drill a matching hole in each part, then insert a piece of straight-pin or stiff wire. Insert the pin into the hole in the tailwheel strut, add a drop of CA, then push it into the boot..

  • Member since
    November 2011
Posted by 70gtvert on Wednesday, March 7, 2012 11:25 AM

handiabled


                            Satch, Geof and Randy,,   all looking great guys!!Yes   70GT haven't seen your latest yet hows it goin?

                      Herman and I are back at it again,, going to start with the paper thin cowling from the Big Sin kit,, to be honest this Eduard kit doesn't need a lot of help anyways,, but I'm all in on this one,, more to come

                                                           Thanks for lookin!  Smile


[View:/themes/fsm/utility/http://i1225.photobucket.com/albums/ee394/handiable/BF%20109%20Balkans/DSCI1489.jpg:550:0]

Handi, the weather here recently gave me a few decently warm days that it allowed me to build my "super sized" kit. The 109 had to have the engine bay gutted, some of the worst fitment issues I ever saw in a kit, and now for a short while anyways, it is sitting on the back burner. As to my "super sized" kit, here is a link to some movies (2) of the completed chassis. This was last summer and fall. Currently I am fixing the body to fit up to snuff. Cold weather creeps back and I will be back on the 109.

http://www.flickr.com/photos/58568087@N03/5970727166/in/photostream

http://www.flickr.com/photos/58568087@N03/5970183547/in/photostream

John.

  • Member since
    December 2011
  • From: AZ
Posted by Luft Modeler on Wednesday, March 7, 2012 11:22 AM

The 109's are looking great! I have my engine painted on mine. 

  • Member since
    September 2009
  • From: Spring Branch, TX
Posted by satch_ip on Wednesday, March 7, 2012 10:54 AM

After Jacks comments, I decided to re-mask and shoot more grauviolett so as to even it out and give it a hard edge.  I went to paint and my compressor seems to have suffered some sort of catastrophic failure.  It wont start.  Oh well,  I was coveting that Grex compressor anyway!

satch

  • Member since
    February 2003
  • From: Rothesay, NB Canada
Posted by VanceCrozier on Wednesday, March 7, 2012 9:53 AM

Hammer - the red -109! I can't wait to see that one!

randypandy - MM enamels gave you problems? I've always had good results with them, but am scaling them back as I switch to the (for me) easier to clean up acrylics.

Nathan T - that's some great airbrush work, convincingly random.

Handsome Rob - no problems mixing the Tamiya acrylics so long as you have the right recipe. Don't forget your coat of Future will darken down the flat colours.

Geof - love the sand colour on your machine, nice amount of variation along the panel lines as well. Which kit is that - I see Cyrilic text on your instruction sheet!

satch ip - another mottled ME, you're closing in on the finish line as well.


Still lurking here gang, trying to clear up the bench a little before I crack into my contribution.

On the bench: Airfix 1/72 Wildcat; Airfix 1/72 Vampire T11; Airfix 1/72 Fouga Magister

  • Member since
    July 2011
  • From: minnesota
Posted by handiabled on Wednesday, March 7, 2012 7:26 AM


                            Satch, Geof and Randy,,   all looking great guys!!Yes   70GT haven't seen your latest yet hows it goin?

                      Herman and I are back at it again,, going to start with the paper thin cowling from the Big Sin kit,, to be honest this Eduard kit doesn't need a lot of help anyways,, but I'm all in on this one,, more to come

                                                           Thanks for lookin!  Smile


[View:/themes/fsm/utility/Photobucket:550:0]

  • Member since
    February 2011
  • From: Monterey Bay,CA-Fort Bragg, NC
Posted by randypandy831 on Tuesday, March 6, 2012 10:26 PM

awesome work everyone.

hasegawa kit. still finishing decals

revell kit. still working out the canopy issues.

tamiya 1/48 P-47D $25 + shipping

tamiya 1/48 mosquito $20+ shipping

hobby boss 1/48 F-105G. wings and fuselage cut from sprue. $40+ shipping. 

  • Member since
    September 2009
  • From: Spring Branch, TX
Posted by satch_ip on Tuesday, March 6, 2012 7:09 PM

Everyone's a critic! Big Smile.  It's the splinter pattern on the profile provided by the Techmodel decals.  I first sprayed the grauviolet and it came out really shinny and purple.  I then masked and sprayed the graugrun.  I then went to touch up and do mottles with the grauviolet but used a different jar.  It came out lighter and grayer.  So I tried to cover the purple.  Well I was lazy and didn't want to re mask so I did it free hand.  I might try to harden the edges on the wings.  Or I can try to blend it with washes and pastels.

It's supposed to look like this.


First of all I have to strengthen and reattach the tail wheel.  It sagged and finally broke off altogether.  Any ideas?

Satch

  • Member since
    April 2006
  • From: ON, Canada
Posted by jgeratic on Tuesday, March 6, 2012 3:25 PM

satch_ip

Cammo and mottling done on Heinz's F-2.  Ready for gloss, decals, and fiddly bits.


http://i861.photobucket.com/albums/ab171/satch_ip/Hasegawa%20Bf%20109F%20%20Heinz%20Bar/IMG_0626.jpg

Looks good, particularly the mottling.  I'm not familiar with this particular scheme, so bare with with me, but trying to figure out what is happening with the top surfaces of the main wings.  The tail and fuselage clearly have overspray between the two colours, but main wings look to have the camou outlined with a hard edge but colour was appled short of this outline - representative of  quick field work?

regards,

Jack


  • Member since
    February 2011
  • From: Bent River, IA
Posted by Reasoned on Tuesday, March 6, 2012 2:13 PM

Looking great satch, my avatar approves. Wink

Science is the pursiut of knowledge, faith is the pursuit of wisdom.  Peace be with you.

On the Tarmac: 1/48 Revell P-38

In the Hanger: A bunch of kits

  • Member since
    May 2004
  • From: Finland
Posted by smoffo on Tuesday, March 6, 2012 1:33 PM

Just got a package from Hannants, including some decals and PE form my 109.

Decided it's going to be a 109D-1 coded J-306 RLM70 topside and RLM65 below.

Propably going to get the plastic out of the box todaySmile

Michael

  • Member since
    September 2009
  • From: Spring Branch, TX
Posted by satch_ip on Tuesday, March 6, 2012 5:26 AM

Cammo and mottling done on Heinz's F-2.  Ready for gloss, decals, and fiddly bits.

  • Member since
    December 2010
  • From: Colorado Springs
Posted by Geof on Monday, March 5, 2012 11:16 PM

Nathan T

Nice color Geof, interesting markings

Thanks! Rudolph 'Rudi' Sinner bird early in his career with JG27.

Photobucket

On the Bench: Tamiya's 1/48 A-10a Thunderbolt 

In the Hangar:  Hmmm???


  • Member since
    March 2010
  • From: MN
Posted by Nathan T on Monday, March 5, 2012 10:46 PM

Nice color Geof, interesting markings


JOIN OUR COMMUNITY!

Our community is FREE to join. To participate you must either login or register for an account.

SEARCH FORUMS
FREE NEWSLETTER
By signing up you may also receive reader surveys and occasional special offers. We do not sell, rent or trade our email lists. View our Privacy Policy.