SEARCH FINESCALE.COM

Enter keywords or a search phrase below:

B29 Build Progress

53293 views
306 replies
1 rating 2 rating 3 rating 4 rating 5 rating
  • Member since
    April 2014
Posted by r13b20 on Friday, June 20, 2014 2:50 PM

Welcome to my world. We've all been there. My sympathies. Maybe the "wreck" can be turned into a wreck when you get the time? "Bone yard" ship? Bob

  • Member since
    August 2013
Posted by RCH73 on Friday, June 20, 2014 2:09 PM

Thanks to all for the sympathy in my plight; I am sure I am not the first to go through this and I doubt I will be the last.  I would like for this to be the last time it happens to ME, though!

I was not so pleasant to be around last night.  The Missus wisely left me alone to stew.  I finally decided that what I am going to do is to procure another kit and build the fuselage and wings from it, but re-utilize the cockpit and assorted interior parts to save me some time.  I can probably get the seams and paint job better this time around, so I'll focus on that now that I have the recent experience. 

In addition, I will try to repair the fuselage on the old bird as well, just for the practice.  If it turns out well, I'll keep it for myself as a memento of this experience.  If not, I can probably learn some valuable techniques on it. I'll continue the blog so those who have been curious can continue to follow my mishaps and progress. 

More to follow.  I have to go make a new plan...

cheers, Bob

  • Member since
    May 2006
  • From: Chapin, South Carolina
Posted by Shipwreck on Friday, June 20, 2014 1:31 PM

Bob, so sorry to hear of your mishap. My last two P-51's crash landed on a hard floor in the final stages of production. Now they both rattle, but they are just fine if you do not shake them! So you put a lot of good work into this bird and she was looking real good. BTW, real planes crack up and their ground crews patch them back together again and again and again. I want to encourage you to build up more experience by repairing what you have. The aluminum panels on that plan varied, so you can take advantage of the new panel variation scheme of your repair. I can not image that any bulkhead damage would even be noticeable once she is closed up again. If all else fails, then you can buy you another kit!

On the Bench:

Revell 1/96 USS Constitution - rigging

Revell 1/48 B-1B Lancer Prep and research

Trumpeter 1/350 USS Hornet CV-8 Prep and research


  • Member since
    February 2007
  • From: Brunswick, Ohio
Posted by Buckeye on Friday, June 20, 2014 11:18 AM

Bummer. Sad  If it's any consolation I'm sure most of us have been in  your shoes before.

  • Member since
    June 2013
Posted by bvallot on Friday, June 20, 2014 8:39 AM

Bob.  So sorry to hear that. You sound much more optimistic than I imagine I'd be in your shoes.  Don't let it beat you.  Next time around you'll make it better and improve on the little things.  I for one will be excited to see this monster done.  =]

Good luck! take some time to grieve. lol  Come back fresh. =]

On the bench:  

Tamiya F4U-1  Kenneth Walsh


  • Member since
    August 2013
Posted by RCH73 on Friday, June 20, 2014 6:39 AM

Well, disaster struck yesterday.  I was moving the model to my workbench to install the engines and it fell to the hardwood floor.  Crying  Several smaller parts broke off, but that wasn't so bad.  Worst of all is it landed directly on the glass nose and the whole glass cockpit area came off and the centerline seam down the top of the fuselage cracked open.

That area. of course, is the centerpiece of the whole B-29 visually, so any flaws there will stand out like a sore thumb.  I am having a hard time convincing myself that I can repair a natural metal finish in that area and repaint it to match without it being obvious, especially since it is already decaled.  After thinking about it all night I am about ready to concede that I have to get another model and redo the whole fuselage and wings portion.  I can save some time by re-using many of the existing parts, particularly the engines which are undamaged and the cockpit.  I can also close the bomb bay doors and so avoid having to do any of the bomb bay area, which is unseen.

I feel like Churchill when he was ousted as Prime Minister in 1945.  Clementine said "Perhaps this is a blessing in disguise".  He replied "if so, it is certainly very well disguised."

If there is any silver lining in this, it is that I have nine months more experience than when I began this last time, and that I have sufficient time to recover before I am scheduled to deliver the model to my friend.  But other than that, I feel pretty lousy.  I was going to post a pic but can't bring myself to do it.

Cheers, Bob

  • Member since
    October 2004
  • From: NE Oklahoma
Posted by Allen109 on Monday, June 16, 2014 2:25 PM

You could find a printed tarmac sheet ,or simulate your own.There are companies out there that make sheets to scale.At least there were a few years ago.

  • Member since
    August 2013
Posted by RCH73 on Sunday, June 15, 2014 5:30 PM

That is why I love this forum!  I did not know that and had never heard of that before now.  So I guess Monogram gets high marks for accuracy and not humor...

thanks for telling me something new!

cheers, Bob

  • Member since
    October 2011
  • From: Northern Illinois
Posted by OldFart on Sunday, June 15, 2014 4:27 PM

Great looking build, and aromatics is referring to fuel.

  • Member since
    October 2005
  • From: UK
Posted by antoni on Sunday, June 15, 2014 4:23 PM

It means that it able use aromatic fuels. Aromatics are carbon ring compounds such as benzene. They get their name because they are smelly, sometimes nice, sometimes not so nice. They also burn with a smoky flame.

Aromatics have very good octane rating. In Europe between the wars, before tel became available, the way of boosting the octane rating of fuels was to add Benzol. Benzol was the commercial name for a mixture of benzene and toluene derived from coal tar. The disadvantage of using aromatics to boost octane rating is that large quantities have to added as basically you are adding high octane fuel to a low octane fuel to raise its octane rating. In contrast only small amounts of tel need to be added.

When American aircraft were first brought to the UK the engines sometimes encountered problems running with the high aromatic content fuels is use and adjustments had to be made such as replacing the jets in carburetors.

Gasoline used to contain, IIRC, about 60%-65% aromatics but in modern times this has been reduced to about 35%-40%.

  • Member since
    August 2013
Posted by RCH73 on Sunday, June 15, 2014 3:33 PM

After further review, I noticed that my humor is not likely to be noticed.  I blew up the decal in question:

 IMG_2063 - Version 2 by robertholcomb73, on Flickr

The last line says the aircraft is "suitable for aromatics".  I suppose the actual marking says "acrobatics", but what the heck do I know?

I then moved the model to a large counter and marked off a 27" square base in blue tape.  I wanted to position the medals and a brass plaque (represented by a piece of white paper) to see if the arrangement made any sense:

 Untitled by robertholcomb73, on Flickr

Still haven't glued the engine cowlings on. 

cheers, Bob

  • Member since
    August 2013
Posted by RCH73 on Sunday, June 15, 2014 12:27 PM

Another weekend of progress.  I did something new (to me) this time:  I made my own decals.  I wanted the airplane to reflect his own aircraft, so I did research to find the names of the aircraft commander, crew chief and navigator and put their names on a decal sheet to scale.  I also made three Purple Hearts to put on the nose, as my research indicated that they painted those on the nose after the June '45 Kobe mission (where they shot down the three Japanese fighters and all the crew received Distinguished Flying Crosses).

 image by robertholcomb73, on Flickr

I also put the remainder of the decals on the aft end of the airplane, most visibly the "Circle X" of the 9th Group:

 image by robertholcomb73, on Flickr

I noted in one pic that Monogram has a sense of humor.  Underneath the pilot's names, I installed the kit-supplied decal of the model of the B-29, sort of the Air Air Corps version of the "dataplate" to identify the type of aircraft.  Note the bottom line:

 image by robertholcomb73, on Flickr

Anyway, it is well on its way to completion now.  I still have to install the engines and have been giving thought to a base.  I think it will be cherry plywood with a molding border to provide a lip, and an acrylic cover that sets within said lip. I'll also include a full sized Distinguished Flying Cross and Air Medal with three oak leaf clusters, and his enlisted observer wings.

cheers, Bob

  • Member since
    February 2003
  • From: Cameron, Texas
Posted by Texgunner on Monday, June 9, 2014 12:08 PM

Allen109

Just thought of this.

You could hide the string/fishing line using wheel chocking blocks.

That's a great idea!  I've found some balsa stock at Hobby Lobby that is milled to a trapezoidal shape.  Cut to size, prime and connect with some thread (rope) and presto!   Wheel chocks to conceal your line...Big Smile

Gary


"All you mugs need to get busy building, and post pics!"

  • Member since
    October 2004
  • From: NE Oklahoma
Posted by Allen109 on Monday, June 9, 2014 11:58 AM

Just thought of this.

You could hide the string/fishing line using wheel chocking blocks.

  • Member since
    March 2013
Posted by MikeyBugs95 on Sunday, June 8, 2014 4:11 PM

Wow! Looks great. I hear you on relearning Scouting skills... But I just have to remember them... even though I'm still involved with Scouting!

 In progress:

CAD:

1/35 SINCGARS ICOM/ASIP; 1/35 Flat screen TVs; 1/35 tactical light that I shall reveal later Devil

Models:

1/35 DML M4A1 DV; AFV Club M18 Hellcat; DML StuG IV; DML Armored Jeep w/ .50 cal; Panda Cougar 4x4 MRAP; Academy M3A1 Stuart; 1/700 Midship Models USS Miami; 1/700 Skywave Rudderow Destroyer Escort

  • Member since
    August 2013
Posted by RCH73 on Sunday, June 8, 2014 4:05 PM

Curt:  I did a trial run today on the mounting, pics below.  I cut a small piece of plywood as a sample base, just to have a way to work with the model in the last phases, including being able to put it on a turntable for ease of access.  This is NOT the finished base, just a working base. 

Below you can see the nose gear tied down.  I had to relearn my Boy Scout skills a bit and did not get the knot quite tight enough; you can see the wheel is up about 1/8-1/16". I used thread for this trial run, rather than clear fishing line (which is my plan for the finished product). 
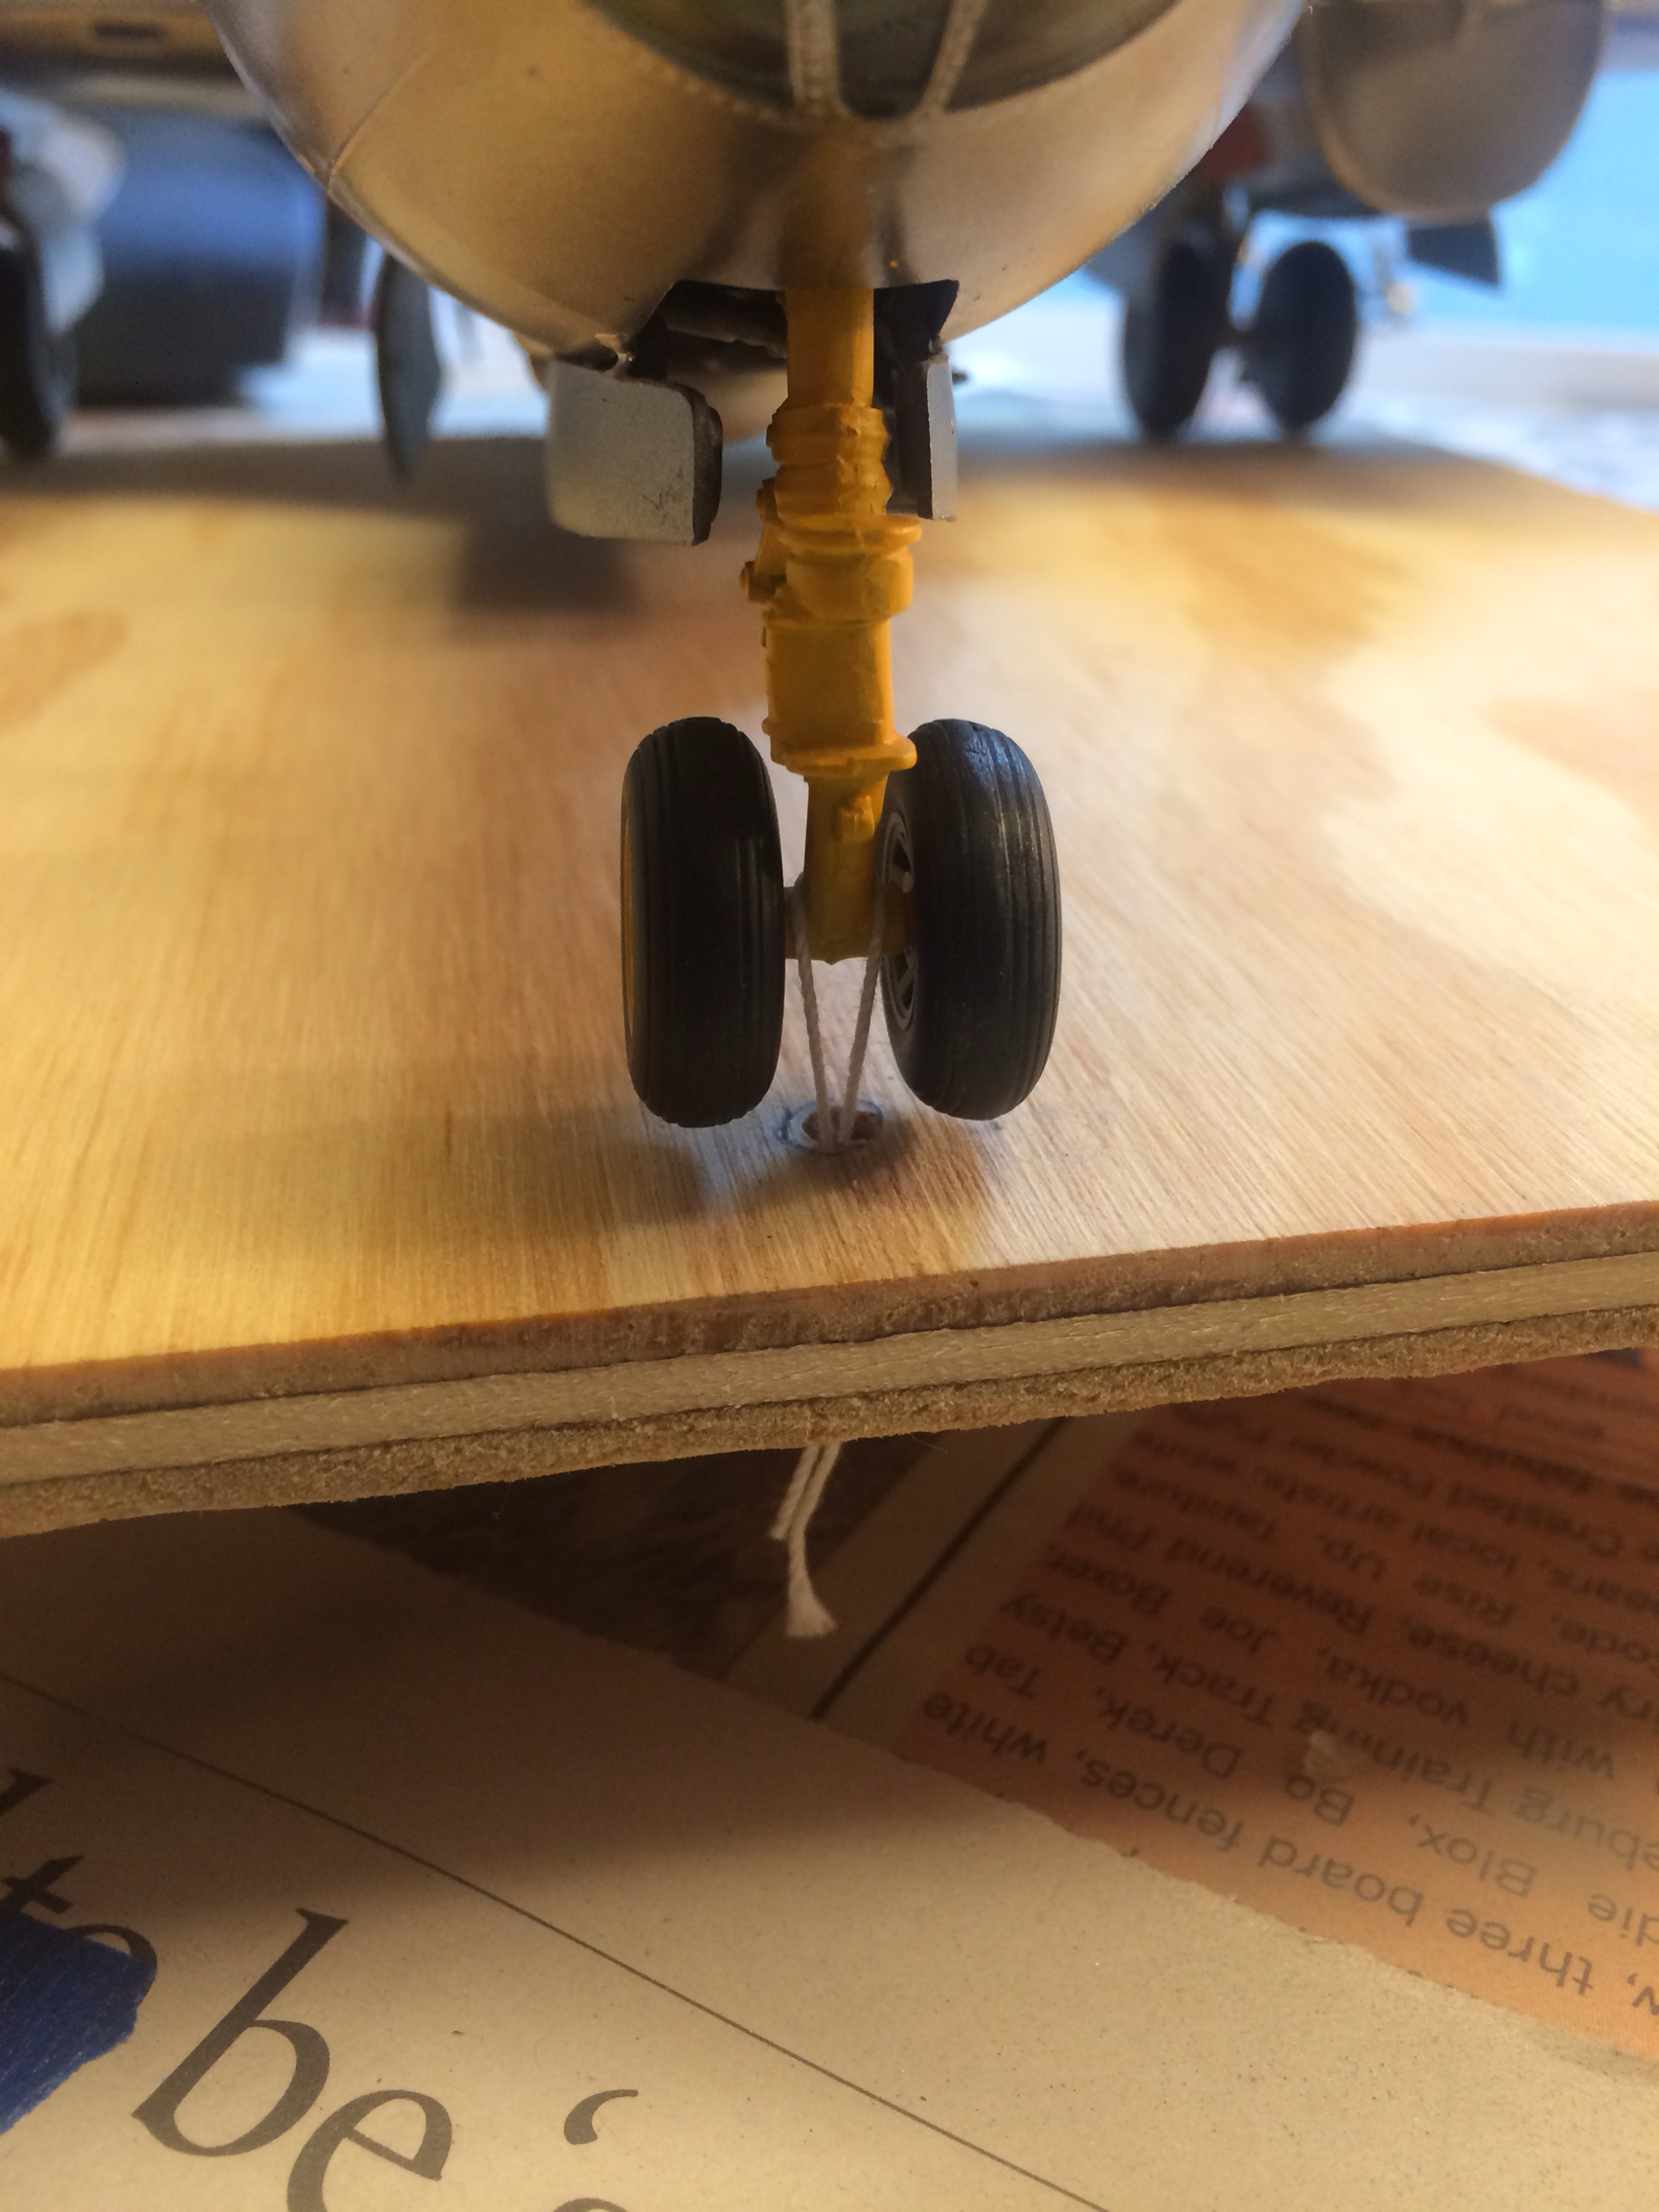
 image by robertholcomb73, on Flickr

The next pic shows all three wheels tied down and the model, with its new plywood base, setting on top of a small turntable.
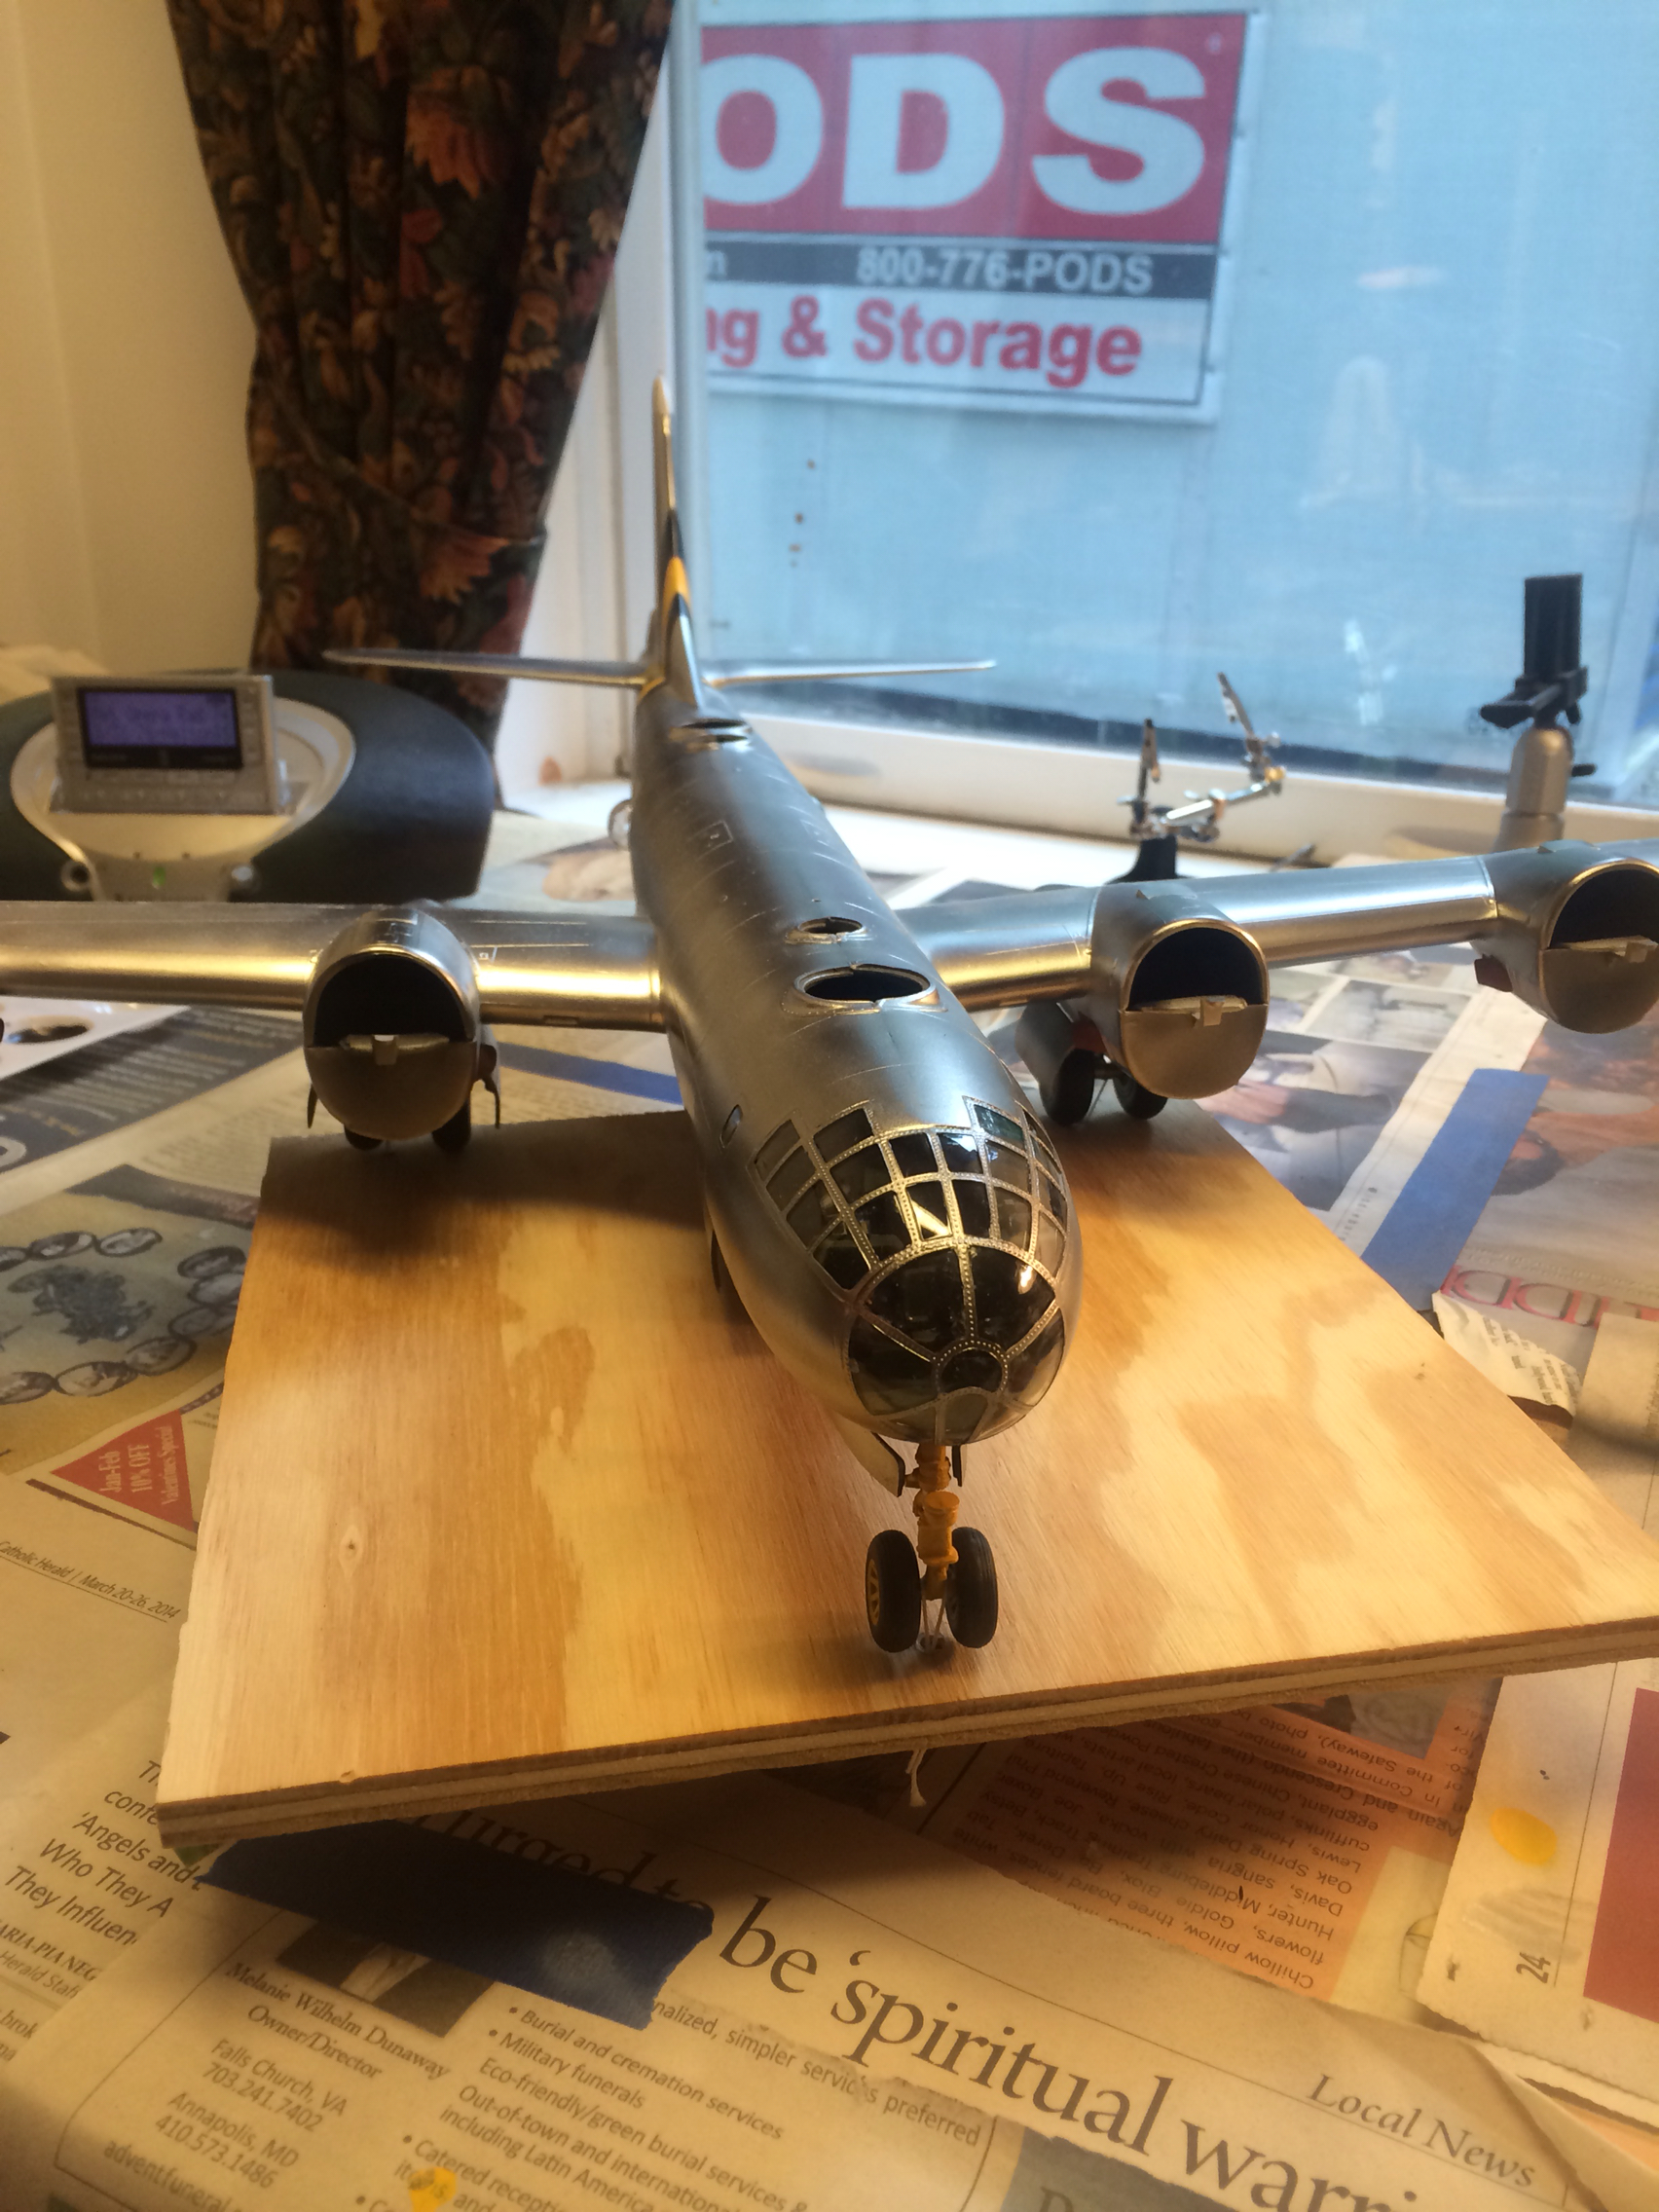
 image by robertholcomb73, on Flickr

I spent the little time I had this weekend attaching the gear doors and bomb bay doors.  After I had them glued in place, I mixed up a touch of epoxy and put a drop on each of the hinges for all ten doors, to strengthen the joint a bit in case of bumps.
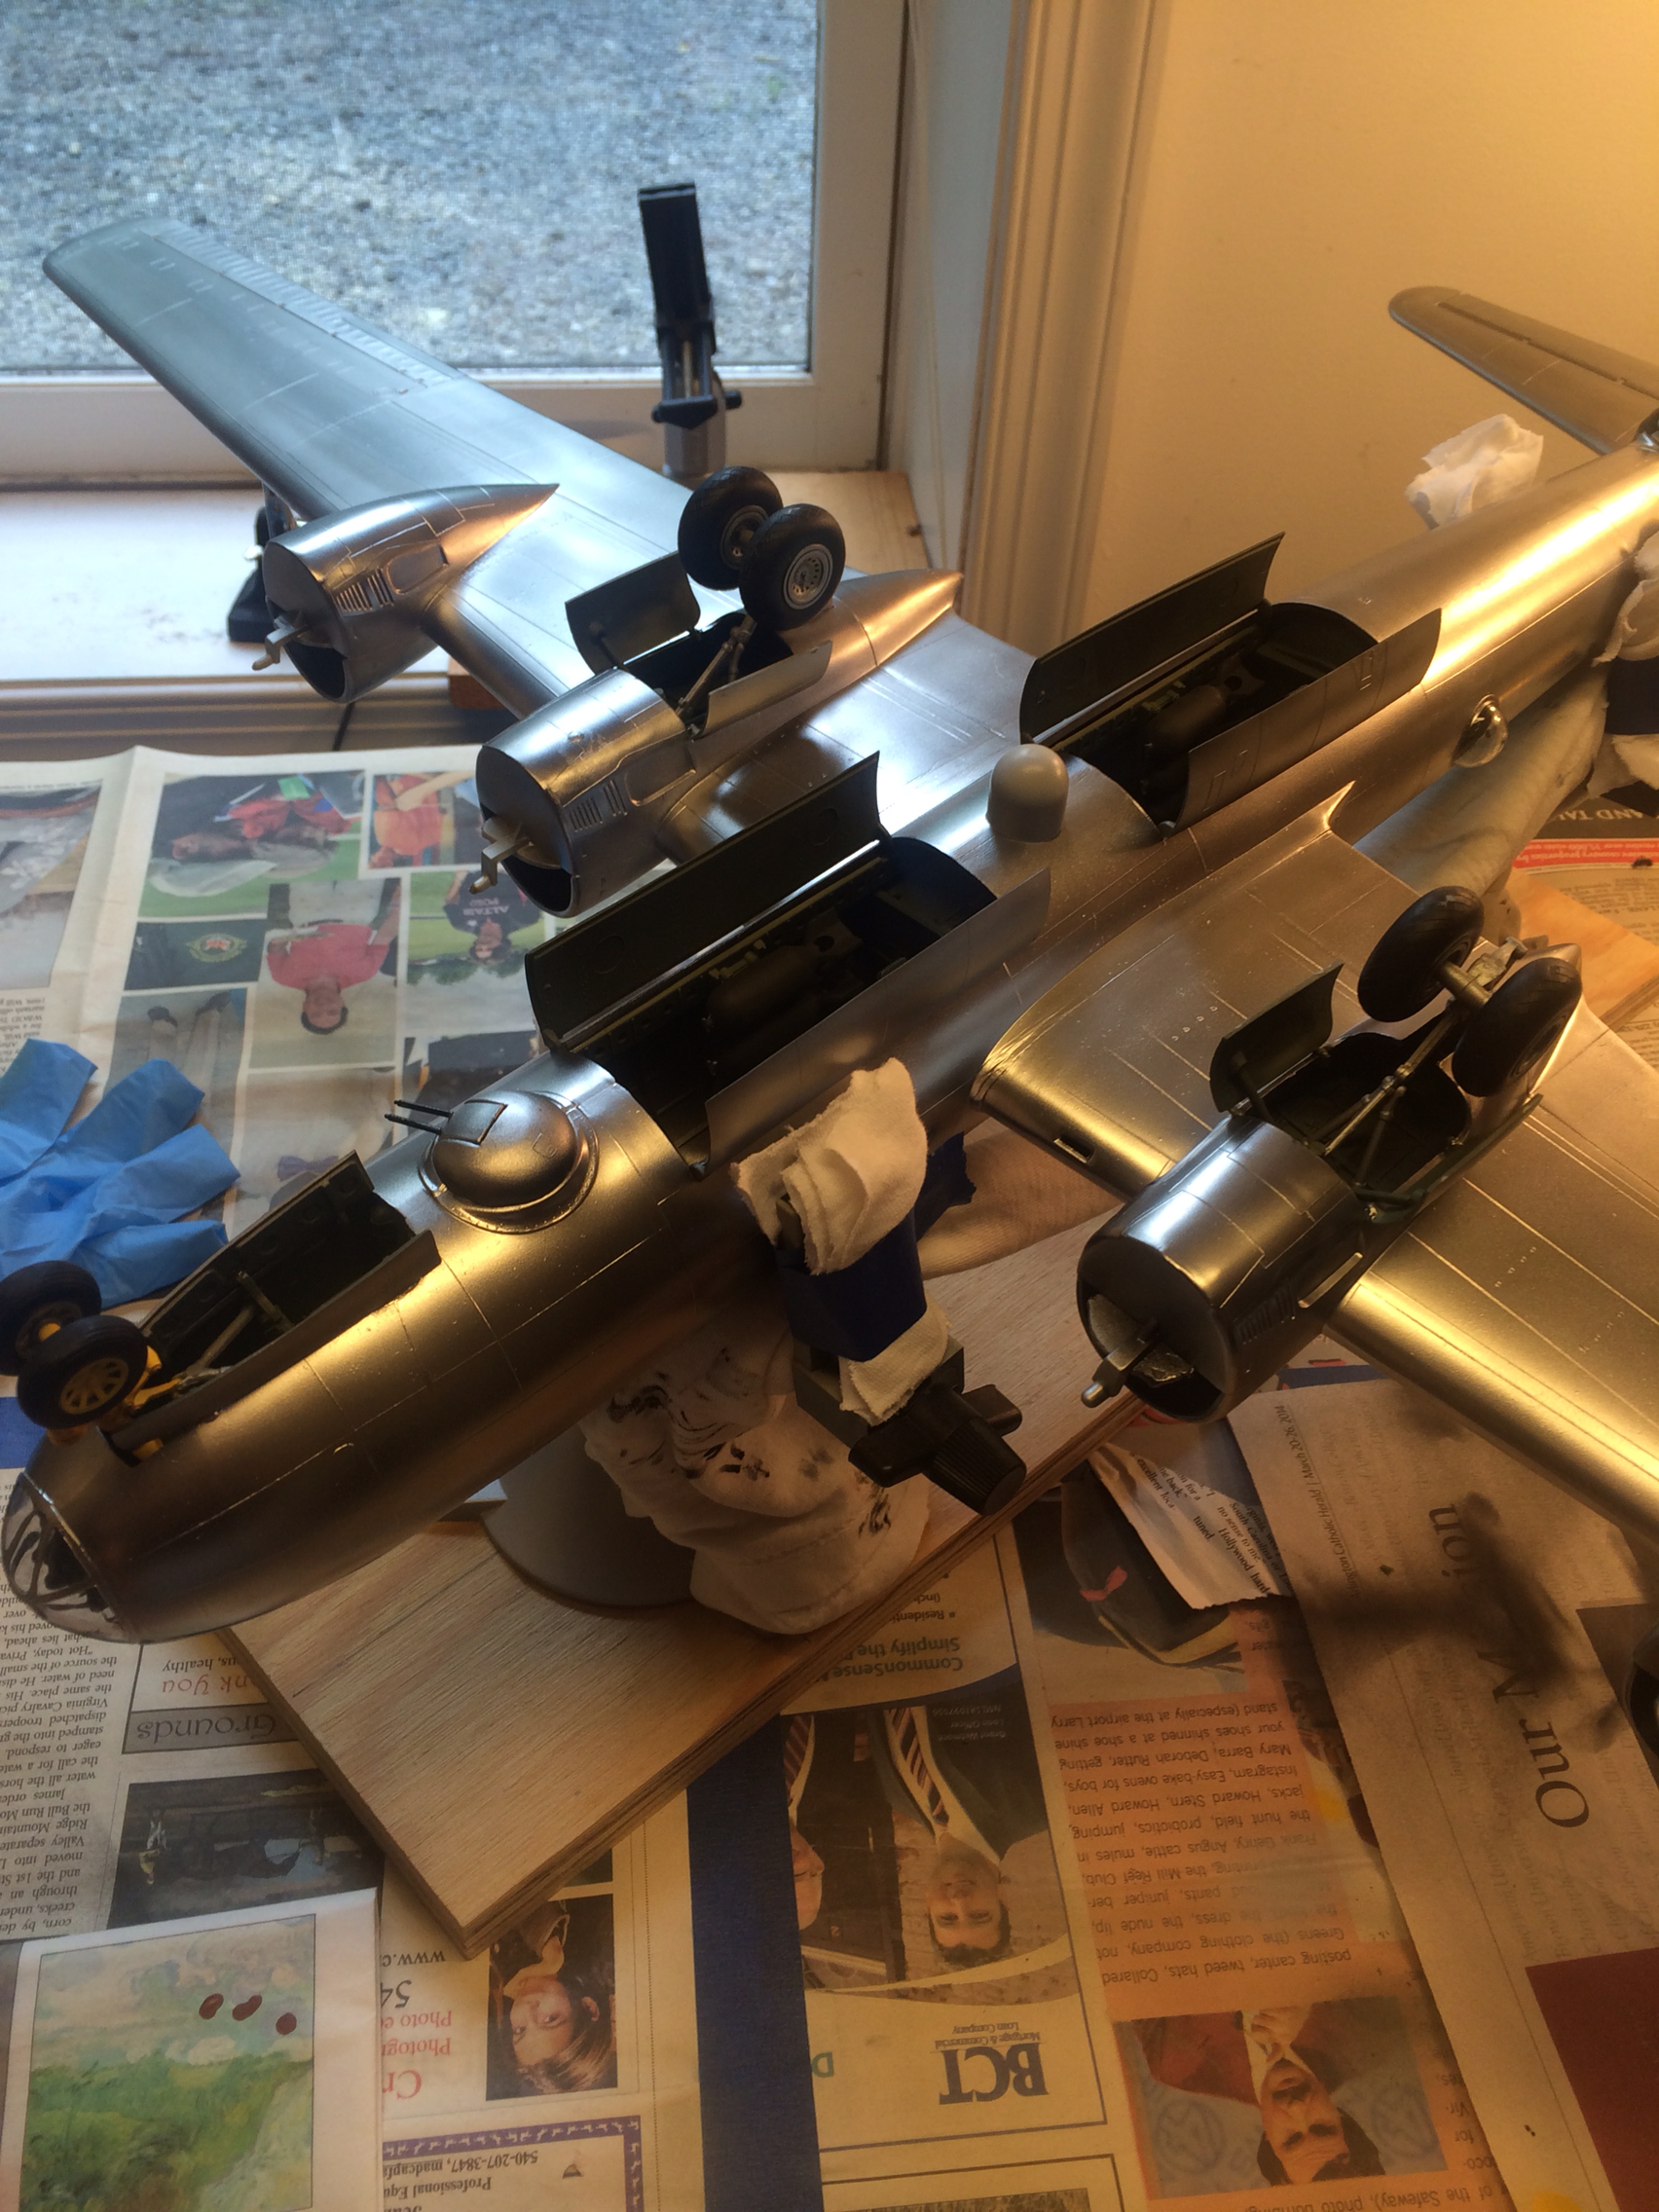
 image by robertholcomb73, on Flickr

I made up some decals on my printer and got clear decal paper and a sealer.  This will be another first for me.  I am breaking all sorts of personal new ground on this build!

Recall that this is for a friend who won a Distinguished Flying Cross (and four Air Medals) in this airplane.  I thought some sort of identification of his achievements was necessary, so I procured the full-size medals of each award (including the three oak leaf clusters on his Air Medal), along with a set of enlisted observer wings.  I plan to mount the wings, and medals, alongside a brass engraved plaque with his name on it on the actual base.  I don't plan on doing a diorama base, just a plain wooden one.  There should be plenty of room!

Stay tuned, film at eleven...

cheers, Bob

  • Member since
    May 2003
  • From: Springfield, VA
Posted by crkrieser on Saturday, June 7, 2014 3:54 PM

Bob -

You and other folks here make a good point about mounting all three landing gears.  Sounds like the method you plan on using will work.  I'll be very interested in the results.

Curt

US Army, Retired

  • Member since
    August 2013
Posted by RCH73 on Tuesday, June 3, 2014 6:19 PM

bvallot:  I did check out the NMF group Build you suggested and it was great, thanks so much for steering me there.  Lots of good ideas and tips.  Best thing about this forum!

Shipwreck:  I used two 1 oz. bottles of Polished Aluminum.  A little goes a long way.  The Alcald did OK over the Tamiya gloss black.  I did not have any Alclad surfaces pull up when I masked them later.  Last night I sprayed some of the lower engine nacelles Stainless Steel, and had to mask over the original Polished Aluminum; the masking came off just fine with no issues.

However, the original purpose of putting the Stainless Steel down was to emulate those panels that were stainless to disseminate heat and I did not get that effect.  Instead, it looked almost just like the Polished Aluminum that it was sprayed over.  I figured out (later, of course) that I should have put more Gloss Black down on the masked portions.  The Stainless Steel was reflecting the undercoat it was on, which was Polished Aluminum.  Lesson learned here is to re-apply the base coat on any panels you want to overspray with a different Alclad color.  Probably should have figured that out beforehand, but I didn't.  Story of my life Confused  So I guess I will get to re-mask and do it all again. 

Cheers, Bob

  • Member since
    May 2006
  • From: Chapin, South Carolina
Posted by Shipwreck on Tuesday, June 3, 2014 6:28 AM

Bob, earlier you mentioned that your bird took 3 bottles of Black paint for an under coat. How much Alclad II polished aluminum did you use? I like the way your plain aluminum worked out for your fabric control surfaces. I am ordering some Alclad II to start some practice runs. I expect to start my B-29 by August. Yours is looking really good!

How did the Alclad over Tamiya acrylic work out; especially when pulling up your masking tape?

On the Bench:

Revell 1/96 USS Constitution - rigging

Revell 1/48 B-1B Lancer Prep and research

Trumpeter 1/350 USS Hornet CV-8 Prep and research


  • Member since
    June 2013
Posted by bvallot on Sunday, June 1, 2014 10:37 PM

Bob, before you do the coat of Future...I'd recommend you checking out the NMF Group Build going on right now.

Try starting here.  That way you're not wandering through too much boring forum talk.  Start there and move forward and you'll see the general discussion unfold for you between everyone in the group.  Generally though you don't need to apply Future or any type of clear coat to Alclad on account of the fact that you should already have a very pristine surface that is very smooth.  The decals will adhere without any trouble.  However, should you weather your B-29 and want to protect it, there is a Light Sheen offered by Alclad that wont detract from the shine too much.  Just lay it down in light coats....very light coats.  It will provide for a weather-beaten warplane that looks the part.  =]

That's the short version.  Give it a look see.

On the bench:  

Tamiya F4U-1  Kenneth Walsh


  • Member since
    August 2013
Posted by RCH73 on Sunday, June 1, 2014 7:27 PM

Shipwreck is right.  If I just attached the nosewheels (either with fishing line or magnets, a screw, or whatever) then the model could easily shift from left to right if jarred, and that would put a lot of strain on the single attachment point.  

My plan will be to secure all three landing gear.  I plan to drill two very small holes just left and right of the gear centerline, then loop a clear piece of line over the gear axle and tie it off underneath.  If I do that to all three gear it should sit pretty securely.

Two more photos of today's progress.  First, I painted the tip of the tail assembly white, which was another part of the squadron markings for 1st Squadron of 9th Group.

image by robertholcomb73, on Flickr

You can also see where I have painted the fabric-and-dope covered control surfaces of the horizontal stabilizers.  Same for the rudder.  I did those in plain aluminum, vice the polished aluminum I used on the aircraft body.  I think the contrast is subtle, yet highlights the difference between the fabric surfaces and the aircraft skin.

I did the same on the ailerons on the wings.  I also touched up the trim tabs in polished aluminum afterwards, as they were metal vice the fabric:

image by robertholcomb73, on Flickr

Tomorrow is Monday so I go back to the old grind again.  More to follow next weekend.  My plans for then are to turn the aircraft over and paint the stainless steel panels along the exhaust path, then attach the bomb bay and gear doors.

I think I'll hit the whole thing with a coat of Future before I put the decals on, to give them a smooth surface to cling to.

cheers, Bob

  • Member since
    December 2006
  • From: Phoenix, AZ
Posted by Fly-n-hi on Sunday, June 1, 2014 4:55 PM

Would it be hard to drill out some openings in the wheels and insert some of those small but strong magnets?  Then you could put the other magnets in the base.  Those wheels should be big enough to do that.

  • Member since
    June 2013
Posted by bvallot on Sunday, June 1, 2014 4:52 PM

That's a good point actually.  When you do happen to start moving it around, I bet it'd be a good idea to have each gear secured especially if you've added weights somewhere along the way.  

On the bench:  

Tamiya F4U-1  Kenneth Walsh


  • Member since
    May 2006
  • From: Chapin, South Carolina
Posted by Shipwreck on Sunday, June 1, 2014 4:43 PM

Curt, it seems to me that if you just nail down the nose gear the tail will not sag but what will keep it from shifting left to right and twisting off that nose gear? I would suggest at least a two point mount; or, more is better.

On the Bench:

Revell 1/96 USS Constitution - rigging

Revell 1/48 B-1B Lancer Prep and research

Trumpeter 1/350 USS Hornet CV-8 Prep and research


  • Member since
    May 2003
  • From: Springfield, VA
Posted by crkrieser on Sunday, June 1, 2014 4:11 PM

Bob

Thanks for the info.  Sounds like the best approach for me in the future is to mount the nose wheels to the display board.  Easiest method, plus I won't run the high risk of stressing and breaking the landing gear under too much weight.

By the way, you have a great looking build there.  My compliments.

Curt

US Army, Retired

  • Member since
    August 2013
Posted by RCH73 on Sunday, June 1, 2014 7:10 AM

LOL...wish I had thought more about it before I got started!

Cheers, Bob

  • Member since
    June 2013
Posted by bvallot on Saturday, May 31, 2014 11:08 PM

aaaaaannnd of course I just read more of the above discussion...and consequently feel like an idiot.  Anyhow, it seems like you're on the right track.  =]

On the bench:  

Tamiya F4U-1  Kenneth Walsh


  • Member since
    June 2013
Posted by bvallot on Saturday, May 31, 2014 10:59 PM

God! this looks like a lot of pain.  Pain?  Sorry...I meant paint. A lot of paint. lol =]  Rob, I've been following along for a little while now and I'm excited about your build.  I would more than love to have one of these, but for now I'll still just live vicariously through you.

You mentioned the weight still being a problem.  Have you considered anchoring the front end down onto whatever you are placing it on... i.e. a base or tarmac of some sort.  you could place a rod secured into your base and glue it through a small hole in one of the tires of the front landing gear.  Just a thought.  There's definitely more than one way to fix something like that. =]

Looking forward to seeing more from you.

On the bench:  

Tamiya F4U-1  Kenneth Walsh


  • Member since
    August 2013
Posted by RCH73 on Saturday, May 31, 2014 7:42 PM

Thanks, and the best is yet to come.  

Curt, I did not measure precisely, but I have a half ounce fishing weight mashed flat and draped over each engine nacelle, plue five or six more mashed flat in the lower equipment bay.  That is not enough.  I also have one gun tub for the forward upper turret filled with a mixture of ball bearings and expoxy.  Still not enough.  I am going to tie the nose gear down to the base and give up on the weight.  I don't think I have enough volume left (that I can still reach) to add enough weight to level her out.  I'm reluctant to add more to the engine nacelles because I don't want to risk wing joint cracks, especially when I transport it across country.

If I was starting over I would use the bomb bay space, either by weighting the bombs, or filling in the space behind the closed doors. It takes a lot of weight.

Today I spent researching fonts and details on making my own decals.  I found two photographs of "Sweet Sue" online, that show mission markings on the fuselage of thirteen missions, three Purple Hearts and three Japanese fighters shot down.  Those markings were earned on the June 1945 mission where my friend earned his DFC.  I also got a font that looks like the font used to paint the crew names on the side, and what those names were.  So if I can make my own decals I can really make this his airplane.  

More to follow!

Cheers, Bob

  • Member since
    February 2011
  • From: St louis
Posted by Raualduke on Saturday, May 31, 2014 6:50 PM

Just a beautiful piece of work

JOIN OUR COMMUNITY!

Our community is FREE to join. To participate you must either login or register for an account.

SEARCH FORUMS
FREE NEWSLETTER
By signing up you may also receive reader surveys and occasional special offers. We do not sell, rent or trade our email lists. View our Privacy Policy.