SEARCH FINESCALE.COM

Enter keywords or a search phrase below:

Revell 1/32 Tornado ECR WIP

24416 views
93 replies
1 rating 2 rating 3 rating 4 rating 5 rating
  • Member since
    September 2013
Revell 1/32 Tornado ECR WIP
Posted by Dean30 on Sunday, March 23, 2014 1:06 PM

Well I have had this model for a few years and I thought I'd just go ahead and make it now, I was looking for after market details for the aircraft and found only IDS, GR1,GR4 etc... No ECR so I thought I'd just go straight from the box, I have always loved the look of this aircraft and I think considering the in box detail that it's not really necessary for any after market, and if the reviews are correct there shouldn't be any need for filler either but that's another issue, well I have run out but I do have Milliput, does anyone know if this can be used as a filler should I need any? Anyway here's some photos for now. 

Here's the detail supplied on basic parts which never usually get this moulded on.

Didn't realise the blur there sorry about that.

Here's the primed instrument panel, the detail looks pretty good, should be fun to paint!

  • Member since
    December 2002
  • From: Coldwater, Mich
Posted by MKelley on Sunday, March 23, 2014 1:50 PM

I built this kit a long time ago and it is pretty good in my opinion. I don't remember any issues with it. I actually got see one in the air about 15 years ago at an airshow. Relatively small and makes a lot of noice. Good luck and show some pictures of the build.

  • Member since
    September 2013
Posted by Dean30 on Sunday, March 23, 2014 2:41 PM

I remember them too, they were noisy considering the size lol. I have the cockpit pained with the base coat, photos will follow tomorrow when the camera has new batteries!

  • Member since
    December 2002
  • From: Northern California
Posted by jeaton01 on Sunday, March 23, 2014 7:48 PM

Milliput is the best filler of all.

John

To see build logs for my models:  http://goldeneramodel.com/mymodels/mymodels.html


  • Member since
    January 2014
  • From: Toronto
Posted by Rob S. on Sunday, March 23, 2014 9:07 PM

Yup, did a blue box Revell Tornado a year or so ago and I was very pleased with it as well. I like the Tiger meet paint jobs. They create awesome models. As matter of fact I just picked up a Tiger meet Mirage 2000. Not as spectacular as your Tornado, but, it's pretty cool. Geez, I bet, if it hasn't already been done, a GB for Tiger meet would be cool.

______________________________________________________________________________


On the Bench: Nothing on the go ATM

  • Member since
    September 2013
Posted by Dean30 on Monday, March 24, 2014 5:38 PM

That's a great idea Rob! Perhaps later in the year it's a good one, I don't think I've ever seen a Tiger Meet GB. However here are more photos of progress, along with realising I had painted an IDS instrument panel I have primed the ECR's instrument panel's instead. I hadn't noticed them until I looked at the HARM missiles, tip there lol, look for the HARM's and thats where the ECR parts are, otherwise you could build an IDS if you prefer!

  • Member since
    September 2013
Posted by Dean30 on Monday, March 24, 2014 5:46 PM

I tried to to post photos with my last post but none seemed to get through, and it seems none of them even ended up on my laptop, either way I'll post some tomorrow and it will be under natural light as the ones I took tonight weren't great anyway. 

  • Member since
    September 2013
Posted by Dean30 on Tuesday, March 25, 2014 7:08 AM

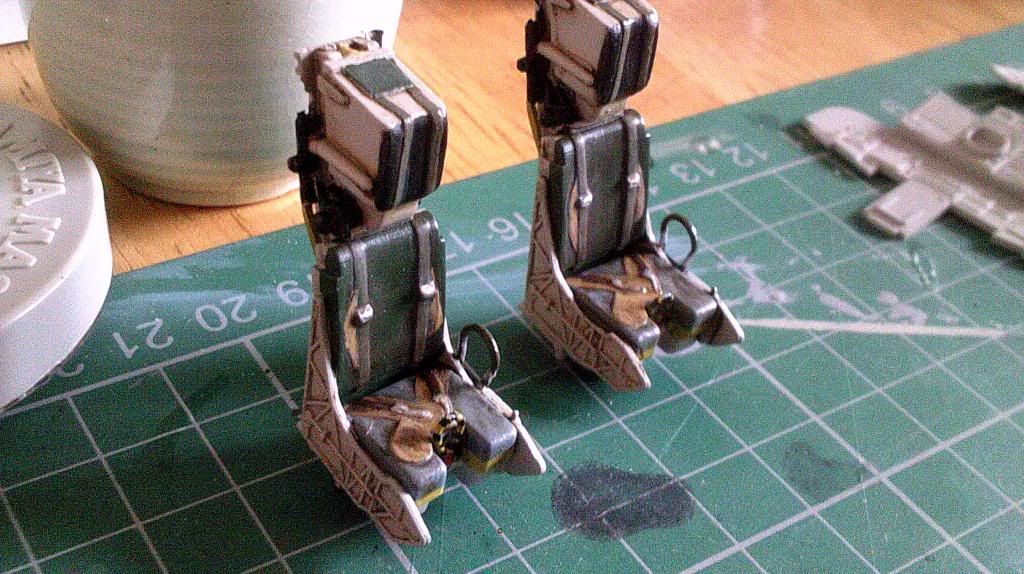
Okay here are some photos of the seats I will have to give them a black oil wash but I am happy with them so far, I am just going to build this OOB I wasn't going to, I was just going to add detail myself but where does it end lol? So for this particular build I'll be making if from the box.

  • Member since
    September 2013
Posted by Dean30 on Tuesday, March 25, 2014 7:13 AM

I was supposed to attach photos there, so here goes.

The panels on the left are IDS panels, the detail is superior but not what I need unfortunately, gutted the ECR detail is poor by comparison.

Here are a few photos of the nearly finished seats, another reason why I'm making this OOB is because the kit is so well detailed it doesn't need any adding really.

I'm not exactly happy with the effort I have put in on the seats I think they need more work, but so far so good. 

Dre
  • Member since
    June 2007
  • From: here, not over there
Posted by Dre on Tuesday, March 25, 2014 11:49 AM

Woohoo, a new project by Dean!   I'd have gone with the IDS panels as they're just a bit sharper in detail than the others, but that's just me.

I'll be watching this one.

  • Member since
    February 2014
Posted by T3chDad® on Tuesday, March 25, 2014 12:21 PM

Nice job so far Dean.


  On the bench: Between Builds...

  • Member since
    September 2013
Posted by Dean30 on Tuesday, March 25, 2014 3:29 PM

Cheers guys, well so far this is where I am at, 

The Raw Umber wash made a much better difference, I will have to let them dry now, clear up excess wash and matt them where necessary and use some pigments and they should look the part, I'm pleased with them considering they're kit supplied. 

Ohhh shaky hands there well I have masked the instrument panels and painted Humbrol Metalizer over them I will have to smooth the dry paint with micromesh and then apply the clear colours, I'll be using green and blue, also possibly smoke, then drench them with Klear before continuing with the rest of the panels, this is because with the subtle detail I have to mask all the parts and use a bright light to get any kind of accurate painting done, should work out! Also yeah Dre a plane that's not a Mig lol. I have always loved this aircraft well the IDS/GR4 but it's basically a hi-tech version of both so it's even better. 

  • Member since
    September 2013
Posted by Dean30 on Tuesday, March 25, 2014 3:34 PM

Forgot these pics. You can see how the metalizer goes so it'll take a quick clean up (he says lol) and should make a great looking computer screen.

So far so good I think. 

  • Member since
    September 2013
Posted by Dean30 on Wednesday, March 26, 2014 4:05 PM

Well here's the progress and it;s hit a bit of an annoying spot and I have to say I am basically stuck correcting/over correcting the paint as when I pulled the mask off the panel I found the paint decided to join the tape! Anyway onwards and upwards!

  • Member since
    September 2013
Posted by Dean30 on Wednesday, March 26, 2014 4:35 PM
  • Member since
    September 2013
Posted by Dean30 on Wednesday, March 26, 2014 4:36 PM

I cant post actual photos for some reason!!!!

  • Member since
    September 2013
Posted by Dean30 on Thursday, March 27, 2014 4:01 AM

Ok I think I can get the photos up now, let me know what you think so far guys, any corrections I could make?

First the disaster with painting the instrument panels.
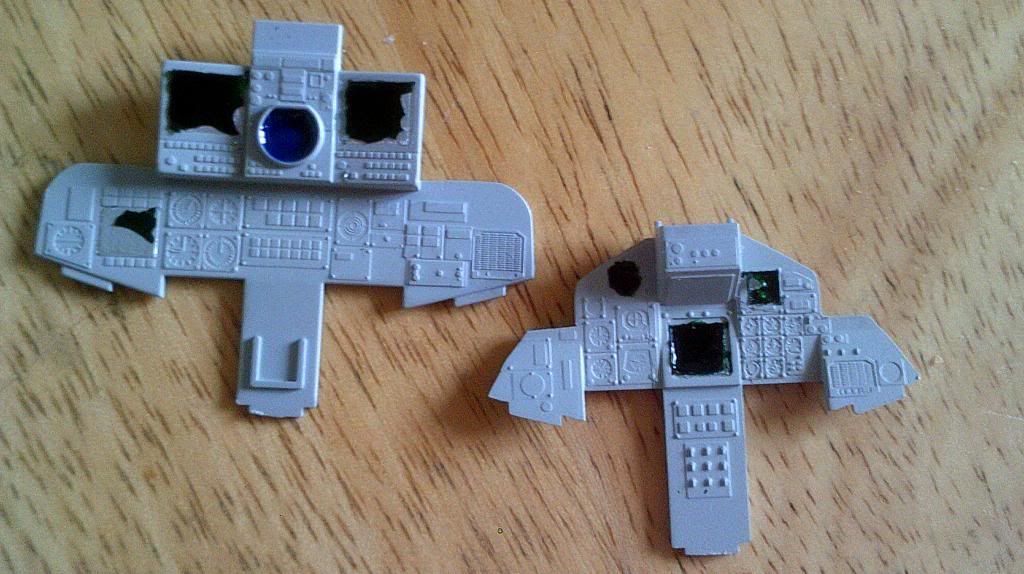
Now the fixed panels, the green is so dark now it looks black, I am not sure if I can fix this as I dont want to paint silver again and then re-do it again as it was literally a day of messing around as the clear colours take ages to dry, masking that took ages and then I basically screwed it up, 
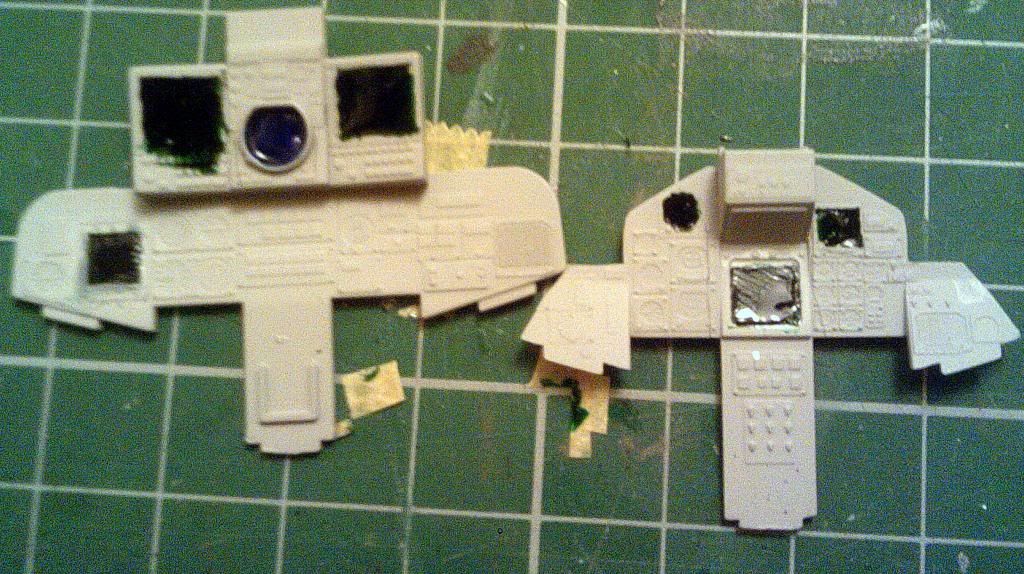
See awful, but below is what they look like now.
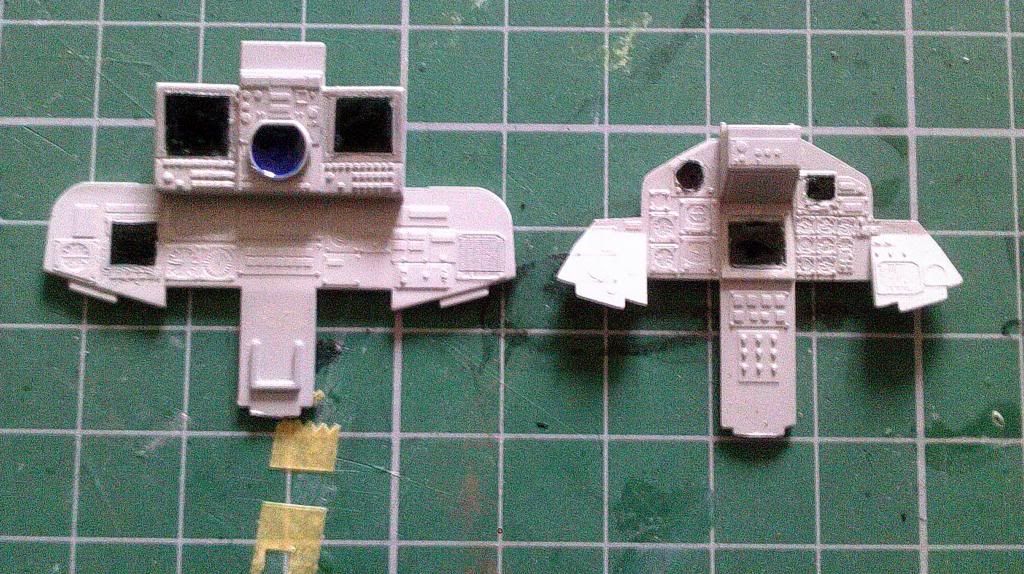
They're nowhere near finished and I am not satisfied with the edges of the screens so I will probably correct them again, I think I should be able to make them look good.

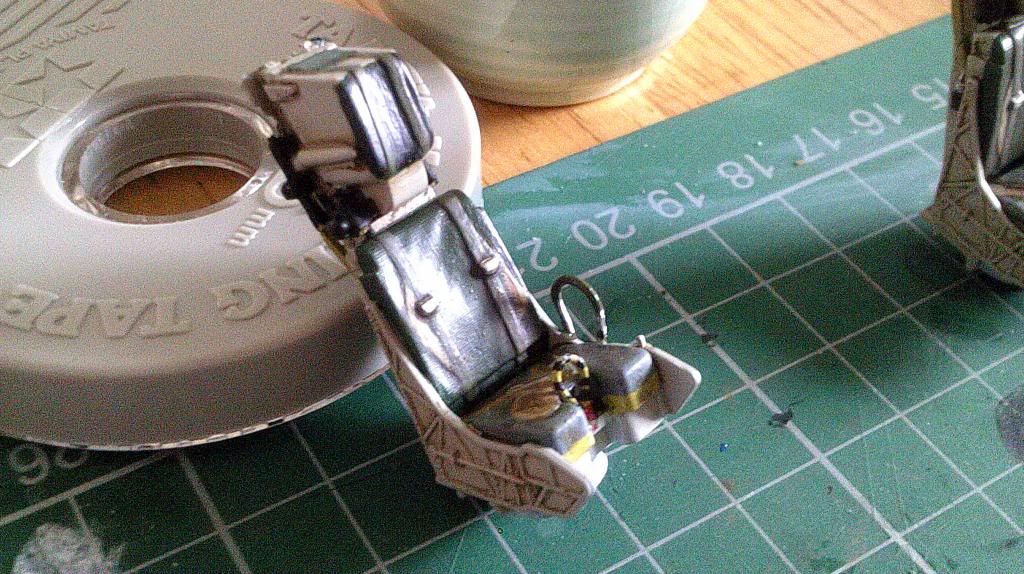
I have shown the seats before but this is them finished, I wanted to get the seats to look like leather backs under the harnesses and seats, I think to my eye it looks pretty good, I am very happy with how they turned out. 
  • Member since
    December 2002
  • From: Coldwater, Mich
Posted by MKelley on Thursday, March 27, 2014 5:28 AM

Looks pretty good so far. I feel your pain on the panels they can trying at times. Plus I need to learn how to spell noise (I was rereading the thread) Dunce. Guess all the spellling tests in school did not help!

Dre
  • Member since
    June 2007
  • From: here, not over there
Posted by Dre on Thursday, March 27, 2014 10:34 AM

Everything looks pretty good to me, Dean.   The IP's look OK, but I'm sure you'll take them up a notch or two before calling them finished.

And yeah, it's not a MiG but I wasn't going to say anything about that since the Tornado is a kick-ass aircraft.

On a side note..  I learned first-hand this morning that a mild hangover doesn't go too well with zero G flight maneuvers Ick!, but positive G's are OK....   what did I expect of a former F-16 pilot at the stick of a Cessna 182?

  • Member since
    September 2013
Posted by Dean30 on Thursday, March 27, 2014 5:47 PM

Lol, did you make a mess of the Cessna? I suppose when you're in an aircraft at zero G everything including the contents of your stomach are weightless, I nearly flew out the side of an RAF puma many years ago when the side doors were open and after going through the clouds the pilot decided to drop the helicopter and I had my seat belt really loose for comfort lol.

Anyway on with the build, what you are about to see is what happens when you screw up the instrument panels, you mask the detail for hours and then airbrush for about 20 seconds that's what. Yes I did just say mask panels, not just the panels, but the buttons, seriously that's what I did.

  • Member since
    September 2013
Posted by Dean30 on Thursday, March 27, 2014 5:52 PM

I took a photo of this so you guys would see I was serious, I actually masked buttons for hours and airbrushed them!

Here's what it looks like.

In the photo's I can now see the panels are not exactly neat, I swear I dunno why I do this to myself.......TAXI! 

  • Member since
    September 2013
Posted by Dean30 on Thursday, March 27, 2014 5:54 PM

Dre you can build the Tornado or MKelly, I'm outta here lol.

Dre
  • Member since
    June 2007
  • From: here, not over there
Posted by Dre on Friday, March 28, 2014 11:42 AM

Wha?   Surely you're not walking away from this one already?    

I can see why you'd want to mask the IP's- sprayed paint just looks cleaner than hand-brushed.   It would take far longer to use, but a masking fluid might be the trick for this job.   Goop it on, let dry and then trim with a new #11 blade point.   That should give you a greater degree of control over the angles and trim lines.  

Now, grab a pint, settle back and give it a rethink!

Dre
  • Member since
    June 2007
  • From: here, not over there
Posted by Dre on Friday, March 28, 2014 11:44 AM

BTW- no, I didn't mess the Cessna (thankfully).   I'm not at all scared of flying, but that particular sensation gives me PTSD-levels of stress.   Ugh, I just don't like that feeling.

  • Member since
    September 2013
Posted by Dean30 on Friday, March 28, 2014 5:29 PM

Ok I just typed half a paragraph and my computer is about to become a damn kit if it erases a post again. Ok I have painted the instrument panel and consoles, I'm not typing everything again, have a look and see what you think, the ECR has medium grey buttons and switches and a light grey cockpit, a very clean over all appearance.

The dials have been painted black, I will drybrush them to highlight detail, I have a good feeling about this one Dre!

I have to still tidy up the consoles but no big deal, I will use a wash to highlight and help add detail.

Here are the pieces placed together, they are beginning to look all right.

A long way to go before I'm happy with the pit, but getting there!

  • Member since
    September 2013
Posted by Dean30 on Friday, March 28, 2014 5:51 PM

Also I'm not gonna give up on this Dre lol, was being sarcastic lol.

  • Member since
    December 2006
  • From: Phoenix, AZ
Posted by Fly-n-hi on Friday, March 28, 2014 5:53 PM

Nice work so far!  Looks like a cool kit.

  • Member since
    September 2013
Posted by Dean30 on Friday, March 28, 2014 6:02 PM

It is Fly it's had great reviews and the supplied detail surpasses most, even the hydraulic lines are a moulded part, I love the tiger scheme and will do it strictly OOB and just do it to the best of my abilities, no added detail, no fuss!

Dre
  • Member since
    June 2007
  • From: here, not over there
Posted by Dre on Saturday, March 29, 2014 11:58 AM

Looking  better, Dean.   Nothing like painting an IP or two to make one squinty-eyed and nearsighted.

  • Member since
    September 2013
Posted by Dean30 on Saturday, March 29, 2014 4:29 PM

True lol, I've now given the IP a raw umber wash but I have more to do. I am using the wash to highlight detail I have missed and help me mask a few parts, I need to dry brush over the dials as well to bring out the detail.

The detail is pretty good when highlighted in this kit. 

JOIN OUR COMMUNITY!

Our community is FREE to join. To participate you must either login or register for an account.

SEARCH FORUMS
FREE NEWSLETTER
By signing up you may also receive reader surveys and occasional special offers. We do not sell, rent or trade our email lists. View our Privacy Policy.