SEARCH FINESCALE.COM

Enter keywords or a search phrase below:

Bf-109: Reich Defender GB The End

186082 views
1406 replies
1 rating 2 rating 3 rating 4 rating 5 rating
  • Member since
    October 2004
  • From: League City, Texas
Posted by sfcmac on Wednesday, December 10, 2008 11:18 PM
 Daywalker wrote:

Aaron- Actually, that is a re-boxed Hasegawa kit.  Here's a review of it on Testor's Scale Workshop:

Click here!

And, here's a review of the Hasegawa version:

and here!

Thanks Frank I kinda thought they couldn't have come up with a kit this nice on their own and it been such a secret.  I am hoping I can follow along with you and Guy and try to emulate (fancy word for steal) some of your ideas. I was looking at the foot pedals to drill out and said , " yeah, Right" Better get Frank over here. Tongue [:P]

  • Member since
    April 2005
Posted by Thunderbolt379 on Wednesday, December 10, 2008 11:20 PM

Aaron and Frank -- if that's the kit that TMMI rapturized over as "Hasegawa's sublime K-4" then it should build very nicely indeed! The review shots looked impressive, though I'm not crazy about the homogenous sludge-toned camo. Maybe it was the lighting conditions across a flat-coat, but I'd want more definition between the colors.

Cheers,

Mike

http://worldinminiature.blogspot.com/

  • Member since
    December 2004
  • From: Yokosuka, Japan
Posted by luftwaffle on Wednesday, December 10, 2008 11:36 PM
 soulcrusher wrote:

Found this nice chart in an old 70's boxing of the Fujimi 1/48 Me 109 G/K. Thought it might answer some questions that have been floating around here.

                                                                           SoulcrusherPirate [oX)]


There appear to some inaccuracies on that one.  "M" is identified as K model, but has G features, MG 151 bulges (G-6, G-14), radio access hatch in the "G" position, has a master compass access hatch (not present on K) and DF loop in wrong position.

A: Only correct for up to G-4.

B and D are off too.  G-4 and earlier had MG 81 (7.92) machine guns in the cowl, the G-5 and up were equipped the with the 13 mm.

L: The Erla "Galland" hood was used on the G-6 as well.

Kit instructions are notorious for inaccuracies, I've been burned by them several times.  Fool me once shame on you, fool me a bunch of times and sooner or later I'll catch on! Wink [;)]

aka Mike, The Mikester My Website

"He has all the virtues I dislike and none of the vices I admire."   -Winston Churchill

  • Member since
    October 2004
  • From: League City, Texas
Posted by sfcmac on Wednesday, December 10, 2008 11:59 PM

 Where ya been Luftwaffle!?!?!

For the record I concure with both Mikes.

 The nice part about knowing that this is also the Hasegawa kit is when looking for AM items if you choose. There was a Ref in the Hasegawa  review that mentions an inaccuracy in the canopy and the rear bulkhead, The reviewer dismissed them as boo bird minor flaws. From here I learned that there is a slight difference in the Erla hoods. Not certain how much maybe just the angle of the arch? I think there was mention of some G-10's being fitted to this newer hood but not sure how big a shape change that was or if it would matter in a smaller scale even. Not sure about the bulk head shape? Probably just concurrent with the Canopy shape change.

  • Member since
    December 2004
  • From: Yokosuka, Japan
Posted by luftwaffle on Thursday, December 11, 2008 12:16 AM
 sfcmac wrote:

 Where ya been Luftwaffle!?!?!

Hey Aaron, I'm in Japan (again).  Flying back tomorrow and hopefully will get started on my G-14/AS this weekend.  I've been following along with the builds with much interest, you know me and 109's! Cool [8D]

aka Mike, The Mikester My Website

"He has all the virtues I dislike and none of the vices I admire."   -Winston Churchill

  • Member since
    October 2004
  • From: League City, Texas
Posted by sfcmac on Thursday, December 11, 2008 12:33 AM
Heck Mike you weren't supposed to go with out me again!? I'm never gonna get to go to a real Japanese Hobby store! Did you bring me anything? ( It's what my kids always ask me.)Tongue [:P]
  • Member since
    February 2003
  • From: Niagara Falls NY
Posted by Butz on Thursday, December 11, 2008 12:45 AM
 TANGO 1 wrote:

Hello Chaps!!

I've not built a bandit before so I thought I'd start with this:

From what I hear its a decent kit and I'm looking forward to getting stuck into it, however its my first 109, so be gentle with me!

Auf Wiedersehen!Cool [8D]

 Aahhh totally not fair Tango, that's the same exact kit I picked too.. And yes, I am going to do her up in that scheme tooTongue [:P]

O Frank my Boy,

 I may have another 109 to add... However I am going to have to do a lot of research on this one..!! Heh heh

 I may throw the all resin one into this build as well... I want to say no but I will let you know sometime down the line k?

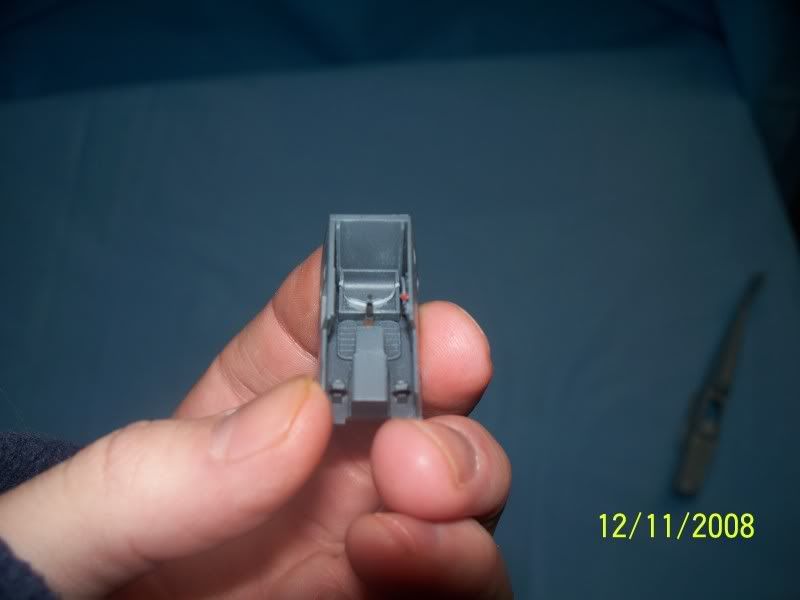
As for the G-10, this is what I have thus far...

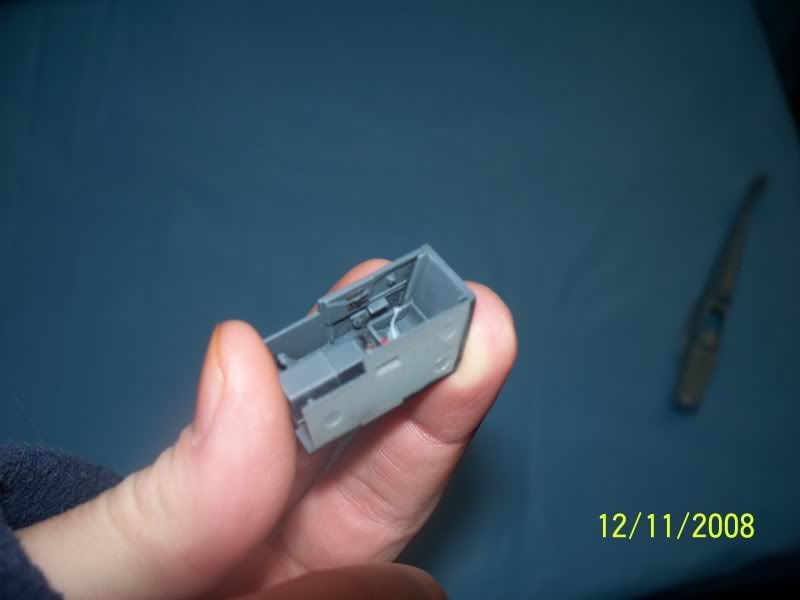
 This build will essentially be oob. Since this is my first 109 that I have done by Hasegawa, I wanna kind of take her easy.. LaughsPropeller [8-]

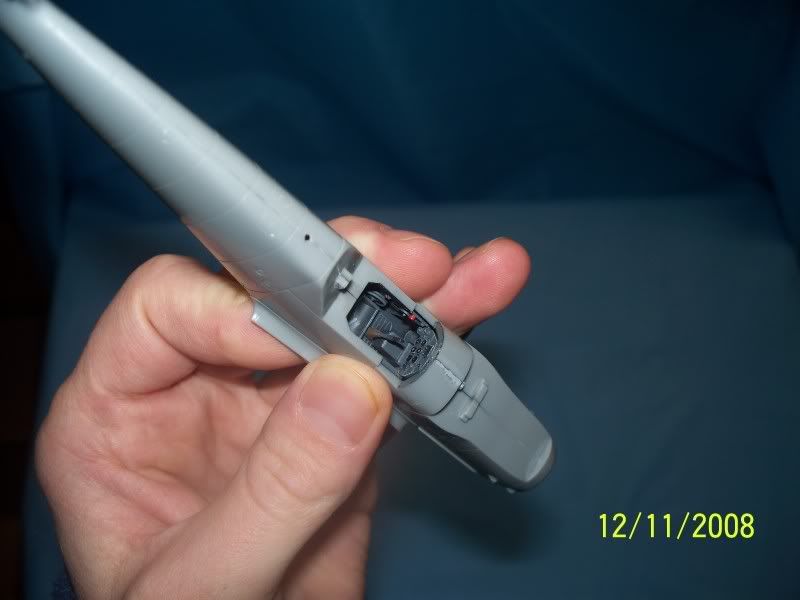
 This is probably one of a few builds where it will be a closed pit.. I love the over all detailing especially on the exterior but for what ever reason, Hase did not do justice on the office. I know the interiors were minimal but wow..

 Anywho, this is where I am at in the build..

Flaps up,

Mike

Rangers Lead The Way

  If you would listen to everybody about the inaccuracies, most of the kits on your shelf would not have been built Too Close For Guns, Switching To Finger

  • Member since
    October 2004
  • From: League City, Texas
Posted by sfcmac on Thursday, December 11, 2008 12:54 AM

Great progress Butz! Looks like you got the bug!

Frank and all I found a review that has excellent pics of the parts and such for my K-4. Short of no swaztika's thee kit is the same and sells for more than $20 less

http://www.largescaleplanes.com/reviews/Kits/WW2/Revell/Me109K4/Me109K4.html


  • Member since
    February 2003
  • From: Niagara Falls NY
Posted by Butz on Thursday, December 11, 2008 1:03 AM

Hey Aaron,

 Thank you very much for the compliments.. Yea the bug bit me and it's all Frank's fault too...

PM inbound

Flaps up,

Mike

Rangers Lead The Way

  If you would listen to everybody about the inaccuracies, most of the kits on your shelf would not have been built Too Close For Guns, Switching To Finger

  • Member since
    December 2004
  • From: Yokosuka, Japan
Posted by luftwaffle on Thursday, December 11, 2008 1:26 AM

Aaron- Only one hobby shop where I'm at and nothing that interested me.... Sigh [sigh]

When I'm up near Tokyo is where I do all the damage!

Mike- Would love to see that Hawkeye G-10 built up, you know you want to do something 1/72!  Looking good on your in progress.

aka Mike, The Mikester My Website

"He has all the virtues I dislike and none of the vices I admire."   -Winston Churchill

  • Member since
    September 2003
  • From: South Central Wisconsin
Posted by Daywalker on Thursday, December 11, 2008 7:21 AM
Great looking progress Butz!  Enjoyable lil' kit for sure.  I'd also love to see that 1/72 G-10 built, let me know if you want me to add it to your list. Wink [;)]

Frank 


  • Member since
    June 2004
  • From: Akron ohio
Posted by phoenix7187 on Thursday, December 11, 2008 11:05 AM
looks good butz, Nice work. I found out last night I need a new modem. my net connection is hit or miss. should have one in about 3 days. I'll post pic's when I get it fixed. I still have a dial up connection, but I don't like it.
Stan
  • Member since
    February 2007
  • From: Bournemouth UK
Posted by Luftwoller on Thursday, December 11, 2008 11:34 AM

Great work so far Butz, theres something theraputic about working in Braille scale. Im loving that resin one. Youve gotta do that sucker.

Im glad i was asleep when you sent that Clip, Aaron. Oh i Laughed, Ha    ha      ha       ha. Funny man, LOL. You seriously have too much time on your hands BTW and your still officially nutzo.

Still no sign of my replacement pit. Ive done everything i can think of so far that doesnt involve the sides being together. The wings are all together a filled. U/C is together. Rads are detailed and in. Tail wheel is painted. When the pit comes it should be fairly quick to get to paint. Whoopeee. LOL.

...Guy

..'Your an embarrassment to the human genus, makes me ashamed to call myself Homo'.
  • Member since
    October 2004
  • From: League City, Texas
Posted by sfcmac on Thursday, December 11, 2008 1:42 PM

 Guy that link you sent... that company is crazy nutzo with cool stuff. Has awesome 109 extras in 1/48 and 1/32. I hadn't checked 1/72. Just about anything you can think up.

 I just got a box. I am fixin to open it and see what 109 goodies are inside!

Hmmm so Lufwaffle I guess that means your not bringing me home that Hasegawa 1/350 Confused [%-)]Akagi then....

  • Member since
    October 2004
  • From: League City, Texas
Posted by sfcmac on Thursday, December 11, 2008 7:07 PM

 Hmmmm oddly quiet here. Almost too quiet...... So on the Me-109 G-6 would the yellow fuel line be present on the upper right side of the pit?

 Gosh you can hear a pin drop? Confused [%-)]

  • Member since
    October 2004
  • From: League City, Texas
Posted by sfcmac on Thursday, December 11, 2008 7:26 PM
 Ok then there is the seatbelt thing? I remember on Frank's G-10 build he had to make a quick fix on how the belts went thru or over the seat. For the life of me I can't recall which was correct or if this applies to a G-6. The kit and the resin part shows them up and over the back of the seat as oppossed to thru it. Oh geeze where is my aspirin?
  • Member since
    September 2003
  • From: South Central Wisconsin
Posted by Daywalker on Thursday, December 11, 2008 7:39 PM

Aaron- Yep, yellow fuel line on the upper right side panel on the G-6. Wink [;)]

For the seatbelt thing, I think you're remembering my E-3 in the BoB GB.  I accidentally put them over the back of the seat, when they should have passed through a slot near the top of the seat back.  On the G-6, they should go up the back, and onto the rear deck and attach to brakets.  Not the best photo, but you can see the brackets for the belts:


Frank 


  • Member since
    October 2004
  • From: League City, Texas
Posted by sfcmac on Thursday, December 11, 2008 7:49 PM
 Your right Frank too many Me-109 happy memories to keep track of and I used to be pretty good at that. That was the BOB! Thanks for the pic and the answer and the info! Just what I need!  If I ever say I can live with out ya! remind me of this moment! Blush [:I]
  • Member since
    October 2004
  • From: League City, Texas
Posted by sfcmac on Thursday, December 11, 2008 7:51 PM
 I forgot to ask about that wheel do dad thingie. Looks like an elevation ajustment wheel for an artillery piece.  That was in the G-6 wasn't it? Not in thePE or resin here but is molded in the side wall of the Otaki kit? I have to find my book I mislaid it.Confused [%-)]
  • Member since
    October 2004
  • From: League City, Texas
Posted by sfcmac on Thursday, December 11, 2008 7:53 PM

Ah found it! It should be there!


  • Member since
    October 2004
  • From: League City, Texas
Posted by sfcmac on Thursday, December 11, 2008 11:08 PM

 And it'a called a trim adjuster!  Looks mounted on the wall but wasn't it actually on the floor by the seat? Hmmmmm

Ok it is official I have broken sprue on the G-6 Time to stop belly aching and start a glueing or sanding or painting or all the above! Party [party]

  • Member since
    April 2005
Posted by Thunderbolt379 on Friday, December 12, 2008 7:14 AM

Here's some more research stuff -- the G-6 cockpit schematic I mentioned, and some profiles by Rikyu Watanabe, all from the Janes book:

Photobucket" border="0" />

Photobucket" border="0" />

Cheers,

Mike

http://worldinminiature.blogspot.com/

  • Member since
    February 2007
  • From: Bournemouth UK
Posted by Luftwoller on Friday, December 12, 2008 9:05 AM

Aaron, my lovely. Those wheels (There are 2), One is a trim wheel, to trim for level hands off flight and the other is an emergency U/C lowerer. I also believe they were made3 of wood too.

Whats this about a G-6? I thouight you were doing a K-4 in 1/32? Oh im seriously lost now.

Did i mention i hate computers. Ive had all afternnon off and ive only just managed to jerry rig this sucker into working.....and my pit hasnt arrived yet Booooo.

...Guy

..'Your an embarrassment to the human genus, makes me ashamed to call myself Homo'.
  • Member since
    February 2007
  • From: Bournemouth UK
Posted by Luftwoller on Friday, December 12, 2008 10:01 AM

Found another Cockpit pit of a K-4 Woo hoo.

...Guy

..'Your an embarrassment to the human genus, makes me ashamed to call myself Homo'.
  • Member since
    October 2004
  • From: League City, Texas
Posted by sfcmac on Friday, December 12, 2008 1:24 PM
 Luftwoller wrote:

Found another Cockpit pit of a K-4 Woo hoo.

...Guy

Hey do the G-6 versions have that bracing in the upper windshield corners?

  • Member since
    February 2007
  • From: Bournemouth UK
Posted by Luftwoller on Friday, December 12, 2008 1:29 PM

They most certainly do, Big boy. I personally reckon they are to help the pilot to get out of the plane in the event of a bail out. All other suggestions appreciated.

...Guy

..'Your an embarrassment to the human genus, makes me ashamed to call myself Homo'.
  • Member since
    October 2004
  • From: League City, Texas
Posted by sfcmac on Friday, December 12, 2008 1:29 PM

Cool Pics Thunderbolt ! I am keeping them all in a file. Printed some out while I work on the pit. Good references and color questions. I do like to know the name of the part and what it does for some odd reason.

 Is it just me or is Mike a very popular name here? Looks like we will have to rename the Build Mike -109 FRank!

  • Member since
    October 2004
  • From: League City, Texas
Posted by sfcmac on Friday, December 12, 2008 1:37 PM
 Luftwoller wrote:

They most certainly do, Big boy. I personally reckon they are to help the pilot to get out of the plane in the event of a bail out. All other suggestions appreciated.

...Guy

 Well my completely uneducated guess was the additional bracing was needed to help support and stabilize the entire hood due to the weight of the armor protection. Armored glass and what not. Or it could be close to what you suggesst as getting in and out that tight pit may put to much weight on an unsupported hood top.

That's my story and I'm sticking with it!. Dunce [D)]

  • Member since
    October 2004
  • From: League City, Texas
Posted by sfcmac on Friday, December 12, 2008 3:23 PM

 Well here I am all alone. Up to my basnizzle in PE. and glue. Guess I should post a pic as this is a slow process for me. Treading into unknown realms. I used PE before with armor but not quite so small. I mean why am I buckleing belts on foot pedals in 1/48 when yesterday I was chicken to drill out there holes in 1/32?

 Spent a lot of time making certain it would fit. Did not want to do all that work only to find it was a klinker! Wonder who I learned that and all these odd words from?

  • Member since
    December 2005
  • From: back seat of your car with duct tape streched out
Posted by soulcrusher on Friday, December 12, 2008 4:48 PM
 sfcmac wrote:

Cool Pics Thunderbolt ! I am keeping them all in a file. Printed some out while I work on the pit. Good references and color questions. I do like to know the name of the part and what it does for some odd reason.

 Is it just me or is Mike a very popular name here? Looks like we will have to rename the Build Mike -109 FRank!

Yes Aaron there are alot of us Mike's in the A/c forum. All the really "cool" guys are named Mike! Ha Ha!

                                                                           SoulcrusherPirate [oX)]


JOIN OUR COMMUNITY!

Our community is FREE to join. To participate you must either login or register for an account.

SEARCH FORUMS
FREE NEWSLETTER
By signing up you may also receive reader surveys and occasional special offers. We do not sell, rent or trade our email lists. View our Privacy Policy.