SEARCH FINESCALE.COM

Enter keywords or a search phrase below:

Bf-109: Reich Defender GB The End

186213 views
1406 replies
1 rating 2 rating 3 rating 4 rating 5 rating
  • Member since
    February 2003
  • From: Melbourne, Australia
Posted by darson on Monday, January 12, 2009 8:22 PM

 luftwaffle wrote:

Canopy, wheels: Hasegawa, Propeller blades, wheel bumps: Italeri, Rudder, horizontal stabs: FineMolds, Exhaust stacks, supercharger intake: Quickboost.

Wow congrats on Frankenschmitt Mike she turned out a real beaut, nice job Thumbs Up [tup]Thumbs Up [tup].

SC the camo is coming along really nicely there and I've got to admit that's one of the things that really appeals to me about German aircraft especially late war is the variety of weird looking paint schemes.

Frank nice work on the radiators, it's those little touches that make your builds come alive.

Progress on the RM is going well with the prop and hub painted and assembled, the wings assembled, landing gear painted and assembled and the cockpit complete except for the masking and painting of the glass armored plate behind the pilots head.

I'll try and take a few pics tonight before I close up the fuselage.

  • Member since
    November 2003
  • From: Naples, FL
Posted by tempestjohnny on Monday, January 12, 2009 8:25 PM

Frank good to see some progress.

Mike great work

SC that is a really cool camo job.  What color is up front?


  • Member since
    December 2003
  • From: Indiana
Posted by hkshooter on Monday, January 12, 2009 9:18 PM

Great work going on guys.

Frank, nice to see you whipping that kit into submission. Looking smooth so far.

Mike, mike, mike, mike. You da man. Another great looking build. As impressive as the finished plane is is the fact that you had all the stuff to make it like it should. Amazing finish.

Steve, oops, my bad. Why did I think those were 72nd? Getting old I guess. Nice builds, all! How about a shot of all of them on the shelf at the same time?

  • Member since
    December 2005
  • From: back seat of your car with duct tape streched out
Posted by soulcrusher on Monday, January 12, 2009 9:47 PM

Thanks Darren thats why I picked it. If I had know how much work t would have been I might not have. I had to make all of the masks for the field paint overs of the plane numbers and squadron markings very tediuos. The Acadamy kit is no shinning star but I hope the cool camo will draw attention away from the kits short comings.

John the color on the nose and tail mottleing is RLM 83 Lichtgrun. It is usally only seen as an extra color on the mottleing on the side of the fuselage camo. I do not know how it ended up on the nose of this bird but it looks pretty cool. Like Mike said this bird took place in operation Bodenplate. The luftwaffe scrapped up what ever they had and threw them in the air resulting alot of weird markings.

                                                                                      SoulcrusherPirate [oX)]


  • Member since
    September 2003
  • From: South Central Wisconsin
Posted by Daywalker on Monday, January 12, 2009 10:51 PM

Thanks fellas.  Glad you like!  Modeling with the talent we have here is quite a thrill, great bunch of lads to be sure! Approve [^]

Thanks SC, I appreciate that.  I wouldn't miss a chance to build 109's with you guys, the best modelers I have had the pleasure or building with.  Thank goodness you guys are building like you are, if we were waiting for me to finish everyone would have left by now! Shock [:O]


Frank 


  • Member since
    February 2003
  • From: Niagara Falls NY
Posted by Butz on Tuesday, January 13, 2009 12:04 AM

Hey Mike,

 Your build is right on my man..!! Wow she looks great!! I like the over all apprearance and the setting makes it all the more stand out..

Hey SC,

 Your attention to the paint scheme is turning out just fine.. I too at times get a lil frustrated with the abing but as you mention I soldier one..

 Looking forward to seeing her finished..

Wuz up Frank,

 I really like your progress thus far!!.. Ggeeez I thought my Hasegawa build would be a lil easier..

 The fit is ok but the fit of the radiators for the wings are reversed to what the destructions say..

 Had to do a little test fitting and realized the the radiators were set in the wrong direction in terms on how they were shaped!!

 I just flipped them around and tada... My wings fit rather nicley..

Again I am really enjoying your progress just like I am with the rest of the fella's builds!!

Flaps up,

Mike

Rangers Lead The Way

  If you would listen to everybody about the inaccuracies, most of the kits on your shelf would not have been built Too Close For Guns, Switching To Finger

  • Member since
    February 2003
  • From: Niagara Falls NY
Posted by Butz on Tuesday, January 13, 2009 12:16 AM

Howdy all,

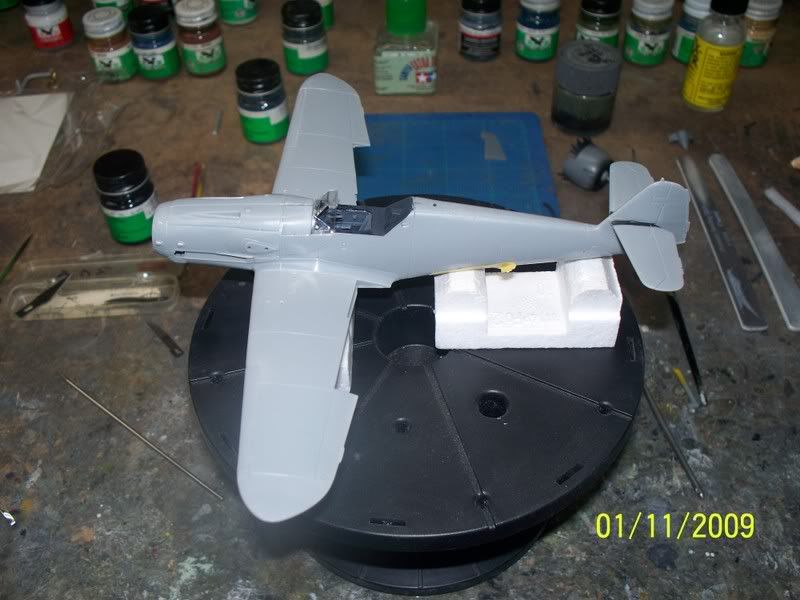
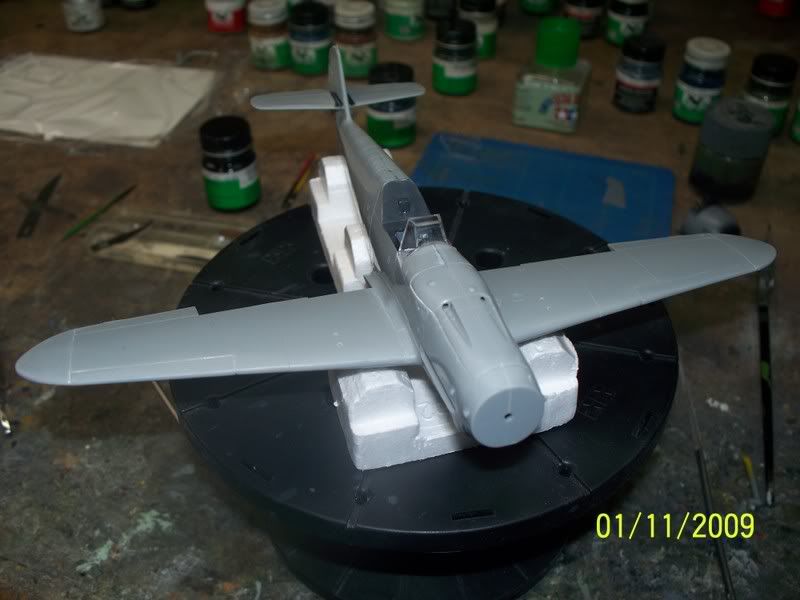
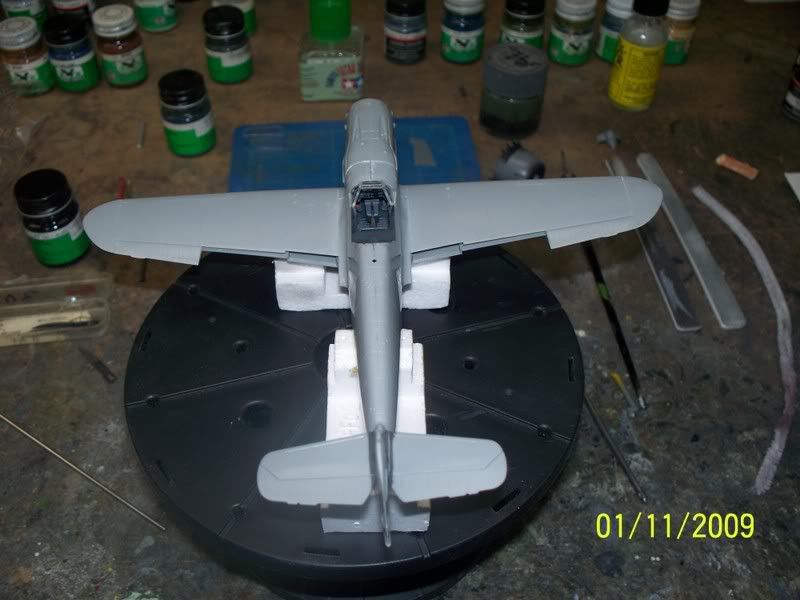
 Just like Frank, I too am a lil bit slow at this build.. So far I have the fuselage buttoned up and the main wings as well as the stablizers in place..

 Had a lil set back with the radiators as I explained to Frank in my previous posting.. Never knew directions could be wrong...Laugh [(-D]Tongue [:P] I was smarter than them and after about 15 minutes of test fitting, I figured out that they were reversed!! Lol....

 Anywho, I have to go over the seams, attach the air scoop, the antenna's, attach the main canopy since it's going to be a closed pit and hopefully I'll be able to start thrown paint on her..

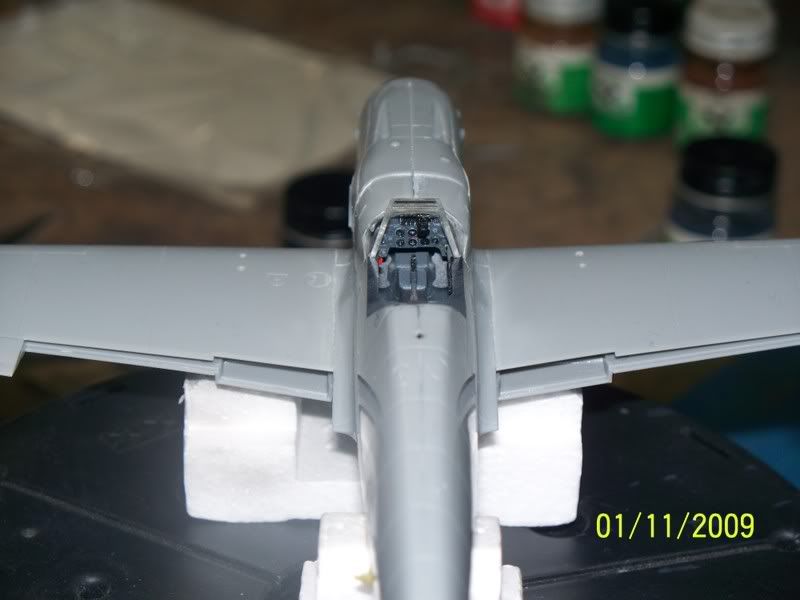
 One thing I noticed when I attached the upper cowling, the panel lines seem a lil wider in certain sections.. I may use some Liquid fill to close up the seam to make it closer to what the rest of the cowling is like! What do you fella's think?

 Included are a few pix.. Thank you for looking and as always, comments welcomed!!


Flaps up,

Mike

Rangers Lea The Way

  If you would listen to everybody about the inaccuracies, most of the kits on your shelf would not have been built Too Close For Guns, Switching To Finger

  • Member since
    February 2007
  • From: Bournemouth UK
Posted by Luftwoller on Tuesday, January 13, 2009 4:50 AM

Very nice Mike, I love them when they are at that stage. All ready to be painted, mmmmm, yummy. Great shot from the rear looking into the pit.

...Guy

..'Your an embarrassment to the human genus, makes me ashamed to call myself Homo'.
  • Member since
    November 2006
  • From: Coastal Maine
Posted by dupes on Tuesday, January 13, 2009 10:31 AM

Man, 7 weeks and you guys have been cranking out some SERIOUS builds! WOW! Shock [:O]

I'm hoping I can find some time to squeeze something in for this one...I have the Monogram 1/48 beast, my question was going to be "what kind of G" is this, but I think it's been answered from the front page - a G10? Have some nice AM decals for a -6, was hoping it might be that. Think anyone would notice? Knowing you guys, probably. Wink [;)]

Also have a Hasegawa G10 I could bang out if necessary.

Once again...WOW! Bow [bow]

  • Member since
    November 2003
  • From: Naples, FL
Posted by tempestjohnny on Tuesday, January 13, 2009 11:37 AM

OK a little more progress. Have the yellow and white sprayed and just finished the RLM 76 bottom. Comment critiques please.


  • Member since
    February 2003
  • From: Niagara Falls NY
Posted by Butz on Tuesday, January 13, 2009 12:25 PM

Hey John,

 Really like how the underside has that worn look!! The panle lines are just right!! Looking forward to seeing her done.

Flaps up,

Mike

Rangers Lead The Way

  If you would listen to everybody about the inaccuracies, most of the kits on your shelf would not have been built Too Close For Guns, Switching To Finger

  • Member since
    December 2004
  • From: Yokosuka, Japan
Posted by luftwaffle on Tuesday, January 13, 2009 1:19 PM

John- Great work, really like the pre-shading.

Mike- The refined cowl didn't really fit that well in many cases, so a perfect fit would be the exception.  By late in the war much of the assembly was being done by forced labor so the quality wasn't nearly as high on these aircraft.

aka Mike, The Mikester My Website

"He has all the virtues I dislike and none of the vices I admire."   -Winston Churchill

  • Member since
    July 2003
  • From: Bicester, England
Posted by KJ200 on Tuesday, January 13, 2009 1:33 PM

Mike, stunning job on the little 109.

Sounds like the spares box is a little emptier!

SC, cool looking camo.  You have to love late war Luftwaffe camo!

Karl

Currently on the bench: AZ Models 1/72 Mig 17PF

  • Member since
    November 2003
  • From: Naples, FL
Posted by tempestjohnny on Tuesday, January 13, 2009 2:21 PM
Thanks Mike and Mike.  I'm really beginning to like this pre-shading stuff.  Takes the single colors and makes them stand out.


  • Member since
    July 2003
  • From: waynesboro va, via Ireland
Posted by sidure on Tuesday, January 13, 2009 3:43 PM

Very nce progress John, really like the pre shading it turned out well

Steve

  • Member since
    April 2005
Posted by Thunderbolt379 on Tuesday, January 13, 2009 6:27 PM

Hi all,

Great work going on here, I'm ashamed to say I've still not found a shipping source for those paints I need to get on with the K-4. My HS is due to restock in a few weeks, I could cool my heels till them and work on other projects (like I don't have enough on my bench...)

I dug into my stash and pulled out Promodeller's 1997 G-10 in 1:72 and it's a very sweet lil kit! Recessed panel lines, good quality decals (if a tad shiny) for two planes Jan 1945, one in Hungary, one in Norway. There are only 38 parts! Red legs, they must have been high altitude interceptors.

But the paint scheme is RLM 74/75/76... WAAAHHHH!!! So the same thing applies to this as to the K-4, even that Hasegawa 1:32 Fw 190 A-8 I took down from the stash and ogled the other day (not that it's appropriate for this build...)

That's where I am, guys -- still eager to build but nothing to paint with at this point.

Cheers,

Mike

http://worldinminiature.blogspot.com/

  • Member since
    December 2004
  • From: Yokosuka, Japan
Posted by luftwaffle on Tuesday, January 13, 2009 8:34 PM
 Thunderbolt379 wrote:

I dug into my stash and pulled out Promodeller's 1997 G-10 in 1:72 and it's a very sweet lil kit! Recessed panel lines, good quality decals (if a tad shiny) for two planes Jan 1945, one in Hungary, one in Norway. There are only 38 parts! Red legs, they must have been high altitude interceptors.

Mike,

That kit is a good base to start with but takes some work to make into an accurate 109.  See my posts on the one that I converted to a G-14/AS and good luck!

Also be careful of red legs...there are only a handful of photographs that actually document 109's with red legs.  Most C-3 fueled 109's had RLM 02 landing gear.

aka Mike, The Mikester My Website

"He has all the virtues I dislike and none of the vices I admire."   -Winston Churchill

  • Member since
    December 2005
  • From: back seat of your car with duct tape streched out
Posted by soulcrusher on Tuesday, January 13, 2009 9:53 PM

Layed down my second coat of Future tonight. Hopefully tomorrow night I will be posting pics of decals being applied. I hope the decals pull the whole thing together and make it look as interesting as it does in the color profile.

                                                                                      SoulcrusherPirate [oX)]


  • Member since
    September 2003
  • From: South Central Wisconsin
Posted by Daywalker on Tuesday, January 13, 2009 10:33 PM

Mike (Butz)- Looks like you're sailing through your build as well!  For the panel lines on the cowl, if you are referring to the one between the top insert and the fuselage sides, the line there is almost invisible.  Here's a photo I found at the 109 Lair:

Hope that helps! Big Smile [:D]

Marc- Yep, the fellas here would notice! Smile,Wink, & Grin [swg]  Of course, you could possibly change around the camo or modify the markings, and no one would know! Whistling [:-^]

John- Oh yeah baby!  I'm lovin that one!  You extra work on the paint really paid off, looks very nice from here! Tongue [:P]

Mike (Tbolt379)- Bummer about the paint!  Don't worry about falling behind, you'll still finish before I do!

SC- See?  You're doin g quite well too.  Can't wait to see those markings, should go very well with your camo job. Thumbs Up [tup]

Frank 


  • Member since
    April 2005
Posted by Thunderbolt379 on Tuesday, January 13, 2009 10:40 PM

Hi Lufty --

I shall review those posts most carefully, thanks for the heads-up! The parts are distressingly tiny in the box (or my eyesight is getting worse!), I'm not sure how much modification I'd be able to do on such a small subject! The plans of this edition cited the 109 at Planes of Fame Museum are the main reference source, plus Detail & Scale photos, so I'd be guessing it's not too bad a starting point. if I can get am AM or two, that'd be great. Quickboost make 1:72 but I've not found anybody carrying that part of the range yet...

Cheers,


Mike

http://worldinminiature.blogspot.com/

  • Member since
    April 2005
  • From: Piscataway, NJ!
Posted by wing_nut on Wednesday, January 14, 2009 8:53 AM
WOW there is some awesome stuff coming out of this GB. And there is still 4 months ot go.

Marc  

  • Member since
    February 2003
  • From: Niagara Falls NY
Posted by Butz on Wednesday, January 14, 2009 1:01 PM

Hey Mike,

 I will definitely take that into consideration my friend!! Thank you for your assistance!! Hopefully the cowling turns out to my liking however, fit to what you described without looking to out of scale.. Thank you againWink [;)]

Howdy Frank,

 Interesting indeed!! In this pix, the upper cowl looks to be part of the whole cowling itself correct at least in this photo? I can totally see how smooth it is as well which is interesting..

 Between you & Mike, you have me craving to do more reseach on this..Thumbs Up [tup]

  Below is a closer view of the cowling.. When I glued it in place using TenX, I was actually squeezing in the sides of the fuselage a bit for a more snug fit..

 Thank you again Frank & Mike for your input, very much appreciated!!

Flaps up,

Mike

Rangers Lead The Way

  If you would listen to everybody about the inaccuracies, most of the kits on your shelf would not have been built Too Close For Guns, Switching To Finger

  • Member since
    April 2005
  • From: Piscataway, NJ!
Posted by wing_nut on Wednesday, January 14, 2009 5:13 PM

Since I had this guy withthe wheels up I played around with the photos.  What do you think?

Marc  

  • Member since
    December 2002
  • From: Reno, NV
Posted by espins1 on Wednesday, January 14, 2009 5:25 PM
Hey Marc, those black and white photos are pretty cool!!!  Cool [8D] Thumbs Up [tup] Thumbs Up [tup]

Scott Espin - IPMS Reno High Rollers  Geeked My Reviews 

  • Member since
    December 2005
  • From: back seat of your car with duct tape streched out
Posted by soulcrusher on Wednesday, January 14, 2009 9:53 PM

Nice photograpy work there wingnut. I like the second photo better. Make it grainier and it could pass for something shot out of another plane during WWII.

I got my decals down tonight. The usual crappy out of register decals from Academy. Going to shoot it with some dullcoat tomorrow and then deal with all of the fiddly bits. I'm already thinking of building another on for this GB since the Academy kit is really not that spectacular and thier is still alot of time left. I will have to see how much trouble Frank's Knights of the Skies GB gives me as I am not that good at stacking wings.

                                                                                            SoulcrusherPirate [oX)]


  • Member since
    December 2005
  • From: back seat of your car with duct tape streched out
Posted by soulcrusher on Thursday, January 15, 2009 9:22 PM

Wow this thread has slowed down a bit. So I thought I would post the little bit of work I have done in the past two days. Decals are on and under a flat coat. Tommorow all of the fiddle bits hopefully will find thier respective places and behave nicely for me. Here is a pic so far. Still have a bit to go as you can see.

                                                                               SoulcrusherPirate [oX)]


  • Member since
    September 2003
  • From: South Central Wisconsin
Posted by Daywalker on Thursday, January 15, 2009 10:51 PM

Glad to help Butz!  Hope you guys don't mind me using handles, so many Mikes around here! Shock [:O]

Marc- I like those photos too!  Especially the second one, looks like a period photo. Thumbs Up [tup]

SC- Those decals look very good, tying in all of those cool colors.  I'm really liking your build! Approve [^]

Frank 


  • Member since
    July 2003
  • From: waynesboro va, via Ireland
Posted by sidure on Thursday, January 15, 2009 11:50 PM

Wing nut, very cool bleck and white photos, I like them a lot.

SC, nice progress on the painting and hoping to see this one finished soon.

Steve

  • Member since
    February 2007
  • From: Bournemouth UK
Posted by Luftwoller on Friday, January 16, 2009 4:38 AM

Nice B+W's Marc, thats something ive fancied trying. I like the way you got the prop to blur as well. Cool. Now i have photoshop (Ask Sfcmac Evil [}:)]) ill give it a try.

SC, looking stupendous, my friend. Are you going to weather the bird? If so, do you do it over a flat coat?

...Guy

..'Your an embarrassment to the human genus, makes me ashamed to call myself Homo'.
  • Member since
    December 2005
  • From: back seat of your car with duct tape streched out
Posted by soulcrusher on Friday, January 16, 2009 7:45 PM

I am stuck on that very point Guy. This plane was obvoiusly reasigned at one point fom the painted out numbers and emblems on the nose. So it is an plane that has probally been in service awhile and should have some weathering I have no real photos of the plane to go buy only the color guide that came with the kit. I think. I just have to be carefull with the washes because the panel lines on this kit are not that great so I think I will apply the washes carefully so I do not accent some areas that are not up to par. I am going to apply another coat of Future before adding the wash. I have heard some models say they apply it over flat finishes with no problems but I think I will stick to applying it over a gloss coat.

                                                                                 SoulcrusherPirate [oX)]


JOIN OUR COMMUNITY!

Our community is FREE to join. To participate you must either login or register for an account.

SEARCH FORUMS
FREE NEWSLETTER
By signing up you may also receive reader surveys and occasional special offers. We do not sell, rent or trade our email lists. View our Privacy Policy.