Brian: Thanks for the link! That's just the paint I've heard so much about.. I will most ceratinly try to give them a try!!
Alex: The M12 is indeed a nice looking vehicle. One of my favorite US vehicles for sure!! And I'm still waiting for a closeup of that camera ![Big Smile [:D]](/emoticons/icon_smile_big.gif)
Well, here's my very first update! WOHOOO!! ![Party [party]](/emoticons/icon_smile_party.gif)
I spent two hours modelling outdoors. It was purely gorgeous!! First time I ever did that.
The kit is a multi-kit kit. Including a figure that comes in 17(!!!!!) parts. Quite alot, considering the two other figures are in 4 parts each.. It further includes a radio and a tent, and a Kübelwagen, with the worst winter road tyres you can ever imagine...

It's a rather new kit, moulded in 1997, decals printed in 1999 and box printed in 2005. It's a typcal Tamiya kit, being very well moulded, lots of details and not too many parts. Erwin Eugene Johannes Rommel is a little special, consisting of 17 parts. The two other figures are more typical Tamiya figure, 4 parts. It's actually way too little to satisfy me, but will work just fine!
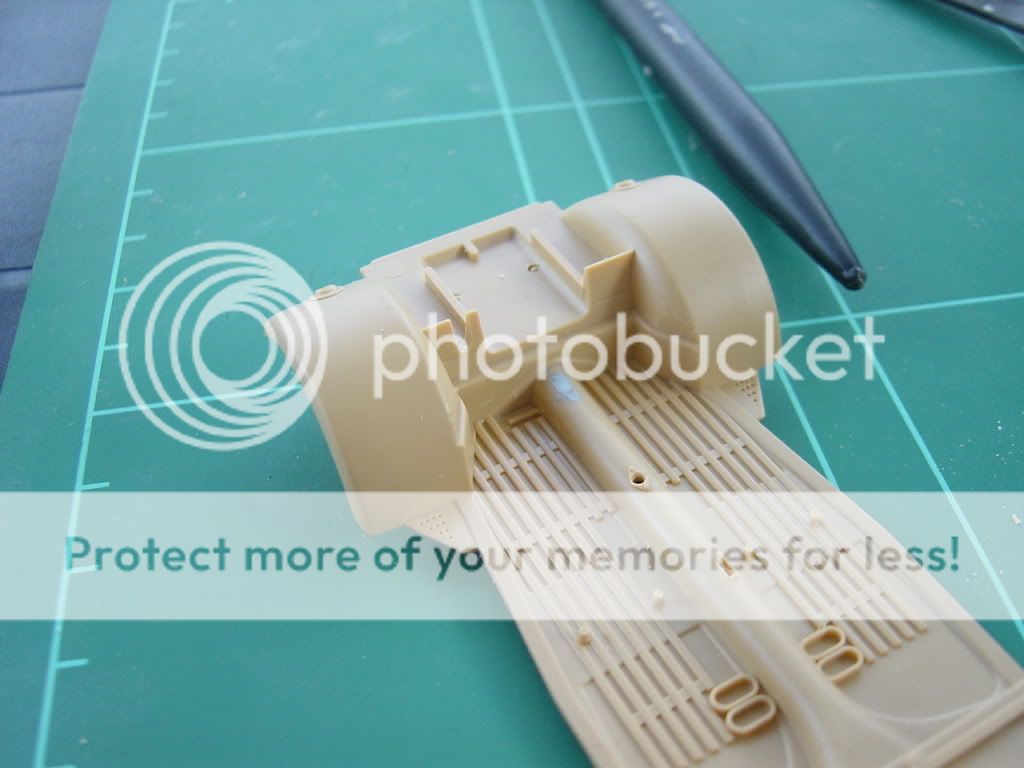
First part was the chassis, or undercarriage, and I cleaned it (Some mouldline going along the edge) and inspected it. Found one ejector pinmark (A circular mark) that I guess will be noticable once completed. I filled and smoothed it as greatly as I could. The filler (putty) is the grey spot:

Here's three parts attached to the underside...

I'll explain. The front axle, and the rearaxle (plus gearbox) and a little cover that goes along the middle of the boyd and cover both axels, are all one part each:

And one very happy outdoor modeler. Photo taken of my dad, who is building a PAK 36 beside me:

I attached the steerwingwheel rod, pedals, hanbreak and similar.. Also the detailed engine walls. No engine is provided, however. I believe it is detailed because of the Kübelwagen Engine Set that is sold seperatley that you can buy from the same producer; Tamiya.
The Steeringwheel rod was a little bad. Or, I made it bad. When I was scraping the mouldlines away and removing some STUPIDLY placed ejector pinmark, I made some dents here and there on it. I smeared it with Putty, and sanded it nice and smooth again....

Here you got the sidepanels. Each sidepanel consists of two parts. The top panel is cleaned and assembled, bottom panel is neither:

Here you can see the bonnet, that already was assembled as shown in the other post, the rear panel and the two sidepanels. Those will make the frame of the kübelwagen Typ 82. The parts are all cleaned and ready to be assembled:

After quite some fiddling about with mounting one and one part onto the chassis, I discovered it was just as good and even easier to assemble them seperately.. So here you got the frame:

And the mounting went painlessly:

It's really awsome now, eh? I can't believe how great and awsome this kit is. I will most ceratinly make more of these!!
I did encounter some lining up errors, but just very, very, very minor ones. It's probably because I drytouch everything before I even touch the glue! ![Smile [:)]](/emoticons/icon_smile.gif)
Questions and comments are very appriciated!
Enjoy!
-Lasse