SEARCH FINESCALE.COM

Enter keywords or a search phrase below:

ME-262: Reich Defender II 10/09-7/10

392673 views
1854 replies
1 rating 2 rating 3 rating 4 rating 5 rating
  • Member since
    March 2006
Posted by simpilot34 on Wednesday, June 15, 2011 8:58 AM

Thanks so much guys!!!!! Still can't believe it lol!! Big cheers to all!!!!Toast

Cheers, Lt. Cmdr. Richie "To be prepared for war, is one of the most effectual means of preserving the peace."-George Washington
  • Member since
    March 2009
  • From: Wirral. UK
Posted by Spike190 on Tuesday, June 14, 2011 2:12 PM

Balloons, well done Richie, very well deserved Yes

Cheers...

Mike  Toast


  • Member since
    April 2005
Posted by Thunderbolt379 on Tuesday, June 14, 2011 8:22 AM

Echoed bigtime -- well done!

M/TB379

http://worldinminiature.blogspot.com/

  • Member since
    February 2003
  • From: Rothesay, NB Canada
Posted by VanceCrozier on Tuesday, June 14, 2011 7:00 AM

"Local Member Makes Good!"  Congrats simpilot, a deserving entry.

On the bench: Airfix 1/72 Wildcat; Airfix 1/72 Vampire T11; Airfix 1/72 Fouga Magister

  • Member since
    December 2002
  • From: Bury St Edmunds, Suffolk, England
Posted by Bish on Tuesday, June 14, 2011 5:43 AM

Yep, a big well done. And its great so how much can be done with small scale kits. Yes

I am a Norfolk man and i glory in being so


On the bench: Airfix 1/72nd Harrier GR.3/Fujimi 1/72nd Ju 87D-3

  • Member since
    July 2008
  • From: USA California
Posted by vetteman42 on Monday, June 13, 2011 11:42 PM

Simpilot I remember your lil 1/72 build, still dont know how you did that in 1/72 scale, sure is a nice 262 man. Your motteling in that scale blew me away. And IMHO it is very deserving of an award.

 CONGRADULATIONS to you sir

Randy So many to build.......So little time

  • Member since
    March 2006
Posted by simpilot34 on Monday, June 13, 2011 10:23 PM

Well i have had a great weekend and entered my lil 1/72 bird I completed for this build in the model expo here in Oz and came up with a Third place in OOB small jet or rocket propelled!!!! I am so stoked!!! First ever award!!!! Thought I would post this news here since this GB was why I built it in the first place. Toast


Cheers, Lt. Cmdr. Richie "To be prepared for war, is one of the most effectual means of preserving the peace."-George Washington
  • Member since
    July 2003
  • From: Bicester, England
Posted by KJ200 on Monday, October 4, 2010 3:49 PM

Thanks Dave.

Applied the oil wash over the weekend, however hit a few snags as a result, as one of the ailerons simply snapped in half, along with one of the hings on the wings.

No doubt a casualty of the oil wash treatment, but nothing that can't be fixed.

I did take some pics of the build before I applied the wash, but managed to freak the camera out, and ended re-setting the memory card.

Karl

Currently on the bench: AZ Models 1/72 Mig 17PF

  • Member since
    September 2004
  • From: Vernon, BC, Canada
Posted by razordws on Saturday, September 25, 2010 11:16 AM

Karl, as usual that is some beautiful work on that bird. Bow Down

Dave

  • Member since
    July 2003
  • From: Bicester, England
Posted by KJ200 on Friday, September 24, 2010 2:25 PM

Thanks for the comments guys.

Frank, know what you mean about the Trumpy oleos looking a tad long, but it's too late now.

Dupes, I use Gator glue for attaching PE, as unlike CA you get some wiggle time, and if you get it wrong, you can just wipe it off with a damp Q tip.

Unlike CA it is much more resistant to knocks and general handling, retaining a little flex, while still adhering very well.

Not a lot of progress this week on the big 262, but should get a fair bit done over the weekend.

Karl

Currently on the bench: AZ Models 1/72 Mig 17PF

  • Member since
    November 2006
  • From: Coastal Maine
Posted by dupes on Wednesday, September 22, 2010 3:54 PM

KJ200


http://img.photobucket.com/albums/v351/KT200/DSCF2535.jpg


Wow...that's some sweet looking build!

Hey, talk to me about Gator Glue - I picked some up after being told it's useful to use with PE stuff...however, it seems more like Elmer's to me. Am I just using it wrong? What do you use it for?


  • Member since
    October 2007
  • From: Rhode Island
Posted by jmabx on Tuesday, September 21, 2010 8:29 PM

Paint work and landing gear look great Karl! Yes

Jeremy    Propeller


  • Member since
    March 2006
Posted by simpilot34 on Tuesday, September 21, 2010 8:08 PM

Beautiful work Karl!!! Loving that paintwork!!!Toast Looking forward to seeing paint on her feet as well!!!

Cheers, Lt. Cmdr. Richie "To be prepared for war, is one of the most effectual means of preserving the peace."-George Washington
  • Member since
    March 2009
  • From: Wirral. UK
Posted by Spike190 on Tuesday, September 21, 2010 3:32 PM

Karl that looks beautiful, all your hard work is shining through, cant wait to see you paint up that undercarriage.

Cheers...

Mike  Toast


  • Member since
    September 2003
  • From: South Central Wisconsin
Posted by Daywalker on Monday, September 20, 2010 5:07 PM

Karl, that is some really, REALLY nice work!  The busied-up landing gear look very good, especially the tape straps.  Good work on the missing weld seam on the nose gear too.

One thing I noticed about the Trumpy kit- the main gear oleos look like they are extended as far as possible.  I toyed with the idea on mine of removing them, and replacing with some shorter metal tubes.  Just thought I would mention it in case you wanted to try something like that too.  With the separate scissor links, it doesn't look like it would be too hard to pull off... (famous last words!)


Frank 


  • Member since
    July 2003
  • From: Bicester, England
Posted by KJ200 on Monday, September 20, 2010 3:43 PM

Never one to disappoint....

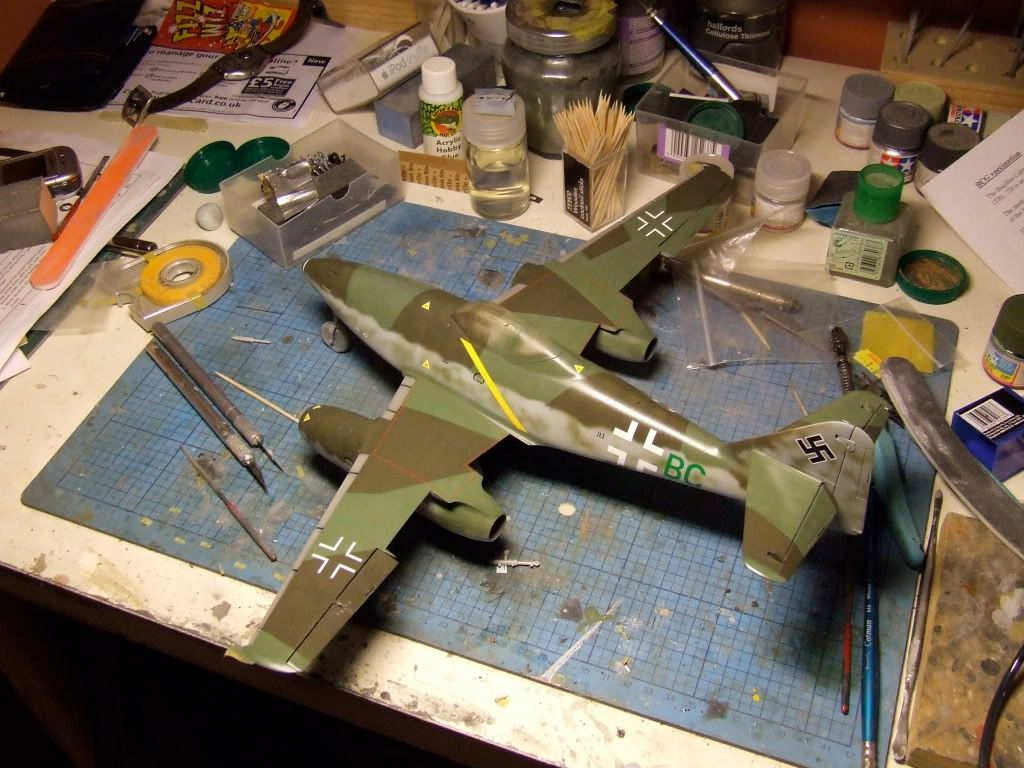
The Cutting Edge decals went on really well, as did the markings from the Trumpy sheet.

Overall not particularly impressed with the CE decal set, as the instructions were very poor, with no top side view of the camo scheme, and the side view showing a green on the fuselage that didn't even feature in the colour key!

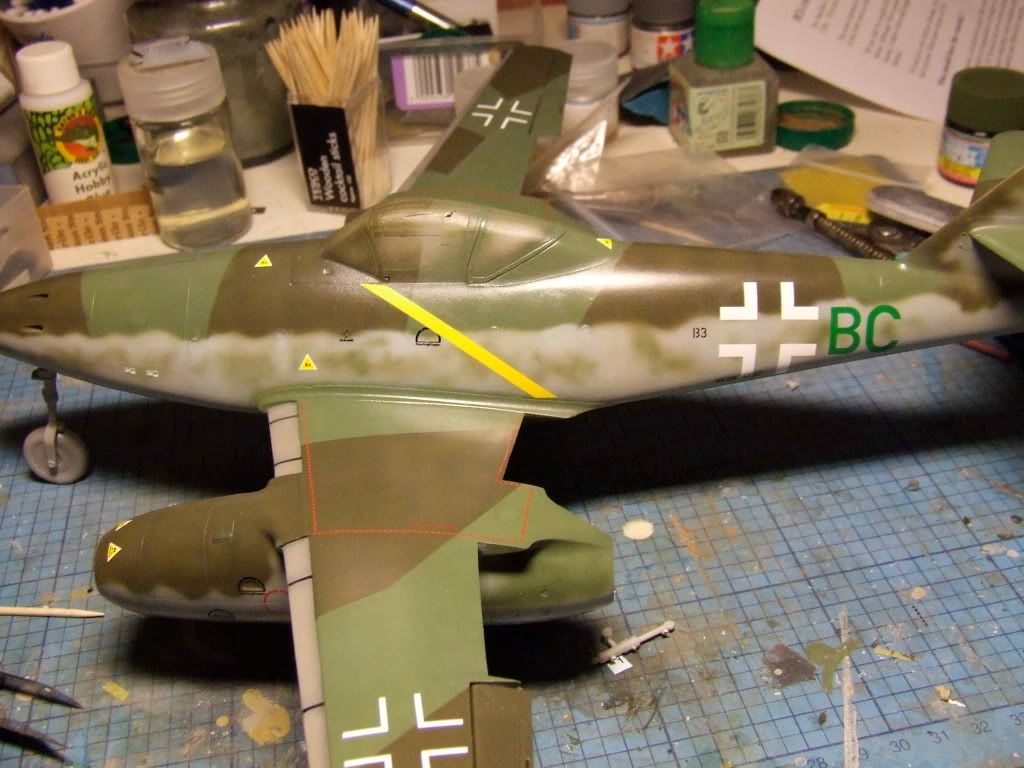
You can see that the yellow line decal isn't quite long enough, so I feel a little masking and painting coming on to cure that.

All the stencils came from the Trump sheet as the CE set has only the bare minimum markings for this bird.

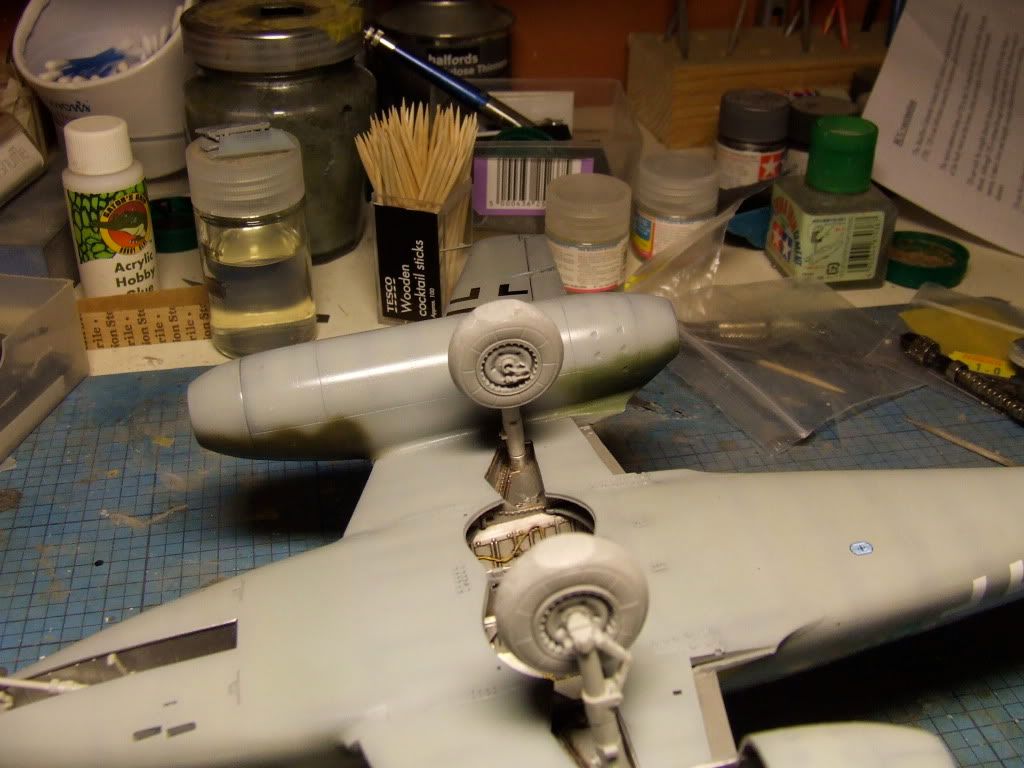
A quick view of the underside..

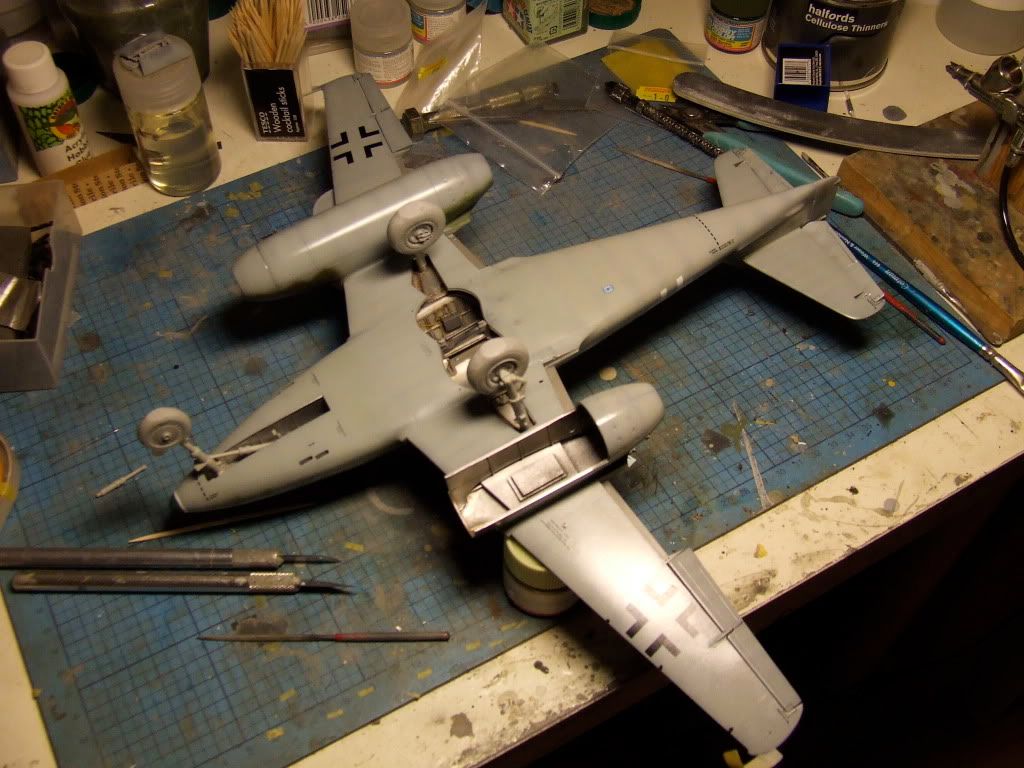
You can see the built up mount in the nearest engine nacelle to which the engine attaches.

I need to touch in the nose band, as you can see in this shot.

I've ditched the kit wheels & tyres, and opted for a really nice resin set from Mastercasters instead.

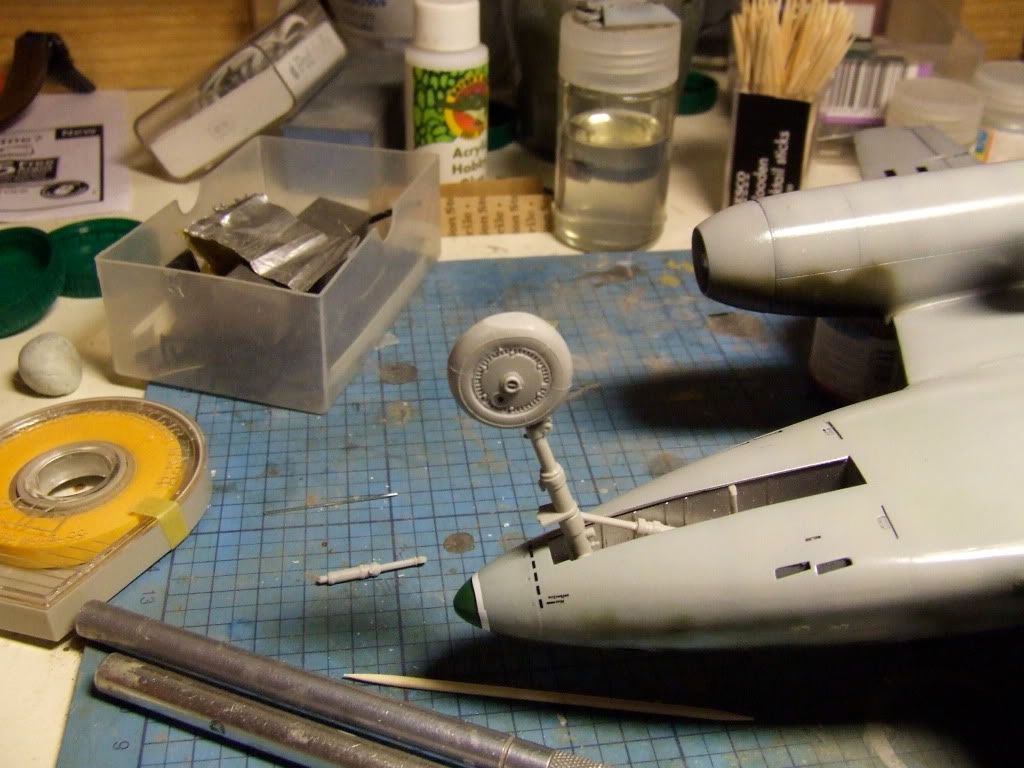
Just check out the detail on the hubs...

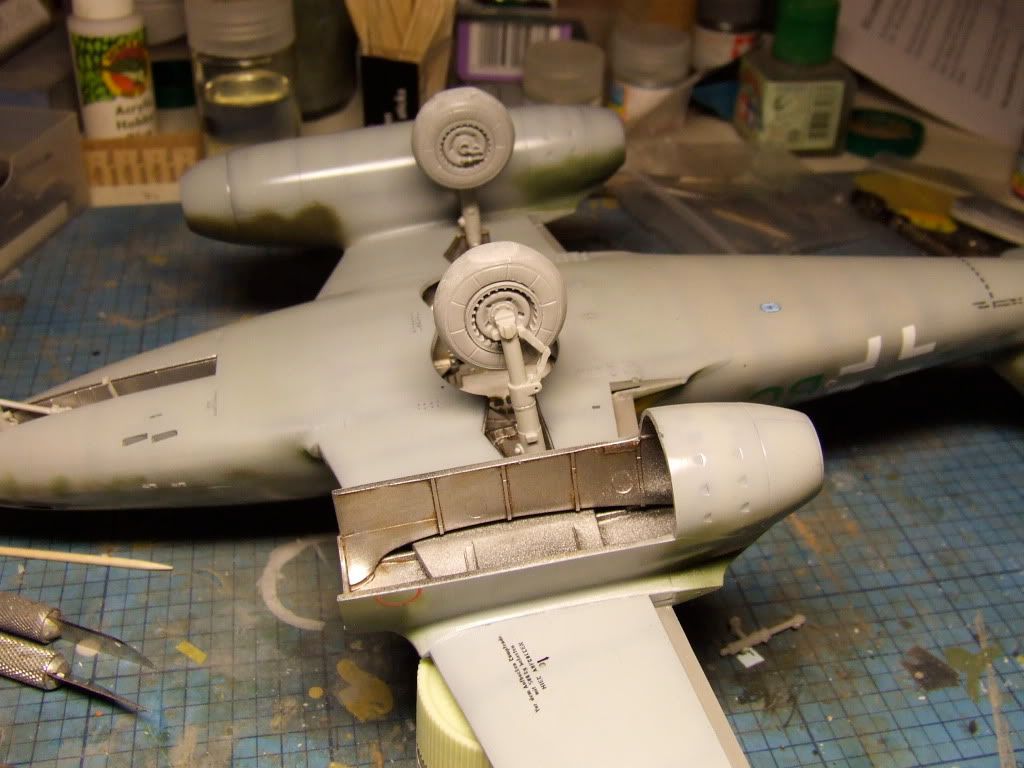
Most of the above was done last week, so I spent the weekend sorting out the under carriage, a job I wasn't looking forward to, however I got stuck in....

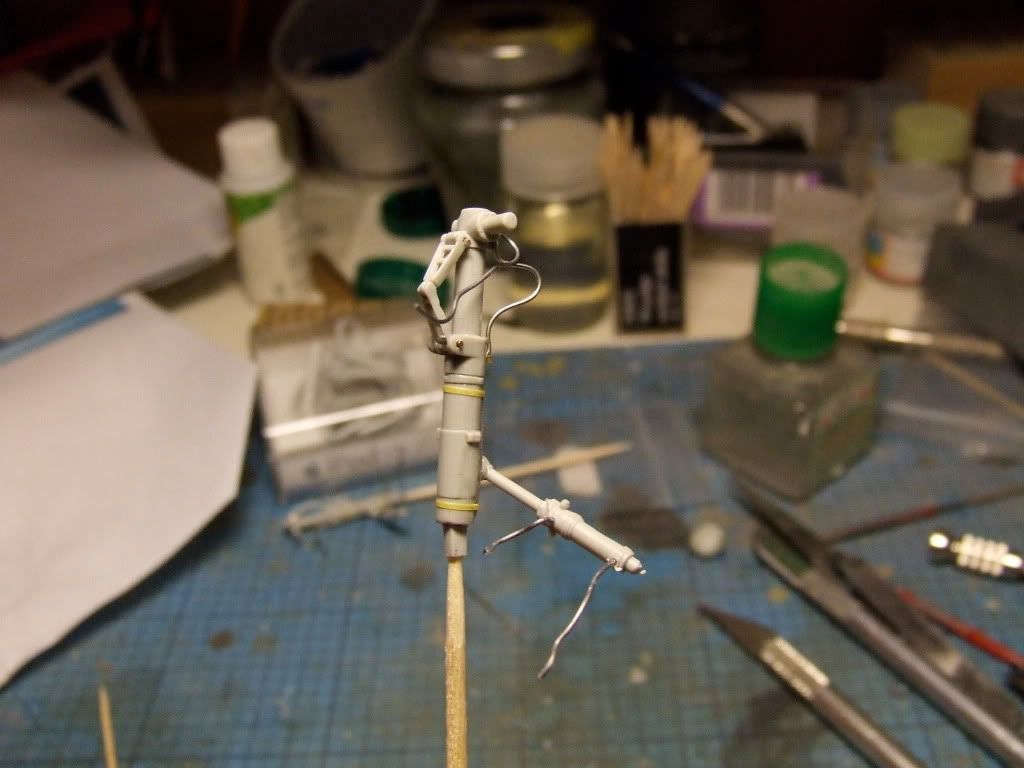
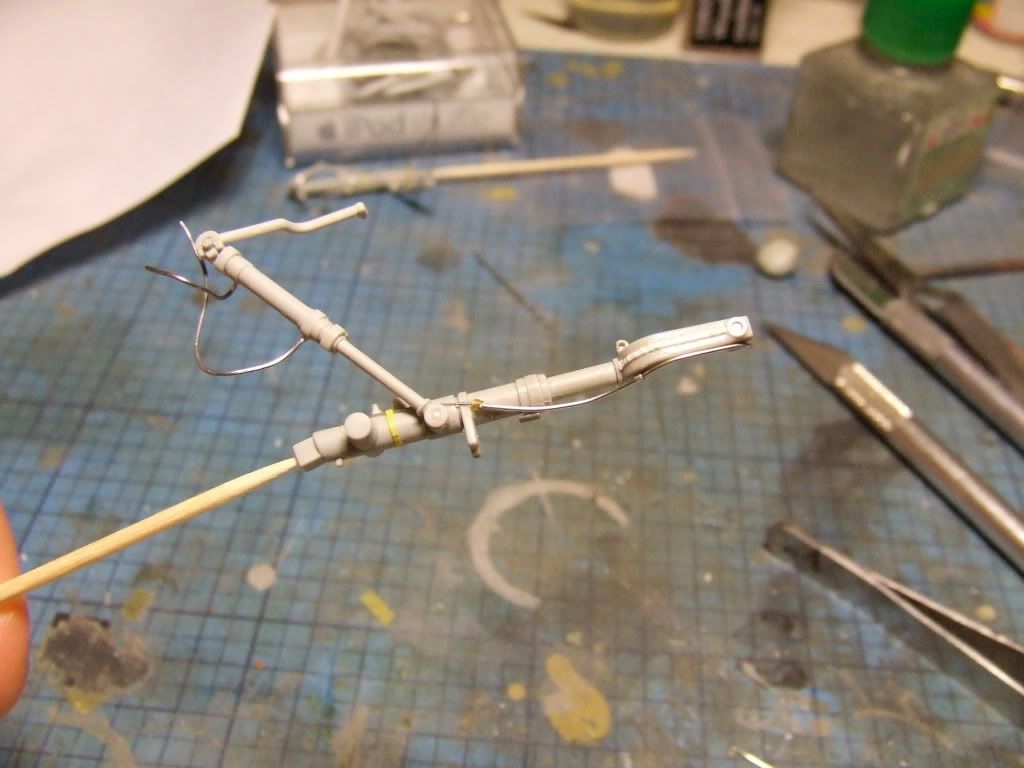
I drilled the pivots for the torque links, as well as adding the brake lines, and the hydraulic lines for the retraction cylinders.

I did the same on the nose gear, and did my usual building the gear as a complete assemble and test fitting before painting. I find this saves tears further down the line.

One key element missing from the Trump part is the prominent weld seam, so I've added one in with strip styrene softened with solvent, and worked over with a scalpel blade. Now it just needs sanding down a little.

I also removed the upper torque link bracket, and modified the lower bracket by drilling it out and making a notch.

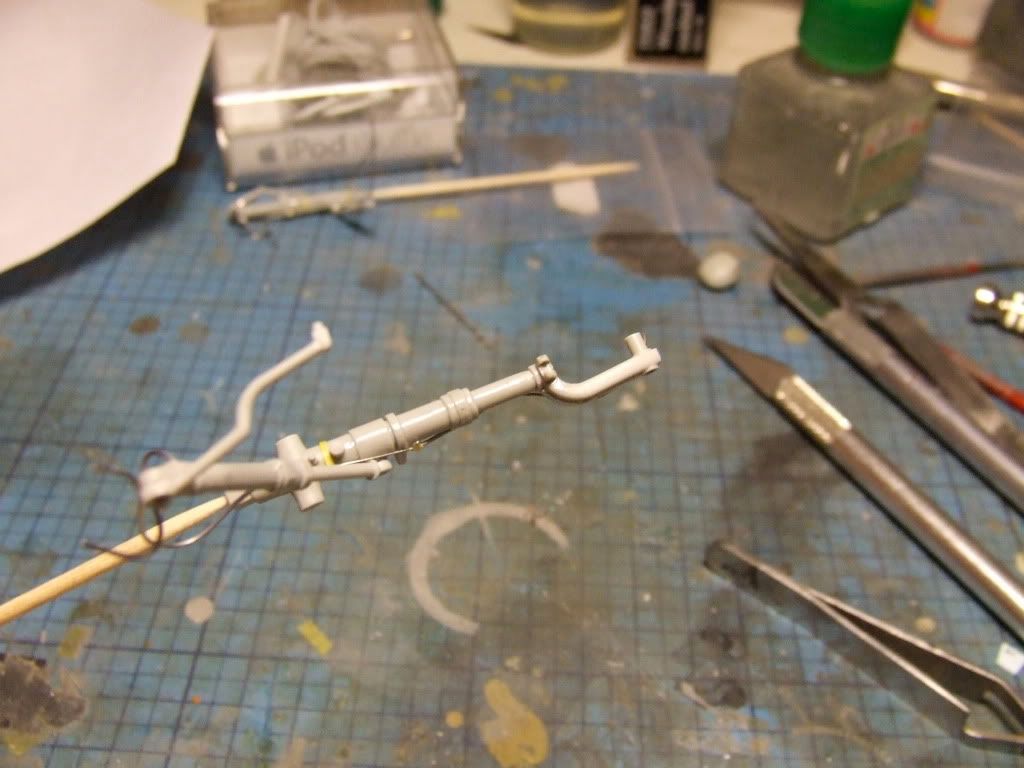
Next step will be cleaning up the resin wheels, and prepping the under cart for paint.

Karl


Currently on the bench: AZ Models 1/72 Mig 17PF

  • Member since
    September 2003
  • From: South Central Wisconsin
Posted by Daywalker on Friday, September 17, 2010 6:51 PM

I'll be looking forward to those pics Karl! Eats

Frank 


  • Member since
    July 2003
  • From: Bicester, England
Posted by KJ200 on Friday, September 17, 2010 3:17 PM

Mike, nice progress on the Tamiya 262.

Looking forward to seeing it get some paint.

My big 262 has received the bulk of the decals, just a few more stencils to go.

I will take some pics tomorrow to show I am at least making some progress!

Karl


Currently on the bench: AZ Models 1/72 Mig 17PF

  • Member since
    March 2009
  • From: Wirral. UK
Posted by Spike190 on Monday, September 13, 2010 6:32 AM

Mike/TB379 it looks like you've sorted the canopy very nicely, I think on this kit you really need to get that piece attached before paint or suffer an untidy join.

Cheers...

Mike  Toast


  • Member since
    March 2006
Posted by simpilot34 on Sunday, September 12, 2010 10:17 AM

Thunderbolt379

GRIN -- Richie, you couldn't see the seam from your house if you used the Hubble telescope...

Mate IF I had the hubble telescope I think I could see alot of things I shouldn't !WhistlingCool

Cheers, Lt. Cmdr. Richie "To be prepared for war, is one of the most effectual means of preserving the peace."-George Washington
  • Member since
    April 2005
Posted by Thunderbolt379 on Sunday, September 12, 2010 10:02 AM

GRIN -- Richie, you couldn't see the seam from your house if you used the Hubble telescope... But thanks for the motion of confidence!

It'll be good to have this one done. We have the mid-semester break at uni starting at the end of this week and I'm thinking of using the time to build my new display case and get the last five finished models into it, then I'll have heaps of incentive to get all my unfinished projects onto its sparkling white shelves...

cheers, Mike/TB379

http://worldinminiature.blogspot.com/

  • Member since
    March 2006
Posted by simpilot34 on Sunday, September 12, 2010 9:56 AM

Looking good Mike!!!! Can't see the seam from my house!!Toast

Cheers, Lt. Cmdr. Richie "To be prepared for war, is one of the most effectual means of preserving the peace."-George Washington
  • Member since
    April 2005
Posted by Thunderbolt379 on Sunday, September 12, 2010 9:46 AM

Hi Frank,

Thanks for the appreciative comments! You know, it might have been an attack of AMS, or just knuckling down to a job I've been subconsciously putting off for a very long time, but I tackled the fit of that canopy part this evening. Maybe I just didn't want to scratch and scrape and sand so close to the canopy proper, and rather bucked against the necessity given that the rest of the kit is so excellent. Anyway, I began by sanding away the 66 overspray, then adzed the seams, wet-sanded them, then filled and sanded twice. Here's the result:


I may respray the 66 to touch up after I'm satisfied with the wet-polishing of the surface. If I decide panel lines have to be visible in those areas to look right against the rest of the model, there's a studio trick that usually looks fine, and involves a black ballpoint pen...

Cheers, Mike/TB379

http://worldinminiature.blogspot.com/

  • Member since
    September 2003
  • From: South Central Wisconsin
Posted by Daywalker on Saturday, September 11, 2010 10:19 PM

Great looking work so far Mike!  I know what you mean about that windscreen part on the Tamiya kit, funny how they can take a remarkable kit and fudge one thing so badly on it somewhere...

As far as imperfect seams, that seemed to be the nature of these birds!  Meticulously maintained by their ground crews, but assembled rather roughly by the slave labor building them.

Frank 


  • Member since
    April 2005
Posted by Thunderbolt379 on Saturday, September 11, 2010 8:57 AM

Kaloo-kalay, the trumpets shall sound -- progress hath been made!

Karl, I think it was seeing your monster coming together that finally got me off my sorry butt and prompted me to DO SOMETHING! I pulled the Tamiya 262 off the shelf today and did some masking, snapped some shots and discovered some shots from months ago that never got posted!

First, masking the canopy, ages ago (Eduard set plus Tamiya tape):


I remembered taking these shots but can't ever have posted them as they weren't at my Photobucket gallery. Better late than never! Of course, the 66 showed up the jointline around that clear part that forms the fuselage ahead of the canopy, and I've wondered what to do about that for a long time. Besides having a scrape at the joints, my best option is to forget it. I could fill and sand for ages and not get a really good finish. Yet... I'm enough of a perfectionist to try, but disappointed in Tamiya that they'd c*** up the engineering like that. Same with the rest of the canopy, and the fit of the starboard wingroot, below:


I barely touched the model and the wingroot cracked open, so using techniques learned hereabouts I flexed it firmly closed with tape stays and let plenty of liquid cement do the job. The seams are not perfect but probably good enough. Next I masked the exhausts and wheelwells, a big job I had not been looking forward to, but which went surprisingly easily:


Again, not precise, but close enough to get me within touch-up range of a small brush here and there.

Next job will be to spray the red nosecap for Red 13, tinting Tamiya XF-7 to approximate RLM-23, which had a somewhat pinkish hue. Then I'll be mixing 76 (on the company recommendations from the FW 190 F-8 kit) for the underside. I'm thinking of soft-masking the camo, I certainly got a good result on that Bf 109 K-4 I did for RD I that way. After that I either need to find mixing ratios for 81 and 82, or do the topside camo in enamels -- but there's lots more rain forecast locally.

I'll be doing prep spraying on some 190s for RD III in the same round of work, and their camo should be all acrylic for the 74/75/76 scheme, and again I'm looking at soft masking.

Cheers, Mike/TB379

http://worldinminiature.blogspot.com/

  • Member since
    September 2003
  • From: South Central Wisconsin
Posted by Daywalker on Friday, September 3, 2010 11:22 PM

Good to see you John!  Hope you are able to free those model supplies from storage soon, we'd love to see your -262!

Frank 


  • Member since
    November 2003
  • From: Naples, FL
Posted by tempestjohnny on Friday, September 3, 2010 8:36 PM

  I have been away much too long.  I was forced to move out of my house 3 weeks ago.  I have been renting the house that I am buying since,  but unable to unpack much because we still had not gotten the approval from the selling bank.  Well the approval finally came through yesterday.  Now we are waiting for all the mortgage paperwork.  Then I will be able to start unpacking.  My model stuff has not seen daylight for over 3 months.   Hopefully I will be able to get going soon.  JOHN


Frank thank you for letting me extend this a little


  • Member since
    October 2007
  • From: Rhode Island
Posted by jmabx on Tuesday, August 31, 2010 5:02 PM

The engine looks amazing Karl! Very nice work! Yes

Jeremy    Propeller


  • Member since
    March 2006
Posted by simpilot34 on Tuesday, August 31, 2010 9:27 AM

Karl she's looking good mate!!!! Love the paintwork!!! And the engine!!Toast

Cheers, Lt. Cmdr. Richie "To be prepared for war, is one of the most effectual means of preserving the peace."-George Washington
JOIN OUR COMMUNITY!

Our community is FREE to join. To participate you must either login or register for an account.

SEARCH FORUMS
FREE NEWSLETTER
By signing up you may also receive reader surveys and occasional special offers. We do not sell, rent or trade our email lists. View our Privacy Policy.