Hi all,
Nate -- the suspension of the Dragon 234 looks amazing, an order of magnitude better than the old Italeri kit. I find myself thinking I'll have to add these kits to my stash!
Update on the Testor/Italeri Puma:
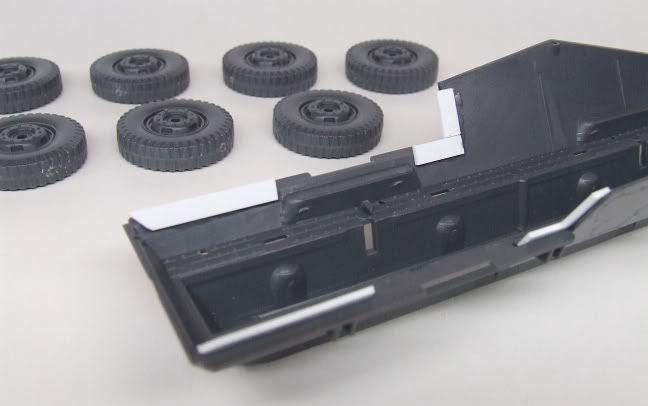
The limitations of molding way back when this series was tooled meant the rear hull had to have some cut-outs (Dragon no doubt do it with slidemolds). I've worked on this hull design once or twice in the past (never completed one, though) and found the best way to line up those parts was to lay in some stripstock to create ledges:
![]()
 " border="0" />
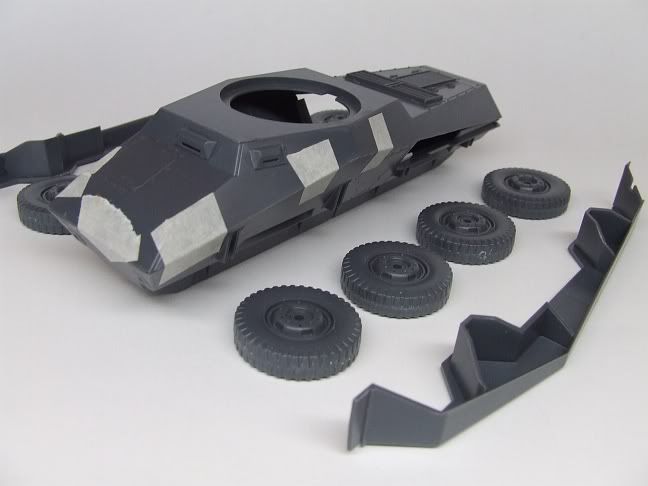
The ledges mean you can drop in the triangular fillets that complete the hull without alignment issues. I glued the upper and lower halves together and taped them overnight (the fillets are not yet installed here):
![]()
 " border="0" />
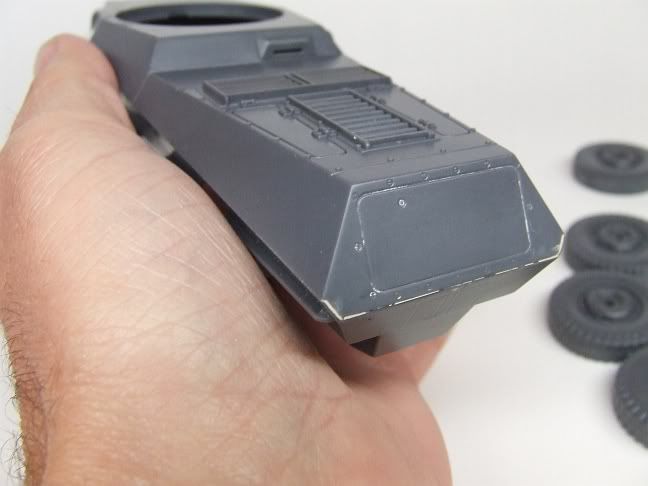
The skirt/stowage bin fairings cover all but the foremost and rearmost parts of the hull armour apex so there's no need to dress most of it. I used some filler to close the hull at nose and tail:
![]()
 " border="0" />
The filler is mostly dressed here, it might need a touch more here and there.
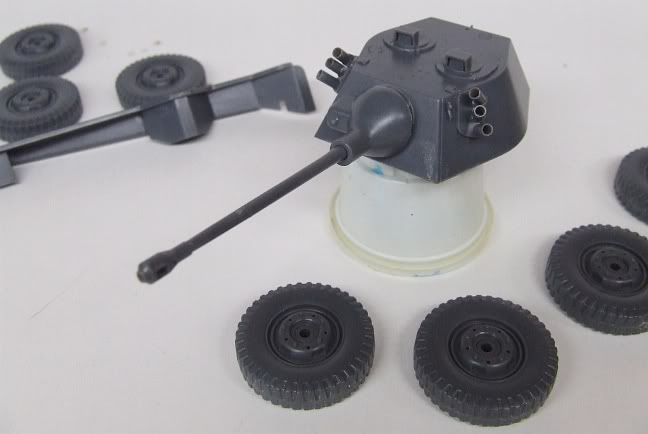
Next I moved on to the turret and assembled it in a couple of rounds of work. The dressing parts are very small and Italeri is one ofthose companies that offers you minute components without positive alignment devices, which makes my hackles rise. I make no guarantees about the survival of the turret lifting lugs through the handling between here and the display case!
![]()
 " border="0" />
There's an interesting story goes with the turret. The bottom lays into the turret with some corner ledges to rest on, but not very well at all. I superglued it and added tape to hold it in place. later, to reinforce the joint I flowed in some liquid cement, but some was carried by capillary action under the tape in the forward portside corner. Naturally, it reduced the plastic surface to a softened, almost rubber-like texture, which was still a bit pliable even after drying overnight. I brushed on some cya to redress it, then filed the surface down so it would mate cleanly to the hull.
As it's a closed-hull build I left out all internal parts, not that there are many. My next jobs are mounting the stowage bins/flank hulls, and the suspension, not sure which order yet. My objective is to get the model structurally complete and ready for paint, then set it aside and concentrate on my StuG IV for 1000 Roadwheels, bringing that one up to the same stage, so I can get them both in the paintshop together and put them into dunkelgelb (Tamiya acrylics all the way).
Cheers,
Mike/TB379