SEARCH FINESCALE.COM

Enter keywords or a search phrase below:

The Ostfront (eastern front) GB 2010/11

106899 views
900 replies
1 rating 2 rating 3 rating 4 rating 5 rating
  • Member since
    April 2005
Posted by Thunderbolt379 on Tuesday, October 19, 2010 12:51 AM

Echoing Satch -- I have a Dragon StuG III Ausf. F/8 that is fairly crying out to be built, and looks like a great opportunity to try out "Panzer" Mrosko's acrylic-over-enamel winter camo technique...

Cheers, Mike/TB379

http://worldinminiature.blogspot.com/

  • Member since
    December 2006
  • From: t.r.f. mn.
Posted by detailfreak on Tuesday, October 19, 2010 8:12 AM

Great looking builds so far folks,looking forward to posting an update soon myself.

[View:http://s172.photobucket.com/albums/w1/g-earl828/]  http://i158.photobucket.com/albums/t104/cycledupes/1000Roadwheels4BuildBadge.jpg

  • Member since
    December 2009
  • From: Ankara / Turkey
Posted by onge on Tuesday, October 19, 2010 8:49 AM

Hello Kermit,

If it is not too late I would like to join Ostfront GB staff...

I have just began constructing Zvezda's Sdkfz.251/3 Communications Vehicle in 1/35 scale.

Smile 

  • Member since
    June 2009
  • From: Netherlands
Posted by kermit on Tuesday, October 19, 2010 10:38 AM

Onge, Satch_ip and thunderbolt379:

Your builds will be added to the list as soon as i'm done typing thisSmile. Wow, lots of StuG's....Big Smile I don't mind at all. They look very agressive. Might have to build myself a SU85 to counter them....lol.

Love the work on the Lavochkin and yak sofar; love every update! Also the messerschnitzel is promising to turn out very well in the endWink Keep those WIP's coming gentlemen!

As i have completed 3 builds already my stash is growing thin now.... Will have to do some looking around to find myself a suitable next project to do...

Richard

"Success is the ability to go from one failure to another with no loss of enthusiasm." - Sir Winston Churchill

  • Member since
    December 2006
  • From: t.r.f. mn.
Posted by detailfreak on Tuesday, October 19, 2010 11:30 AM

Some minor progress but I'll share anyway,first off the Tristar firewall was fitted to the Italeri tub and it was a pretty good fit.The Dragon bow plate is currently in place but I may still use the Italeri one.Much of the Tristar interior pieces are primed and ready for final painting and weathering and all that good stuff.Also I am considering the use of the Dragon rear plate as the cooling system /fan cover can be left open to view the details that would otherwise be hidden. As usual any comments or suggestions welcome.Pictures are in no particular order.Yes


[View:http://s172.photobucket.com/albums/w1/g-earl828/]  http://i158.photobucket.com/albums/t104/cycledupes/1000Roadwheels4BuildBadge.jpg

  • Member since
    November 2009
  • From: LaSalle, Ontario, Canada
Posted by bouttime on Tuesday, October 19, 2010 7:10 PM

Evening Gents

Been a while since I've had an update. You know work, life, stupid 2 week cold and oh the stupid so called magic tracks on my panther. Anyway since the last pics I have primed, sprayed the base panzergrau and then freehand sprayed the white. I figured freehand as the crews probably didn't have stencils in the field. Next up and a first for me will be colour modulation by brushing really thin white on the grey areas and then drybrushing some grey on the white areas hopefully making it look to be wearing off. Comments and suggestions always welcome.

Jeff

  • Member since
    April 2005
Posted by Thunderbolt379 on Tuesday, October 19, 2010 7:24 PM

Kermit -- thanks! I'll enjoy doing a bit of cut and stick again instead of what seems wall to wall masking and spraying!

bouttime -- lovely work! Your spray demarkation is top notch, I'd have to soft-mask to get it that clean!

Cheers, Mike/TB379

http://worldinminiature.blogspot.com/

  • Member since
    November 2009
  • From: LaSalle, Ontario, Canada
Posted by bouttime on Wednesday, October 20, 2010 8:37 AM

Thanks for the compliment Mike. I had the coffee shakes so bad I wasn't sure if it would hurt or help. Hopefully the finishing goes as well.


  • Member since
    June 2010
  • From: Austin, TX
Posted by DoogsATX on Wednesday, October 20, 2010 11:48 AM

bouttime - I have to agree with Mike about that spray demarkation. If you hadn't said anything I'd have sworn it was soft masked!

The Commie bastards continue to come along. I sprayed the gear bays/interior gear doors/gear struts/canopy frames with Vallejo Light Grey last night. I continue to be impressed with how smooth Vallejo goes down. 

I also took the opportunity last night to try out my new wheel painting technique. I painted the tires with Vallejo Black Grey on Monday night, and last night I hit the hubs holding them up against a cheap plastic circle template I picked up at OfficeMax. Way better results that trying to brush it, and a lot faster than masking. The True Details wheels for the Yak presented a bit of an issue, since the exaggerated tire bulge kept the hubs from sitting flush, but I didn't notice much overspray at all. 

The Yak hubs are light grey, while the La-5's are a shade of green that just screams out for drybrushing and a nice dirty wash.

Tonight I get to break out the White Ensign colourcoats for the first time, and I'm ridiculously excited. Of course, I have to figure out how to open the tins first! I assume it's like opening a can of house paint, just in miniature?

On the Bench: 1/32 Trumpeter P-47 | 1/32 Hasegawa Bf 109G | 1/144 Eduard MiG-21MF x2

On Deck:  1/350 HMS Dreadnought

Blog/Completed Builds: doogsmodels.com


  • Member since
    November 2009
  • From: LaSalle, Ontario, Canada
Posted by bouttime on Wednesday, October 20, 2010 12:00 PM

Thanks Doogs. I use the same wheel painting technique with the circle template. Not always perfect sizes but a lot easier than the alternatives.


  • Member since
    June 2010
  • From: Austin, TX
Posted by DoogsATX on Thursday, October 21, 2010 1:16 AM

Paint time!

I finally got to break out the White Ensign enamels tonight and hoo boy! Every other paint I've used has been a compromise. Model Master's inconsistent quality and tendency (for me at least) to spatter when spraying fine lines. Tamiya's suckage at brushing and the dusting problem. Vallejo's tip dry issues, less than stellar fine performance and inability to thin down to nothing the way Tamiya can.

But this White Ensign stuff...wow. Thins down perfect. Sprays brilliantly...like Tamiya when you've really got it dialed in, but without any fear of tip dry. Coverage is excellent, even with a lighter color like AMT-7 Blue.

Tonight was all about seeing how this stuff sprays. Tomorrow I'm going to go back and start adding depth to the underside. 

On the Bench: 1/32 Trumpeter P-47 | 1/32 Hasegawa Bf 109G | 1/144 Eduard MiG-21MF x2

On Deck:  1/350 HMS Dreadnought

Blog/Completed Builds: doogsmodels.com


  • Member since
    December 2006
  • From: t.r.f. mn.
Posted by detailfreak on Thursday, October 21, 2010 11:21 AM

Ok ,a quick update on where I'm at.Doing a bit of dry fitting in the engine compartment,the rear plate that is fitted is the Italeri one.As I am trying to squeeze this in before I head off too work I'll save the transmission experience for tonight.Heres a few pics I took outside this morning,probably try angling the base for my outdoor pics toward the light so as to avoid casting that shadow next time.


[View:http://s172.photobucket.com/albums/w1/g-earl828/]  http://i158.photobucket.com/albums/t104/cycledupes/1000Roadwheels4BuildBadge.jpg

  • Member since
    November 2009
  • From: LaSalle, Ontario, Canada
Posted by bouttime on Thursday, October 21, 2010 11:48 AM

How many kits are you using to build this one? I have a hard enough time with one box.


  • Member since
    April 2009
  • From: Carmel, IN
Posted by deafpanzer on Thursday, October 21, 2010 11:52 AM

Detailfreak, I am starting to have doubts about you... I think you served for the Germans during WWII as a mechanic to all tanks because you usually come out with great details on the engines and wheels.  How old really are you?  Loving this... Yes

Andy

  • Member since
    November 2009
  • From: LaSalle, Ontario, Canada
Posted by bouttime on Thursday, October 21, 2010 5:40 PM

We're getting very close to the finish line on the Panzer. I brushed some very thin white onto the grey areas and drybrushed some grey for wear. Personally I think I was a little heavy handed with the drybrushing. Must remember to keep wiping even after I think it's enough.

Not too much left to do. Decals, mount the tracks, paint the tools, maybe a little dusting of the running gear with some dark earth, and seal her up.


  • Member since
    December 2006
  • From: t.r.f. mn.
Posted by detailfreak on Friday, October 22, 2010 7:25 AM

First off the base kit is the old Italeri 38t, with a smidgeon of pieces from the Dragon . The interior kit is Tristars offreing which fits very well so far. The only tricky spot being the steering and breaking lever assemblies. There is a small plastic pin which all the photo-etch pieces load onto and mine broke off very easily. My fix was to drill out the spot where the pin was and slide a wire through,as can be seen by the blue insulation.The other half of the bracket that holds the levers was also drilled and with all those pieces threaded onto the wire in thier proper sequence the styrene parts were glued and after a bit of curing time all the levers where aligned and a drop off super glue fixed them into position. Next up will be the control rods.More later. Andy thanks for looking in buddy.Yes

[View:http://s172.photobucket.com/albums/w1/g-earl828/]  http://i158.photobucket.com/albums/t104/cycledupes/1000Roadwheels4BuildBadge.jpg

  • Member since
    December 2006
  • From: t.r.f. mn.
Posted by detailfreak on Friday, October 22, 2010 7:30 AM

Pushing 50 my friend.Toast

[View:http://s172.photobucket.com/albums/w1/g-earl828/]  http://i158.photobucket.com/albums/t104/cycledupes/1000Roadwheels4BuildBadge.jpg

  • Member since
    June 2010
  • From: Austin, TX
Posted by DoogsATX on Friday, October 22, 2010 10:24 AM

The armor's looking good, gents! 

Added some layering to the Ruskie fighters last night. It was a bit of a challenge with the lack of panels to play with. I lightened the ailerons and elevators and added slightly lighter and darker streaking and random spots. The effect is very subtle, but I'm hoping some washes will bring it out a bit more.

I also went heavier on the La-5 than the Yak-3. Seems appropriate since the Yak was a late war fighter and likely better maintained.

Here's the La-5:

And the Yak-3:

I'd been hoping to move on to the upper surfaces tonight, but it's raining today, so I'll probably end up fussing over the landing gear and wheels...


On the Bench: 1/32 Trumpeter P-47 | 1/32 Hasegawa Bf 109G | 1/144 Eduard MiG-21MF x2

On Deck:  1/350 HMS Dreadnought

Blog/Completed Builds: doogsmodels.com


  • Member since
    November 2009
  • From: LaSalle, Ontario, Canada
Posted by bouttime on Friday, October 22, 2010 10:38 AM

Nice to see some colour on those commie birds. Looking good.


  • Member since
    June 2010
  • From: Austin, TX
Posted by DoogsATX on Saturday, October 23, 2010 9:59 AM

Looks like the Yak was the first one to get paint on the upper surfaces. White Ensign AMT-11 Blue-Grey. 

On the Bench: 1/32 Trumpeter P-47 | 1/32 Hasegawa Bf 109G | 1/144 Eduard MiG-21MF x2

On Deck:  1/350 HMS Dreadnought

Blog/Completed Builds: doogsmodels.com


  • Member since
    November 2009
  • From: LaSalle, Ontario, Canada
Posted by bouttime on Saturday, October 23, 2010 7:22 PM

Gentlemen

As I have already taken giant leaps out of my comfort zone (this Panzer is only my 4th completed kit) I have decided to call this one complete! Many of you with more skills than I would probably have carried on but I am more than satisfied with the results I have obtained. I must recommend this kit Tamiya #35290 to anyone looking for a kit that is a pleasure to build with no problems thus giving you the confidence to try some new finishing techniques.

Please enjoy the walk around pics:

I would like to thank wbill76 for his recent WIP of a Panzer that was my inspiration for this build. Mine is no where near the quality of his but he inspired me.

Thanks to Kermit for hosting this GB and to all of you for the words of support. Rest assured I will be checking in regularly to see everyone's progress and who knows I may be back with a T34 to attempt a different style of winter camo. After all both sides of a conflict must be equally represented right?

Thanks again.

Jeff

Oh I almost forgot...Requesting permission to use the badge sir?


  • Member since
    July 2008
  • From: USA California
Posted by vetteman42 on Saturday, October 23, 2010 9:39 PM

DoogsATX lookin good there buddy. I really like the underside Russian blue, I had a heck of a time finding that color for my build.

Bouttime wow this is only your 4th build ??? I have to say shes a beaut very very well done, looks like you have been building for years. I hope my first armor build comes out half as well as this build, cause you have that camo nailed.

Randy So many to build.......So little time

  • Member since
    June 2010
  • From: Austin, TX
Posted by DoogsATX on Sunday, October 24, 2010 1:38 AM

Things started out great tonight. Date night with the wife, finally got to try a donut from Gourdough's (the Flying Pig, topped with bacon and maple icing!), toddler went to bed without incident, so I got an early start masking the Yak...

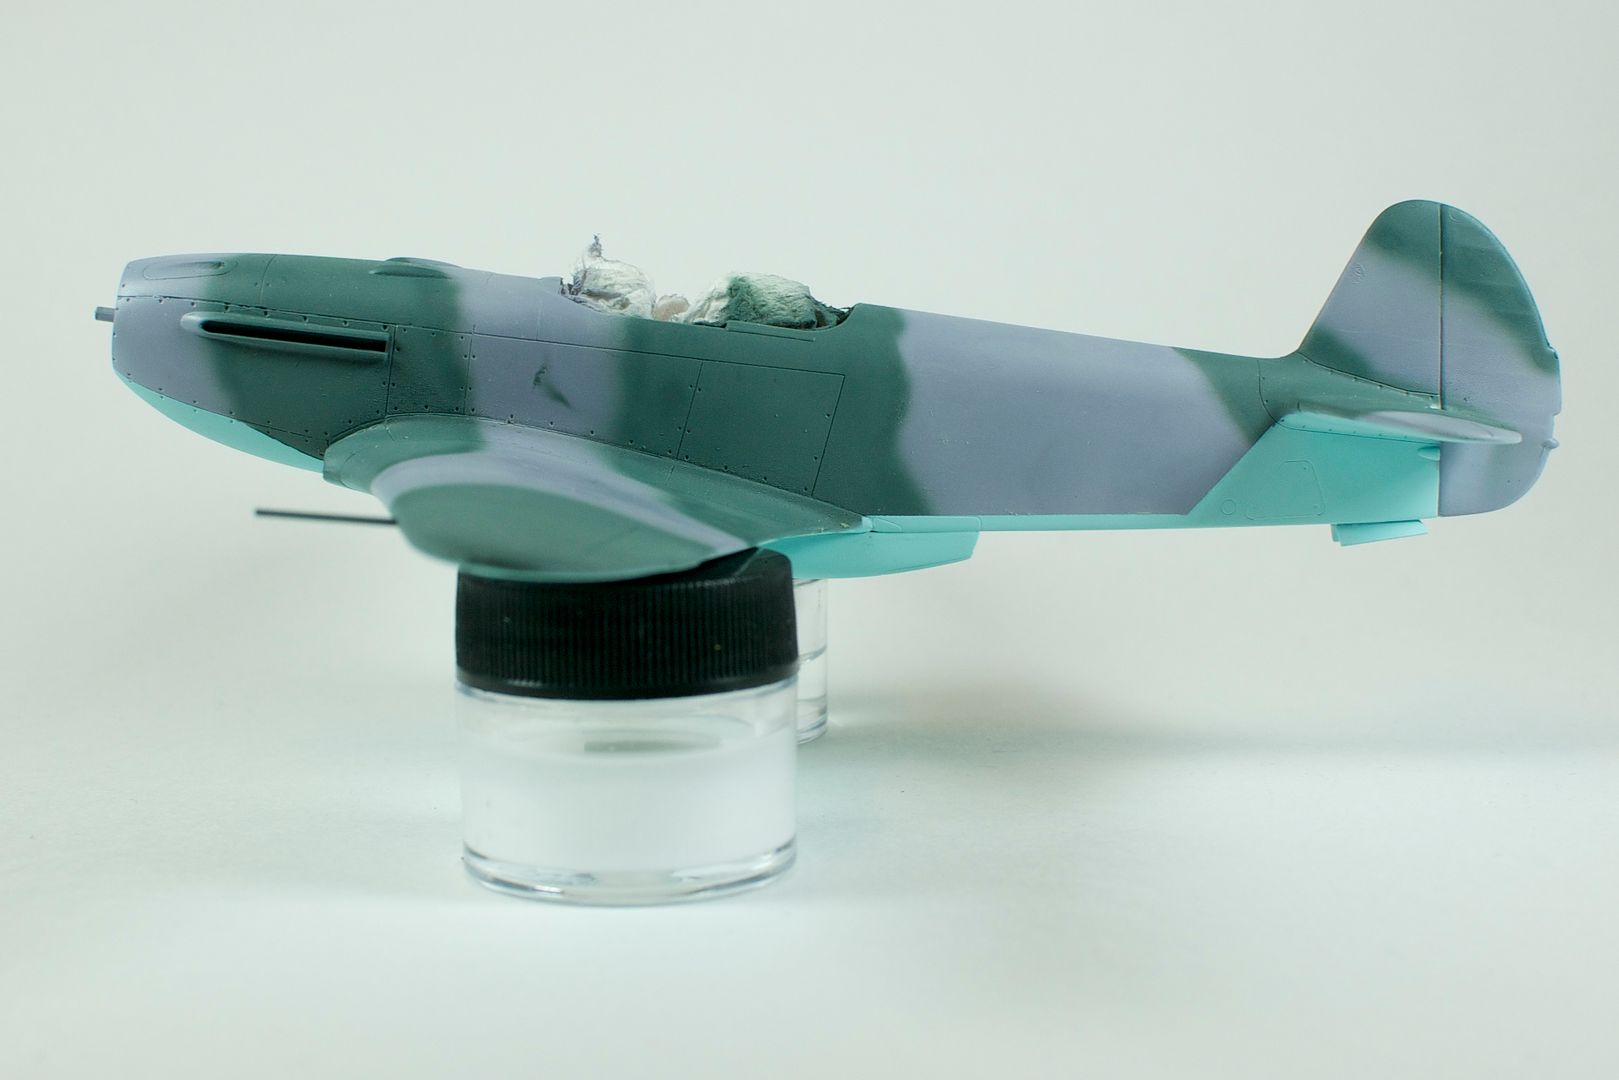
Once again, the WEM enamels (this time AMT-12 Soviet Dark Grey) sprayed amazingly well.

Of course, this being a Doogs build, SOMETHING has to go catastrophically wrong...

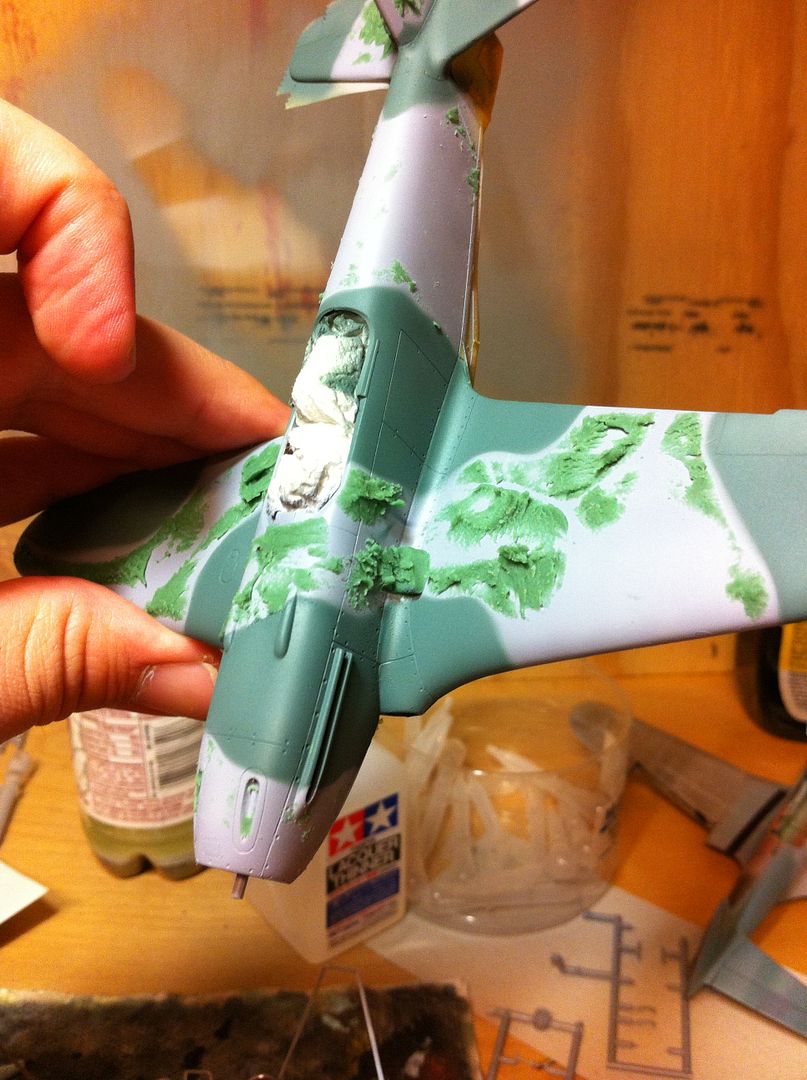
You know how play-doh picks up other play-doh? Yeah, not this time.

After much swearing, and various attempts to remove the play-doh (rubbing kinda worked, goo-gone ate through the enamel), the stuff started to harden. I couldn't get it off. I started wet sanding and that worked, but then I noticed that the play-doh softened under water, so I just started brushing on water and wiping up with paper towels. Finally managed to get oh, 95% of it off.

Took up the airbrush again and just freehanded the camo outlines.

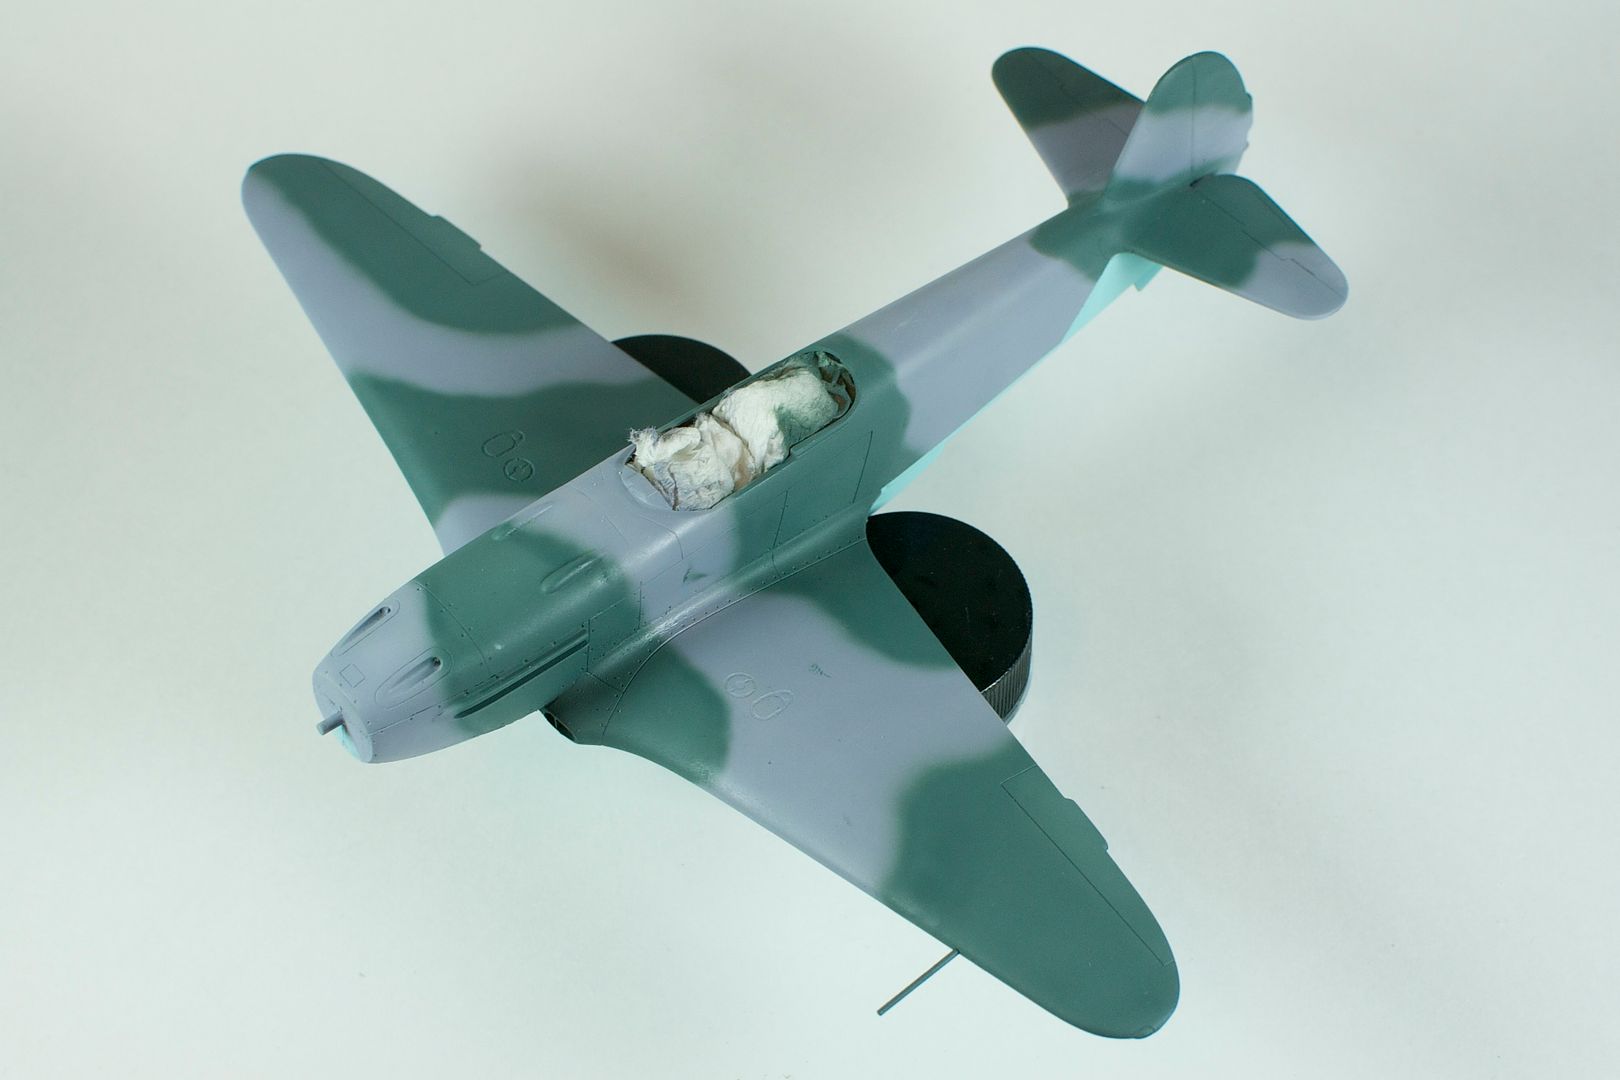
Suffice to say, I will NOT be using play-doh to mask the La-5.


On the Bench: 1/32 Trumpeter P-47 | 1/32 Hasegawa Bf 109G | 1/144 Eduard MiG-21MF x2

On Deck:  1/350 HMS Dreadnought

Blog/Completed Builds: doogsmodels.com


  • Member since
    June 2010
  • From: Austin, TX
Posted by DoogsATX on Sunday, October 24, 2010 1:42 AM

bouttime - for your fourth kit, that thing looks amazing! I can only hope the armor builds I've got planned (Zvezda T-34, Tamiya KV-2, Tamiya M4 early production, Tasca M4A3/76) come out anywhere near as good!

On the Bench: 1/32 Trumpeter P-47 | 1/32 Hasegawa Bf 109G | 1/144 Eduard MiG-21MF x2

On Deck:  1/350 HMS Dreadnought

Blog/Completed Builds: doogsmodels.com


  • Member since
    June 2009
  • From: Netherlands
Posted by kermit on Sunday, October 24, 2010 4:33 AM

Bouttime,

I can only agree with what has already been said: Great work on an amazingly well done paintjob! You can be proud of that one. The fourth you say?? Simply stunning my friendYesYesYes

Doogs,

Sorry to read about your play doh mishap...[:9] but from where i am sitting you have taken care of it nevertheless. Nice spraying thereWink

Richard

"Success is the ability to go from one failure to another with no loss of enthusiasm." - Sir Winston Churchill

  • Member since
    November 2009
  • From: LaSalle, Ontario, Canada
Posted by bouttime on Sunday, October 24, 2010 6:52 AM

Thanks for all the kind words guys.

Doggs, I would have felt like wall mounting that plane. You know stand back 10' and let her fly. You showed great patience and sticktoitiveness! At first I thought you would have a different kind of adventure when you said it was "date" night :)

Jeff


  • Member since
    June 2010
  • From: Austin, TX
Posted by DoogsATX on Sunday, October 24, 2010 9:41 AM

bouttime

Doggs, I would have felt like wall mounting that plane. You know stand back 10' and let her fly. You showed great patience and sticktoitiveness! At first I thought you would have a different kind of adventure when you said it was "date" night :)

You don't know how close the Yak came to taking flight! The wet sanding was a last ditch attempt. Figured if nothing else it'd improve aerodynamics of the Yak's last flight. Fortunately it worked.

Alas, with a toddler and a five month old, our "date" nights basically consist of going out to dinner without the kids...

On the Bench: 1/32 Trumpeter P-47 | 1/32 Hasegawa Bf 109G | 1/144 Eduard MiG-21MF x2

On Deck:  1/350 HMS Dreadnought

Blog/Completed Builds: doogsmodels.com


  • Member since
    June 2010
  • From: Austin, TX
Posted by DoogsATX on Monday, October 25, 2010 1:14 AM

Well tonight went better! No play-doh mishaps or other disasters to speak of. In fact, I think I'd have to call this my single best airbrush session ever.

The Yak's still a bit tacky, so I decided to let it cure another day and focus on the La-5 tonight. Now that I'm getting the hang of these White Ensign enamel, I love them even more. They don't clog the brush at all, and actually seem to spray better as time goes. It also seems to "break in" over time. Cleaning the Iwata has actually been getting easier each time.

I'm also loving AMT-4. Such a rich color. Nice change from the grays I've been shooting lately. 

Here's the base coat:

And some lightening to add tonal variety. Control surfaces, a few forward panels, and some random streaking on the wings. There's a bit more to work with on this plane vs. the Yak, but not much.

And finally, the blended coat. Sprayed over everything with AMT-4 thinned 75% vs. the usual 50. It toned down the lightening just right!


On the Bench: 1/32 Trumpeter P-47 | 1/32 Hasegawa Bf 109G | 1/144 Eduard MiG-21MF x2

On Deck:  1/350 HMS Dreadnought

Blog/Completed Builds: doogsmodels.com


  • Member since
    March 2010
  • From: Brisbane
Posted by Julez72 on Monday, October 25, 2010 2:53 AM

DoogsATX

Of course, this being a Doogs build, SOMETHING has to go catastrophically wrong...


And i thought i was the only one....Lol

Good save and great work, both are looking very sweetYes

Boutime, lovely build, i agree completey with the other fellas...Well done sirYesYesYes


  • Member since
    April 2005
Posted by Thunderbolt379 on Monday, October 25, 2010 7:35 AM

Bouttime -- that is one sweet Panzer and I'd love to do one like it! Excellent work, your airbrushing is very nice indeed.

Doogs -- nice planes! I must say I'm impressed with the WEM paints too, i wish we could gets them in this country. I could possibly order them from the UK by surface. They sure look smooth!

I've made a modest start on the Dragon StuG III F/8, with a batch of small parts added to the hull top and bottom, assembled the drives and exhausts, and hope to tackle a few more subassemblies this week. Then I'll be on hiatus for a couple of weeks as I'll be away in England, and it'll be the end of November before I can really get to grips with projects again.

Cheers, Mike/TB379

http://worldinminiature.blogspot.com/

JOIN OUR COMMUNITY!

Our community is FREE to join. To participate you must either login or register for an account.

SEARCH FORUMS
FREE NEWSLETTER
By signing up you may also receive reader surveys and occasional special offers. We do not sell, rent or trade our email lists. View our Privacy Policy.