SEARCH FINESCALE.COM

Enter keywords or a search phrase below:

The Ostfront (eastern front) GB 2010/11

106899 views
900 replies
1 rating 2 rating 3 rating 4 rating 5 rating
  • Member since
    June 2009
  • From: Netherlands
Posted by kermit on Saturday, October 9, 2010 2:22 AM

Aaronw,

Your model only got better and better with the little dio base. Love it!

Bouttime,

Great work on your panzer. Built the same one in a desert scheme and the kit was a fun and quality build for me. From the look of it is going to look great. I assume you'll be doing the grey with whitewash camo version?

As for me i have been working on both my kits during the week. The sturmovik has been decalled and is receiving the small bits and bobs as we speak. The KV also has been decalled and i am applying lots of washes and drybrushes to it. Will post some pics once i get new batteries for my cameraBig Smile

Great work all around boys. This really is a fun GB to host sofar with lots of talented participants!Yes

Richard

"Success is the ability to go from one failure to another with no loss of enthusiasm." - Sir Winston Churchill

  • Member since
    November 2009
  • From: LaSalle, Ontario, Canada
Posted by bouttime on Saturday, October 9, 2010 6:58 AM

Julez

Thanks. The construction phase usually goes pretty well for me and this kit is exceptional. I know what you mean about the Panther. I have a Dragon kit that has the base coat on but the holdup is the magic tracks. Never done them before and have to build up my nerve.


Kermit

Thanks as well. Yes I will be doing the grey with whitewash but still unsure as to the method for the whitewash as I have only completed 2 kits since a 35 year absence from the hobby the finishing stage is where I fall short. I'm thinking of straying from the camo theme on the box and applying a white coat made from pastel chalk and water and then brushing some away showing it wearing off.


  • Member since
    December 2006
  • From: t.r.f. mn.
Posted by detailfreak on Saturday, October 9, 2010 8:19 AM

Hey Kermit it looks like this groupbuild could use an Italeri panzer 38t ,with a complete Tristar interior set,so if I may join you can add me to the list of entries.

[View:http://s172.photobucket.com/albums/w1/g-earl828/]  http://i158.photobucket.com/albums/t104/cycledupes/1000Roadwheels4BuildBadge.jpg

  • Member since
    April 2005
Posted by Thunderbolt379 on Saturday, October 9, 2010 8:54 AM

Hi guys, some progress to report. The Bf 109 F-2 is moving along, here she is at this moment:


The mouldings seemed somewhat less substantial than those of the Tamiyas I've built, and the engineering of the F nose was quite flimsy. I reinforced many of the joints with styrene strip inside, especially around the portside nose panel. The staggered guns were meant to be glued to the firewall and poke through the appertures in the engine cowls, and while that worked for the long gun, the short one would be completely lost inside. I cut it away and glued it inside the starboard cowl piece, so although it'll be longer than intended, it will actually be visible -- instead of a rather prominent hole.

The wing is assembled, including the radiators painted and assembled, plus some .035" rod for the actuators. The cockpit was sprayed dark grey and drybrushed with silver, the instruments were given the usual treatment (black dials, drybrushed with white, then clear cement for the glasses). The stick, trim wheels and armoured headrest come next. The sidewall detail does not really resemble the real deal, so I'm not investing much in dressing it: the canopy will be closed anyway.

Now, to wrestle that other engine cowl panel into place...

Cheers, Mike/TB379

http://worldinminiature.blogspot.com/

  • Member since
    June 2009
  • From: Netherlands
Posted by kermit on Saturday, October 9, 2010 9:43 AM

Bouttime,

Given it some thought on how i would approach the matter as i've never attempted a whitewash sofar...

I think your chalk approach has merit as long as you are sure to grind the chalk down as finely as you can. Tanks of the era were actually airbrushed (large scale airbrushes ofcourse)  with camo using the tanks own airsupply/ compressors. I have seen pictures of this activity in progress. So we can assume the finish of these field applied washes were quite good and not as haphazard as often is thought.

With this in mind i actually think that an airbrushed camo would be acceptable as well as a brushed on method as i can imagine that sometimes tank crews would not have the actual airbrush gear at hand. I am really looking forward to your solution on the projectWink In any case this knowledge merits artistic freedomBig Smile

Detailfreak,

One Pz.38t for the board.....comin' up! LOL

Love to have you. The 38t's look kinda cool to my eyes so i am really getting comfortable in my hobby chair for this oneWink Have fun sir and glad to have you!

Thunderbolt,

Thank you for sharing your views on this kit. I often see people buy the tamigawa's blindly assuming they will get a perfect kit in your hands but your review post certainly proves again that these brands are not always "top notch". Thank you very much and i am sure that you will solve any and all problems as you encounter them judging from your descriptions.Smile Carry on sir!

Richard 


"Success is the ability to go from one failure to another with no loss of enthusiasm." - Sir Winston Churchill

  • Member since
    June 2009
  • From: Netherlands
Posted by kermit on Saturday, October 9, 2010 10:31 AM

Promised you guys some WIP's...

The KV2 didnt look that good in the light i have at my disposal right now; most of the weathering is invisible on the pics i took so i am waiting for better lighting conditions on that build...

But the il2 pics turned out ok:

The pink is putty i have applied prior to the dull coat this bird obviously need after all that futureSmile The blue on the canopy is liquid masking from microscale; a first time i use the stuff. The musical notes decal really makes the mount of captain emilyanenko stand out. Appearantly he played the balalaika (stringed guitarlike instrument).

Close to wrapping this one up....

Richard

"Success is the ability to go from one failure to another with no loss of enthusiasm." - Sir Winston Churchill

  • Member since
    November 2009
  • From: LaSalle, Ontario, Canada
Posted by bouttime on Saturday, October 9, 2010 12:54 PM

That plane is looking real nice Kermit. Ever have any issues getting the Dullcoat to knock the sheen off the Future. To this point I have only brushed the Future where the decals will be applied and then over them to seal before the Dullcoat but it seems to take a crazy amount of coats to accomplish the dull finish?

The main reason I ask is because my other idea for camo on the Panzer is to freehand airbrush the white as per the instructions and then really thinning down some flat white and brushing it onto the remaining grey areas. I would then do some drybrushing to even things out. My understanding is that if I paint with enamel I should then seal with Future before brushing the thin white (enamel) so I don't affect the base. Is this correct or are there other methods as well?

Jeff


  • Member since
    June 2009
  • From: Netherlands
Posted by kermit on Saturday, October 9, 2010 1:25 PM

Bouttime,

I used to have problems with paint peeling off after masking it for a subsequent color layer. It happened more times than it did not. In time i developed the habit of using a (brushed on) layer of future after each coat of paint.

Especially so with more complicated 3 or 4 tone camo jobs your model will become very shiny indeed as is my il2 here.

Up untill now a single or double coat of matte varnish afterwards will tone this down to acceptable levels. Never any problem sofar.

A little sidenote that is slightly off topic: in general you want to apply acrylic paint over enamels and vice versa. This will help you in the end. alternate.

Since i have applied these two simple rules (apply future after each coat and never mix the same paint type on a subsequent layer) i never had any problems with paint peeling or any other yucky side effect.

Hope my yacking helped you a bit...

Richard

EDIT: Forgot to tell you...

I have just applied that dull coat with enamel matte varnish (last layer was future---> acrylic) and will post a pic of the result in the morning. You will see that the mirror shine has gone entirely.

Btw, did anyone tell you that all the layers of future will actually help with decalling and applying washes? A mirror smooth finish will make the decals slide and adhere better without silvering and your washes will travel better.

"Success is the ability to go from one failure to another with no loss of enthusiasm." - Sir Winston Churchill

  • Member since
    June 2010
  • From: Austin, TX
Posted by DoogsATX on Saturday, October 9, 2010 9:28 PM

Richard - the Sturmovik is looking awesome! Have to admit, I had no conception of the size of the things until I saw one on the tables at the Austin SMS contest today. It's massive! Strange, considering that most VVS aircraft are tiny next to their opponents. Looking forward to seeing it dulled and dirtied.

I've also got a slew of additions for the GB thanks to today's show. May be sneaking the last one ins under the wire next fall...but what the hey right?

1:35 Zvezda T-34/85

1:35 Tamiya KV-2

1:48 Eduard Lavochkin La-7

On the bench front...the toddler woke up last night vomiting and so it looks like I'm probably on hiatus until I get back in town on Thursday. Just praying I don't catch whatever he's got.

On the Bench: 1/32 Trumpeter P-47 | 1/32 Hasegawa Bf 109G | 1/144 Eduard MiG-21MF x2

On Deck:  1/350 HMS Dreadnought

Blog/Completed Builds: doogsmodels.com


  • Member since
    June 2009
  • From: Netherlands
Posted by kermit on Sunday, October 10, 2010 9:50 AM

Well,... i am calling this sturmovik officially done!Big Smile

Added some ordnance too. Usually i don't but it looked sexier with em lol:

That masking liquid really worked out great. Was crossing my fingers on that one... After the dullcoat i added some exhaust streaks and drybrushed and powdered the wings and fuselage a bit to make it look more worn.

This kit was fabulous to do even though the fuselasge wing joint needed some work. Detail is great and building it was a real breeze. Hope you guys like it tooWink

Richard

"Success is the ability to go from one failure to another with no loss of enthusiasm." - Sir Winston Churchill

  • Member since
    November 2009
  • From: LaSalle, Ontario, Canada
Posted by bouttime on Sunday, October 10, 2010 9:57 AM

That looks great Kermit. And nothing wrong with a little ordnance on any aricraft.


  • Member since
    January 2004
Posted by Captain Morgan on Sunday, October 10, 2010 10:12 AM

Is it too late to enter? This will be my first group build so other than the given directions I am not 100% sure how this all works!

If not I would like to build the SdKfz 251/4 Ausf C Tracked Vehicle w/leFH18/40 Howitzer Gun 1-35 from AFV.

A lot of nice choices so far. I cant wait to see them all completed.

Theirs not to make reply, Theirs not to reason why,
Theirs but to do and die: Into the valley of Death
Rode the six hundred

  • Member since
    September 2015
  • From: The Redwood Empire
Posted by Aaronw on Sunday, October 10, 2010 12:14 PM

Kermit, the little base is something I've seen others do and I think it adds a lot. I got the wood blank from Micheals they come in various shapes and sizes and are really cheap. The largest ones are about $5 and would work for a 1/72 medium bomber, small ones like this cost less than $1. I just varnish them and cut a sheet of model RR turf. The first ones I did I tried to cut the grass even with the edges, but I've decided they look better cut unevenly a little smaller than the base.  

Your IL-2 looks great, I have a 1/72 Eastern Express kit of the IL-2 that includes the same markings. 


Coincidently I had ordered several Soviet aircraft kits about the time this GB started, but some of the kits were backordered. It finally shipped last week so now my USSR stash is well stocked for this GB.


Boutime, there was a post recently I believe in the aircraft section talking about using Tempura paints for a white wash. They are the powdered water based paints you find many schools use with younger children. The real white wash paints were water based so its probably a fairly accurate paint to put on a model.


Captain Morgan, the primary rules for a GB is to show your work as you build and have fun. GBs are a good way to show off techniques you are good at and to get help in areas you may not be so good at yet. In general though you can picture a GB as a group of modelers building around a big table, sharing tips, and occasionally throwing Cheetoes at each other or spilling someones Dr Pepper on the instructions. Big Smile


  • Member since
    December 2006
  • From: t.r.f. mn.
Posted by detailfreak on Sunday, October 10, 2010 12:30 PM

Ok ,I'm off and running with the panzer 38t.The trans cover and drivers front plate are spares from the Dragon Geschutzwagen smart kit as will be the fenders and a few other items to spruce up the old italeri kit.got this new Nikon coolpix L22 camera so heres some pics.

All commentts and feedback accepted.Yes Well I really have to get on over to the Vikes game.

[View:http://s172.photobucket.com/albums/w1/g-earl828/]  http://i158.photobucket.com/albums/t104/cycledupes/1000Roadwheels4BuildBadge.jpg

  • Member since
    March 2010
  • From: Brisbane
Posted by Julez72 on Monday, October 11, 2010 2:25 AM

Richard, very cool build my freind, one of your best IMO....Well done indeedYesYesYes

Detailfreak, looks like you have a kitbash going on...Nice progress so farYes


  • Member since
    March 2009
  • From: East Bay, CA
Posted by Lundergaard on Monday, October 11, 2010 10:23 AM

great looking sturmovik, richard!  looks awesome.

  • Member since
    September 2008
  • From: Ancaster, Ontario
Posted by maxfax on Monday, October 11, 2010 4:48 PM

Kermit: Great job on the Il-2!  I'm just finishing up my FW 190 for ther RD III GB, and I am simply "planed out". I am going to change my Il-2 on skis for a Dragon 1/35 Stug III Ausf G.  I've had it for about a year and it is time to make it, and do something other than aircraft for awhile.

Thanks

Rob

On the bench:  Revell 1/72 HCMS Snowberry


  • Member since
    June 2009
  • From: Netherlands
Posted by kermit on Tuesday, October 12, 2010 12:02 AM

Thank you all for your kind words! Appreciate it alot. I had great fun with that one altough i wouldn't call it one of my best. Maybe one of the most interesting camo's i've done....Smile

Anyways,

Captain Morgan and Maxfax,

Your builds are listed/ updated now. Have lots of fun guys! Great to have you and looking forward to your pics.

Detailfreak,

Nice work sofar. Are the pz38t's really small or just small? I can't really tell from the pictures... Looks great thoughBig Smile

Richard

"Success is the ability to go from one failure to another with no loss of enthusiasm." - Sir Winston Churchill

  • Member since
    September 2015
  • From: The Redwood Empire
Posted by Aaronw on Tuesday, October 12, 2010 12:01 PM

Kermit, would you consider Finland part of the Eastern front?

Following the start of Barbarosa, Finland became an opportunistic ally of Germany, with Finland seeing the opportunity to reclaim lands lost in the Winter War while the USSR was busy with the Germans, and Germany seeing an ally  (the enemy of my enemy).

The Continuation War could be seen as a parallel war following the Finns agenda, and not really integrated as part of the overall German plan. It could also be seen as part of the eastern Front since they were a German ally against the Soviets. I could see it going either way.


  • Member since
    June 2009
  • From: Netherlands
Posted by kermit on Tuesday, October 12, 2010 12:58 PM

But certainly Aaron i would accept finnish stuff as well as hungarian, romanian and all countries like that who were at least involved in the conflict.

In fact, i intend to do either a hurricane or better still, a B239 (brewster buffalo) in finnish markings during the course of the GB myselfWink

Richard

"Success is the ability to go from one failure to another with no loss of enthusiasm." - Sir Winston Churchill

  • Member since
    June 2010
  • From: Austin, TX
Posted by DoogsATX on Thursday, October 14, 2010 10:50 AM

Finally managed to get back out to the bench last night after a weekend and change of illness, and found that a few days away were more than enough for several dozen tiny spiders to set up shop in between bottles and under lights and pretty much everywhere. Ugh. Good thing I keep the kits in tupperware bins.

I must have wanted to make up for lost bench time, since I got a ton done on the La-5 last night. Got the stabs, control surfaces, and major forward panels attached, and it's really looking like a plane now.

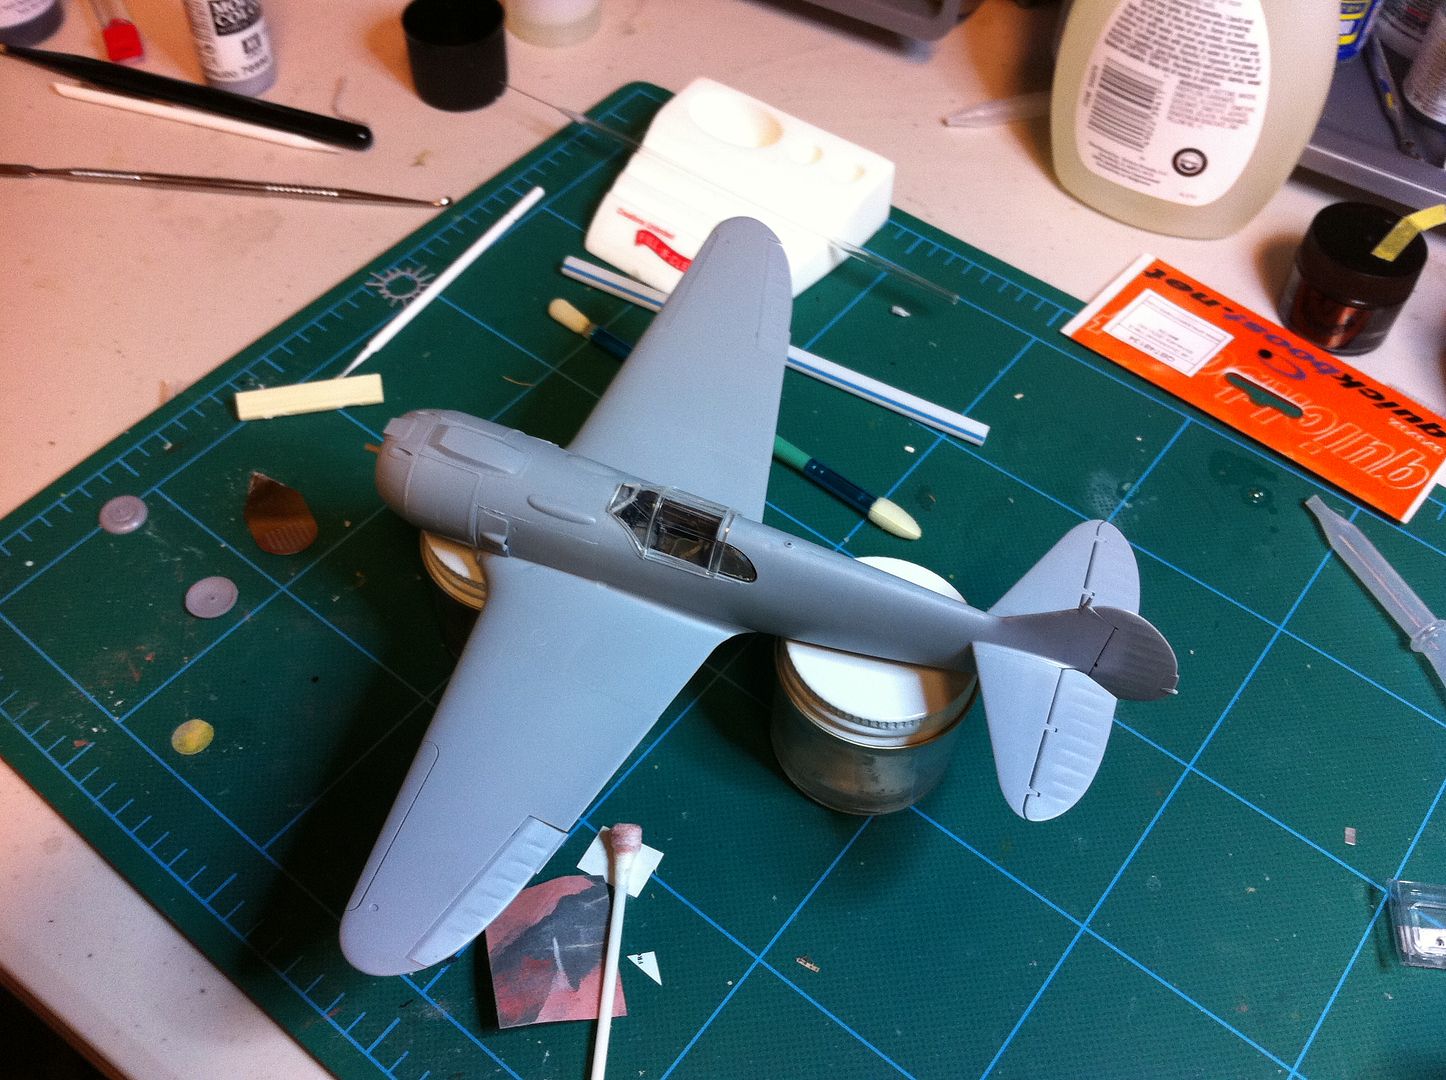
The control surfaces let me down a little bit. Their fit is nowhere near as assured as the internal structure/fuselage/wing assembly. But it was more of a frustration than any real problem.

The forward panels were a bit more of a hassle, since you've got four major pieces that have to hold together and to the fuselage with nothing more than your adhesive of choice, and all of the major seams are choked with some of the finest surface detail I've ever seen on a 1/48 kit.

I know this kit hasn't had near the exhaustive coverage of others, so in the interest of sharing, here's how I tackled this section:

I stated with the gun panels/air intake bulge piece. This piece basically covers the area from the windscreen forward. It sits on the exhaust shielding on the sides, and uses the engine as a support up top. I couldn't bear to mar the fine detail on the exhaust shielding, so I tacked the piece back near the cockpit, pulled the engine, then joined the sides from inside the fuselage. Once everything was pretty well cured I shoved the engine back in.

Next came the left and right engine access panels. These also contain the leading edge of the wing root. I touch-n-flowed along the wing root, figuring it'll need filling and sanding anyway, then along the top where the panels butt up against the intake bulge. 

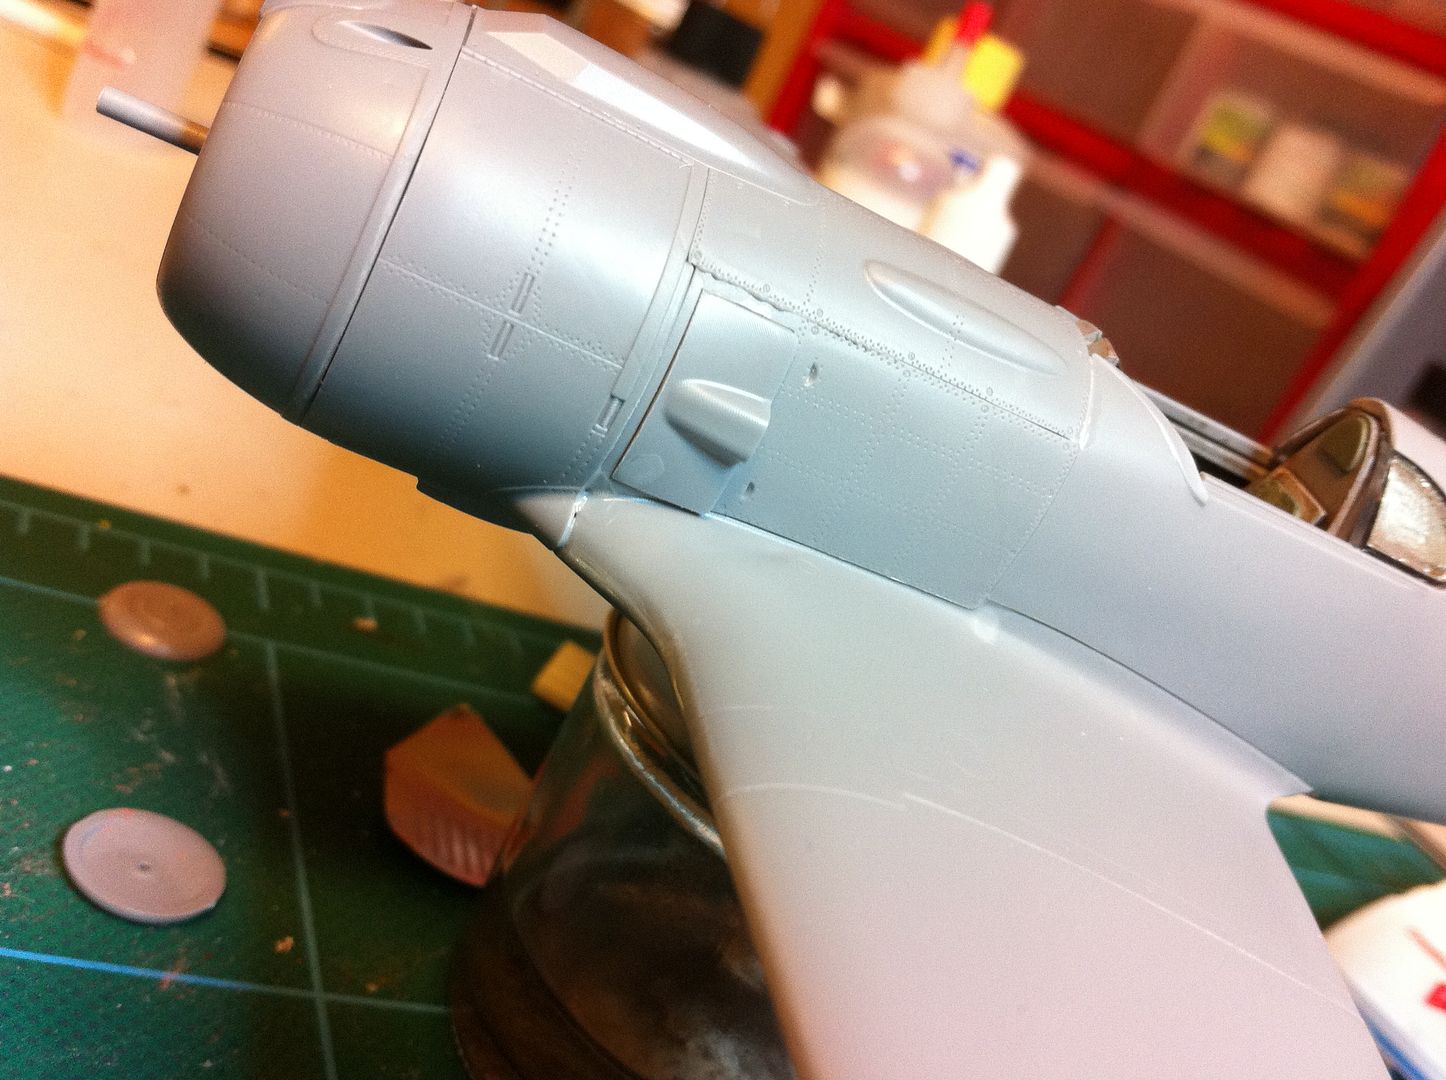
With these in place, it's easy to notice that the "tongue" protruding from the lower wing cants up too high and doesn't align. I fixed that by prying the tongue down and welding it to the access panels from the inside, and then the outside. 

After that it was a simple matter of attaching the cowl. This could have actually been a lot easier with one simple addition to the kit. The top of the cowl has a little tab where it lines up and slots into the intake bulge. Another tab on the bottom to position the underwing tongue would have really helped ensure proper alignment. But oh well.

I also ended up chopping off the exhausts. Love the idea, but with the covers in place, you literally cannot see them, and on top of that they were interfering with fit.

Overall, I'm still loving this kit. It's fun and forces you to stay on your toes, but it's also test-fit friendly and the soft-ish plastic welds together like a dream.

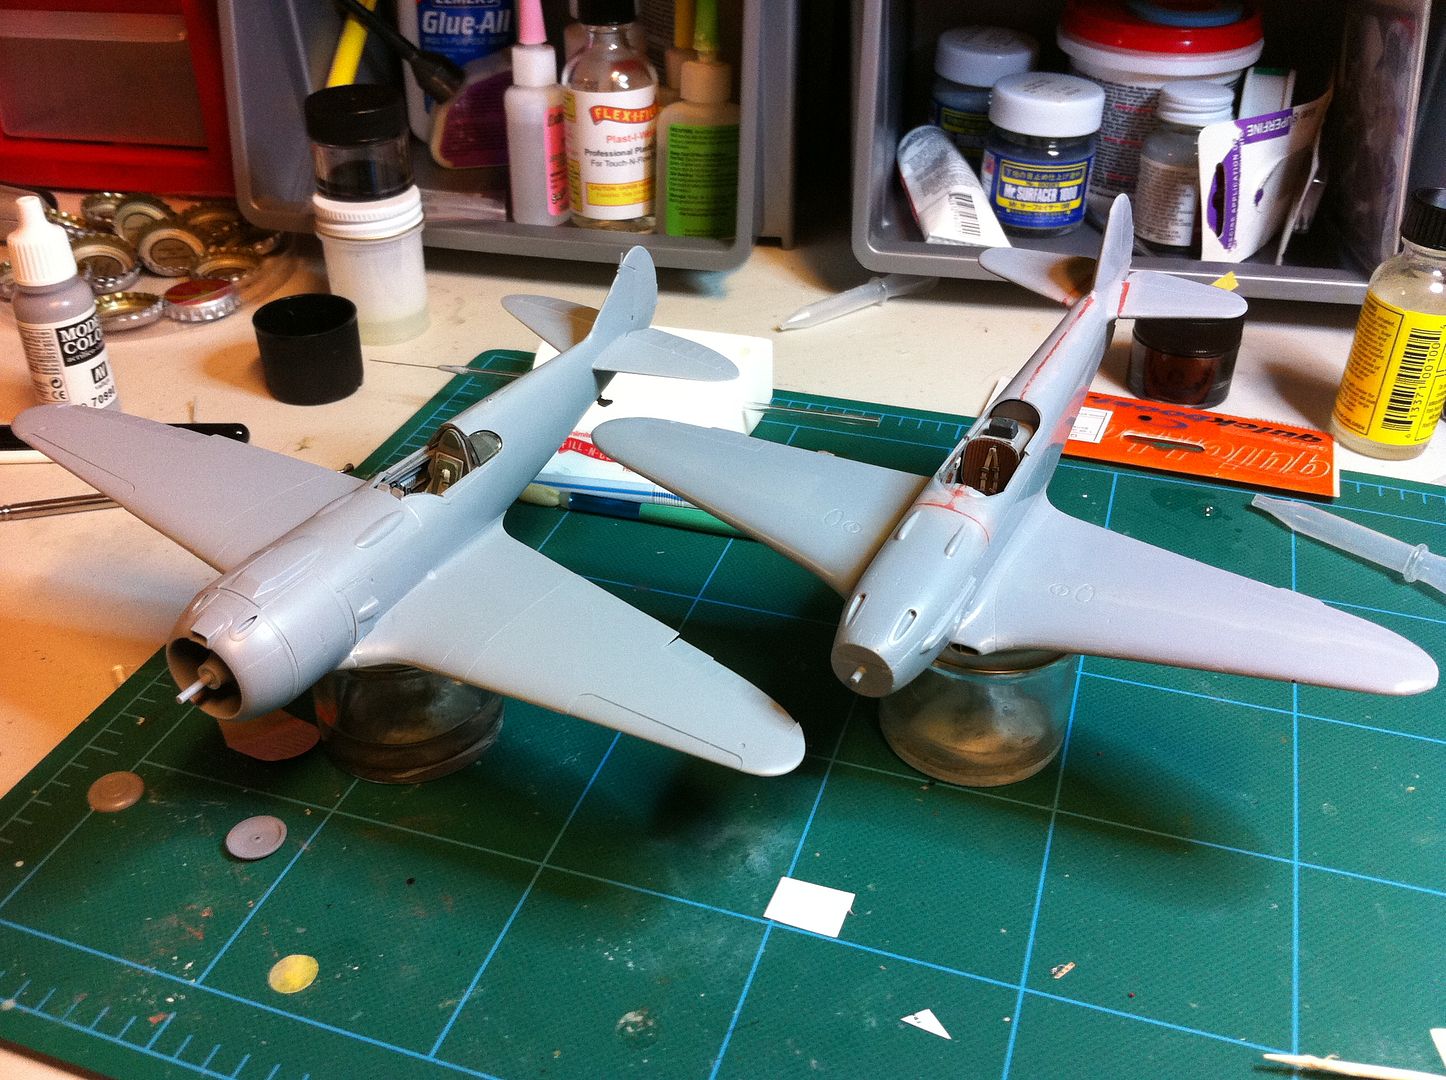
As of now, the La-7's getting close to the end of principal construction, and the Yak-3 is just about ready for primer. 


On the Bench: 1/32 Trumpeter P-47 | 1/32 Hasegawa Bf 109G | 1/144 Eduard MiG-21MF x2

On Deck:  1/350 HMS Dreadnought

Blog/Completed Builds: doogsmodels.com


  • Member since
    March 2010
  • From: Brisbane
Posted by Julez72 on Friday, October 15, 2010 11:18 PM

Doogs, very niceYes I wouldn't mind taking on an La5 myself one of these days...I thought the La7 had a radial engine, shows how much i don't know about Russian A/C....I noticed the bottle of model color on your bench, is it premixed for an airbrush and is it good stuff????I had a little trouble painting mottle on my FW 190D9, i think it's my mixing and i'm looking for a premixed paint that works well...


  • Member since
    June 2009
  • From: Netherlands
Posted by kermit on Sunday, October 17, 2010 10:03 AM

Ladies and gentlemen,..... the KV2 is doneBig SmilePropeller

Took me awhile to finalize the weathering due to everyday life stuff and what not but i gave this beast a proper beating. The last dusting with pastel chalks was done last night but couldn't take pics with artificial light. Somehow it confused the h*ck out of my camera....

Anyways, look for yourselves. Hope you like my work:

Rear...:

Front:

Turret (or should we say tower...?):

And this one gives a good look at the tracks/ roadwheels:

Actually the hardest part about this particular kit was the assembly of the towing cables... The other trumpeter kits come with ends that have holes in them so the supplied brass wire will fit right in. These were solid and had to be superglued on....

After basic painting i progressed with washes of black and rust. Then drybrushing with lighter green, white and gunmetal. Finally i applied dark brown and lighter brown pastels to make it extra dustySmile. Had great fun!

Richard

"Success is the ability to go from one failure to another with no loss of enthusiasm." - Sir Winston Churchill

  • Member since
    April 2009
  • From: Carmel, IN
Posted by deafpanzer on Sunday, October 17, 2010 11:32 AM

Richard,  I like you KV2!!! Yes Especially the weathered edges and corners.  It would be cool if you can add 'Wash Me' in Russian somewhere. LOL  I can't wait to start my kit but it will be a while because I need to finish my two ongoing GBs and I have been slow!  Stick out tongue


Andy

  • Member since
    July 2008
  • From: USA California
Posted by vetteman42 on Sunday, October 17, 2010 10:45 PM

WOW DoogsATX you really do like to build in pairs huh Surprise Looking good there guy.

Kermit now that is a GREAT KV2 man Bow Down That thing looks very well used and mean as a junk yard dog. Your weathering technique is spot on. Bow Down Think I will send you my Sherman to build for me.

Randy So many to build.......So little time

  • Member since
    April 2005
Posted by Thunderbolt379 on Monday, October 18, 2010 6:36 AM

Richard -- echoing Randy, that's one darn fine KV-2! The dust and dirt came out superb!

Well, I didn't let the grass grow under my Bf 109 F-2, these pics should have been posted last night in fact. Main construction is complete, now waiting on small parts (undercarriage, antennae, exhausts, prop and mass balanaces). The canopy could have been packaged better, there were some marks, and for some reason it was very uncooperative to work with. The Clear Parts Cement was a joke, I wiped it off and used superglue instead, and hopefully most or all marking will disappear under the paint on the frames.

Here's the finished cockpit at component level before being installed and the wing mated:


That lot went on pretty easily and I added the wing, which was a superb fit at fore and aft, but left something to be desired at the roots. The top surface of each wing needed to be flexed upward from the open flap bays to make a decent fit, and the whole wing flexed up from the tips likewise. I used tape to maintain the tip-flexure and levered the upper surfaces into line with a paintbrush, holding them in place while liquid glue did the honours. The final result looks pretty good, though there's a small step inboard at the front now:


The model is set aside at this point, as the next step is to mask the canopy and the Eduard set won't be here from the US for a while, certainly not before I head out on a plane to the UK at the end of the month, and i won't be back for a couple of weeks, so it'll be over a month from this point before I can resume. One extra job I did get to was to add the actuator rod to the chin radiator, a useful extra detail in a visible spot. I drilled through the scoop, passed a piece of .020" rod through, glued it in place, then trimmed and sanded the stub flush.

I look forward to getting to the paintjob on this one in about a month's time, hopefully working in enamels as the weather will have warmed up by them (I certainly hope it has!)\

Cheers, Mike/TB379

http://worldinminiature.blogspot.com/

  • Member since
    March 2010
  • From: Brisbane
Posted by Julez72 on Monday, October 18, 2010 7:23 AM

Richard, Nice buddy, very coolYesYesYes I hope my Panther comes out just as good as that one did...

Mike, Looking good, nice progress...Can't see any filler in that oneYes


  • Member since
    June 2010
  • From: Austin, TX
Posted by DoogsATX on Monday, October 18, 2010 10:24 AM

Julez72

Doogs...I noticed the bottle of model color on your bench, is it premixed for an airbrush and is it good stuff????I had a little trouble painting mottle on my FW 190D9, i think it's my mixing and i'm looking for a premixed paint that works well...

Nope, it's just Vallejo Model Color, not Model Air. And while I can recommend VMC for big stuff (worked great on my Dauntless), I've found that it doesn't really do fine detail well at all. Thin it down too much and it gets all watery, even using Future as the thinning medium (which works great otherwise). Don't thin it enough and it clogs up the airbrush. Unfortunately for fine details that's a very fine and possibly invisible line. 


On the Bench: 1/32 Trumpeter P-47 | 1/32 Hasegawa Bf 109G | 1/144 Eduard MiG-21MF x2

On Deck:  1/350 HMS Dreadnought

Blog/Completed Builds: doogsmodels.com


  • Member since
    June 2010
  • From: Austin, TX
Posted by DoogsATX on Monday, October 18, 2010 10:36 AM

Richard - the KV-2 looks nice and dirty, as it should be! I'll definitely be referring back to these pics when I start my Tamiya KV-2 (whenever that happens to be...). Just received my Aber 152mm turned aluminum barrel for it on Friday, and dang is it pretty. It's even got rifling on the inside of the barrel. Huge improvement over the kit gun.

Mike - Interesting to hear the issues you're having with the Hasegawa kit. It's looking great from the pics, though!

On my end, I've finally pushed through the annoying fill/sand/fill/sand portion of the builds, primed and pre-shaded. 

The pre-shading was actually something of a nightmare. Got it in my mind to use Model Master Flat Black for some reason. Mixed it with Mr. Leveling Thinner and...it came out all spattery. Tried different ratios, different PSIs, but it couldn't handle the fine lines whatsoever. I knew there was a reason I keep not airbrushing with Model Master, but this was some of the worst spatter I've ever experienced. Maybe it doesn't play well with lacquer thinner? But that makes no sense whatsoever...

Switched to Tamiya Flat Black with the Yak and had no problems except for my poor airbrush control.

Also got the La-5's exhaust plates painted up last night. I tried Alclad Steel at first, since all the painting guides call for steel. Yeah. WAAAAY to dark. I ended up overspraying with Dark Aluminum to much better effect.

Tonight's going to be all about masking the canopies and the exhaust plates, then painting the light gray for the canopy interior frame, wheel wells and whatnot. Hopefully that means I can finally bust out the White Ensign paints tomorrow.

On the Bench: 1/32 Trumpeter P-47 | 1/32 Hasegawa Bf 109G | 1/144 Eduard MiG-21MF x2

On Deck:  1/350 HMS Dreadnought

Blog/Completed Builds: doogsmodels.com


  • Member since
    September 2009
  • From: Spring Branch, TX
Posted by satch_ip on Monday, October 18, 2010 8:52 PM

Can I throw in a DML/Dragon Stug III F into the mix.  It will be a Großdeutschland vehicle.  Thanks


satch

JOIN OUR COMMUNITY!

Our community is FREE to join. To participate you must either login or register for an account.

SEARCH FORUMS
FREE NEWSLETTER
By signing up you may also receive reader surveys and occasional special offers. We do not sell, rent or trade our email lists. View our Privacy Policy.