SEARCH FINESCALE.COM

Enter keywords or a search phrase below:

The Ostfront (eastern front) GB 2010/11

106899 views
900 replies
1 rating 2 rating 3 rating 4 rating 5 rating
  • Member since
    April 2009
  • From: Carmel, IN
Posted by deafpanzer on Wednesday, August 24, 2011 9:20 AM

Eric- Good news... problem has been solved!  Appreciate your offer.  I posted in armor looking for help and our good friend Greg (detailfreak) offered some of his spare Magic Tracks.  I didn't think of those earleir... duh!  I have plenty of DML kits so I went thru and found a perfect match.  Stole few from my Hummel kit... it has same Pz IV hull chassis of course!

\

Now it looks alot better with a full rack... Big Smile

\

The tracks have been primed with black paint.  Thanks for looking!

Andy

  • Member since
    March 2003
  • From: Rain USA, Vancouver WA
Posted by tigerman on Wednesday, August 24, 2011 12:22 AM

I might have some Tamiya runs for you. They aren't indies, but short runs.

   http://i7.photobucket.com/albums/y269/wing_nut_5o/PANZERJAGERGB.jpg

 Eric 

  • Member since
    April 2009
  • From: Carmel, IN
Posted by deafpanzer on Tuesday, August 23, 2011 7:58 PM

Guys- Small update on my Panzer IV... detail painting in process and attached the wheels to the hull. 

http://i713.photobucket.com/albums/ww137/aleffler/Panzer%20IV%20Ausf%20H/IMG00939-20110823-1849.jpg 

 I ran into tracks issue and I hope somebody can help me out here.  Tongue Tied

I used ModelKasten tracks (SK-17) and the instruction said to use 97 tracks on each side.  So I did 98 tracks during the assembly to start with.  BUT it wasn't long enough!  I had to add four more making it 102 tracks to fit each side.  Unfortunately I broke couple of links during 'cutting off the sprue' stage.  Now I am left with only four links to be used as spare tracks in the front... Sad

http://i713.photobucket.com/albums/ww137/aleffler/Panzer%20IV%20Ausf%20H/IMG00940-20110823-1849.jpg 

I posted this in Armor forum to see if somebody can help me out.  Because it doesn't look that good with few tracks and I'd hate to spend another $30 for more tracks from MK. 

Andy

  • Member since
    April 2009
  • From: Carmel, IN
Posted by deafpanzer on Tuesday, August 23, 2011 12:20 PM

I apologize for being quiet for last two weeks or so.  My Panzer III GB has been keeping me busy and away. 

Ernest- Real good looking gun... very clean with good details. Yes  Looking forward to see it painted.

Richard- You are alot braver than I am Tongue Tied... can't wait to see how it comes out!

Trey- Looking good so far... wondering what was the maxium speed of your biplane?   Bet way too slow that my car can go faster...


Andy

  • Member since
    August 2009
  • From: Borlando Fla home of the rat
Posted by TREYZX10R on Monday, August 22, 2011 7:18 PM

Ernest wow that gun is going together great ,nice touch with the scratched rods! From what research I've gathered the Hs123 was used as a close support weapon and dive bomber. The design won over a Fiesler entry and was really just supposed to be a 'filler' while the Ju87 was developed. They did so well they remained in service until there were simply none left.

Eric,Vetteman thanks!

I filled the gaps in the upper cabanes with more green putty ,first masked off the area

then the putty

before the putty has a chance to set I remove the tape and brush it smooth with acetone on a small brush

then a final going over with some fine grit

  • Member since
    July 2008
  • From: USA California
Posted by vetteman42 on Monday, August 22, 2011 2:04 AM

Bufflehead I am lovin this gun cant wait to see more of it !! Sweet lookin kit too.

Trey I have been following your build and am looking forward to seeing more of it. Nice work sir

Kermit what can I say ?? Your relationship with that airbrush has blossomed beautifully, that is one very nice winterizing paint job Bow Down Everyone is gonna be envious of your Hiney Propeller

Randy So many to build.......So little time

  • Member since
    March 2003
  • From: Rain USA, Vancouver WA
Posted by tigerman on Monday, August 22, 2011 1:28 AM

Guys great work here.

Ernest, you sure threw that gun together quickly. I loved the scratched rods, much better then my effort on the Jagdtiger. How did you get that pointy end?

   http://i7.photobucket.com/albums/y269/wing_nut_5o/PANZERJAGERGB.jpg

 Eric 

  • Member since
    July 2006
  • From: San Francisco Bay Area
Posted by bufflehead on Monday, August 22, 2011 1:18 AM

trey - the He-123 is coming along great!  Don't know much about these aircraft.  What role did they play in the epic battles in the Ostfront?

Richard - You're a braver man than me!  I'd have a hard time spraying white all over an AFV, let alone a nicely built and camo'ed AC like that He-111!!  I'm sure you'll pull it off though!

Assembly of the F22 gun is almost complete.  To prevent some clumsy oaf (namely me) from knocking off an losing some of the smaller parts I've left them off until just before painting.  Here it is at about 98% assembled. 

It was nice to finally build a kit that didn't need any rework or detailing.  Its great as is, however the ranging rods got a little bent up while still on the sprue (that same clumsy oaf!) so I decided to scratchbuild replacements from styrene rod.  If not for that, it would be 100% OOB!  It really is a nice little kit!

Look at that DETAIL!

Painting won't happen until next weekend, but I think maybe now is a good time to start the BT-5 that's my original build for this GB!

Ernest

Last Armor Build - 1/35 Dragon M-26A1, 1/35 Emhar Mk.IV Female


Last Aircraft Builds - Hobby Boss 1/72 F4F Wildcat & FW-190A8


  • Member since
    December 2002
  • From: Bury St Edmunds, Suffolk, England
Posted by Bish on Saturday, August 20, 2011 10:31 AM

I have sort of been toying with the idea of using tamiya Flat white on top of Xtracolor enamels. Then rubbing away some of the white to give a worn appearance. Deffinatly like how you have done yours. It all comes down to how much wear you want. I think i feel a use for a couple of my broken kits.

I am a Norfolk man and i glory in being so


On the bench: Airfix 1/72nd Harrier GR.3/Fujimi 1/72nd Ju 87D-3

  • Member since
    June 2009
  • From: Netherlands
Posted by kermit on Saturday, August 20, 2011 10:27 AM

Bish,

Thank youSmile

In my case i used the revell acrylic flat white heavily thinned. The revell aqua paints are amazing. Semi self leveling (so good for brush painting as well) and drying lightning fast (repaintable in 1 hour, dry in 4)

Richard

"Success is the ability to go from one failure to another with no loss of enthusiasm." - Sir Winston Churchill

  • Member since
    December 2002
  • From: Bury St Edmunds, Suffolk, England
Posted by Bish on Saturday, August 20, 2011 10:17 AM

Richard, well done for takeing the plunge. What paint did you use for the white wash.

TREY, seems to have needed a bit of filler there.

I am a Norfolk man and i glory in being so


On the bench: Airfix 1/72nd Harrier GR.3/Fujimi 1/72nd Ju 87D-3

  • Member since
    August 2009
  • From: Borlando Fla home of the rat
Posted by TREYZX10R on Saturday, August 20, 2011 9:44 AM

Andy thanks,everytime I think about all the road wheels and tread links you armor builders deal with I think the same;)

Bufflehead thanks! That field cannon is going to be very nice with all that detail,looking forward to more

Richard Wow what a great job, you've pulled that off very nicely indeed. I think its really going to 'pop' when its unmasked ca'nt wait to see it!

I filled some seams using squadron green and fitted the armored head rest . I still need to blend the upper wing cabanes after I make sure everything fits good.

and removed the wheel spat base


  • Member since
    June 2009
  • From: Netherlands
Posted by kermit on Saturday, August 20, 2011 8:10 AM

Deafpanzer,

That's what blending in is all about!YesYesYes It was already looking great but your latest update is no less than stunning! Excellent.

Trey,

I love that pit! Makes me wonder if i should be less stubborn with OOB builds and get me some aftermarket goodies for my next big project.... That is one dirty but amazing looking pit.

Bufflehead,

The detail on that field gun is great! It will undoubtedly enhance the model once everything is put together. I don't envy you as you must have given yourself headaches with bits that small without proper instructionsWink

Well,..... it took me the better part of a week to muster up the courage to cover my hiney 111(...)in white... This morning i fired up the airbrush compressor and went for it. First i freehanded white squiggles all over the plane before blending these in with an all over, thinner layer as per the directions and this is what turned out:

The decals are still nicely showing through, exactly what i was hoping for and for a first shot at it i am not very dissapointed myself. Wish the underlying camo job would show through better though.... It is still there but hard to see. Maybe defend myself with saying it is a freshly applied winter wash...?Zip it!

She's ready to receive her final markings and last minute paintwork....Hope you guys like her....my hiney....Stick out tongue

Richard 

"Success is the ability to go from one failure to another with no loss of enthusiasm." - Sir Winston Churchill

  • Member since
    July 2006
  • From: San Francisco Bay Area
Posted by bufflehead on Saturday, August 20, 2011 12:09 AM

I'm catching up too guys!

Richard - Your He111 is looking fabulous!  Great camo and markings.  That's one of my favorite bombers and its nice to see what a bang up job you're doing with that kit!

Andy - Nice rework of the camo on the Pv IV!  That looks like a tough, intricate paint job, but it came out great! 

TREY - Wow! Amazing work on that interior!  I don't build AC, but I can appreciate a nicely done cockpit! 
Can't wait to see the completed build!

As for me, I managed to do a detail wash on the T-26T, but then decided to delay detail painting and weathering until the towed artillery piece was done.  So I've started work on this:

A few nights work and we're here:

Still need to add a few more tiny bits, but here's a look at the assemblies dry-fitted together.

Detail on the kit is fantatstic!  However, with all the detail comes a load of tiny parts and assembly is a bit fiddly.  Also, the orientation of some of these tiny parts isn't clear in the kit instructions so I've spent a good deal of itme at www.primeportal.net.  This site has some great reference photos of the 1936 76.2 divisional field gun that has helped immensely (Thank You Prime Portal!!)

On to the split trail carriage!


Ernest

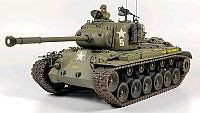
Last Armor Build - 1/35 Dragon M-26A1, 1/35 Emhar Mk.IV Female
     

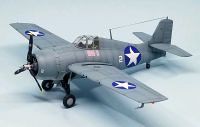
Last Aircraft Builds - Hobby Boss 1/72 F4F Wildcat & FW-190A8
     

  • Member since
    April 2009
  • From: Carmel, IN
Posted by deafpanzer on Friday, August 19, 2011 7:42 PM

Trey- Catching up here... stunning work on the canopy!!!  Thank you for reminding me why I prefer to build armors. LOL

http://img.photobucket.com/albums/v710/treyzx10r/HS123A%20eastern%20front/Hs123Aoffice2002.jpg

Andy

  • Member since
    August 2009
  • From: Borlando Fla home of the rat
Posted by TREYZX10R on Friday, August 19, 2011 7:25 PM

Eric,Bish thanks very much it was my first resin interior and aside from being very brittle not too bad to work with.. The basic airframe and lower wing had some fit issues but nothing too hateful. I did have to remove a little material at the wing root on the fuse side to get a decent fit . The gun cowl needed a trim on the aft end as its too wide and will still need some filling.

I got the engine ready not too much going on but will look okay under the cowl. Uggggh ! the cowl is molded so the seam is right in the middle of the rocker cover blisters this should be a treat to sand!


  • Member since
    December 2002
  • From: Bury St Edmunds, Suffolk, England
Posted by Bish on Thursday, August 18, 2011 1:12 AM

Yep, lovely looking pit TREY. Love the detail.

I am a Norfolk man and i glory in being so


On the bench: Airfix 1/72nd Harrier GR.3/Fujimi 1/72nd Ju 87D-3

  • Member since
    March 2003
  • From: Rain USA, Vancouver WA
Posted by tigerman on Wednesday, August 17, 2011 8:55 PM

Great detailing on the battered office Trey.

   http://i7.photobucket.com/albums/y269/wing_nut_5o/PANZERJAGERGB.jpg

 Eric 

  • Member since
    August 2009
  • From: Borlando Fla home of the rat
Posted by TREYZX10R on Wednesday, August 17, 2011 7:36 PM

Doogs best of luck with the job hope ya score big!

I got some progress on the office despite my big fumble fingers breaking some of the finer details and having to scratch them back,ie the the throttle levers

the resin parts are very nicely detailed tho

and after a wash what little will be seen looks the part

on to the power plant next

  • Member since
    June 2010
  • From: Austin, TX
Posted by DoogsATX on Tuesday, August 16, 2011 3:54 PM

vetteman42

Doogs hope things on the employment front look better for you very soon man, cant have you running short of kits ya know.

I've likened the job hunt from the very beginning to launching torpedoes. All kinds of frantic work up front to get the things in the water and heading the right direction. Then nothing to do but sit back and wait.

Well, after a lot of waiting, one of my fish is closing in on a nice, fat battleship.

Had a great phone interview with the hiring manager about two weeks ago. Last Thursday, a battery of in-person interviews. This Thursday - the final step, delivering a presentation (sample quarterly report for the position I'm gunning for). The presentation's been freaking me out, but now that I'm into the data and putting things together, I'm having an absolute blast! That says some very good things about how I'd like the job, that's for sure. 

Now I just have to get it!

On the Bench: 1/32 Trumpeter P-47 | 1/32 Hasegawa Bf 109G | 1/144 Eduard MiG-21MF x2

On Deck:  1/350 HMS Dreadnought

Blog/Completed Builds: doogsmodels.com


  • Member since
    July 2008
  • From: USA California
Posted by vetteman42 on Tuesday, August 16, 2011 3:47 PM

Kermit lookin great there buddy !! I would venture to say you and your airbrush are well on the way to being bestest of friends. Now lets see it Kermified !!!!!!!!!!

Deafpanzer love that camo man !!!!!!!!!!!

Doogs hope things on the employment front look better for you very soon man, cant have you running short of kits ya know.

Randy So many to build.......So little time

  • Member since
    April 2009
  • From: Carmel, IN
Posted by deafpanzer on Tuesday, August 16, 2011 11:54 AM

Doogs-  This is one real cool looking camo scheme on late Panzer IV.  It looks alot easier because it is hard edged... I'd love to get it if it ever is on sale.  Often I buy kits thru Dragon's Facebook promotions...  I bought Pz IV Ausf J loaded with PEs especially the skirts few weeks ago for only $25. LOL

Hope you will land on a job soon... good luck buddy!

Andy

  • Member since
    June 2010
  • From: Austin, TX
Posted by DoogsATX on Tuesday, August 16, 2011 11:34 AM

Andy - that thing's looking sweet!

I have to confess, your build has me eyeing a late Pz.IV...and then lo and behold Dragon releases this:

Now I just need to get a job so I can end my kit freeze!

On the Bench: 1/32 Trumpeter P-47 | 1/32 Hasegawa Bf 109G | 1/144 Eduard MiG-21MF x2

On Deck:  1/350 HMS Dreadnought

Blog/Completed Builds: doogsmodels.com


  • Member since
    April 2009
  • From: Carmel, IN
Posted by deafpanzer on Tuesday, August 16, 2011 11:00 AM

Bish- Thank you... you are way too nice!  I agree it came better than the first job. 

Eric- Thanks for dropping by!  Looking forward to BITW GB... Big Smile

Andy

  • Member since
    December 2002
  • From: Bury St Edmunds, Suffolk, England
Posted by Bish on Tuesday, August 16, 2011 12:54 AM

Very nice paint job Andy, deffinatly looks alot better than the first go.

I am a Norfolk man and i glory in being so


On the bench: Airfix 1/72nd Harrier GR.3/Fujimi 1/72nd Ju 87D-3

  • Member since
    March 2003
  • From: Rain USA, Vancouver WA
Posted by tigerman on Monday, August 15, 2011 11:46 PM

Richard and Andy, those are marvelous camo jobs.

   http://i7.photobucket.com/albums/y269/wing_nut_5o/PANZERJAGERGB.jpg

 Eric 

  • Member since
    April 2009
  • From: Carmel, IN
Posted by deafpanzer on Monday, August 15, 2011 10:44 PM

Trey- Thanks I am glad you liked the camo... trust me I don't think I will be doing another camo scheme for a long time. LOL

Andy

  • Member since
    August 2009
  • From: Borlando Fla home of the rat
Posted by TREYZX10R on Monday, August 15, 2011 7:48 PM

Richard really looking sharp so far,I'm sure you'll pull off the winter job just fine!

Andy that is some really awesome freehand a/b skills ,looks stunning

Sadly I 've been stalled so not much progress on the Hs123

  • Member since
    April 2009
  • From: Carmel, IN
Posted by deafpanzer on Sunday, August 14, 2011 9:31 PM

Guys- What a crazy week!  I couldn't find workbench time until today.  It is a good thing football season hasn't really started yet... I never watch pre-season games especially when Colts like to loose every of those.

Here's update on my Panzer IV Ausf H... airbrushed the camo freehanded on the rest of the tank. Did touch up couple of times before I over sprayed heavily thinned tan paint all over to bring the camo together.  It really helped... thanks guys!

I am ready to do the next stage... detail painting!  Thanks for looking and comments are always welcome... Beer

Andy

  • Member since
    April 2009
  • From: Carmel, IN
Posted by deafpanzer on Sunday, August 14, 2011 1:25 PM

Richard- Stunning camo work! Yes  Always wanted to use that on a Junker 87 one day... looking forward to see it completed.

Andy

JOIN OUR COMMUNITY!

Our community is FREE to join. To participate you must either login or register for an account.

SEARCH FORUMS
FREE NEWSLETTER
By signing up you may also receive reader surveys and occasional special offers. We do not sell, rent or trade our email lists. View our Privacy Policy.